

Page 1

1
USERS MANUAL
MCDVR-480G
Page 2

2
List of contents
1. Notice for safety.................................................................................................................. 3
2. Package contents................................................................................................................. 4
3. Name and function of each part.......................................................................................... 4
4. Menu setup..........................................................................................................................6
4.1 Time Setup .................................................................................................................... 6
4.2 Record Setup................................................................................................................. 7
4.3 Camera Setup................................................................................................................ 8
4.4 SD card information.................................................................................................... 10
4.5 Etc setup......................................................................................................................11
5. Installing instructions........................................................................................................ 12
6. Operation instruction ........................................................................................................ 14
7. Internal and external cameras setting................................................................................ 14
8. Specification ..................................................................................................................... 15
9. Rules for maintenance, repair and use .............................................................................. 15
Page 3

3
Security
1. Notice for safety
1) Do not use water or volatile chemicals when cleaning the inside of the car or the product.This
may increases the risk of product damage, file, and electric shock.
2)Avoid causing the product severe impact and immersing it in a foreign substance.
3) If the user is in a tunnel or is driving at night, video recording cannot work properly. Intense
backligths also affect the image quality of the video.
4) Do not relocate the product arbitrarily. This may cause GPS communication error.
5) Refer all servicing to qualified service personnel. We take no responsibility for any damage or
problems caused by arbitrarily repairing or modifying the product.
6) Window tinting can also affect video quality. Users should check the recorded imagery before
operating the product, if their cars have tinted windows.
7) Do not cover the product when using other electronic devices. This may cause GPS
communication failure.
8) Do not approach magnets. This may cause machine fault.
9) Before taking out the SD card,insure the recorder is lay off. This may cause stoppage and data
loosing.
10)Do not insert foreign body into the SD card slot.
11)Use recommended SD card,we take no responsibility for quality of SD card. And SD card
belongs to consumable items, it may lose efficacy for a long use.
12)Power socket should be pulled up if the car not be used over 3 days.
13)Facility must be closed during installing (Insert the power plug when the installation is over).
14)Do not manipulate or stare at the product while driving. This may increase the risk of
automobile accidents.
15)The product should be fixed on the windshield tightly, make sure driving safety.
16)Temperature, humidity, dust, severe shock may cause machine fall.
17)Built-in battery, belongs to consumable items, it may lose efficacy for a long use.
18)Make sure to use the proper voltage .(12V-36V)
19)Make sure installation of the product will not influence driving safety.
20) Do not install the product or change function while driving in order to prevent traffic accidents
from occuring.
21) Do not use this product in dangerous conditions where smoke or a burning smell is detected. In
such cases, deactivate the product and contact an agency. Remove dust in the cigar lighter socket
periodically, for it may result in a fire hazard.Check frequently whether the product is installed firmly.
If the product falls from its place, it may injure passengers or cause damage to the product.
22) Only use the cable and automobile electric power provided, as instructed. If not, this may
cause product damage, fire, and electric shock.
23) Electric quantity may reduce due to without using for a long time, to make the recorder work
properly, it would be a long time when the battery is filled.
24) Do not use the SD card supplied with the product for any other purpose. If the SD card is used for
another purpose or other files are stored in it, fatal errors may be caused. SD cards compatible with the
product can be allowed, but using different SD cards may result in product malfunction. In such
cases, the user is responsible for the problems.
Note:We do not take resposibility for any damage caused by an accident or carelessness.
Page 4

4
2. Package contents
Check the objects in the packing box before using the product, if there is missing, please contact
the dealer.
Purchase on selection:
1* External camera
1* SD card
1* SD card reader
3. Name and function of each part
The back
1 In 2 Out 3 Reset 4 Power 5 LED 6 Mic 7 Up 8 Enter 9 Down
(1)video input connect external camera
(2)video output connct external monitor
(3)reset applicable when the recorder has system fault
(4)power connector port power supply of the recorder, pleaseuse the standard power source
(5)power/recording LED status indication
(6)Micphone record voice
(7)button switch the video input (press once,built-in camera record;press again,external camera
record;press once more,two camera record at the same time.)
Page 5

5
(8)button swith the video output (press once,switch to the picture of the other camera.)
(9)button enmergency record (press one second), enter into main menu( press three seconds)
(10)SD Card slot Before use,please insert SD CARD
Disconnect the power cable or turn off the engine before Inserting or removing the SD card. The
user should format the SD card before when using a SD card not supplied by the manufacturer.
(11)Cradle socket
(12)Front Camera
Periodically clean the lens for clear video image,to avoid lens damage ,clean with a soft cloth.
(13)Speaker
(14)GPS antenna port
Connect with GPS antennas,to receive signal normally ,make sure the screw is tightened up
before installation.
Page 6

6
7
4. Menu setup
Press (9) button for 3 seconds, enter into main menu as the picture below(When enter into the
interface, you can hear deng’s sound three times, after entering into main menu interface, (7)
button upward, (8)button confirm/exit (9) button downward )
Main Menu
1. Time Setup
2. Record Setup
3. Camera Setup
4. SD card Info
5. ETC Setup
6. Exit
Menu Number:
1, Time Setup 2, Record Setup 3, Camera Setup 4, SD card Info 5, ETC Setup 6, Exit
4.1 Time Setup
Press comfirm/exit botton,enter into time setup interface. ( you can hear deng’s sound two
times)
1. Time Setup
1. Year: 2165
2. Month: 25
3. Date: 45
4. Hour: 45
5. Min: 85
6. Sec: 85
7. Exit
Menu Number:
Press comfirm/exit botton,enter into year setup interface,set the year by pressing the up and
down button, press comfirm/exit botton to exit.
1.1 Change Year
Current Year: 2165
Other setments has the same theory
Page 7

7
4.2 Record Setup
Select the Record Setup at the main menu interface,enter into record setup interface
2. Record Setup
1. Record Time
2. Record Quality
3. Record Resolution Record Setup
4. Record Volume
5. Exit
Menu Number
Record hold time setup: 1 min,5 min,10 min;
2.1 Set Record Time
1. 1 Minute
2. 5 Minute
3. 10 Minute
Menu Number:
Record Quality setup
2.2 Set Record Quality
1. Low
2. Normal
3. High
4. Exit
Menu Number:
Record Resolution Record Setup
2.3 Set Record Resolution
1. VGA
2. QVGA
3. Exit
Menu Number:
Page 8

8
Record Volume Setup
2.4 Set Record Volume
1. Volume Up Level 2
2. Volume Up Level 1
3. Normal
4. Volume Down Level 1
5. Volume Down Level 2
6. Exit
Menu Number:
4.3 Camera Setup
Select the Record Setup at the main menu interface,enter into camera setup interface
3. Camera Setup
1. Brightness
2. Flip
3. Mirror
4. Frame Rate
5. Power Frequency
6. Exit
Menu Number:
Brightness setup
3.1 Set Brightness
1. Dark Level 2
2. Dark Level 1
3. Nomal
4. Bright Level 1
5. Bright Level 2
6. Exit
Menu Number:
Flip setup
32. Set Flip
1. Flip off
2. Flip On
3. Exit
Menu Number:
Page 9

9
Camera Mirror Setup
3.3 Set Mirror
1. Mirror Off
2. Mirror On
3. Exit
Menu Number
Camera Frame Rate Setup(1,fixed frame rate;2,variable frame rate)
3.4 Set Frame Rate
1. Fix Frame Rate
2. Frame Rate Variable
3. Exit
Menu Number:
Power frequency setup
3.5 Set Power Frequency
1. 50 Mhz
2. 60 Mhz
3. Exit
Menu Number:
Page 10

10
4.4 SD card information
Select the SD Card Info at the main menu interface,enter into SD card information interface
4. SD Card Information
1. Total Size
2. Free Size
3. Format
4. Exit
Manu Number:
Check total size of SD card
4.1 Total Size
SD Card Total Size is 1883 MB
Press any key to return
Check free size of SD card
4.2 Free Size
SD Card Free Size is 329 MB
Press any key to return
SD card fromat
4.3 SD card Format
Do you want to format?
1. No
2. Yes
3. Exit
Select number:
Page 11

11
4.5 Etc setup
Select the Etc setup at the main menu interface,enter into setuo interface
5. Etc Setup
1. Set Acceler Trigger Level
2. Set UTC Time
3. Get Firmware Version
4. Update Firmware
5. Exit
Menu Number:
Sensitive of accel trigger setup
5.1 Trigger Level
1. Trigger Level low
2. Trigger Level Middle
3. Trigger Level High
4. Exit
Menu Number
Set UTC Time
5.2 Change UTC Time
Current UTC Time: 1
Users must set the UTC time according to the Timezone, or the time would be inaccuracy.
Get firmware version
5.3 Get Firmware Version
Current Firmware Version
Lib 1.01. BL_20100812.bin
Page 12
12
Update Firmware
Can used to upgrade functions of the product (need manufacturer provide upgrade file, for free)
Update Instructions
Copy the update program to the SD card, then insert the card into the product. Enter into the main
menu, select 5.ETC Setup, and then select 4.Update Firmware, product can automatic updates.
Note:
Do not remove the power cable and do not turn off the engine,power off during the update
process may cause fatal error.
reset: After finishing all the previous operations and power on, but this vehicle recorder still do not record,
please use a little pin press button (3), it will work normally when the machine restart. If it stil do not work,
please contact the local dealer.
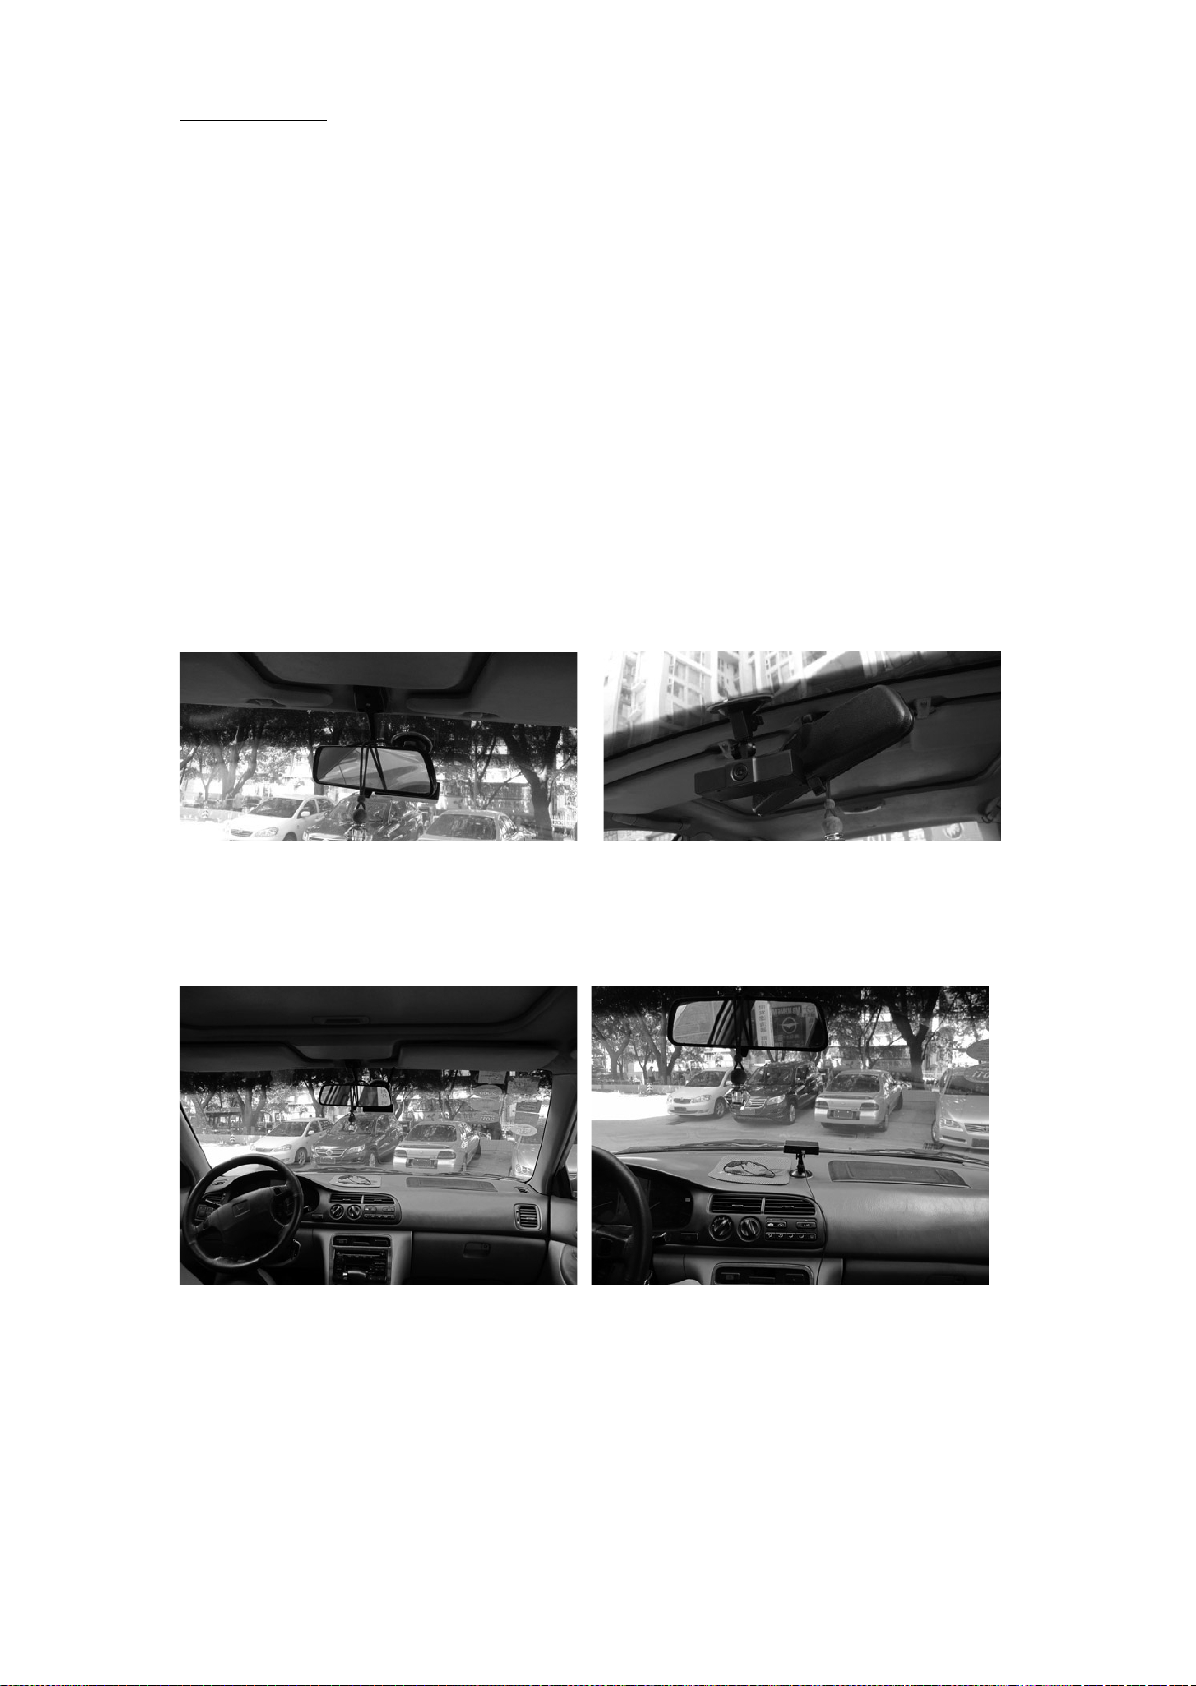
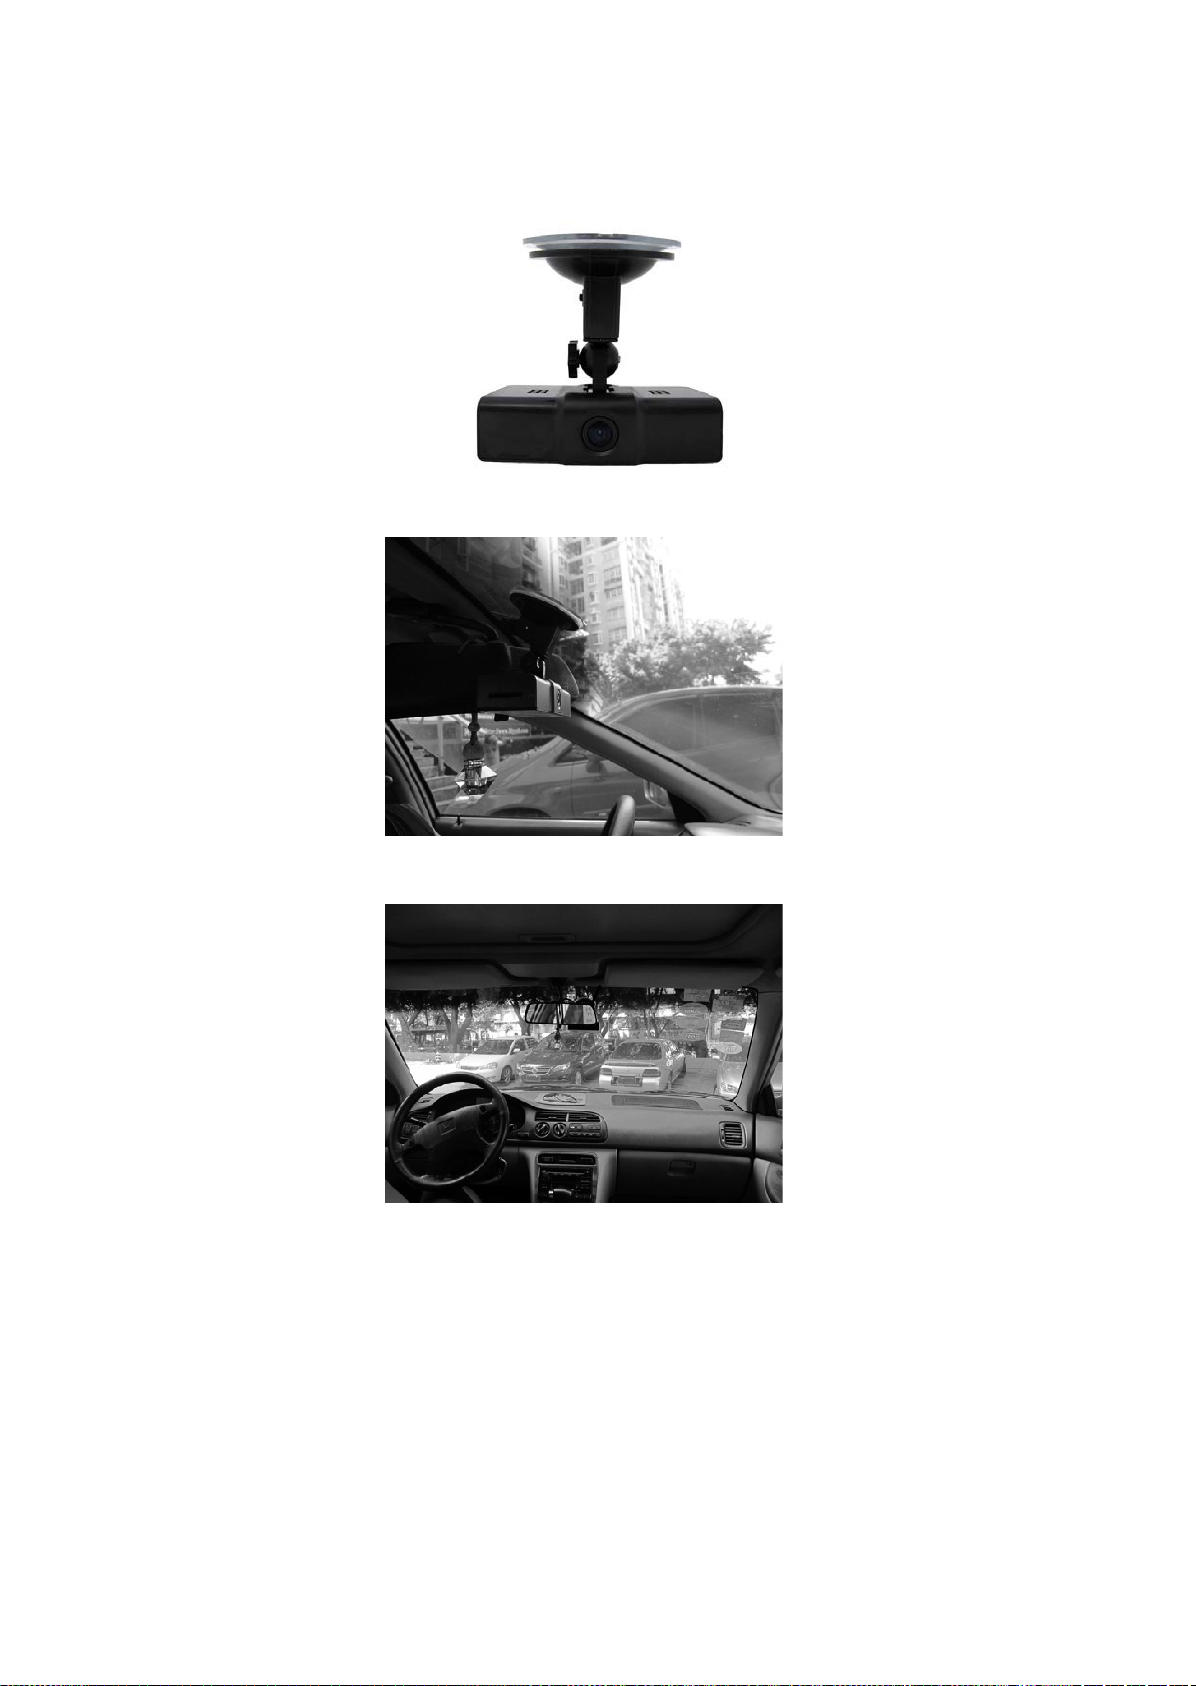
5. Installing instructions
Turn off the engine before installating, and make sure that the windshied is clean.
•
Recommended installation position:
It would be best to fix the product at the back of rearview mirrior of the frond glass, to avoid
affecting your sight. If could not, fix it on the left or ringht side of the rearview mirrior.
•
Designsketch for integral installation
The illustration above should be ajusted according to different cars.
Page 13
13
•
Detailed description for installation
fix the mount with the body as the image mounted on holder like a drawing to the body.
(tear off the clear film at the bottom before using, or it can not attracted to the glasses)
Remove all foreign materials on the window where the product will be attached to.
Securely attach the product to the window.
Connect cables of each part.
Note: To avoide influencing beauty and clean of the car, do not let the cable show up.
GPS antanna must be installed vertically and upward.
Page 14

14
6. Operation instruction
Before operation
Before operating, please follow the sketch to let each part come together and mount this vehicle
recorder to the most suitable place.
Insert SD Card, and this product will start working simultaneously when the cigarette lighter
connected and the car started.
Be sure the power light is ON, when starting up the engine.If the power light does not light up,
check the connection between parts. Remove dust or foreign substances near the cigarette lighter
socket.
Note: please make sure this vehicle recorder be settled stably.
Operation Functions
LED
Mark
Power on
Ren lighting
Car DVR is starting
Recording
Blue flash lighting
Press button 7
Green flash lighting
Press button 8
Press button 9 one time
Green flash lighting
Press button 9 2 sec.
Green lighting
SD card missing
Green flash lighting
Please insert SD card
7. Internal and external cameras setting
Internal and External Camera Mode: default
Internal Camera Mode: press the Up button once
External Camera Mode: press the Up button once
Internal and External Camera Setting for the External Monitor (Only 2CH working is effective):
Press the botton (8) once, the external body camera mode is enabled.
Page 15

15
8. Specification
Item
Specification
Double camera
WDR CMOS Sensor(Angle:140)
Video
640*480 @ 30fps(1Ch.)/15fps(2Ch.)
320*240 @ 30fps(1Ch.)/15fps(2Ch.)
Audio
Inernal Mic.
GPS
Inernal GPS Module
Event
G-sensor(3-Axis).EMR Button
Memory
SD Card Memory (1/2/4/8/16GB)
Compressed Format
H.264
Interfaces
Power (DC 12-36V)/SD Card slot/TV-in/TV-out
Power
Power DC12V-DC36V
Backup Li-Polymer battery
Operating
temperature
-10℃~70℃
Storage
temperature
-20℃~75℃
Dimensions
90*50*25mm
Weight
98G
Saving Time
SD card Capacity
Front or External camera
Front + External camera
1GB
75 min.
37min.
2GB
150 min.
75min.
4GB
300 min.
150min.
8GB
600 min.
300min.
16GB
1200 min.
600min.
Note: according to the differences between holders, brands of memory cards, and other settings,
the measurements of files and the image amount can be took will be different.
9. Rules for maintenance, repair and use
•The device should be mounted inside the windshield of your car. Thus events can be
recorded while driving
•Avoid electric shocks and do not damage the camera's circuit
•Do not attempt to loosen the screws..
•Lens protection: clean with a soft damp cloth, do not use solvents.
•Do not store the camera in extreme cold or hot place.
•During transporting, keep away from excessive shocks and fallen.
•When camera work in higher voltage and temperature, do not run, otherwise the system
could be permanently damaged.
•In case of any failure, do not continue to operate the camera.
 Loading...