

Page 1
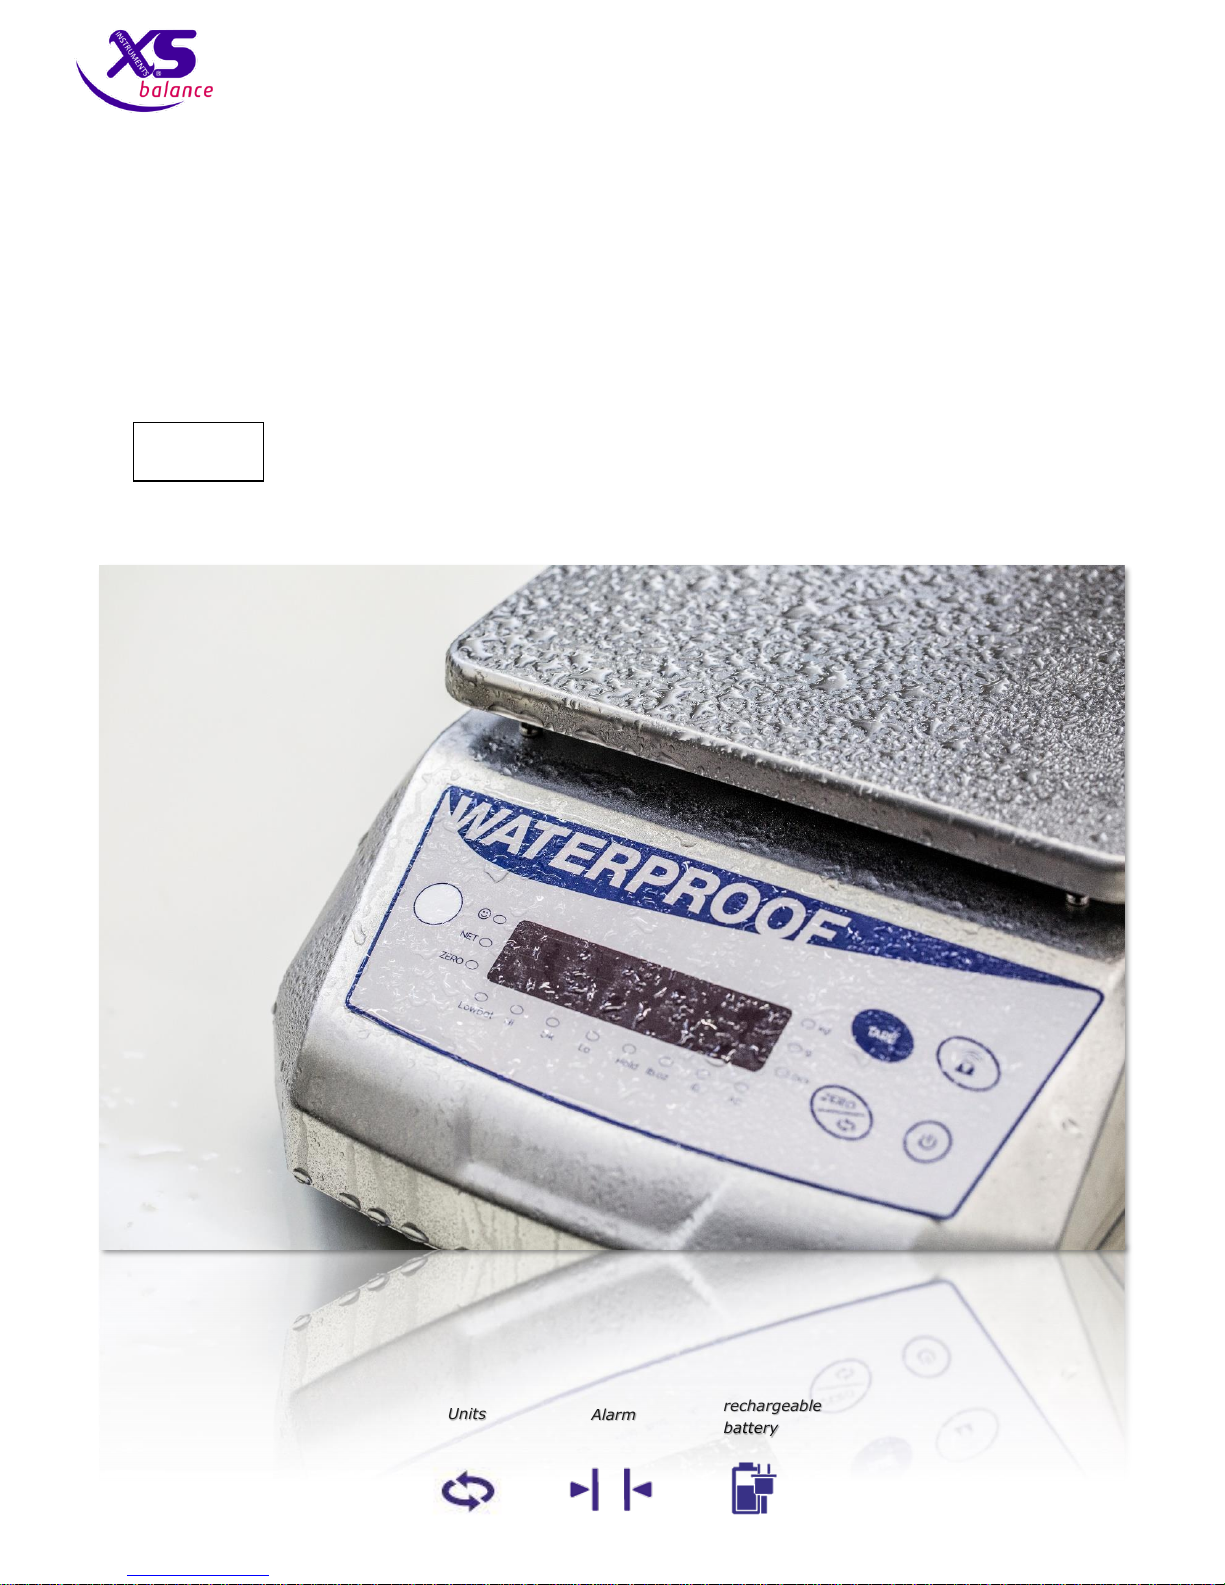
Rechargeable
batteries
Units
Alarm
rechargeable
battery
6 = No ingress of dust; complete protection against contact (dust tight)
7= Ingress of water in harmful quantity shall not be possible when the enclosure is immersed
in water under defined conditions of pressure and time (up to 1 m of submersion).
IP 67
User Manual XS BW 3000
Page 2

2
Index
Installation ......................................................................................................................................................... 3
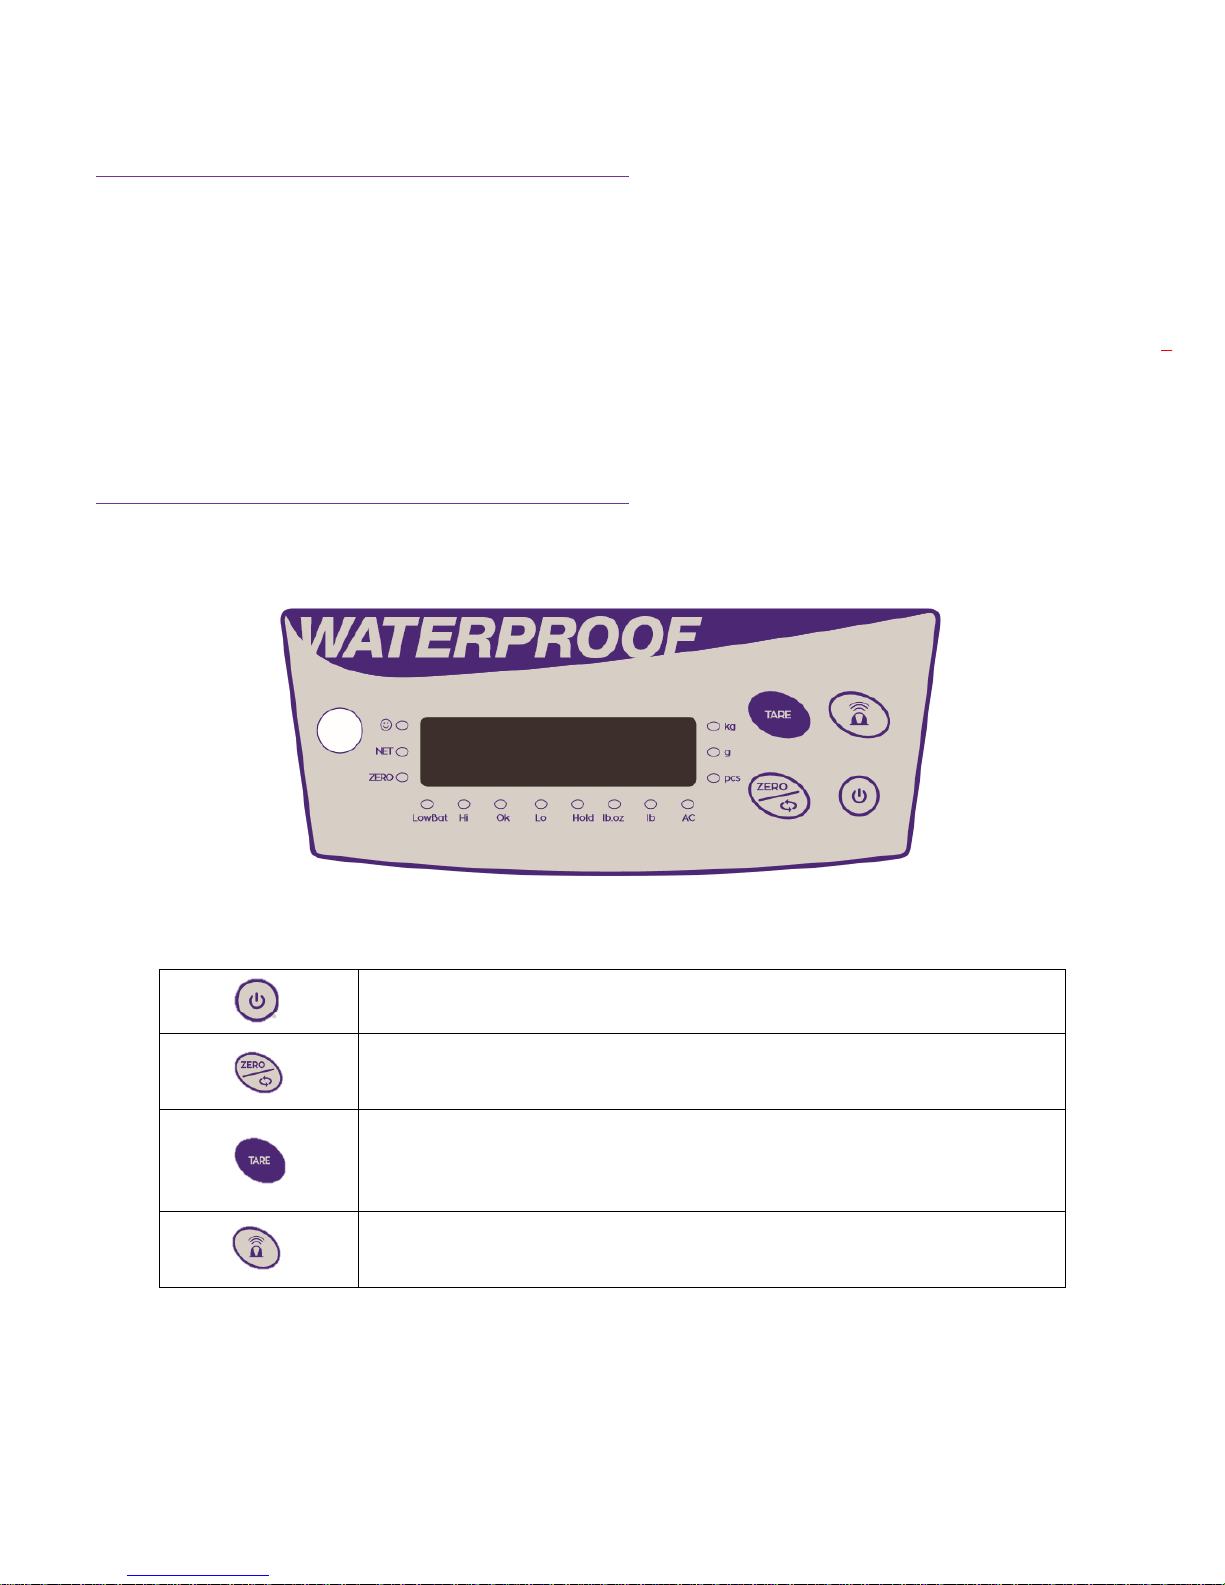
Keyboard and definition of keys ........................................................................................................................ 3
Start ................................................................................................................................................................... 4
User calibration (only for no OIML products) .................................................................................................... 4
Calibration procedure .................................................................................................................................... 4
Unit Setting ........................................................................................................................................................ 4
Unit selection ................................................................................................................................................. 4
Zero .................................................................................................................................................................... 4
Tare .................................................................................................................................................................... 4
Measure ............................................................................................................................................................. 5
Function ............................................................................................................................................................. 5
Counter function ........................................................................................................................................... 5
Limit and Alarm Settings.................................................................................................................................... 5
Function settings ............................................................................................................................................... 7
Battery ............................................................................................................................................................... 8
Troubleshooting ................................................................................................................................................ 8
Data sheet.......................................................................................................................................................... 8
Disposal of electronic devices ........................................................................................................................... 8
Page 3
3
Installation
• Place the balance and, using the adjustable feet and the bubble on the front, adjust the
inclination. The scale must be leveled;
• Do not install near windows or air conditioners;
• Protect the balance from vibrations;
• Working temperature: 10°C – 40°C;
• Installation and removal of the scale must be done with the machine switched off;
• After switch On, wait at least 15 minutes warming up before the first weighing;
• For assistance, contact your dealer or an authorized service center.
Keyboard and definition of keys
• Press the key for 3 seconds to turn on or turn off the balance
• Press and weight display to zero when load is in the scope of zero
• Press the key in weighing mode for 3 seconds to convert unit
• Press the key and weight displays to zero when load is in the scope of
tare weight
• Press this key for 3 seconds to turn on/off the animal weighing mode.
• In weight mode, press the key to turn on/off the function of alarm
• Press the key for 3 seconds to enter in settings menu
Page 4

4
Start
Place the scale, and ,using the bubble on the frontside, level It.
Press to turn on the scale. Following a countdown, marked also by the beep, you will see the software
version, the capacity of the scale, and then you enter the measurement mode.
Wait at least 15 minutes to warm up before the first use.
User calibration (only for no OIML products)
Each balance is calibrated in the laboratory by qualified technicians using certified sample masses.
Calibration procedure
• Turn off the balance. Keep pressed key, and press key to display shows “CAL”;
• When no-load, press key to calibrate zero point, display [C-ZERO] first;
• Then display shows “SPAN”: place 1 kg, 2 kg or 3 kg.
The display shows “on1”, “on2” or “on3” in reference with the mass on weighing plate;
• Then display shows “pass” and count backward to the weighing mode.
Unit Setting
Unit selection
When the balance is in weighing mode, keep pressed for 3 second to change the unit one by one: kg,
g, lb-oz, pcs. The led of the corresponding unit lights on.
Default unit selected is gram [g].
Zero
With no weight on the scales, press the button to take the 0.00 reading on the display. The ZERO
function is only effective if the value shown is less than 4% of total capacity. If the value is greater than 4%,
the load is regarded as a tare.
Tare
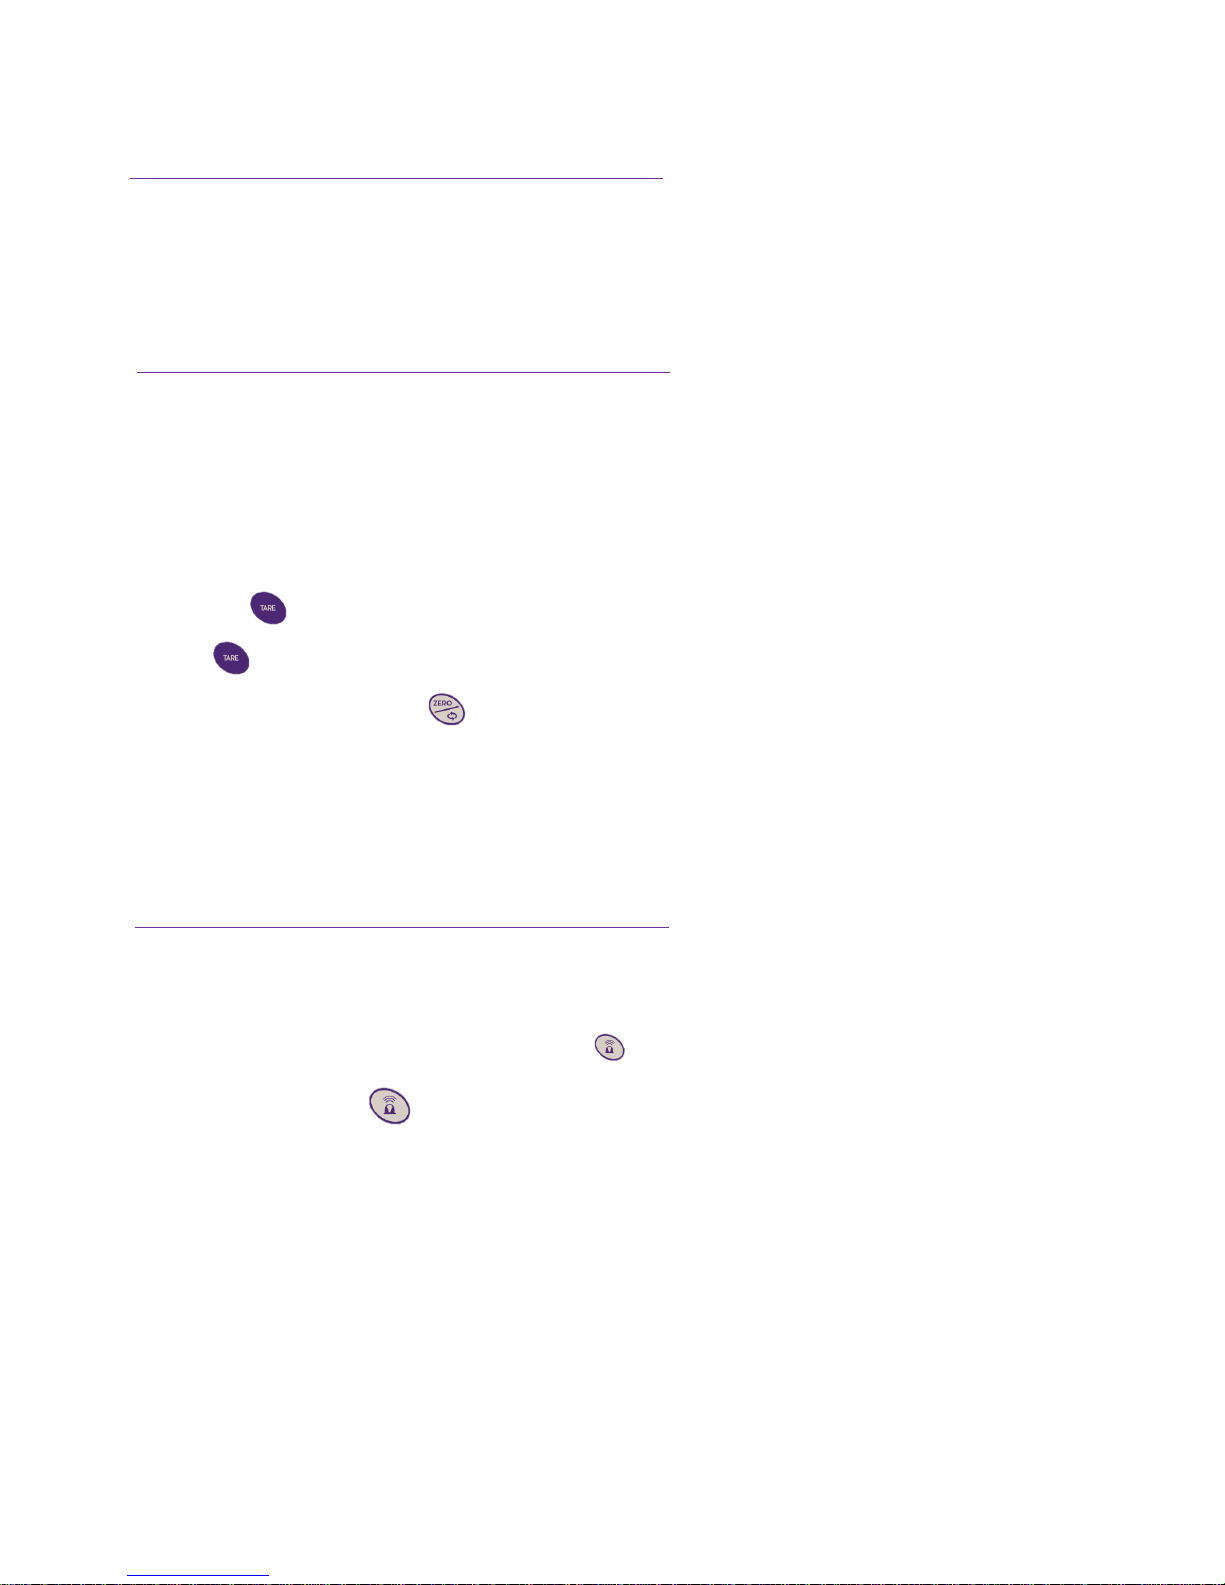
After placing the tare on the scales, press the button to reset the value displayed to 0.00. The load
used for Tara has to be subtracted by the overall capacity weighing.
Page 5
5
Measure
Place the sample on the plate.
Wait that the stability indicator lights before taking the measurement.
Function
Counter function
Select weighting unit PCS.
Now hold key for 3 second: display shows SP=5.
Press key to select the reference number (5, 10, 20, 50, 100, 200, 500), place the same quantity of
samples on the plate and press key. Now put all the other samples on the plate to count them.
Limit and Alarm Settings
XS BW3000 allows you to set measures limits, higher and lower.
This function is very useful in a lot of production process, to check very fast if the sample respect the specification.
You can set higher and lower limit, alarm rules (how alarm has to work) and activate or not the sound.
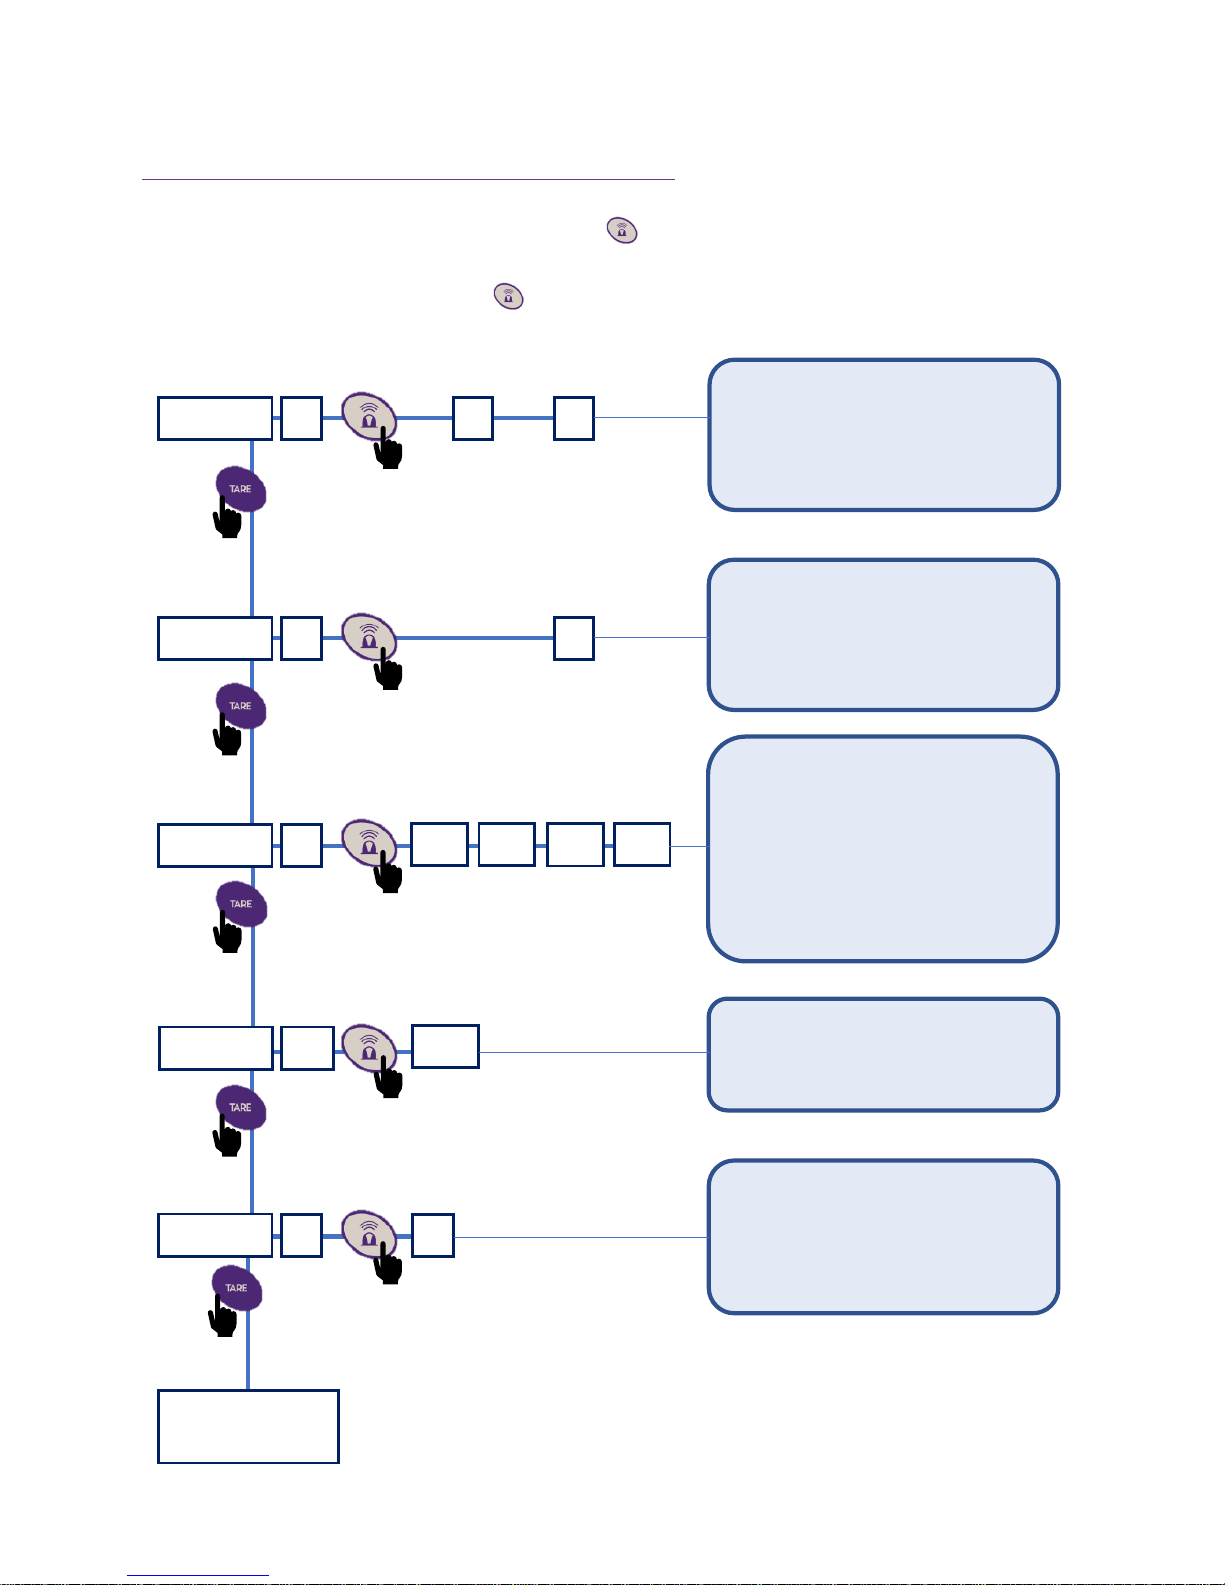
To activate the check-weighing, in weighing mode, press . Display shows Ck – On.
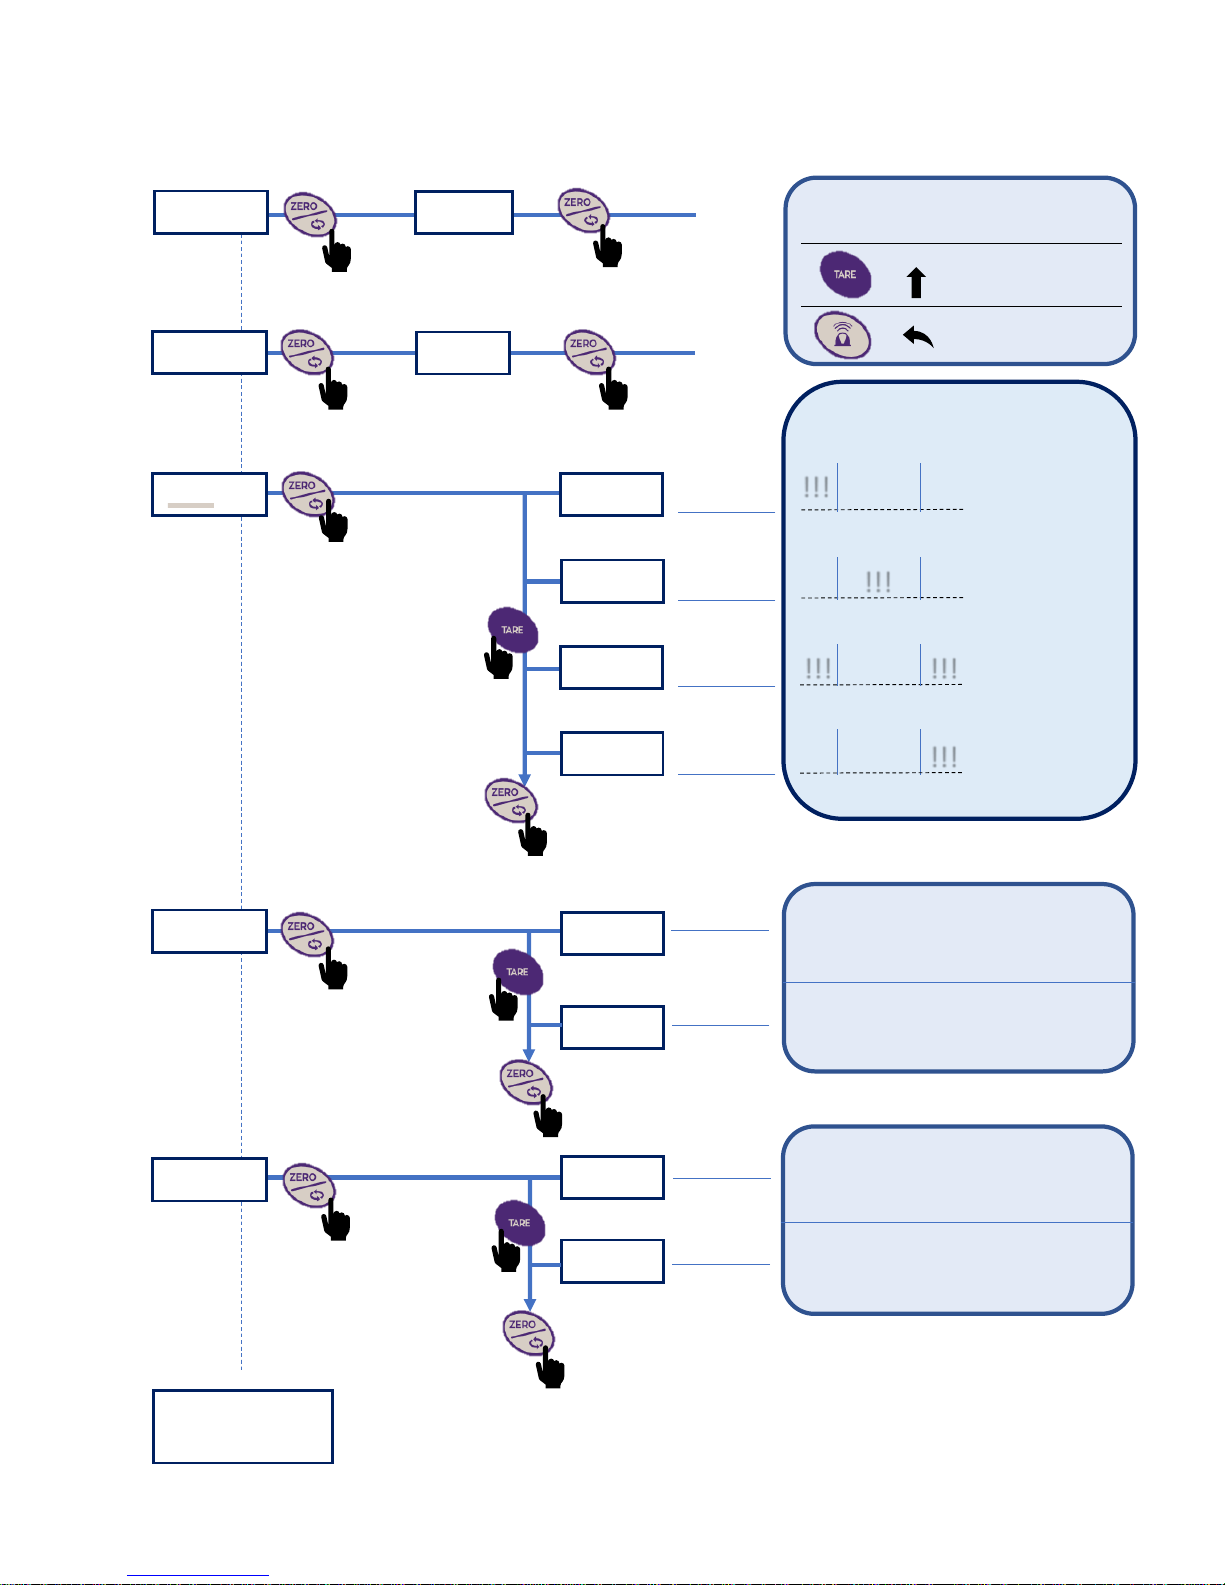
To set alarm, keep pressed for 3 seconds (only if the check-weighing function is ON):
Page 6
6
to scroll
to scroll
to scroll
How to change value when is
flashing
Increase the value
Move to next digit
Set - Ck
Set - Hi
Set - Lo
Set - Li
Set - Bz
L in - Lo
L in - In
L in - Un
L in - Hi
3,000
0,000
St
Us
Bz
Mu
Set higher limit
Set lower limit
Alarm works when measures are
stable or unstable
Alarm works only when measure is
stable
Acustic alarm OFF
Confirm the
selection
Confirm
Confirm
Only when the weight is
less than the lower limit
When the weight is
between lower and
higher limits
When the weight is
less than the lower
limit or more than
the higher limit
Only When the
weight is more
than the higher
limit
!!!
!!!
!!!
!!!
!!!
Set alarm rules
Confirm the
selection
Confirm the selection
Return to measure
mode
Display
Low
limit
High
limit
Display
Display
Display
Display
Page 7
7
to scroll
to scroll
to scroll
to scroll
to scroll
Function settings
To enter in the function settings menu, , keep pressed for 3 seconds
(If check-weighing function is active, software doesn’t allow the operator to enter in the function menu.
To deactivate, in weighing mode press . Display shows Ck – OFF.)
Speed -
L
A J -
0
9
F = Fast
M = medium
S = Slow
Set the speed
of the
measurement
Set the stability filter,
from 0 (less stability)
to 9 (max stability)
APF -
0
30
20
10
60
Set the auto power off:
0= no auto power off
10= auto power off in 10 minutes
20= auto power off in 20 minutes
30= auto power off in 30 minutes
60= auto power off in 40 minutes
Display
PS -
0n
off
Set the power saving mode:
On or Off
SAVE -
Y
N
Save the unit set after turning
Off:
Yes (Y) or No (N)
Return to measure
mode
Page 8
8
Battery
The scale mounts a rechargeable battery.
To recharge the battery use the power supply placed inside the compartment at the bottom of the scale. In
order to open the compartment it is necessary to remove the 4 screws.
Is not recommended to use the balance with the power supply connected.
With the bottom compartment opened, IP67 Is no guaranteed.
Troubleshooting
Description
Solution
Does not turn on
Connect the power supply.
Verify the power supply status and
connection.
Low voltage lamp flicker
Recharge the battery
Display B-Err
Recharge the battery
Reading error.
Does not calibrate.
Recalibrate the scale.
Look for the right work conditions
O-load
Overload, loss weight
O-zero
Exceed initial zero, modify settings
or remove object
Data sheet
Capacity
3000 g
Division
1 g
Repeatability
1 g
Linearity
± 1 g
Plate Dimensions (mm)
220 * 180
Calibration
External
RS 232
No
rechargeable battery
Yes
Dual display (front and back)
Yes
Disposal of electronic devices
The electrical and electronic equipment marked with this symbol cannot be disposed of in
public landfills.
According to the UE Directive 2002/96/EC, the European users of electrical and electronic
equipment can return it to the dealer or manufacturer upon purchase of a new one.
The illegal disposal of electrical and electronic equipment is punished with an administrative fine.
 Loading...