

Page 1

Quick Start Guide
Kurzanleitung
Guide de démarrage
Guida introduttiva
Guía de inicio rápido
Guia de Início Rápido
クイックスタートガイド
快速入门指南
快速入門指南
Page 2
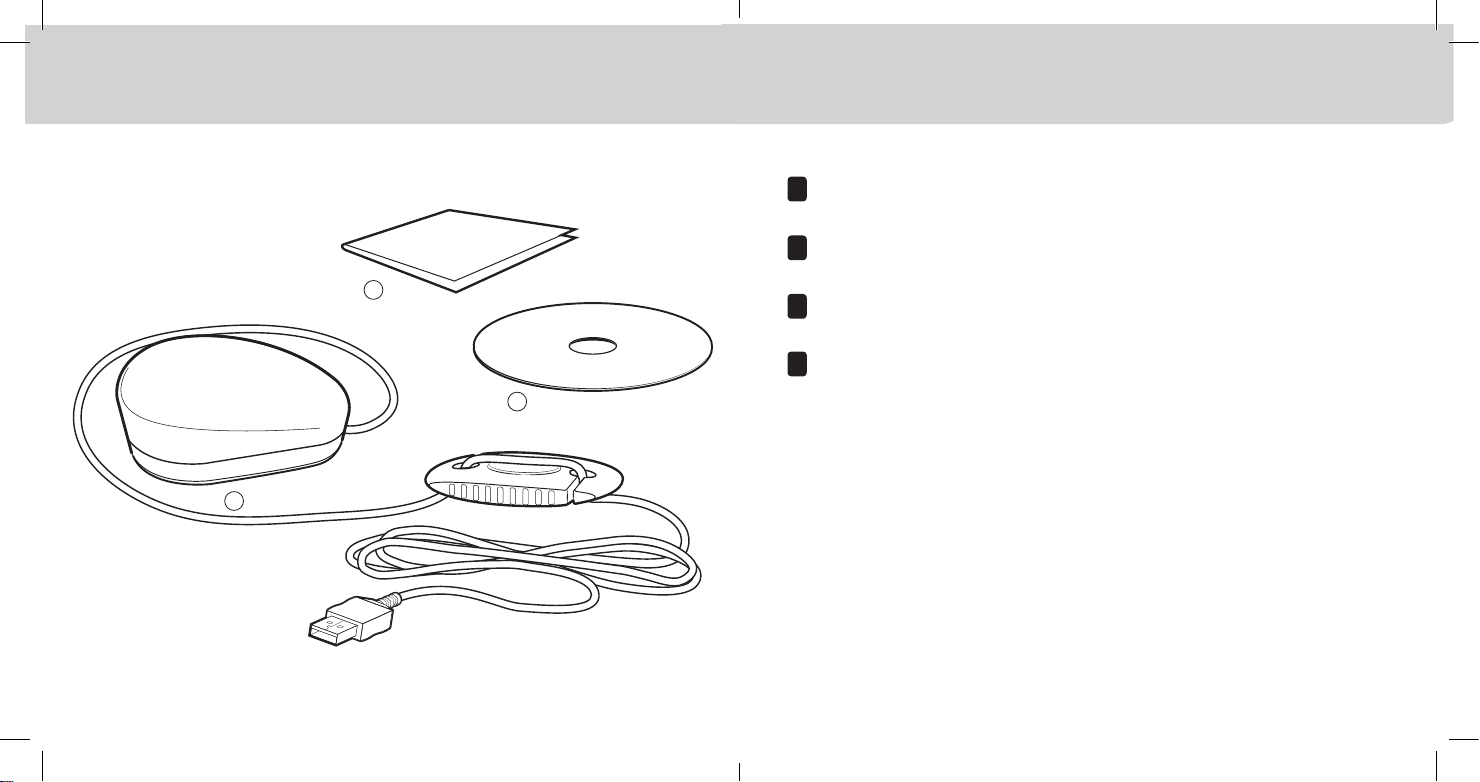
Package Contents Lieferumfang Contenu du coffret
Contenuto della confezione
EN
1. ColorMunki Smile 2. Quick Start Guide 3. Software CD
DE
1. ColorMunki Smile 2. Kurzanleitung 3. Software-CD
2
3
1
FR
1. Instrument ColorMunki Smile 2. Guide de démarrage 3. CD du logiciel
IT
1. ColorMunki Smile 2. Guida introduttiva 3. CD contenente il software
Page 3
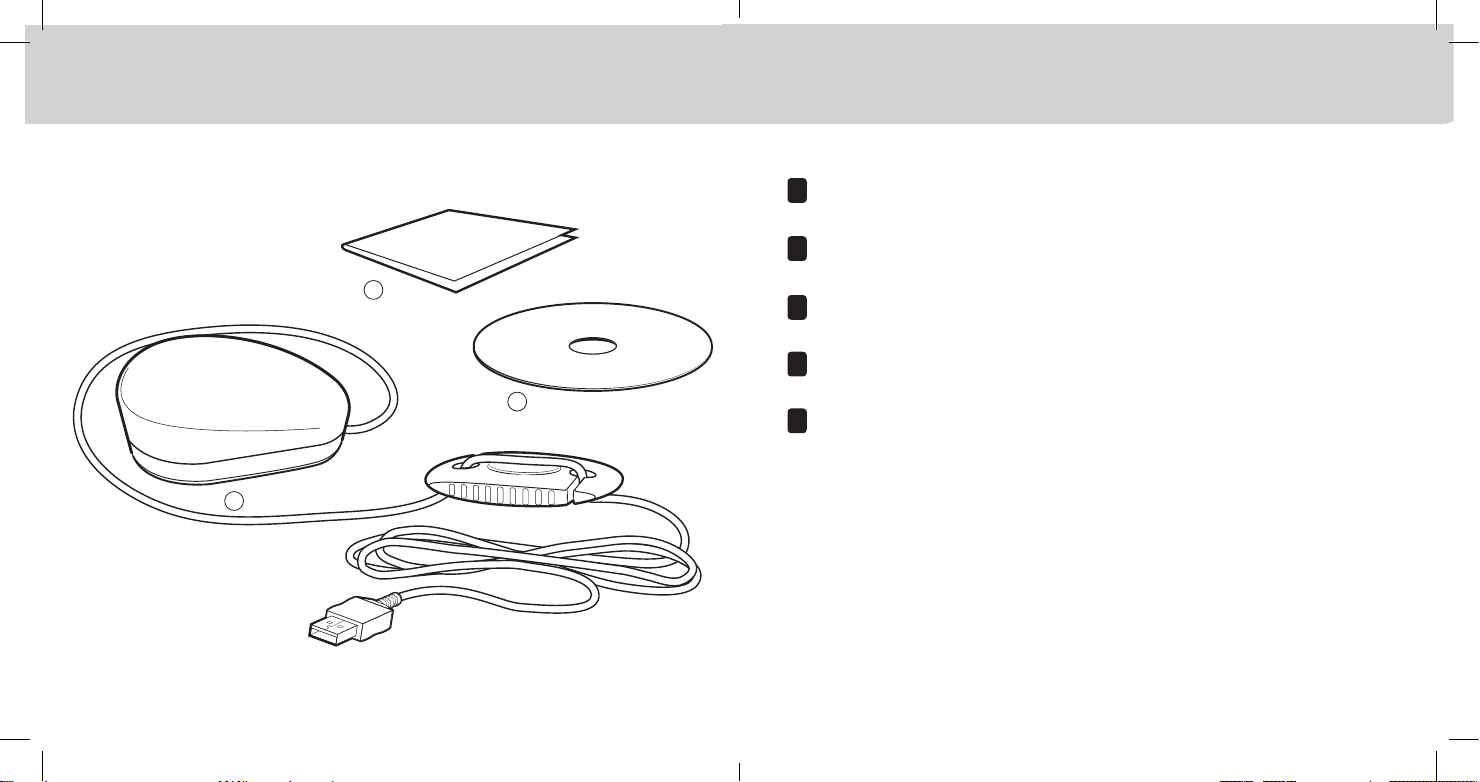
Package Contents Contenido del paquete Conteúdo da Embalagem
パッケージ内容 包装内容 包裝內容
ES
1. ColorMunki Smile 2. Guía de inicio rápido 3. CD del software
PT
1. ColorMunki Smile 2. Guia de Início Rápido 3. CD do aplicativo
2
3
1
JP
1. ColorMunki Smile 2. クイックスタートガイド 3. ソフトウェアCD
CS
1. ColorMunki Smile 2. 快速入门指南 3. 软体 CD
CT
1. ColorMunki Smile 2. 快速入門指南 3. 軟體 CD
Page 4
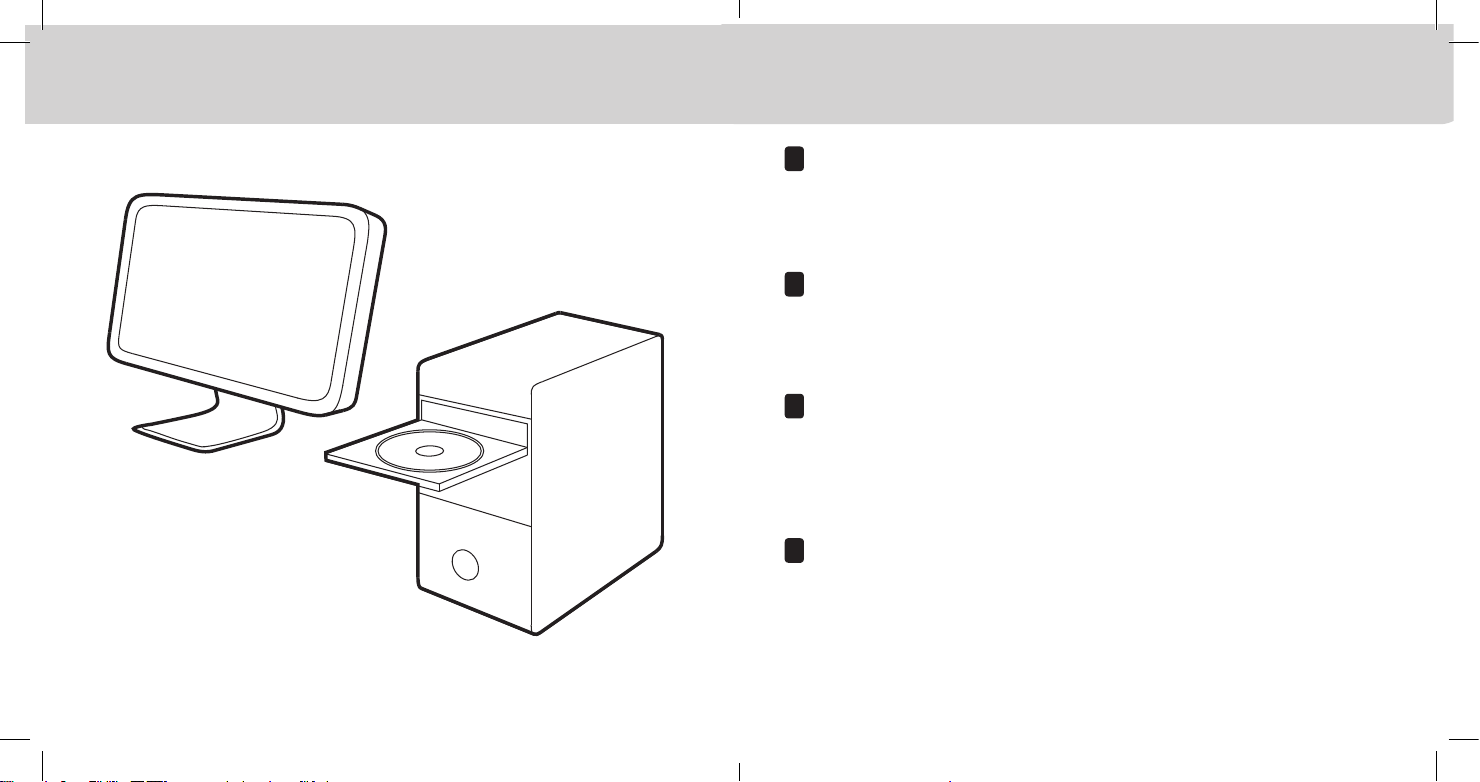
1 Install Software Installation Installation Installazione
EN
Install the software application from the CD onto your PC or Macintosh®
Please do not plug in the instrument USB cable to your computer until
after you have installed the software from the CD. Review all of the
instructions in this Quick Start Guide before you start using your new device.
For more detailed information, please refer to contents on software CD.
DE
Installieren Sie das Programm von der CD auf Ihren PC oder Macintosh®.
Bitte schließen Sie das Gerät erst an den Computer an, nachdem Sie das
Programm von der CD installiert haben. Lesen Sie diese Kurzanleitung sorg-
fältig, ehe Sie Ihr neues Gerät erstmalig verwenden. Weitere Informationen
finden Sie in der Dokumentation auf der Software-CD.
FR
Installez l‘application sur votre ordinateur PC ou Macintosh® à l‘aide du
CD fourni. Reliez le câble USB de l‘instrument à votre ordinateur unique-
ment APRÈS avoir installé le logiciel figurant sur le CD. Passez en revue
toutes les instructions de ce guide avant d‘utiliser votre nouveau périphérique.
Pour de plus amples informations, reportez-vous aux informations contenues
sur le CD du logiciel.
IT
Inserire il CD e installare l‘applicazione software sul PC o sul Macintosh®.
Non collegare il cavo USB dello strumento al computer finché non è stato
installato il software dal CD. Leggere tutte le istruzioni di questa Guida
introduttiva prima di iniziare a utilizzare il dispositivo. Per informazioni più
dettagliate vedere il contenuto del CD del software.
Page 5

1 Install Software Instalación Instalar o Aplicativo ソフトウェアのインストール 安装软件 安裝軟件
ES
Instale la aplicación del software a partir del CD en su PC o Macintosh®.
No conecte el cable USB del instrumento a la computadora antes de instalar el software a partir del CD. Revise todas las instrucciones de esta guía de
inicio rápido antes de empezar a usar su nuevo dispositivo. Para obtener información más detallada, consulte el contenido del CD del software.
PT
Instale o aplicativo do programa a partir do CD no seu PC ou Macintosh®.
Instale primeiro o aplicativo a partir do CD e só depois disto conecte o
cabo USB do instrumento ao computador. Consulte todas as instruções
neste Guia de Início Rápido antes de começar a usar seu novo dispositivo. Para
informações mais detalhadas, consulte o conteúdo do CD do aplicativo.
JP
CDからソフトウェアのアプリケーションをPCまたはMacintosh® にインス
トールします。CDからソフトウェアをインストールするまで、装置のUSB
ケーブルをコンピュータに接続しないでください。新しい装置を使用する
前に、この基本操作の手引きにある手順をお読みください。詳細は同梱ソ
フトウェアCDをご参照ください。
CS
通过光盘将该软件应用程序安装于 PC 或 Macintosh®。安装光盘中的软件
之前,切勿将仪器的 USB 电缆连接至计算机。开始使用新设备前,请先阅
读本《快速入门指南》中的所有说明。若需更多详细信息,请参阅软件光盘
内容。
CT
透過 CD 將軟體應用程式安裝到您的個人電腦或 Macintosh® 上。透過 CD 安
裝完軟體前,請勿將儀器的 USB 電纜插入電腦。開始使用新裝置前,請查閱
快速入門指南中的所有說明。更多資訊,請參閱軟體 CD 中的內容。
Page 6
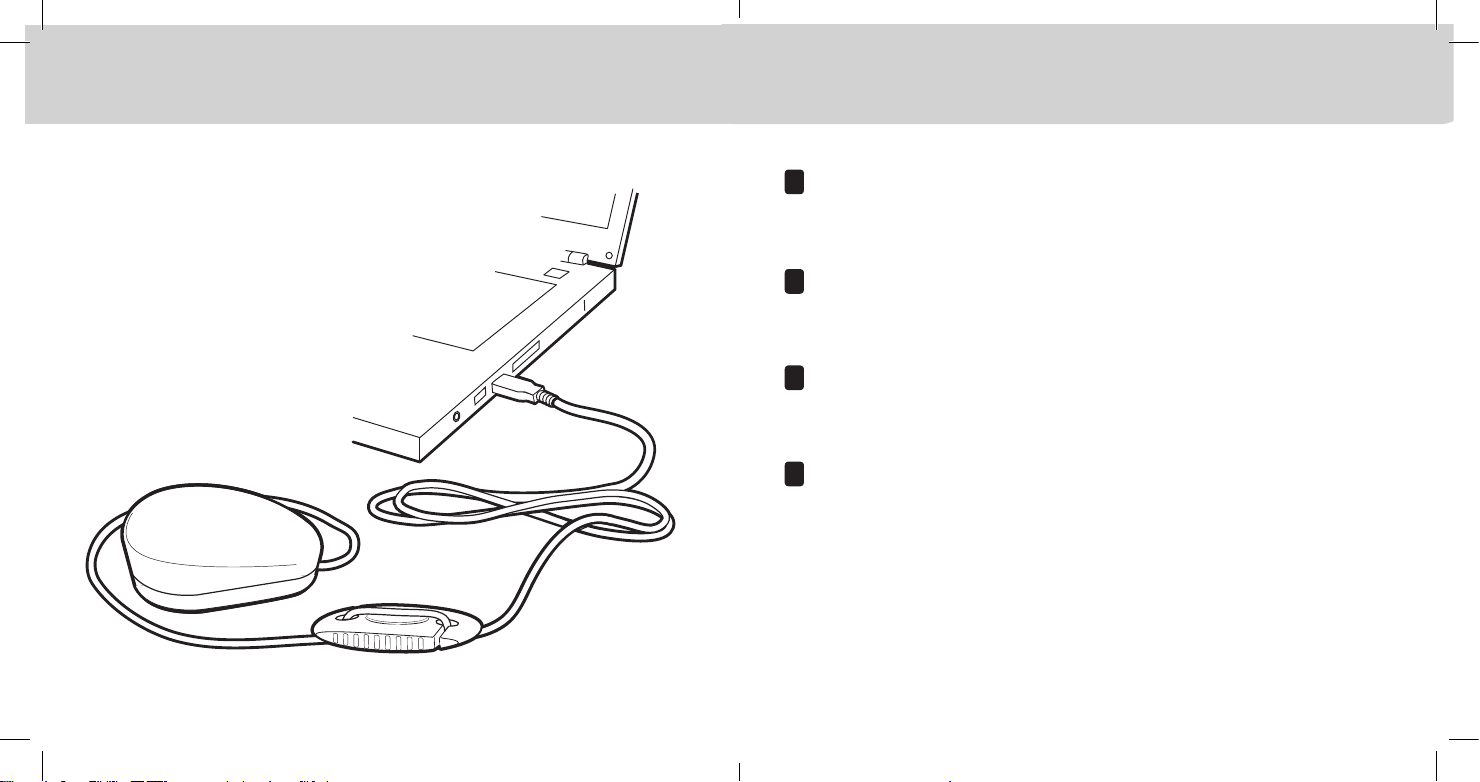
2 Connect Device Gerät anschließen Connecter l’instrument Collegare dispositivo
EN
Connect your ColorMunki Smile device to a powered USB port on
your computer.
DE
Schließen Sie das ColorMunki Smile an einen aktiven USB-Port an
Ihrem Computer an.
FR
Reliez votre instrument ColorMunki Smile à un port USB alimenté de
votre ordinateur.
IT
Collegare il dispositivo ColorMunki Smile ad una porta USB alimentata
sul computer.
Page 7

2 Connect Device Conectar dispositivo Conectar o Dispositivo 装置の接続 连接装置 連接裝置
ES
Conecte el dispositivo ColorMunki Smile a uno de los puertos USB
potenciados disponibles en su computadora.
PT
Conecte o dispositivo ColorMunki Smile a uma porta USB energizada
no seu computador.
JP
ColorMunki Smile装置を、コンピュータのUSB電源ポートに接続します。
CS
将 ColorMunki Smile 设备连接到计算机上已接通电源的 USB 端口。
CT
將 ColorMunki Smile 設備連接到計算機上已接通電源的 USB 端口。
Page 8

3 Launch Software Software starten Lancer le logiciel Avviare il software
EN
Launch the ColorMunki Smile software application on your computer
and follow the on-screen instructions in the application.
DE
Starten Sie das Programm ColorMunki Smile, und folgen Sie den
Anweisungen auf Ihrem Bildschirm.
FR
Lancez l’application ColorMunki Smile sur votre ordinateur et suivez les
instructions à l’écran.
IT
Avviare l’applicazione ColorMunki Smile sul computer e seguire le
istruzioni visualizzate sullo schermo.
Page 9

3 Launch Software Inicie el software Inicie o Aplicativo ソフトウェアの起動 启动软件 啟動軟件
ES
Inicie la aplicación del software del dispositivo ColorMunki Smile en su
computadora y siga las instrucciones en pantalla.
PT
Inicie o aplicativo do programa do ColorMunki Smile no seu computador
e siga as instruções na tela.
JP
ColorMunki Smile ソフトウェアを起動し、アプリケーションに表示
される指示に従ってください。
CS
启动计算机上的 ColorMunki Smile 软件应用程序,然后遵照该程序上
的屏幕指令操作。
CT
啟動計算機上的 ColorMunki Smile 軟件應用程序,然後遵照該程序上
的屏幕指令操作。
Page 10

4 Counterweight Adjustment Gegengewicht anpassen Régler le contrepoids Regolazione del contrappeso
1
2
3
EN
To adjust the position of the counter weight, push a length of USB cable up
first and then pull the excess cable down on the other side. Repeat until
desired position is achieved.
DE
Passen Sie die Position des Gegengewichts an, indem Sie zuerst das USBKabel etwas nach oben schieben und dann auf der anderen Seite herunterziehen, bis sich das Gerät in der gewünschten Position befindet.
FR
Pour régler la position du contrepoids, tirez d‘abord sur le câble USB,
puis faites repasser l‘excès de câble de l‘autre côté. Répétez l‘opération
jusqu‘à ce que vous arriviez à la position désirée.
IT
Per regolare la posizione del contrappeso, allungare per prima una parte del
cavo USB verso l‘alto e poi tirare il cavo in eccesso verso il basso dall‘altro
lato. Ripetere questa procedura fino a raggiungere la posizione desiderata.
Page 11

4 Counterweight Adjustment Ajuste del contrapeso Ajuste do Contrapeso バランスウェイト(重り)の調整 平衡锤调整 平衡錘調整
1
2
3
ES
Para ajustar la posición del contrapeso, en primer lugar estire una porción
del cable USB hacia arriba y, a continuación, tire el exceso de cable hacia
abajo del otro lado. Repita este proceso hasta obtener la posición que desee.
PT
Para ajustar a posição do contrapeso, estique uma parte do cabo USB primeiro para cima e, em seguida, puxe o excesso de cabo para baixo no outro
lado. Repita este procedimento até obter a posição desejada.
JP
バランスウェイト(重り)の位置を調整するには、USBケーブルを移動
方向にたぐり、たるみを反対方向から引っ張ってください。最適な位置
になるまでこの作業を繰り返します
CS
要调整平衡锤的位置,请先拉长 USB 缆线,然后将多余的缆线向下拉往另
一侧。重复操作直至达到理想的位置。
CT
要調整平衡錘的位置,請先拉長 USB 纜線,然後將多餘的纜線向下拉往另
一側。重複操作直至達到理想的位置。
Page 12

5 Position Device Gerät platzieren Positionner l’instrument Posiziona dispositivo
EN
When directed by the software, place the device on the center of your
display and be sure it is resting flat. Position the USB cable and counter
weight behind your display to counter balance.
DE
Platzieren Sie das Gerät in der Mitte des Bildschirms, sobald das
Programm Sie dazu auffordert. Achten Sie darauf, dass es flach aufliegt.
Führen Sie das USB-Kabel und das Gegengewicht hinter dem Monitor
entlang.
FR
Lorsque le logiciel vous y invite, placez l‘instrument au centre de votre
écran et vérifiez qu‘il repose bien à plat sur celui-ci. Positionnez le câble
USB et le contrepoids derrière l‘écran pour faire contrepoids.
IT
Quando richiesto dall‘applicazione, sistemare il dispositivo sul centro
dello schermo e assicurarsi che si trovi appoggiato perfettamente.
Sistemare quindi il cavo USB e il contrappeso dietro lo schermo per
controbilanciare il peso.
Page 13

5 Position Device Posicionar dispositivo Posicionar Dispositivo 装置をセット 安置设备 安置設備
ES
Cuando así lo solicite la aplicación, coloque el dispositivo sobre el centro
de la pantalla y asegúrese de que esté acostado completamente plano.
Coloque el cable USB y el contrapeso detrás de la pantalla para
contrabalancear.
PT
Quando pedido pelo aplicativo, coloque o dispositivo sobre o centro da
tela e certifique-se de que ele esteja apoiado de maneira plana.
Posicione o cabo USB e o contrapeso por trás da tela para contrabalançar.
JP
ソフトウェアに指示が表示されたら、装置がディスプレイ中央に平ら
になるようにセットしてください。USBケーブルおよびバランスウエ
イト(重り)がディスプレイの後ろに来るように取り付け、バランス
を取ってください。
CS
根据软件指示,将设备置于显示器中央并确保其平坦搁置。将 USB 缆线
和平衡锤放置在显示器后面来保持平衡。
CT
根據軟件指示,將設備置於顯示器中央並確保其平坦擱置。將 USB 纜線
和平衡錘放置在顯示器後面來保持平衡。
Page 14

6 Position Counterweight Gegengewicht platzieren Positionner le contrepoids Sistemare il contrappeso
EN
Adjust the position of the counter weight according to the size of your display.
Be sure the foam pad on the bottom of the device sits flat on your display.
DE
Position des Gegengewichts muss für die Monitorgröße angepasst werden.
Schaumstoff unter dem Gerät muss flach auf dem Monitor aufliegen.
FR
Réglez la position du contrepoids en fonction de la taille de votre écran.
Assurez-vous que le coussin en mousse situé sous l’instrument repose
bien à plat sur votre écran.
IT
Regolare la posizione del contrappeso in base alle dimensioni dello schermo.
Assicurarsi che il cuscinetto spugnoso sulla parte inferiore del dispositivo sia
appoggiato correttamente e in piano sullo schermo.
Page 15

6 Position Counterweight Posicionar contrapeso Posicionar o Contrapeso バランスウエイト(重り)の設定 安置平衡锤 安置平衡錘
ES
Ajuste la posición del contrapeso en función del tamaño de la pantalla.
Asegúrese de que la almohadilla de espuma en la parte inferior del dispositivo se asiente completamente acostada sobre la pantalla.
PT
Ajuste a posição do contrapeso de acordo com o tamanho da tela.
Certifique-se de que a almofada de espuma na parte inferior do dispositivo
assente-se corretamente plana sobre a tela.
JP
ディスプレイのサイズに合わせてバランスウェイトの位置を調整してく
ださい。装置底のフォームパッドがディスプレイに対して平らになるよ
うにしてください。
CS
根据显示器尺寸调整平衡锤的位置。确保设备底部的泡沫护垫平整贴在显
示器上。
CT
根據顯示器尺寸調整平衡錘的位置。確保設備底部的泡沫護墊平整貼在顯
示器上。
Page 16

System Requirements
Device Specifications
EN
Minimum System Requirements for Windows®:
Microsoft® Windows® XP 32 bit, Microsoft® Windows Vista® 32 bit, or Microsoft Windows
7® 32 or 64 bit. All operating systems should have latest Service Pack installed. 500MB
RAM, Intel® Core 2 Duo or AMD Athlon™ 64 X2 or better CPU, 500 MB of available disk
space, powered USB port, and display resolution of 1024 x 768 pixels or higher. User must
have Administrator rights to install and uninstall the application. Internet connection
required for software update.
Minimum System Requirements for Macintosh®:
MacOS X 10.6, 10.7, or 10.8 (with latest upgrades installed). 500MB RAM, Intel® Core 2
Duo CPU, 500 MB of available disk space, powered USB port, and display resolution of 1024
x 768 pixels or higher. User must have Administrator rights to install and uninstall the application. Internet connection required for software update.
Device Specifications:
Supply voltage & current: 5VDC, 100mA maximum
Operating temperature range: 40° to 104°F (5° to 40°C) 85%
relative humidity maximum
(non-condensing)
Dimensions: 64.5mm x 39mm x 66mm
Weight: 130g
Usage: Indoor only
Altitude: 2000m
Pollution degree: 2
Overvoltage category: Category 1
Page 17

Warranty Conditions
Care, Support, & Service
EN
Warranty Conditions
X-Rite warrants this product against defects in material and workmanship for a period of twelve
(12) months from the date of sale, unless different local regulations apply. During the warranty
period, X-Rite will either replace or repair at its discretion defective parts free of charge.
This warranty shall not apply to any goods supplied hereunder which after shipment are damaged,
altered in any respect, or subjected to negligent treatment. X-Rite`s sole and exclusive obligation
for breach of the above warranties shall be the repair or replacement of any part, without charge,
which within the warranty period is proven to X-Rite`s reasonable satisfaction to have been defective. Repairs or replacement by X-Rite shall not revive an otherwise expired warranty, nor shall
the same extend the duration of a warranty. X-Rite shall in no event be liable for losses or costs
to Buyer in manufacturing, or for Buyer`s overhead, other expenses, lost profits, goodwill, or any
other special, indirect, consequential, incidental or other damages to people or property resulting
from a breach of any of the foregoing warranties. There are no other warranties, either express or
implied, which extend beyond the warranties set forth herein. The express warranties contained
herein are in lieu of all other warranties, express or implied, including, but not limited warranty or
merchantability and fitness for a particular purpose or application. No representations, conversations or statements not expressly set forth herein shall be binding upon X-Rite as a warranty, guarantee or any other form of assurance. To obtain warranty service, you must take the product, or
deliver the product freight prepaid, in either its original packaging or packaging affording an equal
degree of protection, to an authorized X-Rite service center. Proof of purchase in the form of a bill
of sale or receipted invoice which is evidence that the unit is within the Warranty period must be
presented to obtain warranty service.
Care
When not in use, always position the device with the optical tubes and serial # label pointed
down to prevent dust or debris from entering the optical path. Also, always store the device
between 10 degrees C to 35 degrees C at 20% to 80% relative humidity (non-condensing).
Warranty Registration
To receive technical support, obtain warranty service, and get the latest software updates and
product news, please register your product with us as directed by the software application.
Service
Do not try to dismantle the ColorMunki for any reason. Unauthorized dismantling of the equipment will void all warranty claims. Contact the X-Rite support or the nearest X-Rite Service
Center, if you believe that the unit does not work anymore or does not work correctly.
Service Center
Visit www.XRITE.com to locate the nearest X-Rite Service Center or contact your X-Rite dealer
for more information.
Page 18

Important Notices Safety Information
EN
CE Declaration
Manufacturer’s Name: X-Rite, Incorporated
Authorized Representative: X-Rite, Incorporated
Siemensstraße 12b • 63263 Neu-Isenburg • Germany
Phone:+49 (0) 61 02-79 57-0 • Fax: +49 (0) 61 02 -79 57-57
Model Name: CMUNDLT
Directive(s) Conformance: EMC 2004/108/EC and LVD 2006/95/EC
FEDERAL COMMUNICATIONS COMMISSION NOTICE
NOTE: This equipment has been tested and found to comply with the limits for a Class B digital device, pursuant to
Part 15 of the FCC Rules. These limits are designed to provide reasonable protection against harmful interference in a
residential installation. This equipment generates, uses and can radiate radio frequency energy and, if not installed and
used in accordance with the instructions, may cause harmful interference to radio communications. However, there is no
guarantee that interference will not occur in a particular installation. If this equipment does cause harmful interference to
radio or television reception, which can be determined by turning the equipment off and on, the user is encouraged to try
to correct the interference by one or more of the following measures:
• Reorient or relocate the receiving antenna.
• Increase the separation between the equipment and receiver.
• Connect the equipment into an outlet on a circuit different from that to which the receiver is connected.
• Consult the dealer or an experienced radio/TV technician for help.
INDUSTRY CANADA COMPLIANCE STATEMENT
This Class B digital apparatus complies with Canadian ICES-003.
Cet appareil numérique de la classe B est conforme à la norme NMB-003 du Canada.
EQUIPMENT INFORMATION
Use of this equipment in a manner other than that specified by X-Rite, Incorporated may compromise
design integrity and become unsafe.
!
WARNING: This instrument is not for use in explosive environments.
ADVERTENCIA – NO use este aparato en los ambientes explosivos.
AVVERTIMENTO – NON usare questo apparecchio in ambienti esplosivi.
WARNUNG: Das Gerät darf in einer explosiven Umgebung NICHT verwendet werden.
AVERTISSEMENT: Cet instrument ne doit pas être utilisé dans un environnement explosif.
RoHS/WEEE
Instructions for disposal: Please dispose of Waste Electrical and Electronic Equipment (WEEE)
at designated collection points for the recycling of such equipment.
If this product is used in a manner not specified by the instruction, the safety protection provided by the device
may be impaired or become inoperable.
Unauthorized dismantling of the ColorMunki will void all warranty claims.
Page 19

有毒有害物质或元素名称及其标识 Toxic/Hazardous Substances and Elements Table
WPP
CMUNDLT Assemblies
部件名称
(Parts)
电路模块
(Circuit Modules)
感应器塑胶和聚合物部件
(Senaor Block-Plastic and Polymeric Parts)
遮光垫圈
(Light Sealing Gasket)
粘垫
(Flat pad Part)
USB 电缆及电缆组件
(USB A Cable and Cable Assemblies)
(Cable Weight-Plastic and Metal Components)
(Top Body-Plastic and Polymeric Parts)
(Bottom Body-Plastic and Polomeric Parts)
线重塑胶和金属组件
内部重块金属组件
(Inside Weight-Metal Parts)
上壳塑胶和聚合物部件
下壳塑胶和聚合物部件
光学和光学组件
(Optics and Optical Components)
铅
(Pb)汞(Hg)镉(Cd)
X ○ ○ ○ ○ ○
○ ○ ○ ○ ○ ○
○ ○ ○ ○ ○ ○
○ ○ ○ ○ ○ ○
○ ○ ○ ○ ○ ○
○ ○ ○ ○ ○ ○
○ ○ ○ ○ ○ ○
○ ○ ○ ○ ○ ○
○ ○ ○ ○ ○ ○
X ○ ○ ○ ○ ○
○: 表示该有毒有害物质在该部件所有均质材料中的含量均在SJ/T11363-2006规定的限量要求以下。
○: Indicates that the content of the toxic and hazardous substance in all the homogenous material
of the part is below the concentration limit requirement as described in SJ/T 11363-2006.
X: 表示该有毒有害物质至少在该部件的某一均质材料中的含量超出SJ/T11363-2006规定的限量要求。
X: Indicates that the content of the toxic and hazardous substance in at least one homogenous material
of the part exceeds the concentration limit requirement as described in SJ/T 11363-2006.
有毒有害物质或元素
六价铬
(Cr+6)
多溴联笨
(PBB)
CN
多溴二苯醚
(PBDE)
20
Page 20

Corporate Headquarters 4300 44th Street SE, Grand Rapids, Michigan 49512
Phone 1 800 248 9748 or 1 616 803 2100
Fax 1 800 292 4437 or 1 616 803 2705
Corporate Headquarters Europe Althardstrasse 70, 8105 Regensdorf, Switzerland
Phone (+41) 44 842 24 00
Fax (+41) 44 842 22 22
X-Rite Asia Pacific Limited Asia 36/F, 169 Electric Road, Hong Kong, China
Phone (852) 2568-6283, Fax (852) 2885-8610
Email: info_ap@xrite.com mail to: info_ap@xrite.com
Please visit www.xrite.com for a local office near you.
TM Trademark of X-Rite. Part No. CMUNSML-QSG (05/12)
 Loading...