

X-PROGRAM X-WE10, X-WE12 Owner's Manual
X-PROGRAM
Subwoofers
Owners manual
Thank you for buying an X-program subwoofer.
Please read this manual before installation.
Installation
The subwoofer must be installed correctly in order to work well.
This manual will show you how to install it like a pro. Please read
the entire manual before beginning the installation.
Install the subwoofer yourself if you feel confident with our
instructions and if you have the proper tools. However if you feel
unsure, turn over the installation job to someone better suited to it.
Connection
How to connect depends on what type of amplifier you use. The
best is to follow the instructions given in the manual for the
amplifier. Most amplifiers today have built-in lowpass crossover
and possibilities to connect your subwoofer in bridge mode.
The X-WE10 and X-WE12 subwoofers have a 4 ohm voice coil,
if connected in bridge mode to your amplifier the resulting
impedance is 2 ohm. This means that your amplifier must be 2
ohm stable.
Make sure to connect in a way that don´t ruin the amplifier. If you
have an X-A10 or X-D11 mono amplifier it´s possible to connect
two subwoofers in parallel, these ampliers are 1 ohm stable.
We also recommend the use of a subsonic highpass filter. This
gives a better bass reproduction with less "rumble". In all X-program amplifiers this feature is already built-in.
For wiring use high class speaker wires, min AWG11 (4 mm
2
).
For models:
X-WE10 - 10”
X-WE12 - 12”
Running-in period
Allow the speakers to play for at least 15-20 hours. After this
time the performance is correct.
Speaker grille
A red high gloss grille is included in the packing, this grille
perfectly matches the subwoofer.
The outer dimension of the basket is 266 mm for X-WE10 and
315 mm for X-WE12 if you have plans for using another type of
grill.
Technical Assistance
For technical assistance ask the shop where the product was
sold or the distributor in your very country.
Information can also be found on our WEB-site
www.xprogram.com
We follow a policy of continuous advancement in development.
For this reason all or part of specifications & designs may be
changed without prior notice.
Subwoofer enclosures
Build your enclosure in a stable and airtight material. The best is
MDF-board, 19 mm, or particle board, 22 mm. Larger enclosures
must have bracing inside to avoid vibrations. The enclosure must
be completely airtight. Use sealing compound in all joints, also
around the cable terminals. The size of the enclosure is decided
by the speaker data. The parameters of the X-program 10 and
12” subwoofers are made for vented enclosures only, The vent
port kit is included with the subwoofers.
Vented enclosures
A speaker in a vented enclosure has a higher efficiency (+3 dB)
and higher power handling capacity than in a sealed enclosure.
In a vented enclosure the sound from the speaker and the port
work together creating a higher sound level. The sound from the
port must come out in the same phase as from the speaker cone,
otherwise the result is bad.
The size of the vented enclosure is decided by the speaker data .
We advice you to follow our enclosure recommendations on next
page and use the port coming with the subwoofer for maximum
performance.
Important!
Consider the speaker weight when you do your install. Use heavy
bolts when fastening the sub to the enclosure baffle.
This product must be returned to the separate collection system for electronic products. Do not dispose this product together with general household
waste.
DLS Svenska AB
P.O. Box 13029 - SE-40251 Göteborg - Sweden
Tel: +46 31 840060 - Fax: +46 31 844021
E-mail: info@dls.se
www.xprogram.com
X-program speakers are produced in Taiwan
X-program is designed, engineered and distributed by:
Warranty service
This speaker is covered by warranty, depending on the
conditions in the country where it is sold. If the speaker is returned for service, please include the original dated receipt with
the product.
Model Speaker size Nom. Peak Sensi- Magnet Installation Mounting Fs Qts Qes Qms Vas Z BL
power power tivity diameter depth hole Hz litre ohm
X-WE10 25 cm / 10” 400 W 1200 W 88 dB 155 mm / 6,1” 110 mm / 4,33” 236 mm / 9,3” 38,2 0,43 0,49 3,35 32,5 4 12,2
X-WE12 30 cm / 12” 500 W 1500 W 89 dB 180 mm / 7,1” 123 mm / 4,84” 286 mm / 11,25” 36,8 0,44 0,50 3,64 55 4 13,45
Speaker facts for X-program subwoofers
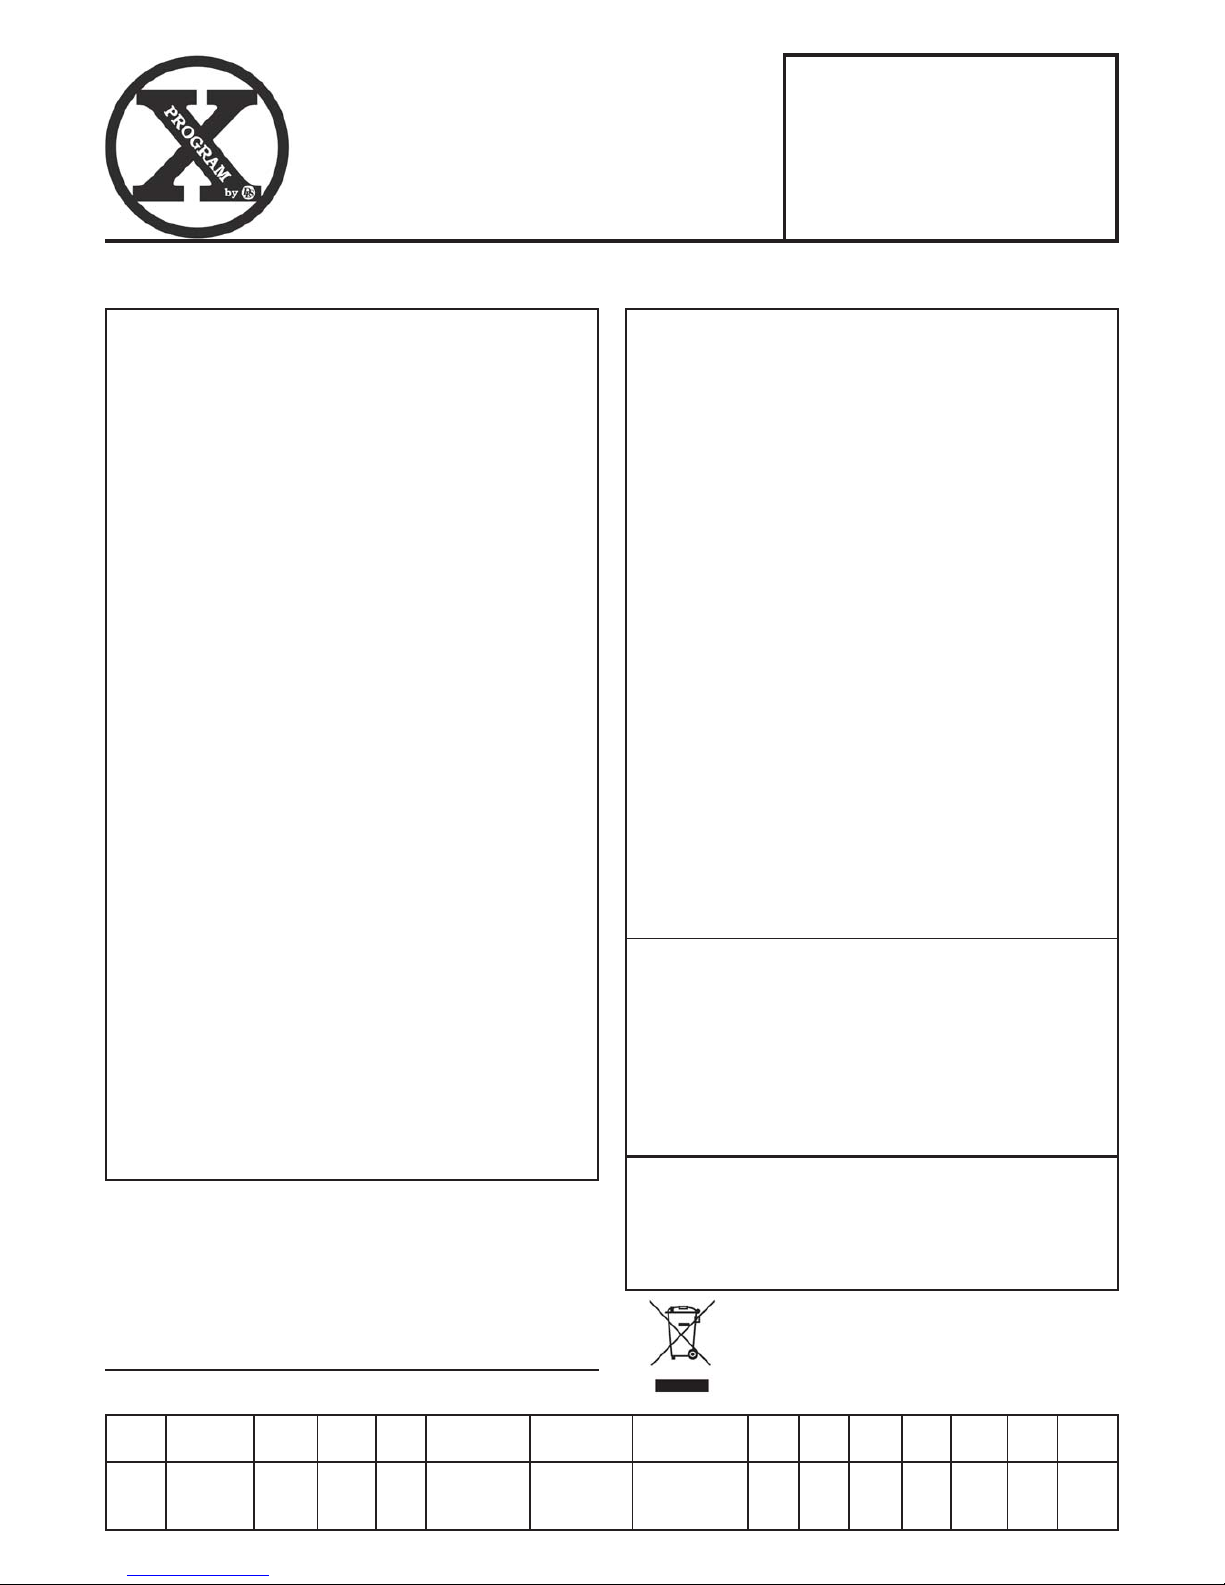
Recommended vented enclosure for X-WE10
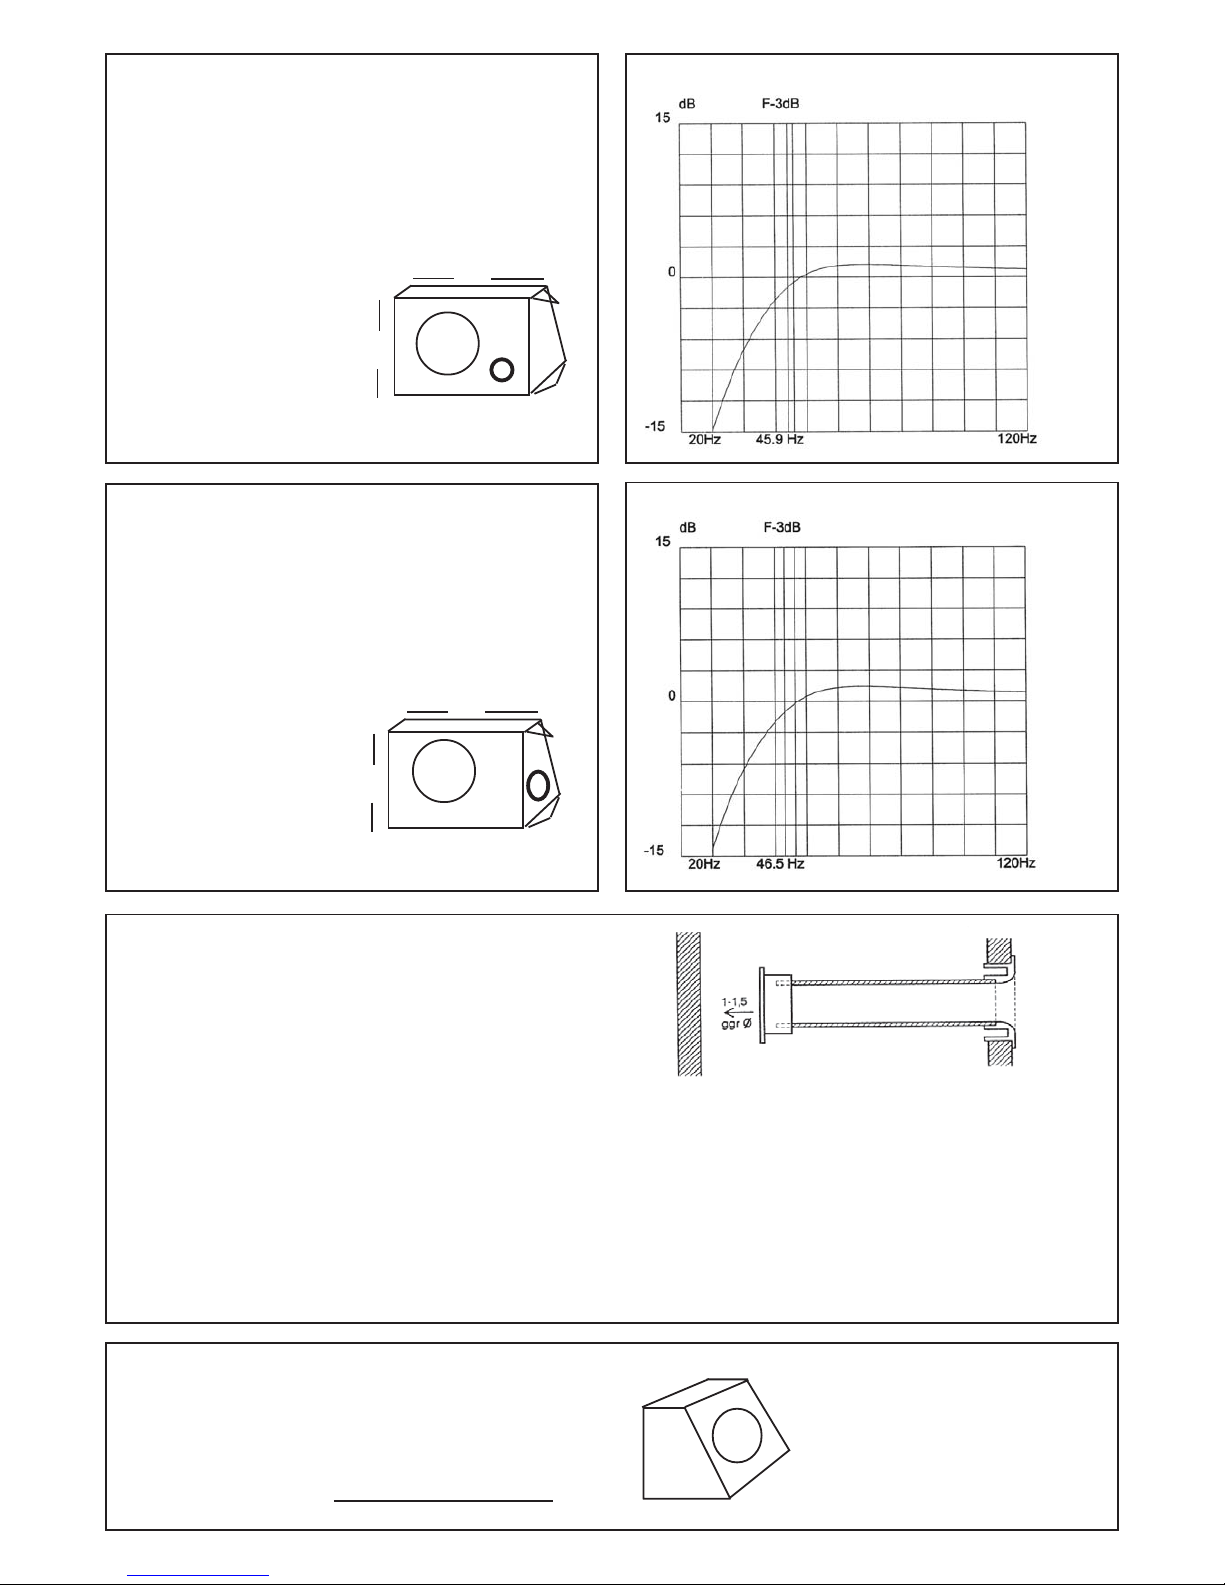
Recommended vented enclosure for X-WE12
Sealed enclosure:
Wiring : 4 ohm voice coil
Volume : 40 / 1,41 (litre / ft3)
Port/vent* : 4” (10 cm) x 28 cm / 11”
installed on the side of the box
Damping : Line inside
F3 : 46,5 Hz
Outside box dimensions:
Width : 520 mm (20,47”)
Height : 370 mm (14,56”)
Lower depth : 337 mm (13,26”)
Upper depth : 237 mm (9,33”)
Material : MDF 19 mm (3/4”)
Calculate your own enclosure:
Box volumes:
When calculating the inner volume of an enclosure you just multiply the
width (W) x height (H) x depth (D).
Use measures in dm and you will get the answer in liters.
A trapezoid box is calulated as this:
Volume = width (W) x height (H) x upper depth (UD) + lower depth (LD)
2
Be sure to measure the
inside dimensions.
W
H
UD
LD
Vented enclosure:
Wiring : 4 ohm voice coil
Volume : 25 / 0,88 (litre / ft
3
)
Port/vent* : 3”(6,8 cm) x 20 cm / 7,87”
Damping : Line inside
F3 : 45,9 Hz
Outside box dimensions:
Width : 430 mm (16,9”)
Height : 320 mm (12,6”)
Lower depth : 310 mm (12,2”)
Upper depth : 210 mm (8,26”)
Material : MDF 19 mm (0,75”)
VENTED
Width
Height
Lower
Upper
VENTED
Width
Height
Lower
Upper
Installation of the port / vent:
Make a round hole in the box where you want to install the bass port.
Mounting hole for BP-75 (3”) is 115 mm
Mounting hole for BP-110 (4”) is 145 mm
The larger flange should be mounted in the box. Fasten it to the box
with screws or with some glue. There are prepared drill holes on the
back of the flange.
The smaller flange is for the inner end of the tube. Use a
PVC-glue to attach it to the tube.
Then glue the tube to the port mounted in the box.
Since the inner flange is smaller you can also mount it all together on
the outside, and then mount it into the box afterwards.
Use sealing compound round the flange to make the box as
airtight as possible.
The port kit contains of:
2 pcs conical flanges (1 large & 1 small) in ABS-plastic
1 pc black PVC-tube, made of re-used PVC
NOTE!
The distance from the port opening inside the box, to the wall behind
it, should be at least 1 - 1,5 times the port diameter in order not to
stop the airflow.
When you test the box with music you should be able to feel the airflow from the port. At high volumes with a lot of bass, the air-flow
should increase a lot.
It is important that the box is absolutely air-tight, the air should come
out only through the bassport.
Sealed enclosures:
We don’t recommend the use of sealed
enclosures to these subwoofers
Frequency response in the box
Frequency response in the box
 Loading...