

XPower X-430TF + 430MDK, X-800TF + 800MDK Owner's Manual
X-430TF + 430MDK
X-800TF + 800MDK
Cage Dryer
(Air Mover + Mul Drying Kit)
Models:
OWNER’S MANUAL
MDK
Air Mover
XPOWER Manufacture, Inc.
220 Clary Ave.
San Gabriel, CA 91776, USA
Tel: 626-285-3301, Fax 626-285-3302
www.xpower.ws

Index
Introduction .......................................................................................................................... 2
Operations ........................................................................................................................... 3
Multiple Drying Kit ........................................................................................................... 4~5
Safety Instructions ............................................................................................................... 6
Maintenance / Troubleshooting ........................................................................................... 7
Specifications ...................................................................................................................... 8
Parts List ............................................................................................................................. 9
Limited Warranty ............................................................................................................... 10
XPOWER Cage Dryers, Air Movers with Multi Drying Kits (MDKs), are specially designed for the professional
pet grooming industry. Cage Dryers are offered in two models: X-430TF w/ 430MDK and X-800TF w/ 800MDK.
Features:
• Low power draw with an high velocity air flow from 3,200 to 3,600 CFM
• Super quiet motor and super lightweight.
• Easy carrying handle and stackable up to 3-4 units high.
• Easy and quick to disassemble for thorough cleaning and service.
• Power cord lengths are 20’ for P models and 25’ for X models.
• Easy cord wrap on handle.
• 3-hour Timer and two Filters included
• 3-speed switch.
• Durable and rugged housing with 1 years warranty.
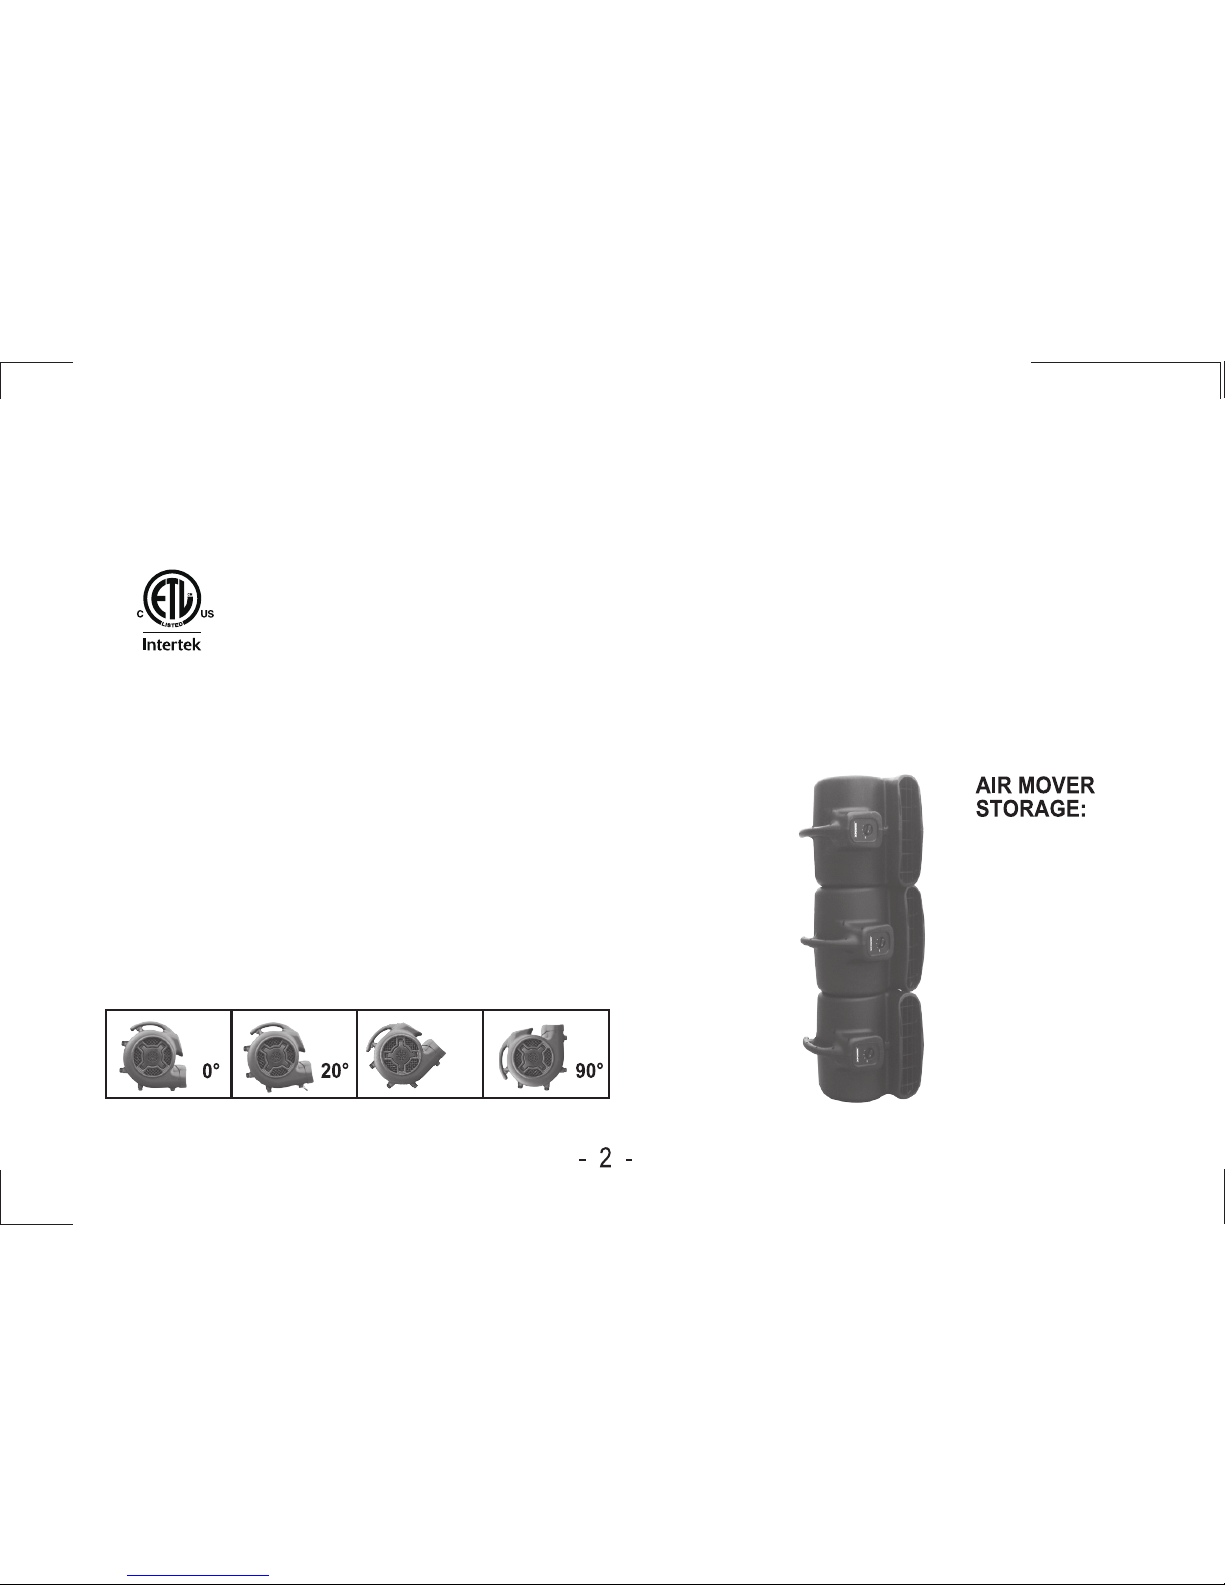
• 4 air-flow positions for other models (0°, 20°, 45°, 90°).
Air Movers can
be stacked
(up to 3) on
their sides for
storage.
NOTICE:
Stacking feature
is not secure for
transportation.
Must remove the
filters before
stacking.
(For unit with filters)
45°
Introduction
With the most efficient engineering design, professional Level Multifunctional Air Movers
X-430TF and X-800TF are ETL/CETL Certified, and also used in many other industies.
1. Prior to plugging the unit into the power source, inspect completely for any shipping damage.
2. Carefully place the Air Mover unit on a stable, flat dry surface.
Filters: a set of Filters is included with air mover, which will help prevent small debris and dust from entering the
unit. To clean the filters, simply remove the filters from the unit and wash with warm soapy water, rinse with clean
water and let dry thoroughly before reinstalling.
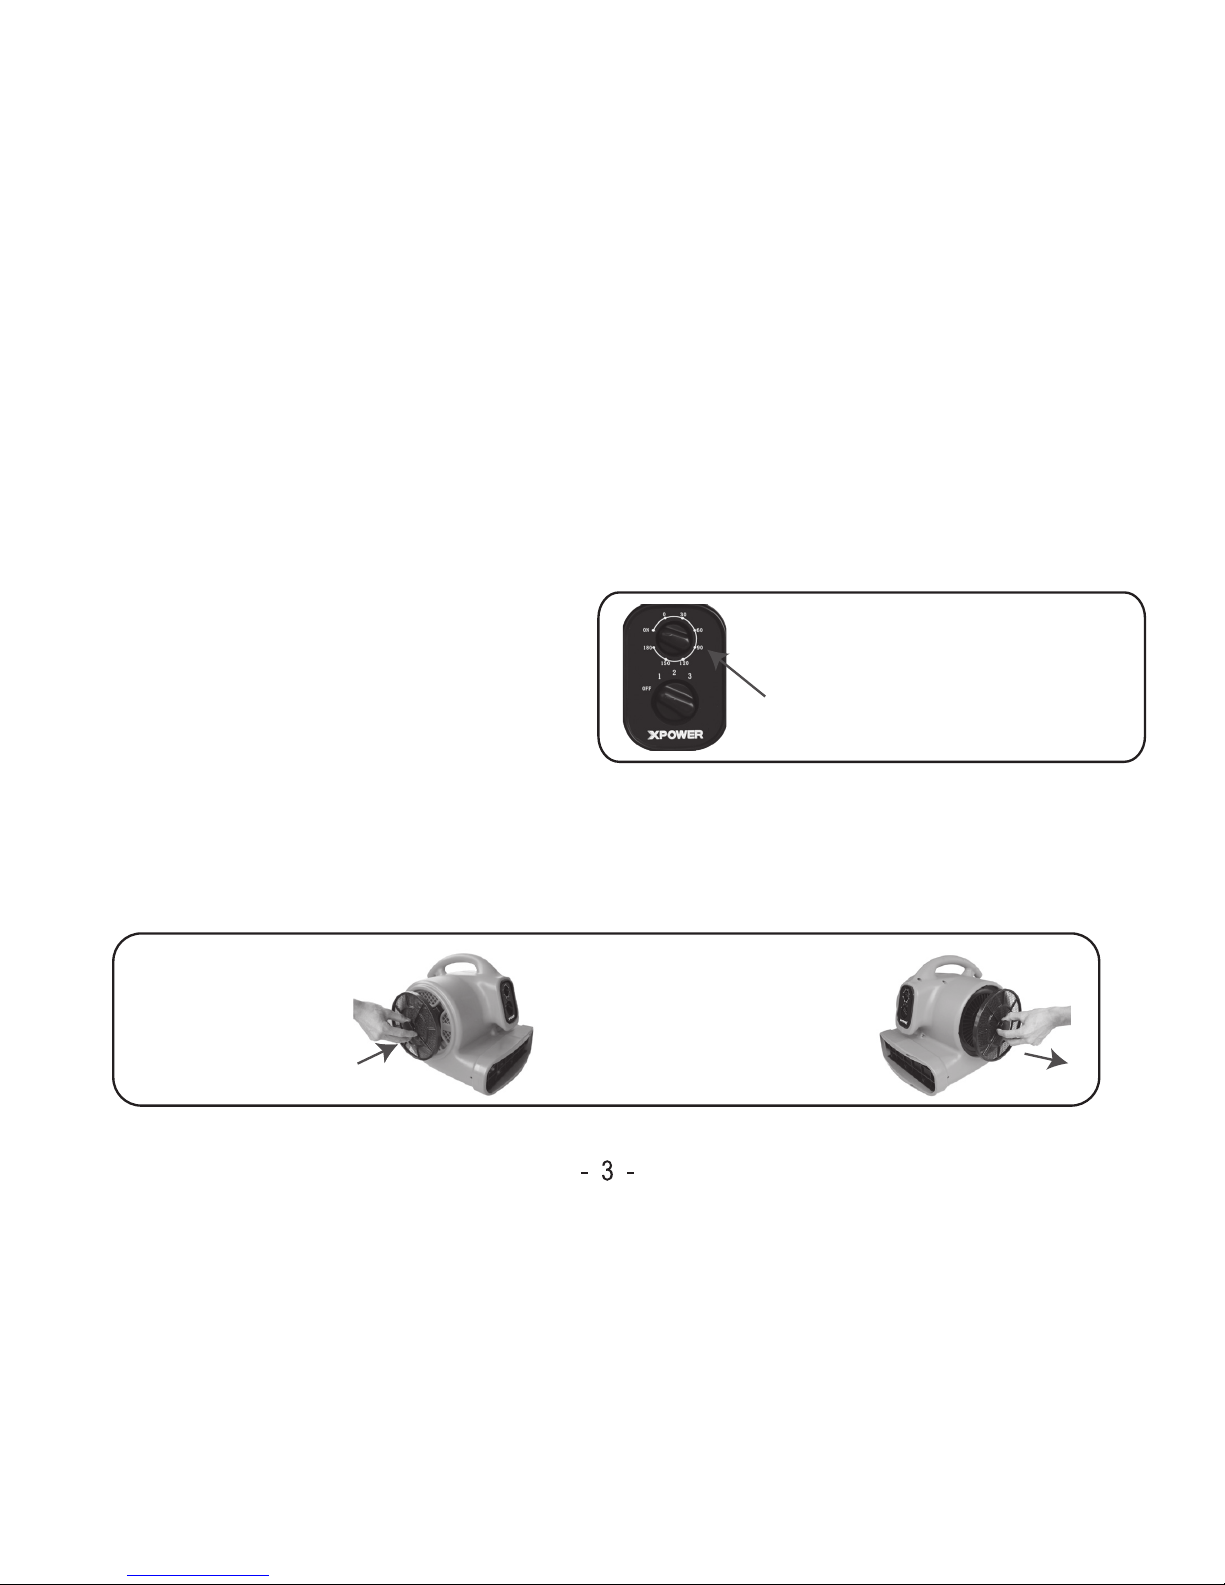
Installation:
Filters snaps into the air inlets.
Note:
The filter I is for Motor Side,
The filter II is for Fan Side
Filter Removal:
Pull the filters off the unit.
Note:
After cleaning make sure the
filters are dry before
reinstalling.
TM
3. Plug the electrical cord into the power outlet.
4. The unit is capable to be used at 4 different
angles to direct air flow, except that the unit
with handle is at 3 different angles.
5. Turn the switch to select desired speed, while
making sure unit operates normally.
6. All Air Movers in operation must be supervised
at all times.
Use the Timer to set the preferred
time from 1 min to 180 min
Timer Instruction
Operations
Carefully read Safety Instructions (page 6) before starting operations
As a Cage Dryer, the Multiple Drying Kit, 430MDK / 800MDK
combined with X-430TF / X-800TF is specially designed for
professional pet grooming industry.
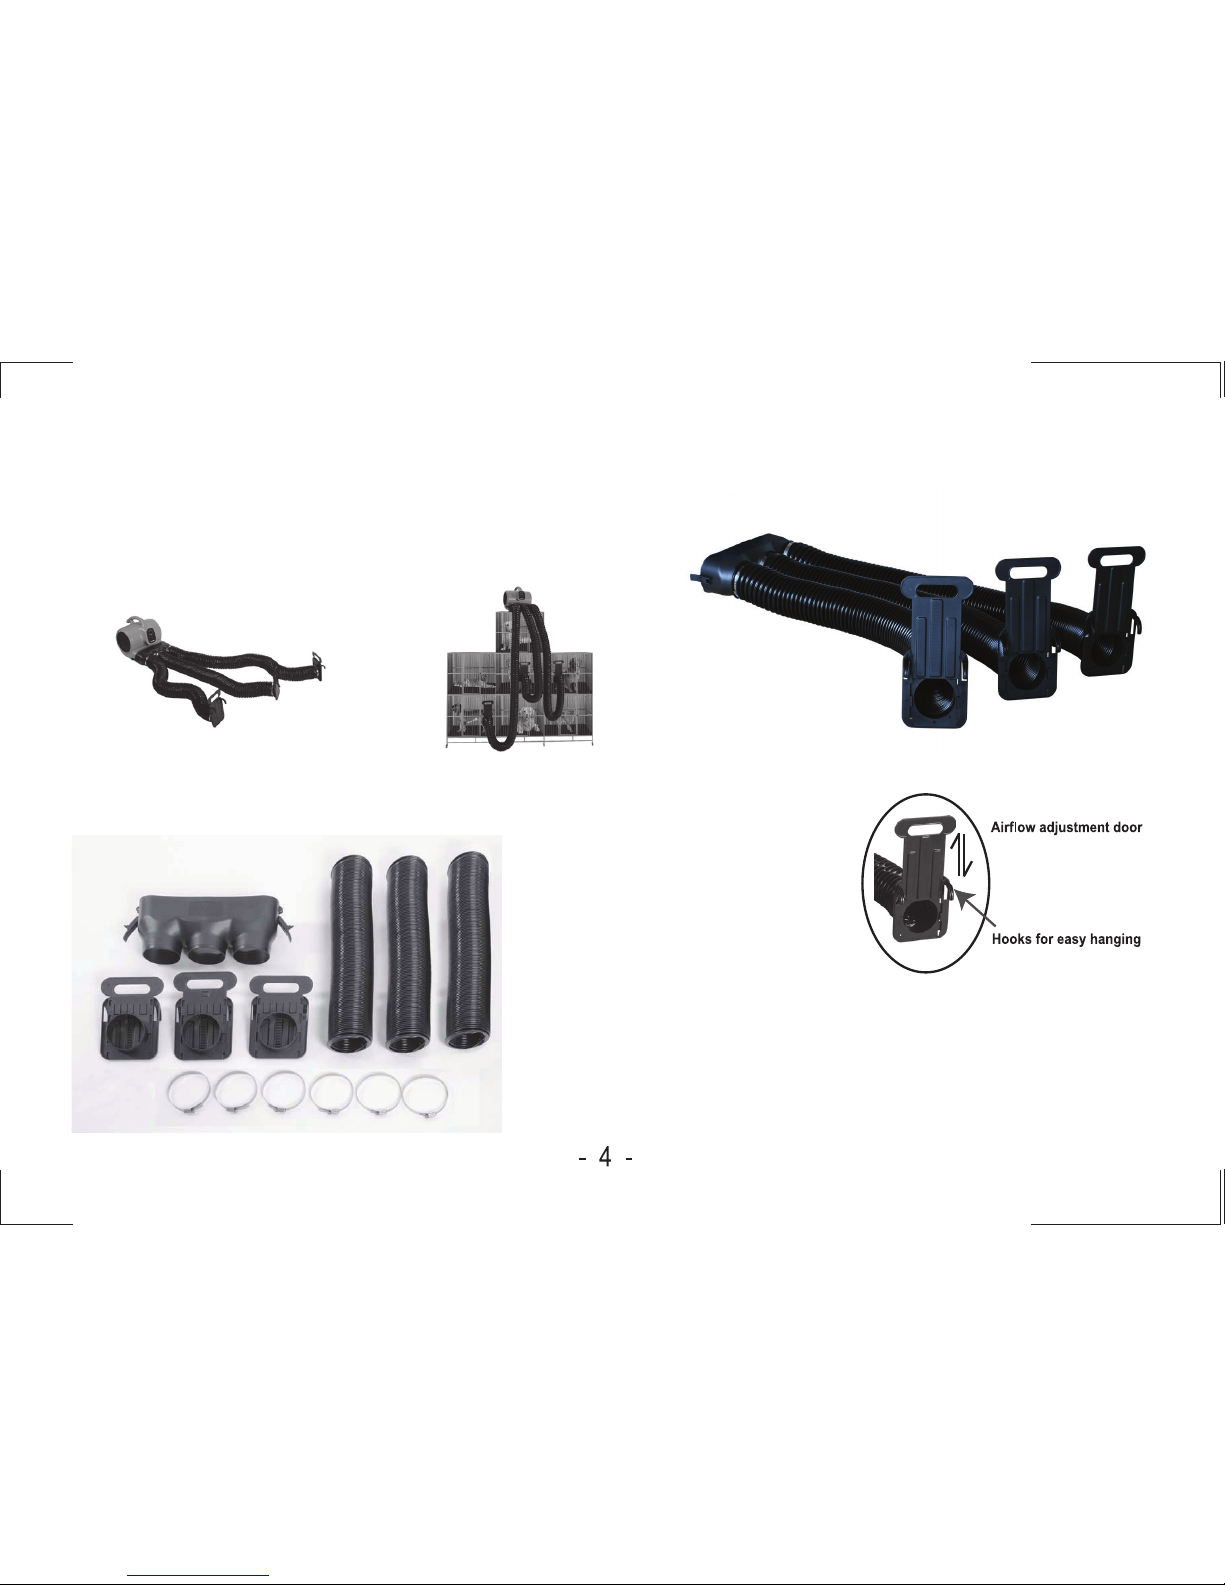
Multiple Drying Kit - 430/800 MDK
The MDK includes:
(A) Air Mover Adapter (1)
(B) 8 ft Flex Hoses (3)
(C) Airow Adjustment Doors (3)
(D) Hose Clamps (6)
See next page for MDK installation
Attach to Air Mover
Use for Cage Dryer
MDK
(A)
(D)
(C)
(B)
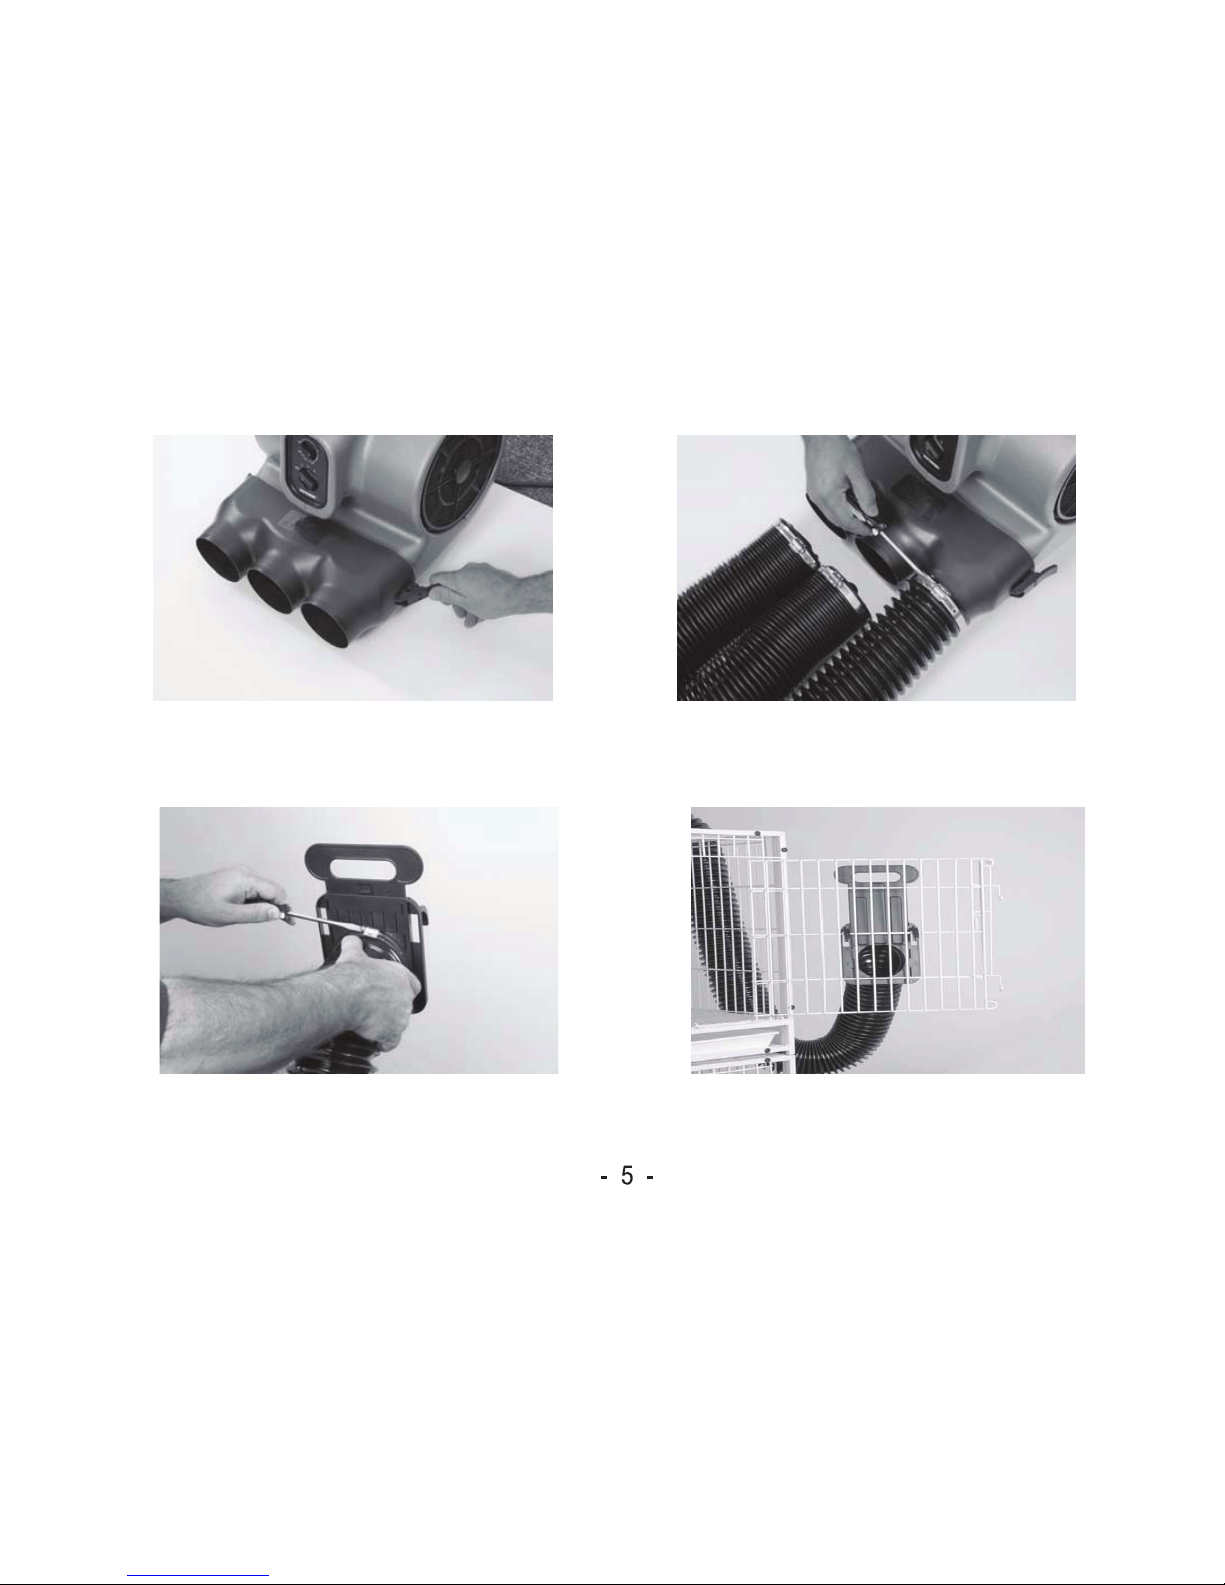
1) Clamp Air Mover Adapter (A) to air-outlet of the
air mover. Make sure the Snap Lock Buckles on
both sides of the Adapter are securely locked.
2) Attach each Flex Hose (B) to Adapter (A) by using
the Hose Clamp (D). Tighten Hose Clamp (D) with
a flat head screwdriver (not included).
3) At the other end of each Hose (B), attach the
Airflow Adjustment Door by using the remaining
Hose Clamps (D).
4) Use the cage hanger on the Airflow Adjustment
Door (C) to place the Flex Hose (B) on a desired cage.
 Loading...