

Page 1
EN
MEET YOUR X5-EVO
What's in the box?
NOTE:
- Use only approved accessories.
- Accessories may vary by country or region.
- For more detailed information on the use and care of your Heart Rate
and Combo Sensor, please refer to User’s Manual.
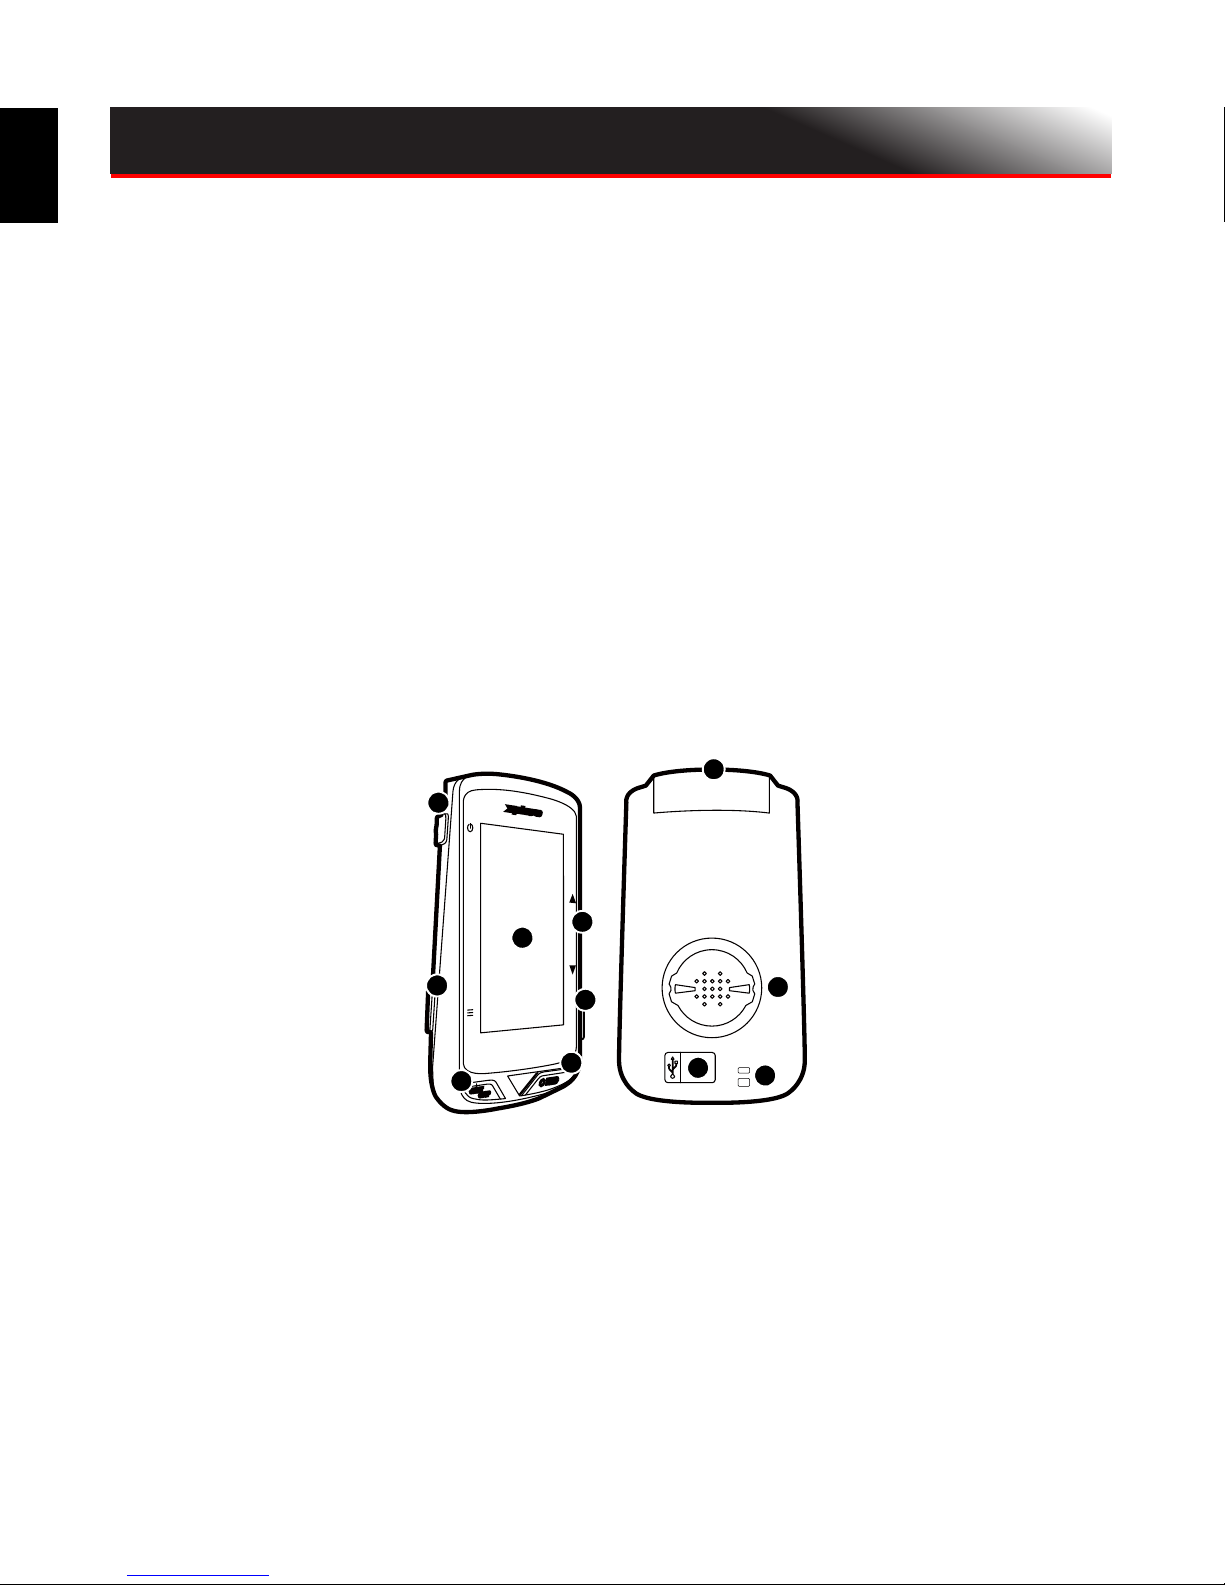
Part names and functions
• Smart Video Cycling Computer
X5-Evo
• Extended out-front Bike Mount
Kit
• Micro-USB Cable • Quick Start Guide
•Warranty Card •Strap
• Heart Rate Sensor (Optional) • Speed/Cadence Combo Sensor
(Optional)
1
2
3
4
5
6
7
8
9
10
11
1. POWER
•Short press: suspend/
wakeup screen
•Long press: power on/
off
2. BACK/LAP
•BACK: press it to
return to previous
page when not in
riding mode
•LAP: press it to start a
new lap during riding
mode
3. START/STOP
• Short press: start/stop
riding
•Long press: switch to
Bike mode
4. Touchscreen
5. UP/DOWN
•Zoom in/out in Map mode
•Change datasheet in Data mode
6. Slot (not supported)
7. REC
• Short press: start/stop
video recording
•Long press: switch to
Record mode
8. Camera
9. Bike mount latch
10. Strap hole
Fasten the strap to the
handlebars to enhance
security during riding
11. Micro USB port
Tighten the weather cap
for the USB port to ensure
water resistance
Page 2
EN
GETTING STARTED
Charging the X5-Evo to 100%
For initial use, you need to charge the built-in battery (by the
provided USB cable) for at least 5 hours. To prevent corrosion,
thoroughly dry the Micro USB port, weather cap and the surrounding
area before charging or connecting to a computer.
Please pull out the weather cap from the Micro USB port with care
to avoid breakage. When charging process is completed, please
ensure to put it back in snuggly.
NOTE
- The X5-Evo can be charged while using. Please be aware that the
Micro USB port is not water-resistant. Do not attempt to charge
X5-Evo in the rain or excessive moisture conditions.
- The operating temperature range for X5-Evo is from -10°C to 50°C.
- Do not leave X5-Evo in high temperature (over 60°C) and damp
environments.
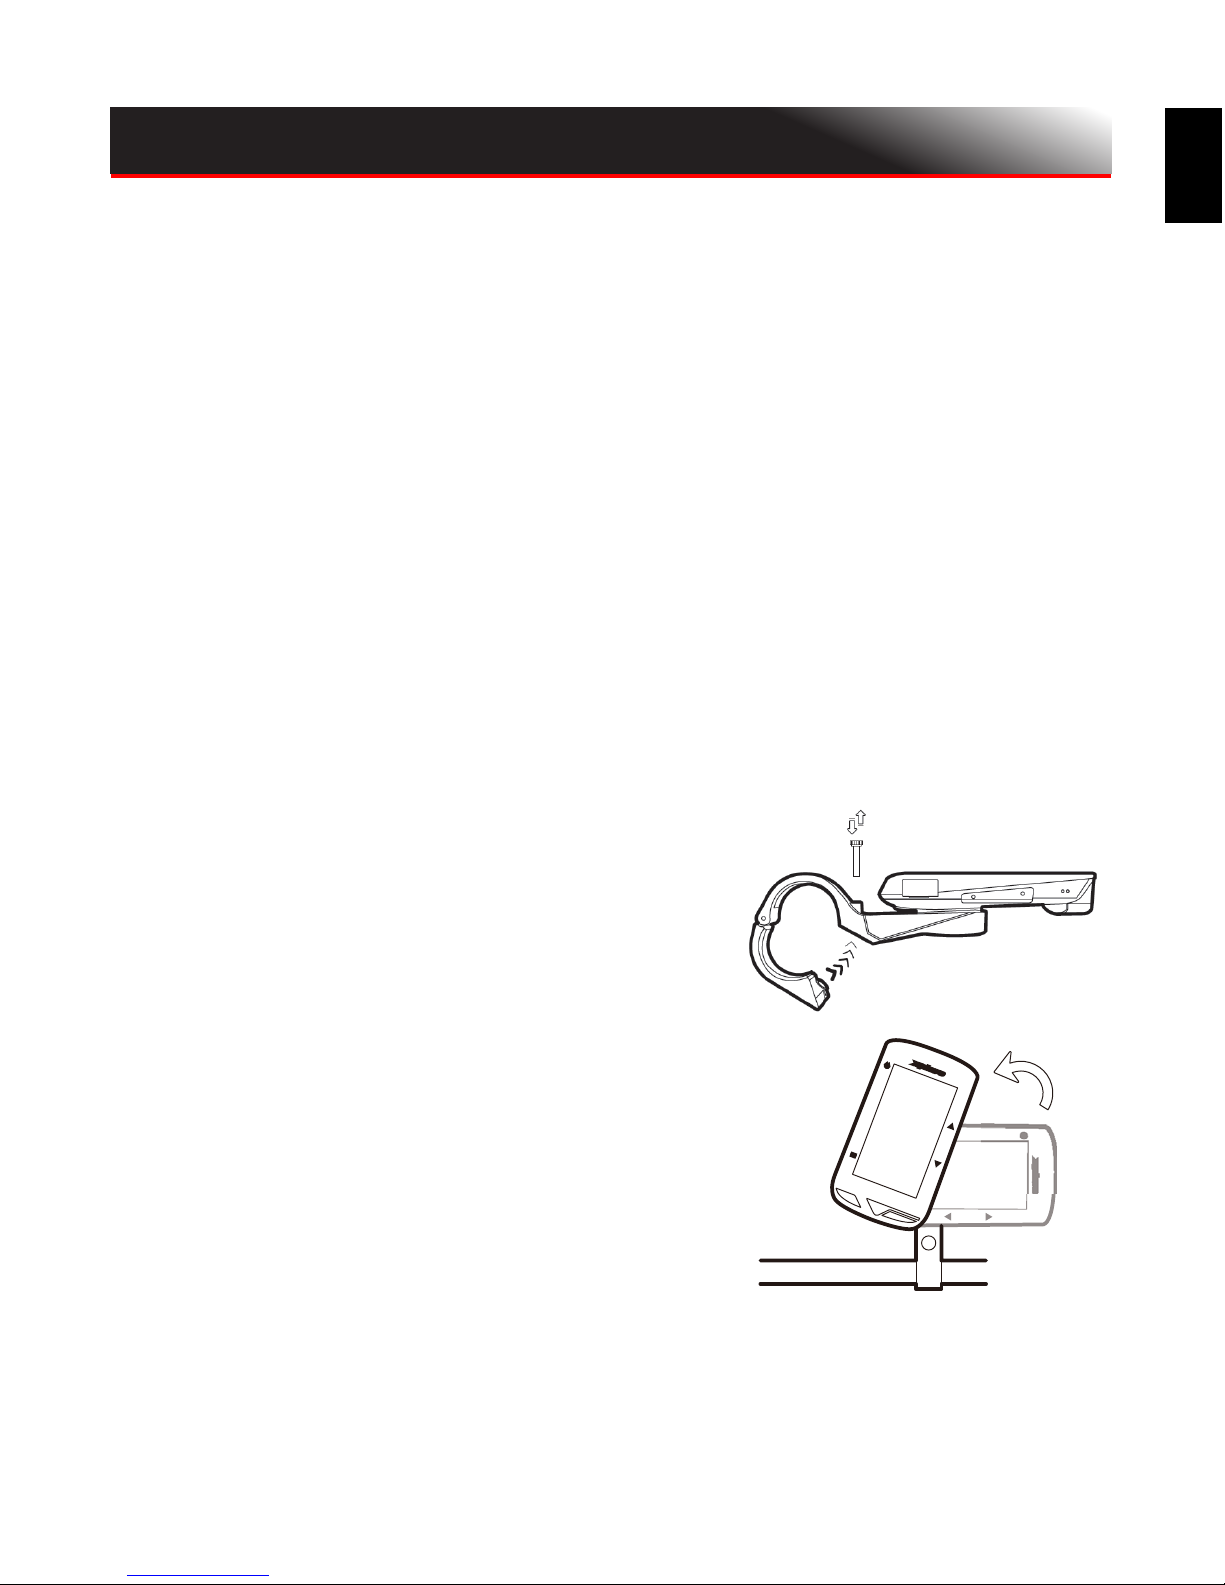
Installing the X5-Evo on the bike
1. Attach the Extended Out-Front Bike
Mount on the bike handlebar. Align it
with the bike stem and tighten the
screw. Ensure that the mount is
securely locked and parallel with the
ground level toward the front.
2. Hold X5-Evo firmly and turn it
toward the right. Place it
horizontally on the mount notch and
press downward slightly.
3. Turn 90-degrees counterclockwise
to lock it on the bike mount.
4. Eventually X5-Evo is parallel to your
stem. You can operate with ease.
Page 3
EN
Performing the initial Setup
Press and hold the [POWER] button to activate X5-Evo and follow the
on-screen instructions to personalize your computer profile and
configure system settings.
Pre-Ride Setting
Please set the basic settings in advance to get more accurate ride
information from X5-Evo.
• Connect to a Wi-Fi network: Settings > Network > Wi-Fi.
• Locate your GPS: Settings > System > GPS > activate GPS.
(It is recommended to locate your GPS in an open area.)
• Pair your X5-Evo with optional ANT+ Sensors (if available):
Settings > ANT+.
• Altitude Calibration: Settings > Device > Altitude Calibration.
LET'S GO FOR A RIDE
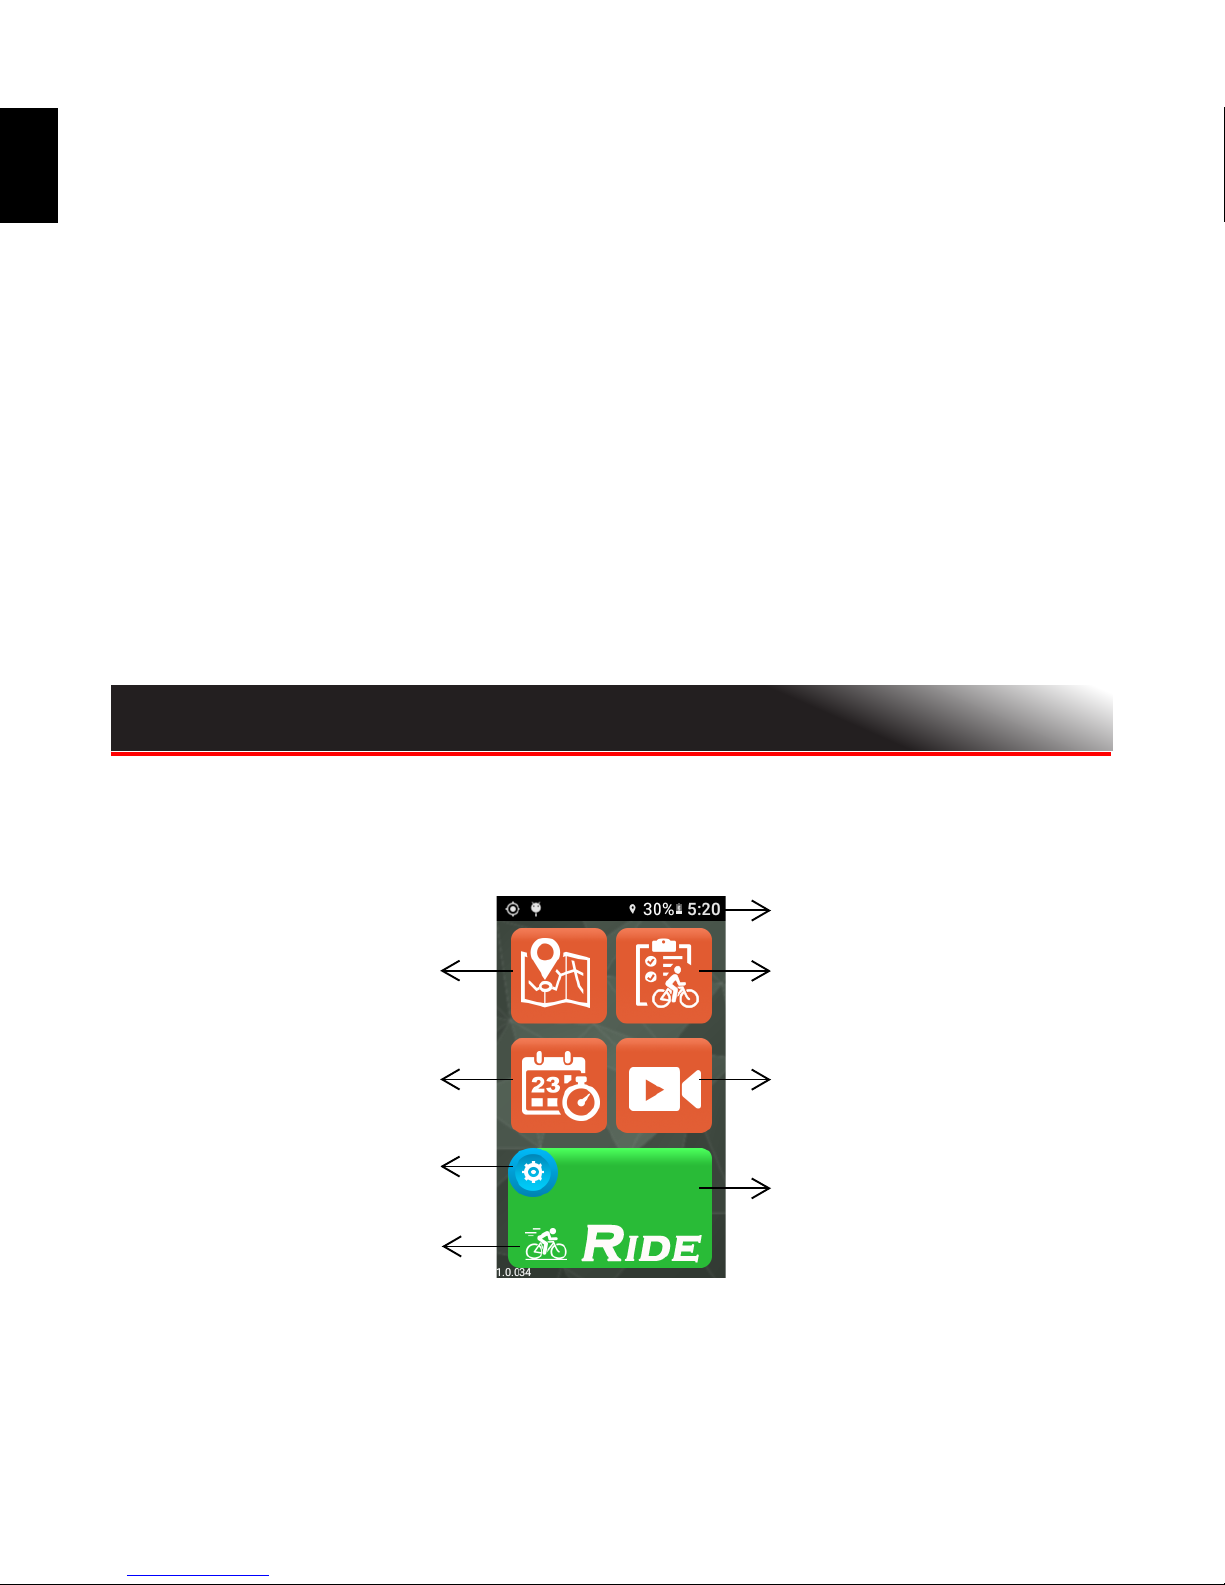
Home screen overview
The home screen provides quick access to features and settings.
Activities
Train
Routes
Video
Settings
Ride mode (Start)
Status bar
Bike mode menu
Page 4
EN
Start/Stop a ride
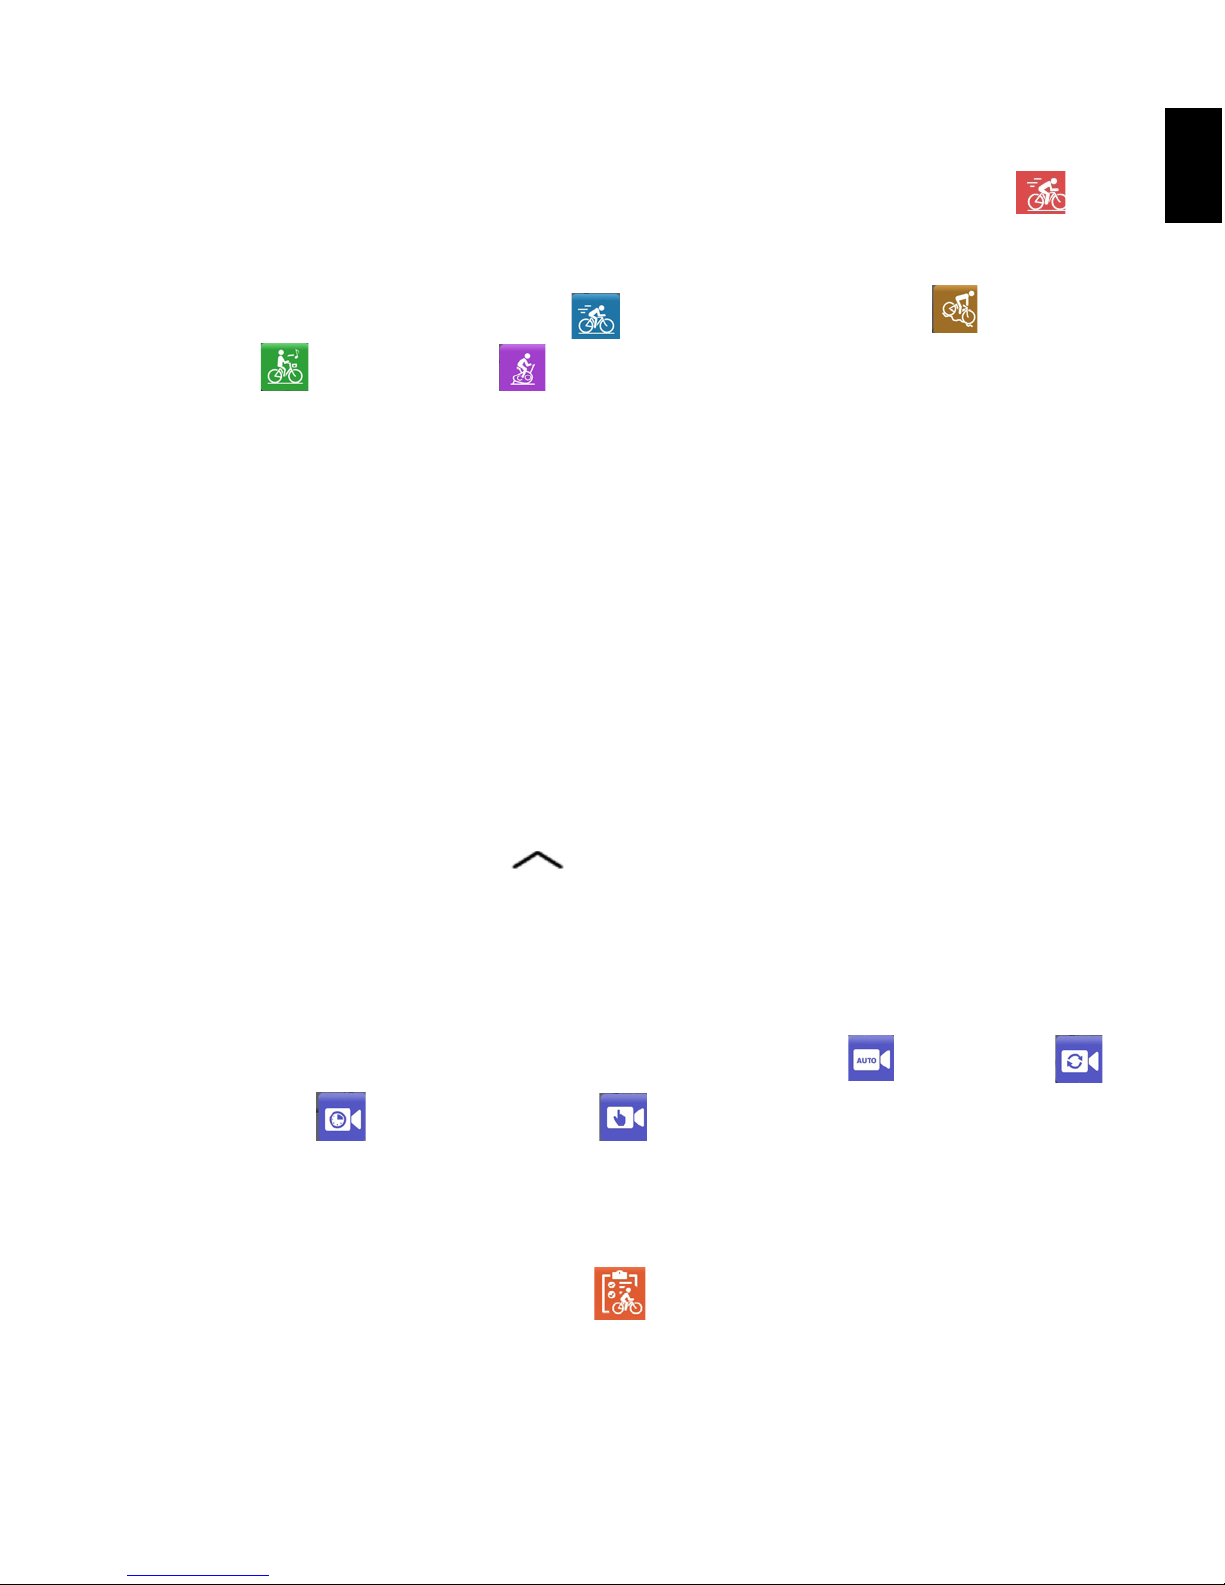
1. From the home screen, specifically tap on the bike icon on
the [RIDE] button to bring up Bike Mode menu (or long press
[START/STOP] button). There are four different bike modes for
selection: Road (default) , Downhill Off-Road , Leisure
ride and Indoor . Choose the most applicable to your
need.
2. Tap [RIDE] button to start riding (or short press [START/STOP]
button).
3. During riding, you can:
- tap screen to stop timer or lap. Or
- short press [LAP] button to lap. Or
- short press [START/STOP] button to continue/save/discard
the riding.
4. When timer is stopped, tap screen again to continue/save/discard the riding (or short press [START/STOP] button to resume
timer).
5. Swipe down from the top of the screen to access the Quick
Access Menu and tap to close it.
6. Swipe left or right to view other data pages.
Camera recording setup
X5-Evo supports four types of camera recording. Long press [REC]
button to bring up the Record mode menu: [Auto] , [Recycle] ,
[Time-lapse] and [Manual] . Select one in which you are
interested. Short press [REC] button to start/stop recording.
View activities
1. From the home screen, tap to view recorded activities.
2. Select an activity. From the selected activity page, you will see
the overview of the data from the ride.
Page 5
EN
Get your routes ready and start training yourself
Would you like to create/plot your own bike routes or discover new
ones? With Xplova CONNECT app, you can easily draw your own
routes, or simply download routes for your X5-Evo. In addition,
Xplova CONNECT app also allows you to customize your training
schedule and workout plans, helping you to achieve your cycling
goals more effectively.
More exciting features
To maximize your X5-Evo's availability/functionality, it is strongly
recommended that you install our two apps in your smartphone:
1. You can use Xplova CONNECT to:
- View/store activities from X5-Evo.
- Download routes from websites.
- Create/send routes/training plans to X5-Evo.
- Upload your activities/routes on different platforms (e.g.,
Xplova, Strava and others).
2. You can use Xplova VIDEO to:
- View/store videos from X5-Evo.
- Video editing and production.
- Overlay activity stats onto video.
- Post videos to social networks.
Open your smartphone’s application store (Google Play or App Store)
and search for "Xplova VIDEO" or "Xplova CONNECT". Download and
install the applications.
Find more information
P le as e s ca n b e lo w Q R co de s fo r f u rt he r i nfo r ma t io n a bo u t X 5- Ev o.
Xplova Website User Manual Service information
 Loading...