

Page 1
User Guide
Apollo
Tablet (WiFi)
Page 2
apollo
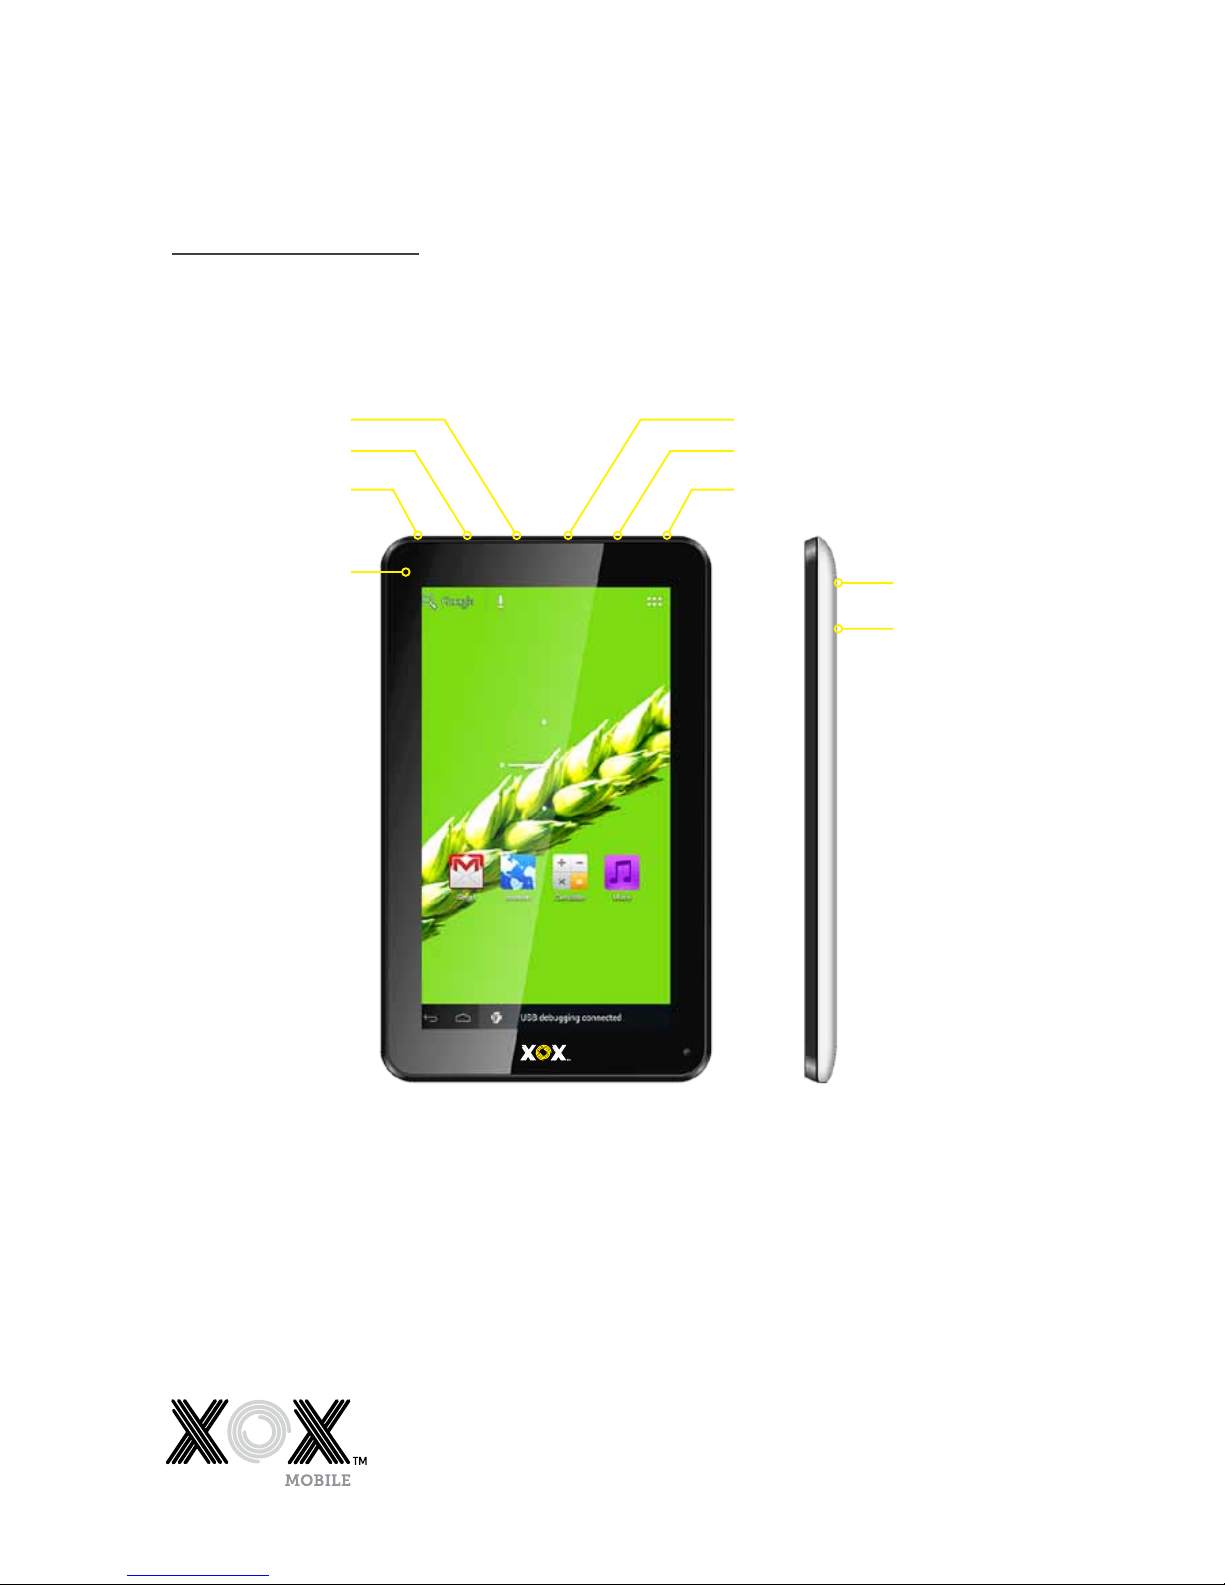
Charger
Micro SD Card
Power On/O
Camera
Volume +
Volume -
Earphone
Reset
Microphone
Page 3

1
Table of
Contents
1 General Information 2
1.1 Profile 2
1.2 Safety Notices 2
2 Overview 4
2.1 Appearance 4
2.2 Function of Keys 4
2.3 Open and close standby mode 4
2.4 Lock and unlock the screen 5
2.5 Using the touch screen 5
2.6 Homepage Information Column 5
2.7 Text Input 6
2.8 Reset tablet 6
2.9 USB Connect 6
2.10 Accessories 6
3 Internet 7
3.1 Browser 7
4 Applications 9
4.1 Explorer 9
4.2 Downloads 9
5 System Settings 10
5.1 Wireless and Network Settings 10
5.2 Display Settings 10
5.3 Application Settings 10
5.4 Date and Time Settings 11
5.5 Language and Input Settings 11
5.6 Storage 11
5.7 About Tablet 11
6 Using the Menus 12
6.1 Calculator 12
6.2 Calendar 12
6.3 Camera 13
6.4 Clock 13
6.5 Contacts 14
6.6 Downloads 14
6.7 Email 14
6.8 Gallery 15
6.9 Gmail 15
6.10 Google search 15
6.11 Latitude 15
6.12 Local 15
6.13 Maps 15
6.14 Messenger 15
6.15 Music 15
6.16 Play store 16
6.17 Search 16
6.18 Sound Recorder 16
6.19 Talk 16
6.20 Voice search 16
6.21 YouTube 16
7 Specifications 17
8 Appendix 18
Page 4

2
Thank you for choosing an XOX tablet. Your State of Independence.
Please read this manual carefully so you can maximise your
XOX tablet experience.
1.1 Profile
Our company may make changes to this tablet model without prior
written notice and reserves the final right to interpret the specifications
and performance of this tablet.
Due to dierent software and network operators, the information displayed
on your tablet may be dierent. Refer to your tablet for details.
1.2 Safety Notices
Precautions
> Keep your tablet dry. Keep your tablet away from rain, moisture, liquid
or other substances that could corrode electronic circuits.
> Do not expose your tablet to temperature extremes. Exposure to high
temperatures will shorten the life of electronic circuits, damage the
battery and some plastic parts. Cold temperatures may cause
condensation and moisture build-up.
> Please take care of your tablet. Do not throw, knock or shock your tablet.
This could cause damage to the internal circuits and high-precision
components of your tablet.
> If the system shuts down automatically you will be able to reboot it
shortly after is has shutdown.
> Keep your tablet out of the reach of children.
> Do not use or store your tablet in dusty places.
> Please charge the tablet regularly if you are not using it for a long
period of time to avoid damage caused by the excessive consumption
from the battery.
> Do not disassemble or use alcohol based products over the surface
of the tablet.
> Storage and memory space may vary from the nominated system due
to applications and programmes using space on opening.
> When the CPU is in high-speed operation, especially with 3D games or
high-definition video this will cause the tablet to heat up considerably
over a long period of time.
Safety warning
> Road Safety comes first
Never use your tablet when driving or walking in the street.
> Switch o your tablet in-flight
Wireless devices can cause interference with aircraft electronic
equipment. Using a transmitting device in-flight is illegal and risky.
Please ensure your tablet is powered o and in flight mode when
instructed if you wish to use the non-transmitting functions during
the flight.
General
Information
1.0
Page 5

3
General
Information,
continued
> Qualified servicing of your tablet
Only qualified personnel should repair your table. Any attempt
to repair or tamper with your tablet will void your tablet warranty.
> Accessories
Use only approved accessories.
Page 6
4
2.0
overview
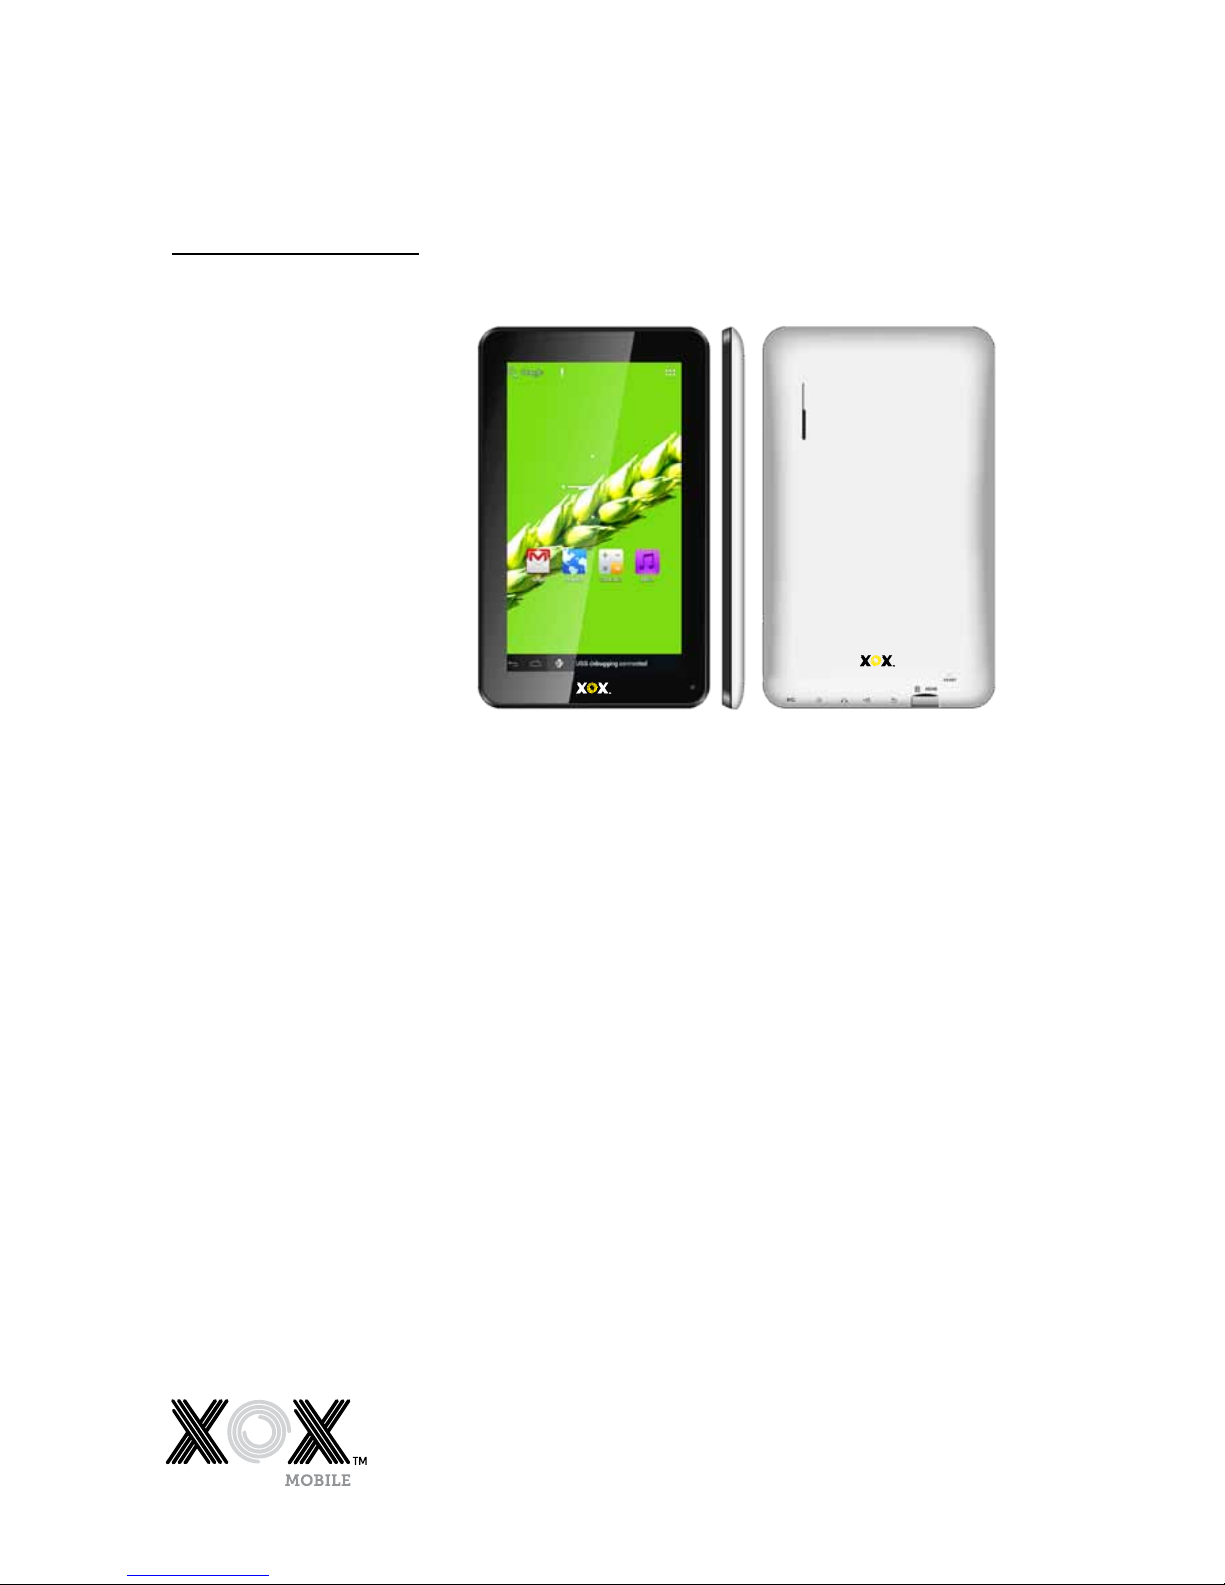
2.1 Appearance
2.2 Function of Keys
Your tablet has the following keys:
> Power Key
The Power key is located at the bottom side of your tablet.
Press and hold the Power Key for 2-3 seconds to open the screen.
You can press this button to power on/o the screen.
To shut down, hold down the power key and you will be asked if you
would like to shut down. Press OK to shut down. When the tablet is o,
press the power button to show the charging feature. Press the power key
to re-open the tablet.
> Volume Key
The volume key is located on the bottom side of your tablet. You can
adjust the ringer volume by pressing this key up or down to increase and
reduce the volume.
2.3 Open and close standby mode
> Open the Standby mode
In start up mode, you can press the power key and the system will go into
standby mode which will save power.
> Close the Standby mode
In standby mode, lightly tap the power key to enter the normal state
Page 7

5
2.4 Lock and unlock the screen
> Lock
You can set the screen timeout in the settings>display function.
The tablet screen will timeout automatically and lock the screen
to the standby mode if there is no activity and it reaches the preset
standby time.
> Unlock
To unlock the screen, drag the lock sign displayed right to unlock the
screen and to enter the application screen.
2.5 Using the touch screen
Slide your finger left or right across the Home screen. These screens provide
space for more widgets, shortcuts, and other items.
The main way to control Android features is by using your finger to
manipulate icons, buttons, menu items, the onscreen keyboard, and other
items on the touch screen.
Touch
To select an icon or function simply touch your finger on the icon, letters
and symbols on the onscreen keyboard, or press onscreen buttons to utilise
the functions and applications on your tablet.
Touch and hold
Touch and hold an item on the screen by touching it and not lifting your
finger until an action occurs. For example, to open a menu for customising
the Home screen, you touch an empty area on the Home screen until the
menu opens.
To Drag an Icon
Touch and hold the icon for a moment and then, without lifting your finger,
move your finger on the screen until you reach the desired position on the
screen.
Swipe or slide
To swipe or slide, you quickly move your finger across the surface of the
screen, without pausing when you first touch it (so you don’t drag an item
instead). For example, you slide the screen up or down to scroll a list.
2.6 Homepage Information Column
Voice search
Back
Recent search
Host interface
Menu shortcut key
USB WiFi
USB Debug Time
Remaining battery
overview,
continued
Page 8

6
2.7 Text Input
When using the tablet, you can enter text using the onscreen keyboard.
Some applications open the keyboard automatically. In others, you touch
a text field where you want to enter text to open the keyboard.
To switch between the numbers and letters on the keyboard, touch the
“?123” or “ABC” button
To switch between capital letters and lowercase letters, touch the arrow that
forms above the “?123” icon.
Touch the keys on the keyboard to type.
The characters you have entered appear in the text field with suggestions for
the word you are typing below. Use the Delete icon to erase characters to the
left of the cursor. After you have finishing typing, touch Back icon to close
the keyboard.
2.8 Reset tablet
Press the reset button on the reverse side of the device to restart and reset
your tablet.
2.9 USB Connect
You can connect your tablet to a computer with a USB cable to
transfer music, pictures, and other files between your tablets SD card
and the computer. Turn o USB storage to disconnect your tablet from
your computer.
2.10 Accessories
Power Adapter 1
USB Cable 1
User Manual 1
overview,
continued
Page 9

7
3.1 Browser
You can use the Browser to view web pages and search for information on
the internet. When you open the browser, your home page opens. You will
require network support before using a web browser. If there are network
related problems, please contact your network provider.
Touch the Browser sign (world globe) in the application list to enter the
browser pages. The default home page is the recently viewed, showing your
recently viewed pages.
To go to a webpage or search the web
Go to the URL box at the top of the Browser screen. Enter the address (URL) of
a webpage, or enter the terms you want to search for by touching search icon
(magnifying glass). As you enter text, your web search engine makes
suggestions of web pages and queries.
Working with bookmarks
To bookmark a website that you are looking at touch the star icon on the left
to add it into a list of bookmarks. To open a bookmarked website, touch the
star icon on the right where you can view thumbnails of your bookmarks.
To refresh the current page
Touch the circle arrow icon to refresh and update the current web page.
To zoom in or out on a webpage
Slide your finger slightly on the screen to reveal the Zoom control.
Touch the plus or minus side of the Zoom control to zoom in or out.
To find text on a webpage
Touch Menu icon and touch More > Find on page. Enter the text you’re
looking for. As you type, the first word with matching characters is
highlighted on the screen and subsequent matches are boxed. Touch the left
or right arrow to scroll to, and highlight the previous or next matching word.
To Copy text from a webpage
Open a webpage and scroll to the beginning of the text you want to copy,
touch the Menu icon and select More > Select text. Use your finger to drag
across the text you want to copy. Touch the text you selected and the text
will be copied to the clipboard.
To navigate among webpages
You can open links on a webpage, navigate back and forward, and review
your browsing history, just as in any web browser.
> To open a link: Touch a link to open it. Links that you touch are
highlighted in orange until the webpage they refer to opens in
the window.
> To go back and forward among the pages you’ve opened: Press back key
or touch menu icon> forward.
> To view your Browser history: As you browse the web, Browser keeps
track of the pages you visit, to help you find your way back later. Select
the icon at the right of the URL box, and select the History tab to view
your browser history. Select Most visited tab and you can view a list of
the most visited webpages.
3.0
internet
Page 10

8
internet,
continued
Working with multiple browser windows
You can open up several Browser windows at once and switch among them.
> To open a new Browser window, Select the menu icon >Windows>new
window; New windows open with your home page.
> To switch Browser windows, Select the menu icon > windows. All of your
open windows are listed here. You can select one of them as you need.
> To close a Browser window, Select menu icon > windows. All of your
open windows are listed here. You can touch the close icon at the right
side of each open window to close it.
Downloading files
You can download files and applications from a webpage. The files that you
download are stored on your SD card.
To download a file - Dierent webpages oer dierent mechanisms for
downloading pictures, documents, applications, and other files. Select, touch,
and hold an image or a link to a file or to another webpage. In the menu that
opens, select Save. If the file is in a format supported by an application on
your tablet, it is downloaded to your SD card. Select the menu icon, select
More>downloads, to find a list of downloaded files. If you want to delete a
file, touch the indication box at the left of the downloaded file, and an option
box will pop out, you can select delete to delete an unnecessary file.
Page 11

9
4.1 Explorer
Touch Explorer (white box) in the application list. This supports the files that
are held in the internal memory, USB and SD Card.
To copy, cut, and delete, touch Editor in the files list. Select the file you want
to chose, then touch the function you wish to use.
4.2 Downloads
Click on the downloads icon here in the application list where you can
preview the downloading or completed document contents.
Click download file to stop or delete the download contents.
applications
4.0
Page 12

10
The Settings application contains most of the tools for customising and
configuring your tablet.
5.1 Wireless and Network Settings
You can use Wireless & Network settings to configure and manage
connections to networks and devices by using Wi-Fi, Bluetooth and mobile
networks. You also can use Wireless & Network settings to configure
connections between your tablet and virtual private networks (VPNs), to
connect your computer to the Internet using your tablet, and to turn o all
wireless and network transmitting functions with Airplane mode.
Connecting to Wi-Fi networks
To activate the WiFi capability on your tablet:
> Go to Settings>Wireless & networks. Select Wi-Fi to turn it on. Your tablet
scans for available Wi-Fi networks and displays the names of those it
finds. Secured networks are indicated with a Lock Icon.
Note: If your tablet finds a network that you have previously connected to, it will automatically
connect to it. Go to a network to connect to it. If the network is open, you are prompted to confirm
that you want to connect to that network by touching Connect. If the network is secured, you are
prompted to enter a password or other credentials.
Connecting to a computer via USB
You can connect your tablet to a computer with a USB cable to
transfer music, pictures, and other files between your tablets SD card
and the computer.
5.2 Display Settings
You can use the Display settings to configure the brightness, wallpaper type,
font size, and screen timeout of your tablet.
5.3 Application Settings
You can use the Applications settings to view details about the applications
installed on your tablet, to manage their data and force the application to
stop, to view and control currently running services, and to view the storage
used by applications, etc.
Application Management
In this setting it is easy to manage and delete applications that have
been installed.
Swipe across to get to all applications, touch the top right hand icon
to sort by size or name. Click on the application of your choice to see its
relevant information.
Running services
In this setting you can end and set up programmes that are running.
Access Management
In this setting you can access and manage content permissions
in applications.
system
settings
5.0
Page 13

11
5.4 Date and Time Settings
You can use Date & Time settings to set your preferences for how dates are
displayed. You can also use these settings to set your own time and time
zone, rather than obtaining the current time from the mobile network, etc.
5.5 Language and Input Settings
In this setting you can choose the language you want.
The input methods can be set by users. You can add words into the dictionary
or delete them.
The Android keyboard can be set to have automatic capital function of
opening or closing.
5.6 Storage
Use the Storage settings to monitor the used and available space on your
tablet and your SD card, and to manage your SD card.
5.7 About Tablet
This function enables you to view some tablet related information.
system
settings,
continued
Page 14

12
using
the menus
6.0
6.1 Calculator
Enter numbers and arithmetic operators on the basic screen. Drag the basic
screen to the left to open the advanced screen, select Clear to delete the last
number or operator you entered. Select and hold Clear to delete everything
on the display. On the calculator screen, you can touch menu icon to clear
history or access advanced panel.
6.2 Calendar
You can open Calendar to view events you’ve created.
Select the Calendar icon in the main menu interface. Events from each
account you have added and configured to synchronise to your tablet are
displayed in Calendar.
Creating an event
Before you can add an event, you must add at least one calendar account
to your device.
You can use Calendar on your tablet to create events. In any calendar view,
select the menu icon and then touch more> new event to open an event
details screen for a new event.
Or you can also select and hold a spot in Day, Week, or Month view. Select
New event to open the Event details screen with that day and time already
entered.
Enter the name, time, and additional details about the event. You can select
the Plus icon to add more reminders. In the Guests field, you can enter the
email address of people you want to invite to the event. Separate multiple
addresses with commas (,). If the people to whom you send invitations use
Google Calendar, they will receive an invitation in Calendar and by email.
Select the menu icon and select Show extra options to add details about the
event. When you have completed all the details for the event scroll to the
bottom of the Event details screen and select Done. The event will be added
to your calendar.
Change calendar view
In the Calendar screen, select the menu icon >Agenda, Day, Week, or Month.
Each view displays the events in your calendar for the period of time that you
specify. To view more information about an event in Agenda view, select the
event. To view the events of a day in Month view, touch a day.
Synchronising and displaying calendars
When you add a Google Account or Microsoft Exchange ActiveSync account
to your tablet that includes a calendar service, and you configure that
account to synchronise calendar events to your tablet, the events from
that calendar are added and kept up to date in Calendar on your tablet.
In the calendar screen, select menu icon and select More > Calendars, where
you can set whether calendars are stored on your tablet. The Calendar screen
displays all the calendars you’ve added or subscribed to for each account
synchronised to your tablet, organised by account. Select the name of an
account to show or hide its calendars on your tablet. An icon to the right of
each calendar indicates whether its events are synchronised in your tablet
and whether they are visible in Calendar.
Page 15

13
Using the
Menus,
continued
Change Calendar settings
You can change the settings for how your Calendar displays an event, and
how your Calendar notifies you of upcoming events. Open a Calendar view,
select menu icon and select more>settings.
> Hide declined events: Select if you don’t want to see events that you
have declined.
> Use home time zone: You can turn on/o this function as required.
> Home time zone: After turning on Use home time zone, you can set
home time zone through this function.
> Set alerts & notifications: You can configure event reminders to open
an alert, send you a notification, or turn o event notifications on
your tablet.
> Select ringtone: You can select the ringtone to sound when you receive
an event reminder.
> Vibrate: You can select the vibration mode when you receive an event
reminder.
> Default reminder time: You can select the default time before an event
for event reminders.
> Build version: The version of Calendar you are using.
6.3 Camera
The Camera is a combination camera and video recorder that you use
to shoot and share pictures and videos.
Select the Camera icon in the main menu, or on the home screen. The
camera opens in Landscape mode, ready to take a picture. In this mode,
press the round icon at the bottom of the screen to take a picture. To switch
between the camera and video recorder press the icon on the left side of
the round icon to select the function you require.
You can use the setting icon to fine tune camera related parameters to
achieve better results.
6.4 Clock
Select the Clock icon on the Home screen or in the main menu interface.
Alarms
You can set an alarm by modifying an existing alarm or by adding a new
alarm. Note: Alarms that are set are underlined in green.
Gallery
You can view pictures through this function.
Music
You can play music on your tablet or via the SD card on your tablet through
this function.
Home
Select to get to the Home screen.
Page 16

14
Using the
Menus,
continued
6.5 Contacts
In the People screen, select the menu icon and you can perform the
following operations:
> Search: Start entering the name of the contact you’re searching for.
As you type, contacts with matching names appear below the search
box. You can then select a matching contact in the list to perform
further operations.
> New contact: Select this function to add a new contact to contacts list.
> Display options: You can select the display options and choose contacts
to display.
> Contacts groups: You can assign contacts to several caller groups.
> Contacts Delete: Select this function and highlight the contacts which
you want to delete. To delete all contacts, you just need to select all at the
top of contacts screen. Select OK and confirm to Delete contacts.
> More: Through this function, you can perform following operations:
accounts and import/export.
> Favorites: You can add contacts you communicate with most frequently
to favorites.
Note: Factory data reset enables you to erase all of your personal data from internal tablet storage,
including all messages and contacts information stored in tablet memory.
6.6 Downloads
Through this function, you can view a list of files and applications which you
downloaded from the web page.
6.7 Email
You use the Email application to read and send email.
Opening Email and the Accounts screen
> To open Email: Select the Email icon on the Home screen or in the main
menu interface. The first time you open Email, a setup wizard opens to
help you add an email account. After the initial setup, Email opens to the
last screen you were viewing or, if you have not used Email recently, it
displays the contents of your Inbox (if you have only one account) or the
Accounts screen (if you have multiple accounts).
> To open the Accounts screen: The Accounts screen lists your Combined
Inbox and each of your email accounts. If you have starred (highlighted),
drafted, or unsent messages in any of your accounts, the folders for those
items from all accounts are also displayed. From a folder screen, select the
menu icon >Accounts. Each folder and account on the Accounts screen
displays the number of unread messages in green, or the total number of
messages in gray. You can select a combination folder, such as the
Combined Inbox folder, to view the messages it contains.
> To open combined inbox: If you have configured Email to send and
receive email from more than one account, you can view all messages
sent to all accounts in your Combined Inbox. Open the Accounts screen,
and then select the Combined Inbox.
Page 17

15
Using the
Menus,
continued
> Reading your messages: You can read messages in your Combined Inbox,
or in the Inbox, or folder for an individual account. When you receive
a new message, you will receive a notification in the Status bar, unless
you’ve turned o Email notifications using the Email Account settings.
You can also set whether Email notifications vibrate your tablet, or pick
a ringtone from Email Account settings.
> Open the Combined Inbox, an account’s Inbox, or another folder of
messages: Select the message to read. The message opens in a screen
with information about who sent it, the date it was sent, and related
information at the top, followed by the contents of the message. You
can reply to, or forward a message that you receive. You can also delete
messages and manage them in other ways.
> Starring emails
You can star an important message to highlight it, and make it easy to
keep track of. Once you star an email, a Starred folder is added to the
Accounts screen. While reading an email, select the star in its header if
you wish to highlight the email. Or you can select a message’s star while
viewing a list of messages in a folder. You can select an email’s star again
to un-star an email.
> Composing and sending email
You can send email to your contacts or to other people or groups.
Select menu icon >Compose. As you enter text, matching addresses are
oered from your Contacts. You can select the suggested address or enter
a new addresses. Separate multiple addresses with commas. Press menu
and select the Add Cc/Bcc to address a copy or blind copy of the message
select Add Attachment to add an attachment to the email. Enter a subject
for the message. Enter the text of the message. After finishing, select the
Send to send the email.
> Adding a signature to your messages
You can add one or a few lines of text to every message you send from an
account, such as your name, contact information, etc. Open the Accounts
screen. Select and hold the account whose settings you want to change.
In the menu that opens, select Account settings>signature. Or you can
open the settings for an account while you’re viewing its inbox, by
selecting the menu icon and selecting Account settings>signature.
Enter a signature and confirm.
> Adding email accounts
The first time you open Email, you are prompted to set up an email
account. After that, you can configure Email to send and receive email
from additional accounts.
To add an email account: Open the Accounts screen. Select the menu
icon, and select Add account. In the Setup Email screen, enter your email
address and password. Select Next. If you need to enter email account
settings the wizard can’t configure for you, select Manual setup, you
are prompted to enter your email account details. Enter any other
information requested by the type of account you are adding and select
Done. Enter a name for the account and select Done. Your email will start
downloading your email messages and you can start using it to send
and receive messages using the new account.
> To delete an email account
Open the Accounts screen. Select and hold the account to delete. Select
Remove account in the menu that opens. Select OK in the dialogue to
confirm that you want to delete the account.
Page 18

16
Using the
Menus,
continued
6.8 Gallery
Both pictures and videos taken by camera or stored in SD card can be viewed
through this function.
6.9 Gmail
You can use Gmail to send and receive email.
6.10 Google search
You can use Google search through this function.
6.11 Latitude
You can enter Google Maps through this function.
6.12 Local
You can fix your location through this function.
6.13 Maps
You can enter Google Maps through this function.
6.14 Messenger
An instant messaging service that provides both text and voice
communications by logging in through your google/gmail account.
You can use Messaging to exchange text messages (SMS) and multimedia
messages (MMS) with your friends on their tablets.
6.15 Music
Music plays audio files that are stored on your tablet’s SD card, so before you
open Music, you must copy audio files from your computer onto the SD card.
Music supports a wide variety of audio file formats, so it can play music that
you purchase from online stores, music that you copy from your CD
collection, and so on.
To open Music and view your music library
Select the Music icon in the main menu interface, or on the Home screen.
When you copy music to your SD card, Music searches the card for music
files and builds a catalogue of your music, based on information about each
file that is stored in the file itself. This can take from a few seconds to several
minutes, depending on how many files you have copied onto the SD card.
When the catalogue is complete, the Music library screen opens, with tabs
that you can touch to view your music library organised by Artists, Albums,
Songs, or Playlists.
Page 19

17
Using the
Menus,
continued
Note: If your tablet powers o due to a low battery while you are downloading music via USB cable,
your tablet will prompt ‘ SD card error’ when you power on your tablet. Repower on your tablet
about 5 times, the same prompt would occur. Under this circumstance, you should repower on
your tablet until it prompts ‘SD card error. Format?’. Please select format to format your SD card
to ensure your tablet runs properly.
Any sudden interruption during downloading music via USB cable may
result in damage to your SD card.
Play music
You can listen to music by using your tablet’s built-in speaker, through a
wired headset, or through a wireless Bluetooth stereo headset or speaker.
Select a song in your library to listen to it. The Playback screen opens and
the song you selected starts to play. The Playback screen contains several
icons that you can select to control the playback of songs. On the right-top
of playback screen, you will find three function icons. You can select them
to open the current playlist, shue the current playlist or repeat the current
playlist/repeat the current track (touch twice). Three function icons just
above the process bar can be used to control the playing process of the music
application. Their functions can be defined as the following: switch to last
song (select) /rewind (select and hold), play/pause and switch to next song
(select)/ fast forward (select and hold)
To delete a song from the SD card
You can delete music from the storage card. Select and hold a song in a
library list. In the menu that opens, select Delete.
6.16 Play store
You can download and manage media files through this application.
6.17 Search
The Search function enables you to open a search box for searching your
tablet and the web.
6.18 Sound Recorder
Use this function to record audio files. Three function icons at the bottom of
the Recorder screen are corresponding to start recording, review record file
and stop recording.
6.19 Talk
You should add a Google account first.
6.20 Voice search
You can search by voice through this function.
6.21 YouTube
You can log on YouTube through this application.
Page 20
18
DIMENSION (MM*MM*MM)
191.5x120.0x11mm
WEIGHT
Approx 328g
LCD
7” WVGA 1024 x 600 TFT, 5 points Capacitive Touch
OS
Android 4.2
PROCESSOR
Amlogic AML 8726-MXS 1.5GHz
MEMORY
1GB DDR3 RAM, 4GB internal, Micro SD up to 32GB
WI-FI
IEEE 802.11 b/g/n
CONNECTIONS
Micro USB, Mono Speaker, Headphone Jack, Mic
CAMERA
0.3MP Front, 2.0MP rear
BATTERY
3000mAh
SENSOR
G-sensor
SIM
Dual SIM, Dual Standby
CAMERA
0.3MP Front, 2.0MP Rear
Specifications
7.0
Page 21
19
Appendix
Appendix 1 – Troubleshooting
If you find exceptions when operating your tablet, restore the factory
settings and then refer to the following table to solve the problem.
If the problem persists, contact the distributor or service provider.
FAULT CAUSE SOLUTION
Your tablet
cannot be
powered on
The battery energy
is exhausted.
Charge the battery
The battery
cannot be
charged
The charging voltage
does not match the
voltage range indicated
on the charger
Ensure the charging
voltage matches the
voltage range indicated
on the charger
An incorrect charger
is used
Use the charger specially
designed for your tablet
Poor contact
Ensure the charger plug
is in good contact with
your tablet
8.0
 Loading...