

Page 1

Console Module
XP0020
Quick Start Guide (V1.0)
Page 2
XP0020 Quick Start Guide
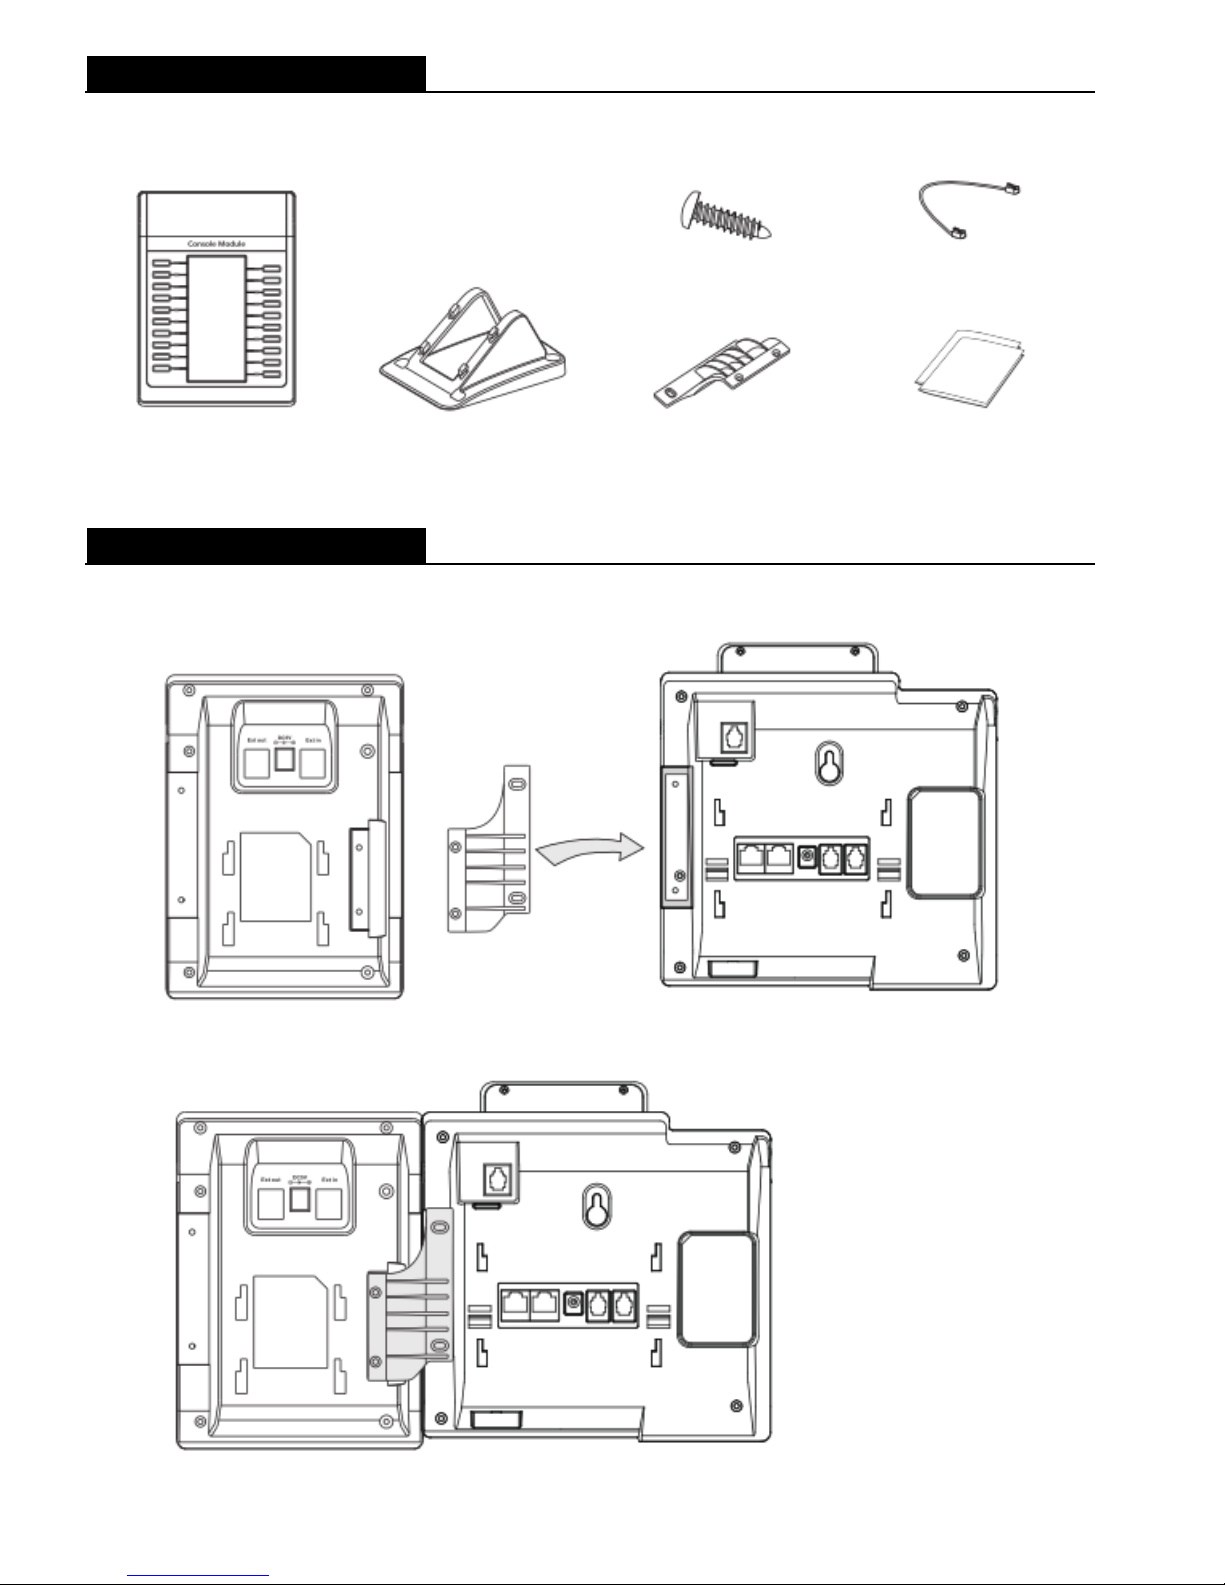
Packing List
The following items are included in your package. If you find anything missing, contact your system
administrator.
Console Module
Stand
Spiral Shell
Connecting Cord
Connecting Sheet
Quick Start Guide &
Quick Reference
Connect to the Phone
1. Use the connecting sheet and spiral shell to connect the console module to the IP phone, as shown
below:
The phone and the console module are connected as shown below:
Page 3
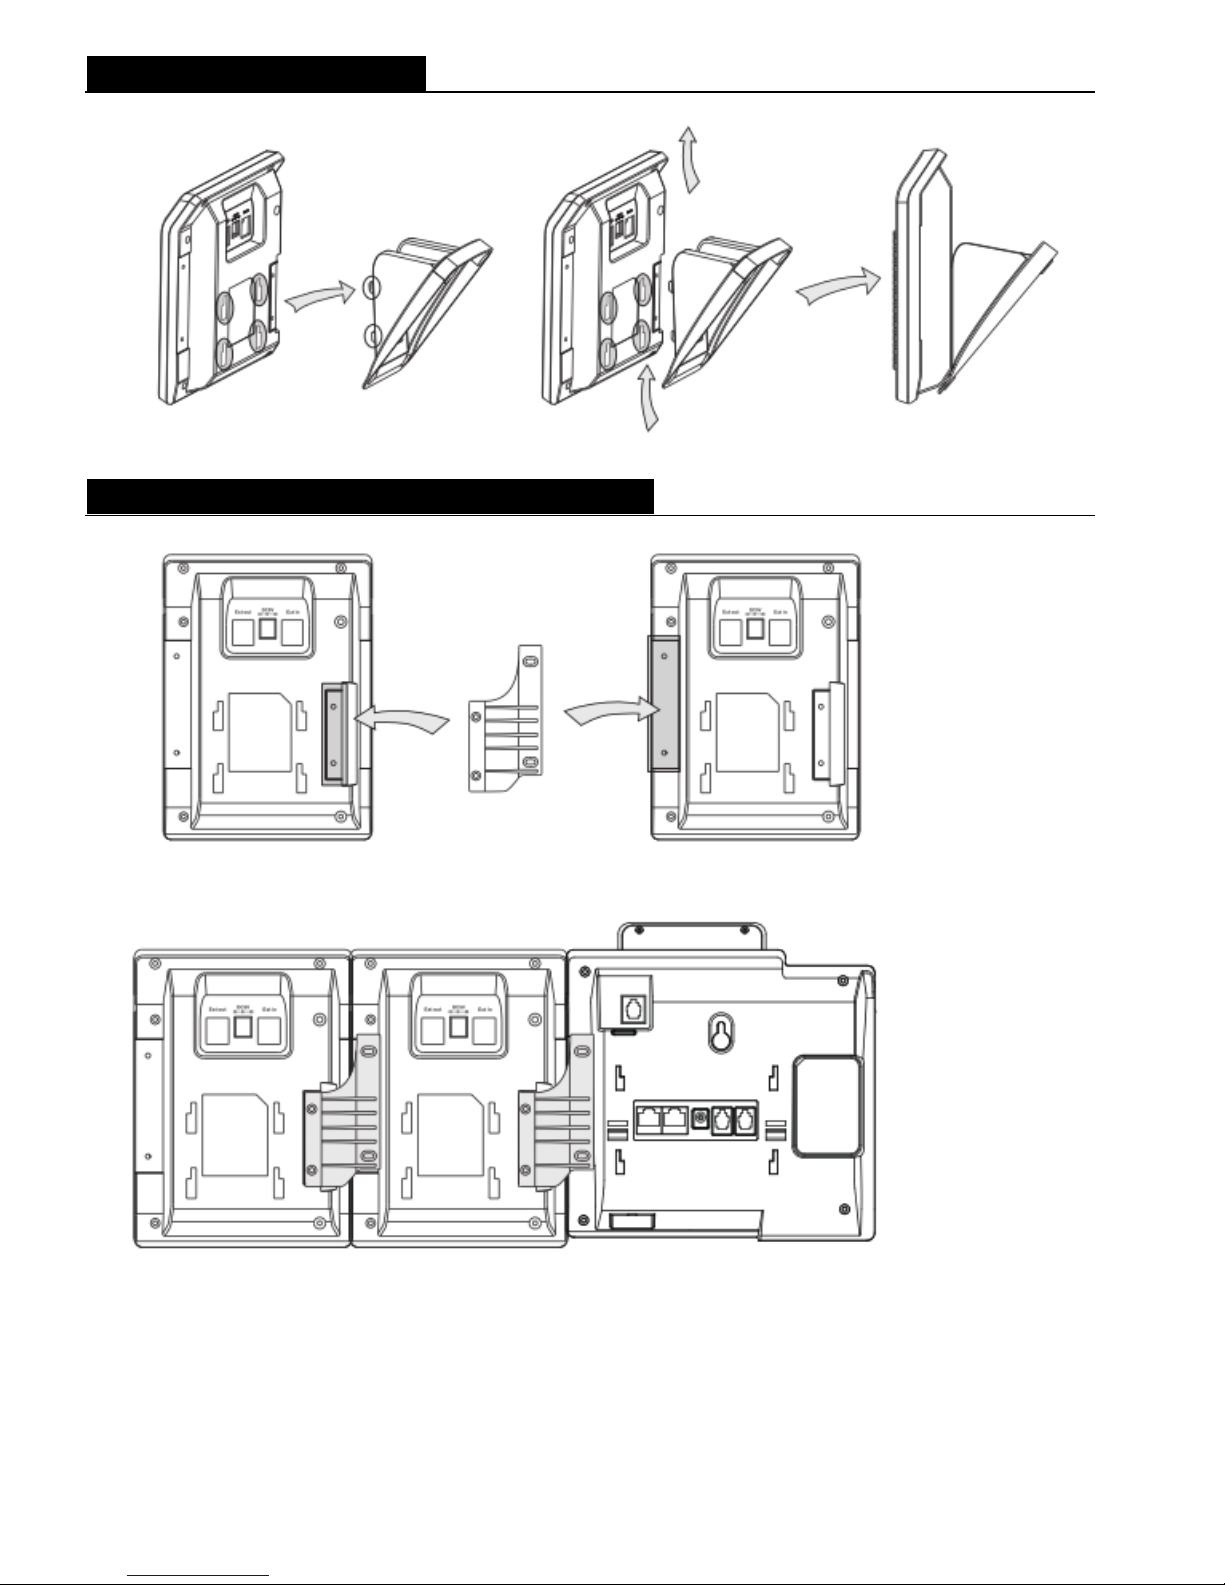
Attach the Stand
2. Attach the stand, as shown below:
Connect to the Next Console Module
3. Use the connecting sheet and spiral shell to connect the next console module, as shown below:
The phone and the two console modules are connected as shown below:
Note: The IP phone supports up to two console modules. Repeat the steps listed above to connect more
console modules.
Page 4
XP0020 Quick Start Guide
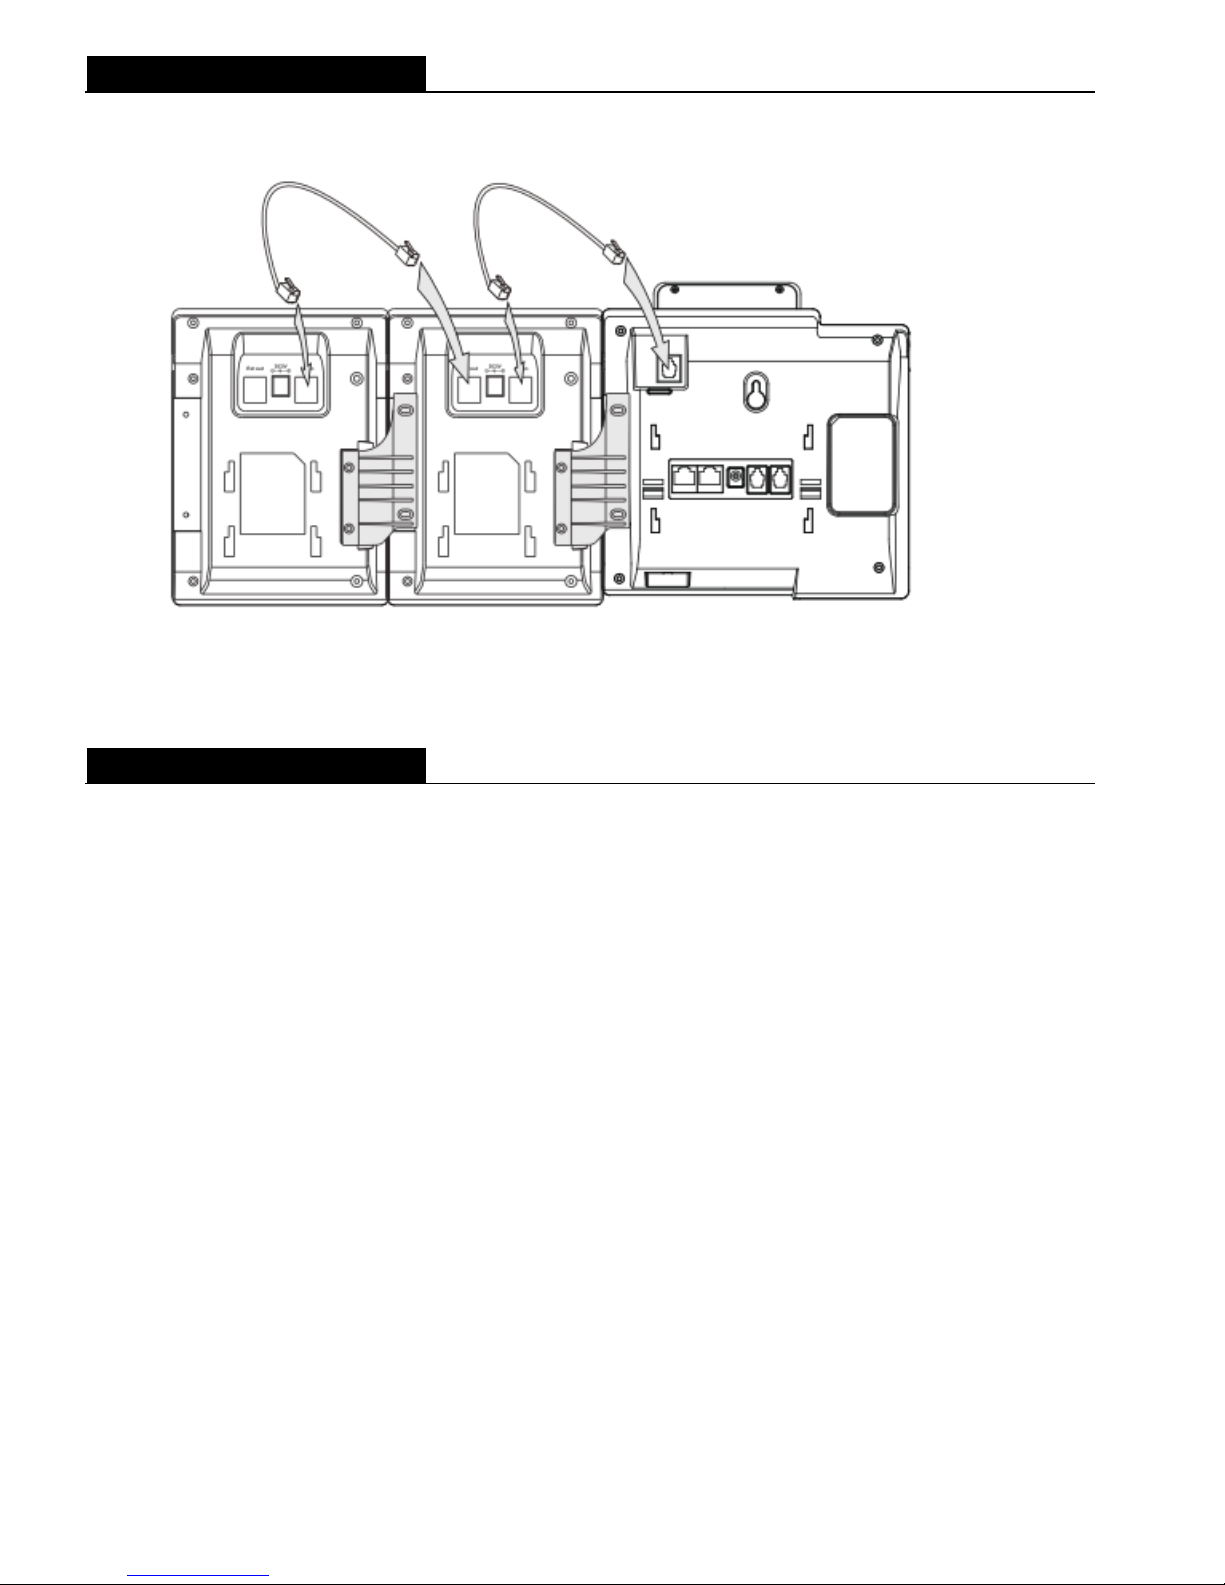
Connect the Cords
4. Connect the connecting cord between the Ext port on the IP phone and the Ext in port on the first
console module. Connect the connecting cord between the Ext out port on the first console module
and the Ext in port on the second console module.
Note: Repeat the step to connect the cords for more console modules.
Startup
Power is automatically transferred from the host IP phone to the console modules upon connection.
However, if you use more than two console modules, you need to connect an additional power adaptor to
any of the console modules.
The console modules automatically begin the loading process after being supplied with power. After that,
you can configure key features for them via the Web browser interface or the phone user interface.
For more information on how to use your new console module(s), refer to the Quick Reference guide in the
package.
 Loading...