

XonTel Technology S200 User Manual
S200 IP-PBX
User Manual
XonTel Technology

XONTEL S200 Administrator's Guide
www.sahabtec.com
Page2
Table of Contents
1. Introduction ............................................................................................ 5
1.1 Features ............................................................................................ 5
1.2 Hardware Specifications ....................................................................... 6
1.2.1 Exterior Appearance ...................................................................... 6
2. System Setup ......................................................................................... 7
2.1 Connection Drawing ............................................................................ 7
2.2 Connecting Ethernet Line ..................................................................... 7
2.3 Supplying Power ................................................................................. 8
Managing XonTel PBX .................................................................................. 9
3. Administrator Login ................................................................................. 9
4. Status .................................................................................................. 11
4.1 Line status ....................................................................................... 11
4.1.1 Extension Status ......................................................................... 11
4.1.2 Trunk Status ............................................................................... 12
4.2 System Status .................................................................................. 13
4.2.1 System Info ............................................................................... 13
4.2.2 Network Status ........................................................................... 14
5. System… ............................................................................................... 15
5.1 Network Preferences ......................................................................... 15
5.1.1 LAN Settings ............................................................................... 15
5.1.2 WAN Settings ............................................................................. 17
5.1.3 DHCP Server .............................................................................. 18
5.1.4 VLAN Settings ............................................................................. 19
5.1.5 VPN Settings .............................................................................. 21
5.1.6 DDNS Settings ............................................................................ 22
5.1.7 Static Route ............................................................................... 23
5.2 Firewall Settings ............................................................................... 24
5.2.1 Firewall Rules ............................................................................. 24
5.2.2 IP blacklist ................................................................................. 26
5.3 System Preference ............................................................................ 27
5.3.1 Password Settings ....................................................................... 27
5.3.2 Date and Time ............................................................................ 27
5.3.3 Firmware Update ......................................................................... 28
5.3.4 Hot Standby ............................................................................... 29
5.3.5 Backup and Restore ..................................................................... 31
5.3.6 Reset and Reboot ........................................................................ 31
5.4 Storage Management ........................................................................ 32
5.4.1 External Storage ......................................................................... 32

XONTEL S200 Administrator's Guide
www.sahabtec.com
Page2
6. PBX ...................................................................................................... 33
6.1 Extensions ....................................................................................... 34
6.1.1 FXS/VoIP Extensions .................................................................... 34
FXS Extensions ................................................................................... 34
VoIP Extensions ................................................................................... 38
6.1.2 Phone Provisioning ....................................................................... 42
6.2 Trunks .................................................................................................... 49
6.2.1 Physical Trunk ................................................................................... 49
6.2.2 VoIP Trunk...................................................................................... 56
6.3 Outbound Call Control ....................................................................... 62
6.3.1 Outbound Routes ........................................................................ 62
6.3.2 Speed Dial Settings ...................................................................... 64
6.4 Inbound Call Control ......................................................................... 65
6.4.1 IVR ............................................................................................ 65
6.4.2 Ring Groups ................................................................................ 67
6.4.3 Queues ....................................................................................... 68
6.4.4 Conferences ................................................................................ 72
6.4.5 Inbound Routes ........................................................................... 73
6.5 Audio Settings .................................................................................. 77
6.5.1 Custom Prompts .......................................................................... 77
6.5.2 Music on Hold Prompts.................................................................. 78
6.6 Basic Settings ................................................................................... 79
6.6.1 General Preferences ..................................................................... 80
6.6.2 Business Hours ............................................................................ 82
6.6.3 Feature Codes ............................................................................. 83
6.6.4 Voicemail Settings ........................................................................ 87
6.7 Advanced Settings ............................................................................ 89
6.7.1 SIP Settings ................................................................................ 90
6.7.2 IAX Settings ............................................................................... 96
6.7.3 Blacklist ...................................................................................... 97
6.7.4 Callback Settings ......................................................................... 98
6.7.5 DNIS Settings ............................................................................ 101
6.7.6 DISA ........................................................................................ 101
6.7.5 PIN User Settings ....................................................................... 102
6.7.8 Paging Groups ........................................................................... 104
6.7.9 SMS Settings ............................................................................. 106
7. Reports ................................................................................................ 108
7.1 Call Logs ......................................................................................... 108
7.2 System Logs ................................................................................... 109
8. Logout .............................................................................................. 110
9. Use XonTel PBX ..................................................................................... 111
9.1 Make outbound call .......................................................................... 111

XONTEL S200 Administrator's Guide
www.sahabtec.com
Page2
9.1.1 Sample Routing via VoIP Trunk........................................................ 112
9.2 Incoming call .................................................................................. 114
9.2.1 Sample Routing to an IVR ........................................................... 114

XONTEL S200 Administrator's Guide
www.sahabtec.com
Page5
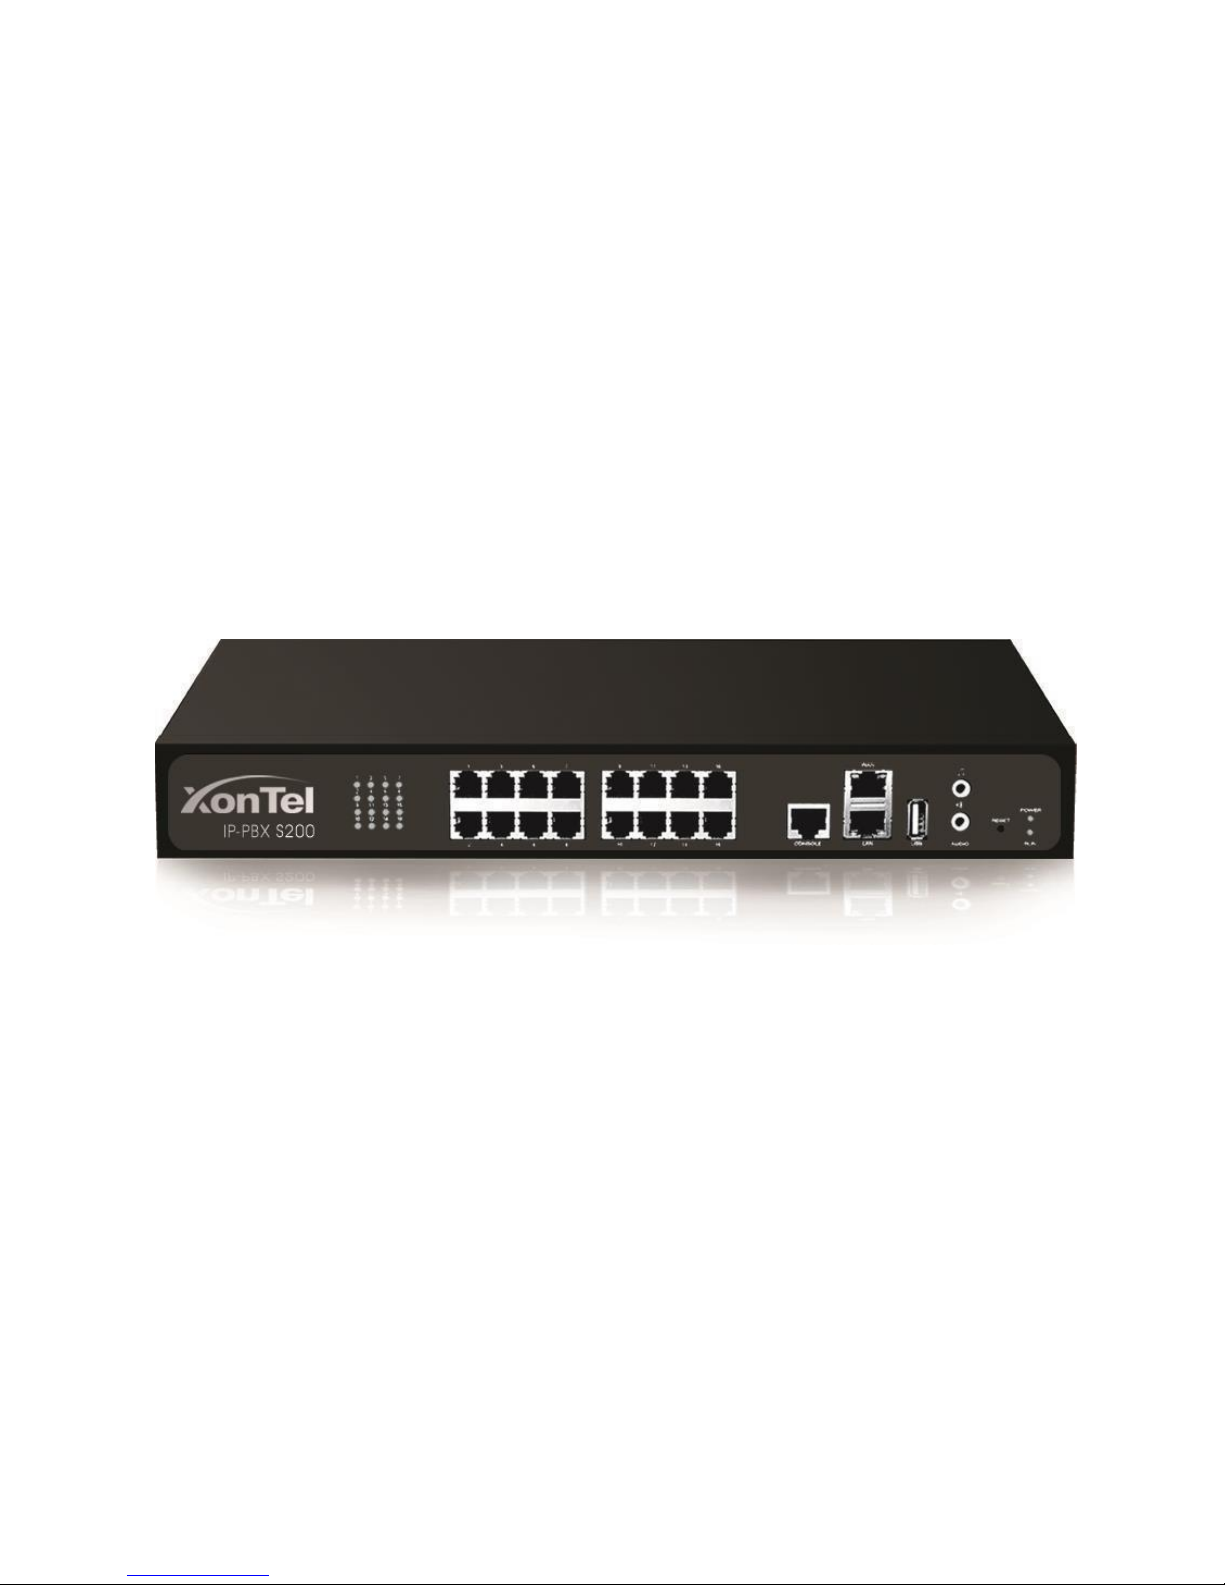
1. Introduction
XonTel PBX—IP-PBX for Medium Businesses/Home Office
New products XonTel PBX S200 is a standalone embedded hybrid PBX for
medium businesses and remote branch offices of larger organizations (1-200
users per site). XonTel PBX S200 also offers a hybrid solution (a combination of
VoIP applications using PSTN/BRI/GSM/UMTS/FXS equipment) alternative for
enterprises who are not yet ready to migrate to a complete VoIP solution.
1.1 Features
● Auto-provision
● Follow me
●
Audio in/out
● Interactive Voice Response (IVR)
● BLF Support
● Intercom / Zone Intercom
● Blacklist
● Music On Hold
● Call transfer
● Hot standby
● Call Detail Records(CDR)
● Paging / Zone Paging
● Call Forward
● PIN Users
● Call Parking
● Queue
● Call Recording
● QOS
● Call Pickup
● Ring Group
● Call Routing
● Route by Caller ID
● Call Transfer
● Spy functions
● Call Waiting
● Skype Integration (Skype Connect)
● Caller ID
● Three-way Calling
● Call Back
● Mobility Extension
● Conference
● External Storage
● Speed Dial
● DDNS
● Define Office Time
● OpenVPN
● Direct Inward System Access(DISA)
● T.38
● DIDs
● Voicemail
● Distinctive Ringtone
● VLAN
● Do Not Disturb(DND)
● WAN
● Dial by Name
● PPPoE
● Firewalls
● Static Route
XONTEL S200 Administrator's Guide
www.sahabtec.com
Page6
1.2 Hardware Specifications
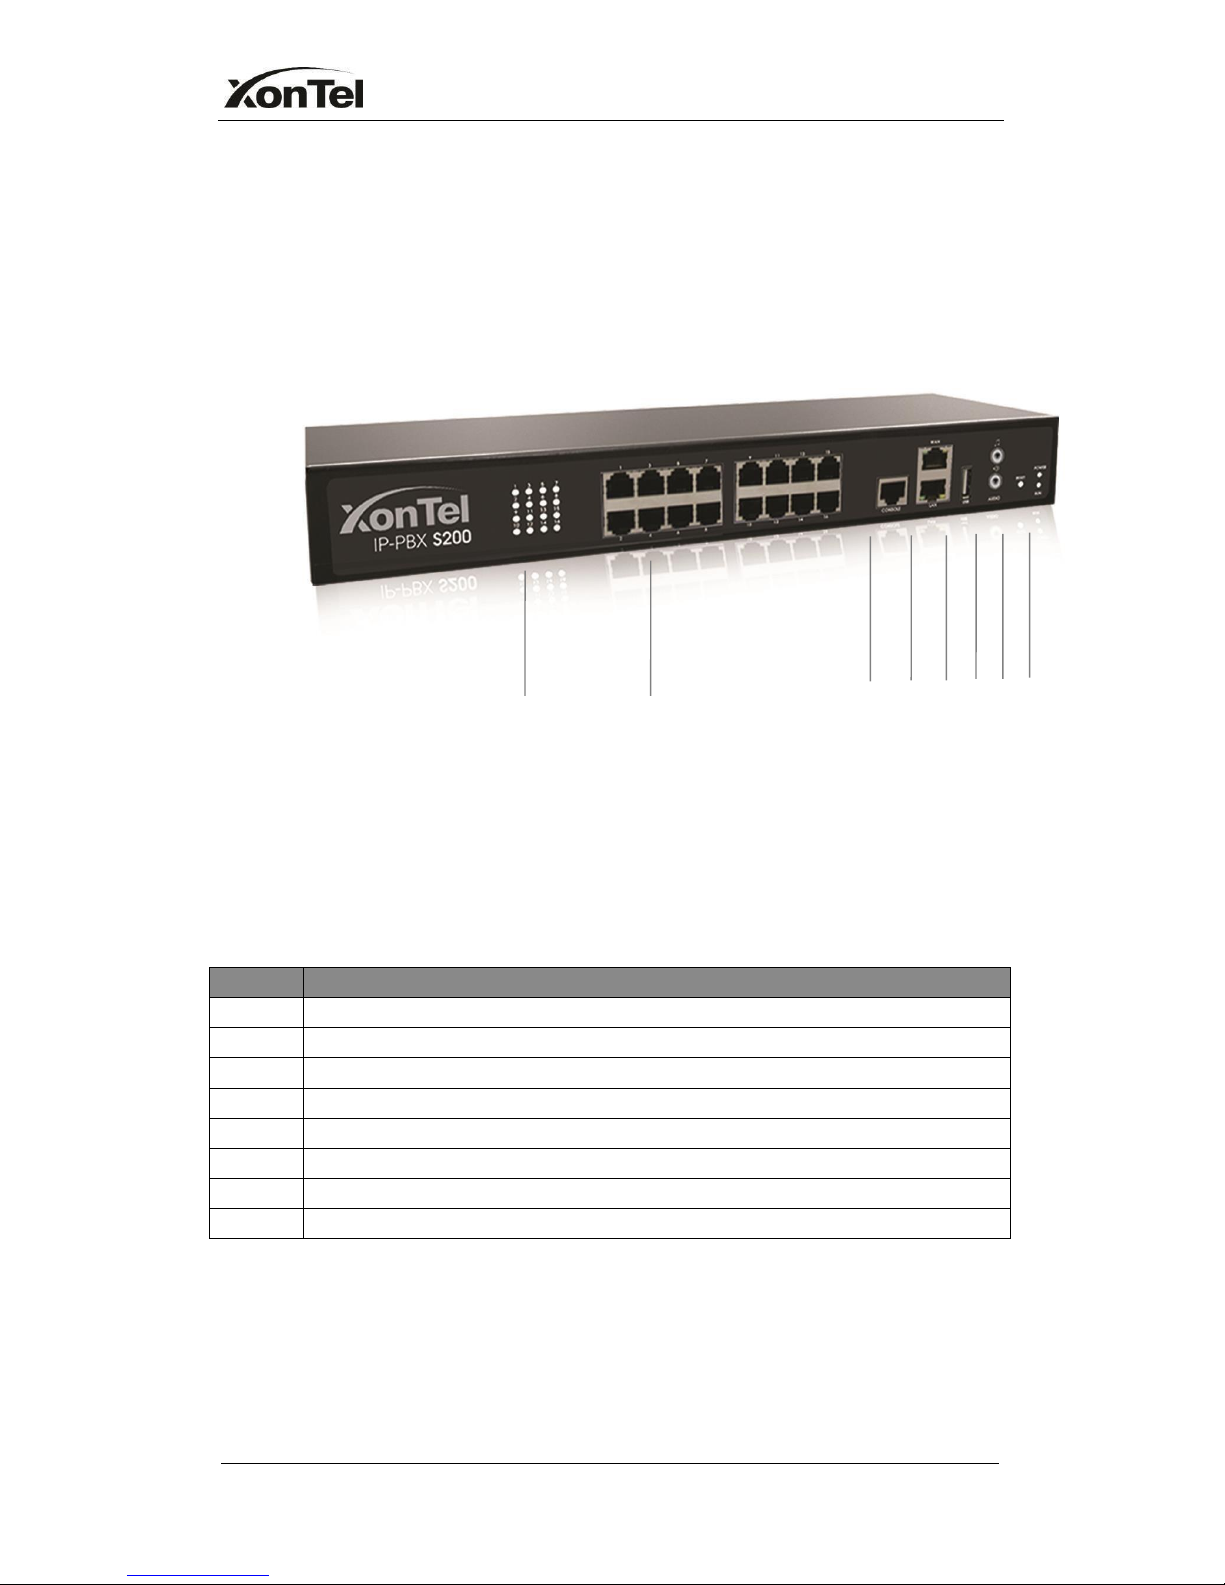
1.2.1 Exterior Appearance
Front Panel
1 2345678
Figure1-1 XonTel PBX S200 Front Panel
No.
Indication
1
16 Green LEDs
②
16 RJ11 ports
③
Console port (RJ45)
④
WAN/LAN port
⑤
USB 2.0 port
⑥
Audio in/out
⑦
Reset Button
⑧
Power and Run indicator

www.sahabtec.com
Page7
XonTel S200 Administrator's Guide
2. System Setup
2.1 Connection Drawing
Figure 2-1
2.2 Connecting Ethernet Line
XonTel PBX provides two 10/100MEthernet ports with RJ45 interface and LED
indicator. Plug Ethernet line into XonTel PBX’s Ethernet port, and then connect
the other end of the Ethernet line with a hub, switch, router, LAN or WAN.
Once connected, check the status of the LED indicator. A yellow LED indicates
the port is in the connection process, and a green LED indicates the port is
properly connected.

www.sahabtec.com
Page8
XonTel S200 Administrator's Guide
2.3 Supplying Power
Please follow the steps below to connect the XonTel PBX unit to a power outlet:
1.
Connect the small end of the power cable to the power input port on the
XonTel PBX back panel, and plug the other end of the cable into a
100V~240V AC power outlet.
2.
Check the Power LED on the front panel. A solid green LED indicates that
power is being supplied correctly.

www.sahabtec.com
Page9
XonTel S200 Administrator's Guide
Managing XonTel PBX
3. Administrator Login
From your web browser, input the IP address of the XonTel PBX server.
If this is the first time you are configuring XonTel PBX, please use the default
settings as below (your PC should be in the same local network with XonTel
PBX):
IP Address: http://192.168.5.150
Username: admin
Password:xontel
In this example, the IP address is 192.168.5.150
Figure 3-1
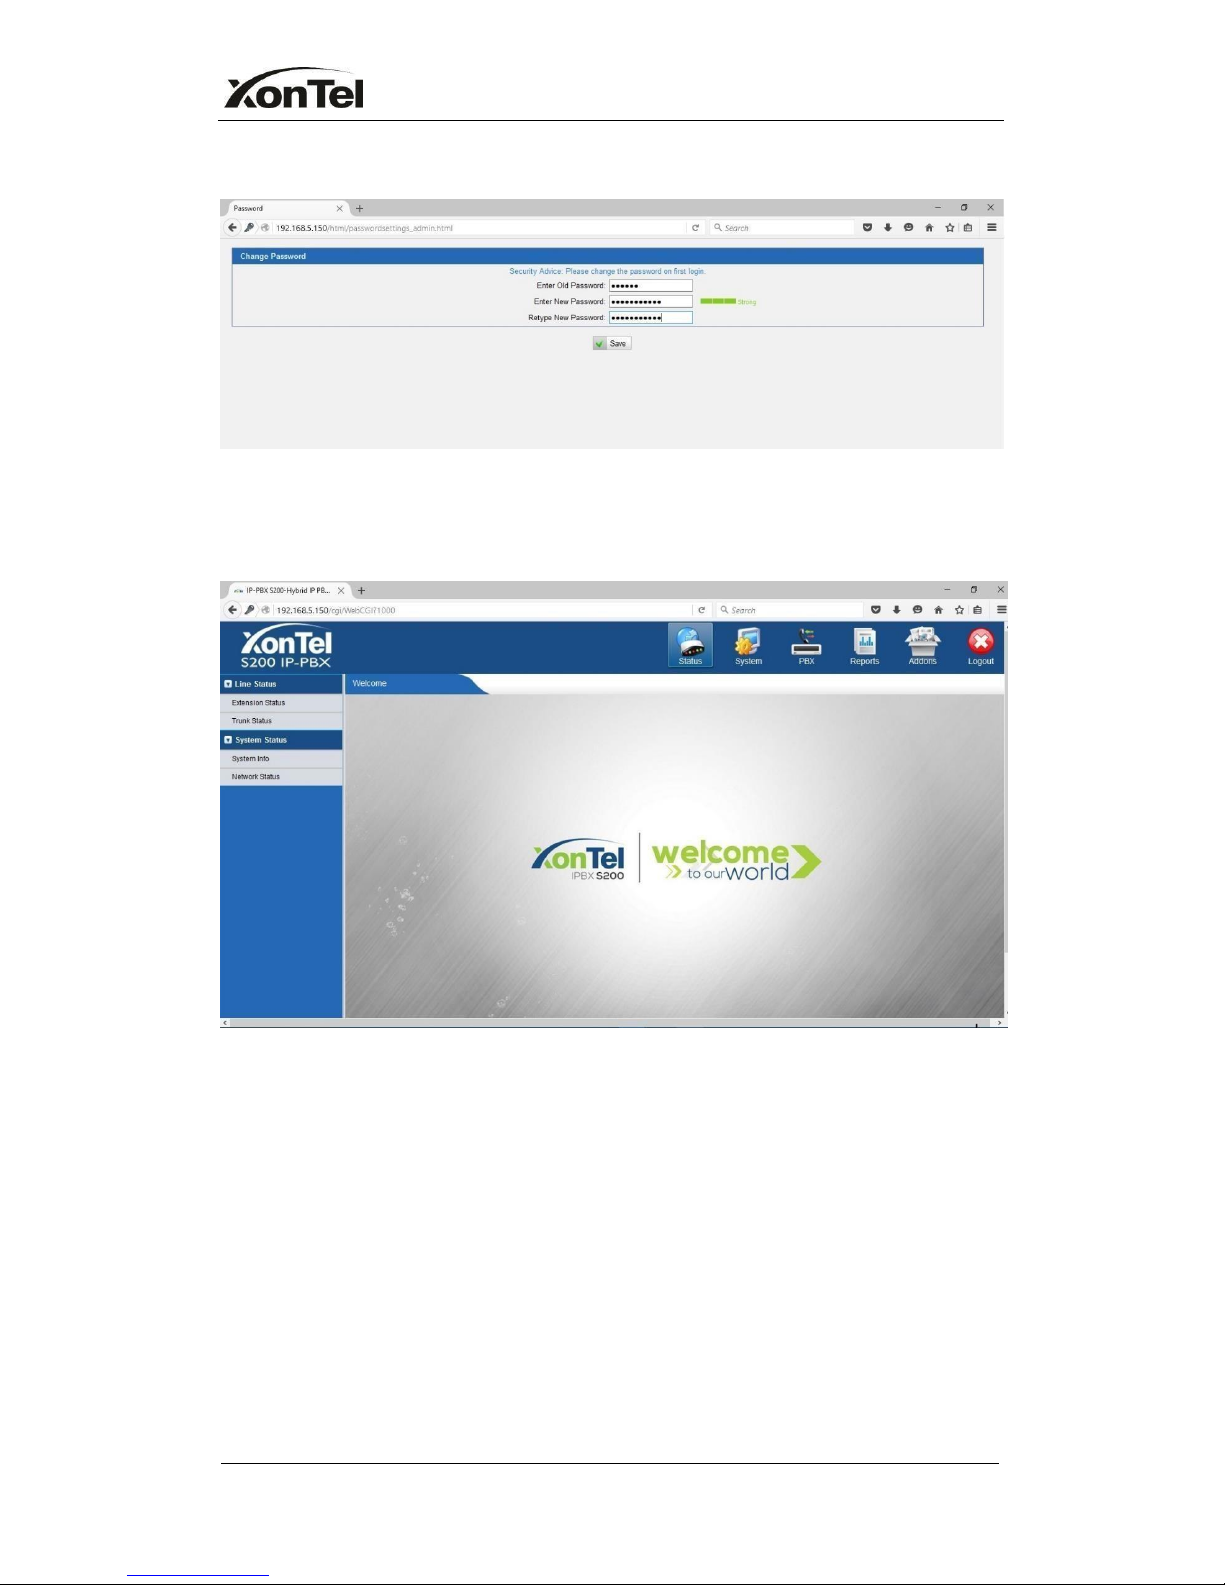
after first login the system will enforce you to change the default password for
security issue and the password should be complex which mean it should
contains capitals letter and small letters plus numbers or special symbols like
(@,#,$,%,…).
www.sahabtec.com
Page10
XonTel S200 Administrator's Guide
Figure 3-2
This is the welcome page of XonTel PBX S200 after successful login.
Figure 3-3
www.sahabtec.com
Page11
XonTel S200 Administrator's Guide
4.
Status
Click to start to check the status of XonTel PBX S200,where we can
check the status of extension, trunk, network and system information.
4.1 Line status
In this page, we can check the status of extension and trunks
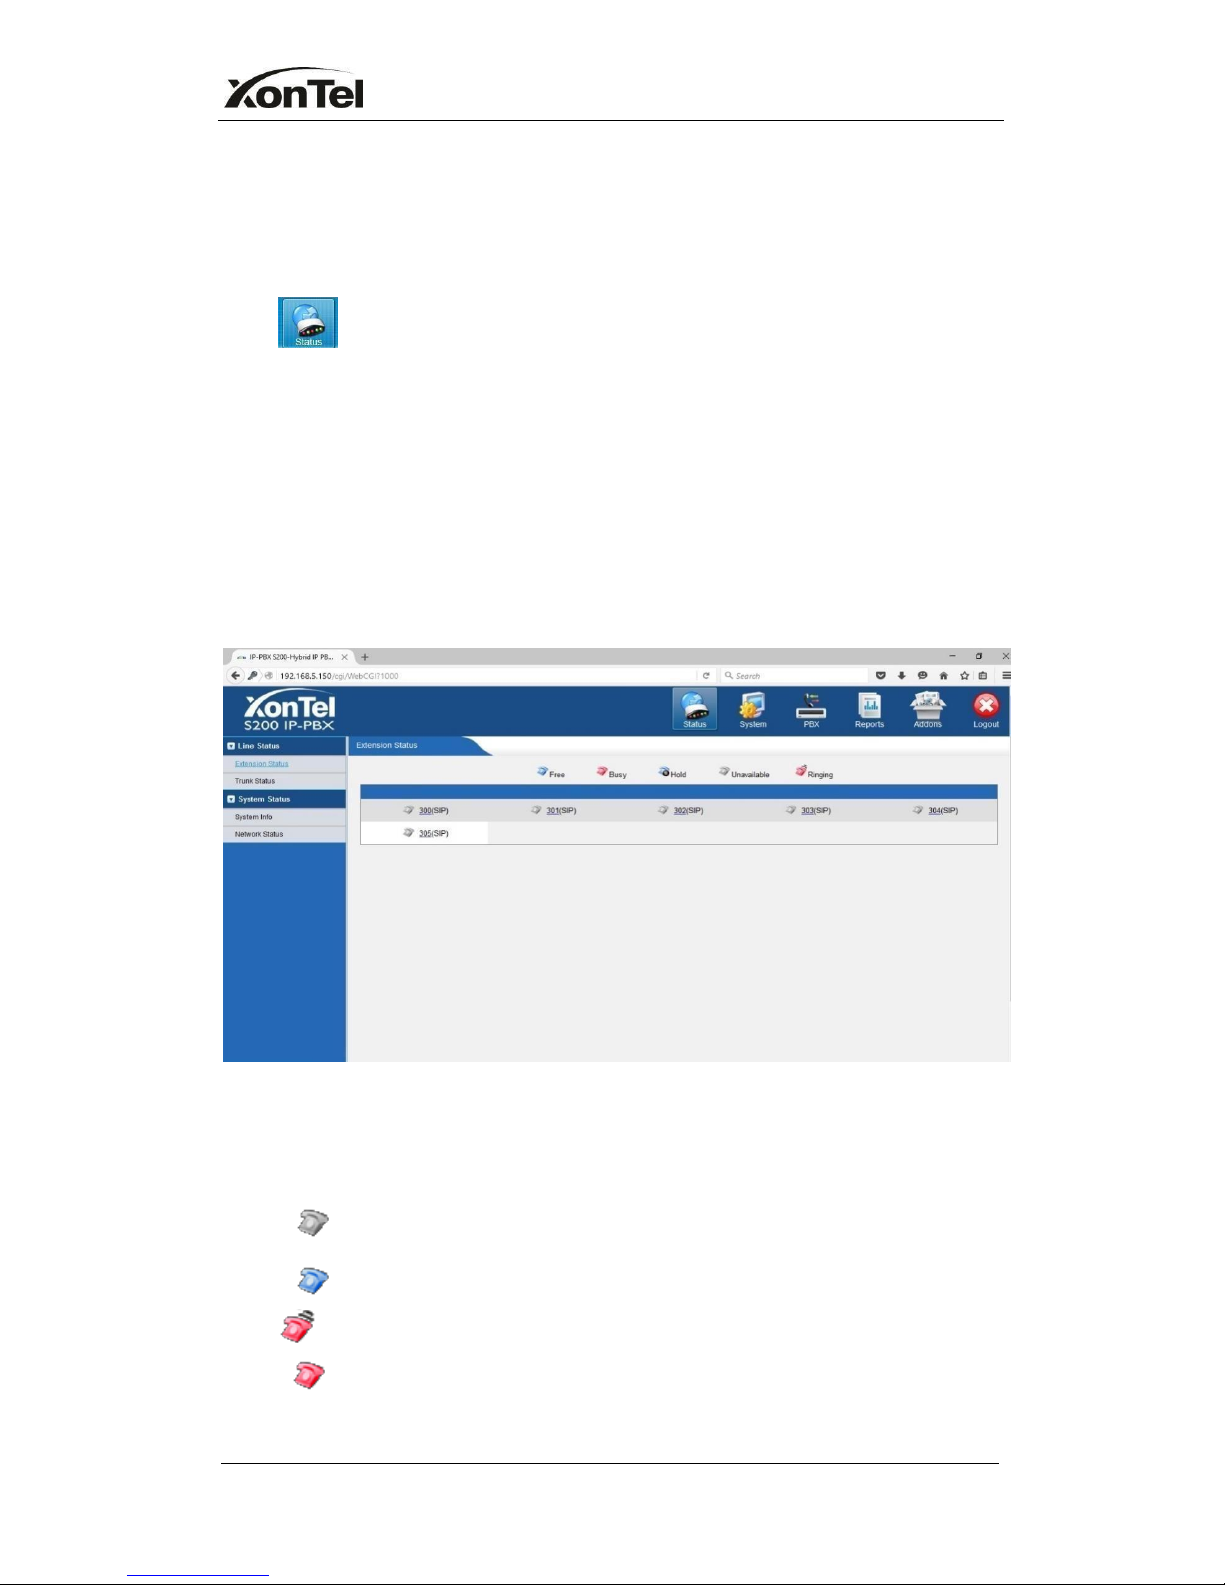
4.1.1 Extension Status
Figure 4-1
XONTEL PBX Status Description:
Extensions:
1) : Extension is unavailable
2) :Extension is idle 3
) :Extension is ringing
4) :Extension is busy
www.sahabtec.com
Page12
XonTel S200 Administrator's Guide
5) : Extension is on hold
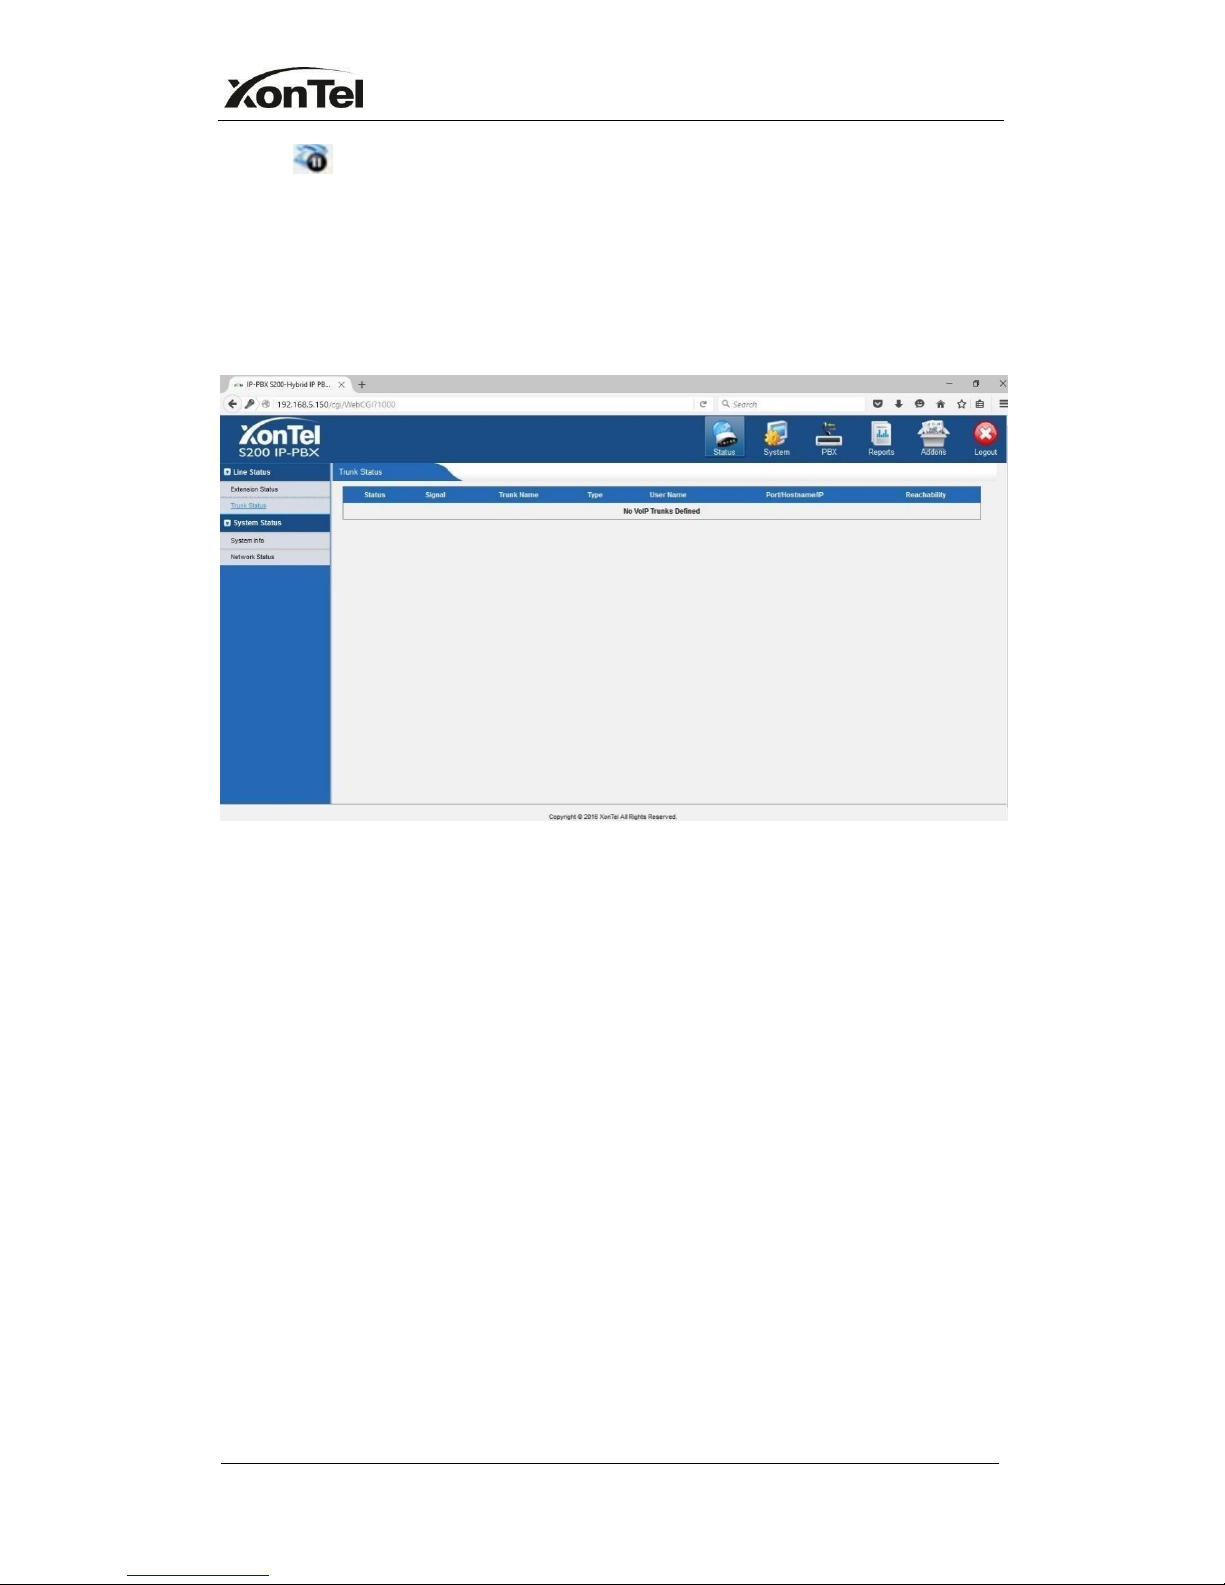
4.1.2 Trunk Status
Trunks:
Figure 4-2
VOIP Trunk:
Status
Unregistered: Trunk registration failed.
Registered: Successful registration, trunk is ready for use.
Request Send: Registering.
Waiting: Waiting for authentication.
Service Provider:
Status
OK: Successful registration, trunk is ready for use.
Unreachable: The trunk is unreachable.
Failed: Trunk registration failed.
FXO Trunk:
Status
Idle: The port is idle.
Busy: The port is in use.
Disconnected: The port hasn’t connected to the PSTN line.
More detail message, please refer to the LED indication of front panel.
www.sahabtec.com
Page13
XonTel S200 Administrator's Guide
GSM/UMTS Trunk:
Status
Idle: The port is idle.
Busy: The port is in use.
Signal
: No signal.
: Poor.
: Average.
: Good.
: Excellent.
BRI Trunk:
Status
Ok: The ports connect correctly.
Disconnected: The port hasn’t connected to the BRI line
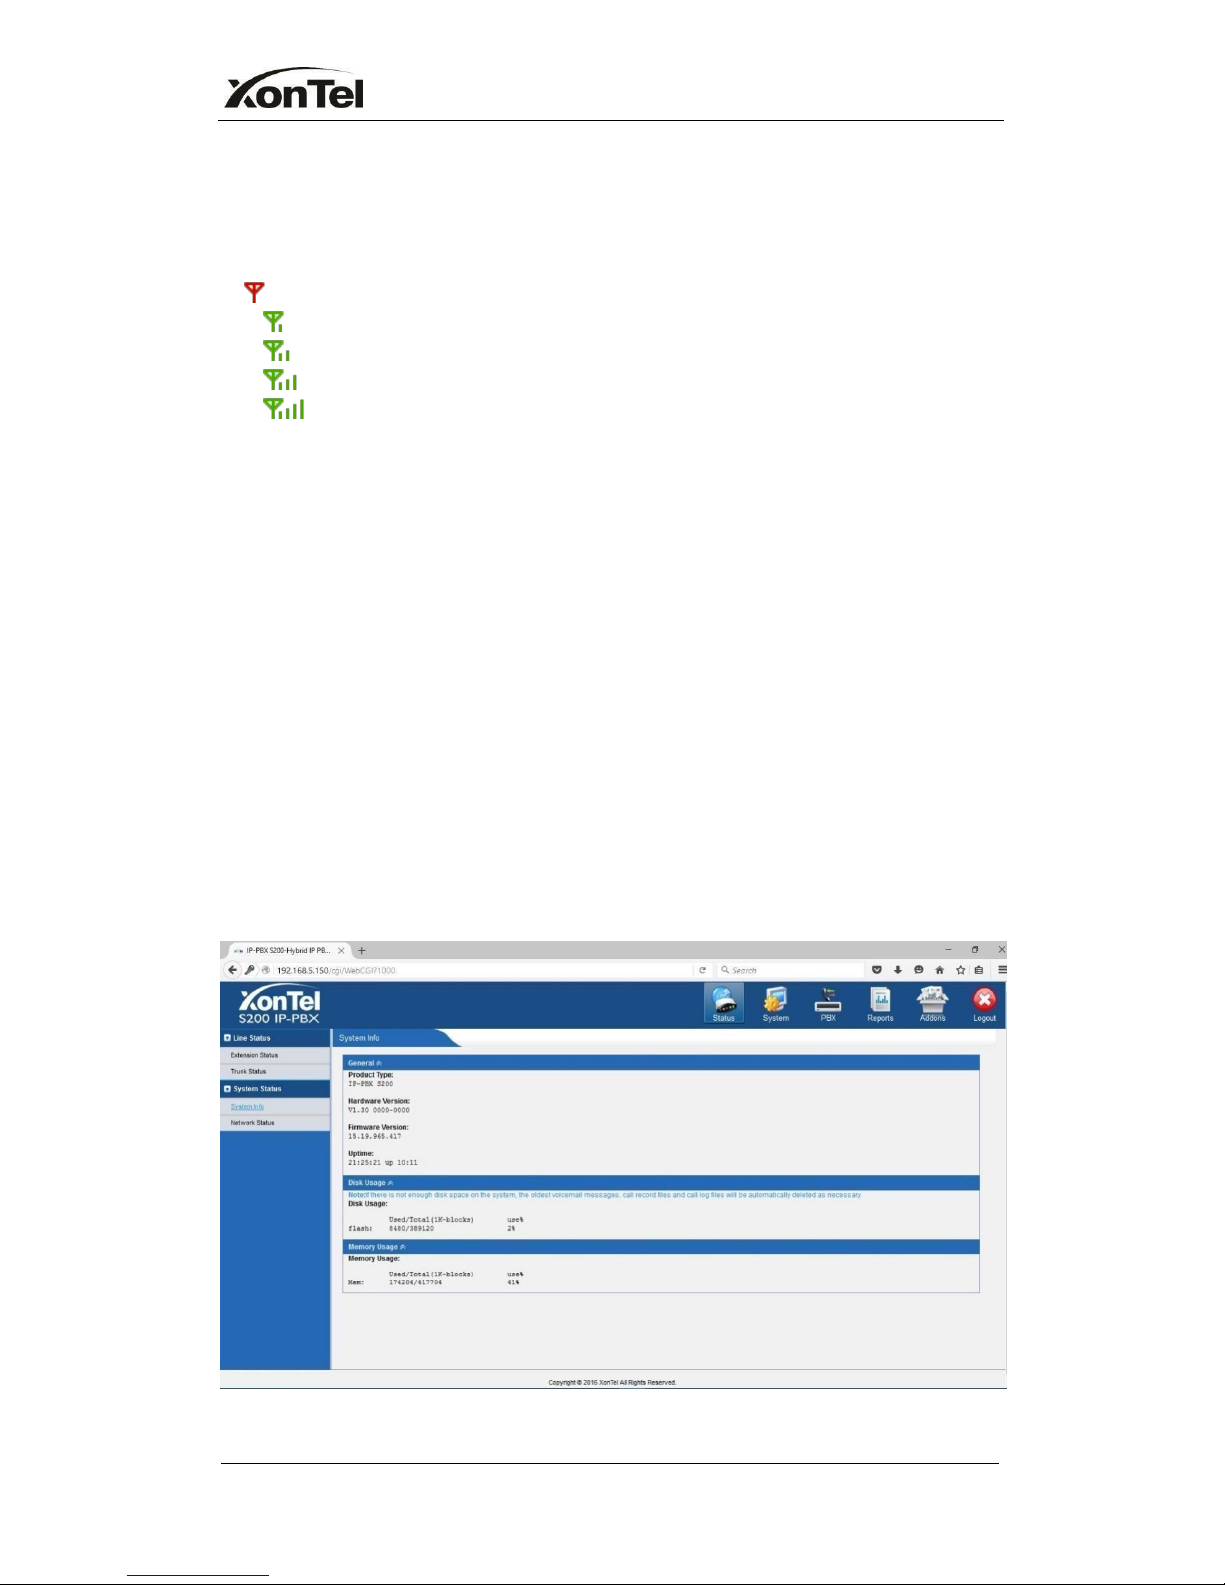
4.2 System Status
In this page, we can check the status of XonTel PBX system, including the
hardware, firmware version and the network status of LAN and WAN ports.
4.2.1 System Info
In this page, we can check the hardware/firmware version, or the disk usage of
XonTel PBX.
Figure 4-3
www.sahabtec.com
Page14
XonTel S200 Administrator's Guide
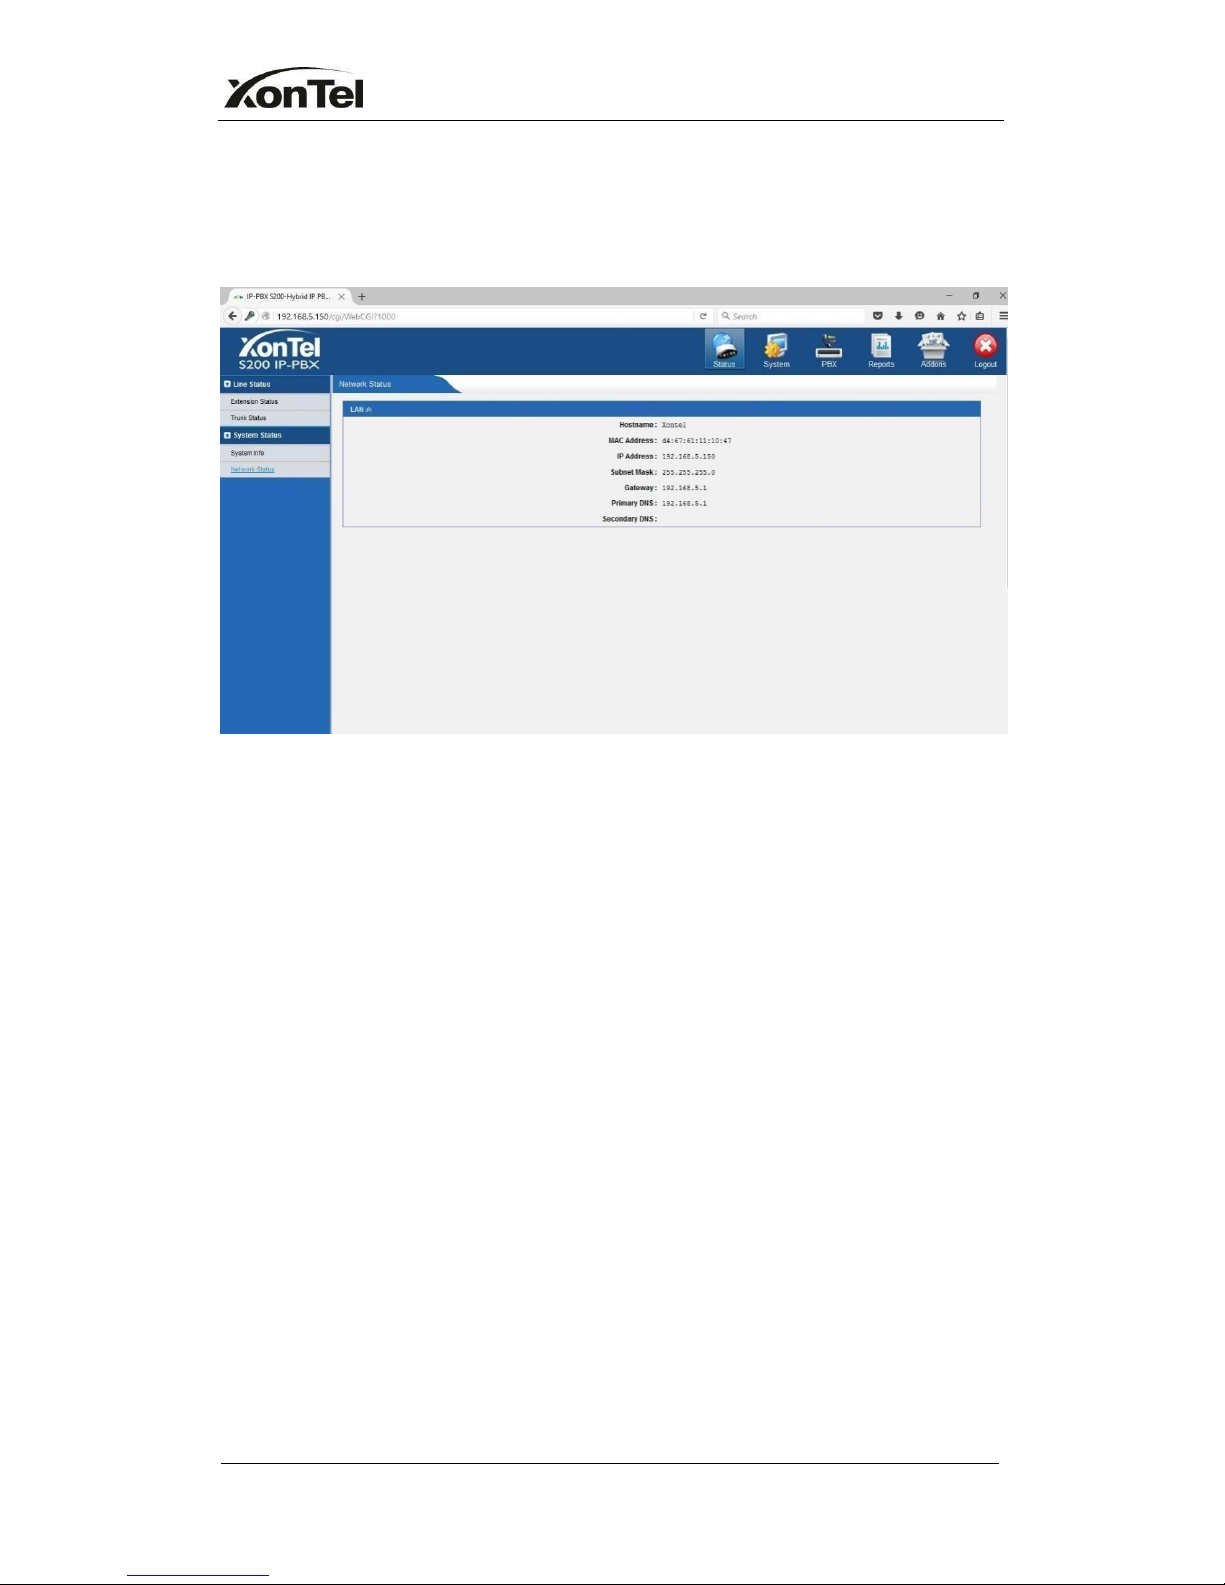
4.2.2 Network Status
In this page, the IP address of LAN and WAN port will appear, if OPENVPN and
VLAN are configured well, they will be display here too.
Figure 4-4
www.sahabtec.com
Page15
XonTel S200 Administrator's Guide
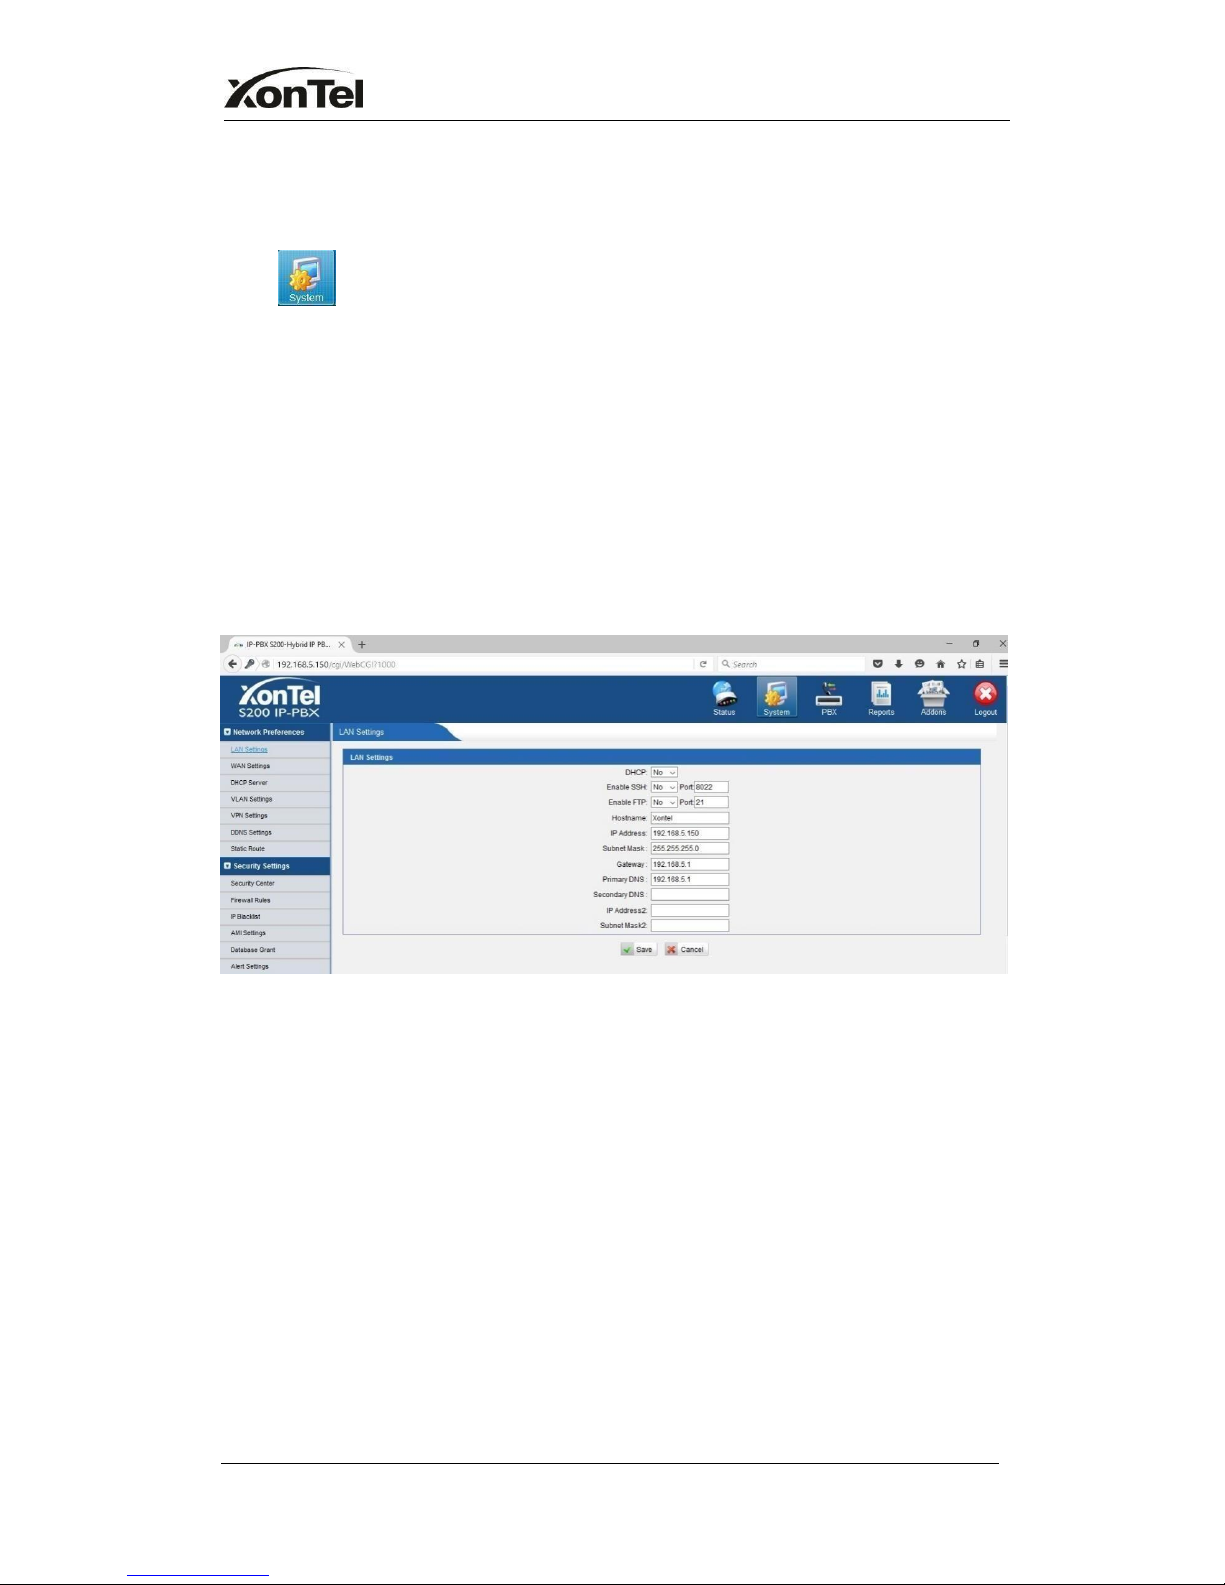
5. System
Click to access.
In this page, we can configure the network settings, firewall settings, storage
management and some other preferences like firmware update and hot
standby.
5.1 Network Preferences
5.1.1 LAN Settings
Figure 5-1
·
DHCP
If this option is set, XonTel PBX will use DHCP to get an available IP address
from your local network. Not recommended or you cannot access XonTel PBX
without the right IP address
·
Enable SSH
This is the advance way to access the device, you can use the putty software to
access the device. In the SSH access, you can do more advanced setting and
debug, it’s disabled by default.
·
Port: the default is 8022, you change it to another one
·
Hostname: Set the host name for XonTel PBX.

www.sahabtec.com
Page16
XonTel S200 Administrator's Guide
·
IP Address
Set the IP Address for XonTel PBX.
Recommend to configure a static IP address for XonTel PBX
·
Subnet Mask
Set the subnet mask for XonTel PBX.
·
Gateway
Set the gateway for XonTel PBX.
·
Primary DNS
Set the primary DNS for XonTel PBX.
·Secondary DNS
Set the secondary DNS for XonTel PBX.
·
IP Address2
Set the second IP Address for XonTel PBX.
·
Subnet Mask2
Set the second subnet mask for XonTel PBX.

www.sahabtec.com
Page17
XonTel S200 Administrator's Guide
5.1.2 WAN Settings
Figure 5-2
It supports three connection types: DHCP (obtain an IP automatically), PPPoE,
Static IP Address.
Note:
1. WAN port is disabled by default
2. WAN port cannot be used as a router to route the internet packages from
WAN port to LAN port.
·
DHCP
.If your ISP says that you are connecting through DHCP or a dynamic IP address
from your ISP, perform these steps:
Step1:Select DHCP as the WAN Connection Type.
Step2: Click Save button to save the settings.
Step3: Reboot the device.
Step4: Check the WAN’s Status (Status Network status).
·
Static IP Address
If your ISP says that you are connecting through a static or fixed IP address
from your ISP, perform these steps:
Step1: Select Static IP Addressas theWAN Connection Type.
Step2: Enter the IP Address.
Step3: Enter the Subnet Mask.
Step4: Enter the Gateway Address.
Step5: Enter the Primary DNS and Secondary DNS.
Step6: Click the Save button to save the settings.
Step7: Reboot the device.
Step8: Check the WAN’s Status (Status Network status).
www.sahabtec.com
Page18
XonTel S200 Administrator's Guide
·
PPPoE
If your DSL provider says that you are connecting through PPPoE or if you
Normally enter a user name and password to access the Internet, perform
these Steps:
Step1: Select PPPoE as the WAN Connection
Type. Step2: Enter the User Name.
Step3: Enter the Password.
Step4: Click the Save button to save the settings.
Step5: Reboot the device.
Step6: Check the WAN’s Status (Status Network status)
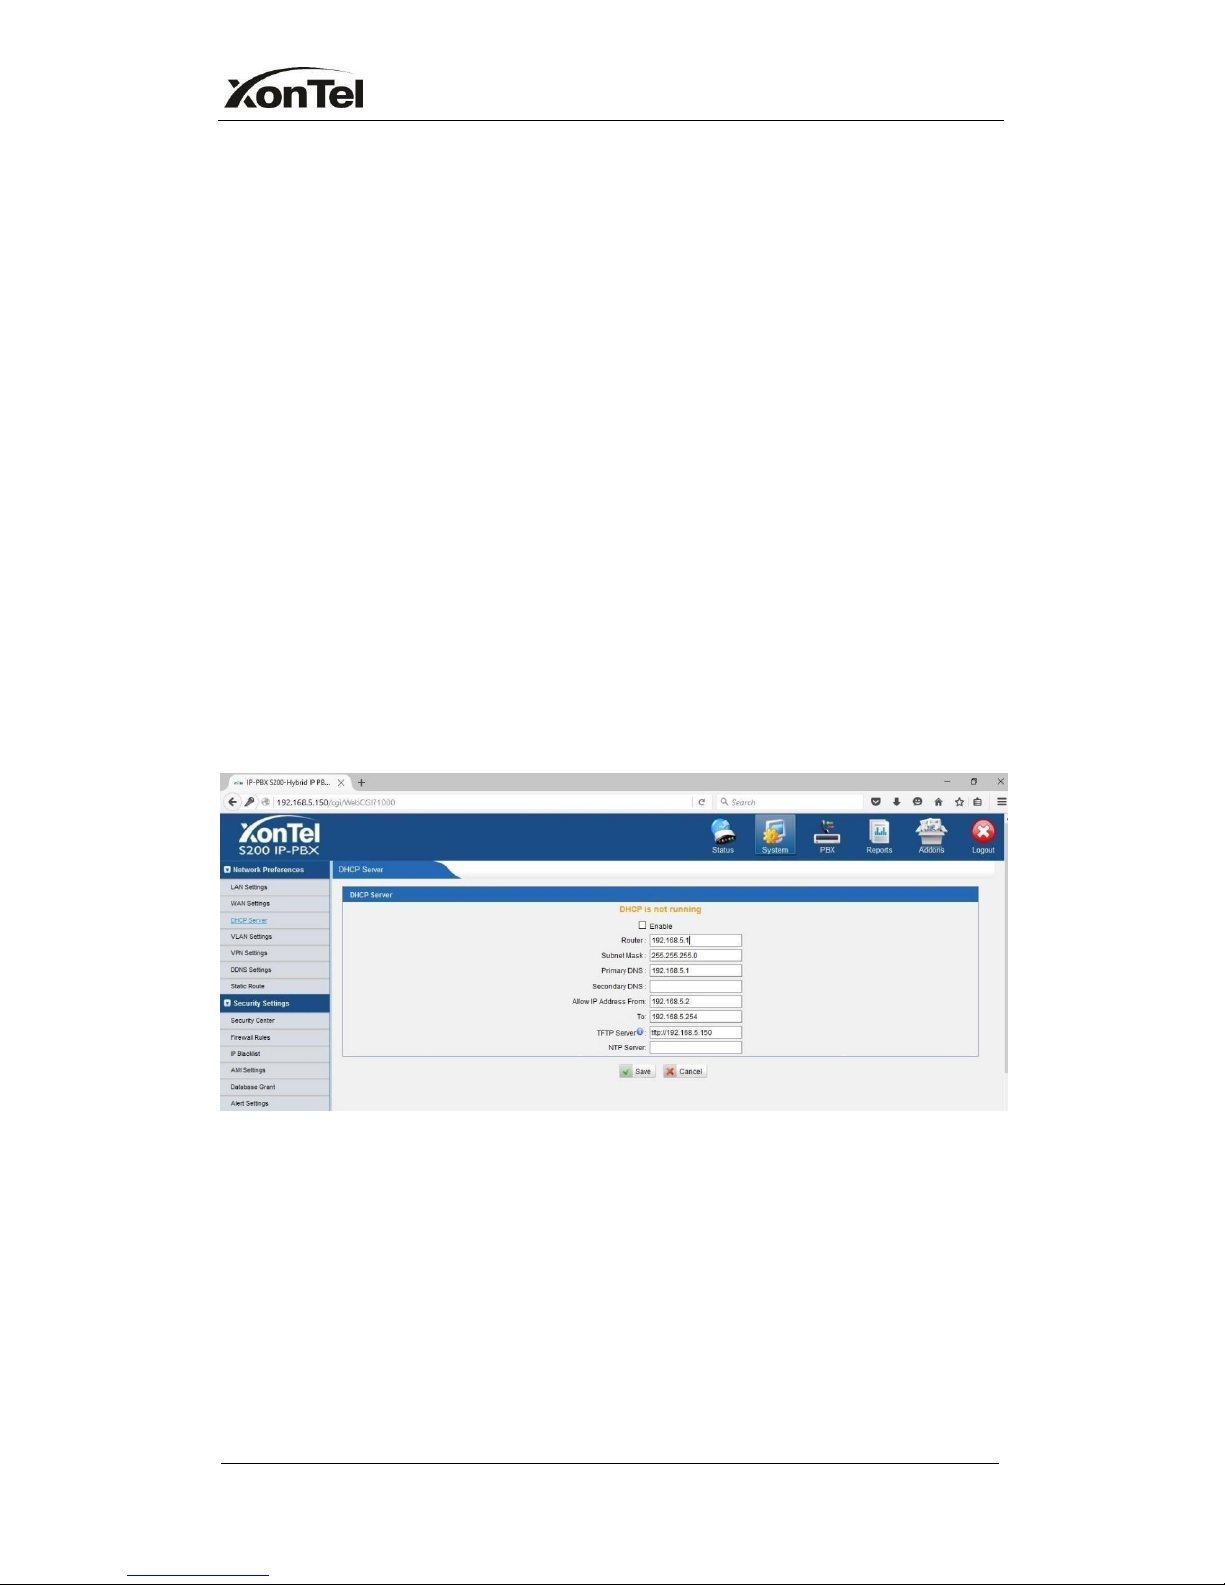
5.1.3 DHCP Server
Dynamic Host Configuration Protocol (DHCP) is a network protocol that enables
a server to automatically assign an IP address to a computer from a defined
range of numbers (i.e., a scope) configured for a given network. You can set a
local network NTP server for XonTel PBX here too
Note: XonTel S200 PBX can be working as a DHCP server, but cannot be
regarded as a router.
Figure 5-3
www.sahabtec.com
Page19
XonTel S200 Administrator's Guide
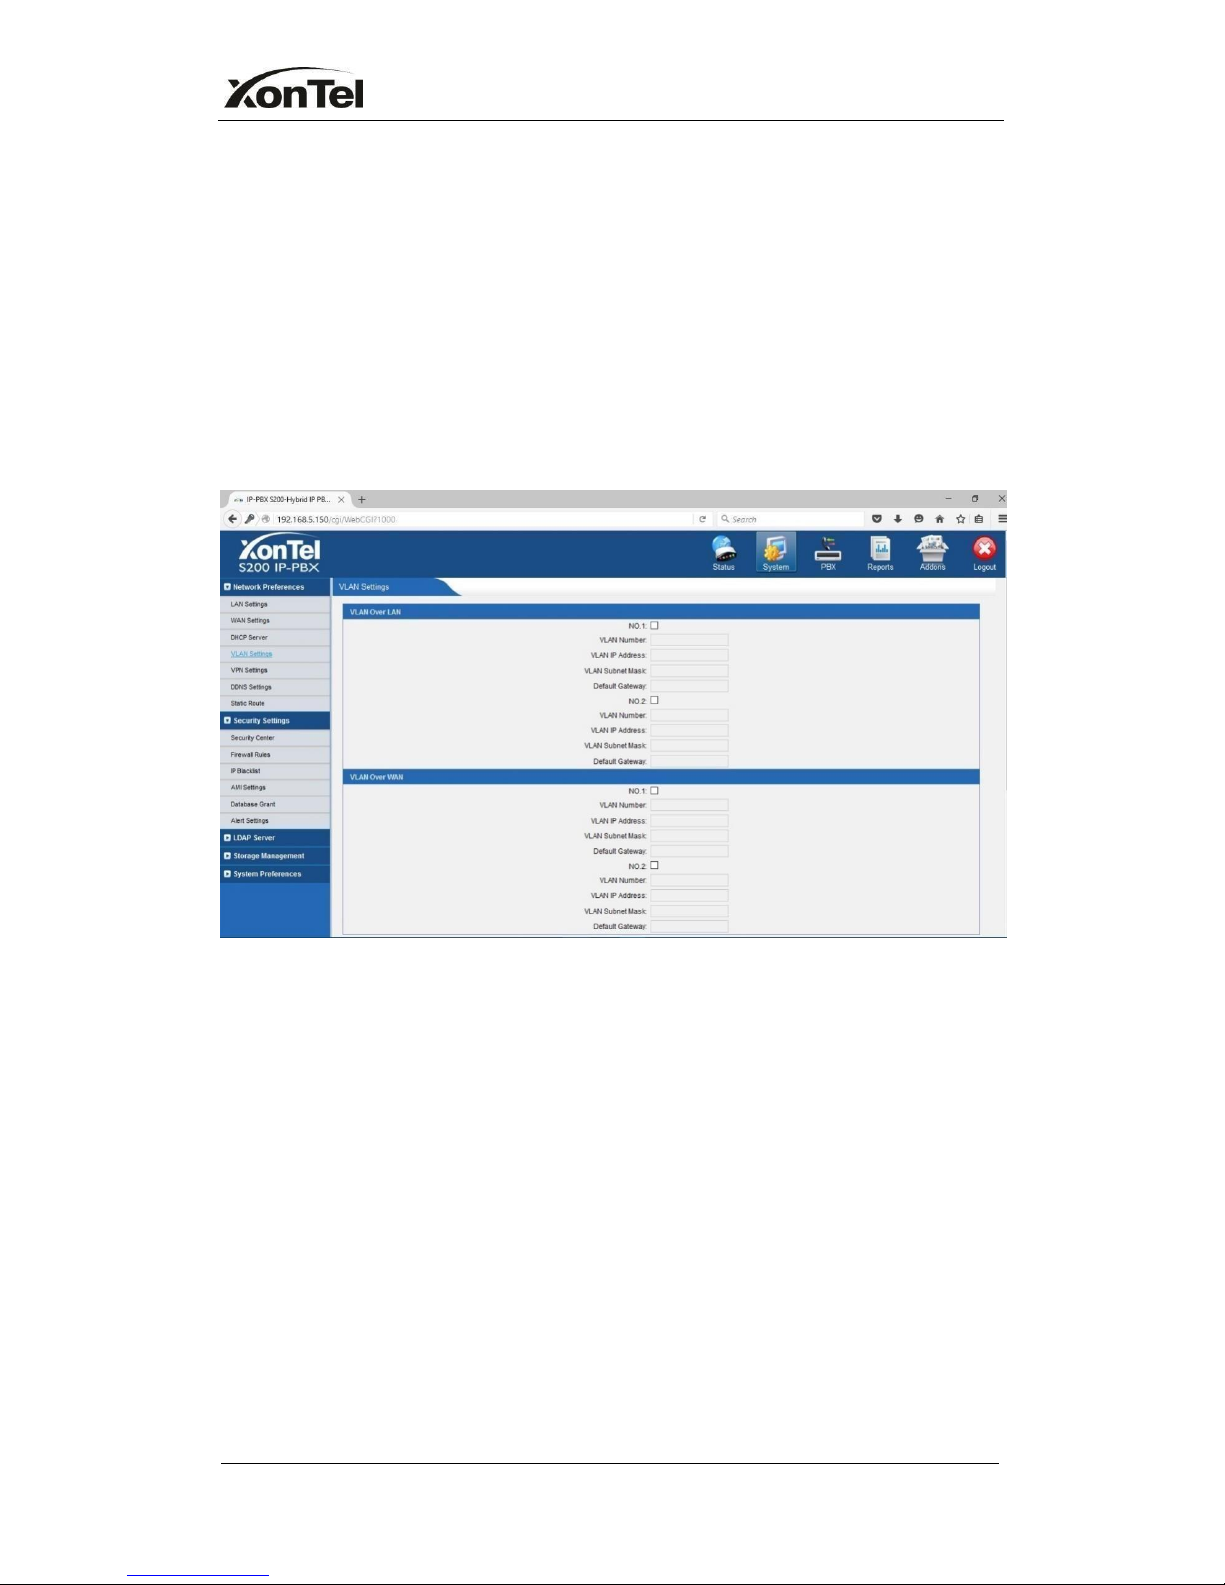
5.1.4 VLAN Settings
A VLAN (Virtual LAN) is a logical local area network (or LAN) that extends
beyond a single traditional LAN to a group of LAN segments, given specific
configurations.
Note:
XonTel PBX S200 is not the VLAN server, a 3-layer switch is still needed, please
configure the VLAN information there first, then input the details in XonTel PBX,
so that the packages via XonTel PBX will be added the VLAN label before
sending to that switch.
Figure 5-4
1) VLAN Over LAN
·
NO.1
Click the NO.1 you can edit the first VLAN over LAN.
·
VLAN Number
.The VLAN Number is a unique value you assign to each VLAN on a single device.
·
VLAN IP Address
Set the IP Address for XonTel PBX VLAN over LAN.
·
VLAN Subnet Mask
Set the Subnet Mask for XonTel PBX VLAN over LAN.

www.sahabtec.com
Page20
XonTel S200 Administrator's Guide
·
Default Gateway
Set the Default Gateway for XonTel PBX VLAN over LAN
·
NO.2
Click the NO.2 you can edit the first VLAN over LAN.
·
VLAN Number
.The VLAN Number is a unique value you assign to each VLAN on a single device.
·
VLAN IP Address
Set the IP Address for XonTel PBX VLAN over LAN.
·
VLAN Subnet Mask
Set the Subnet Mask for XonTel PBX VLAN over LAN.
·
Default Gateway
Set the Default Gateway for XonTel PBX VLAN over LAN.
2) VLAN Over WAN
·
NO.1
Click the NO.1 you can edit the first VLAN over WAN.
·
VLAN Number
.The VLAN Number is a unique value you assign to each VLAN on a single device.
·
VLAN IP Address
Set the IP Address for XonTel PBX VLAN over WAN.
·
VLAN Subnet Mask
Set the Subnet Mask for XonTel PBX VLAN over WAN.
·
Default Gateway
Set the Default Gateway for XonTel PBX VLAN over WAN.
·
NO.2
Click the NO.2 you can edit the first VLAN over WAN.
·
VLAN Number
.The VLAN Number is a unique value you assign to each VLAN on a single device.
·
VLAN IP Address
Set the IP Address for XonTel PBX VLAN over WAN.
·
VLAN Subnet Mask
www.sahabtec.com
Page21
XonTel S200 Administrator's Guide
Set the Subnet Mask for XonTel PBX VLAN over WAN.
·
Default Gateway
Set the Default Gateway for XonTel PBX VLAN over WAN.
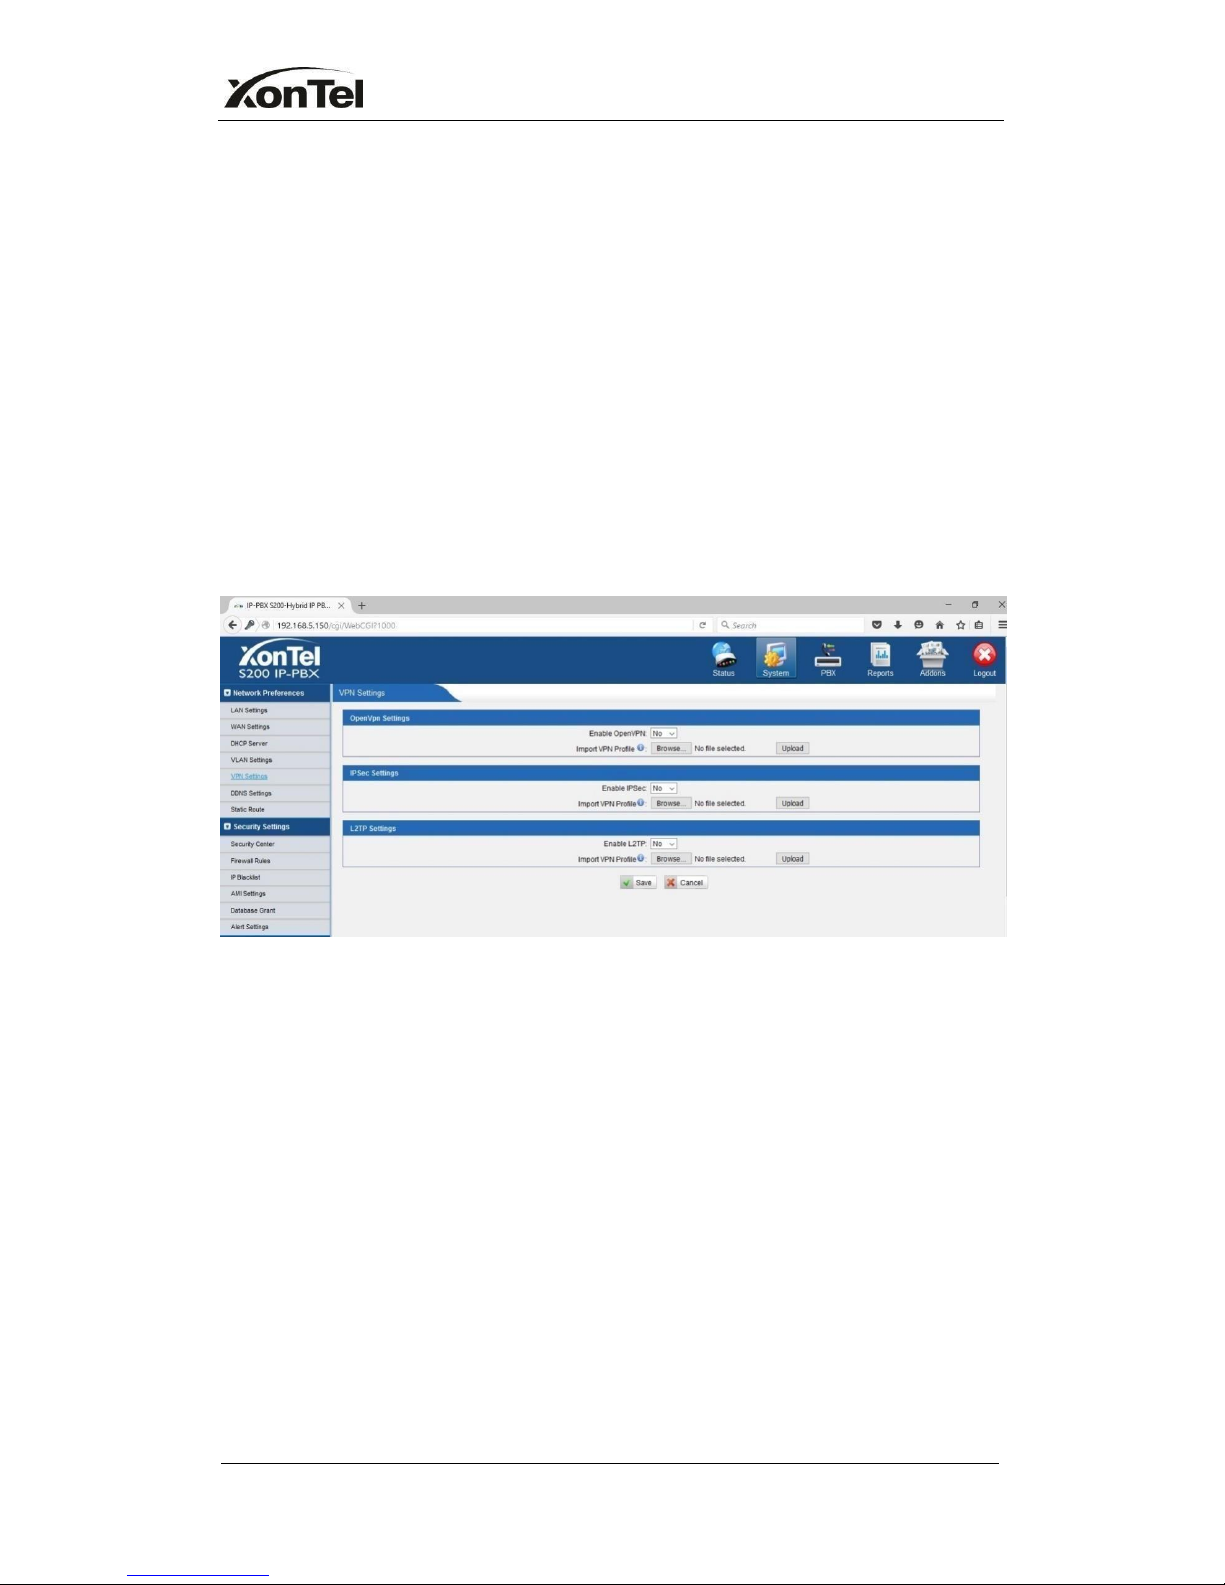
5.1.5 VPN Settings
A virtual private network (VPN) is a method of computer networking--typically
using the public internet--that allows users to privately share information
between remote locations, or between a remote location and a business' home
network. A VPN can provide secure information transport by authenticating
users, and encrypting data to prevent unauthorized persons from reading the
information transmitted. The VPN can be used to send any kind of network
traffic securely. XonTel PBX supports OPENVPN, IPSEC and L2TP.
Figure 5-5
·
Enable VPN
·
Import VPN Config
Import configuration file of OpenVPN.
Note: Don't configure 'user' and 'group' in the 'config' file.
You can get the config package from the OpenVPN provider.
www.sahabtec.com
Page22
XonTel S200 Administrator's Guide
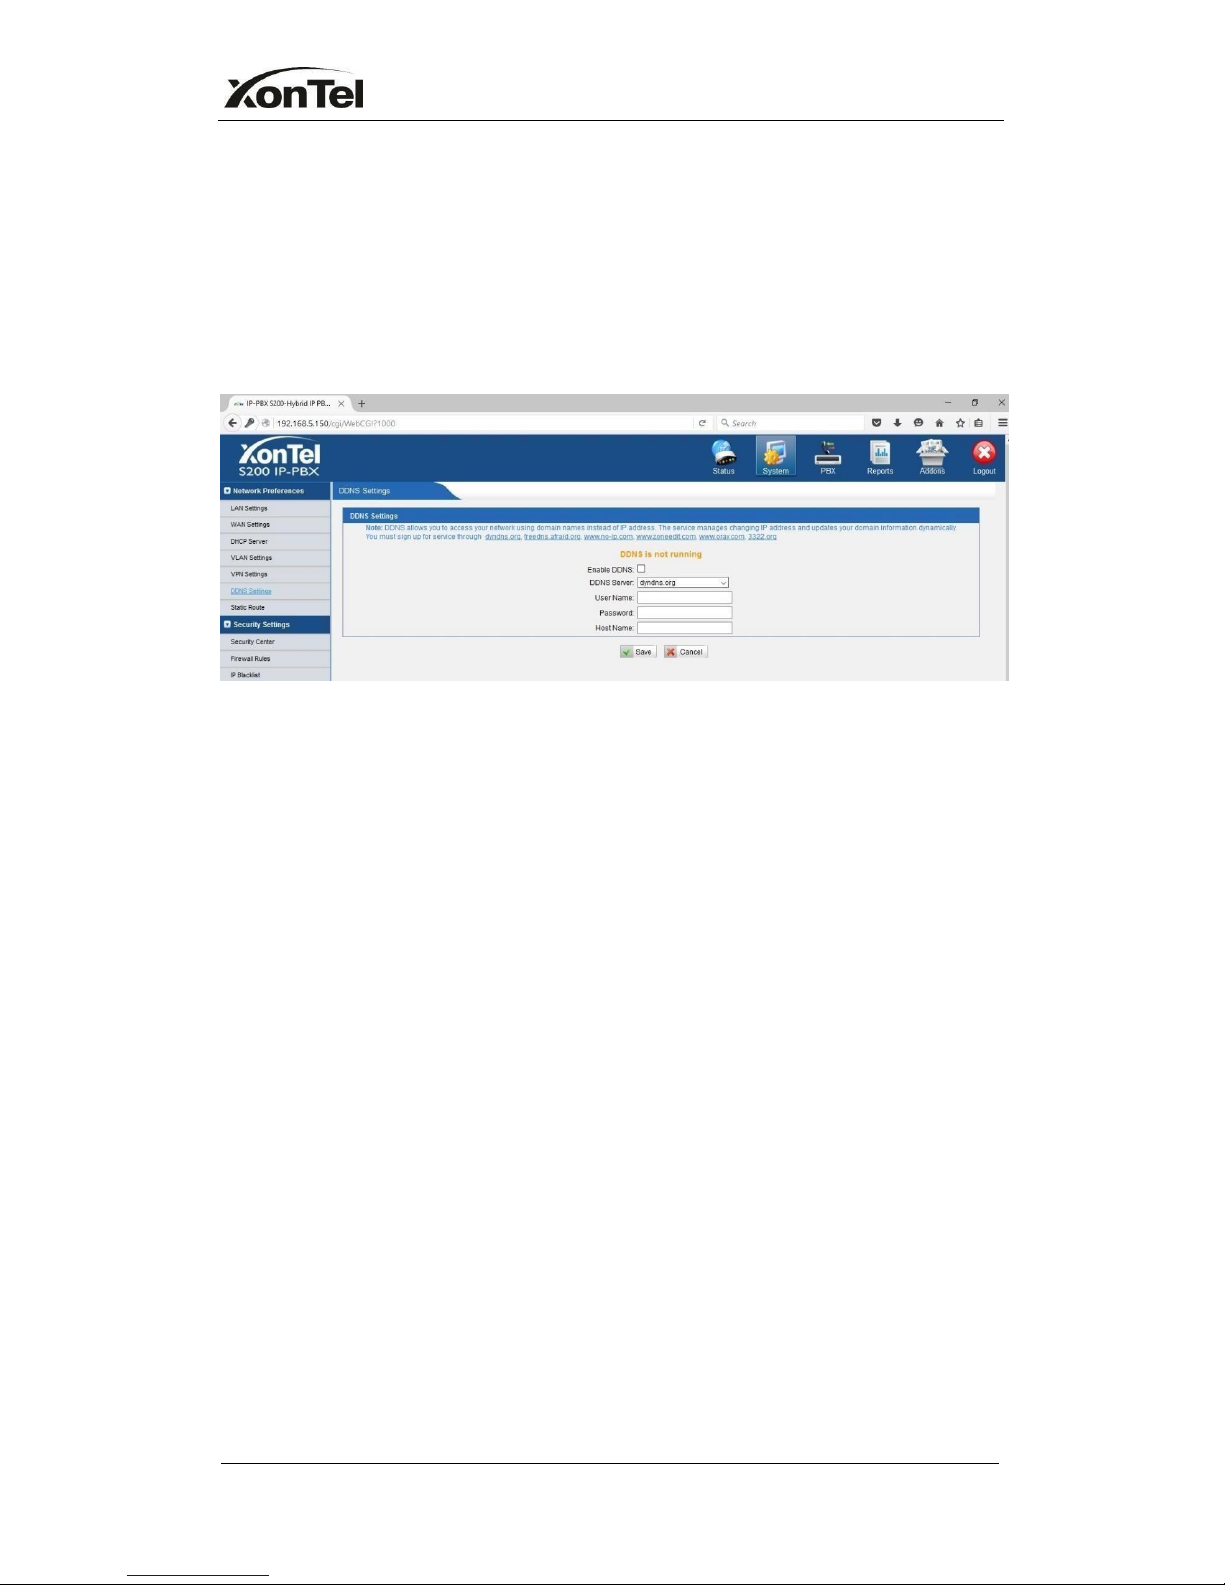
5.1.6 DDNS Settings
DDNS(Dynamic DNS) is a method / protocol / network service that provides the
capability for a networked device, such as a router or computer system using
the Internet Protocol Suite, to notify a Domain Name System (DNS) name
server to change, in real time, the active DNS configuration of its configured
hostnames, addresses or other information.
·
Enable DDNS
Figure 5-6
·
DDNS Server
Select the DDNS server you sign up for service.
·
User Name
User name the DDNS server provides you.
·
Password
User account’s password.
·
Host Name
Note:DDNS allows you to access your network using domain names instead of
IP address.The service manages changing IP address and updates your domain
information dynamically.You must sign up for service through dyndns.org,
freedns.afraid.org, www.no-ip.com, www.zoneedit.com
www.sahabtec.com
Page23
XonTel S200 Administrator's Guide
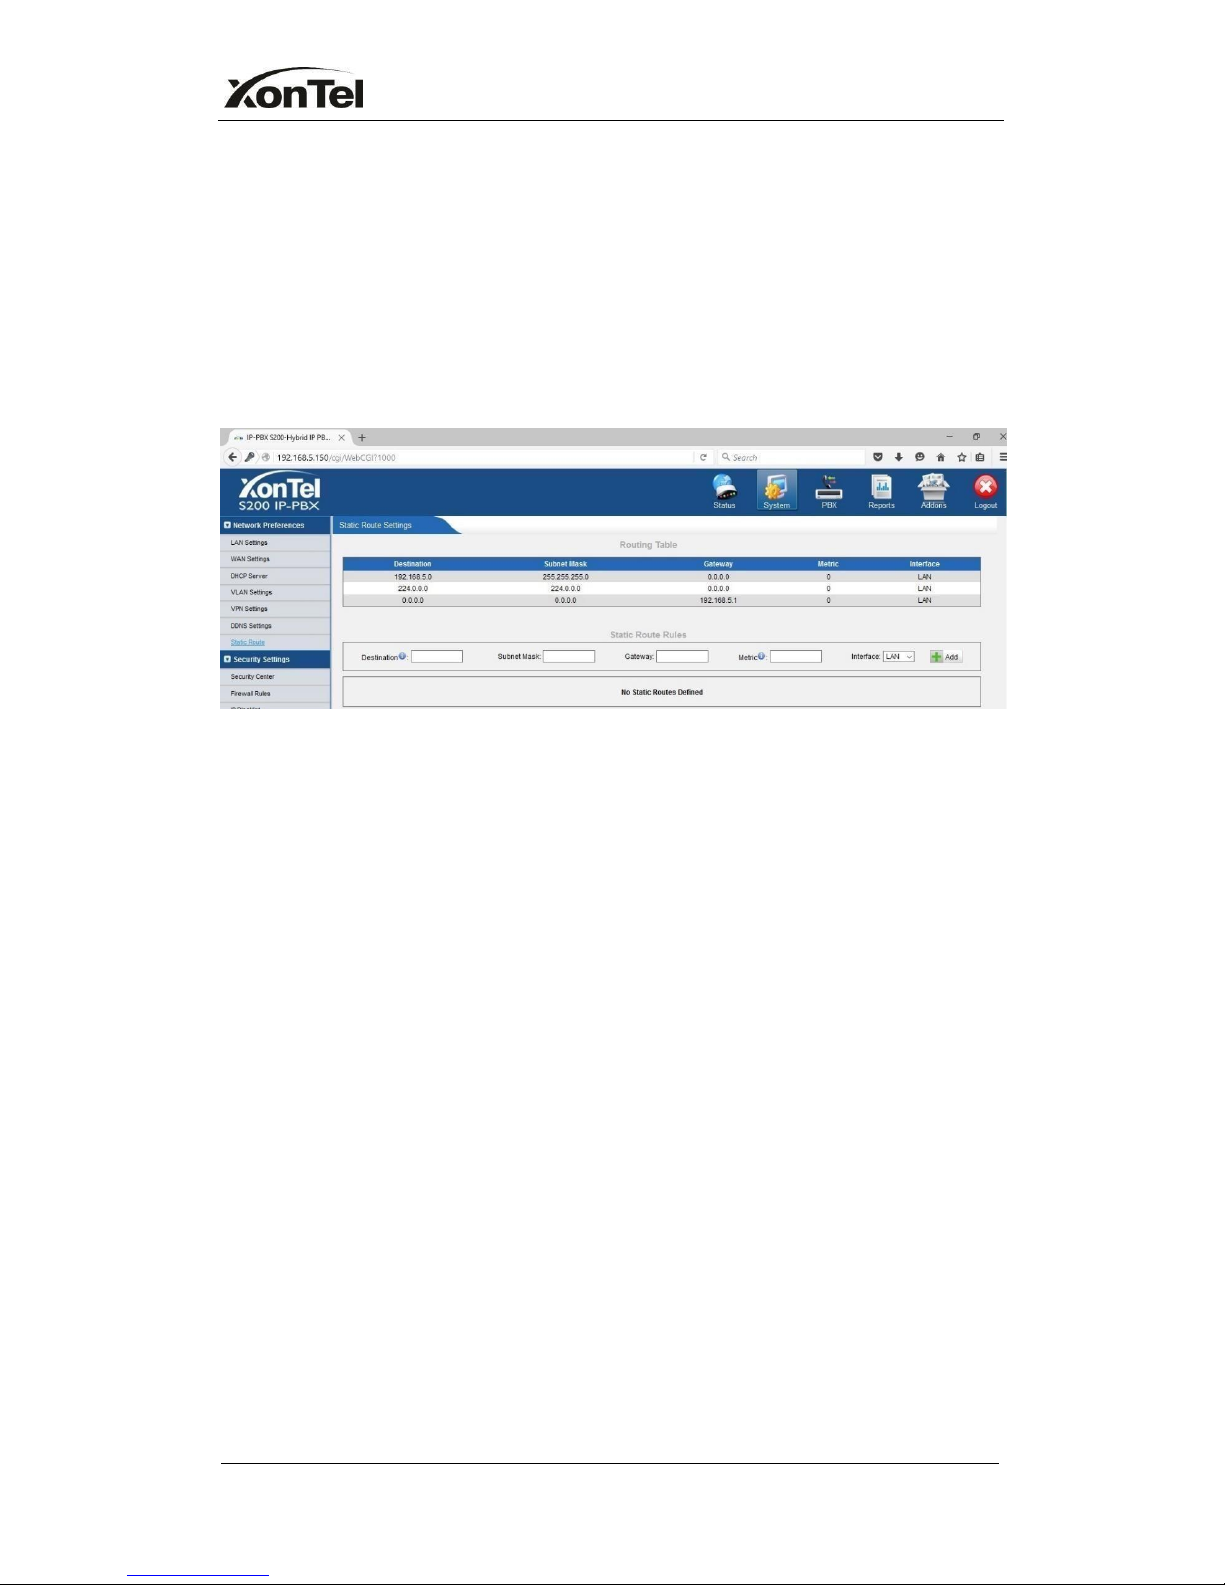
5.1.7 Static Route
XonTel PBX will have more than one internet connection in some situations but
it has only one default gateway. You will need to set some Static Route for
XonTel PBX to force it goes out through different gateway when access to
different internet.
The default gateway priority of XonTel PBX from high to low is OpenVPNWAN
portLAN port.
Figure 5-7
1) Route table
The current route rules of XonTel PBX
·
Destination
The destination network to be accessed to by XonTel PBX
·
Subnet Mask
Specify the destination network portion.
·
Gateway
Define which gateway XonTel PBX will go through when access to the
destination network.
·
Metric
The cost of a route is calculated by using what are called routing metric. Routing
metrics are assigned to routes by routing protocols to provide measurable
statistic which can be used to judge how useful (how low cost) a route is.
·
Interface
Define which internet port to go through.
2) Static Route Rules
You can add new static route rules here.
www.sahabtec.com
Page24
XonTel S200 Administrator's Guide
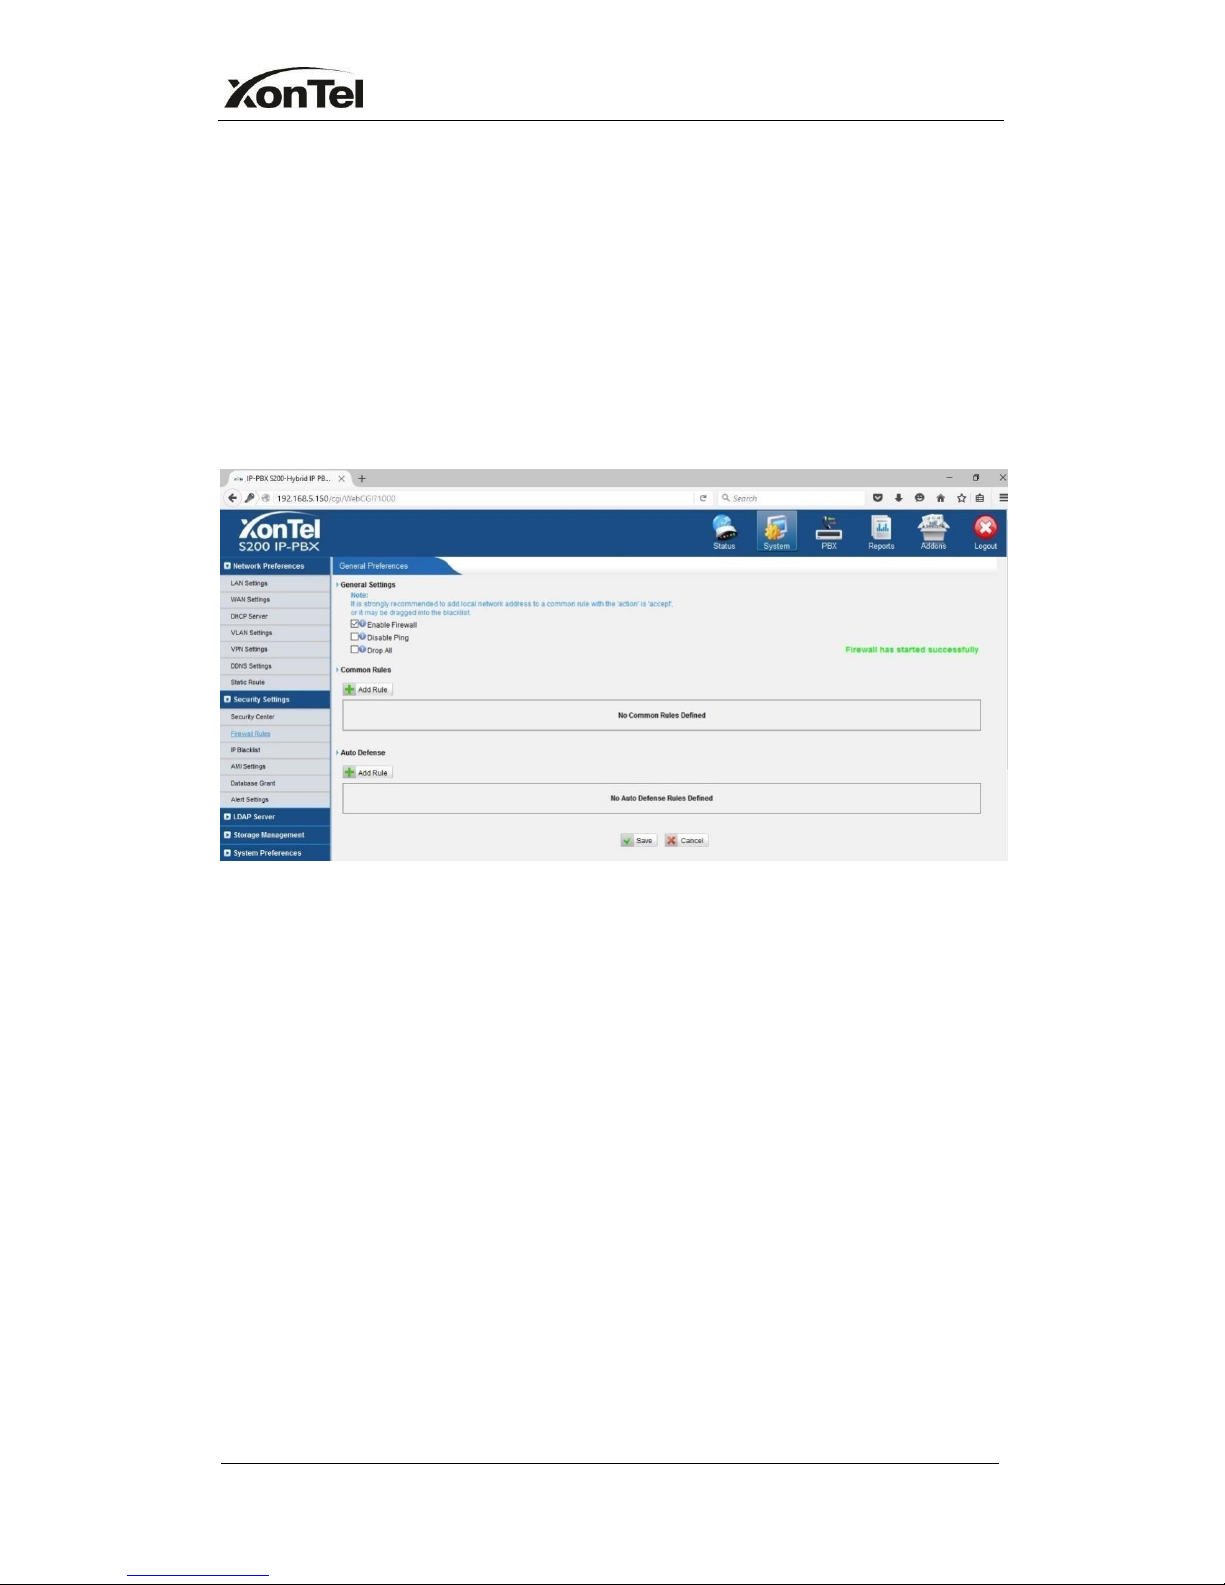
5.2 Firewall Settings
Firewalls are used to prevent unauthorized Internet users from accessing
private networks connected to the Internet, especially intranets. All messages
entering or leaving the intranet pass through the firewall, which examines each
message and blocks those that do not meet the specified security criteria.
5.2.1 Firewall Rules
Figure 5-8
1) General Settings
·
Enable Firewall
Enable the firewall to protect the device. You should reboot the device to make
the firewall run successfully.
·
Disable Ping
Enable this item, net ping from remote hosts will be dropped.
·
Drop All
When you enable ‘Drop All’ feature, system will drop all packets or connection
from other hosts if there are no other rules defined. To avoid locking the devices,
at least one ‘TCP’ accept common rule must be created for port used for SSH
access, port used for HTTP access and port sued for CGI access.
2) Common Rules
There is no default rule inside, you can create them as required.
www.sahabtec.com
Page25
XonTel S200 Administrator's Guide
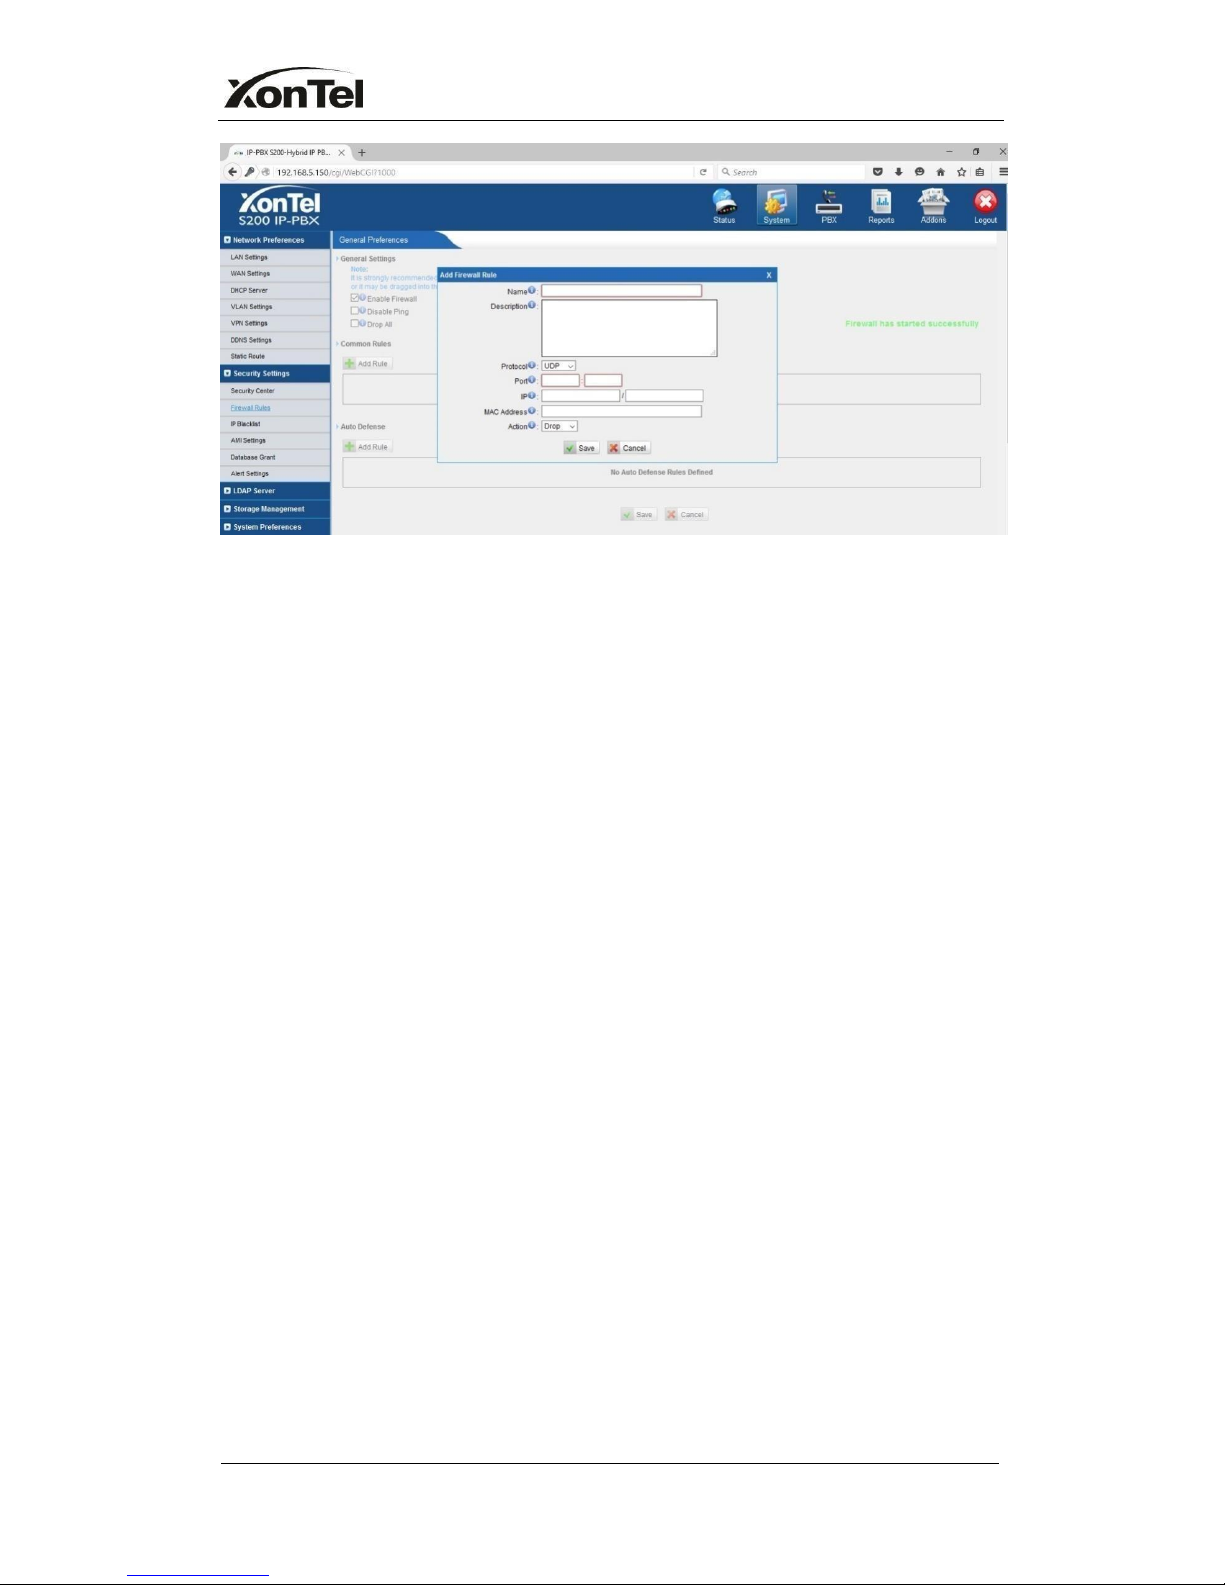
Figure 5-9
·
Name
A name for this rule, e.g. ‘HTTP’.
·
Description
Simple description for this rule. E.g.: Accept the specific host to access the web
interface for configuration.
·
Protocol
The protocols for this rule.
·
Port
Initial port should be on the left and end port should be on the right.
The end port must be equal to or greater than start port.
·
IP
The IP address for this rule. The format of IP address is: IP/mask
Ex:192.168.5.100/255.255.255.255forIP 192.168.5.100
Ex:216.207.245.47/255.255.255.255 for IP 216.207.245.47
Ex:192.168.5.0/255.255.255.0 for IP from 192.168.5.0 to 192.168.5.255 .
·
MAC Address
The format of MAC Address is XX:XX:XX:XX:XX:XX, X means 0~9 or A~F in hex,
the A~F are not case sensitive.
Note: The MAC address will be changed when it’s remotely device, so it will
not be working to filter using MAC for remote devices.
·
Action
Accept: Accept the access from remote hosts.
www.sahabtec.com
Page26
XonTel S200 Administrator's Guide
Drop: Drop the access from remote hosts.
Ignore: Ignore the access.
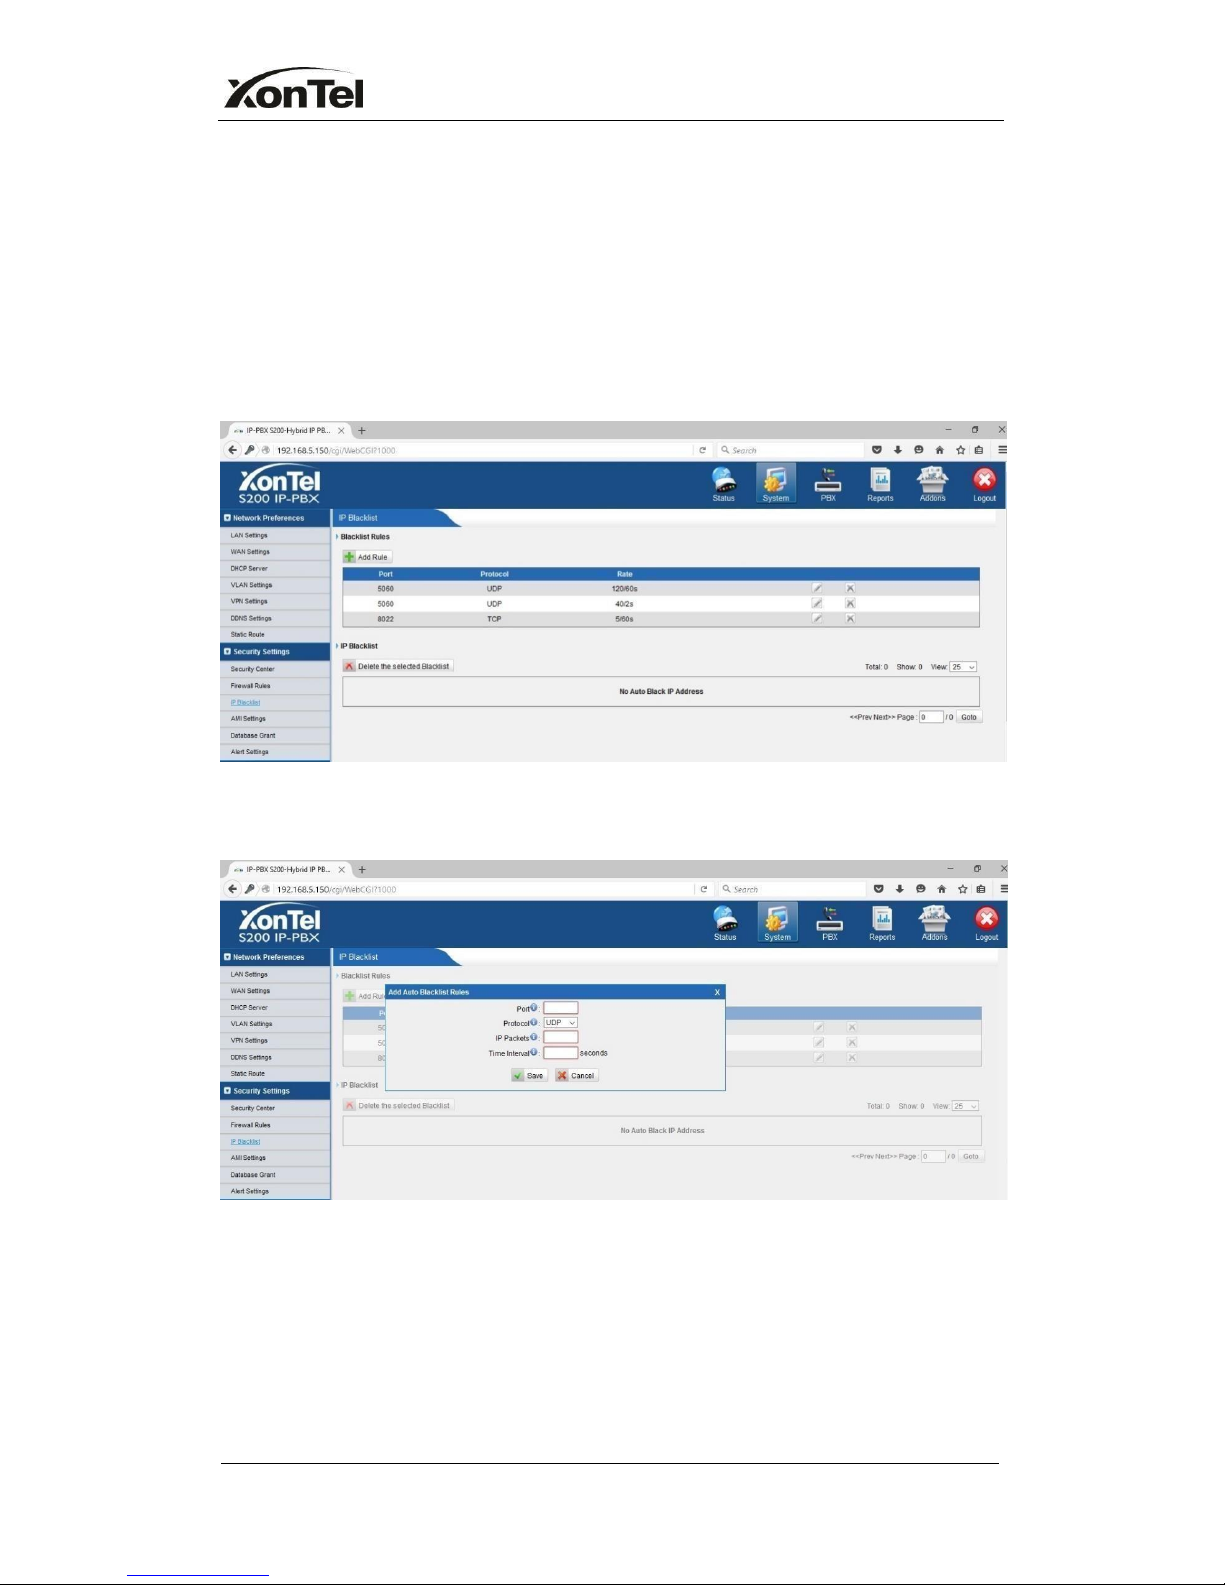
5.2.2 IP blacklist
You can set some packets accept speed rules here. When a IP address which
hasn’t been accepted in common rules sends packets faster than the allowed
speed, it will be set as black IP address and blocked automatically.
1) Blacklist rules
Figure 5-10
We can add the rules for IP blacklist rate as your demand
Figure 5-11
·
Port
Auto defense port
·
Protocol
Auto defense protocol.TCP or UDP.
·
IP Packets
www.sahabtec.com
Page27
XonTel S200 Administrator's Guide
Allowed IP packets number in the specific time interval.
·
Time interval
The time interval to receive IP packets. For example, IP packets 90, time
interval 60 means 90 IP packets are allowed in 60 seconds.
2) IP blacklist
The blocked IP address will display here, you can edit or delete it as your wish.
5.3 System Preference
In this page, we can set other system preference, like the password for admin
account, system date and time, firmware update, hot standby, backup and
restore, reset and reboot.
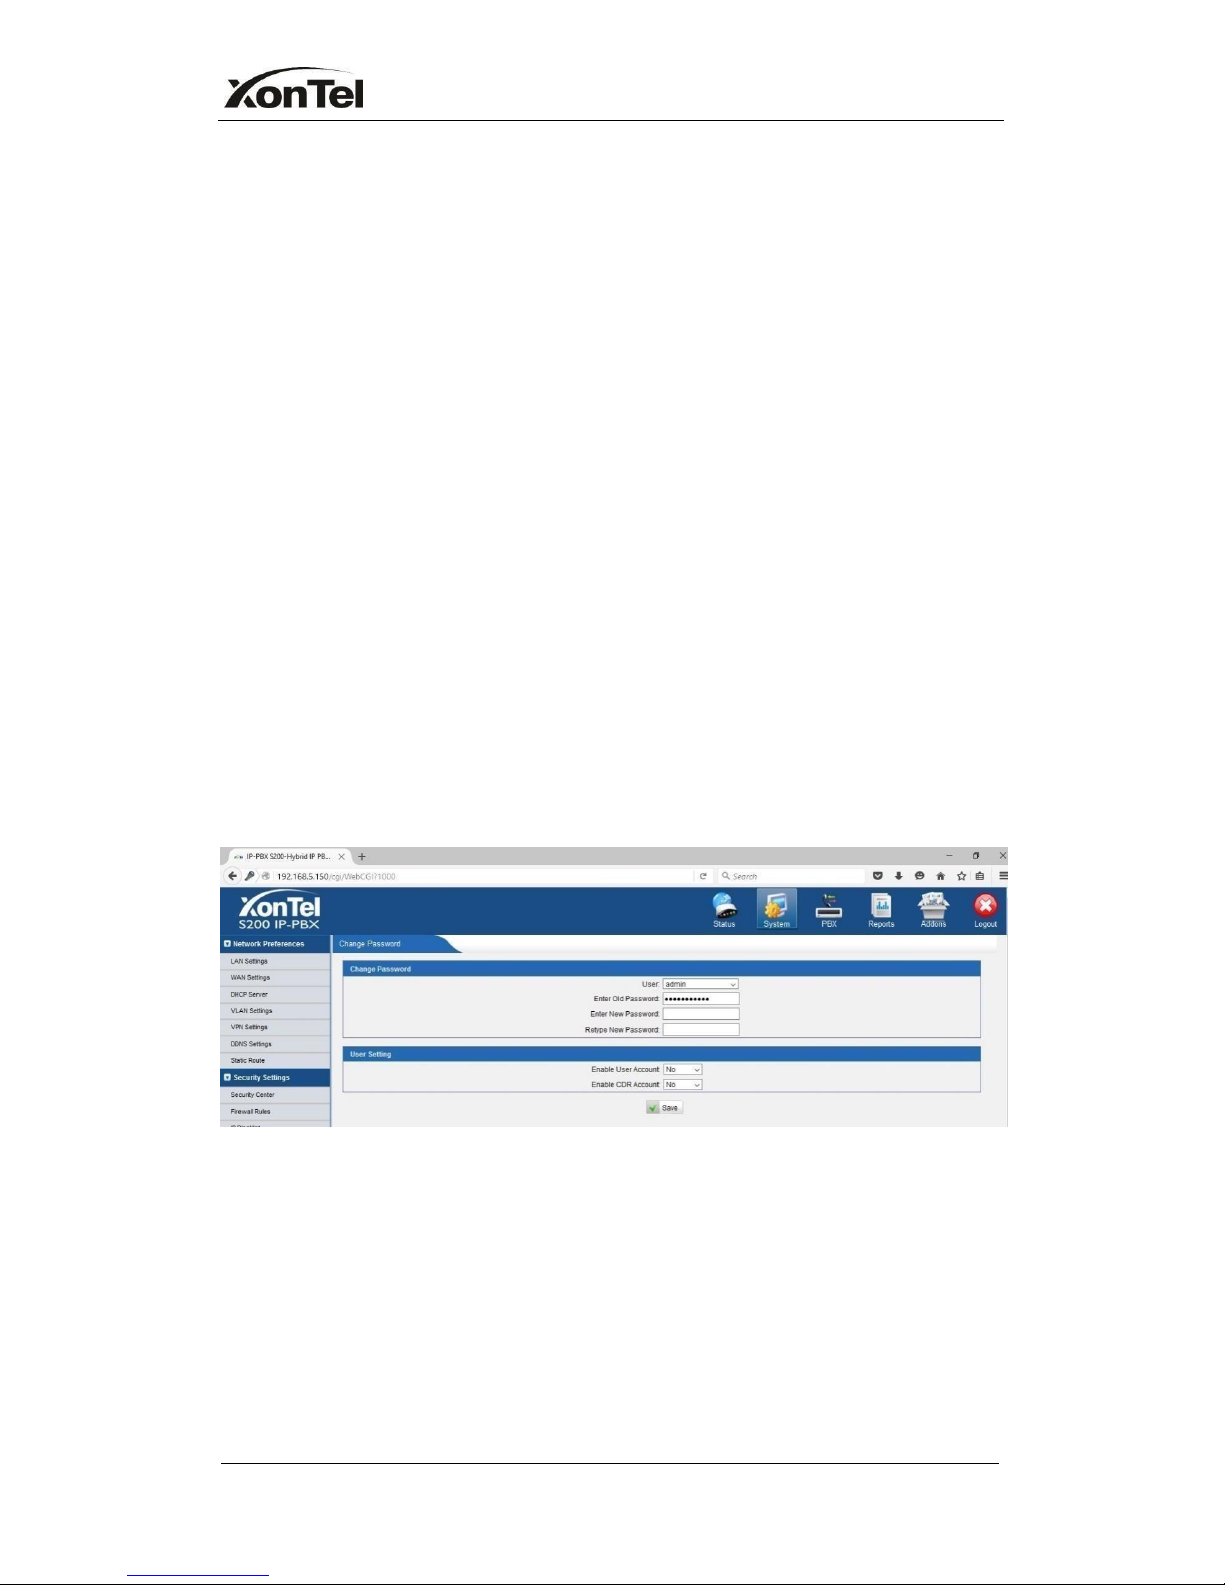
5.3.1 Password Settings
The default password for account admin is ‘xontel’. To change the password,
enter the new password and click update. The system will then prompt you
re- login using your new password, also the default password for CDR account
and User account is ‘xontel’.
Figure 5-12
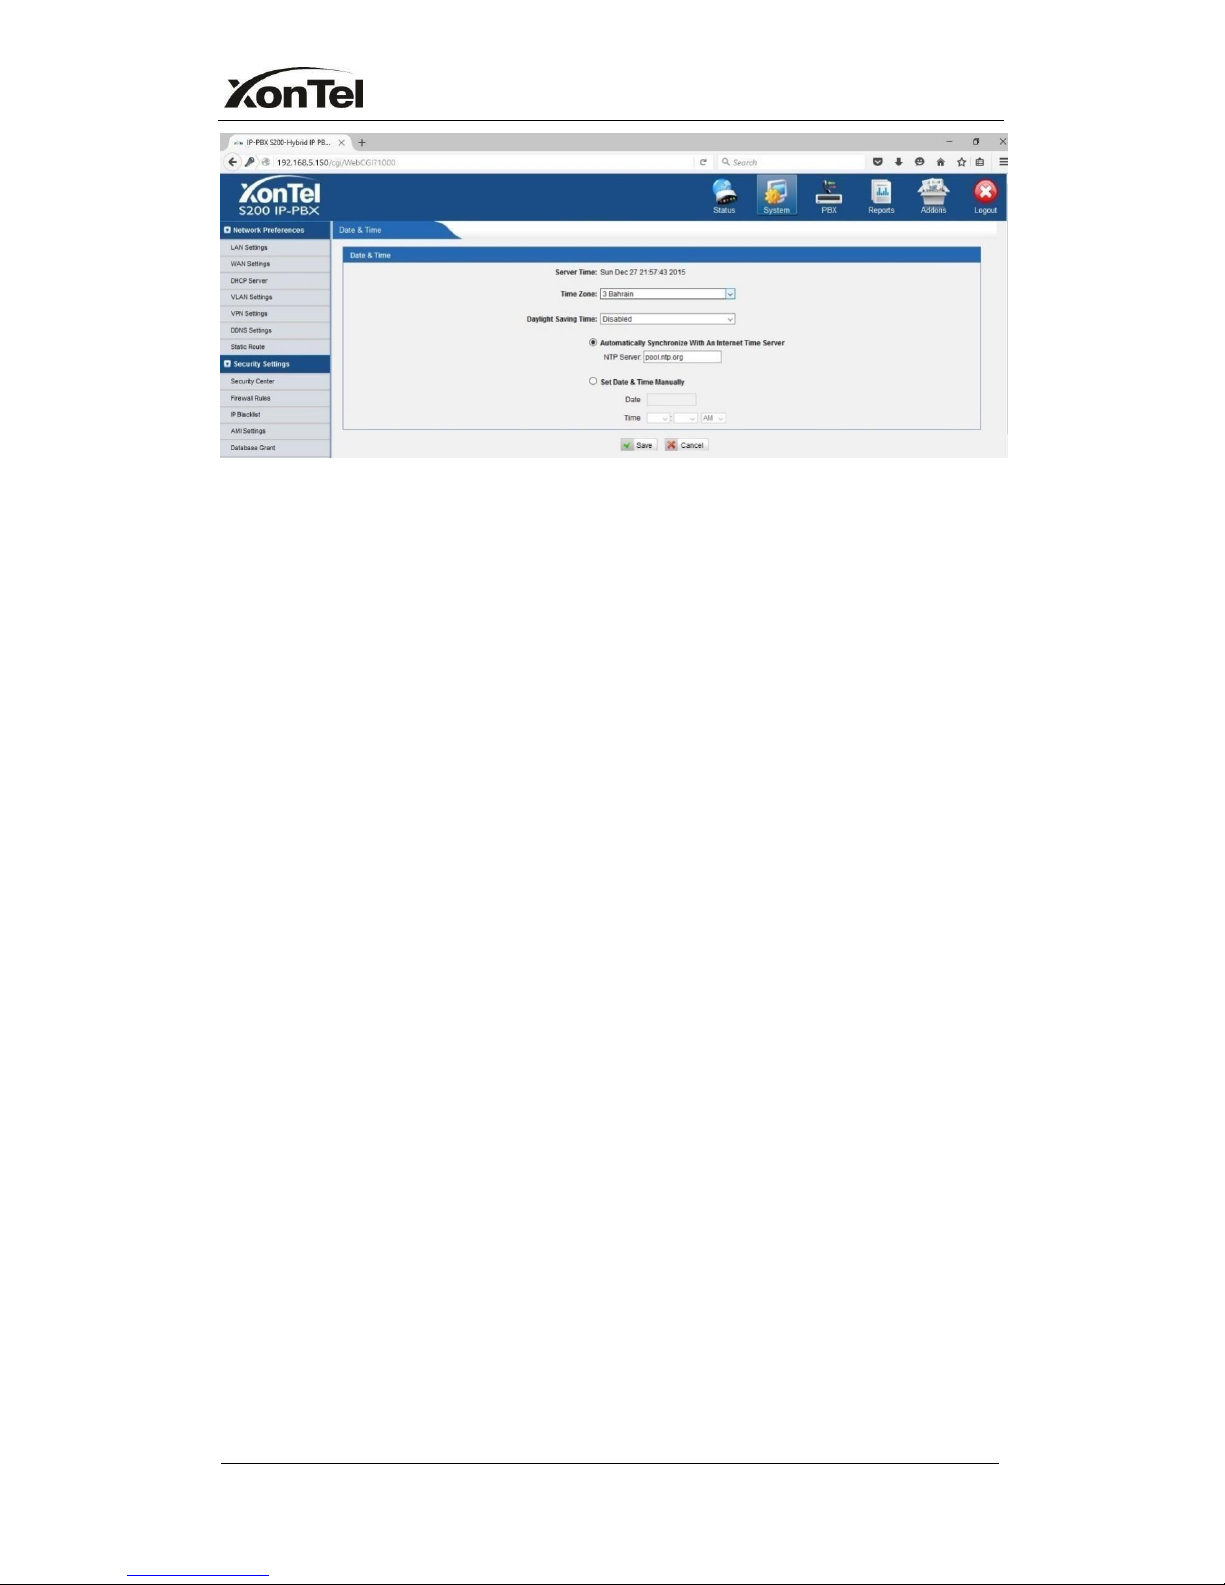
5.3.2 Date and Time
Set the date and time for XonTel PBX.
www.sahabtec.com
Page28
XonTel S200 Administrator's Guide
Figure 5-13
·
Time Zone
You can choose your time zone here.
·
Daylight Saving Time
Set the mode to Automatic or disabled
·
Automatically Synchronize With an Internet Time Server
Input the NTP server so that XonTel PBX will update the time automatically
·
Set Date & Time Manually
You can set the time to your local right time manually here
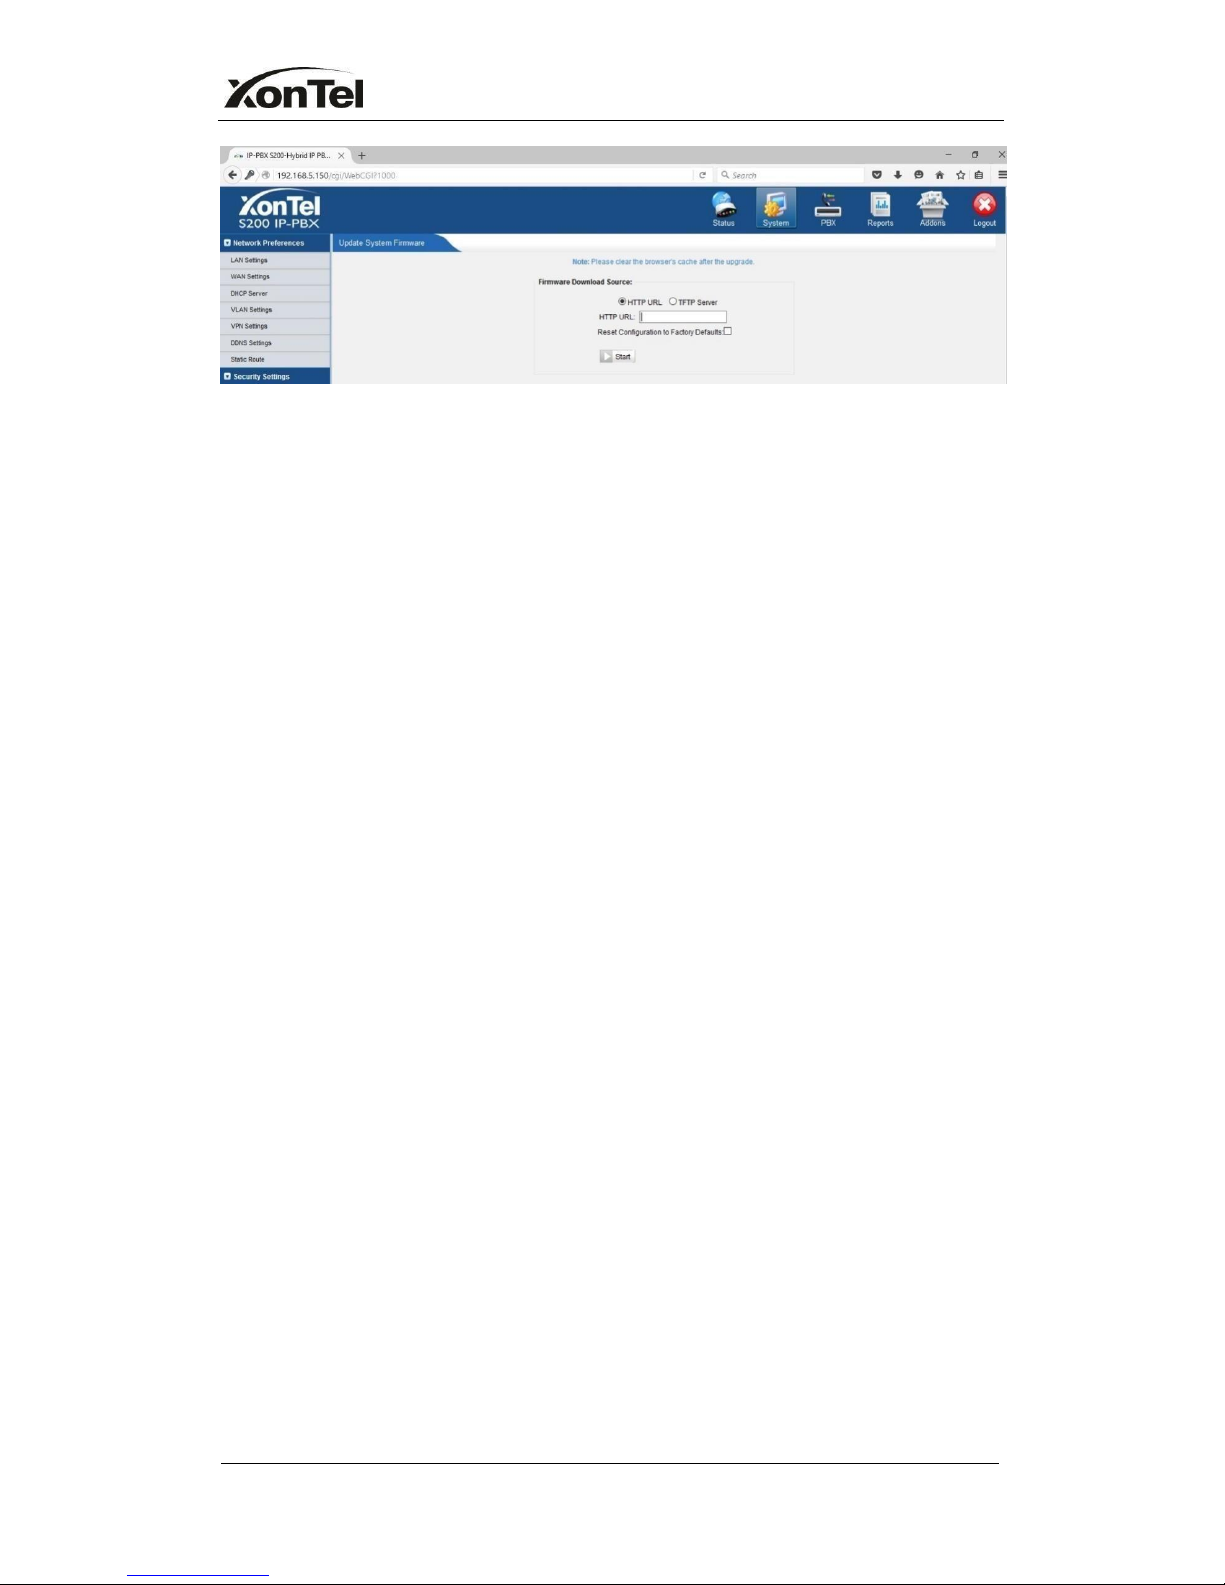
5.3.3 Firmware Update
Upgrading of the firmware is possible through the Administrator web interface
using a TFTP Server or an HTTP URL.
Enter your TFTP Server IP address and firmware file location, then click start to
update the firmware
Note:
1. If enabled ‘Reset configuration to Factory Defaults’, System will restore to
factory default settings.
2. When update the firmware, please don’t turn off the power. Or the system will
get damaged.
www.sahabtec.com
Page29
XonTel S200 Administrator's Guide
Figure 5-14
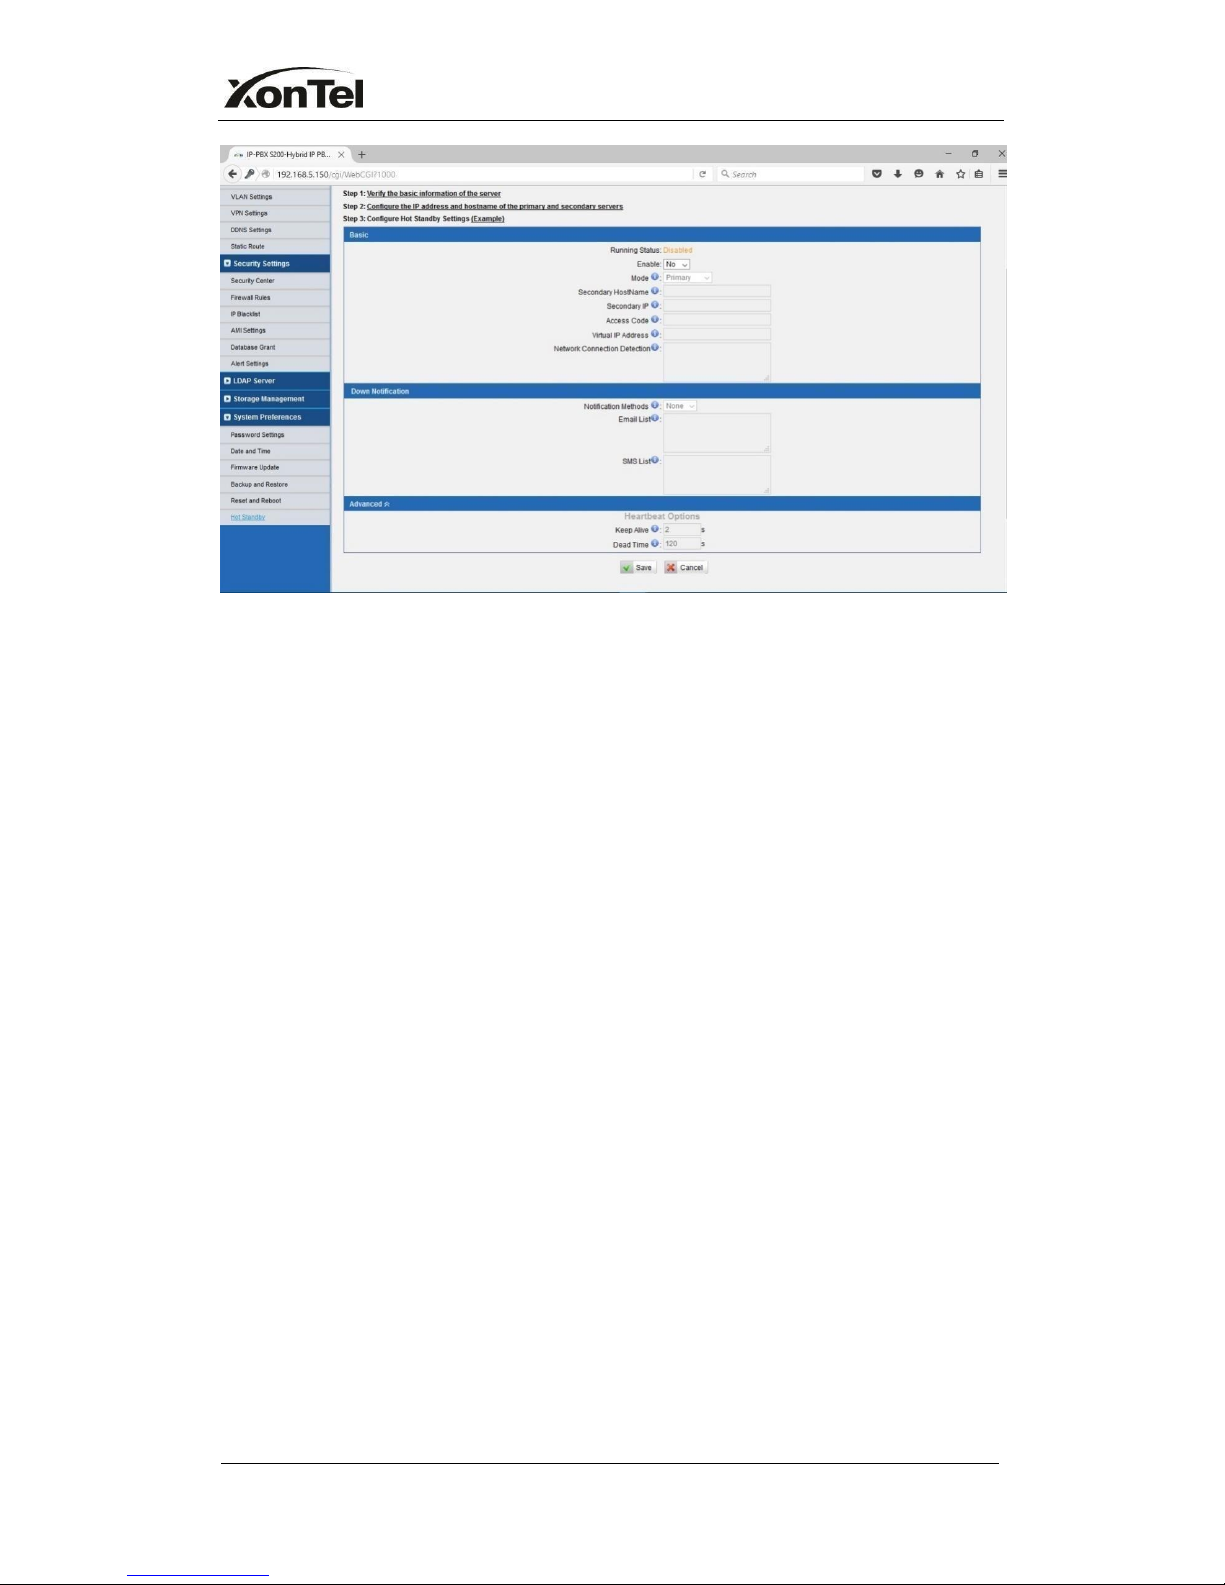
5.3.4 Hot Standby
Redundancy is achieved by using duplicate hardware and software installations
and synchronizing data and operating state.Redundancy assures smooth
operation even if a system goes down. Essentially a duplicate backup system
takes over with virtual no loss of service.This technique assures absolute
reliability no matter what failure occurs. In mission critical installations,
redundancy is a way to address possibility of any failure.
Note 1: Before enabling the Host Standby feature, please make sure that the
two servers in the failover pair are the same model, own the same modules
installed in the same slots, the same hardware configurations and firmware
version.
Note 2: Please configure the primary server first and configure the secondary
server only after the running status of primary server becomes “active”.
Note 3: The virtual IP address inputted in this page will be the one used for
registering in each IP phone.
Note 4: Before configuring the Email list in this page, please configure the
‘voicemail settings’ in “PBXBasic settings”, and make sure the SMTP test
successfully.
Note 5: Before configure the SMS list; please make sure the SIM and
GSM/UMTS modules are installed well
www.sahabtec.com
Page30
XonTel S200 Administrator's Guide
Figure 5-15
Mode: Primary means the main unit; Secondary means the standby unit;
Secondary/Primary Hostname: If this unit mode is primary, then you need
to input the hostname of standby unit; vise versa, if this unit is selected as
secondary, then the hostname of primary unit is required. In brief, you need to
input each other’s host name on this field.
IP: You need to input each other’s IP address on this field.
Access code: To make an identification number to verify each other. The
number must be the same to both units.
Virtual IP address: To fill in a virtual IP address includes mask, which is
always points to the currently activated unit. Customer can register IP phones
through this virtual IP address. Please make sure the virtual IP add includes
mask is the same on both units but different from their former IP address.
Network Connection Detection Generally it requires the IP address of the
router or gateway that connects both units. XonTel PBX will connect another
unit through this IP address.
Down Notification The way of informing customer that the system down.
Keep Alive: Every 2 seconds, a package will be sent from one unit to
another, which can test whether they are working properly.
Dead Time: The default setting is 120 seconds. If there’s no response within
120s after one receiving a package from the other, then the normal working unit
will figure the other unit is dead and send an email or SMS to report the failure.
Disk Synchronization: It works for synchronizing the data on hard disk only,
such as the call recording files and CDR files saved in disk. The configurations
in XonTel PBX will not be influenced by this feature. Two options are
available: timing synchronization and real-time synchronization.
 Loading...