

XONTEL XT- 60 PBX, XT-120PBX Administrator's Manual
XonTel XT-60/XT-120 PBX’s
Administrator Guide

2
Copyright
Copyright 2006-2017 XonTel All rights reserved.
No parts of this publication may be reproduced or transmitted in any form or by any means, electronic
or mechanical, photocopying, recording, or otherwise, for any purpose, without the express written
permission of XonTel Under the law, reproducing includes translating into another language or format.
Declaration of Conformity
Hereby, XonTel declares that XonTel XT-60/XT-120 IP PBXs is in
conformity with the essential requirements and other relevant provisions of
the CE, FCC.
Warranty
The information in this document is subject to change without notice.
XonTel makes no warranty of any kind with regard to this guide, including, but not limited to, the
implied warranties of merchantability and fitness for a particular purpose. XonTel shall not be liable for
errors contained herein nor for incidental or consequential damages in connection with the furnishing,
performance or use of this guide.
WEEE Warning
In accordance with the requirements of council directive 2002/96/EC on Waste of Electrical
and Electronic Equipment (WEEE), ensure that at end-of-life you separate this product
from other waste and scrap and deliver to the WEEE collection system in your country for
recycling.

3
Contents
About This Guide ....................................................................................................................................... 5
XonTel XT-60/XT-120 Overview ................................................................................................................. 6
Introduction ............................................................................................................................................... 7
Feature Highlights .................................................................................................................................... 7
Hardware Overview .................................................................................................................................. 8
LED Indicators and Ports ......................................................................................................................... 9
Getting Started ......................................................................................................................................... 11
Accessing Web GUI ................................................................................................................................ 11
Web Configuration Desktop .................................................................................................................... 12
Make Your First Call ................................................................................................................................ 14
System Settings ....................................................................................................................................... 15
Network................................................................................................................................................... 15
Security ................................................................................................................................................... 20
User Permission ..................................................................................................................................... 26
Date & Time ............................................................................................................................................ 27
Email ....................................................................................................................................................... 28
Storage ................................................................................................................................................... 28
Extensions ................................................................................................................................................ 32
Add New Extension ................................................................................................................................ 32
Add Bulk Extensions ............................................................................................................................... 37
Search and Edit Extensions ................................................................................................................... 38
Importing and Exporting Extensions ...................................................................................................... 38
Extension Group ..................................................................................................................................... 41
Trunks ...................................................................................................................................................................... 42
FXO Trunk .............................................................................................................................................. 42
BRI Trunk ................................................................................................................................................ 44
GSM/3G Trunk ........................................................................................................................................ 47
VoIP Trunk .............................................................................................................................................. 48
Call Control ............................................................................................................................................... 54
Inbound Routes ...................................................................................................................................... 54
Outbound Routes ................................................................................................................................... 57
Auto CLIP Routes ................................................................................................................................... 59
SLA ......................................................................................................................................................... 60
Time Conditions ...................................................................................................................................... 62
Call Features ............................................................................................................................................. 64

4
IVR .......................................................................................................................................................... 64
Ring Group ............................................................................................................................................. 65
Queue ..................................................................................................................................................... 66
Conference ............................................................................................................................................. 69
Pickup Group .......................................................................................................................................... 70
Speed Dial .............................................................................................................................................. 71
Callback .................................................................................................................................................. 73
DISA ....................................................................................................................................................... 74
Blacklist/Whitelist .................................................................................................................................... 75
Pin List .................................................................................................................................................... 77
Paging/Intercom ..................................................................................................................................... 77
SMS ........................................................................................................................................................ 78
Voice Prompts ........................................................................................................................................... 80
Prompt Preference ................................................................................................................................. 80
System Prompt ....................................................................................................................................... 81
Music on Hold ......................................................................................................................................... 82
Custom Prompt ....................................................................................................................................... 83
General ...................................................................................................................................................... 84
Preference .............................................................................................................................................. 84
Feature Code .......................................................................................................................................... 85
Voicemail ................................................................................................................................................ 88
SIP .......................................................................................................................................................... 89
IAX .......................................................................................................................................................... 96
Recording ................................................................................................................................................ 101
Event Center ........................................................................................................................................... 102
Event Settings....................................................................................................................................... 102
Notification Contacts ............................................................................................................................. 102
Event Log .............................................................................................................................................. 103
CDR and Recording ............................................................................................................................... 105
PBX Monitor ............................................................................................................................................ 106
Extension Status ................................................................................................................................... 106
Trunk Status ......................................................................................................................................... 107
Concurrent Call ..................................................................................................................................... 109
Conference ........................................................................................................................................... 109
Resource Monitor .................................................................................................................................... 110
Information ............................................................................................................................................. 110
Network.................................................................................................................................................. 110
Performance .......................................................................................................................................... 110
Storage Usage ....................................................................................................................................... 112

5
Maintenance ............................................................................................................................................. 113
Upgrade ................................................................................................................................................. 113
Backup and Restore .............................................................................................................................. 115
Reset and Reboot .................................................................................................................................. 117
System Log ............................................................................................................................................ 117
Operation Log ........................................................................................................................................ 117
Troubleshooting ..................................................................................................................................... 118
App Center ........................................................................................................................................... 122
6
About This Guide
Thanks for choosing XonTel VoIP PBX. This guide is intended for administrators who need to prepare
for, configure and operate XonTel XT-60/XT-120 IP PBX. In this guide, we describe every detail on
the functionality and configuration of the PBX. We begin by assuming that you are interested in
XonTel VoIP PBX and familiar with networking and other IT disciplines.
Products Covered
This guide explains how to configure the following products:
XonTel XT-60 PBX
XonTel XT-120 PBX
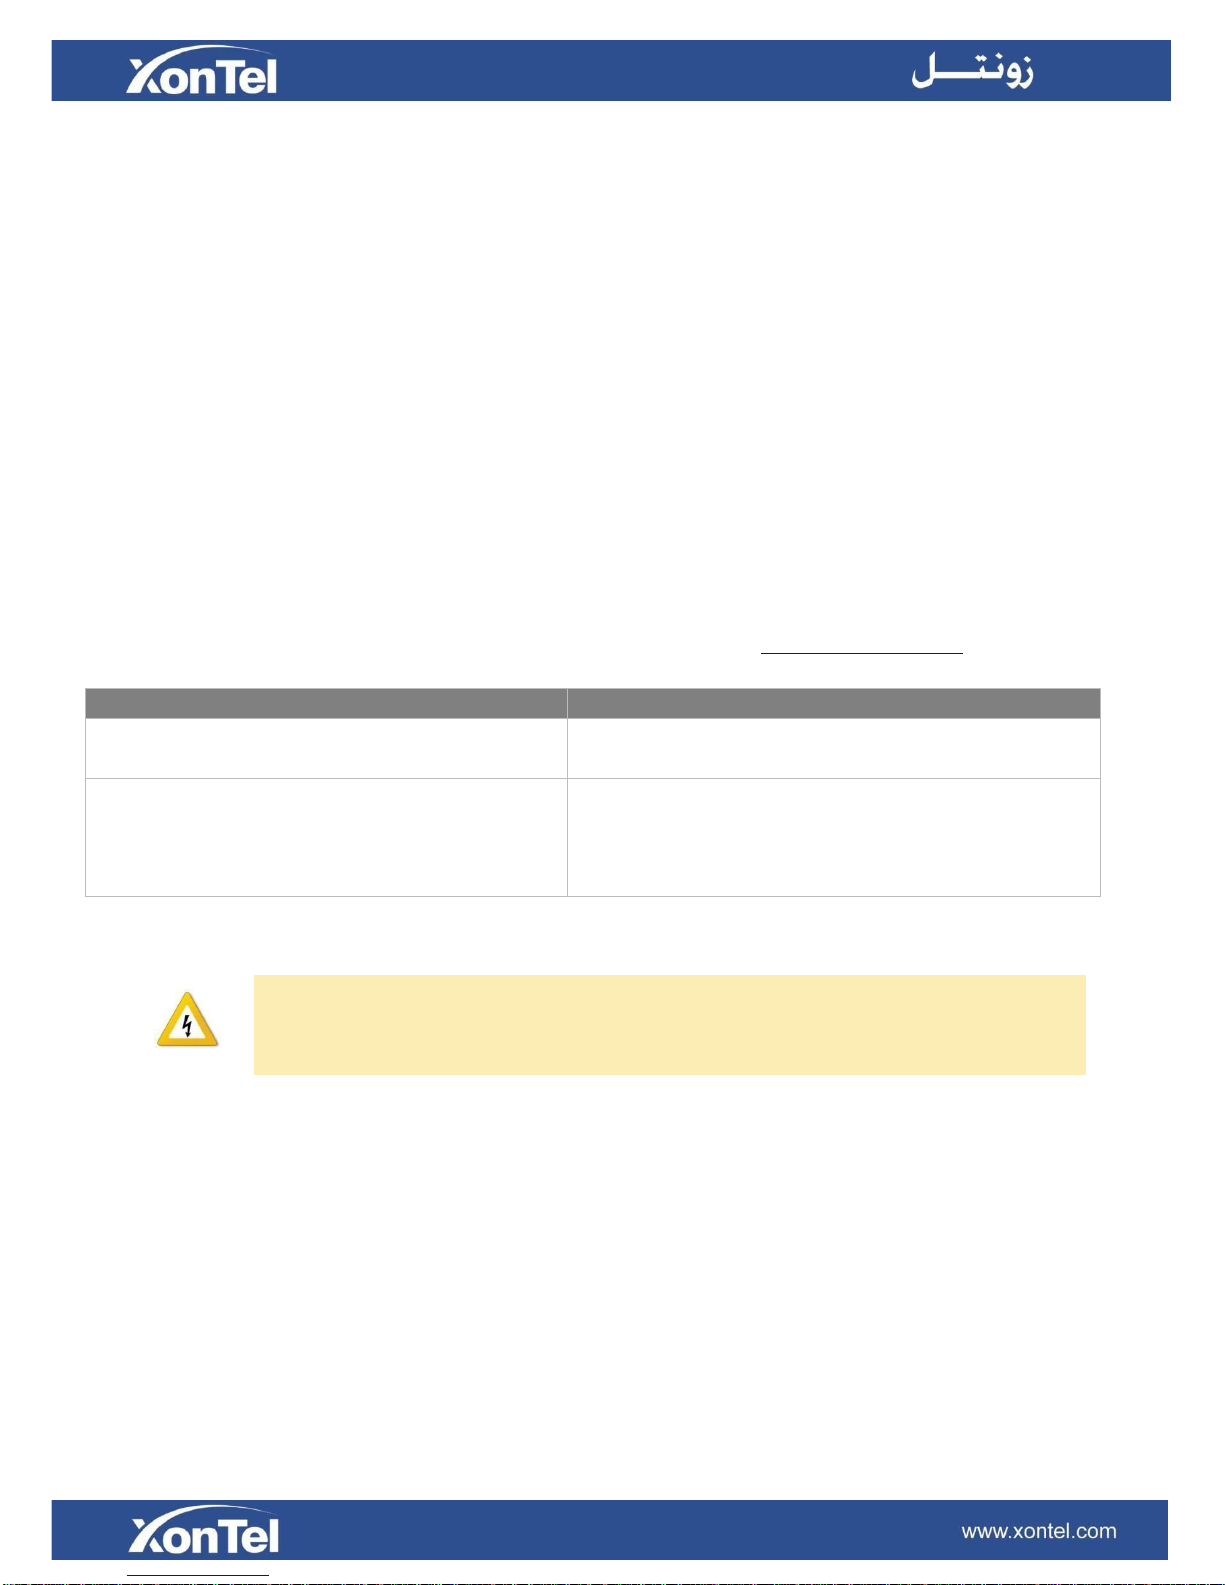
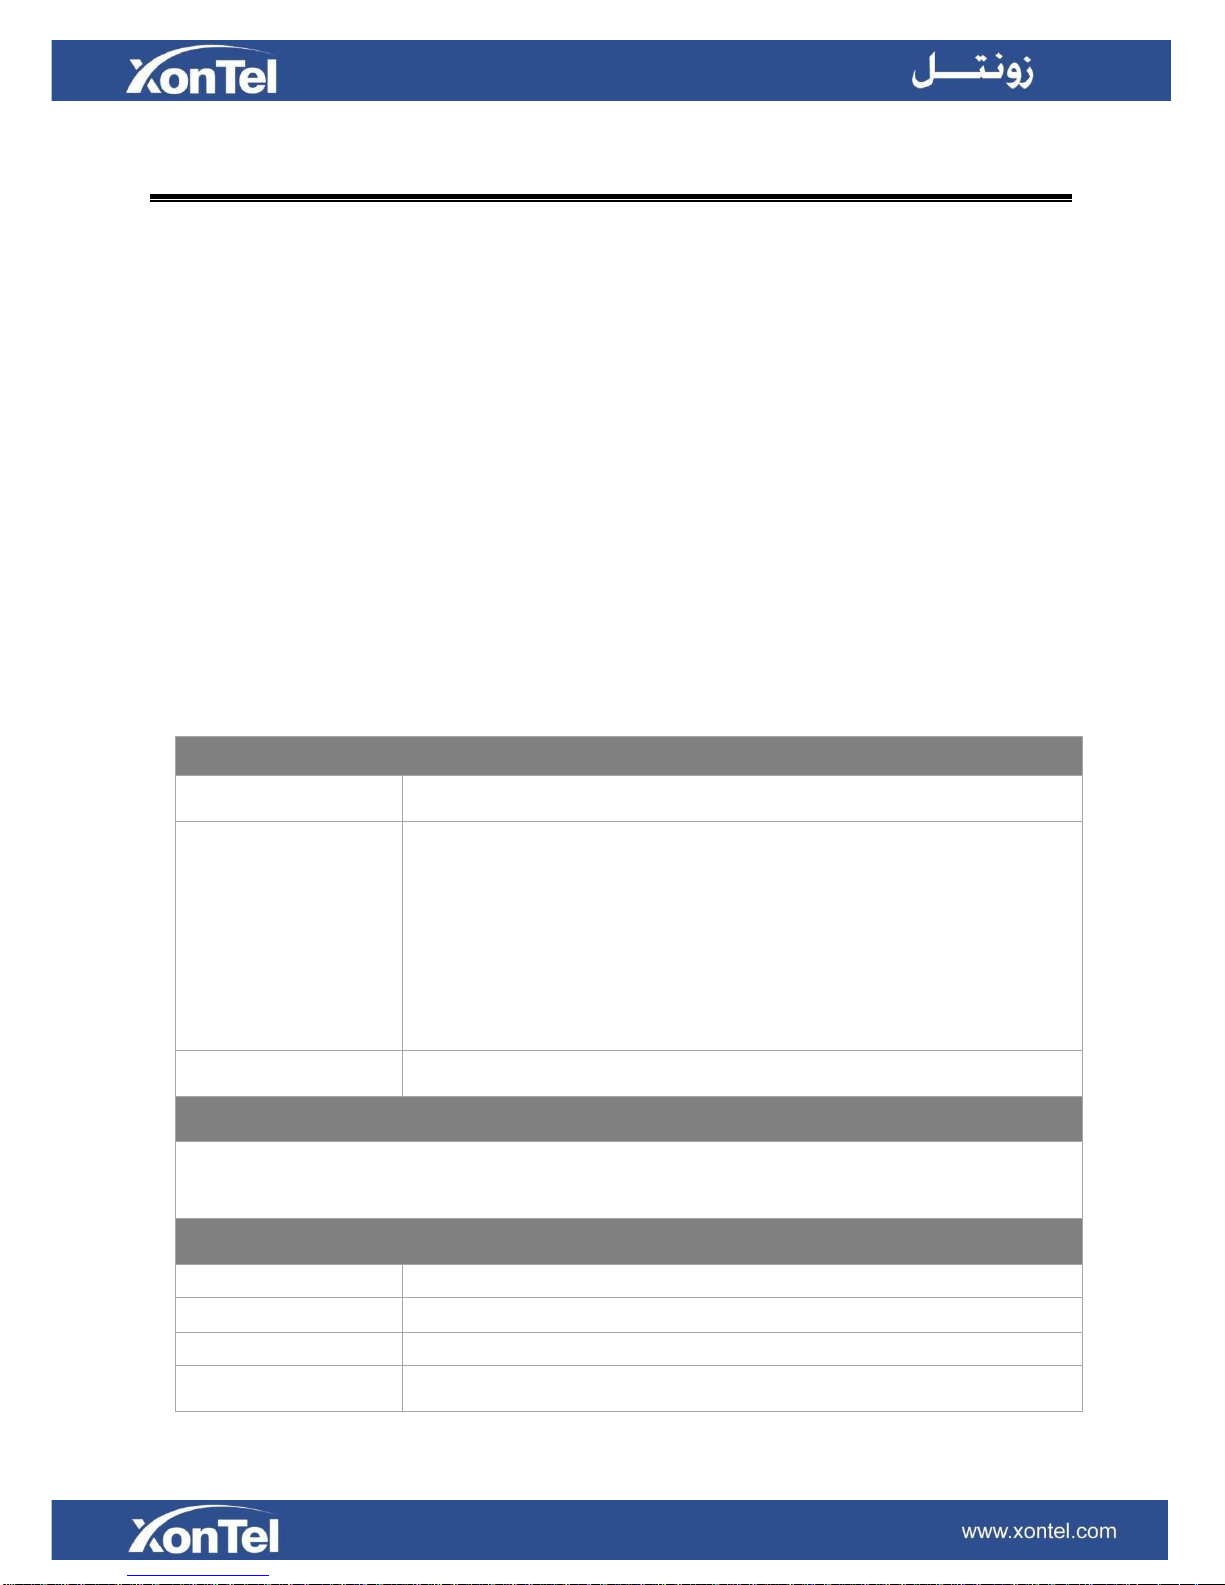
Related Documents
The following related documents are available on XonTel website: http://www.xontel.com.
Document
Description
XonTel XT-60/XT-120 Datasheets
Datasheet for the XT-60/XT-120 PBXs.
XonTel XT-60/XT-120 PBX’s User
manual
User manual for the XonTel XT-60/XT-120 IP PBXs.
Safety when working with electricity
Do not use a 3
rd
party power adaptor.
Do not power on the device during the installation.
Do not work on the device, connect or disconnect cables when lightning strikes.

7
XonTel XT-60/XT-120 Overview
This chapter provides the following sections:
Introduction
Feature Highlights
Expansion Board
Hardware Overview
Introduction
Designed with the small and medium sized enterprises in mind, XT-60 supporting up to 60 users,
XT-120 supporting up to 120 users and built using the very latest technology, the XonTel XT-60/XT120 delivers exceptional cost savings, productivity and efficiency improvements, delivering power,
performance, quality and peace of mind.
The all new XonTel PBXs is engineered for the communications needs of today and tomorrow, and
with the XonTel unique modular design future proofs your investment choice.
Feature Highlights
Appreciate the Easy-to-use Solution
Intuitive and graphical UI brings point-and-click configuration.
Convenient Phone Provisioning feature saves you tremendous time.
Everything can be managed from anywhere with Internet access.
Your Choice of Technologies and Features
Embedded VoIP capability and analog phone connections.
Rich external lines options include SIP, PSTN, ISDN BRI, E1/T1/PRI, and cellular networks.
Concurrent calls and maximum users are expandable with modules.
Telephone System without Risk
Mean well power supply featuring MTBF>560Kh.
High-quality Free scale CPU processor and industry leading TI DSP voice processor.
Connectors from TE Connectivity with a gold plating layer as thick as 15 μ.
Lightening protection on analog ports complying with ITU-T K.20/45/21 8/20 μs and GR-1089
standard.
Play Safe and Expect Reliability
TLS, SRTP, and HTTPS standards for better security.
Defend against malicious attack with built-in Firewall.
Monitor system status and behavior and be notified when abnormalities occur.

Hardware Overview
XonTel XT-60
XonTel XT-120
8
Front Panel
System Indicator
Power Indicator
WAN Status
LAN Status
SD Slot
RJ11 Port
RJ11 Port Status
Reset
Rear Panel
Antenna Socket
Power Switch
Power Inlet
Protective Earth
9
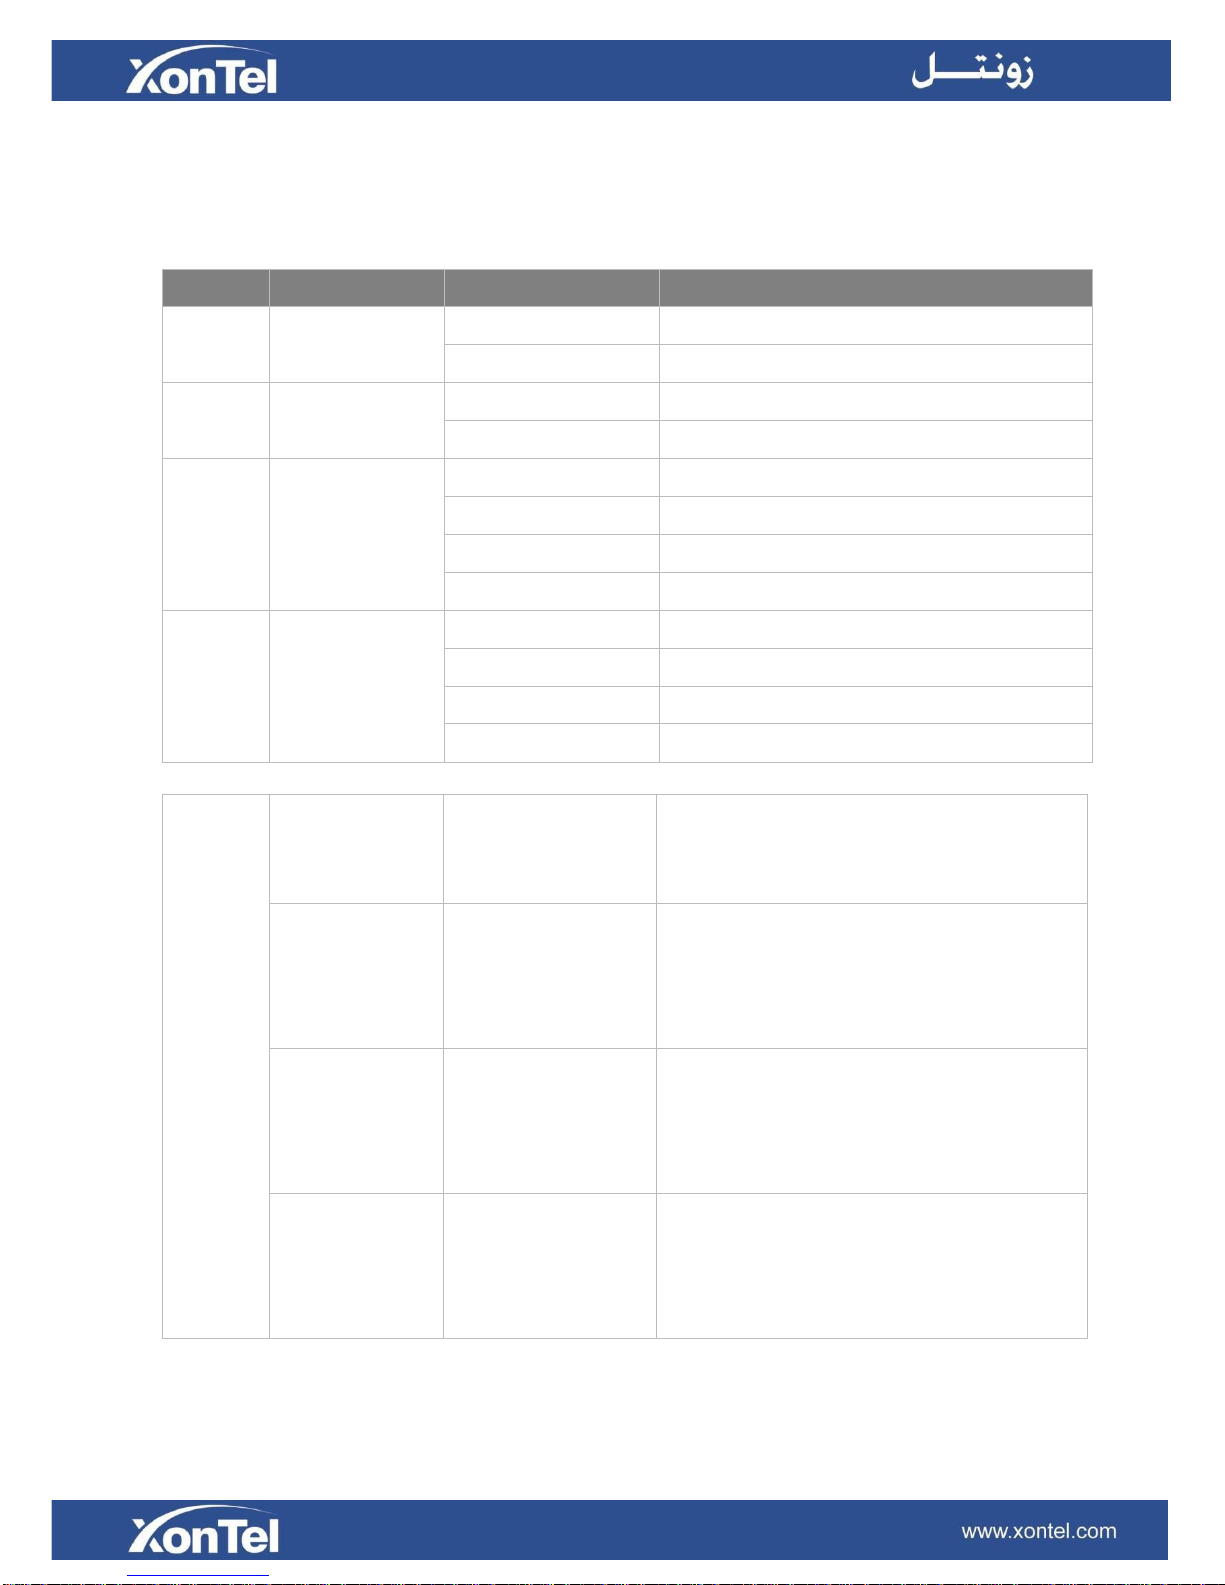
LED Indicators and Ports
LED Indicators
LED
Indication
Status
Description
POWER
Power status
On
The power is switched on
Off
The power is switched off
System
System status
Blinking
The system is running properly
Static/Off
The system goes wrong
WAN
WAN status
Static Green light
Linked normally, 10/100 Mbps.
Static Orange light
Linked normally, 1000 Mbps.
Blinking
In communication.
Off
Off-line.
LAN
LAN status
Static Green light
Linked normally, 10/100 Mbps.
Static Orange light
Linked normally, 1000 Mbps.
Blinking
In communication.
Off
Off-line.
RJ11
Port
Status
FXS
Green light
Static: The port is idle.
Blinking: There is an ongoing call on the
port.
GSM/3G
Red light
Static: the trunk is idle.
Blinking slowly: there is no SIM card
inserted.
Blinking rapidly: the trunk is in use.
BRI
Orange light
Blinking slowly: the BRI line is
disconnected.
Static: the BRI line is connected or in
use.
FXO
Red light
Blinking slowly: no PSTN line is
connected to the port.
Static: the PSTN line is idle.
Blinking rapidly: the PSTN line is busy.
10
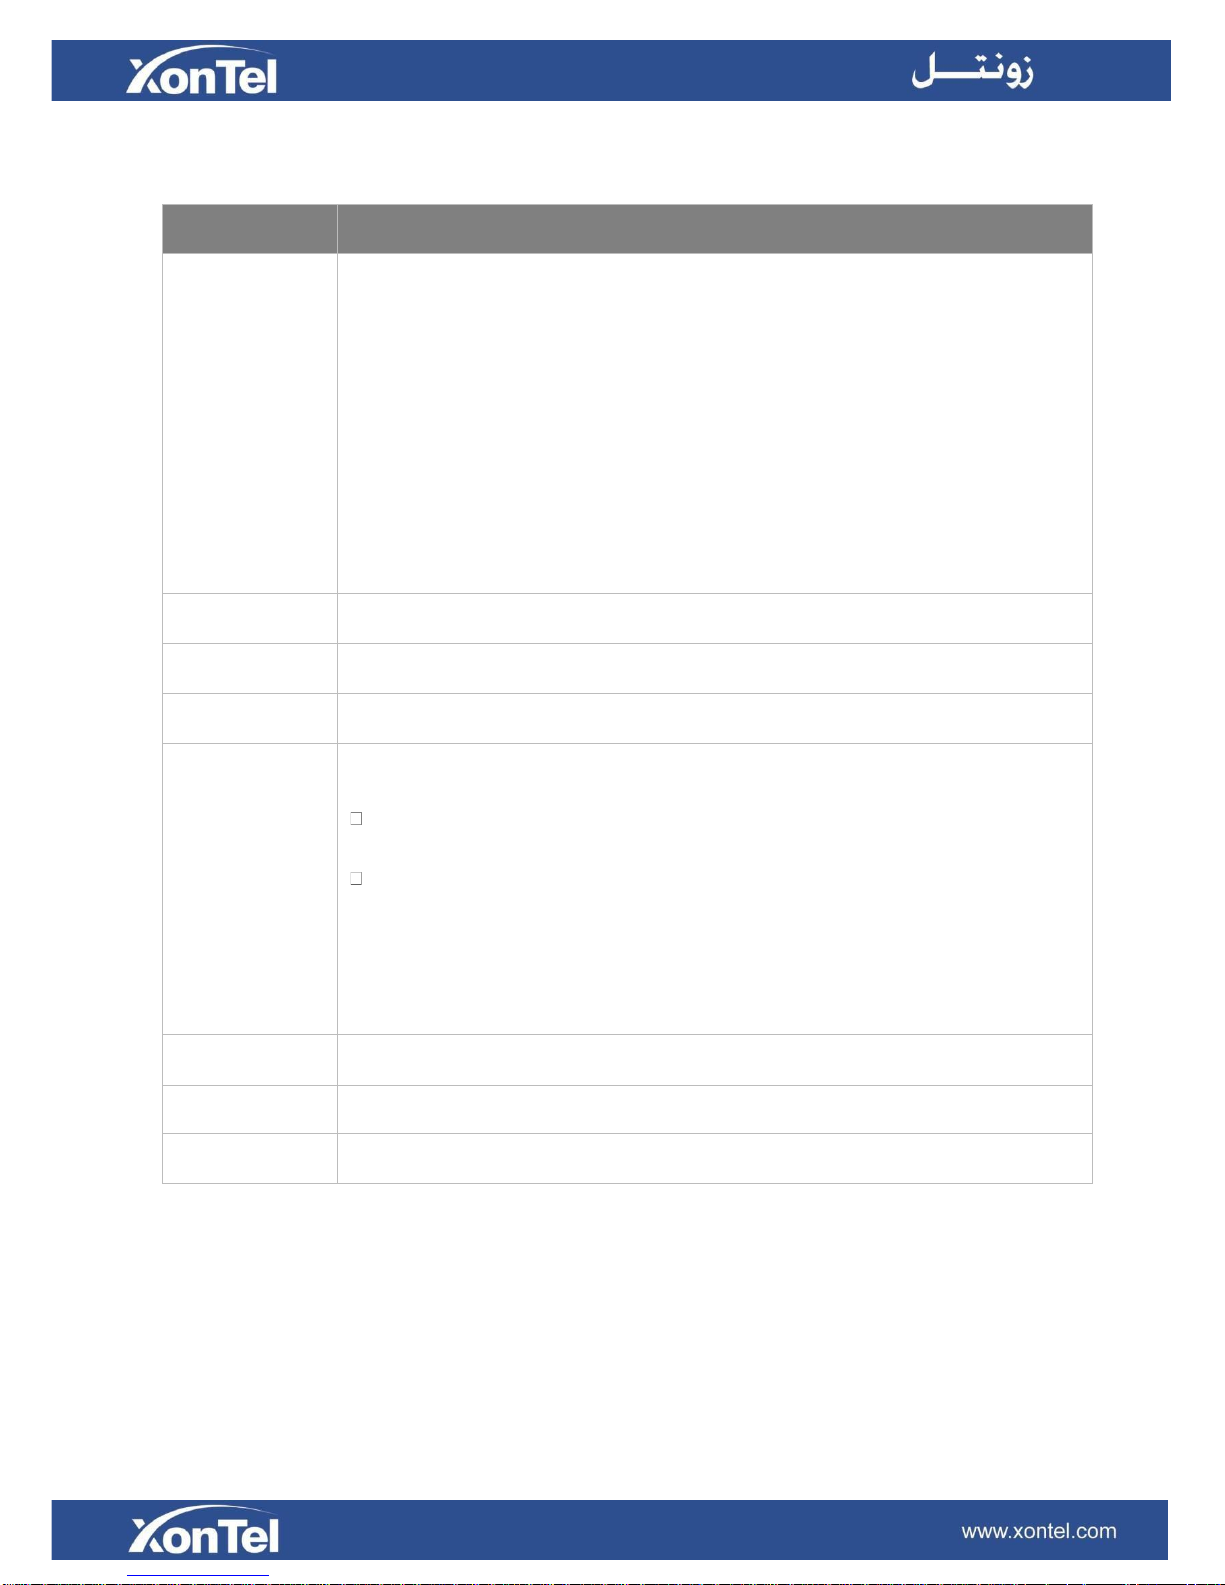
Port Description
Ports
Description
RJ11 Port
FXO port (red light): for the connection of PSTN lines or FXS ports of traditional
PBX.
FXS port (green light): for the connection of analog phones.
BRI port (orange light): for the connection of ISDN BRI lines.
Note: the sequence number of the ports corresponds to that of the Indicator
lights in the front panel. (I.e. the LED lights in the front indicate the connection
status of the corresponding ports at the front panel.)
ANT
Connect to GSM/3G Antenna.
TF Slot
Insert TF card.
SD Slot
Insert SD card.
Ethernet Port
XonTel XT-60/XT-120 supports two 10/100/1000M Ethernet ports. There are 2
Ethernet modes for the system. The default mode is “Bridge”.
Bridge: LAN port interface will be used for uplink connection. WAN port
interface will be used as bridge for PC connection.
Dual: both ports can be used for uplink connection.
Reset Button
Press and hold for 10 seconds to restore the factory defaults
Power Inlet
Connect the supplied power supply to the port.
Power Switch
Press this button to switch on/off the device.
11
Getting Started
This chapter explains how to log in XonTel XT-60/XT-120 Web GUI, use the taskbar and widgets, and
open applications with the Main Menu.
Accessing Web GUI
Web Configuration Desktop
Make Your First Call
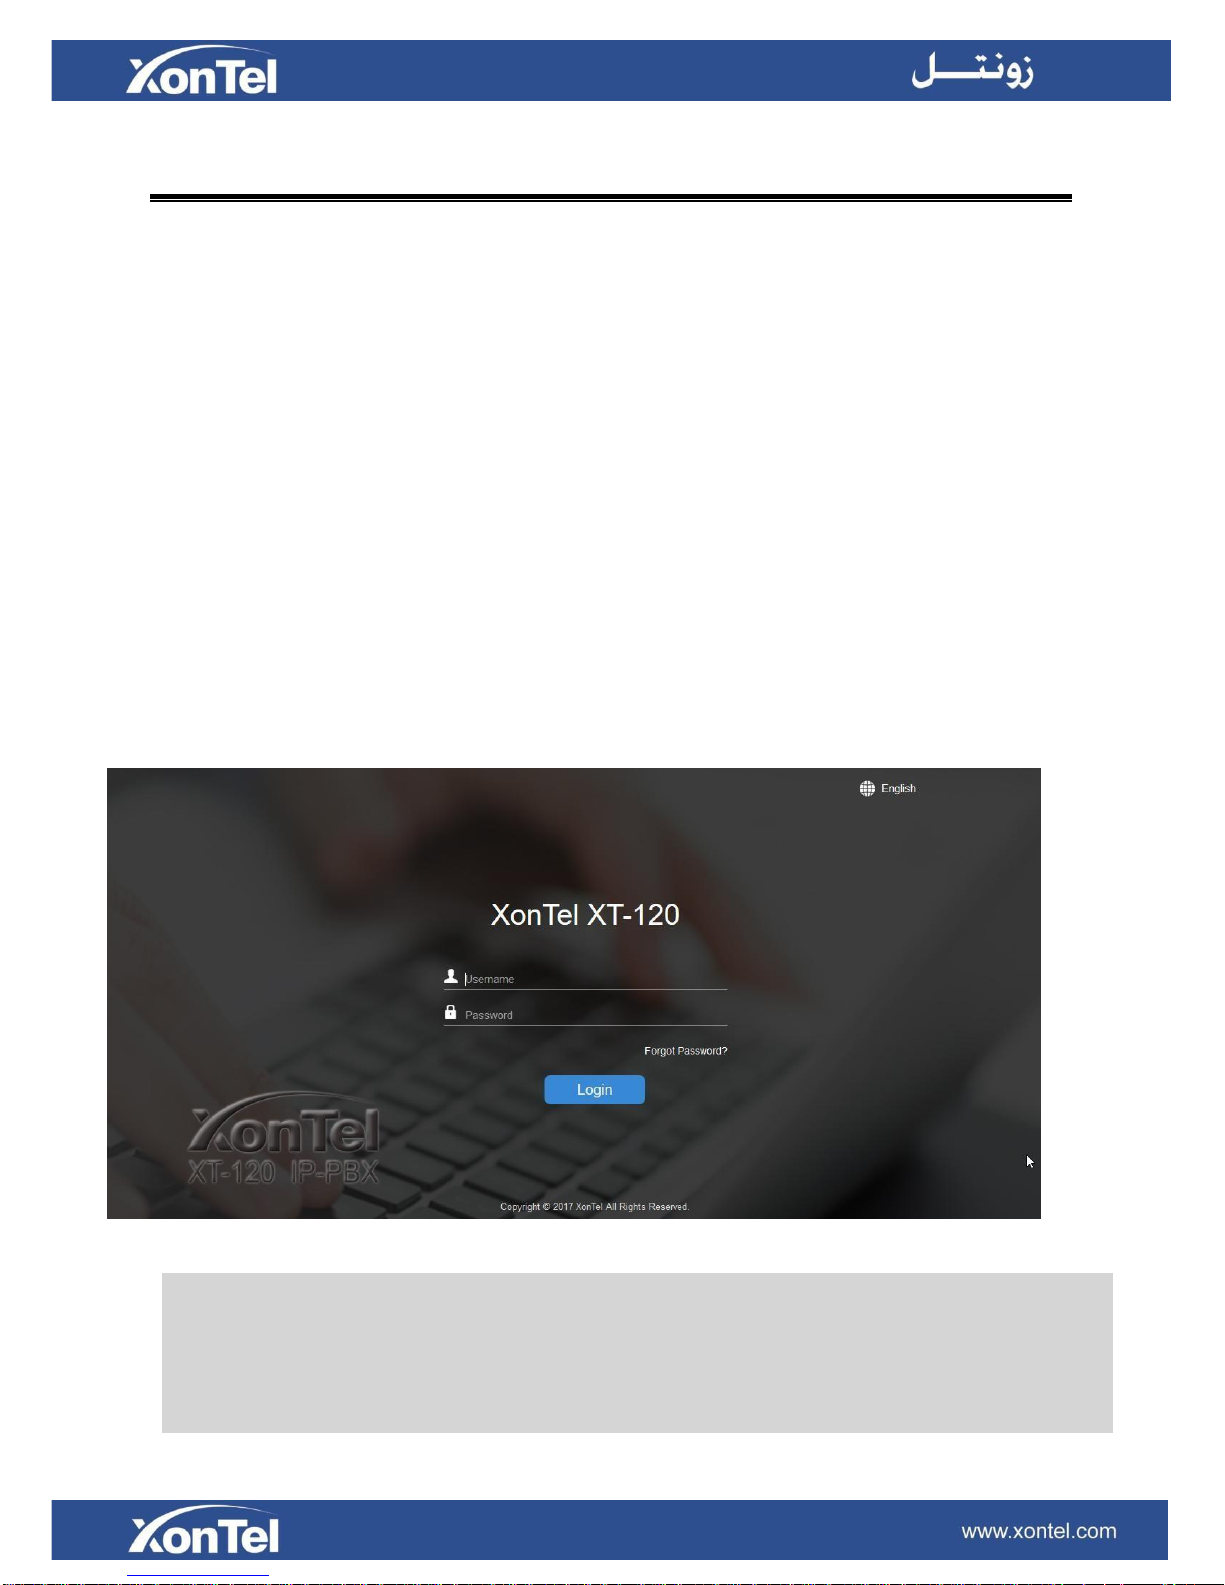
Accessing Web GUI
XonTel XT-60/XT-120 provides web-based configuration interface for administrator and extension
users. The administrator can manage the device by logging in the Web interface. Check the factory
defaults below:
IP address: https://192.168.5.150:8088
User Name: admin
Default Password: xontel
To log in XT-60/XT-120:
1 Make sure your computer is connected to the same network as the IP PBX.
2 Start a web browser on your PC, enter the IP address, press Enter on your keyboard.
3 Enter your user name and password, click Login.
Figure 2-1 XonTel XT-120 Web Configuration Panel Login Page
Note: To ensure your connection to the XonTel XT-60/XT-120 Web GUI runs smoothly, please use
the following browsers:
Chrome
Firefox
Internet Explorer: 11.0 or later

12
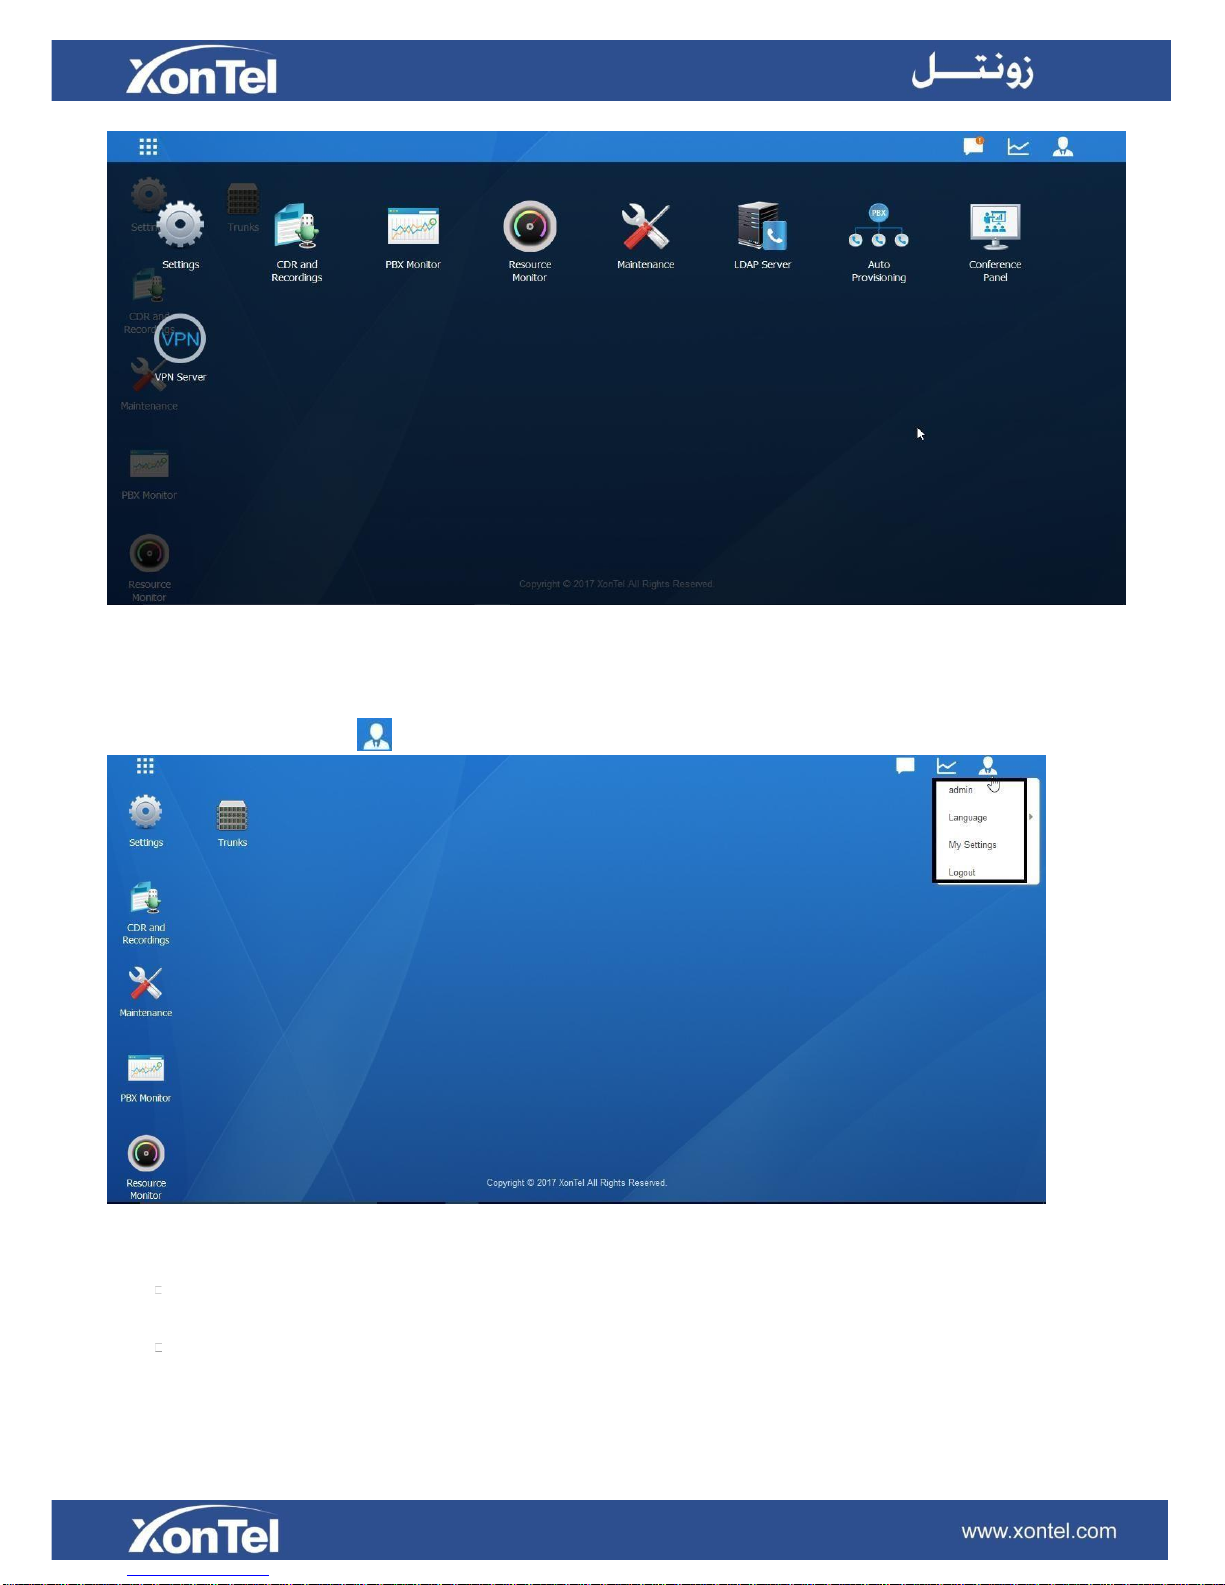
Web Configuration Desktop
When you log in XonTel XT-60/XT-120 Web GUI, you will see the desktop. From here, you can
manage settings, install applications, or view system resource information.
Desktop
The desktop is where your application windows are displayed.
Taskbar
Figure 2-2 Desktop
The taskbar at the top of the desktop includes the following items:
Figure 2-3 Taskbar
1 Main Menu: view and open applications installed on your XonTel XT-60/XT-120 system. Right-click
an application icon, you can add the application to desktop.
2 Open Application
Click the icon of an application to show or hide its window on the desktop.
Right-click the icon and choose from the shortcut menu to manage the application window
(Maximize, Minimize, Restore, Close).
3 Notifications: displays notifications, like errors, status updates, and app installation notifications.
4 Resource Monitor: click the icon to check the system information, network status and storage usage.
5 Options: logout, change Web language or modify personal account options.
Main Menu
Click the Main Menu at the top-left of the desktop, you can find all the installed applications on
your XonTel XT-60/XT-120 system.
13
Options
Figure 2-4 Main Menu
Figure 2-5 Options
Language
Select Language to change web language.
My Settings
Click My Settings to modify your account settings. Here you can change the login password and
bind your email address with the account.
Click the options icon
to logout, change Web language or modify your account settings.
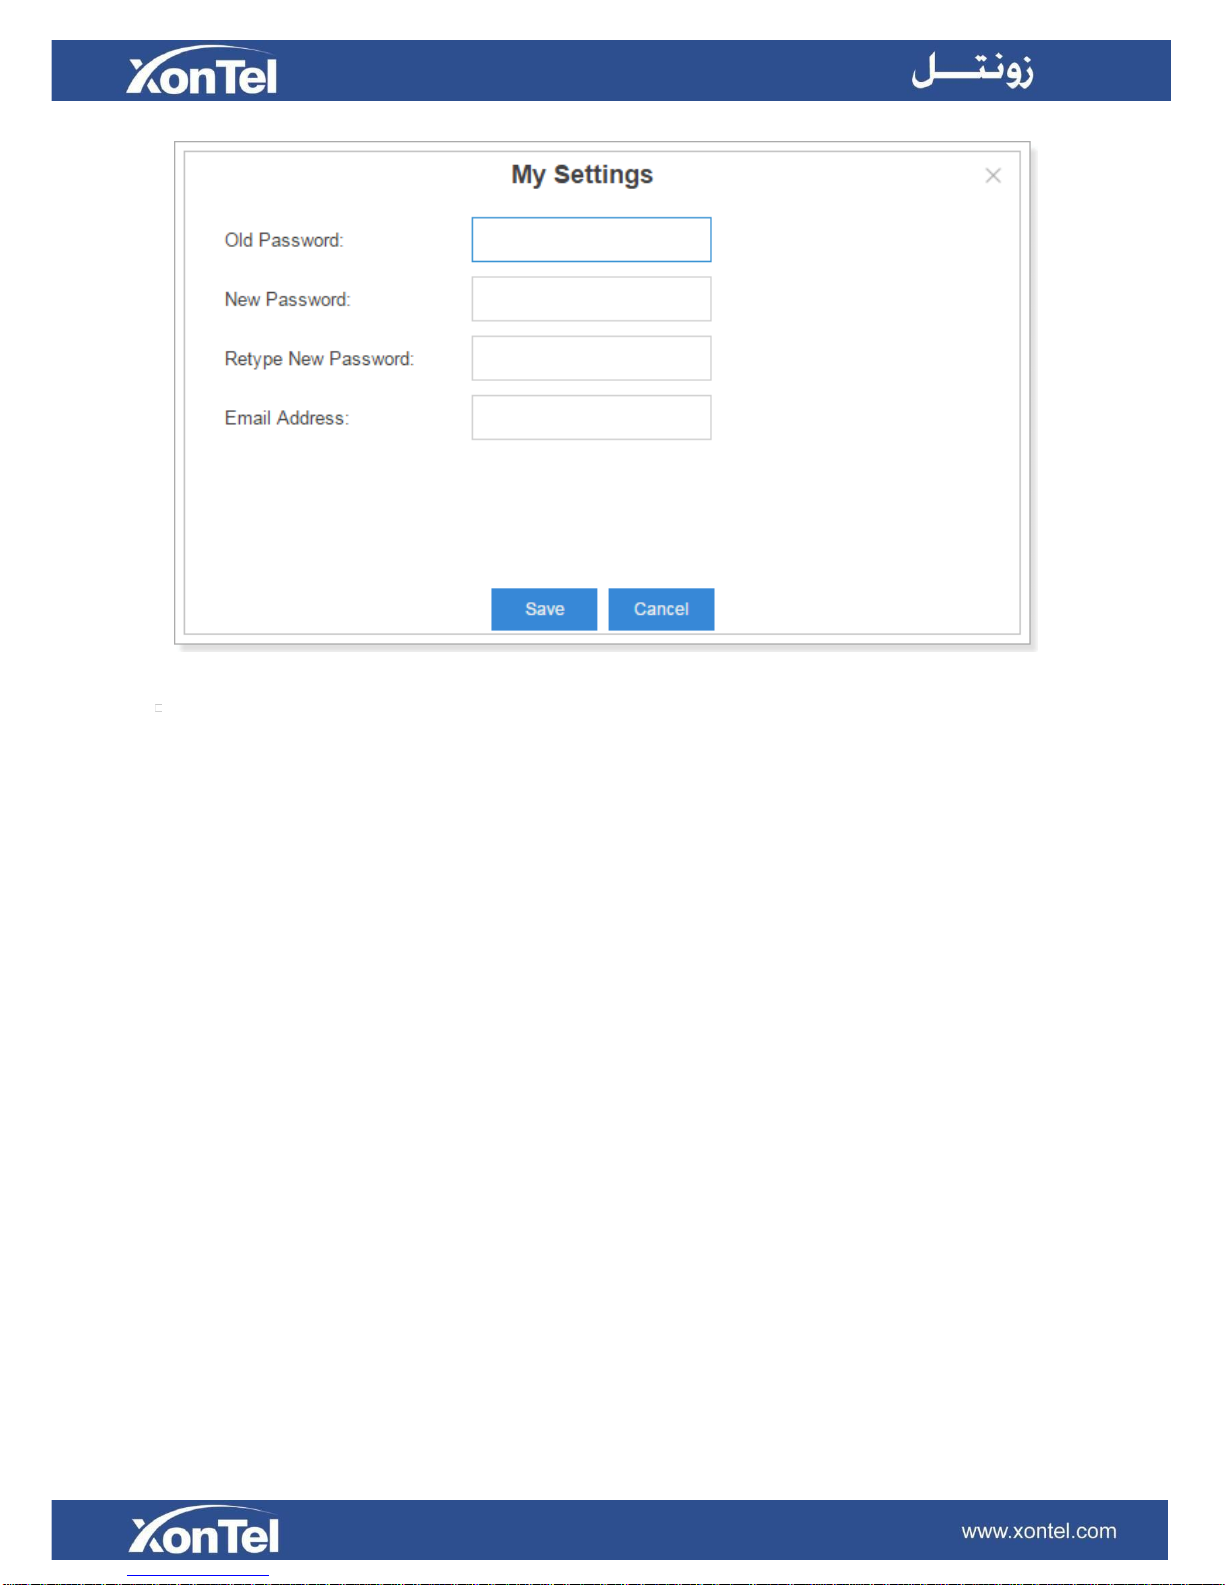
14
Figure 2-6 My Settings
Logout
Click Logout to log out the Web GUI.
Save and Apply Changes
Click Save button after your configurations on the XonTel XT-60/XT-120 system, do not forget to click
Apply button on the upper right of the desktop to submit all the changes. If the change requires reboot
to take effect, the system will prompt you with a pop-upwindow.
Make Your First Call
Connect your IP phone and XonTel XT-60/XT-120 device to the same network. Then register an
extension to the IP phone and make your first call through XonTel XT-60/XT-120 system.
1 Log in your XonTel XT-60/XT-120 Web GUI, go to Settings > PBX > Extensions.
2 Click Add to create a new extension, set the type as “SIP”. You will need the Registration Name
and Registration Password to register the extension later.
3 Register the extension on your phone with the Registration Name and Registration Password, the
SIP server address is your XonTel XT-60/XT-120 IP address.
4 When the extensions is registered to XonTel XT-60/XT-120, you can dial *2 to access your
voicemail box. The default password to enter the voicemail box is your extension number.
5 Once entering the voicemail box, you are connected to the XonTel XT-60/XT-120 system!
15
System Settings
This chapter explains system settings on XonTel XT-60/XT-120. Go to Settings > System to check
the system settings.
Network
Security
User Permission
Date & Time
Email
Storage
Network
After logging in the XonTel XT-60/XT-120 Web GUI for the first time with the factory IP address, users
could go to Settings > System > Network to configure the network for XonTel XT-60/XT-120.
XonTel XT-60/XT-120 supports 3 Ethernet modes: Single, Dual and Bridge.
Basic Settings
Please check the basic network settings below.
Basic Settings
Hostname
Set the hostname for the system.
Mode
Select the Ethernet mode. The default mode is Single.
Single: only LAN port will be used for uplink, WAN port is disabled.
Bridge: LAN port interface will be used for uplink connection. WAN
port interface will be used as bridge for PC connection.
Dual: the two Ethernet interfaces will use different IP addresses.
Assign two IP addresses in this mode.
Default Interface
In Dual mode, you need to choose the default interface.
LAN/WAN Settings (DHCP Mode)
If you choose this mode, the system will act as DHCP client to get an available IP address from
your local network.
LAN/WAN Settings (Static IP Address)
IP Address
Enter the IP address (xxx.xxx.xxx.xxx).
Subnet Mask
Enter the subnet mask (xxx.xxx.xxx.xxx). For example, 255.255.255.0
Gateway
Enter the gateway address (xxx.xxx.xxx.xxx).
Preferred DNS Server
Enter the IP address of the preferred DNS server (xxx.xxx.xxx.xxx).
16
Alternate DNS Server
Enter the IP address of the alternative DNS server (xxx.xxx.xxx.xxx).
LAN/WAN Settings (PPPoE)
Username
Enter the PPPoE username.
Password
Enter the PPPoE password.
VLAN
Enable VLAN
Check this option to enable VLAN.
VLAN ID
Enter the VLAN ID.
VLAN Priority
Set the VLAN priority. The default is 0.
Table 3-1 Network Basic Settings Description
17
OpenVPN
XonTel XT-60/XT-120 supports OpenVPN. The system provides detailed VPN configurations on the
Web GUI and you can also upload the VPN configuration package to the system to make it work.
Before using OpenVPN feature, please Enable OpenVPN first, then choose the Type to configure
OpenVPN:
Manual Configuration
Upload OpenVPN Package
Check the VPN configurations parameters below.
OpenVPN Configuration
Server Address
Enter the server address of OpenVPN.
Server Port
Enter the server port of OpenVPN. The default is 1194.
Protocol
Select the protocol type. The server and client must use the same protocol.
Device
Select the network device. The client and server must use the same
setting.
TUN: a TUN device is a virtual point-to-point IP link.
TAP: a TAP device is a virtual Ethernet adapter.
Username
Specify the username.
Password
Specify the password.
Encryption
Select the encryption method. The server and client must use the same
setting.
Compression
Enable or disable compression for data stream. The server and client must
use the same setting.
Proxy Server
Specify the proxy server.
Proxy Port
Specify the proxy port.
CA Cert
Upload a CA certificate.
Cert
Upload a Client certificate.
Key
Upload a Client key.
TLS Authentication
Enable or disable TLS authentication. If enabled, please upload a TA key via
Settings > System> Security>Certificate.
Table 3-2 OpenVPN Manual Configuration Parameters Description
18
DDNS Settings
Dynamic DNS or DDNS is a method of updating, in real time, a Domain Name System (DNS) to
point to a changing IP address on the Internet. This is used to provide a persistent domain name
for a resource that may change location on the network. DDNS is usually configured on router. If
your router cannot support DDNS, we can set up DDNS on XonTel system.
XonTel XT-60/XT-120 supports the following DDNS servers:
dyndns.org
freedns.afraid.org
www.no-ip.com
www.zoneedit.com
www.oray.com
3322.org
Check the DDNS configuration parameters below.
DDNS
DDNS Status
This shows the current DDNS status of the device.
Enable DDNS
Check this box to enable DDNS.
Server
Choose a DDNS provider from the list.
Username
Enter the username of your DDNS account.
Password
Enter the password of you DDNS account.
Hash
Enter your string of Hash as provided by freedns.afraid.org.
Domain
Enter the domain name.
Static Route
Table 3-3 DDNS Configuration Parameters Description
In computer networking, a routing table is a data table stored in a router or a networked device that
lists the routes to particular network destinations, and in some cases, metrics (distances) associated
with those routes. Static routes are entries made in a routing table by non-automatic means and which
are fixed rather than being the result of some network topology “discovery” procedure.
Static route on the system is used to configure to route the connection, packets to particular network
destinations, usually a specific gateway.
Routing Table
All the static routes are displayed on the Routing Table.

19
Figure 3-1 Routing Table
Static Routes
Click Static Routes tab, you can add static routes here.
Click to add a static route.
Click to edit the static route.
Click to delete the static route.
Check the Static route settings below.
Static Route
Destination
Enter the destination IP address or IP subnet for the XonTel
XT-60/XT-120 to reach using the static route.
Example:
IP address: 192.168.6.120
IP subnet: 192.168.6.0
Subnet Mask
Enter the subnet mask for the destination address.
Example:
255.255.255.255
Gateway
Enter the gateway address. The XonTel system will reach the
destination address via this gateway.
Example:
192.168.6.1
Metric
The cost of a route is calculated using what are called routing
metric. Routing metrics are assigned to routes by routing
protocols to provide measurable values that can be used to
judge how useful (how cost) a route will be.
Interface
Select the network interface. The system will reach the
destination address using the static route through the selected
network interface.
Table 3-4 Static Routes Settings Description
20
Security
VoIP attack, although not an everyday occurrence does exist. When using VoIP, system security is
undoubtedly one of the issues we care about most. With appropriate configuration, and some basic
safety habits, we can improve the security of the telephone system. Moreover, the powerful built-in
firewall function in XonTel system is adequate to enable the system to run safely and stably.
We strongly recommend that you configure firewall and other security options to prevent the attack fraud
and the system failure or calls loss.
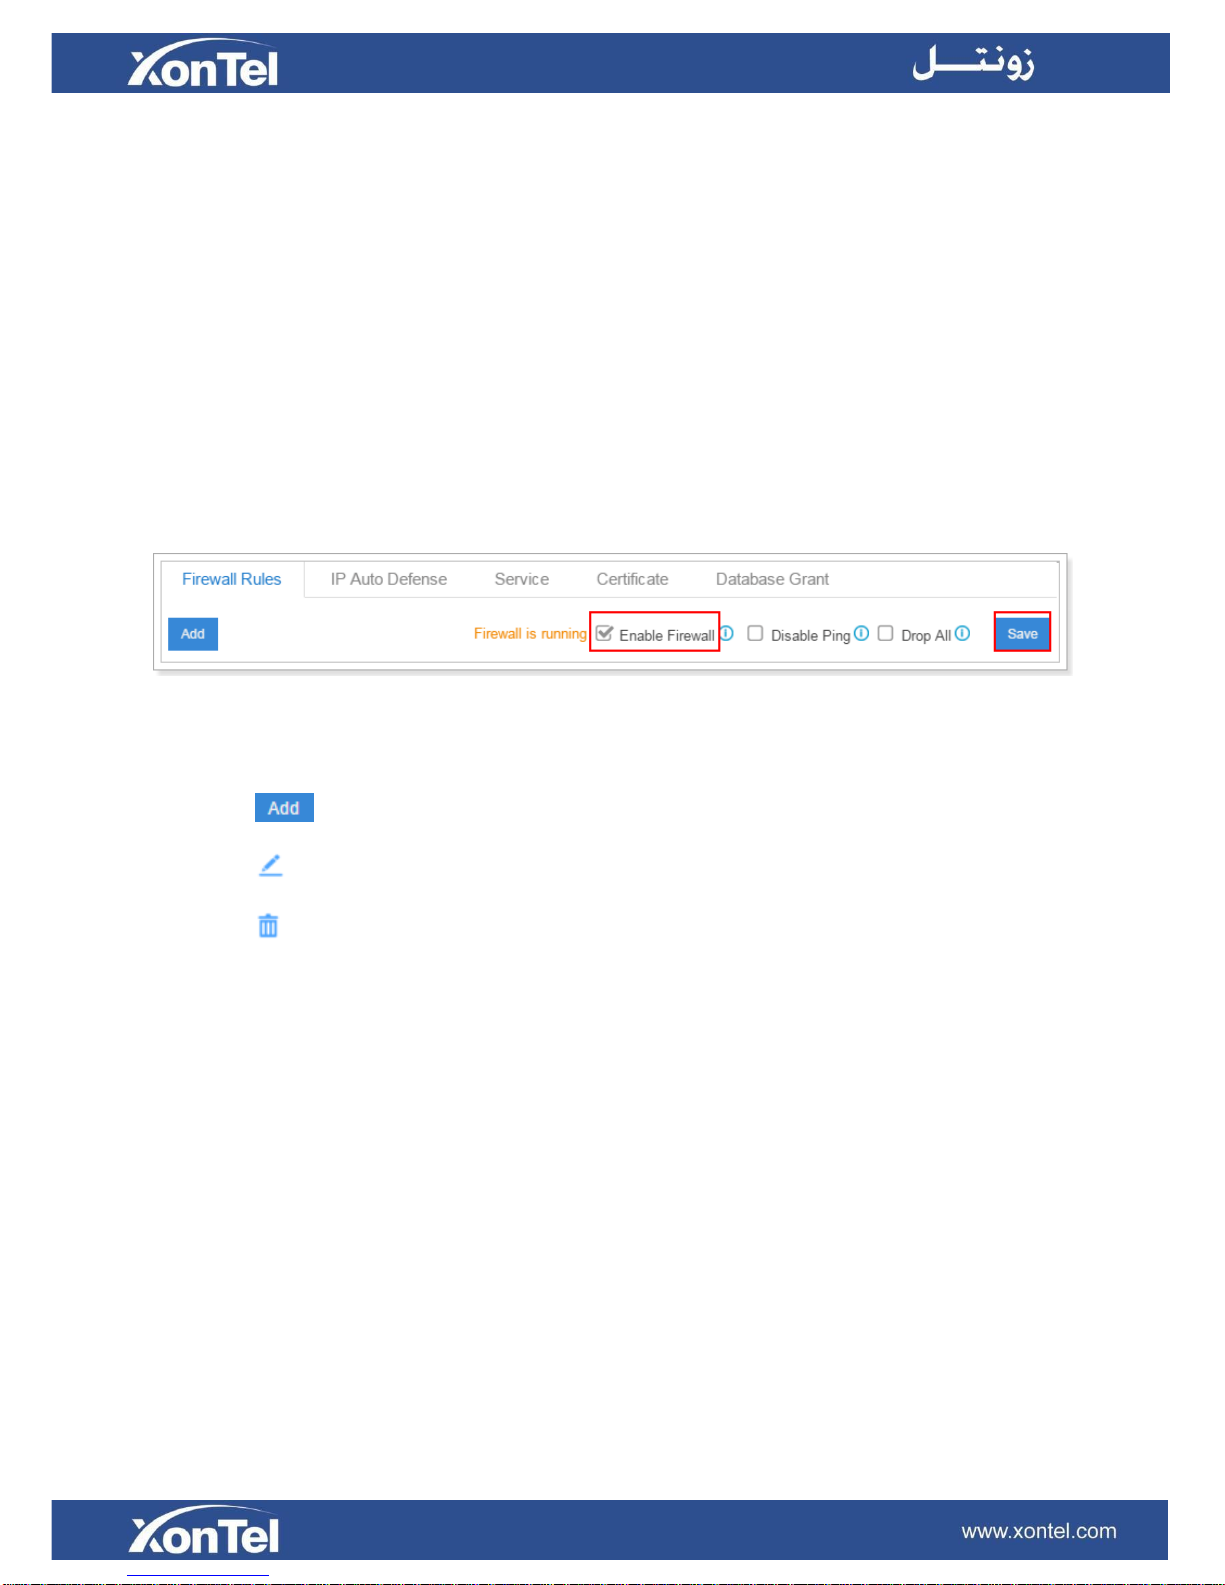
Firewall Rules
Users could add rules to accept or reject traffic through the system. Go to Settings > System >
Security > Firewall Rules to configure firewall for the system.
Before adding firewall rules, please check the option Enable Firewall, then click Save to enable the
firewall.
Figure 3-2 Firewall Rules
Click to add a new rule.
Click to edit the rule.
Click to delete the rule.
Check the firewall configuration parameters below.
21
Firewall
Enable Firewall
Enable Firewall to protect the system from malicious attack. Click Save
icon to apply the changes.
Disable Ping
Enable this item, net ping from remote hosts will be dropped. Click Save
icon to apply the changes.
Drop All
When you enable Drop All feature, the system will drop all packets and
connections from other hosts if there are no other rules defined. To avoid
locking the device, at least one TCP Accept common rule must be created
for port used for SSH access and port used for HTTP access.
Firewall Rules
Name
Specify a name to identify the firewall rule.
Description
Description for this firewall rule.
Table 3-5 Firewall Configuration Parameters Description
22
Action
Select the action for the firewall rule:
Accept
Ignore
Reject
Protocol
Select the protocol applied for the rule:
UDP
TCP
BOTH
Source IP address/
Subnet mask
The IP address for this rule.
Example:
192.168.5.100/255.255.255.255 means this rule is for 192.168.5.100.
192.168.5.100/255.255.255.0 is for IP from 192.168.5.0 to 192.168.5.100.
Port
Set the port for the firewall rule. The end port must be equal to or greater
than start port.
IP Auto Defense
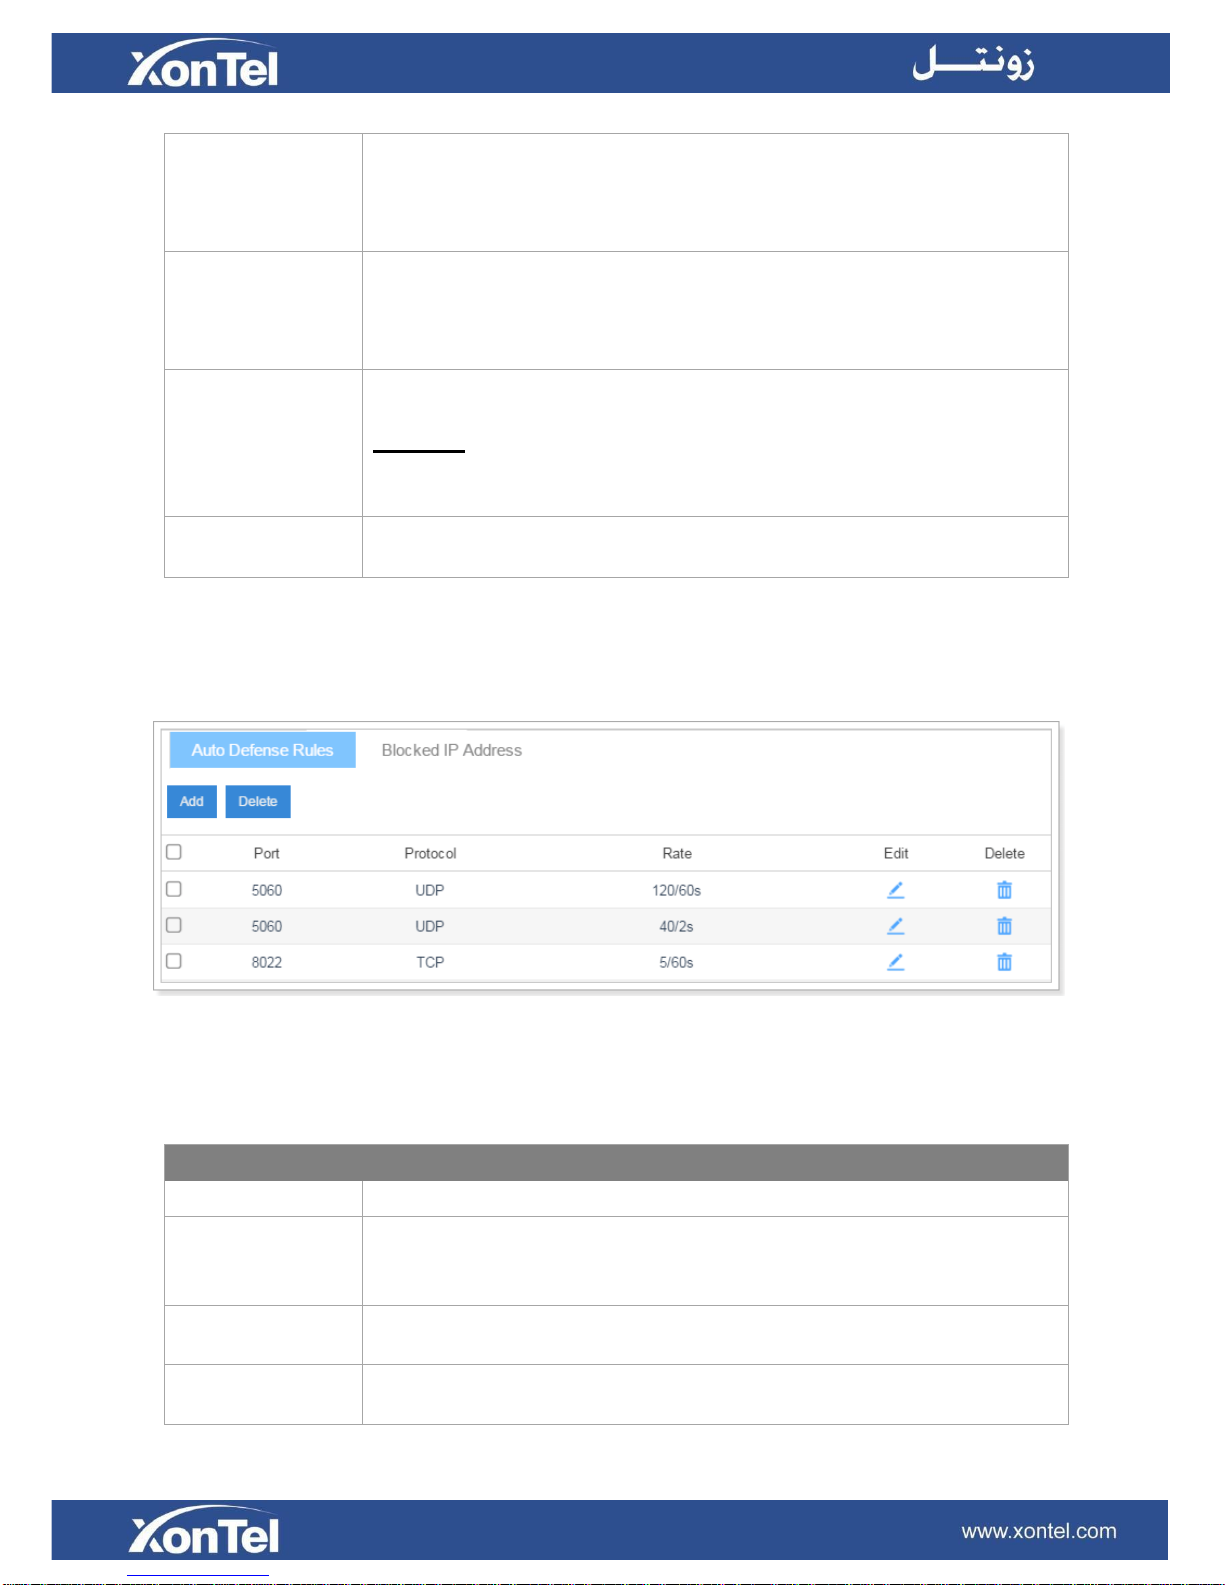
Users could create auto defense rules, then the system will prevent massive connection attempts or
brute force attacks. The IP addresses would be listed in the Blocked IP Address table. There are 3
default auto defense rules; we recommend you keep the rules there.
Figure 3-3 Auto Defense Rules
Please check the auto defense rule configuration parameters below.
IP Auto Defense Rule
Port
Auto defense port, for example, 8022.
Protocol
Select auto defense protocol:
UDP
TCP
The Number of IP
Packets
The number of IP Packets permitted within a specific time interval.
Time Interval
The time interval to receive IP Packets. For example, Number of IP
Packets sets 90 and Time Interval sets 60 mean 90 IP packets are allowed
23
in 60 seconds.
Service
Table 3-6 IP Auto Defense Rule Configuration
The service page displays all the service status and port on XonTel XT-60/XT-120.
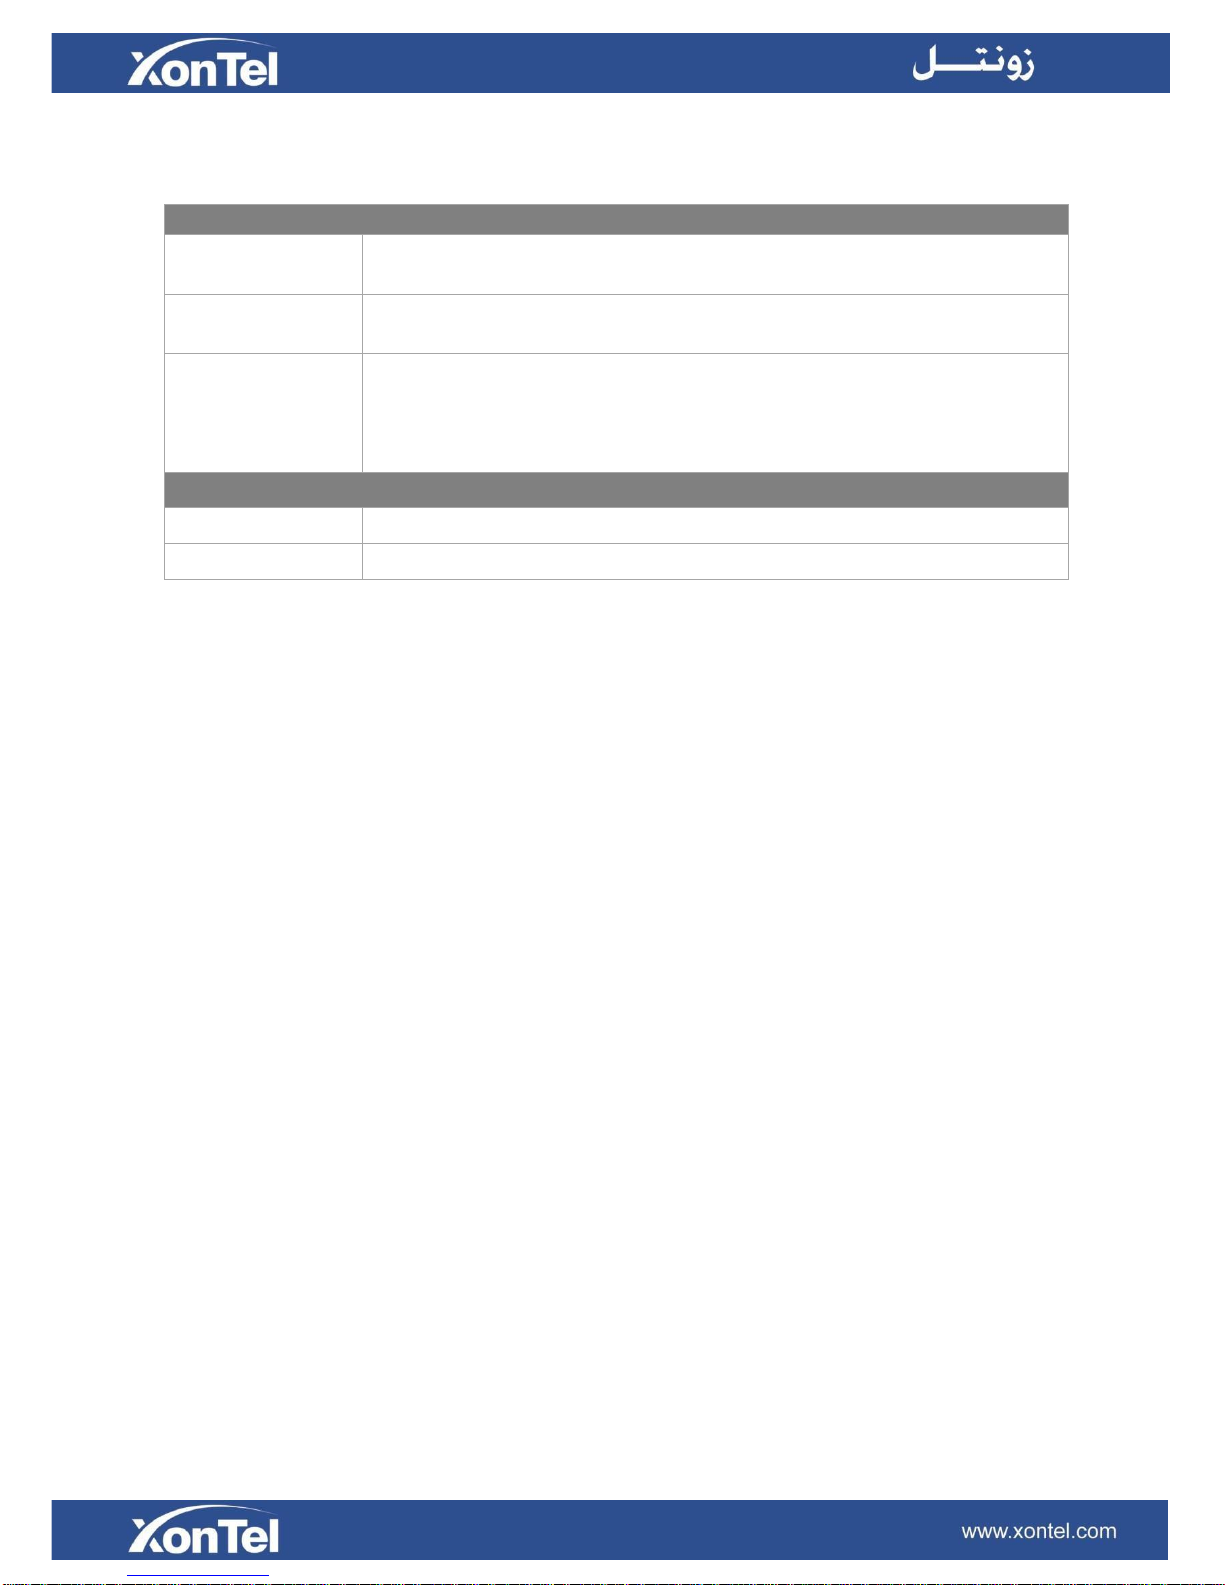
Protocol or Service
Description
HTTPS
The default access protocol is HTTPS and the port is 8088.
Redirect from port 80
If the option is enabled, when you access XonTel PBX using HTTP
with port 80, it will be redirected to HTTPS with port 8088.
Certificate
If you have uploaded HTTPS certificates to XonTel PBX, select it
from the drop-down menu.
HTTP
The default port for HTTP is 80.
SSH
SSH port is used to access XonTel underlying configurations to
debug the system. The default port is 8022. We recommend you
disable SSH port if you do not need it.
FTP
With FTP service, you can connect to PBX via web browser. The
default port is 21.
TFTP
To upload files PBX through TFTP, you need to enable this
option.
IAX
The default port is 4569.
SIP UDP
The default port is 5060.
SIP TCP
The default port is 5060.
SIP TLS
The default port is 5061.
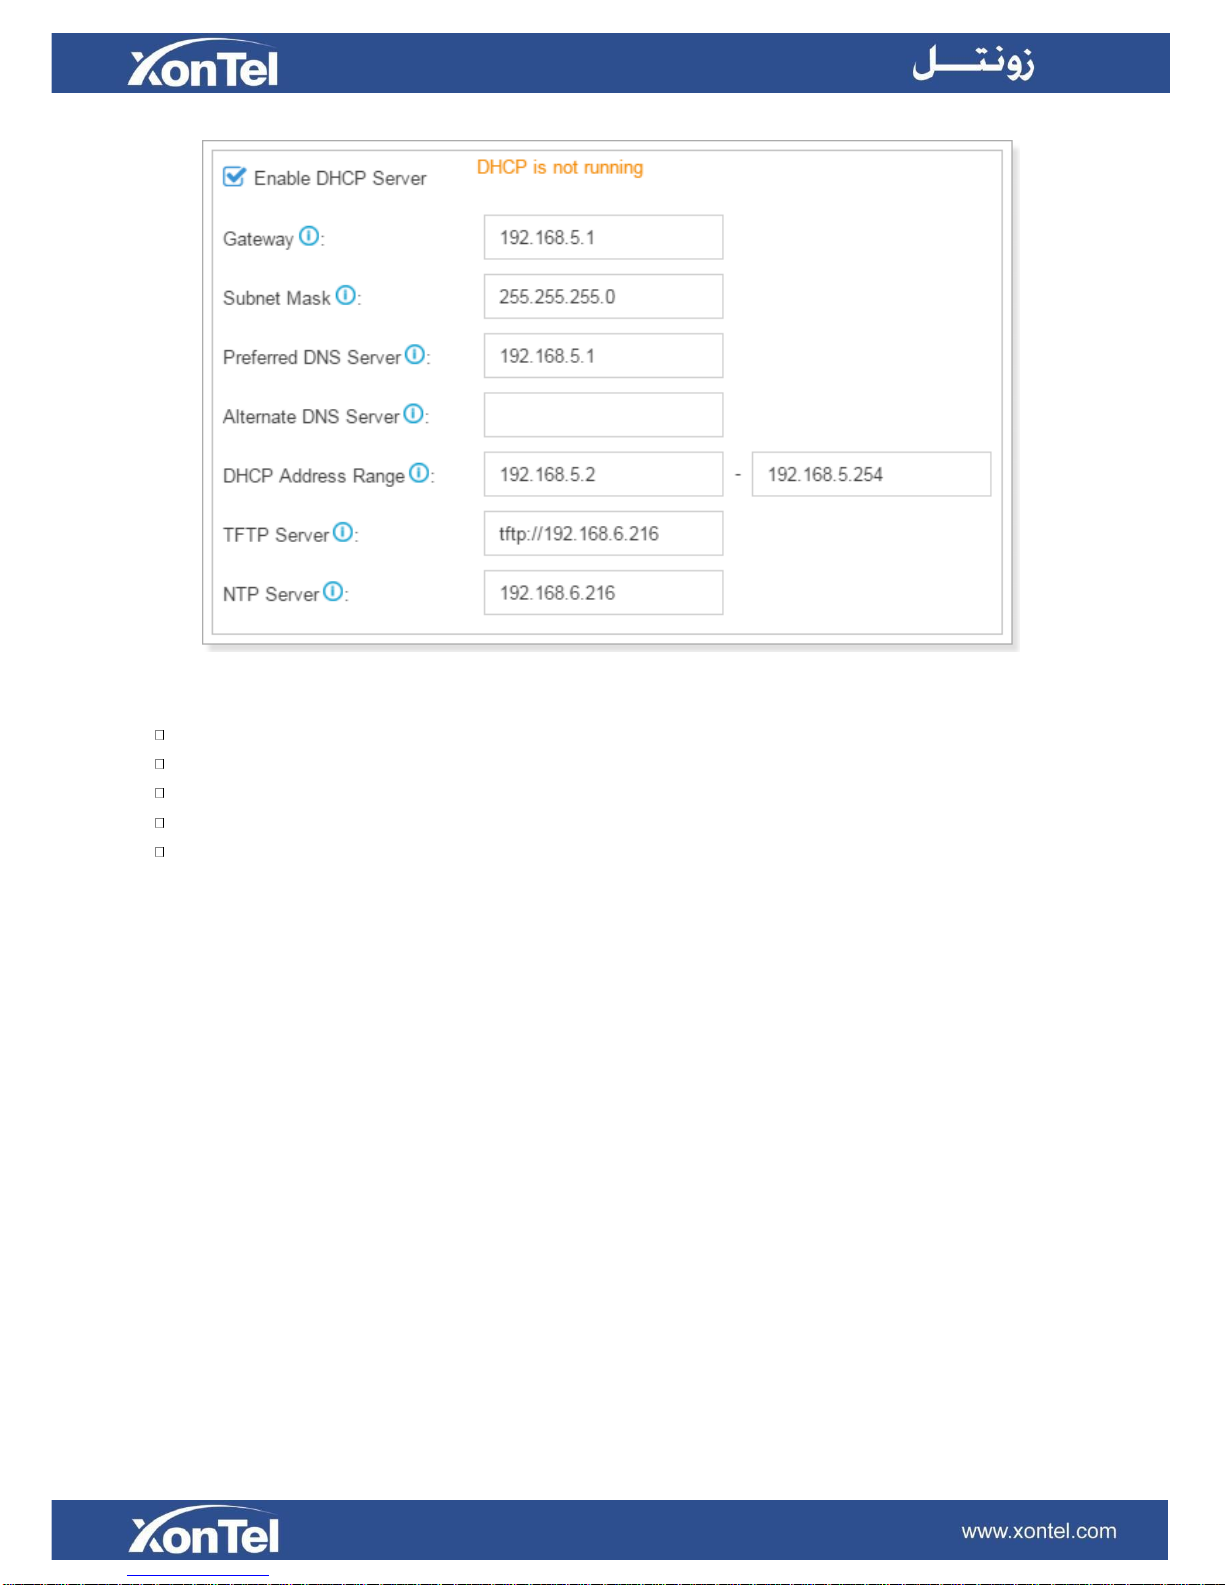
DHCP
Table 3-7 Service Configuration
Check the box Enable DHCP Server, XonTel PBX will acts as a DHCP server. This feature is used
when you do phone provisioning through DHCP mode.
24
Figure 3-4 DHCP Server
Gateway: enter the gateway IP address.
Subnet Mask: enter the subnet mask.
Preferred DNS Server: enter the preferred DNS server.
Alternate DNS Server: enter the alternate DNS server.
Allow IP Address: this sets the IP address that the DHCP server can assign to network devices.
Start IP address is on the left and end IP on the right.
TFTP Server: this option is for Phone Provisioning feature. So IP phones can get configuration
file from this address. For Grandstream and Panasonic phones, enter the PBX’s IP address, for
example: 192.168.5.150. For other IP phones, remember to specify the protocol, for example,
tftp://192.168.5.150.
NTP Server: the PBX can be a NTP server. By default, it is the PBX’s IP address.
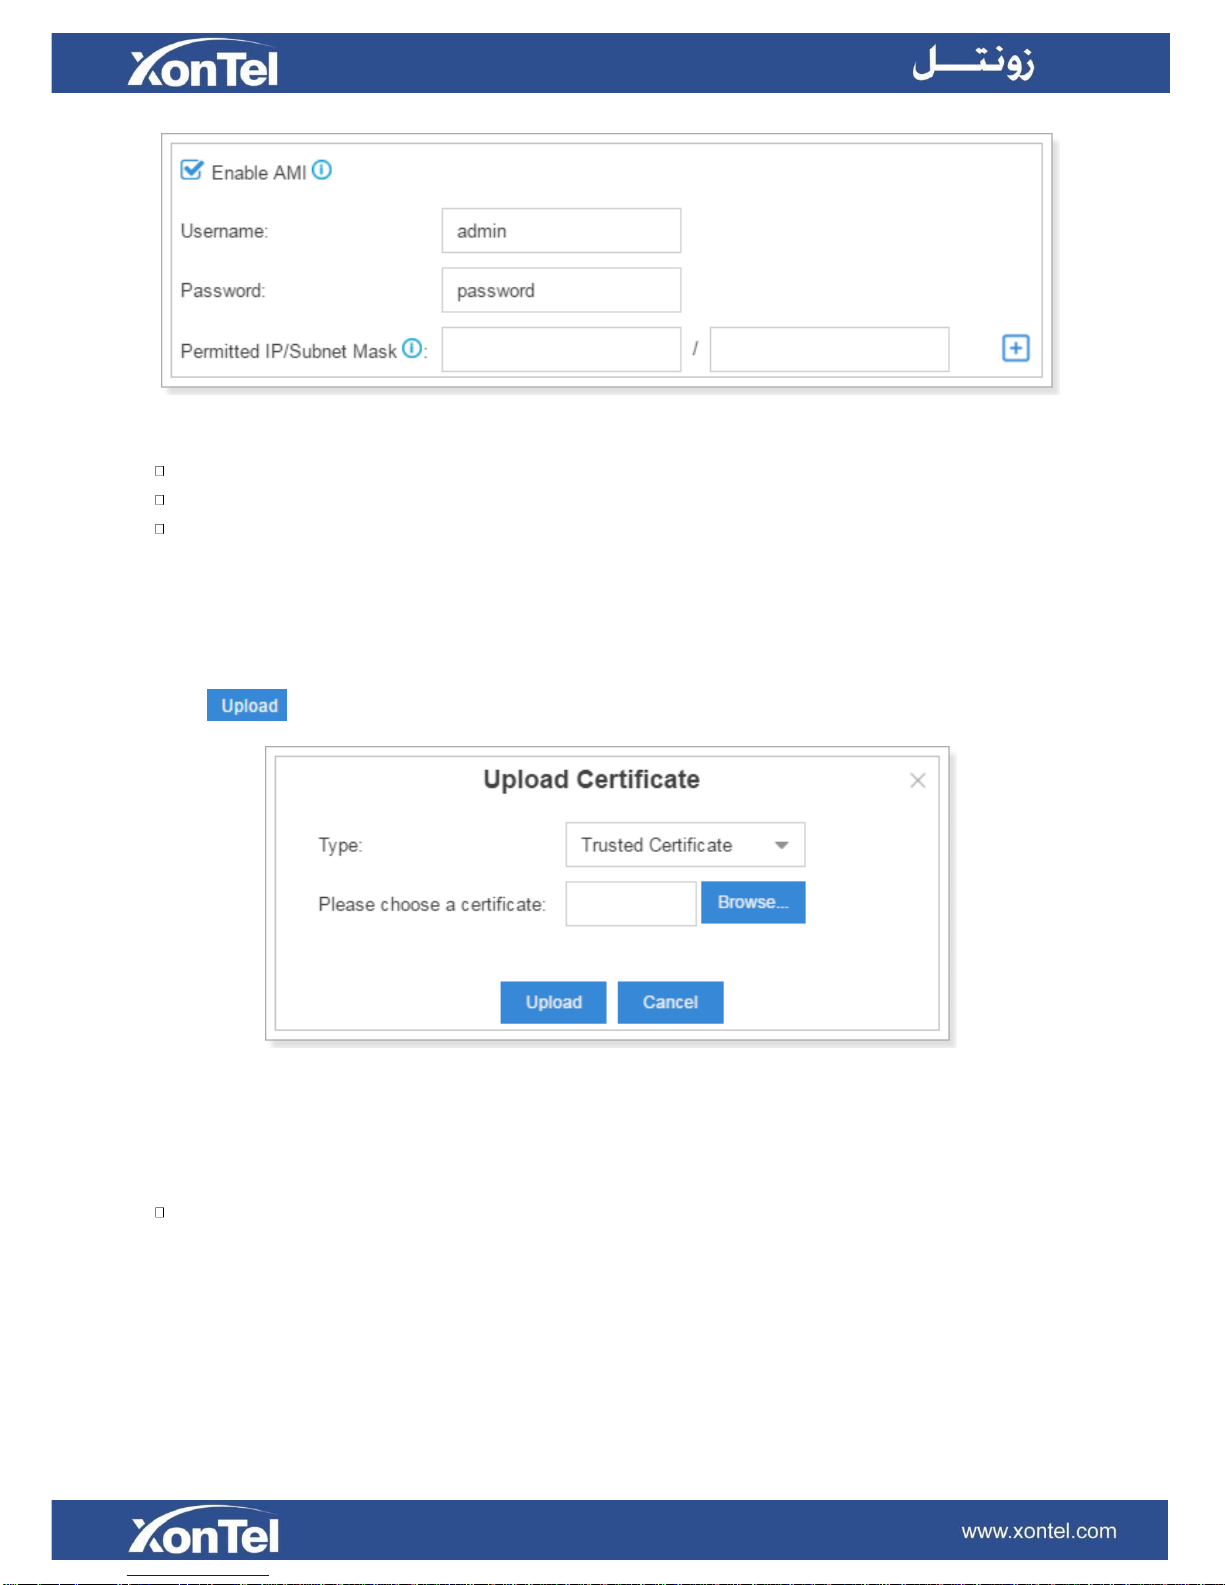
AMI
The Asterisk Manager Interface (AMI) is a system monitoring and management interface provided
by Asterisk. The 3
rd
party software can work with XonTel using AMI interface. The default port is
5038.
25
Figure 3-5 AMI Settings
Username: specify a name for the AMI user.
Password: specify a password for the user to connect to AMI.
Permitted IP/Subnet mask: configure permitted IP address and subnet mask that would be
allowed to authenticate as the AMI user. If you do not set this option, all IPs will be denied.
Certificate
XonTel XT-60/XT-120 supports TLS and HTTPS protocols. Before using these two protocols, you
need to upload the relevant certificates to the system.
Click to upload a certificate.
Figure 3-6 Certificate
Trusted Certificate: This certificate is a CA certificate. When selecting “TLS Verify Client” as
“Yes”, you should upload a CA. The relevant TLS client (i.e. IP phone) should also have this
certificate.
PBX Certificate:
This certificate is server certificate. No matter selecting “TLS Verify Client” as ”Yes” or “NO”, you
should upload this certificate to XonTel. If TLS client (i.e. IP phone) enables “TLS Verify server”,
you should also upload the relevant CA certificate on IP phone.
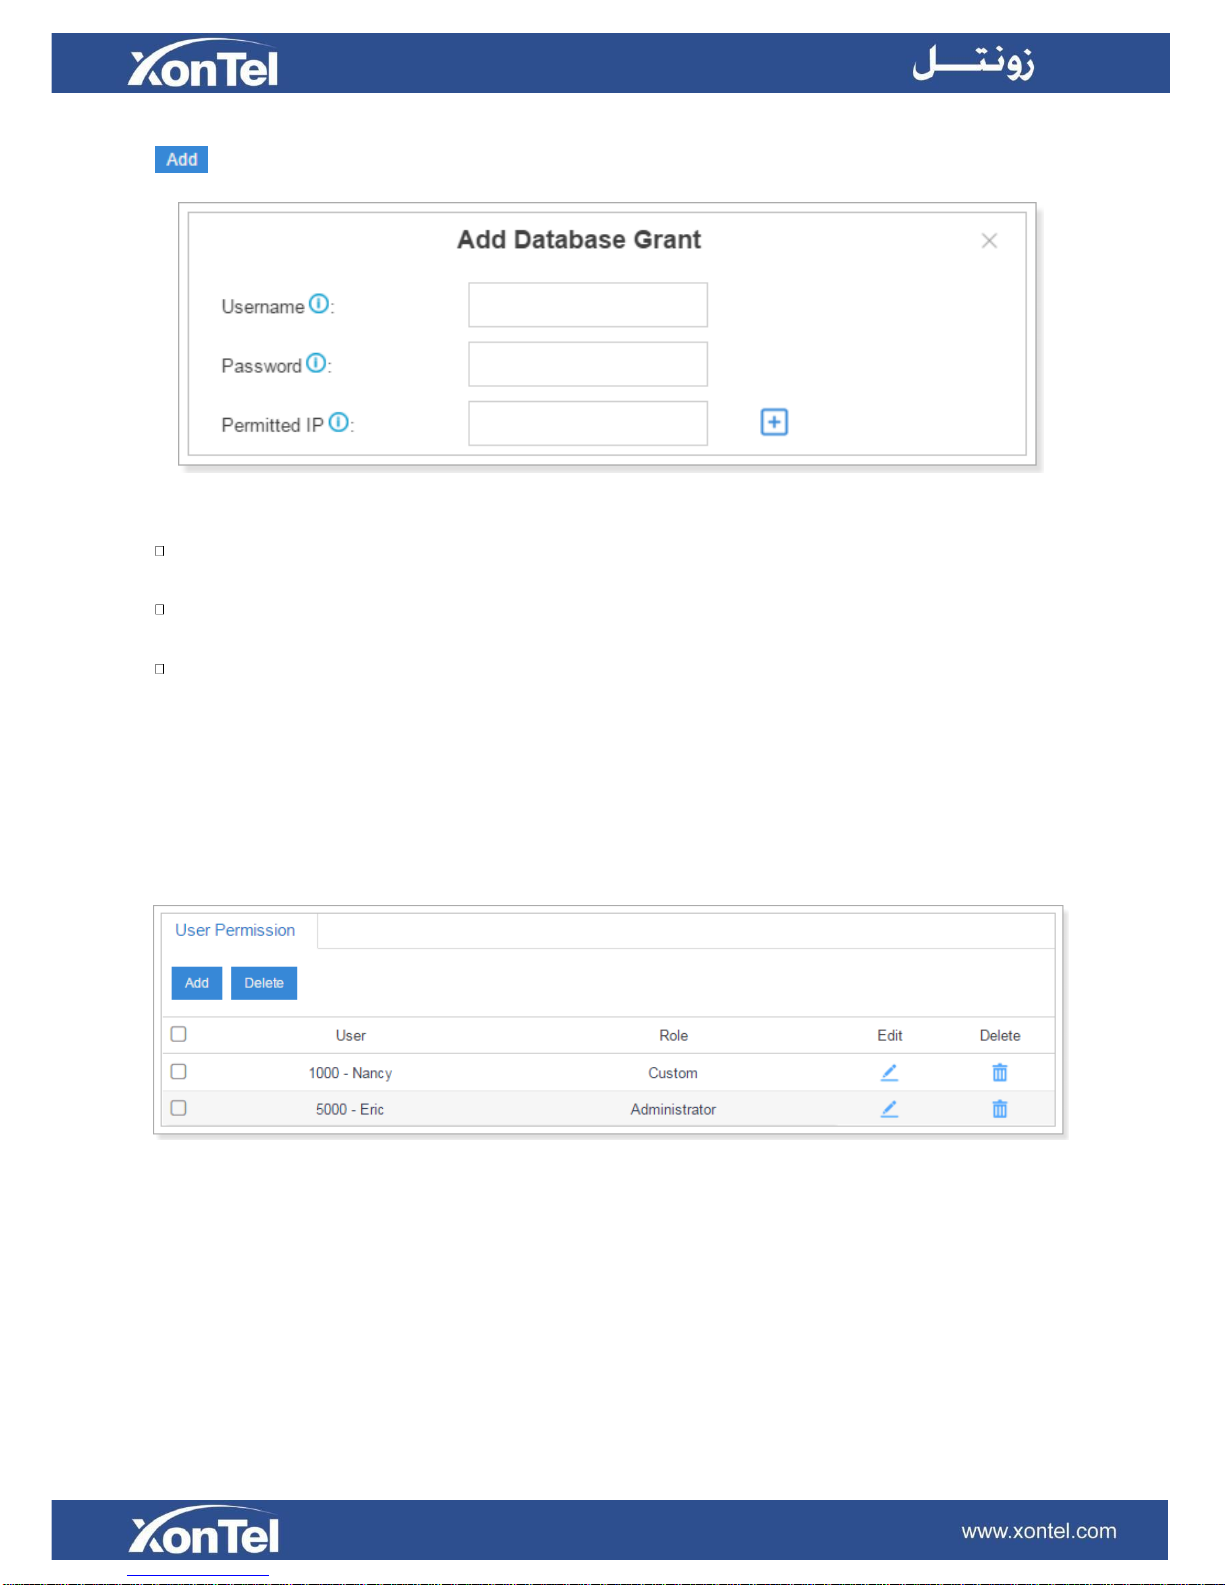
Database Grant
XonTel XT-60/XT-120 is using MySQL database. The 3
rd
party software can access MySQL via the
Internet. Before that, you need to grant the authority to the database user. Go to Database Grant page,
click
26
to add a database user, specify the username and password.
Figure 3-7 Add Database Grant
Username: configure the username which can be used by third party to access the database of
PBX.
Password: configure the password which can be used by third party to access the database of
PBX.
Permitted IP: enter the permitted IP address.
User Permission
The system has one default administrator account, which has the highest privileges. Here the
administrator is referred as Super Admin. The system will automatically create user accounts when
new extensions are created. By default, the extension users can log in the system and check their
own settings and CDR. The Super Admin can grant more privileges for extension users. All the
created users will be displayed on the User Permission page.
Figure 3-8 User Permission
Super Admin has the highest privilege. The super administrator can access all pages on
XT60/XT-120 Web and make all the configurations on the system.
Username: admin
Default Password: xontel
Administrator is created by the Super Admin. The administrator has all the privileges but
cannot create new users for login.
Custom User is created by the Super Admin. The Super Admin sets the privileges for those
users according to different situations.
27
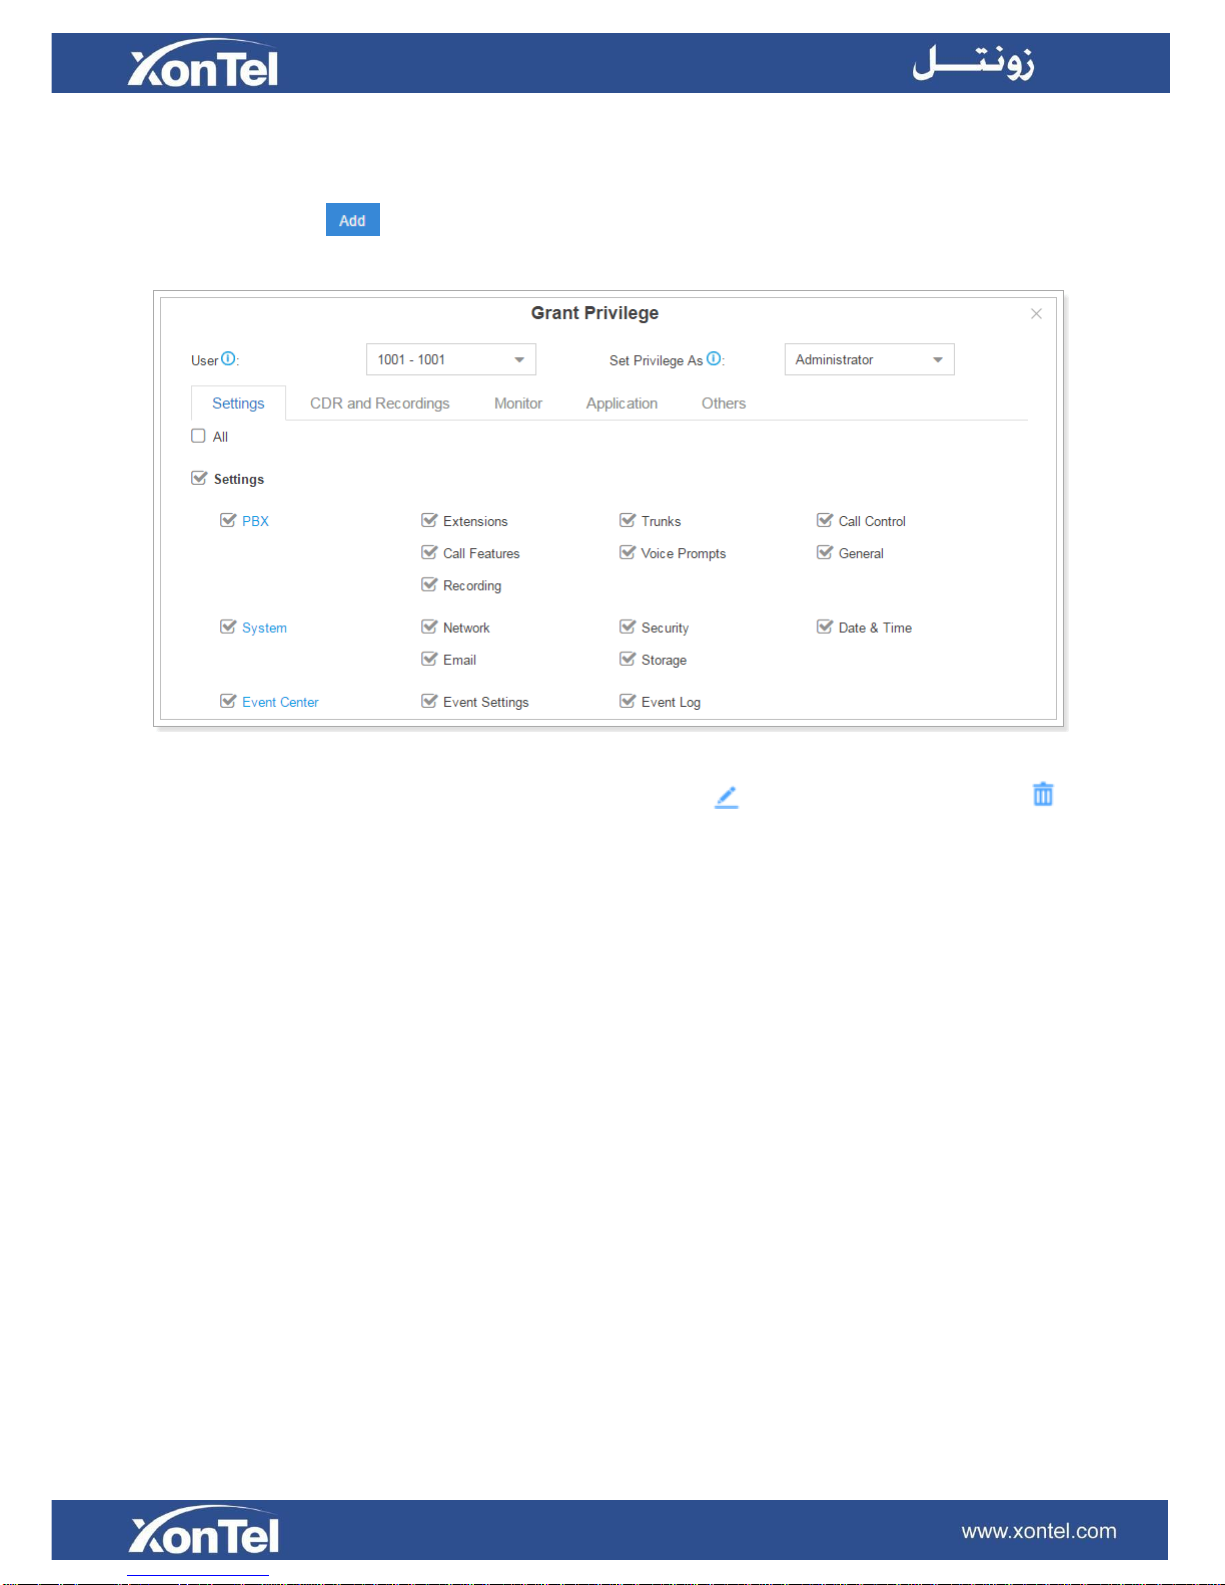
Add New User Permission
Log in the XT-60/XT-120 Web GUI with the Super Admin account, go to Settings > System > User
Permission. Click to add a new User Permission. The following window prompts. Choose the
user and privilege type, then check the options to enable the privileges for the user.
Figure 3-9 Add New User Permission
Once created, the Super Admin can edit the users by clicking or delete the users by clicking .
User Portal
The extension user could log in XT-60/XT-120 Web GUI with the extension username and password.
The extension user account is created automatically when an extension is created on the system.
Username: extension number (i.e. 1000)
Default password: “pass” plus extension number (i.e. pass1000)
Below is an example of login page using extension number 1000.
28
Figure 3-10 User Portal
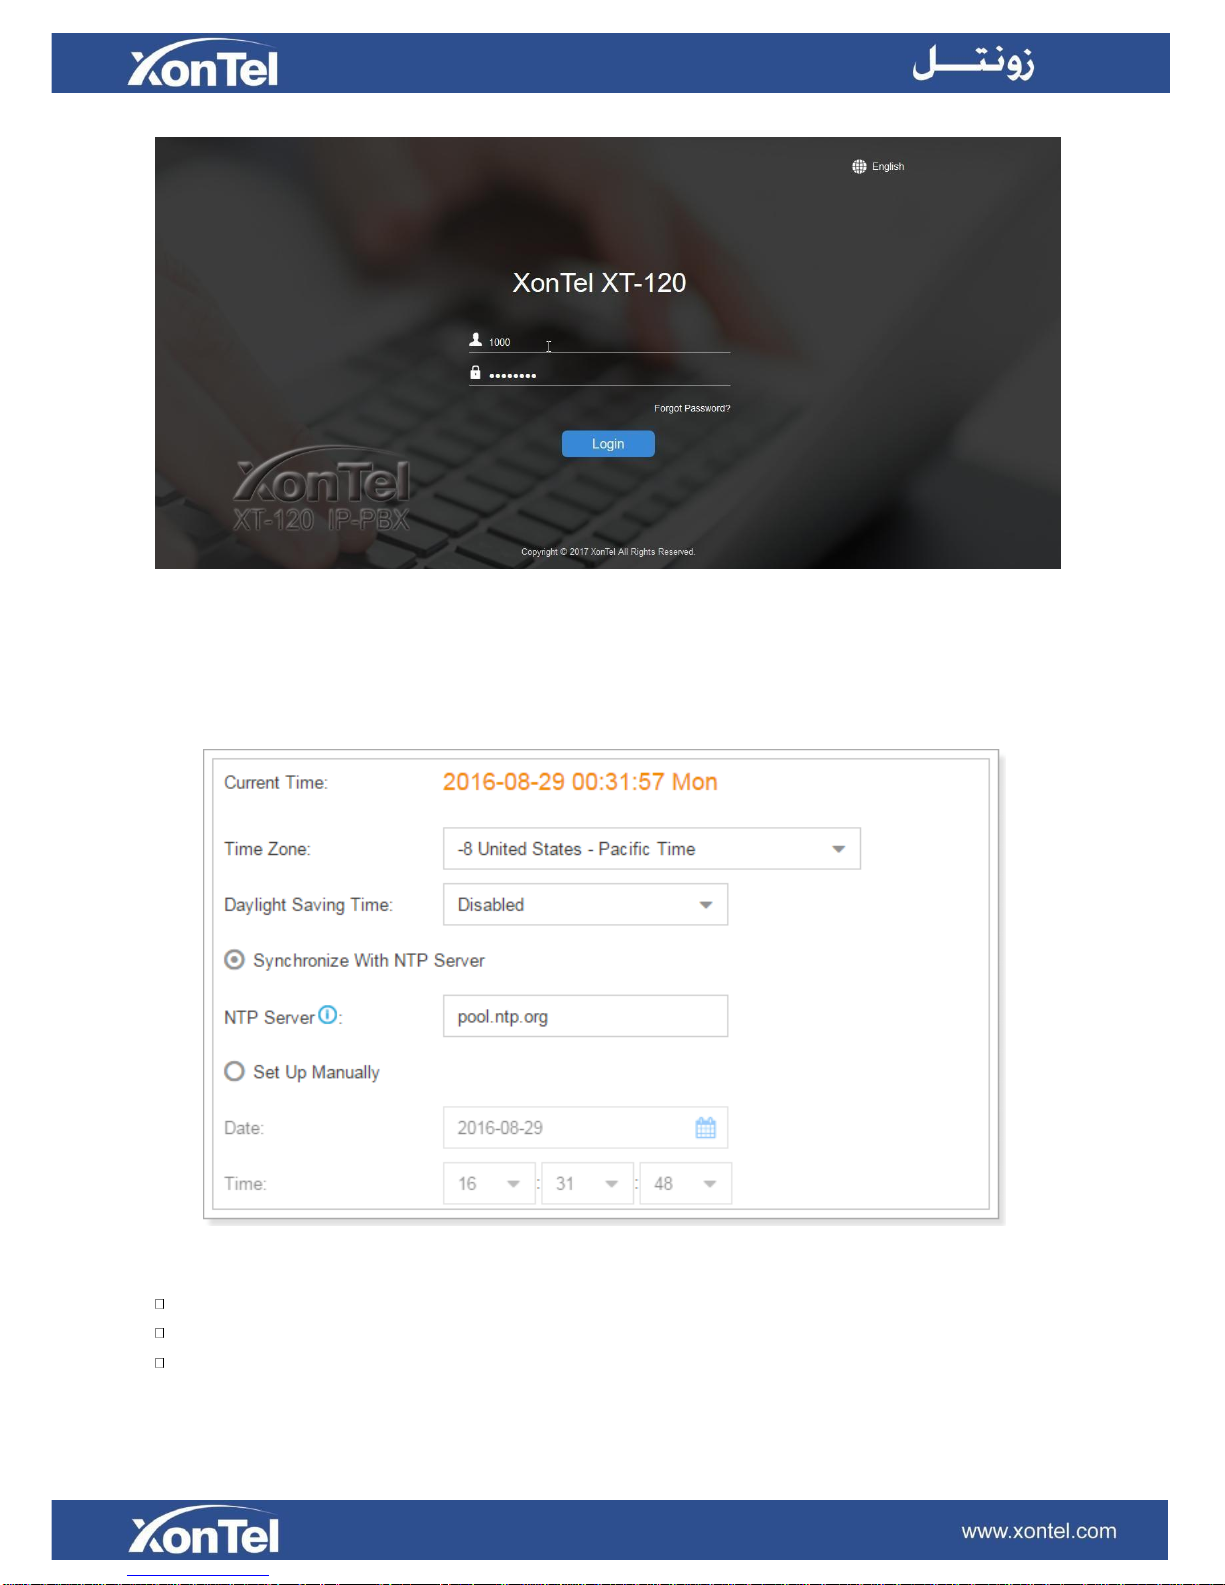
Date & Time
Go to Settings > System > Date & Time to check the current time on the system. Here you can
adjust time of the system (including time zone) to your local time.
Figure 3-11 Date & Time
Time Zone: select your current time zone.
Daylight Saving Time: the option is disabled by default. Enable it when necessary.
Synchronize With NTP Server: if you choose this mode, the system will adjust its internal clock
to a central network server. Please note XT-60/XT-120 should be able to access the Internet if
you choose the mode.
29
NTP Server: enter a NTP server.
Set Up Manually: if you choose this mode, you need to set the time manually.
Date: choose the date.
Time: choose the time.
Email
Set the system’s email to send voicemail to email, alert event emails, fax to email, email to SMS and
SMS to email. Go to Settings > System > Email to configure the system email.
Check the email settings parameters below.
Option
Description
Email Address
Enter the email address.
Password
Enter the password.
Outgoing Mail Server (SMTP)
Enter SMTP server and port.
Example:
smtp.sina.com:25
Incoming Mail Server (POP3)
Enter the POP3 server and port.
Example:
pop.sina.com:110
Enable TLS
Use TLS to send secure message to server .If the email
sending server needs to authenticate the sender, you
need to select the checkbox.
Note: if you use Gmail or Exchange, you need enable
this option.
Table 3-8 Email Settings
After finishing the configuration, click to test the email. In the prompt, fill in an email address
to send a test email to verify the Email settings.
Storage
XonTel XT-60/XT-120 provides local storage (Flash) and supports external storage TF/SD card.
Users could choose where to store the voicemails, CDR, recordings and logs.
Storage Devices
Go to Settings > System > Storage to configure the storage. All the local storage and external
storage status shows on the page.

30
Figure 3-12 Storage Devices
To format a external storage:
1. Click .
2. Click on the pop-up window to start formatting.
To add Network Drive:
The Network Drive feature is used to extend storage space. Before network drive can be properly
configured, an SMB share folder accessible from XonTel system must be set up on a Windows based
machine. Once that has been set up, please follow the following instructions to configure network
drive:
1. Choose a window-based computer that is always in service.
2. Create a folder.
3. Share this folder to Everyone.
4. Click and input the Net-Disk information in XonTel XT-60/XT-120:
Figure 3-13 Add Network Disk
Name: give this network drive a name to help you identify it.
Host/IP: set the IP address where the recordings will be stored.
 Loading...