

Page 1

Reference
Guide
hp StorageWorks
Storage System Scripting Utility
Command View EVA
Product Version: 3.2
Fifth Edition (July 2004)
Part Number: AA-RU5HC-TE
This guide describes the commands available in the Storage System Scripting Utility (SSSU) for
Command View EVA. These commands configure and control HSV controllers.
Page 2

© Copyright 1998-2004 Hewlett-Packard Development Company, L.P.
Hewlett-Packard Company makes no warranty of any kind with regard to this material, including, but not limited to,
the implied warranties of merchantability and fitness for a particular purpose. Hewlett-Packard shall not be liable for
errors contained herein or for incidental or consequential damages in connection with the furnishing, performance,
or use of this material.
This document contains proprietary information, which is protected by copyright. No part of this document may be
photocopied, reproduced, or translated into another language without the prior written consent of Hewlett-Packard.
The information contained in this document is subject to change without notice.
Compaq Computer Corporation is a wholly-owned subsidiary of Hewlett-Packard Company.
Adobe® and Acrobat® are trademarks of Adobe Systems Incorporated.
Intel® and Celeron® are U.S. registered trademarks of Intel Corporation.
Intel® and Itanium® are trademarks or registered trademarks of Intel Corporation in the U.S. and other countries
and are used under license.
Intel® Itanium™ Processor Family is a trademark in the U.S. and other countries and is used under license.
Microsoft®, MS-DOS®, MS Windows®, Windows®, and Windows NT® are U.S. registered trademarks of
Microsoft Corporation.
Oracle® is a registered U.S. trademark of Oracle Corporation, Redwood City, California.
UNIX® is a registered trademark of The Open Group.
Hewlett-Packard Company shall not be liable for technical or editorial errors or omissions contained herein. The
information is provided “as is” without warranty of any kind and is subject to change without notice. The warranties
for Hewlett-Packard Company products are set forth in the express limited warranty statements for such products.
Nothing herein should be construed as constituting an additional warranty.
Printed in the U.S.A.
Command View EVA Storage System Scripting Utility Reference Guide
Fifth Edition (July 2004)
Part Number: AA-RU5HC-TE
Page 3

contents
About this Guide. . . . . . . . . . . . . . . . . . . . . . . . . . . . . . . . . . . . . . . . . . . . . . . . . . . .7
Intended audience. . . . . . . . . . . . . . . . . . . . . . . . . . . . . . . . . . . . . . . . . . . . . . . . . . . . . . . . . . . 8
Related documentation . . . . . . . . . . . . . . . . . . . . . . . . . . . . . . . . . . . . . . . . . . . . . . . . . . . . . . . 9
Conventions . . . . . . . . . . . . . . . . . . . . . . . . . . . . . . . . . . . . . . . . . . . . . . . . . . . . . . . . . . . . . . 10
Document conventions. . . . . . . . . . . . . . . . . . . . . . . . . . . . . . . . . . . . . . . . . . . . . . . . . . . 10
Text symbols . . . . . . . . . . . . . . . . . . . . . . . . . . . . . . . . . . . . . . . . . . . . . . . . . . . . . . . . . . 10
Getting help . . . . . . . . . . . . . . . . . . . . . . . . . . . . . . . . . . . . . . . . . . . . . . . . . . . . . . . . . . . . . . 12
HP technical support . . . . . . . . . . . . . . . . . . . . . . . . . . . . . . . . . . . . . . . . . . . . . . . . . . . . 12
HP storage web site . . . . . . . . . . . . . . . . . . . . . . . . . . . . . . . . . . . . . . . . . . . . . . . . . . . . . 12
HP authorized reseller . . . . . . . . . . . . . . . . . . . . . . . . . . . . . . . . . . . . . . . . . . . . . . . . . . . 12
1 Introduction . . . . . . . . . . . . . . . . . . . . . . . . . . . . . . . . . . . . . . . . . . . . . . . . . . . . . .13
Description . . . . . . . . . . . . . . . . . . . . . . . . . . . . . . . . . . . . . . . . . . . . . . . . . . . . . . . . . . . . . . . 14
Formatting and output of returned data . . . . . . . . . . . . . . . . . . . . . . . . . . . . . . . . . . . . . . 14
Installing the Storage System Scripting Utility . . . . . . . . . . . . . . . . . . . . . . . . . . . . . . . . . . . 15
Installing the HP-UX kit . . . . . . . . . . . . . . . . . . . . . . . . . . . . . . . . . . . . . . . . . . . . . . . . . 15
To execute SSSU. . . . . . . . . . . . . . . . . . . . . . . . . . . . . . . . . . . . . . . . . . . . . . . . . . . . 16
Installing the IBM Host Kit . . . . . . . . . . . . . . . . . . . . . . . . . . . . . . . . . . . . . . . . . . . . . . . 16
LINUX . . . . . . . . . . . . . . . . . . . . . . . . . . . . . . . . . . . . . . . . . . . . . . . . . . . . . . . . . . . . . . . 17
Novell NetWare . . . . . . . . . . . . . . . . . . . . . . . . . . . . . . . . . . . . . . . . . . . . . . . . . . . . . . . . 17
OVMS . . . . . . . . . . . . . . . . . . . . . . . . . . . . . . . . . . . . . . . . . . . . . . . . . . . . . . . . . . . . . . . 18
SUN . . . . . . . . . . . . . . . . . . . . . . . . . . . . . . . . . . . . . . . . . . . . . . . . . . . . . . . . . . . . . . . . . 18
TRU64 . . . . . . . . . . . . . . . . . . . . . . . . . . . . . . . . . . . . . . . . . . . . . . . . . . . . . . . . . . . . . . . 19
To execute SSSU. . . . . . . . . . . . . . . . . . . . . . . . . . . . . . . . . . . . . . . . . . . . . . . . . . . . 20
WINDOWS . . . . . . . . . . . . . . . . . . . . . . . . . . . . . . . . . . . . . . . . . . . . . . . . . . . . . . . . . . . 20
Starting the Storage System Scripting Utility. . . . . . . . . . . . . . . . . . . . . . . . . . . . . . . . . . . . . 21
Syntax. . . . . . . . . . . . . . . . . . . . . . . . . . . . . . . . . . . . . . . . . . . . . . . . . . . . . . . . . . . . . . . . 21
Examples . . . . . . . . . . . . . . . . . . . . . . . . . . . . . . . . . . . . . . . . . . . . . . . . . . . . . . . . . . . . . 21
Understanding paths and naming conventions. . . . . . . . . . . . . . . . . . . . . . . . . . . . . . . . . . . . 23
Cross Vraid . . . . . . . . . . . . . . . . . . . . . . . . . . . . . . . . . . . . . . . . . . . . . . . . . . . . . . . . . . . . . . . 26
Contents
3Command View EVA Storage System Scripting Utility Reference Guide
Page 4

Contents
2 SSSU Command Reference . . . . . . . . . . . . . . . . . . . . . . . . . . . . . . . . . . . . . . . . . . .27
Command introduction . . . . . . . . . . . . . . . . . . . . . . . . . . . . . . . . . . . . . . . . . . . . . . . . . . . . . . 28
ADD . . . . . . . . . . . . . . . . . . . . . . . . . . . . . . . . . . . . . . . . . . . . . . . . . . . . . . . . . . . . . . . . . . . . 29
ADD COPY . . . . . . . . . . . . . . . . . . . . . . . . . . . . . . . . . . . . . . . . . . . . . . . . . . . . . . . . . . . . . . 30
ADD DR_GROUP . . . . . . . . . . . . . . . . . . . . . . . . . . . . . . . . . . . . . . . . . . . . . . . . . . . . . . . . . 32
ADD DISK_GROUP . . . . . . . . . . . . . . . . . . . . . . . . . . . . . . . . . . . . . . . . . . . . . . . . . . . . . . . 34
ADD FOLDER . . . . . . . . . . . . . . . . . . . . . . . . . . . . . . . . . . . . . . . . . . . . . . . . . . . . . . . . . . . . 36
ADD HOST . . . . . . . . . . . . . . . . . . . . . . . . . . . . . . . . . . . . . . . . . . . . . . . . . . . . . . . . . . . . . . 37
ADD LUN . . . . . . . . . . . . . . . . . . . . . . . . . . . . . . . . . . . . . . . . . . . . . . . . . . . . . . . . . . . . . . . 39
ADD SNAPSHOT . . . . . . . . . . . . . . . . . . . . . . . . . . . . . . . . . . . . . . . . . . . . . . . . . . . . . . . . . 40
ADD SYSTEM. . . . . . . . . . . . . . . . . . . . . . . . . . . . . . . . . . . . . . . . . . . . . . . . . . . . . . . . . . . . 42
ADD VDISK . . . . . . . . . . . . . . . . . . . . . . . . . . . . . . . . . . . . . . . . . . . . . . . . . . . . . . . . . . . . . 44
CAPTURE CONFIGURATION . . . . . . . . . . . . . . . . . . . . . . . . . . . . . . . . . . . . . . . . . . . . . . 49
CAPTURE VALIDATE. . . . . . . . . . . . . . . . . . . . . . . . . . . . . . . . . . . . . . . . . . . . . . . . . . . . . 52
DELETE . . . . . . . . . . . . . . . . . . . . . . . . . . . . . . . . . . . . . . . . . . . . . . . . . . . . . . . . . . . . . . . . . 53
DELETE DR_GROUP. . . . . . . . . . . . . . . . . . . . . . . . . . . . . . . . . . . . . . . . . . . . . . . . . . . . . . 54
DELETE DISK_GROUP . . . . . . . . . . . . . . . . . . . . . . . . . . . . . . . . . . . . . . . . . . . . . . . . . . . . 55
DELETE FOLDER. . . . . . . . . . . . . . . . . . . . . . . . . . . . . . . . . . . . . . . . . . . . . . . . . . . . . . . . . 56
DELETE HOST . . . . . . . . . . . . . . . . . . . . . . . . . . . . . . . . . . . . . . . . . . . . . . . . . . . . . . . . . . . 57
DELETE LUN . . . . . . . . . . . . . . . . . . . . . . . . . . . . . . . . . . . . . . . . . . . . . . . . . . . . . . . . . . . . 58
DELETE SYSTEM . . . . . . . . . . . . . . . . . . . . . . . . . . . . . . . . . . . . . . . . . . . . . . . . . . . . . . . . 59
DELETE VDISK . . . . . . . . . . . . . . . . . . . . . . . . . . . . . . . . . . . . . . . . . . . . . . . . . . . . . . . . . . 60
EMVERSION. . . . . . . . . . . . . . . . . . . . . . . . . . . . . . . . . . . . . . . . . . . . . . . . . . . . . . . . . . . . . 62
EXERCISE_DISK . . . . . . . . . . . . . . . . . . . . . . . . . . . . . . . . . . . . . . . . . . . . . . . . . . . . . . . . . 63
EXIT . . . . . . . . . . . . . . . . . . . . . . . . . . . . . . . . . . . . . . . . . . . . . . . . . . . . . . . . . . . . . . . . . . . . 64
FILE . . . . . . . . . . . . . . . . . . . . . . . . . . . . . . . . . . . . . . . . . . . . . . . . . . . . . . . . . . . . . . . . . . . . 65
HELP . . . . . . . . . . . . . . . . . . . . . . . . . . . . . . . . . . . . . . . . . . . . . . . . . . . . . . . . . . . . . . . . . . . 66
REDISCOVER . . . . . . . . . . . . . . . . . . . . . . . . . . . . . . . . . . . . . . . . . . . . . . . . . . . . . . . . . . . . 67
RESTART. . . . . . . . . . . . . . . . . . . . . . . . . . . . . . . . . . . . . . . . . . . . . . . . . . . . . . . . . . . . . . . . 68
SELECT . . . . . . . . . . . . . . . . . . . . . . . . . . . . . . . . . . . . . . . . . . . . . . . . . . . . . . . . . . . . . . . . . 69
SELECT MANAGER . . . . . . . . . . . . . . . . . . . . . . . . . . . . . . . . . . . . . . . . . . . . . . . . . . . . . . 70
SELECT SYSTEM. . . . . . . . . . . . . . . . . . . . . . . . . . . . . . . . . . . . . . . . . . . . . . . . . . . . . . . . . 71
SET . . . . . . . . . . . . . . . . . . . . . . . . . . . . . . . . . . . . . . . . . . . . . . . . . . . . . . . . . . . . . . . . . . . . . 72
SET DR_GROUP. . . . . . . . . . . . . . . . . . . . . . . . . . . . . . . . . . . . . . . . . . . . . . . . . . . . . . . . . . 73
SET DISK. . . . . . . . . . . . . . . . . . . . . . . . . . . . . . . . . . . . . . . . . . . . . . . . . . . . . . . . . . . . . . . . 76
SET DISK_GROUP . . . . . . . . . . . . . . . . . . . . . . . . . . . . . . . . . . . . . . . . . . . . . . . . . . . . . . . . 77
SET FOLDER. . . . . . . . . . . . . . . . . . . . . . . . . . . . . . . . . . . . . . . . . . . . . . . . . . . . . . . . . . . . . 79
SET HOST . . . . . . . . . . . . . . . . . . . . . . . . . . . . . . . . . . . . . . . . . . . . . . . . . . . . . . . . . . . . . . . 80
4 Command View EVA Storage System Scripting Utility Reference Guide
Page 5

Contents
SET MONITOR . . . . . . . . . . . . . . . . . . . . . . . . . . . . . . . . . . . . . . . . . . . . . . . . . . . . . . . . . . . 82
SET OPTIONS . . . . . . . . . . . . . . . . . . . . . . . . . . . . . . . . . . . . . . . . . . . . . . . . . . . . . . . . . . . . 83
SET SYSTEM . . . . . . . . . . . . . . . . . . . . . . . . . . . . . . . . . . . . . . . . . . . . . . . . . . . . . . . . . . . . 86
SET VDISK . . . . . . . . . . . . . . . . . . . . . . . . . . . . . . . . . . . . . . . . . . . . . . . . . . . . . . . . . . . . . . 87
SHOW. . . . . . . . . . . . . . . . . . . . . . . . . . . . . . . . . . . . . . . . . . . . . . . . . . . . . . . . . . . . . . . . . . . 90
SHOW DR_GROUP . . . . . . . . . . . . . . . . . . . . . . . . . . . . . . . . . . . . . . . . . . . . . . . . . . . . . . . 91
SHOW DISK . . . . . . . . . . . . . . . . . . . . . . . . . . . . . . . . . . . . . . . . . . . . . . . . . . . . . . . . . . . . . 92
SHOW DISK_GROUP. . . . . . . . . . . . . . . . . . . . . . . . . . . . . . . . . . . . . . . . . . . . . . . . . . . . . . 93
SHOW HOST . . . . . . . . . . . . . . . . . . . . . . . . . . . . . . . . . . . . . . . . . . . . . . . . . . . . . . . . . . . . . 94
SHOW LUN . . . . . . . . . . . . . . . . . . . . . . . . . . . . . . . . . . . . . . . . . . . . . . . . . . . . . . . . . . . . . . 95
SHOW MANAGER . . . . . . . . . . . . . . . . . . . . . . . . . . . . . . . . . . . . . . . . . . . . . . . . . . . . . . . . 96
SHOW MONITOR. . . . . . . . . . . . . . . . . . . . . . . . . . . . . . . . . . . . . . . . . . . . . . . . . . . . . . . . . 97
SHOW OPTIONS. . . . . . . . . . . . . . . . . . . . . . . . . . . . . . . . . . . . . . . . . . . . . . . . . . . . . . . . . . 98
SHOW POWER . . . . . . . . . . . . . . . . . . . . . . . . . . . . . . . . . . . . . . . . . . . . . . . . . . . . . . . . . . . 99
SHOW SYSTEM . . . . . . . . . . . . . . . . . . . . . . . . . . . . . . . . . . . . . . . . . . . . . . . . . . . . . . . . . 100
SHOW VDISK . . . . . . . . . . . . . . . . . . . . . . . . . . . . . . . . . . . . . . . . . . . . . . . . . . . . . . . . . . . 101
SHOW WORLD_WIDE_NAME. . . . . . . . . . . . . . . . . . . . . . . . . . . . . . . . . . . . . . . . . . . . . 102
SHUTDOWN . . . . . . . . . . . . . . . . . . . . . . . . . . . . . . . . . . . . . . . . . . . . . . . . . . . . . . . . . . . . 103
2 Configuration Examples . . . . . . . . . . . . . . . . . . . . . . . . . . . . . . . . . . . . . . . . . . . .105
Creating a simple configuration . . . . . . . . . . . . . . . . . . . . . . . . . . . . . . . . . . . . . . . . . . . . . . 106
Creating the storage system . . . . . . . . . . . . . . . . . . . . . . . . . . . . . . . . . . . . . . . . . . . . . . 106
Creating and presenting a virtual disk . . . . . . . . . . . . . . . . . . . . . . . . . . . . . . . . . . . . . . 108
Using the SHOW commands . . . . . . . . . . . . . . . . . . . . . . . . . . . . . . . . . . . . . . . . . . . . . . . . 110
SHOW SYSTEM . . . . . . . . . . . . . . . . . . . . . . . . . . . . . . . . . . . . . . . . . . . . . . . . . . . . . . 110
SHOW VDISK. . . . . . . . . . . . . . . . . . . . . . . . . . . . . . . . . . . . . . . . . . . . . . . . . . . . . . . . 111
SHOW HOST. . . . . . . . . . . . . . . . . . . . . . . . . . . . . . . . . . . . . . . . . . . . . . . . . . . . . . . . . 112
SHOW LUN. . . . . . . . . . . . . . . . . . . . . . . . . . . . . . . . . . . . . . . . . . . . . . . . . . . . . . . . . . 113
A Glossary. . . . . . . . . . . . . . . . . . . . . . . . . . . . . . . . . . . . . . . . . . . . . . . . . . . . . . . .115
Index . . . . . . . . . . . . . . . . . . . . . . . . . . . . . . . . . . . . . . . . . . . . . . . . . . . . . . . . . .125
Tables
1 Document Conventions . . . . . . . . . . . . . . . . . . . . . . . . . . . . . . . . . . . . . . . . . . . . . . . . . . . 7
5Command View EVA Storage System Scripting Utility Reference Guide
Page 6

Contents
6 Command View EVA Storage System Scripting Utility Reference Guide
Page 7

about this
guide
This reference guide describes the HP StorageWorks Storage System Scripting
Utility (SSSU) commands.
“About this guide” topics include:
■ Intended audience, page 8
■ Related documentation, page 9
■ Conventions, page 10
■ Getting help, page 12
About this Guide
About this Guide
7Command View EVA Storage System Scripting Utility Reference Guide
Page 8

About this Guide
Intended audience
This guide is intended for storage administrators who are experienced with the
following:
■ Enterprise Virtual Array v2.006, v3.0, v3.010, v3.014, and v3.020
■ Configuration of SAN fabrics
■ HP-UX, HP Open VMS, HP Tru64, Microsoft Windows, Sun Solaris, IBM
AIX, Novell Netware, and Linux AS and SLES8 operating systems
8 Command View EVA Storage System Scripting Utility Reference Guide
Page 9

Related documentation
This section lists documents that provide additional information:
■ HP StorageWorks Host Operating System Kit for Enterprise Virtual Array
Installation and Configuration Guide (available for Sun Solaris, IBM AIX,
Windows, Tru64 UNIX, OpenVMS, HP-UX, Novell Netware, and Linux
operating systems)
■ HP StorageWorks Enterprise Virtual Array Users Guide
■ HP StorageWorks Enterprise Virtual Array - How to Get More Information
■ HP StorageWorks Enterprise Virtual Array Release Notes
■ HP StorageWorks Enterprise Virtual Array Storage System Read Me First
■ HP StorageWorks Enterprise Virtual Array Storage System World Wide Name
Label
■ HP StorageWorks Interactive Help for command view eva
■ HP StorageWorks Enterprise Virtual Array Configuration Guide
■ HP StorageWorks Enterprise Virtual Array Upgrade Instructions
■ HP StorageWorks Enterprise Virtual Array License Instructions
■ HP StorageWorks Enterprise Virtual Array Catalog of Associated
Documentation
■ HP StorageWorks Enterprise Virtual Array Storage System Installation
Instructions
About this Guide
■ HP StorageWorks Heterogeneous Open SAN Design Reference Guide
Command View EVA Storage System Scripting Utility Reference Guide
9
Page 10
About this Guide
Conventions
Conventions consist of the following:
■ Document conventions
■ Text symbols
Document conventions
The document conventions included in Tabl e 1 apply in most cases.
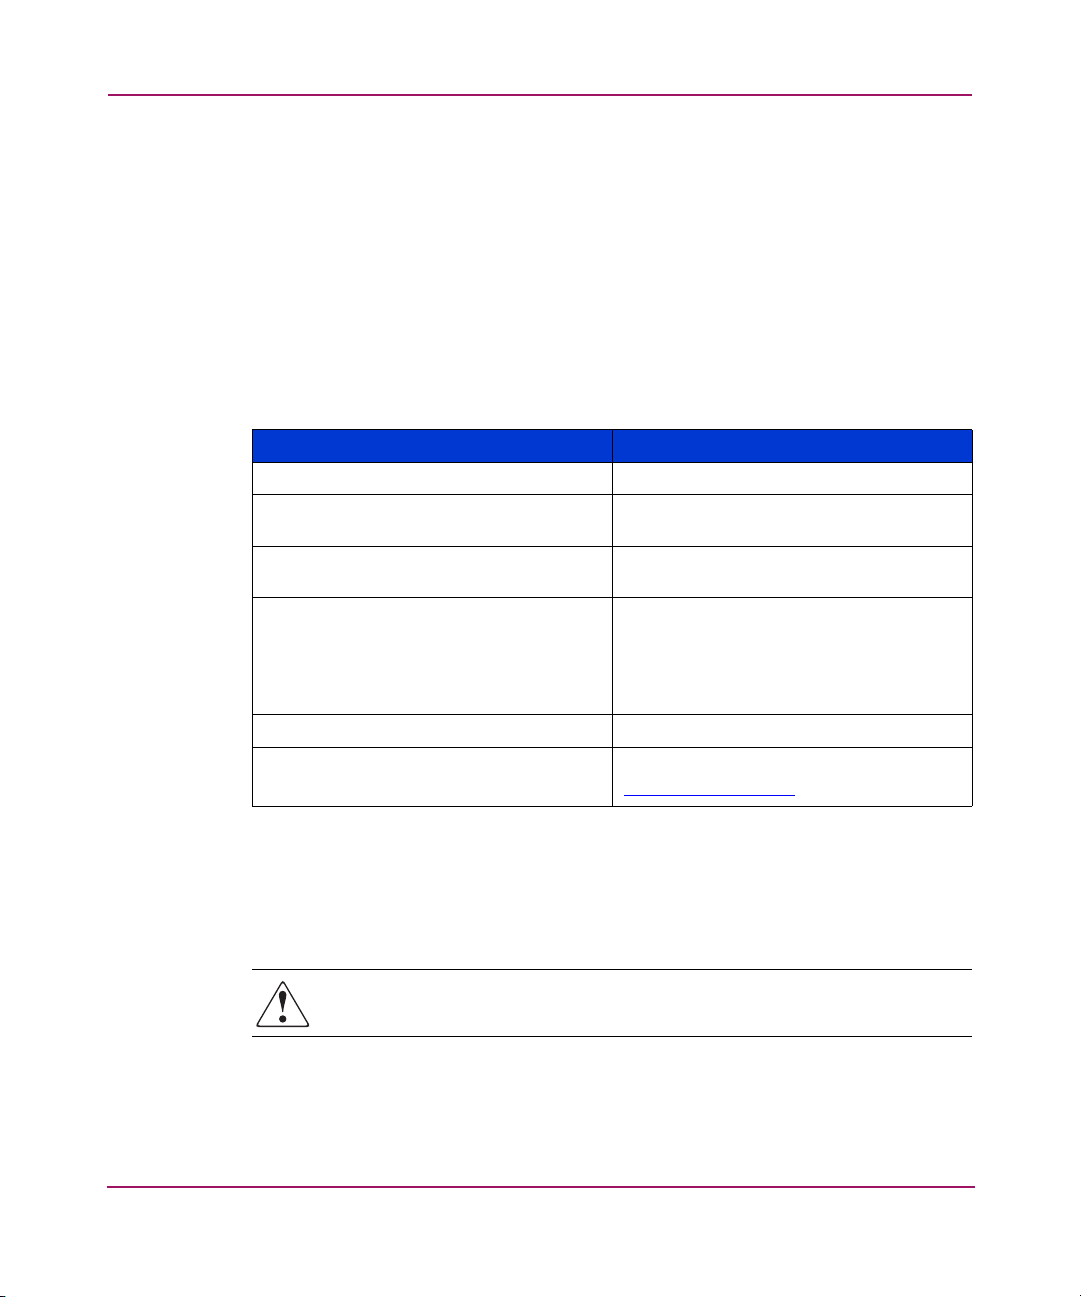
Table 1: Document conventions
Cross-reference links Blue text: Figure 1
Key and field names, menu items,
buttons, and dialog box titles
File names, application names, and text
emphasis
User input, command and directory
names, and system responses (output
and messages)
Variables
Web site addresses
Element Convention
Bold
Italics
Monospace font
COMMAND NAMES
monospace font unless they are case
sensitive
are uppercase
<monospace, italic font>
Blue, underlined sans serif font text:
http://www.hp.com
Text symbols
The following symbols may be found in the text of this guide. They have the
following meanings.
WARNING: Text set off in this manner indicates that failure to follow
directions in the warning could result in bodily harm or death.
10 Command View EVA Storage System Scripting Utility Reference Guide
Page 11

About this Guide
Caution: Text set off in this manner indicates that failure to follow directions
could result in damage to equipment or data.
Note: Text set off in this manner presents commentary, sidelights, or interesting points
of information.
Command View EVA Storage System Scripting Utility Reference Guide
11
Page 12

About this Guide
Getting help
If you still have a question after reading this guide, contact an HP-authorized
service provider or access our web site:
HP technical support
Telephone numbers for worldwide technical support are listed on the following
HP web site:
of origin.
Note: For continuous quality improvement, calls may be recorded or monitored.
Be sure to have the following information available before calling:
■ Technical support registration number (if applicable)
■ Product serial numbers
■ Product model names and numbers
■ Applicable error messages
http://www.hp.com
http://www .hp.com/support/
.
. From this web site, select the country
■ Operating system type and revision level
■ Detailed, specific questions
HP storage web site
The HP web site has the latest information on this product as well as the latest
drivers. Access storage at:
http://www.hp.com/country/us/eng/p rodserv/storage.html
. From this web site,
select the appropriate product or solution.
HP authorized reseller
For the name of your nearest HP-authorized reseller:
■ In the United States, call 1-800-345-1518
■ In Canada, call 1-800-263-5868
■ Elsewhere, see the HP web site for locations and telephone numbers:
http://www .hp .com
12 Command View EVA Storage System Scripting Utility Reference Guide
.
Page 13

Introduction
This chapter introduces the HP StorageWorks Enterprise Storage System
Scripting Utility (SSSU) for the HP StorageWorks Enterprise Virtual Array. The
following topics are covered:
■ Description, page 14
■ Installing the Storage System Scripting Utility, page 15
■ Starting the Storage System Scripting Utility, page 21
■ Understanding paths and naming conventions, page 23
■ Cross Vraid, page 26
1
13Command View EVA Storage System Scripting Utility Reference Guide
Page 14

Introduction
Description
The Storage System Scripting Utility (SSSU) for Enterprise Virtual Array is a
command line application that allows you to configure and control EVA 3000 and
5000 controllers.
You can execute configuration requests using Command View EVA or SSSU.
Command View EVA is the graphical user interface that allows you to control and
monitor a storage system. Use Command View EVA to handle simple or initial
configuration tasks easily and expediently. Use SSSU to script and run repetitious
and complex configuration tasks.
Formatting and output of returned data
All returned SHOW command data is formatted in the form of:
XMLtag : Data
The XML tag displays before the data, and then the tag’s data displays.
14 Command View EVA Storage System Scripting Utility Reference Guide
Page 15

Installing the Storage System Scripting Utility
The following procedures assume that you have loaded the Web kit to a
CD-ROM.
SSSU is installed from your Enterprise Virtual Array host operating system kits.
Refer to Chapter 2 in your Enterprise Virtual Array Installation and
Configuration Guide for detailed instructions for installing SSSU.
Once installed, SSSU can run as a simple executable. For convenience, you can
add the directory containing the SSSU executable to your path or copy the
executable to a directory already in your path. Ensure that the SSSU executable’s
attributes are set with the correct security and execution flags appropriate for your
environment.
The executable file is named sssu or SSSU.EXE depending on the operating
system environment.
Depending on your operating system and workstation, follow one of the
procedures below to install SSSU.
Installing the HP-UX kit
1. If you are re-installing SSSU, remove the older version with the command:
# swremove SSSU
2. Find the CD-ROM device (c3t2d0 in the example shown in step 3) by
entering:
# ioscan -fnuCdisk
Class I H/W Path DriverS/W State H/W Type Description
==========================================================
disk 33 8/4.5.0 sdisk CLAIMED DEVICE SEAGATE ST32550W
/dev/dsk/c0t5d0 /dev/rdsk/c0t5d0
disk 3 8/16/5.2.0 sdisk CLAIMED DEVICE TOSHIBA CD-ROM
XM-5401
A
/dev/dsk/c3t2d0 /dev/rdsk/c3t2d0
disk 4 8/16/5.4.0 sdisk CLAIMED DEVICE DEC RZ29B (C) D
D
C
/dev/dsk/c3t4d0 /dev/rdsk/c3t4d0
Introduction
15Command View EVA Storage System Scripting Utility Reference Guide
Page 16

Introduction
3. Mount the CD-ROM with the command:
# mount /dev/dsk/c3t2d0 /cdrom
4. Copy the depot file from the CD-ROM to a temporary directory on the host
system.
# cp /cdrom/sssu_v7_hpux.depot /tmp
5. Enter the following command to run the installation program (swinstall):
# swinstall -s /tmp/sssu_v7_hpux.depot
The SSSU executable is installed in the following directory:
#/sbin
To execute SSSU
■ Command line version, type
#sssu
Installing the IBM Host Kit
The IBM AIX Kit v3.0e for Enterprise Virtual Array installs the supported FCA
driver and the Storage System Scripting Utility (SSSU).
The HSV controllers can be configured with SSSU as an alternative to the
Command View EVA Element Manager. SSSU allows a command line interface
for issuing commands directly to the controller. Complex configuration requests
and operations can be handled by either the Command View EVA Element
Manager or SSSU. Simple or initial configuration requests can be handled easily
and expediently through the element manager, but repetitious and complex
configuration steps can be scripted and executed through the command line
interface.
The CAPTURE CONFIGURATION command is the only way to capture, save,
and recreate a storage system’s configuration.
The following section describes how to install and uninstall the IBM AIX Kit,
including the Secure Path driver on the IBM AIX host server. The Secure Path
driver is necessary for your IBM AIX server to interact with the Enterprise Virtual
Array.
1. Mount the AIX platform kit.
2. Go to the /aix_spec directory.
16 Command View EVA Storage System Scripting Utility Reference Guide
Page 17

3. Execute the command
LINUX
If you have already installed the FCA drivers, you can choose to install just the
SSSU.
1. Mount the CD-ROM.
2. Change to the RPMS directory.
3. Enter the following command:
Novell NetWare
The HSV controllers can be configured with SSSU. SSSU provides a command
line interface for issuing commands directly to the controller. Complex
configuration requests and operations can be handled by SSSU. Repetitious and
complex configuration steps can be scripted and executed through the command
line interface.
Introduction
installp -acd sssu-v31.rte all
rpm -ivh sssu-<version>.rpm
Note: The CAPTURE CONFIGURATION command is the only way to capture, save,
and recreate a storage system’s configuration.
Follow this procedure to install the SSSU application.
Note: You must use a Windows NT/2000 client, not a NetWare server, to install the
SSSU.
1. Insert the Novell NetWare Kit v3.0e for Enterprise Virtual Array CD-ROM.
2. Copy the SSSU.NLM file to the system directory on the server where you will
be running the utility. You can copy the file from a client, or on the server,
with the Console One file utitility.
17Command View EVA Storage System Scripting Utility Reference Guide
Page 18

Introduction
OVMS
1. Remove the currently installed version of SSSU by entering the following
command
$ Product remove product SSSU
2. Insert the OpenVMS Kit v3.0e for Enterprise Virtual Array CD-ROM.
3. Copy the self-extracting executable file SSSUVxBLDxx.exe from the
CD-ROM to a temporary directory on the host system.
4. Enter the following command to extract the file:
$ run SSSUVxBLDxx
The following file is extracted:
HP-ALPHA-SSSU-V0x00-xx-1.PCSI
Note: The xx designations in the SSSUVxBLDxx command and extracted
HP-ALPHA-SSSU-V0x00-xx-1.PCSI file indicate the latest build number.
5. Use the PolyCenter Software Installation program to install SSSU with the
command:
$ product install sssu
6. Follow the instructions to complete the installation.
The SSSU executable is installed in the following directory by default:
sys$system
SUN
If you have already installed the FCA drivers, you can choose to install just the
SSSU.
1. Follow the steps in the normal installation.
2. Choose the manual option.
3. Follow the instructions and select just the CPQhsv package.
The SSSU executable is installed in the following directory by default:
/opt/CPQhsv/bin
18 Command View EVA Storage System Scripting Utility Reference Guide
Page 19

TRU64
Introduction
Note: This is the default installation directory, which the user may alter during the
installation process. If you have used a different installation directory, the path would
be
/<BASE_DIR>/CPQhsv/bin.
1. Insert the Tru64 UNIX Kit v3.0e for Enterprise Virtual Array CD-ROM.
2. Enter the following command to extract the file (for v5.x):
# mount –r –t cdfs –o rrip /dev/disk/cdrom0c /mnt
Note: Substitute your CD-ROM device for cdrom0c, if necessary.
3. Change directories on the CD-ROM by entering:
# cd /mnt
4. Enter the following command to run the installation program:
# setld –l .
Note: The –l is a lowercase L.
The installation asks whether you want to install the listed subsets.
5. Enter the corresponding number of the software and press Return.
6. Select option y and press Return.
The SSSU executable is installed in the following directory:
#/usr/opt/ENTP003/sbin
Another method for installing SSSU is as follows.
1. Create a temporary directory on the Tru64 system.
2. Copy the file from the Web to the temporary directory.
3. Change the directory to the temp directory:
# tar -xvf filename.tar
# setld –l.
19Command View EVA Storage System Scripting Utility Reference Guide
Page 20

Introduction
To execute SSSU
In the command line version, type:
WINDOWS
You can run SSSU directly from the CD-ROM. The SSSU executable is located
in the SSSU directory on the CD-ROM. Also, you can copy the executable to your
server and run it from a directory of your choosing.
1. Start the Window NT/2000/Server 2003 Kit v3.0e for Enterprise Virtual
2. Click the Solution Software for Windows NT/2000/Server 2003 button on
3. Click the Install Storage System Scripting Utility (SSSU) button on the
The SSSU executable is installed in the following directory:
#/usr/opt/ENTP003/sbin
#sssu
Array kit. If you have created a CD-ROM and if autorun is enabled, the
installation program starts automatically. Otherwise, navigate to the root of
the kit and double-click Launch.exe.
the first screen.
bottom of the second screen.
The installation wizard starts.
4. Follow the instructions to complete the installation.
20 Command View EVA Storage System Scripting Utility Reference Guide
Page 21

Starting the Storage System Scripting Utility
SSSU starts at a command prompt window, shell, or equivalent.
Note: To run SSSU, you must set up password access to the element manager
from the management appliance. You cannot set this password from within
The SET OPTIONS command on page 83 controls how SSSU behaves. The
SSSU.
options you set with the SET OPTIONS command are in effect for the current session
only. Each time you start SSSU, the default options are reinstated.
Note: The CAPTURE CONFIGURATION command on page 49 is the only way to
capture, save, and recreate a storage system’s configuration. After you have
successfully created a storage system, use the CAPTURE CONFIGURATION command
to create scripts that you can use to recreate a storage system in the event of failure or
to create an exact replica.
Syntax
Introduction
Examples
SSSU <additional arguments>
If SSSU is started without arguments, a generic application
<NoSystemSelected> prompt is displayed on the terminal and input can be
accepted.
If SSSU is started with arguments, those commands are echoed to the input
terminal and executed, and then the utility exits.
Note: You must enclose in double quotes any commands or object names that have
embedded blanks (spaces).
SSSU
SSSU “FILE snapD1.txt”
SSSU “cmd1” “cmd2” “cmd2”
The first example starts SSSU without additional arguments and prompts you for
commands.
21Command View EVA Storage System Scripting Utility Reference Guide
Page 22

Introduction
The second example starts SSSU and then executes the file snapD1.txt from the
current directory.
The third example starts SSSU and executes multiple commands.
22 Command View EVA Storage System Scripting Utility Reference Guide
Page 23

Understanding paths and naming conventions
This section describes important information about paths and naming conventions
in SSSU.
Introduction
Note: For detailed descriptions of the following commands, refer to Chapter 2.
hi
The following important root folders let you organize your storage system:
■ “\Hosts\”
■ “\Virtual Disks\”
■ “\Disk Groups\”
■ “\Data Replication\”
■ “\Hardware\” - This folder exists within SSSU; however, you cannot
create any objects within this folder.
You cannot create root-level folders. You can, however, create additional folders
within the “\Hosts\” and “\Virtual Disks\” folders to organize your
storage system (see “ADD FOLDER”on page 36).
Note: SSSU requires that you qualify specified names with full paths. If, however, you
are using the default placement when adding Hosts and Virtual Disks, you do not need
to include the full path.
Hosts Examples
For example, to add a host named engineering to the root Hosts folder:
ADD HOST engineering WORLD_WIDE_NAME=1111-2222-3333-4444
Whenever you refer to this host, you must give the full path. For example, when
adding a LUN to this host:
ADD LUN 4 HOST=\Hosts\engineering VDISK="\Virtual
Disks\Yekao\ACTIVE"
23Command View EVA Storage System Scripting Utility Reference Guide
Page 24

Introduction
If you create a folder structure within the root Hosts, you must include all levels of
the folder structure in your commands.
Here is an example of how to add the engineering host to the resources
folder within the Host root folder:
ADD HOST \Hosts\resources\engineering WORLD=1111-2222-3333-4444
Virtual Disk Example
Because of the space in the root name for the Virtual Disks folder, you must
always enclose strings that include the name of this folder within double quotes
(“”).
Note: Remember to include full paths for objects and enclose any paths that contain
spaces in double quotes.
For example, to add a virtual disk family new_code to the root folder Virtual
Disks:
ADD VDISK “\Virtual Disks\new_code” SIZE=10
This example creates a 10-GB virtual disk family in the default disk group
new_code.
Note: This is a virtual disk family. The actual virtual disk name (the active virtual disk)
is \Virtual Disk\new_code\ACTIVE.
If you create a virtual disk (ADD VDISK) within a deeper folder structure, you
need to include this full path within double quotes.
ADD VDISK “\Virtual Disks\engineering\gene_research” SIZE=2
Disk Groups Example
When a path includes the root folder “\Disk Groups\”, you must enclose the
entire path in double quotes:
SHOW DISK_GROUP “\Disk Groups\admin”
ADD VDISK “\Virtual Disks\new_code” SIZE=10 DISK_GROUP=“\Disk
Groups\admin”
24 Command View EVA Storage System Scripting Utility Reference Guide
Page 25

Introduction
Note: Although this guide shows commands spanning more than one line, always
enter the SSSU command on one line.
Note on OS_UNIT_ID and CONSOLE_LUN_ID
This value is used for IBM AIX (set to zero), OpenVMS (required), and Tru64
UNIX (recommended). Other host operating systems ignore the value. See the
host operating system installation guides for more information.
Note on changing comments on a disk enclosure
SSSU does not allow comments to be changed on a disk enclosure. Anyone
needing to do this can change them using the CommandView EVA UI.
25Command View EVA Storage System Scripting Utility Reference Guide
Page 26

Introduction
Cross Vraid
Cross Vraid for Snapshot and Snapclone allow customers to change the Vraid
type when creating snapshots or snapclones for better disk utilization when
making redundant copies of data. Cross Vraid is supported in the following
manner:
■ Cross Vraid Snapshot (ADD SNAPSHOT) and Snapclones (ADD COPY)
within the same disk group.
■ Cross Vraid Snapclones (ADD COPY) across disk groups (including standard
and FATA disk groups)
The SSSU v3.2 and Command View EVA v3.2 along with VCS v3.020 are
required to support Cross Vraid Snaps.
Refer to ADD COPY and ADD SNAPSHOT for more information.
26 Command View EVA Storage System Scripting Utility Reference Guide
Page 27

SSSU Command Reference
This chapter defines all the commands available in SSSU, including:
■ ADD, page 29
■ CAPTURE CONFIGURATION, page 49
■ DELETE, page 53
■ EMVERSION, page 62
■ EXIT, page 64
■ FILE, page 65
■ HELP, page 66
■ RESTART, page 68
■ SELECT, page 69
■ SET, page 72
■ SHOW, page 90
■ SHUTDOWN, page 103
2
In addition, this chapter includes syntax and examples. The commands are
presented in alphabetical order.
27Command View EVA Storage System Scripting Utility Reference Guide
Page 28

SSSU Command Reference
Command introduction
Most of the commands have switches that you can also use. These are described
under the entry for the command in this chapter.
You can display a list of switches for each command directly within the interface
by entering a ? after the command or option name. For example, ADD ? displays
all of the switches available with the ADD command, and ADD SYSTEM ?
displays the switches available for the ADD SYSTEM command (see “Getting
help” on page 12).
Remember when you issue commands:
■ Use the full path to qualify specified names.
■ If a path name contains a space, enclose the entire name in double quotes (“”).
For a full discussion of these requirements, see “Understanding paths and naming
conventions” on page 23.
Appendix A, “Configuration Examples,” provides a simple configuration example
for using these commands to create and present a single LUN to a host. It also
includes sample output from SHOW commands.
Note: Commands are not case sensitive, and it is often not necessary to type complete
command names. For example, you can type sho for SHOW or shu for SHUTDOWN.
28 Command View EVA Storage System Scripting Utility Reference Guide
Page 29

ADD
SSSU Command Reference
Use the ADD commands to create new systems, folders, disk_groups, dr_groups,
virtual disks, copies, snapshots, as well as to add LUNs and hosts within the
Enterprise Virtual Array.
Note: Creating copies, dr_groups, and snapshots of virtual disks is dependent on your
licensing level. See the documentation that came with your hardware for more
information.
29Command View EVA Storage System Scripting Utility Reference Guide
Page 30

SSSU Command Reference
ADD COPY
Use the ADD COPY command to create a copy of the specified virtual disk. A
copy is a new virtual disk family. The ADD COPY command is equivalent to
creating a snapclone within Command View EVA.
Syntax
ADD COPY <copy_name> VDISK=<vdisk_family>
Switches
The following switches are available with the ADD COPY command.
DISK_GROUP=
This is the name of the disk group where you want to create the virtual disk copy.
The disk group must already exist to use this switch. If not specified, SSSU uses
the same group as the source VDISK.
OS_UNIT_ID=
The ID that is presented to the host operating system. If set to zero, no ID is
presented to the host.
REDUNDANCY=
The amount of data protection set when creating the virtual disk. If not specified,
the default is Vraid0.
■ Vraid0—Provides no data protection. It distributes data among its member
disks into stripes and uses all members to process I/O requests. This method
has no overhead associated with duplication of information and provides the
highest performance.
■ Vraid1—Provides the highest level of data protection but uses the most
space. It duplicates data written to one disk onto a backup disk. In a multidisk
configuration, Vraid1 mirrors each pair of disks to each other. These disk
pairs can then be striped to create a virtual disk.
■ Vraid5—Provides a moderate level of data protection. This method
distributes the parity information among all disk members. If one drive fails,
the failed disk can be recreated after it is replaced.
30 Command View EVA Storage System Scripting Utility Reference Guide
Page 31

Required Switch
SSSU Command Reference
VDISK=
This is the virtual disk name to be copied.
WORLD_WIDE_LUN_NAME=
Sets the World Wide LUN Name on unpresented storage.
WAIT_FOR_COMPLETION
Waits until the command’s operation completes before displaying the next SSSU
prompt (and returning control) or before running another script line. For large
(greater than 1 TB) virtual disks, using this option can result in a long period
before the prompt displays.
NOWAIT_FOR_COMPLETION
Default. Returns control as soon as possible. Some operations are invalid until the
initial operation completes in the background.
The following switch is required with the ADD COPY command:
VDISK=
Examples
ADD COPY wednesday_nite VDISK=“\Virtual Disks\payroll\ACTIVE”
ADD COPY save_reports VDISK=“\Virtual Disks\daily_biz\ACTIVE”
DISK_GROUP=“\Disk Groups\small_disks”
The first example copies the virtual disk payroll to a copy wednesday_nite.
The second example creates a copy of
daily_biz as save_reports within the
specified disk group.
Note: When you use the ADD COPY command, you are actually creating a VDISK. If
you want to delete the VDISK, you must use the DELETE VDISK command.
31Command View EVA Storage System Scripting Utility Reference Guide
Page 32

SSSU Command Reference
ADD DR_GROUP
Use the ADD DR_GROUP command to create a data replication group containing
the specified source virtual disk. This source VDisk will be replicated on the
specified destination system.
Syntax
ADD DR_GROUP <dr_group_name> VDISK=<vdisk> DESTINATION
Switches
The following switches are available with the ADD DR_GROUP.
ACCESSMODE=
The access rights for a connected host. Possible values are readonly and disable.
The default is disable, and this is the safest setting.
SYSTEM=<system>
WARNING: Setting ACCCESSMODE to readonly could seriously impede host
OS operation.
COMMENT=
Used to attach comments to the DR Group being created. This string must be
enclosed in quotes. The maximum number of characters for this optional switch is
64.
DESTINATION_SYSTEM=
The system on which the destination VDISKS are created on linked systems
within this DR Group.
DESTINATION_DISK_GROUP=
The disk group name in which the VDISK on the destination system is created.
DESTINATION_VDISK_NAME=
The name of the VDISK that is created on the destination system. The default
name is the same as that of the source.
32 Command View EVA Storage System Scripting Utility Reference Guide
Page 33

VDISK=
The name of a source system VDISK to be placed within the DR Group. A
destination VDISK is automatically created on the destination system.
WRITEMODE=
Defines the I/O interaction between the destination and source side. Possible
values are synchronous and asynchronous. The default is synchronous.
Required Switches
The following switches are required for the ADD DR_GROUP command.
■ DESTINATION_SYSTEM =
■ VDISK =
Example
This example creates a DR_GROUP named Transactions that contains the source
virtual disk “\Virtual Disks\Hawaii\ACTIVE.” This DR_GROUP will be
connected to the destination system Makawao, on which the destination virtual
disk “\Virtual Disks\Hawaii\ACTIVE” (same as the source by default) will be
created and added to the destination DR_GROUP.
SSSU Command Reference
ADD DR_GROUP Transactions DESTINATION_SYSTEM=Makawao
VDISK=”/Virtual Disks/Hawaii/ACTIVE”
33Command View EVA Storage System Scripting Utility Reference Guide
Page 34

SSSU Command Reference
ADD DISK_GROUP
Use the ADD DISK_GROUP command to add disk groups to the system.
Syntax
ADD DISK_GROUP <group_name>
Switches
The following switches are available with the ADD DISK_GROUP command.
COMMENT=
This is an optional switch that associates a user-defined comment with the new
system. A maximum of 128 characters is allowed, and the string must be enclosed
in double quotes.
Caution: Vraid1 and Vraid5 are virtual disk families that have a SINGLE or
DOUBLE group spare policy to ensure that there is adequate space to
regenerate data. If you set the spare policy to NONE, the disk group may not
have enough available space to regenerate Vraid1 and Vraid5 data.
DEVICE_COUNT=
The number of physical disks to use for this group. The limit is the number of
available disks in the storage system. The default and minimum value is 8.
DISKGROUP_DISKTYPE=
This parameter determines the types of disks to be considered for creating the disk
group. The default value is ONLINE.
ONLINE: Online Fibre channel disks are considered for creating the default disk
group.
NEAR-ONLINE: Near-Online Fibre channel disks are considered for creating the
default disk group.
34 Command View EVA Storage System Scripting Utility Reference Guide
Page 35

SSSU Command Reference
OCCUPANCY_ALARM=
The point when a defined percentage of space is used. When this point is reached,
an event log is generated and sent to the Management Appliance (optionally the
host system) informing the administrator that the group is becoming full. Do not
use the percentage sign (%) after the number. The default is 95%.
SPARE_POLICY=
This parameter determines the amount, if any, of storage space set aside for use in
the event that disks fail. The default is single.
■ NONE—Reserves no space within a disk group to allow for data
reconstruction in case of failure of disk drives
■ SINGLE—Reserves space within a disk group to allow for data
reconstruction for failure of a single disk drive
■ DOUBLE—Reserves space within a disk group to allow for data
reconstruction for failure of two disk drives
Note: The space set aside is not in numbers of physical disks. It is the equivalent
amount of storage space spread across all disks.
Example
ADD DISK_GROUP “\Disk Groups\human_resources” DEVICE_COUNT=12
SPARE_POLICY=SINGLE OCCUPANCY_ALARM=75
This example creates a new disk group, human_resources. It has 12 physical disks
with the equivalent of one disk set aside as a spare and sends an event log to the
Management Appliance when 75% of capacity is reached.
35Command View EVA Storage System Scripting Utility Reference Guide
Page 36

SSSU Command Reference
ADD FOLDER
Use the ADD FOLDER command to create a new folder within the specified
folder to aid in organizing your storage system. You can create folders only under
the “Virtual Disks” and “Hosts” root folders. You cannot create root folders.
For example, if you have a controller that is serving HR and Engineering, you
could create four folders—two to separate the virtual disks and two to separate the
hosts:
■ “\Virtual Disks\Engineering” and “\Virtual Disks\HR”
■ \Hosts\Engineering and \Hosts\HR
Creating these folders allows you to put engineering virtual disks and hosts in the
Engineering folders and Human Resources storage/hosts in the HR folders. This
makes it easier to keep track of the pieces within your storage system. If you want
to nest folders inside folders, you must add one folder at a time.
Syntax
ADD FOLDER <folder_name>
Switch
Only the COMMENT switch is available with the ADD FOLDER command.
COMMENT=
This is an optional switch that associates a user-defined comment with the new
system. A maximum of 128 characters is allowed and the string must be enclosed
in double quotes.
Examples
ADD FOLDER \Hosts\human_resources
ADD FOLDER “\Virtual Disks\colorado\colorado
springs\engineering”
The first example creates a new folder human_resources within the root folder
“Hosts.” The second example creates a folder engineering in the folder colorado
springs, which is two levels below the root folder “Virtual Disks” (“\Virtual
Disks\colorado\colorado springs”).
The folder structure in the second example must already have been in place before
creating the new folder engineering.
36 Command View EVA Storage System Scripting Utility Reference Guide
Page 37

ADD HOST
Syntax
Switches
SSSU Command Reference
Use the ADD HOST command to add a host and its World Wide Name (WWN) to
the list of hosts that can connect to virtual disks within the current system.
The ADD HOST command adds the first Fibre Channel Adapter (FCA) only. The
SET HOST command (see page 80) adds each subsequent FCA.
ADD HOST <host_name> WORLD_WIDE_NAME=<world_wide_name>
The following switches are available with the ADD HOST command.
IP=
This is the network IP address. If the IP address is not specified, the name of the
host will be specified as is (DNS).
COMMENT=
This is an optional switch that associates a user-defined comment with the new
system. A maximum of 128 characters is allowed, and the string must be enclosed
in double quotes.
OPERATING_SYSTEM=
The type of operating system for the specified host. Choose one of the following
operating systems (they are spelled here as SSSU expects):
■ CUSTOM
The correct syntax is
OPERATING_SYSTEM=CUSTOM=<16 hex characters>
■ HPUX
■ IBMAIX
■ OPEN_VMS
■ SOLARIS
■ TRU64
■ UNKNOWN
37Command View EVA Storage System Scripting Utility Reference Guide
Page 38

SSSU Command Reference
■ WINDOWS
For the default operating system, refer to Agent Options - User Interface Options
in the user interface.
WORLD_WIDE_NAME=
The World Wide Name (WWN) of the fibre channel adapter (FCA).
Required switch
The following switch must be set to ensure that Command View EVA recognizes
the host added with the ADD HOST command.
WORLD_WIDE_NAME
Example
ADD HOST \Hosts\development WORLD_WIDE_NAME=5000-1fe1-ff00-0000
This example adds a host development with an adapter at a WWN of
5000-1fe1-ff00-0000.
38 Command View EVA Storage System Scripting Utility Reference Guide
Page 39

ADD LUN
The ADD LUN command makes previously created VDISKs available to a host.
Syntax
Switches
The following switches are available with the ADD LUN command.
HOST=
The name of the host to which the LUN is presented.
VDISK=
The name of the VDISK that is presented to the host.
Required switches
SSSU Command Reference
ADD LUN <LUN_number> VDISK=<storage_name> HOST=<host_name>
LUN_number is 1 through 255.
Examples
Set the following switches so that Command View EVA recognizes the LUN you
add with the ADD LUN command.
■ HOST
■ VDISK
ADD LUN 12 VDISK=“\Virtual Disks\act\payroll\ACTIVE”
HOST=\Hosts\sanfran
ADD LUN 175 VDISK=“\Virtual Disks\user_disk\ACTIVE”
HOST=\Hosts\corporate
The first example adds LUN 12, which presents the ACTIVE virtual disk for the
family payroll to the host called sanfran.
The second example adds LUN 175, which presents the ACTIVE virtual disk for
the family
user_disk to the host called corporate.
39Command View EVA Storage System Scripting Utility Reference Guide
Page 40

SSSU Command Reference
ADD SNAPSHOT
The ADD SNAPSHOT command creates a picture (not a full copy) of a virtual
disk family’s active virtual disk.
Note: Creating snapshots of virtual disks depends on your licensing level. Attempting
to add a snapshot without the license returns an error message. This message indicates
that you need to enter your licensing information in the Command View EVA. You must
have a registered license.
Syntax
ADD SNAPSHOT <snapshot_name> VDISK=<vdisk_to_snapshot>
Switches
The following switches are available with the ADD SNAPSHOT command.
ALLOCATION_POLICY=
Indicates how the space for the snapshot is allocated.
■ DEMAND—Storage is allocated for the snapshot only when required. As the
snapshot and the original storage’s information diverges, the space allocated
for the snapshot increases.
■ FULLY—All storage required to fully contain a snapshot is allocated when
the snapshot is created. This is the conservative method to create a snapshot,
because adequate space is guaranteed for a full snapshot. This is the default.
OS_UNIT_ID=
The ID that is presented to the host operating system. If set to zero, no ID is
presented to the host.
REDUNDANCY=
The amount of data protection set when creating the virtual disk. If not specified,
the default is Vraid0.
40 Command View EVA Storage System Scripting Utility Reference Guide
Page 41

Required switch
SSSU Command Reference
■ Vraid0—Provides no data protection. It distributes data among its member
disks into stripes and uses all members to process I/O requests. This method
has no overhead associated with duplication of information and provides the
highest performance.
■ Vraid1—Provides the highest level of data protection but uses the most
space. It duplicates data written to one disk onto a backup disk. In a multidisk
configuration, Vraid1 mirrors each pair of disks to each other. These disk
pairs can then be striped to create a virtual disk.
■ Vraid5—Provides a moderate level of data protection. This method
distributes the parity information among all disk members. If one drive fails,
the failed disk can be recreated after it is replaced.
VDISK=
The source virtual disk for this snapshot.
WORLD_WIDE_LUN_NAME=
Sets the World Wide LUN Name.
Examples
The following switch is required with the ADD SNAPSHOT command:
■ VDISK=
ADD SNAPSHOT payroll_backup VDISK="\Virtual
Disks\payroll\ACTIVE" ALLOCATION_POLICY=DEMAND
ADD SNAPSHOT wed_nite_biz VDISK="\Virtual
Disks\daily_biz\ACTIVE" ALLOCATION_POLICY=FULLY
The first example creates a snapshot payroll_backup from the ACTIVE partition
of Vdisk family payroll that uses capacity only as needed.
The second example creates a snapshot wed_night_biz from the ACTIVE partition
of the family daily_biz while reserving all capacity necessary to create the
snapshot.
Note: To delete snapshots created by ADD SNAPSHOT, use the DELETE VDISK
command.
41Command View EVA Storage System Scripting Utility Reference Guide
Page 42

SSSU Command Reference
ADD SYSTEM
Use the ADD SYSTEM command to initialize an uninitialized storage system and
to create a default disk group. You must select an uninitialized storage system
before issuing the ADD SYSTEM command. If the system is already initialized,
the command is rejected.
Use the SHOW SYSTEM command (see “SHOW SYSTEM” on page 100) to
display the names of the available uninitialized storage systems. The uninitialized
storage system display as Uninitialized Storage System#>, in which
# represents a number. After initialization is complete, SSSU changes its default
prompt back to NoSystemSelected>.
Because the system’s name changed from the uninitialized string to the name
given with the ADD SYSTEM command, you must reselect the system. Issue the
SELECT SYSTEM command using the new name of the system.
Note: Appendix A includes a configuration example that explains the sequence of
commands you can use to initialize an uninitialized storage system (see “Creating a
simple configuration” on page 106).
Syntax
ADD SYSTEM <system_name>
Switches
The following switches are available with the ADD SYSTEM command.
COMMENT=
This is an optional switch that associates a user-defined comment with the new
system. A maximum of 128 characters is allowed, and the string must be enclosed
in double quotes.
CONSOLE_LUN_ID=
The LUN used for console communication after system creation. If set to zero, no
console LUN is presented to the host.
42 Command View EVA Storage System Scripting Utility Reference Guide
Page 43

SSSU Command Reference
DEVICE_COUNT=
The number of physical disks to use for the default disk group of this system. The
limit is the number of available disks in the storage system. The default and
minimum value is 8.
DISKGROUP_DISKTYPE=
This parameter determines the types of disks to be considered for creating the disk
group. The default value is ONLINE.
ONLINE: Online Fibre channel disks are considered for creating the default disk
group.
NEAR-ONLINE: Near-Online Fibre channel disks are considered for creating the
default disk group.
SPARE_POLICY=
This parameter determines the amount, if any, of storage space set aside for safety
in the event that disks fail. The default SPARE_POLICY is SINGLE.
■ NONE—Reserves no space within a disk group to allow for data
reconstruction for failure of disk drives.
■ SINGLE—Reserves space within a disk group to allow for data
reconstruction for failure of a single disk drive. This is the default.
■ DOUBLE—Reserves space within a disk group to allow for data
reconstruction for failure of two disk drives.
Example
Note: The space set aside is not in numbers of physical disks. It is the equivalent
amount of storage space spread across all disks.
ADD SYSTEM payroll DEVICE_COUNT=12 SPARE_POLICY=SINGLE
This example creates an initialized system payroll with 12 physical disks and a
spare policy of SINGLE.
43Command View EVA Storage System Scripting Utility Reference Guide
Page 44

SSSU Command Reference
ADD VDISK
Use the ADD VDISK command to create a virtual disk with a specified name and
parameters.
Note: This command actually creates a virtual disk family and the ACTIVE partition.
After you create the family, an initial virtual disk, “ACTIVE,” is placed as the only virtual
disk in the family. This is referred to as the active virtual disk. When you later refer to
this virtual disk, specify \ACTIVE after the family name. See the examples that follow
the descriptions of the switches.
Syntax
ADD VDISK <storage_name> SIZE=<n>
The n is the virtual disk size in whole GBs.
Switches
The following switches are available with the ADD VDISK command.
COMMENT=
This is an optional switch that associates a user-defined comment with the new
system. A maximum of 128 characters is allowed and the string must be enclosed
in double quotes.
DISK_GROUP=
The disk group name for where you want to create the virtual disk. The disk group
must already exist to use this switch. If not specified, the default disk group is
used.
MIRRORED_WRITEBACK
All writes are stored in mirrored caches. After the data is stored in both caches, the
write is complete. If one mirrored cache is unusable, the write is not complete
until the data is in both caches.
44 Command View EVA Storage System Scripting Utility Reference Guide
Page 45

SSSU Command Reference
NOMIRRORED_WRITEBACK
No writes are stored in mirrored caches. After the data is stored in one cache, the
write is complete. The write is complete even if a mirror copy of the cache is not
available.
OS_UNIT_ID=
The ID that is presented to the host operating system. If set to zero, no ID is
presented to the host.
PREFERRED_PATH=
The preferred controller path that is specified to handle all I/O for the virtual
disks. If a controller fails, the path always reverts to the working controller.
■ PATH_A _BOTH—Controller path A fails over to controller B. When
controller A restarts, the virtual disks fail back to controller A. This is
failover/failback mode.
■ PATH_A_FAILOVER—Controller path A fails over to controller B. When
controller A restarts, the virtual disks do not fail back over to controller A.
This is failover-only mode.
■ PATH_B _BOTH—Controller path B fails over to controller A. When
controller B restarts, the virtual disks fail back to controller B. This is
failover/failback mode.
■ PATH_B_FAILOVER—Controller path B fails over to controller A. When
controller B restarts, the virtual disks do not fail back over to controller B.
This is failover-only mode.
NOPREFERRED_PATH
Allows the I/O to be handled by either controller.
READ_CACHE
Reads are satisfied from the controller’s cache.
NOREAD_CACHE
Reads are always satisfied from the physical disks, not the controller’s cache.
REDUNDANCY=
The amount of data protection set when creating the virtual disk. If not specified,
the default is Vraid0.
45Command View EVA Storage System Scripting Utility Reference Guide
Page 46

SSSU Command Reference
■ Vraid0—Provides no data protection. It distributes data among its member
disks into stripes and uses all members to process I/O requests. This method
has no overhead associated with duplication of information and provides the
highest performance.
■ Vraid1—Provides the highest level of data protection but uses the most
space. It duplicates data written to one disk onto a backup disk. In a multidisk
configuration, Vraid1 mirrors each pair of disks to each other. These disk
pairs can then be striped to create a virtual disk.
■ Vraid5—Provides a moderate level of data protection. This method
distributes the parity information among all disk members. If one drive fails,
the failed disk can be recreated after it is replaced.
SIZE=
This is a required switch. Size of the storage to be created. You can specify size in
whole gigabytes only, and fractions are not allowed (1 GB – 2000 GB, limited by
the actual amount of space available within the disk group).
WORLD_WIDE_LUN_NAME=
Sets the World Wide LUN Name.
Note: This switch is commonly used to allow a host to point to a new version of the
virtual disk by giving the new virtual disk the same WWN as the old virtual disk.
WRITE_PROTECT
Does not allow writing to the virtual disk for all presented LUNs/host.
NOWRITE_PROTECT
Allows writing to the virtual disk for all presented LUNs/host.
WAIT_FOR_COMPLETION
Default. Waits until the command’s operation completes before displaying the
next SSSU prompt (and returning control) or before running another script line.
For large (greater than 1 TB) virtual disks, using this option can result in a long
period before the prompt displays.
46 Command View EVA Storage System Scripting Utility Reference Guide
Page 47

Required switch
Switch defaults
SSSU Command Reference
NOWAIT_FOR_COMPLETION
Returns control as soon as possible. Some operations are invalid until the initial
operation completes in the background. For example, you cannot present the
Vdisk (add a LUN) until the command completes.
The following switch is required with the ADD VDISK command:
■ SIZE=
The following defaults are used for the ADD VDISK command when nothing is
specified:
■ MIRRORED_WRITEBACK
■ NOWRITE_PROTECT
■ OS_UNIT_ID= defaults to zero
■ PREFERRED_PATH= defaults to NOPREFERRED_PATH
■ REDUNDANCY= defaults to Vraid0
■ DISK_GROUP= “/Disk Groups/Default Disk Group”
Examples
Note: If the Default Disk Group has been renamed, not specifying a disk group will
result in error.
■ READ_CACHE
ADD VDISK “\Virtual Disk\scratch” SIZE=10 REDUNDANCY=VRAID5
READ_CACHE
ADD VDISK “\Virtual Disks\engineering\gene_research” SIZE=2
DISK_GROUP=“\Disk Groups\small_disks” MIRRORED_WRITEBACK
The first example creates a 10-GB virtual disk scratch within the default disk
group using read cache and a Vraid5 redundancy level.
The second example creates a 2-GB disk at Vraid0 redundancy level in the
small_disks group using mirrored writeback cache.
47Command View EVA Storage System Scripting Utility Reference Guide
Page 48

SSSU Command Reference
Note: Remember that this name is the <family_name> and that
“\Virtual Disks\<family_name>\ACTIVE”
must use this full path (enclosed in double quotes) when referring to it with any other
commands.
is the name of the ACTIVE virtual disk. You
48 Command View EVA Storage System Scripting Utility Reference Guide
Page 49

CAPTURE CONFIGURATION
Syntax
CAPTURE CONFIGURATION <file_name>
CAPTURE CONFIGURATION queries the currently selected system and creates
from one to five SSSU scripts. Not all systems require all five scripts. For
example, step1A is always generated and may be the only file that is required. You
use these scripts to recreate the original configuration and in some cases to assist
in the recovery of any site.
The scripts output to the console unless you specify a file. The scripts generate
five files. Given a file name, _StepXX is appended after the file name and before
the extension. XX is the restore step name, which is 1A, 1B, 1C, 2, and 3. For
example, specifying CAPTURE CONFIGURATION newyear.txt causes SSSU to
create the files newyear_Step1A.txt, newyear_Step1B.txt, newyear_Step1C.txt,
newyear_Step2.txt, and newyear_Step3.txt.
SSSU checks to see if any files by the names to be generated exist. If so, SSSU
prompts you to replace existing files with the new files or abort the command
completely.
When creating files that contain the scripts, a progress bar displays on the console.
This command may take a long time to complete depending on the size of the
configuration.
SSSU Command Reference
Step 1 scripts
Note: Do not reconfigure the selected system while this command is executing.
The division of step 1 into three smaller steps facilitates data replication (DR)
recovery.
Step 1A script
Creates the storage system, disk groups, hosts, and VDISKs that are not used for
data replication, either source or destination, and LUNs for the created disks.
Step1A creates a basic system that does not include DR VDISKs or groups.
CAPTURE CONFIG always creates this step.
49Command View EVA Storage System Scripting Utility Reference Guide
Page 50

SSSU Command Reference
Step 1B script
Creates all source VDISKs used in DR groups on this controller.
Step 1C script
Presents all source VDISKs (creates LUNS) that are used for DR groups to their
hosts. This step exists to assist in recovering from a DR failure in which a source
site was lost. LUNs can be presented in their original configuration by running the
correct step 1C script.
Step 2 script
Recreates all DR-specific configuration information for which this system is the
source. This involves the configuration's source DR_GROUPs and their members
only. Presentations of remote VDISKs are not restored by this command (see step
3).
This step provides flexibility when a site is completely lost. You must run step 1A,
step 1B, and step 1C on both source and destination systems before step 2 can be
run.
Note: If no destination VDSIK is presented to a host, a blank script will be generated
for script 3.
Step 3 script
Presents remote VDISKs (creates LUNS) used for DR groups to their hosts.
You must run step 2 on both source and destination systems before step 3 can be
run.
Restoring configurations
To restore system configuration from captured scripts, you must run the following
scripts in the following order on each system that is part of the DR configuration.
Before running a captured configuration script, you need to modify an existing
script, run an additional script, or enter commands directly at the command line
setup, as in steps 1 and 2.
50 Command View EVA Storage System Scripting Utility Reference Guide
Page 51

Example
SSSU Command Reference
Be aware that a specific captured configuration may not be recreated on some
systems. For example, if a captured configuration demands 120 disks and the
target system contains only 80, the captured configuration will not be successful.
1. Select a manager to specify which management appliance will perform the
script commands.
2. Select the system Uninitialized Storage System# to specify the uninitialized
storage system on which you want to recreate the captured configuration.
3. Run scripts 1A, 1B, and 1C successfully against ALL systems in the DR
configuration.
4. Run the step 2 script successfully against ALL systems in the DR
configuration.
5. Run the step 3 script successfully against ALL systems in the DR
configuration.
Once these scripts have been run against all systems, the DR configuration is
restored to its original state.
CAPTURE CONFIGURATION c:\sales.txt
This example creates the files sales_Step1A.txt, sales_Step1B.txt,
sales_Step1C.txt, sales_Step2.txt, and sales_Step3.txt.
Note: Refer to the FILE command on page 65 for further information about restoring
configurations.
51Command View EVA Storage System Scripting Utility Reference Guide
Page 52

SSSU Command Reference
CAPTURE VALIDATE
Syntax
CAPTURE VALIDATE <file_name>
CAPTURE VALIDATE checks the specified script file for modification by
calculating its checksum and comparing the result against the checksum saved
in the file. A script may have been modified (failed the CAPTURE
VALIDATE command) but may still work. SSSU runs a script even if its
checksum shows file modification.
Example
CAPTURE VALIDATE c:\reconfigure_sales_dr_step2.txt
This example determines whether the reconfigure_sales_dr_step2.txt file was
modified.
Syntax
CAPTURE VALIDATE file_name
User functionality
CAPTURE VALIDATE is a switch that determines if a captured script text file has
been edited and modified after it was captured. This allows the user to determine
whether the script is a perfect capture of the existing system or if someone has
modified it after it was created.
Note that the specified script is not executed by this command; the script is
checked only to see whether it's “original” or not.
When a script is captured by the CAPTURE commands, a header is written at the
front of the text file and a checksum is written at the end. If CAPTURE
VALIDATE does not see a correct header, it reports that the script specified is not
a CAPTURE-generated script. If the checksum does not match, this command
reports that the file has been modified.
If and only if a correct header is found and the checksum matches, this command
reports that the CAPTURE script specified is unmodified.
52 Command View EVA Storage System Scripting Utility Reference Guide
Page 53

DELETE
SSSU Command Reference
Use the DELETE commands to remove systems, folders, disk groups, DR groups,
VDISKs, hosts, and LUNs from the storage system. You can control the behavior
of all DELETE commands with the SET OPTIONS command (see “SET
OPTIONS” on page 83 for details on how to use the SAFE_DELETE and
NOSAFE_DELETE switches).
Note: All of the DELETE commands require the full path from the root directory to the
object you want to delete. Only the DELETE VDISK command has switches available.
53Command View EVA Storage System Scripting Utility Reference Guide
Page 54

SSSU Command Reference
DELETE DR_GROUP
Deletes the DR Group on the source and destination system. Be sure that VDISKS
are unpresented and that the source and destination are not communicating. The
SET OPTION NOSAFE_DELETE does not override this requirement. You can
delete a DR Group on the source system at any time.
Syntax
DELETE DR_GROUP <dr_group_name>
Example
DELETE DR_GROUP “\Data Replication\payroll”
This example deletes the DR_GROUP payroll.
54 Command View EVA Storage System Scripting Utility Reference Guide
Page 55

DELETE DISK_GROUP
Use the DELETE DISK_GROUP command to delete a disk group from the
configuration. The command is rejected if any virtual disks are present in the disk
group.
Syntax
DELETE DISK_GROUP <group_name>
Example
DELETE DISK_GROUP “\Disk Groups\human_resources”
This example deletes a disk group named human_resources.
SSSU Command Reference
55Command View EVA Storage System Scripting Utility Reference Guide
Page 56

SSSU Command Reference
DELETE FOLDER
Use the DELETE FOLDER command to delete the specified empty folder. You
should ensure folders are empty before deleting them because the DELETE
FOLDER command will be rejected otherwise. To delete multiple layers of
folders, you must do so sequentially.
Note: Ensure folders are empty before deleting them because the DELETE FOLDER
command is rejected if the folder has contents.
Syntax
DELETE FOLDER <folder_name>
Examples
DELETE FOLDER \Hosts\human_resources\
DELETE FOLDER \Hosts\colorado\colorado_springs\engineering\
The first example deletes a folder named human_resources within the default
Hosts folder.
The second example deletes the folder named engineering nested in the path
\Hosts\colorado\colorado_springs.
56 Command View EVA Storage System Scripting Utility Reference Guide
Page 57

DELETE HOST
Syntax
Example
SSSU Command Reference
DELETE HOST <host_name>
DELETE HOST \Hosts\development
This example deletes the host development.
57Command View EVA Storage System Scripting Utility Reference Guide
Page 58

SSSU Command Reference
DELETE LUN
Use the DELETE LUN command to remove access to a virtual disk through the
LUN from a host.
Syntax
DELETE LUN <LUN_name>
Example
DELETE LUN “\Hosts\accounting department\12”
This example removes access to LUN 12 from the host accounting_department.
58 Command View EVA Storage System Scripting Utility Reference Guide
Page 59

DELETE SYSTEM
Use the DELETE SYSTEM command to permanently remove the system from an
EVA. The system will no longer be accessible, and all data will be lost.
The DELETE SYSTEM command will be rejected if VDISKs exist. Refer to the
SET command for the NOSAFE_DELETE behavior.
Syntax
Example
SSSU Command Reference
Caution: The DELETE SYSTEM command removes the entire system
configuration. All customer data on the entire system is lost when you run this
command. In addition, all information about LUNs and hosts on this system is
lost.
DELETE SYSTEM <system_name>
DELETE SYSTEM payroll
This example deletes the system payroll.
59Command View EVA Storage System Scripting Utility Reference Guide
Page 60

SSSU Command Reference
DELETE VDISK
Use the DELETE VDISK command to permanently remove the specified virtual
disk. The virtual disk is no longer accessible, and all data is lost.
The DELETE VDISK command will be rejected if presented. See
NO_SAFE_DELETE for behavior.
Syntax
DELETE VDISK <storage_name>
Switches
Caution: The DELETE VDISK command removes the entire virtual disk from the
storage system. All customer data on the storage specified is destroyed when
you run this command. In addition, all information about the LUNs presented
from this virtual disk is lost as well.
The following switches are available with the DELETE VDISK command.
WAIT_FOR_COMPLETION
Waits until the command’s operation completes before displaying the next SSSU
prompt (and returning control) or before running another script line. For large
(greater than 1 TB) virtual disks, using this option can result in a long period
before the prompt displays.
NOWAIT_FOR_COMPLETION
Default. Returns control as soon as possible. Some operations are invalid until the
initial operation completes in the background.
Examples
DELETE VDISK “\Virtual Disks\d12\ACTIVE” WAIT_FOR_COMPLETION
DELETE VDISK “\Virtual Disks\daily_biz\wed_nite_biz”
The first example deletes ACTIVE and the virtual disk family d12.
WAIT_FOR_COMPLETION prevents the SSSU prompt from displaying until the
virtual disk deletion is completed.
60 Command View EVA Storage System Scripting Utility Reference Guide
Page 61

SSSU Command Reference
The second example deletes the snapshot wed_nite_biz and does not wait for
completion.
Note: You cannot delete ACTIVE if a snapshot of the virtual disk exists. You must delete
the snapshot and then delete ACTIVE.
61Command View EVA Storage System Scripting Utility Reference Guide
Page 62

SSSU Command Reference
EMVERSION
The EMVERISON command is at the root level, as is help. This command
provides the user with the element manager version and build number.
Syntax
NoSystemSelected: emversion
Switches
No additional keywords, parameters, or switches are available with the
EMVERSION command.
Example
Element manager information
Version: 3.10
Build: 14
Note: You will need to select a manager before using the EMVERSION command, but
you do not need to select a storage system.
62 Command View EVA Storage System Scripting Utility Reference Guide
Page 63

EXERCISE_DISK
This command allows users to test hard disks in the array for defects.
Syntax
Switches
The following switches are available with the EXERCISE_DISK command.
START
Begins testing, or exercising, the disks. The options are:
SSSU Command Reference
exercise_disk
All
Tests all disks in a selected storage system.
List of fully qualified disk names to exercise, comma separated and
enclosed in quotes
Tests specific disks as specified in the command.
Examples
STOP
Stops the testing.
SUMMARY
Provides a summary report of the testing. This can be used while testing is in
progress to show status and also when testing is complete.
exercise_disk start "\Disk Groups\Default Disk Group\Disk 002,
\Disk Groups\Default Disk Group\Disk 004"
exercise_disk start all
63Command View EVA Storage System Scripting Utility Reference Guide
Page 64

SSSU Command Reference
EXIT
The EXIT command terminates the SSSU session.
If SSSU is accepting input from the terminal or the command line, EXIT causes
the program to terminate.
If SSSU is processing a script from a file while encountering a FILE command,
the behavior of the EXIT command depends on how the FILE command was
issued:
■ If the FILE command was issued from the command line, an EXIT command
in the file causes SSSU to terminate.
■ If the FILE command was issued from the terminal, an EXIT command in the
file causes SSSU to return to accepting input from the terminal.
■ If a file is currently executing as a result of another FILE command, an EXIT
command in that file returns control to the previous file. SSSU does not run
any commands in a script beyond the EXIT command. EXIT causes an
immediate return to the “calling” layer.
Syntax
EXIT
Example
EXIT
SSSU terminates.
64 Command View EVA Storage System Scripting Utility Reference Guide
Page 65

FILE
Syntax
Examples
SSSU Command Reference
The FILE command causes the current mode of input to suspend and redirects the
scripting utility to accept input from the specified file. Either the end of the file or
an EXIT command in the specified file causes SSSU to again accept input from
the previous input source.
FILE commands can be nested. Nesting FILE commands means that a file being
executed through a FILE command can have FILE commands within its
command set. The only limitation on how deep FILE commands may be nested is
based on the host system’s resources.
FILE <filename>
An extension is not required by SSSU, although you can choose one appropriate
to your environment.
FILE snapd1.txt
FILE d:\scripts\snapshots\d27.txt
The first example executes the file snapd1.txt from the current directory.
The second example executes a file d27.txt located in the specified directory.
65Command View EVA Storage System Scripting Utility Reference Guide
Page 66

SSSU Command Reference
HELP
The HELP command displays information about using the SSSU help.
To get HELP on specific command syntax, enter a space and a question mark (?)
wherever you would normally include a parameter, at any level of a command
line. The help system will then list the options available for that parameter.
Syntax
HELP
Examples
HELP
Command syntax help is available at any point within a command
by typing a '?'
The first example accesses HELP.
Add VDISK placeholder REDUNDANCY= ?
The system displays:
The options are:
VRAID0
VRAID1
VRAID5
The second example requests the display of the different valid values for the
switch REDUNDANCY.
66 Command View EVA Storage System Scripting Utility Reference Guide
Page 67

REDISCOVER
Syntax
SSSU Command Reference
This command tells Command View EVA to conduct rediscovery to find new
storage systems or update the status of existing systems. For example, when
communication has been lost and then restored, REDISCOVER could be used.
REDISCOVER
67Command View EVA Storage System Scripting Utility Reference Guide
Page 68

SSSU Command Reference
RESTART
Use the RESTART command to restart a controller shown by the SHOW POWER
command.
A power object is a controller.
Syntax
RESTART <controller_name>
Switches
The following switches are available for the RESTART command:
■ ALL_PEERS
■ NOALL_PEERS
These switches are described in the following paragraphs.
ALL_PEERS
Restarts all peer controllers (both controllers) on this system.
NOALL_PEERS
Default. Restarts only the specified controller.
Examples
RESTART “\Hardware\Rack 1\Enclosure 7\Controller B” ALL_PEERS
RESTART “\Hardware\Rack 1\Enclosure 7\Controller A” NOALL_PEERS
The first example restarts Controller B, including its peer controller.
The second example restarts Controller A, but not its peer controller.
68 Command View EVA Storage System Scripting Utility Reference Guide
Page 69

SELECT
SSSU Command Reference
Use the SELECT command to select a system. After you select a system, the
prompt changes to reflect the selected system.
69Command View EVA Storage System Scripting Utility Reference Guide
Page 70

SSSU Command Reference
SELECT MANAGER
Use the SELECT MANAGER command to direct the command prompt to a
selected Command View EVA or management appliance. All configuration
commands run on the selected Command View EVA or management appliance
and affect its storage system configuration. The <manager_name> can be a
server, appliance name, or an IP address. Unless the SAN administrator has
changed the password, the default is “password.”
Syntax
SELECT MANAGER <manager_name> USERNAME=<username>
PASSWORD=<password>
Switches
The switches available with the SELECT MANAGER command are described in
the following paragraphs.
PASSWORD=
Password associated with the username that you use to access the Command View
EVA.
USERNAME=
Username that you use to access the Command View EVA.
Required switches
The following switches are required with the SELECT MANAGER command:
■ PASSWORD=
■ USERNAME=
Example
SELECT MANAGER north_campus USERNAME=XXX PASSWORD=XXXX
This example selects the manager north_campus. The username and password for
the manager are validated in the background on every command.
70 Command View EVA Storage System Scripting Utility Reference Guide
Page 71

SELECT SYSTEM
Use the SELECT SYSTEM command to direct the command prompt to the
selected system or manager. All configuration commands then affect the selected
system. If the system name has spaces in it, the name must be enclosed in double
quotes (“”).
Syntax
Examples
In the first example, the employees system is selected.
The system payroll storage is selected in the second example.
SSSU Command Reference
SELECT SYSTEM <system_name>
SELECT SYSTEM employees
SELECT SYSTEM “payroll storage”
71Command View EVA Storage System Scripting Utility Reference Guide
Page 72

SSSU Command Reference
SET
Use the SET commands to change the properties of systems, disks, folders, DR
groups, disk groups, hosts, and virtual disks. In addition, the SET commands let
you reset existing storage settings and application options.
■ All SET commands require the full path from the root directory to the object
you want to rename.
■ You can perform only one property change per SET command.
72 Command View EVA Storage System Scripting Utility Reference Guide
Page 73

SET DR_GROUP
Use SET DR_GROUP to set the mode of operation of an existing DR Group.
Syntax
Switches
The switches available with the SET DR_GROUP command are described in the
following paragraphs. Note that from the destination side, a user can set only the
COMMENT and NAME switches.
ACCESSMODE=
The access rights for a connected host. Possible values are readonly and disable.
ADD_VDISK=
Name of a source system VDISK to be added to the DR Group. A destination
VDISK is automatically created on the destination system. When adding a
VDISK to the DR Group, the following two optional switches may be specified:
SSSU Command Reference
SET DR_GROUP <dr_group_name>
DESTINATION_DISK_GROUP=
The disk group name on the destination system on which the VDISK is
created. This switch can be specified only after the ADD_VDISK switch.
DESTINATION_VDISK_NAME=
The name of the VDISK that is created on the destination system. The default
name is the same as that of the source. This optional switch can be specified
only after the ADD_VDISK switch.
COMMENT=
An optional field for attaching comments to the DR Group being created. This
string must be enclosed in quotes. The maximum number of characters for this
switch is 64.
DELETE_VDISK=
Name of a source system VDISK to be removed from the DR Group. The
corresponding destination VDISK on the destination system is removed from the
DR Group and deleted from the system.
73Command View EVA Storage System Scripting Utility Reference Guide
Page 74

SSSU Command Reference
DETACH_VDISK=
Name of a source system VDISK to be removed from the DR Group. The
corresponding destination VDISK on the destination system is removed from the
DR Group but not deleted. The detached destination VDISK continues to exist as
an independent VDISK.
FAILOVER
Reverses the roles of the DR Groups; the source becomes the destination and the
destination becomes the source. This is used to both “fail over” to the destination
site and to “fail back” when normal operation is to be resumed.
FAILSAFE
When the connection between the source and the destination system fails, all
writes are immediately halted and none is reported as completing until either the
connection is restored or NOFAILSAFE is set.
NOFAILSAFE
This is the default when you first create the DR Group. When the connection
between the source and the destination system fails, writes are directed to the log
until the connection is restored. At this point, the pending destination writes are
pushed across to the destination system. If the log becomes full, the system makes
a full copy of the source VDISK to the destination VDISK when the connection is
restored. Otherwise, the log resynchs the source and destination VDISKs.
NAME=
This is the new name for the specified DR_GROUP.
SUSPEND
Stops replication of data from the source to the destination. This causes the same
behavior as if the connection failed.
NOSUSPEND
Allows replication of data from the source to the destination to resume. This
causes the same behavior as if the connection was restored.
WRITEMODE=
Defines the I/O interaction between the destination and source side. Possible
values are synchronous and asynchronous.
74 Command View EVA Storage System Scripting Utility Reference Guide
Page 75

Example
SSSU Command Reference
SET DR_GROUP “\Data Replication\Transactions” SUSPEND
This example suspends replication for the DR Group Transactions.
75Command View EVA Storage System Scripting Utility Reference Guide
Page 76

SSSU Command Reference
SET DISK
The SET DISK command changes the properties of a disk.
Syntax
SET DISK <name>
Switches
The switches available for the SET DISK command are described in the following
paragraphs.
COMMENT=
This is an optional switch that associates a user-defined comment with the new
system. A maximum of 128 characters is allowed and the string must be enclosed
in double quotes.
NAME=
New name to give to the specified disk.
Example
SET DISK “\Disk Groups\Ungrouped Disks\Disk 005” NAME=5Disk
This example renames the disk Disk 005 to 5Disk.
76 Command View EVA Storage System Scripting Utility Reference Guide
Page 77

SET DISK_GROUP
The SET DISK_GROUP command changes the specified disk group properties.
Syntax
SET DISK_GROUP <name>
Switches
The switches available with the SET DISK_GROUP command are described in
the following paragraphs.
ADD=
The number of disk drives to add to the specified disk group.
COMMENT=
This is an optional switch that associates a user-defined comment with the disk
group. A maximum of 128 characters are allowed and the string must be enclosed
in double quotes.
SSSU Command Reference
DELETE=
The name of the disk drive to be removed from the disk group. Data is not deleted
when the disk is removed from the disk group.
NAME=
New name to give to the specified disk group.
OCCUPANCY_ALARM=
The point when a defined percentage of space is used. When this point is reached,
an event log is generated and sent to the Management Appliance (optionally the
host system) informing the administrator that the group is becoming full. Do not
use the percentage sign (%) after the number.
SPARE_POLICY=
This parameter determines the amount, if any, of storage space set aside for use in
the event that disks fail. The default is single.
■ NONE—reserves no space within a disk group to allow for data
reconstruction for failure of disk drives
77Command View EVA Storage System Scripting Utility Reference Guide
Page 78

SSSU Command Reference
■ SINGLE—reserves space within a disk group to allow for data reconstruction
for failure of a single disk drive
■ DOUBLE—reserves space within a disk group to allow for data
reconstruction for failure of two disk drives
Note: The space set aside is not in numbers of physical disks. It is the equivalent
amount of storage space spread across all disks.
Example
SET DISK_GROUP “\Disk Groups\pool” NAME=”nuclear secrets”
This example renames the disk group pool with the new name nuclear
secrets.
78 Command View EVA Storage System Scripting Utility Reference Guide
Page 79

SET FOLDER
Syntax
Switches
SSSU Command Reference
The SET FOLDER command changes the specified folder properties.
SET FOLDER <name>
The switches available for the SET FOLDER command are described in the
following paragraphs.
COMMENT=
This is an optional switch that associates a user-defined comment with the new
system. A maximum of 128 characters is allowed, and the string must be enclosed
in double quotes.
NAME=
New name to give to the specified folder.
Example
SET FOLDER “\Virtual Disks\top_secret\” NAME=everyone_knows
This example renames the folder top_secret to everyone_knows.
79Command View EVA Storage System Scripting Utility Reference Guide
Page 80

SSSU Command Reference
SET HOST
The SET HOST command adds or deletes World Wide Names, sets the operating
systems for a host, and adds comments to a specified host.
Note: Use the SET HOST command to add additional FCAs to hosts added to the
storage system with the ADD HOST command.
Syntax
SET HOST <name>
Switches
The following switches are available with the SET HOST command.
ADD_WORLD_WIDE_NAME=
Adds the World Wide Name of the host port.
DELETE_WORLD_WIDE_NAME=
Deletes the World Wide Name of the host port.
COMMENT=
This is an optional switch that associates a user-defined comment with the new
system. A maximum of 128 characters is allowed, and the string must be enclosed
in double quotes.
IP=
This is the network IP address.
NAME=
New name given to the specified host.
OPERATING_SYSTEM=
The type of operating system for the specified host. Choose one of the following
operating systems, which are spelled here as SSSU expects:
■ HPUX
80 Command View EVA Storage System Scripting Utility Reference Guide
Page 81

Examples
SSSU Command Reference
■ IBMAIX
■ OPEN_VMS
■ SOLARIS
■ TRU64
■ WINDOWS
■ CUSTOM = (You must include the equal sign after CUSTOM, and the value
must be 16-digit hexidecimal characters.)
SET HOST \Hosts\install OPERATING_SYSTEM=OPEN_VMS
SET HOST \Hosts\install ADD_WORLD_WIDE_NAME=1000-0000-C922-36CA
The first example assigns OpenVMS as the operating system type for the host
install.
The second example adds a WWN to the host install.
81Command View EVA Storage System Scripting Utility Reference Guide
Page 82

SSSU Command Reference
SET MONITOR
The SET MONITOR command changes the specified monitor properties.
Syntax
SET MONITOR <name>
Switches
The following switches are available with the SET MONITOR command:
COMMENT=
This is an optional switch that associates a user-defined comment with the
monitor. A maximum of 128 characters (including spaces) is allowed, and the
string must be enclosed in double quotes.
NAME=
New name to give to the specified monitor.
Example
SET MONITOR “\Hardware\Rack 1\Enclosure 7\Controller A”
COMMENT=“cabinet near the door”
This example adds the comment cabinet near the door to the monitor
Controller A.
Note: Remember to include full paths for objects and enclose any paths that contain
spaces in double quotes.
82 Command View EVA Storage System Scripting Utility Reference Guide
Page 83

SET OPTIONS
Syntax
Switches
SSSU Command Reference
The SET OPTIONS command changes the SSSU characteristics.
Note: The options you set with the SET OPTIONS command are in effect for the
current session only. Each time you start SSSU, the default options are reinstated.
SET OPTIONS
The following switches are available with the SET OPTIONS command.
COMMAND_DELAY=
The number of seconds (0–300 seconds) to wait between issuing commands when
running a script using the FILE command. The default is 10 seconds. This switch
has no effect when you are typing commands.
NOCOMMAND_DELAY
Specifies no wait time between commands issued from within a FILE command.
DISPLAY_WIDTH=
Sets the amount of characters displayed on a line for SHOW commands. The
default is 80. If the SSSU output is to be parsed, it is useful to set a high line
width. A long line keeps the lines from wrapping, making the output easier to cut,
paste, and parse. Line widths from 70 to 500 may be specified.
ON_ERROR=
■ CONTINUE—In this mode, only the EXIT command causes the scripting
utility to halt. This is the default and is recommended when you are manually
typing commands.
■ EXIT_ON_ERROR—Any error causes the scripting utility to exit with an
error code. This mode is useful when requesting the entire script to halt
immediately if errors occur while executing a script. This causes the scripting
utility to halt on any kind of error: failed command, syntax error, or
ambiguous command.
83Command View EVA Storage System Scripting Utility Reference Guide
Page 84

SSSU Command Reference
■ HALT_ON_ERROR—This is similar to EXIT_ON_ERROR. Any error
causes the scripting utility to halt but not exit until any key is pressed. Then
the scripting utility exits with an error code. This allows you to see the error
before the window closes on exit.
Note: When manually typing commands, HP does not recommend using the
EXIT_ON_ERROR or HALT_ON_ERROR modes. You should avoid these modes
because SSSU exits on
RETRIES=
Number of minutes to attempt “long” period retries, such as when the command
view EVA service is busy or restarting. Specify between 1–10 minutes
(inclusive). The default is four minutes.
NORETRIES
Specify that you do not want the scripting utility to retry commands.
SAFE_DELETE
Specify if you want to delete all dependent or related objects before the specified
object can be deleted. For example, if you specified a deletion of the VDisk that
had LUNs presented, the DELETE VDISK command would be rejected with a
message telling you that all the LUNs presented from this storage must be deleted
before the storage can be deleted. This is the default.
You must always delete related objects if SAFE_DELETE is specified.
any
kind of error, including a typographical one.
NOSAFE_DELETE
Allows the deletion of an object even if related objects are present. The behavior
of the NOSAFE_DELETE command depends on the mode of operation (entering
commands manually or running commands through a script) in which SSSU is
running.
If you are entering commands at a terminal, the Are you sure? prompt
displays and you must type Yes for the deletion to proceed. Note that you must
type a capital Y followed by lowercase es for the deletion to proceed.
If the input is from a script (using the FILE command) or from the command line,
the deletion proceeds without warning.
84 Command View EVA Storage System Scripting Utility Reference Guide
Page 85

Example
SSSU Command Reference
Caution: Using the NOSAFE_DELETE switch can cause accidental deletion of
VDISKs or presentations.
SET OPTION ON_ERROR=HALT_ON_ERROR NORETRIES
The example sets the options for SSSU to stop upon encountering an error and not
to retry the commands.
85Command View EVA Storage System Scripting Utility Reference Guide
Page 86

SSSU Command Reference
SET SYSTEM
Use the SET SYSTEM command to modify system properties.
Syntax
SET SYSTEM <name>
Switches
The following switches are available for the SET SYSTEM command.
COMMENT=
This is an optional switch that associates a user-defined comment with the new
system. A maximum of 128 characters is allowed, and the string must be enclosed
in double quotes.
CONSOLE_LUN_ID=
The LUN used for console communication. If set to zero, a console LUN is not
presented to the host.
Note: This value is used for IBM AIX (set to zero), OpenVMS (required), and Tru64
UNIX (recommended). Other host operating systems ignore the value. See the host
operating system installation guides for more information.
NAME=
New name to give to the specified system.
Example
SET SYSTEM engineering NAME=accounting
This example renames the system engineering to accounting.
86 Command View EVA Storage System Scripting Utility Reference Guide
Page 87

SET VDISK
Syntax
Switches
SSSU Command Reference
SET VDISK <storage_name>
The following switches are available for the SET VDISK command.
COMMENT=
This is an optional switch that associates a user-defined comment with the new
system. A maximum of 128 characters is allowed and the string must be enclosed
in double quotes.
MIRRORED_WRITEBACK
All writes are stored in mirrored caches. After the data is stored in both caches, the
write is complete. If one mirrored cache is unusable, the write is not complete
until the data is in both caches.
NOMIRRORED_WRITEBACK
No writes are stored in mirrored caches. After the data is stored in one cache, the
write is complete. The write is complete even if a mirror copy of a cache is not
available.
NAME=
New name to give to the specified virtual disk.
OS_UNIT_ID=
The ID that is presented to the host operating system. If set to zero, an ID is not
presented to the host.
Note: This is a required field for OpenVMS and is recommended for Tru64 UNIX. It is
optional for all other operating systems.
PREFERRED_PATH=
The preferred controller path that is specified to handle all I/O for the virtual
disks. If a controller fails, the path always reverts to the working controller.
87Command View EVA Storage System Scripting Utility Reference Guide
Page 88

SSSU Command Reference
■ PATH_A _BOTH—Controller path A fails over to controller B. When
controller A restarts, the virtual disks fail back to controller A. This is
failover/failback mode.
■ PATH_A_FAILOVER—Controller path A fails over to controller B. When
controller A restarts, the virtual disks do not fail back over to controller A.
This is failover-only mode.
■ PATH_B _BOTH—Controller path B fails over to controller A. When
controller B restarts, the virtual disks fail back to controller B. This is
failover/failback mode.
■ PATH_B_FAILOVER—Controller path B fails over to controller A. When
controller B restarts, the virtual disks do not fail back over to controller B.
This is failover-only mode.
NOPREFERRED_PATH
Allows the I/O to be handled by any controller.
READ_CACHE
Reads are satisfied from the controller’s cache.
NOREAD_CACHE
Reads are always satisfied from media, not the controller’s cache.
SIZE=
Indicates the new larger size (you cannot change to a size smaller than the
original) of the storage in gigabytes. You can specify size in whole gigabytes
only. Fractions are not allowed. The value of SIZE can be 2 GB through 2000 GB
depending on the disk group’s available space.
WORLD_WIDE_LUN_NAME=
Sets the World Wide LUN Name on unpresented storage (either ACTIVE or
snapshot). This switch is rejected when issued against storage that is presented to
a host.
Note: This switch is commonly used to allow a host to point to a new version of a
snapshot by giving the new snapshot the same WWN as the old snapshot.
88 Command View EVA Storage System Scripting Utility Reference Guide
Page 89

Example
SSSU Command Reference
WRITE_PROTECT
Does not allow writing to the virtual disk for all presented LUNs.
NOWRITE_PROTECT
Allows writing to the virtual disk for all presented LUNs.
SET VDISK “\Virtual Disks\archive\ACTIVE” WORLD_WIDE_NAME_LUN_
NAME=6000-1fe1-ff00-0000
The example assigns the World Wide LUN Name to the ACTIVE virtual disk of
the archive family.
89Command View EVA Storage System Scripting Utility Reference Guide
Page 90

SSSU Command Reference
SHOW
Use the SHOW commands to display information about various elements in the
currently selected system.
Note: All of the SHOW commands require the full path from the root directory to the
object you want to display. Remember to include full paths for objects and enclose any
paths that contain spaces in double quotes.
The following switches are available for all SHOW commands.
■ SHOW <element> FULL
■ SHOW <element> NOFULL (This is the default.)
Example
SHOW VDISK FULL
This example provides all information about all VDISKS.
Example
SHOW VDISK NOFULL
This example lists all the VDISKS. Because NOFULL is the default, SHOW VDISK
also list all VDISKS.
Example
SHOW VDISK <name>
This example displays all the properties of a particular disk.
90 Command View EVA Storage System Scripting Utility Reference Guide
Page 91

SHOW DR_GROUP
Displays a list of data replication groups for the currently selected system. If you
specify the name of the DR Group, it displays detailed information about the
specified DR Group.
Syntax
SHOW DR_GROUP <dr_group_name>
Example
SHOW DR_GROUP “\Data Replication\Transactions”
This example shows the DR_Group Transactions.
SSSU Command Reference
91Command View EVA Storage System Scripting Utility Reference Guide
Page 92

SSSU Command Reference
SHOW DISK
Use the SHOW DISK command to display disk configuration information for
physical disks connected to the currently selected system.
Syntax
SHOW DISK <disk_name>
Examples
SHOW DISK
SHOW DISK “\Disk Groups\Ungrouped Disks\Disk 039"
The first example displays a list of all the physical disks in the currently selected
system.
The second example displays specific information about the physical “Disk 039.”
92 Command View EVA Storage System Scripting Utility Reference Guide
Page 93

SHOW DISK_GROUP
The SHOW DISK_GROUP command displays the disk groups currently
configured by this system. If <disk_group_name> is specified, detailed
information about the specified disk group is displayed.
Syntax
SHOW DISK_GROUP <disk_group_name>
Examples
SHOW DISK_GROUP
SHOW DISK_GROUP “\Disk Groups\Default Disk Group”
The first example displays a list of the available disk groups.
The second example displays information about the default disk group.
SSSU Command Reference
93Command View EVA Storage System Scripting Utility Reference Guide
Page 94

SSSU Command Reference
SHOW HOST
The SHOW HOST command displays the hosts currently configured on this
system. If <host_name> is specified, information about the specified host is
displayed.
Syntax
SHOW HOST <host_name>
Examples
SHOW HOST
SHOW HOST \Hosts\med_lab
The first example displays the list of available hosts on the currently selected
system.
The second example displays specific information about the host med_lab.
94 Command View EVA Storage System Scripting Utility Reference Guide
Page 95

SHOW LUN
Syntax
Examples
SSSU Command Reference
The SHOW LUN command displays the LUNs currently configured on this
system.
SHOW LUN <LUN_name>
SHOW LUN
SHOW LUN \Hosts\SVT165\13
The first example displays the list of available LUNs on the selected system.
The second example displays specific information about the LUN 13 on
\Hosts\SVT165.
95Command View EVA Storage System Scripting Utility Reference Guide
Page 96

SSSU Command Reference
SHOW MANAGER
The SHOW MANAGER command displays information about the currently
selected manager.
Syntax
SHOW MANAGER
Switch
The switches FULL and NOFULL can be specified but are ignored. Specifying a
specific manager name is also ignored. The SHOW MANAGER command
always displays the information for the currently selected manager.
Example
SHOW MANAGER
The example displays information about the currently selected manager.
96 Command View EVA Storage System Scripting Utility Reference Guide
Page 97

SHOW MONITOR
The SHOW MONITOR command displays the monitors currently installed on
this system. If <monitor_name> is specified, detailed information about that
specified monitor is displayed.
Syntax
SHOW MONITOR <monitor_name>
Examples
SHOW MONITOR
SHOW MONITOR “\Hardware\Rack 1\blue_cab”
The first example lists monitors available on the currently selected system.
The second example displays information about the monitor blue_cab.
SSSU Command Reference
97Command View EVA Storage System Scripting Utility Reference Guide
Page 98

SSSU Command Reference
SHOW OPTIONS
The SHOW OPTIONS command displays the current SSSU options.
Syntax
SHOW OPTIONS
Example
SHOW OPTIONS
The example shows the following current options set for SSSU:
Options:
NOCOMMAND_DELAY
DISPLAY_WIDTH = 80
ON_ERROR = CONTINUE
RETRIES = 4 (minutes)
SAFE_DELETE
98 Command View EVA Storage System Scripting Utility Reference Guide
Page 99

SHOW POWER
The SHOW POWER command displays the controllers currently configured on
this system. If you specify <controller_name>, detailed information about that
specific controller is displayed. Controllers are the only power objects.
Syntax
Examples
The first example displays a list of all power objects within the selected system.
The second example displays specific information about Controller A.
SSSU Command Reference
SHOW POWER <controller_name>
SHOW POWER
SHOW POWER “\Hardware\Rack 1\Enclosure 7\Controller A”
99Command View EVA Storage System Scripting Utility Reference Guide
Page 100

SSSU Command Reference
SHOW SYSTEM
Use the SHOW SYSTEM command to display the systems currently managed by
command view eva. If <system_name> is specified, detailed information about
that specified system is displayed.
Syntax
SHOW SYSTEM <system_name>
Examples
SHOW SYSTEM
SHOW SYSTEM payroll
The first example displays a list of available systems on this manager.
The second example displays specific information about the system payroll.
100 Command View EVA Storage System Scripting Utility Reference Guide
 Loading...