

Page 1

Vi deo M P3 400
User Manual
V1.1
Page 2

1
Table of Contents
1. Over vi ew……………… ……………………… ………….….2
2. Ma in Me nu………………… ……………………………..….9
3. Tur n On/ Off……………………………………… ..……..... .1 0
4. Musi cal File Pla yback ………………………………....…...11
5. Re cord …………………………………… …………….…. ..26
6. Voi c e …………………………………………… …….……31
7. FM……………… ……………………… …………….…… ..39
8. Jpeg Vi ewer …… ……………………… ………….………..43
9. Setti ngs …………………………… …..…………………….45
10. UDI SK……………… ……………………… …………..…..51
11. Upgrade ………………… ……………………… …..…...…53
12. Noti ce ………………… ….……………………………...…57
Page 3

2
1 Overview
X-Mi cr o Vi de o MP 3 ca n pl ayin g MP 3/ W MA fi les , dig ita l voice
rec or di ng, USB Disk st or age and FM r adio, the pl ayer als o has
t he added ability of pla ying MTV movi e files (A s peci al
s oftwar e is requi re d t o pe rfo rm n ec es sa ry c on vers i ons .), as we ll
as t he added function of viewi ng JPEG pi ct ures.
The common funct io ns of th e pr oduct:
z Playi ng of mus ical fil es and recorded files stored i n up to
99 subdirect ories of the same level direct ory.
z Rec ognizi ng of up t o 99 -rec or de d fil es i n ea ch di re ct or y.
z De let i ng eit he r si ngle o r all mu si cal ( or re corded) files in
the current directory of the player.
z Off Stat us Me mori zation: When turned on, the pla yer c an
return to t he last off-status , i ncluding the musi cal file to
be pla ye d an d t he rec or di ng posi t i o n .
z Res umi ng playing: The pl ayer ca n memoriz e t he positi on
wh er e it st ops playi ng t he mus ic al fil e i n a dir ect or y.
Once the Play button is pressed aft er turn on t he pl ayer ,
the pl ayer will start playing the musi cal file just from the
point where it stops last time.
Page 4

3
1.1 Specifications
z 65,000 OLED full-color Dis play
z Support MP3, WMA and WAV
z Cre at i ve MTV func ti on
z Support JPEG picture brows ing
z P la y mu s i c wi th 16- L evel Spe ed
z Full band FM stereo radio, with a total of 20 memory
stations .
z Do ub l e-s c re en l y rics s y nc displa y, fa cil ita ti ng l y ri cs
learning and memorizing.
z Friendly fade playback, more comfortable t o your ears.
z Gra p hi cal o pe rat io n i nt erfac e, re mo vab le dis k fo lder
mana ge me nt
z Built-in microphone, hi-fi recording, short-cut start, 35
hours continuous recording (128M Flas h)
z USB 2.0 (Full -Speed) i nterface, with a max speed of
1000K Byte/S
z Powerful expandability, online firmware upgrading
z Con v en i ent l a ngua ge l ear ni ng fe at ures, a true di git al
r epea ti n g de vice , se gme nt A-B repea ti ng, foll ow
speaking by cont rasti ng with ori ginal s ound, 16-level
variable-speed playback.
z For Windows 98/ME/2000/XP
For Wi ndows 98, you s houl d ins tall its driver .
z AA Battery
Page 5
4
1.2 Button Func ti on Definitions
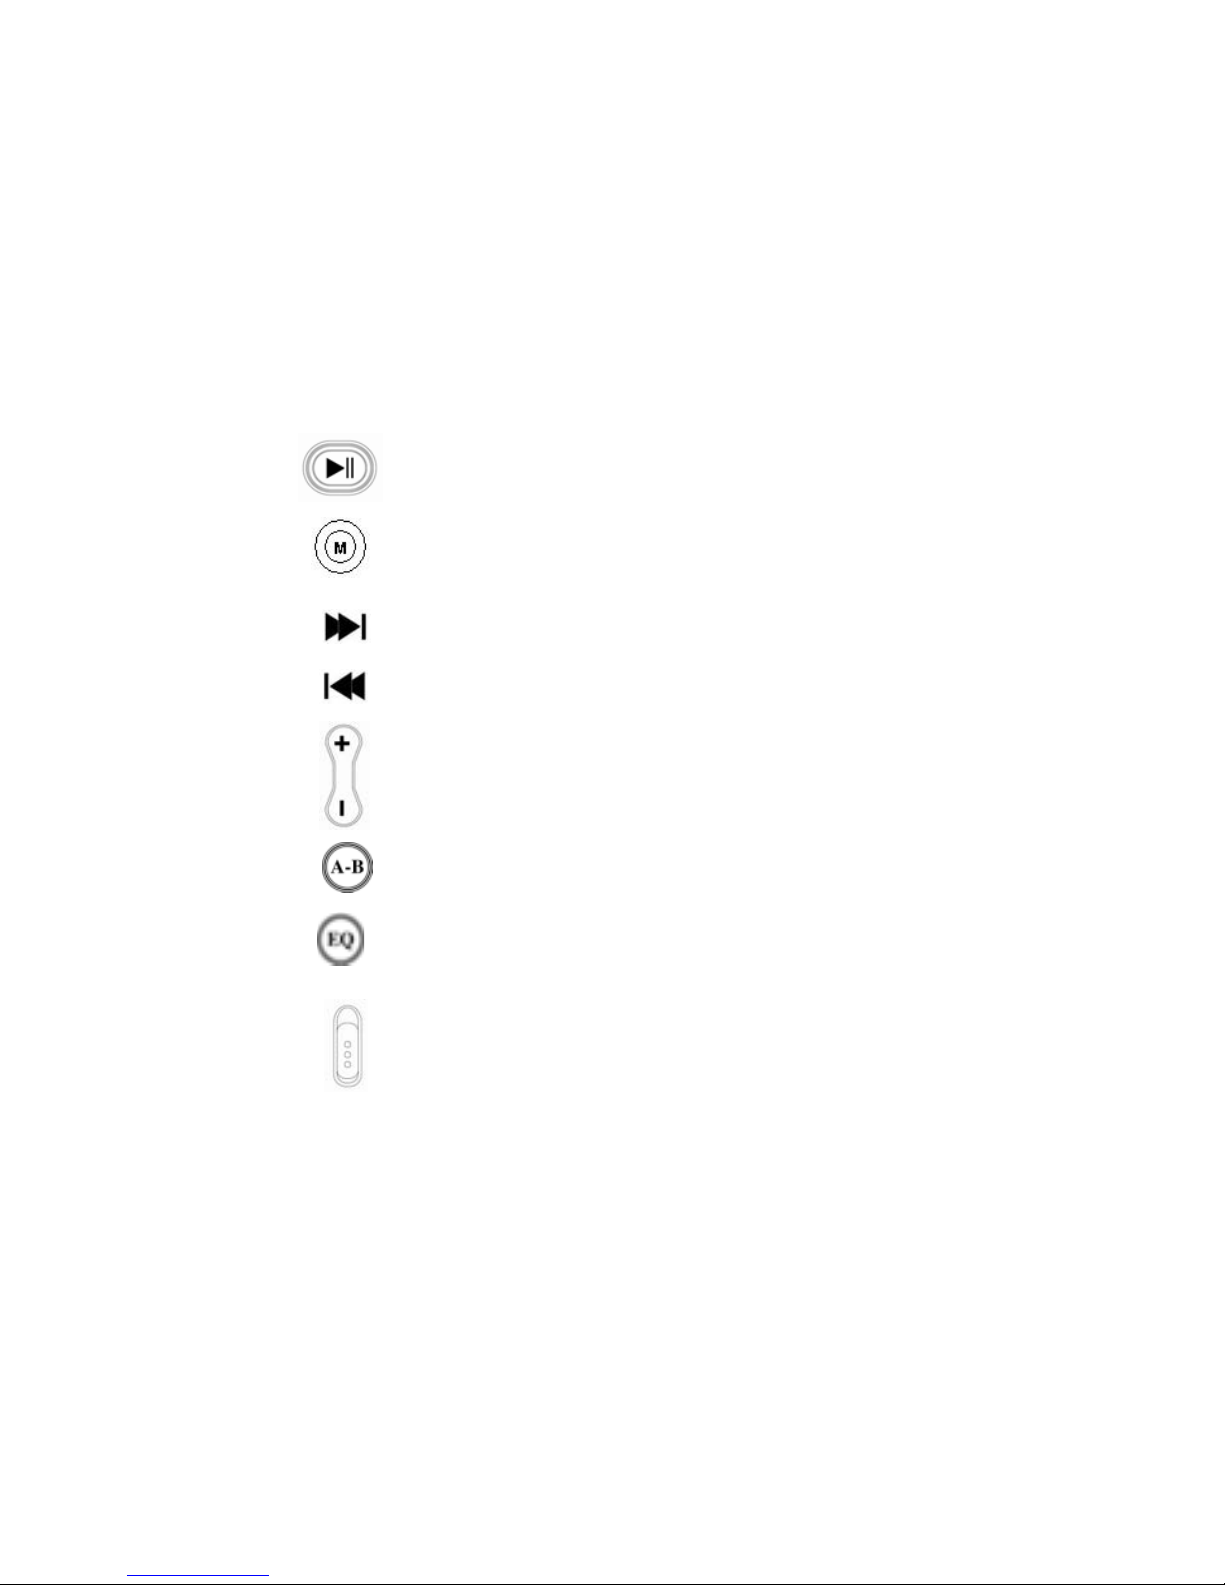
There are 9 buttons.
P L AY: Turn O n, Turn Off, P l ay, Pause , a nd Stop.
MODE: Switchi ng Worki ng Mode, Menu Options ,
Interface Swit ching.
NEXT: Move to Right, Forward
LAST: Move t o Le ft , Bac kwa rd
VOL+: Volume Increasing, Last Item
VOL-: Volume Decreasing, Next Item
A-B/ REC: Special A-B / Re cording Hot Button
EQ: When playi ng MP3 musi cal fi les , us e t his button
t o dir ectly change their sound effects wit hout
e nteri ng t he opti on men us .
HO L D: L oc k butto n/Un l ock b ut t o n
Page 6

5
1.3 Button Pressing Modes
There are three ways for operating buttons:
1.3.1 Short-Press
In cases of but tons with both l ong and s hort press
funct io ns , th e butt o ns wil l functi on as a s hort - pres s o nc e t he y
a re releas ed wit hi n 1 .2 se co nds ( Pl ay, Sto p, Last , Ne xt ).
If a butt on has only s hort-press functions , the button
will res pond onl y once when it is released wit hout ti me limits .
1.3.2 Long-Press: Pres s a but ton for longer t han 1.2 s econds,
then the button will function as a long-press. (On/Off,
Forwar d/Ba ckwa rd)
1.3.3 Ho l d O n: Fr om t he t i me w h en the bu tt on is presse d t o t he
ti me wh en it is r ele as ed , t he butt on is res p ond ed at a ce rtai n rat e
for several ti mes . (Volume Adjustme nt )
1.4 Recording Functi on of the A-B Button
Except the recorded file playback and musical file playback
interface, repeat interface, upgradi ng interface and U Dis k
interface, the A-B button functions as a hot recording button i n
all ot her i nterfaces . A s hort- press of t he A-B button will take
you to the recording interface and start recording.
1.5 Short-Cut Function of the MODE Button
In the music playback, recorder, recorded file playback, radio,
pictures and setti ngs interfaces, except the s peci al inappli cable
cas es , a long-press of t he MODE button wil l stop t he current
operation and ret urn to the main menu.
Page 7
6
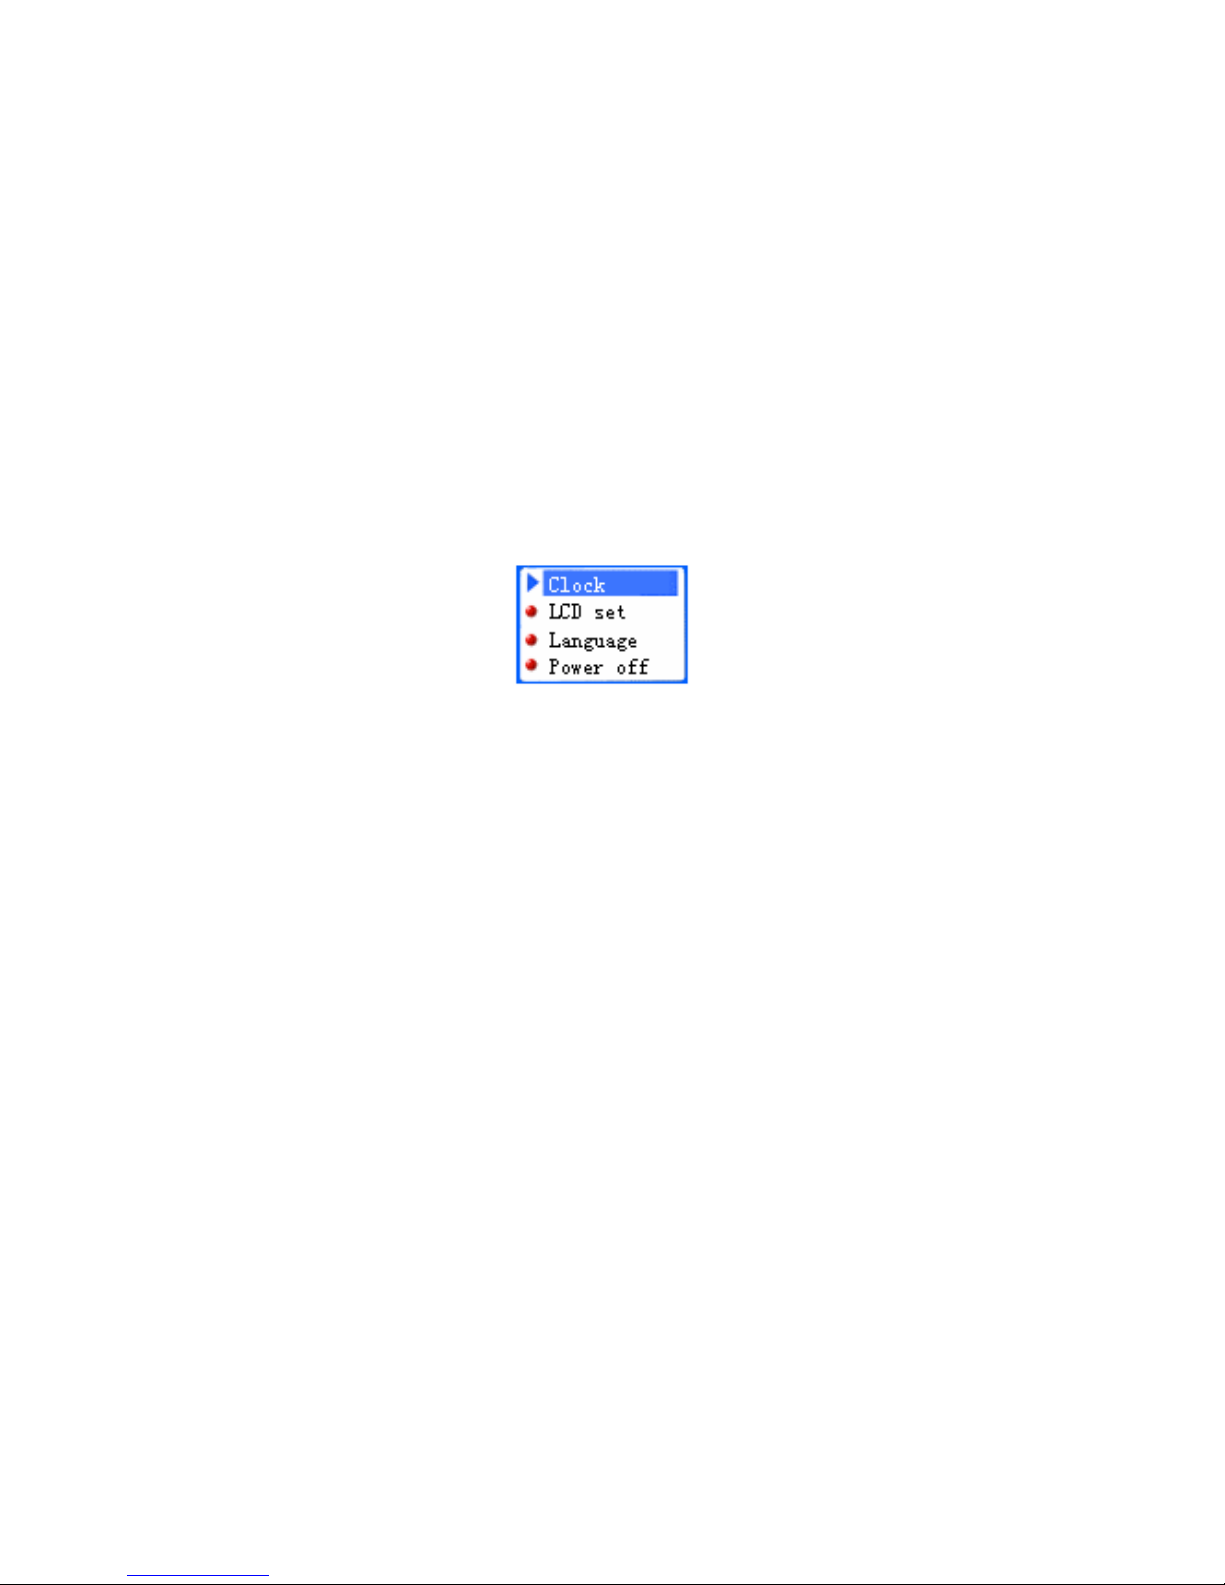
1.6 Standard Control I nterface
Standard Menu
Note: The standard menu offer s a menu s el ect ion i nterface. In
each functional module interface, the standard menu will be
repeatedly used. Every time when entering the interface, its
for mat is as shown in the Fi g below.
The Settings menu
z Up to 4 items can be dis played i n one screen. If the
number of the items i s les s t ha n 4, the i tems will be
dis played from t op to down.
z The i tem wi th t h e blue ba ck gr ound i s t he on e cu rre ntly
selected.
z P r ess t h e M ode b ut t o n t o s e lec t a n d e nt e r t his op ti on .
z A s ho rt- pr ess of the P LAY but t o n wi ll qui t t he me nu.
z But ton Functions of t he Standard Menu
z A short-press or long-press of “Vol-” will move the blue
background downward step by step till the item at the
bottom, then turn over to the next s creen till the las t
screen, then go back to the first s creen.
z A s hort- pr ess or long-press of “Vol+” is opposit e t o t hat
of “ Vol -”.
z A s ho rt- pr es s of M OD E wil l s el e ct t h e e n able d i c o n a n d
execute its corresponding function.
Page 8

7
z A s ho rt- pr es s of A- B wi ll e n te r t he r ec o r di n g mo de a nd
start recordi ng.
z A s ho rt- pr ess of PL AY wi ll quit t he me nu.
z Spe cial Q uit Functi on
Au t o quit for i dli ng for 5 se co nds .
Res t ore of th e en abl e d posit i o n
Each time when you enter the menu, the player will restore to
t he en a bl e d posit i o n wh er e you qui t l as t t i me.
1.1.1 The Standard Slide Bar
Note: The standard slide bar offers an i nt erface for s elect ing
numbers. In each functi onal modul e interface, the standard sli de
bar will be repeate dl y use d.
Its format is as shown in the Fig below.
Brightness Adjust ment
z The s lide bl oc k can b e mo ve d t o l eft or ri ght .
z The number “6” in the Fi g is t he fi gure that corres ponds
to t he posi ti on of the slide block.
z But ton Function in the Slide Bar Interface
z A s ho rt- press or l o ng-p ress of N EXT w i ll move t h e s li de
block a step to right. The corresponding number will be
dis played st ep by step till the max number.
Page 9

8
z A s hort- pr ess or l o ng-p ress of LA ST w i ll move th e
e nabl ed posi t i on a s te p to le ft . Th e co rr es pondin g nu mb er
wil l be dis pl ay ed st ep b y ste p till t he mi n nu mbe r.
z A s ho rt- pr ess of MOD E wil l fi ni sh t h e set ti ng and qu it .
z A s hort- pr es s of A- B wi ll en te r t he recordin g i nter face
and start recording.
1.7 Battery Level
z There are all together 9 levels for measuring the battery
energy.
z
st a nds for l ow b att er y. stands for full battery.
Page 10

9
2 Mai n Menu
There are 6 functions available: music, recorder, voice, radio,
j pe g and s ettings .
2.1.1 The interface is as shown in the Fig below.
The Mus ical Fil e Playba ck
Eac h ro und icon st ands for a mode . Yo u c a n o nl y ent er t he
mod e r e pr es e nt e d by t he o n e t ha t is l oc ate d i n t he ce nte r a n d h as
colors.
2.1.2 Button Function in the Main Interface
z A s ho rt- press o r lo ng-p ress of N EXT w i ll c yc le t he
selection position to right.
z A s ho rt- pr ess o r lo ng-p ress of LA ST wi ll cycl e t he
selection position t o left.
z A short-press of MODE wil l confirm and enter t his
mode. A Long-pres s will ret urn to the main interface.
z A s ho rt- pr es s o f A- B will en te r t he reco rdin g fun ct ion
and start recording.
z A long-press of PLAY will turn the player off.
Page 11

10
3 Tur n O n/ O f f
3.1 Turn Off
A long-press of PLAY will turn off the pl ayer.
When t he pl ayer idles for a time that reac hes what the use r
specifies to turn off the player, the player will be turned off
aut oma ticall y. When the USB port of t he player is connected to
a PC, h ow ever , t his fun cti on wil l be ov er rid de n.
3.2 Turn On
A long-press of PLAY will turn on the player.
3.3 Low Batt er y
If t he batt ery is low, the player will aut omaticall y go into the
Stand By mode. In this case, do not t ur n on the pla yer again.
Page 12
11
4 Musical File Playback
The Musical File Playback funct ion realize the playback of
musical files in MP3 and WMA formats along with the features
of r ep eati ng, fo ll owi ng an d co nt ras ti ng. I t has t he i nt e rfaces o f
Stop, Pl aying, Lyrics Dis play, Repeating, Del eti ng, Directory
Selecting, as well as funct ion sel ection and set ti ngs.
The Musical File Playback also realize the playback of MTV
movie s with onl y s uc h feature s as pl ayi ng, s top, LAST and
NEXT.
4.1 The Stop Inte rf ace
I n t he Sto p i nter face, th e c urre nt musi c st ops at t he c urre nt
pl a ybac k posit i o n, w ait i n g for t h e oper ati ons fro m t h e use r.
Even if the user turns off the player, it should restore to this
stat us to real ize t he function of resuming playback. If you stop
in the lyrics mode, please go in interfaces other than lyrics. In
t he St op i nte rface, you ca n c hoos e th e c urre nt s ong.
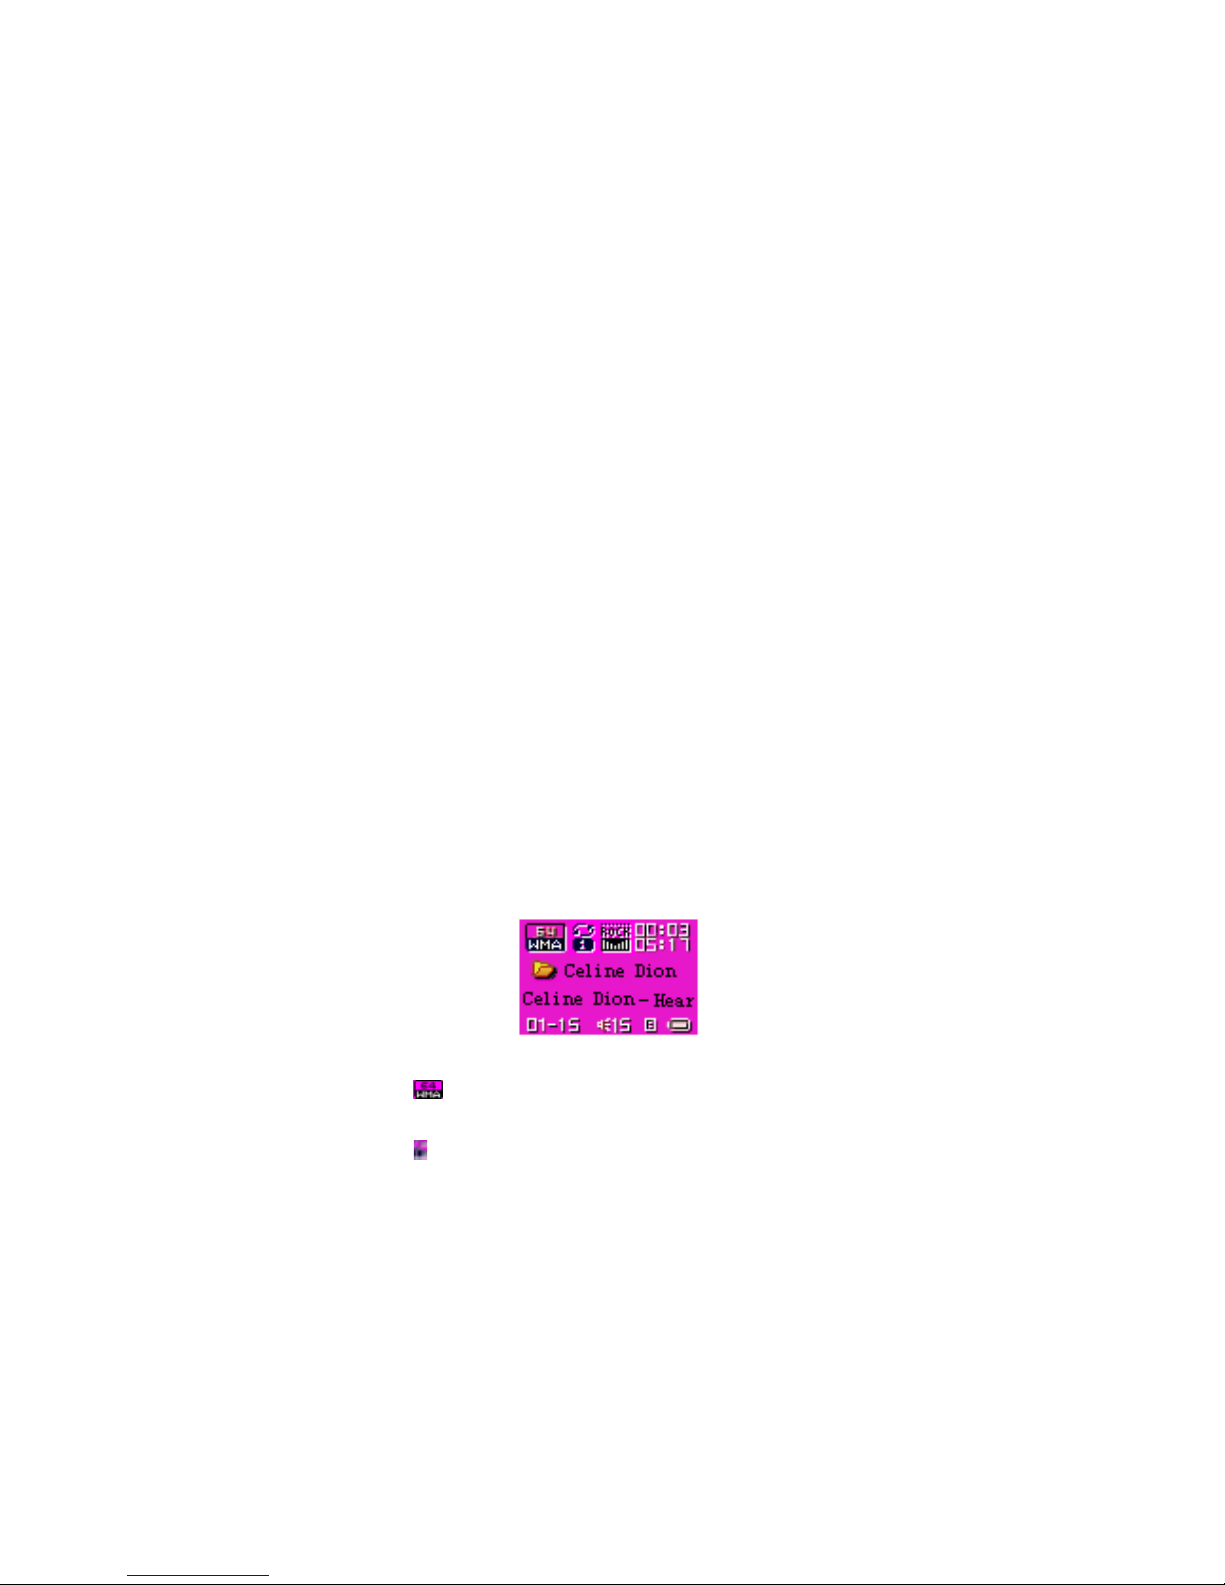
The i nterface is as s hown in the Fig below.
Musi cal File Playba ck
z
indi cates t hat t he c urr ent musi cal file is in the
WMA format with a bit rate of 64Kbit.
z
represents that the current cycle mode is Repeat 1.
Page 13

12
z
indicates that the current musical file is the
fi rst one and the total number of the musi cal files is 15. The
total number refers to the number of musi cal files in the current
di re ct or y.
z
indicates that the current EQ is Rock.
z
shows that the current playback position is at
00: 03 and the tot al length of t he song is 05: 17.
z
represents that the current s ong has its l yric.
z “ My Heart Will Go On” is t he name of the song. If
t he s o n g d oe s not hav e a Ta g, t h en its fil e name wi l l be
dis played here.
z “Celine Dion” is the name of the singer.
4.1.1 Button Functi on i n the Stop Interf ace
z Long-Press of MODE: Enter into the main menu.
z Short-Press of MODE: Enter into the Stop menu
i nte rfac e.
z Short -P ress of PLAY: Play musi cal files.
z Long-Press of PLAY: Turn the player off.
z Hold-On of NEXT: Cycle to the next song in the
cur re nt di rectory and the time posi tion of mus ical files is reset t o
zero.
Hold-On of LAST: Function opposit ely t o NEXT.
z Short-Press of “Vol+” or ”Vol -”: Adjust t he volume.
z Short-Press of A-B: Switch to the recording interface
and start recording.
z Short-Press of EQ: Switch the sound effects.
4.1.2 The Stop Menu Interf ace
Page 14
13
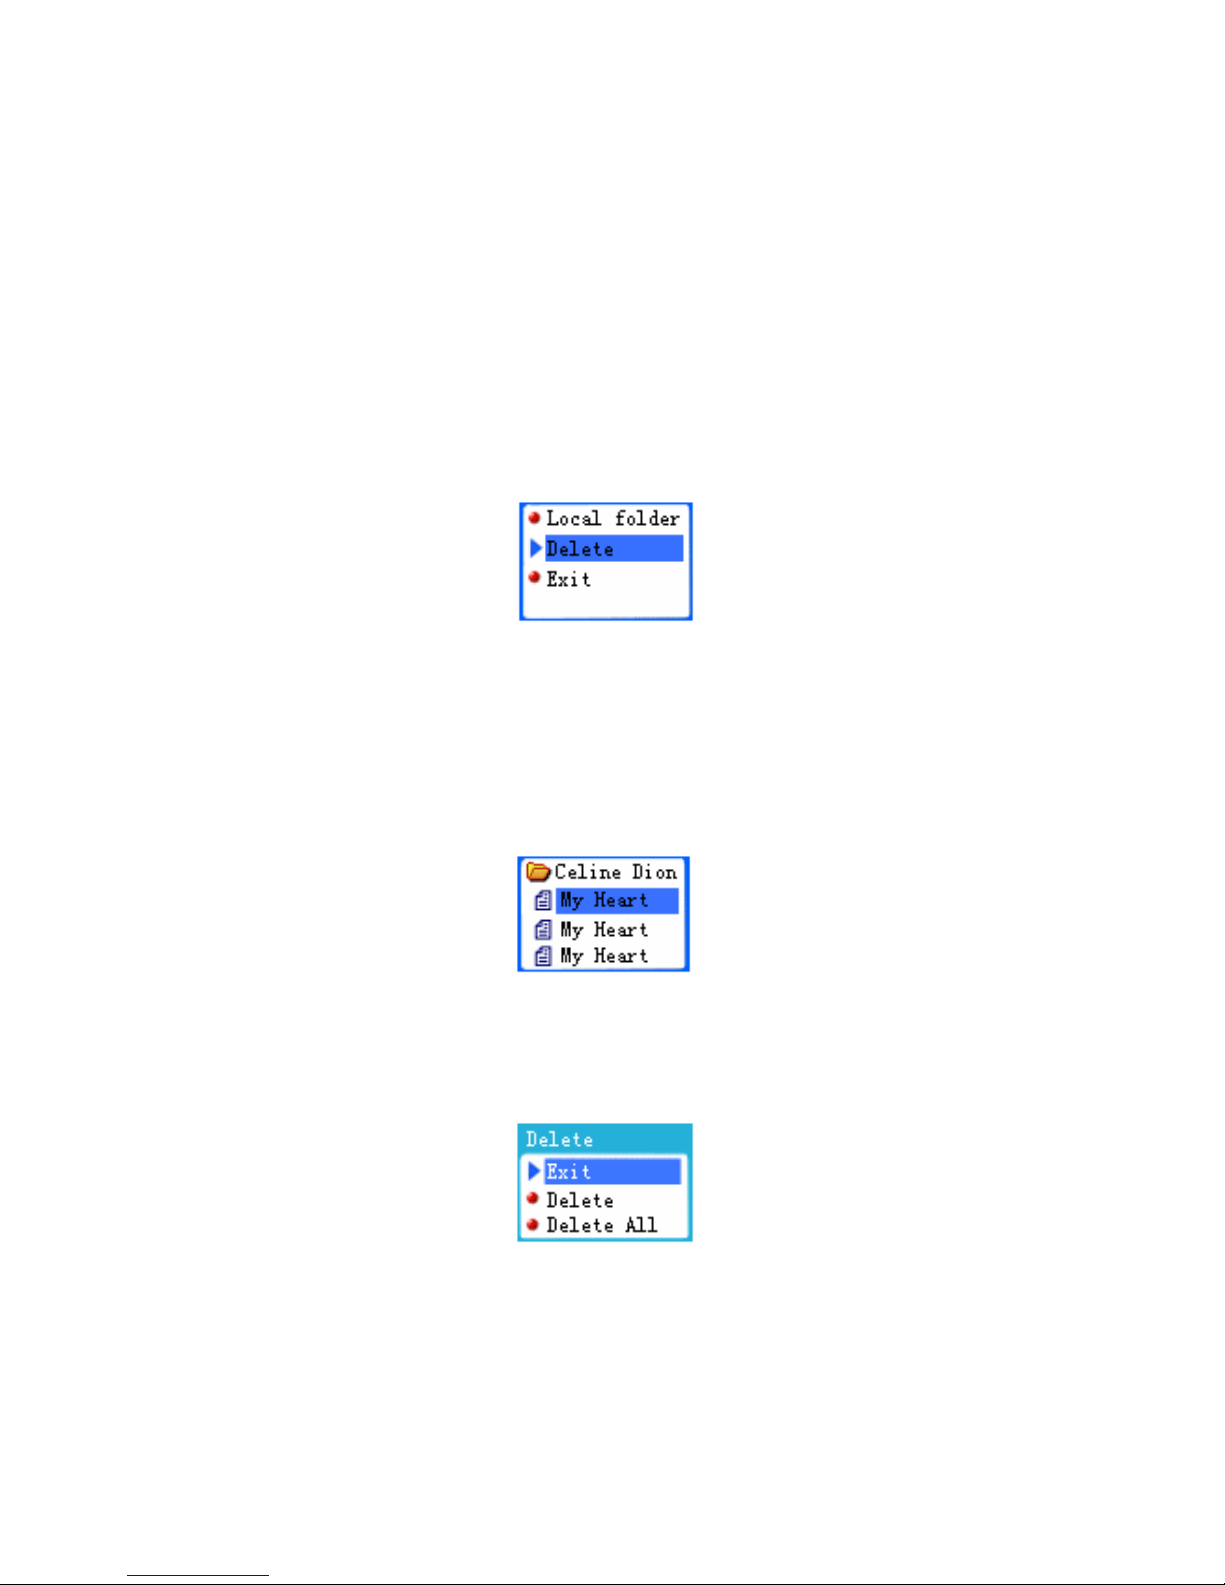
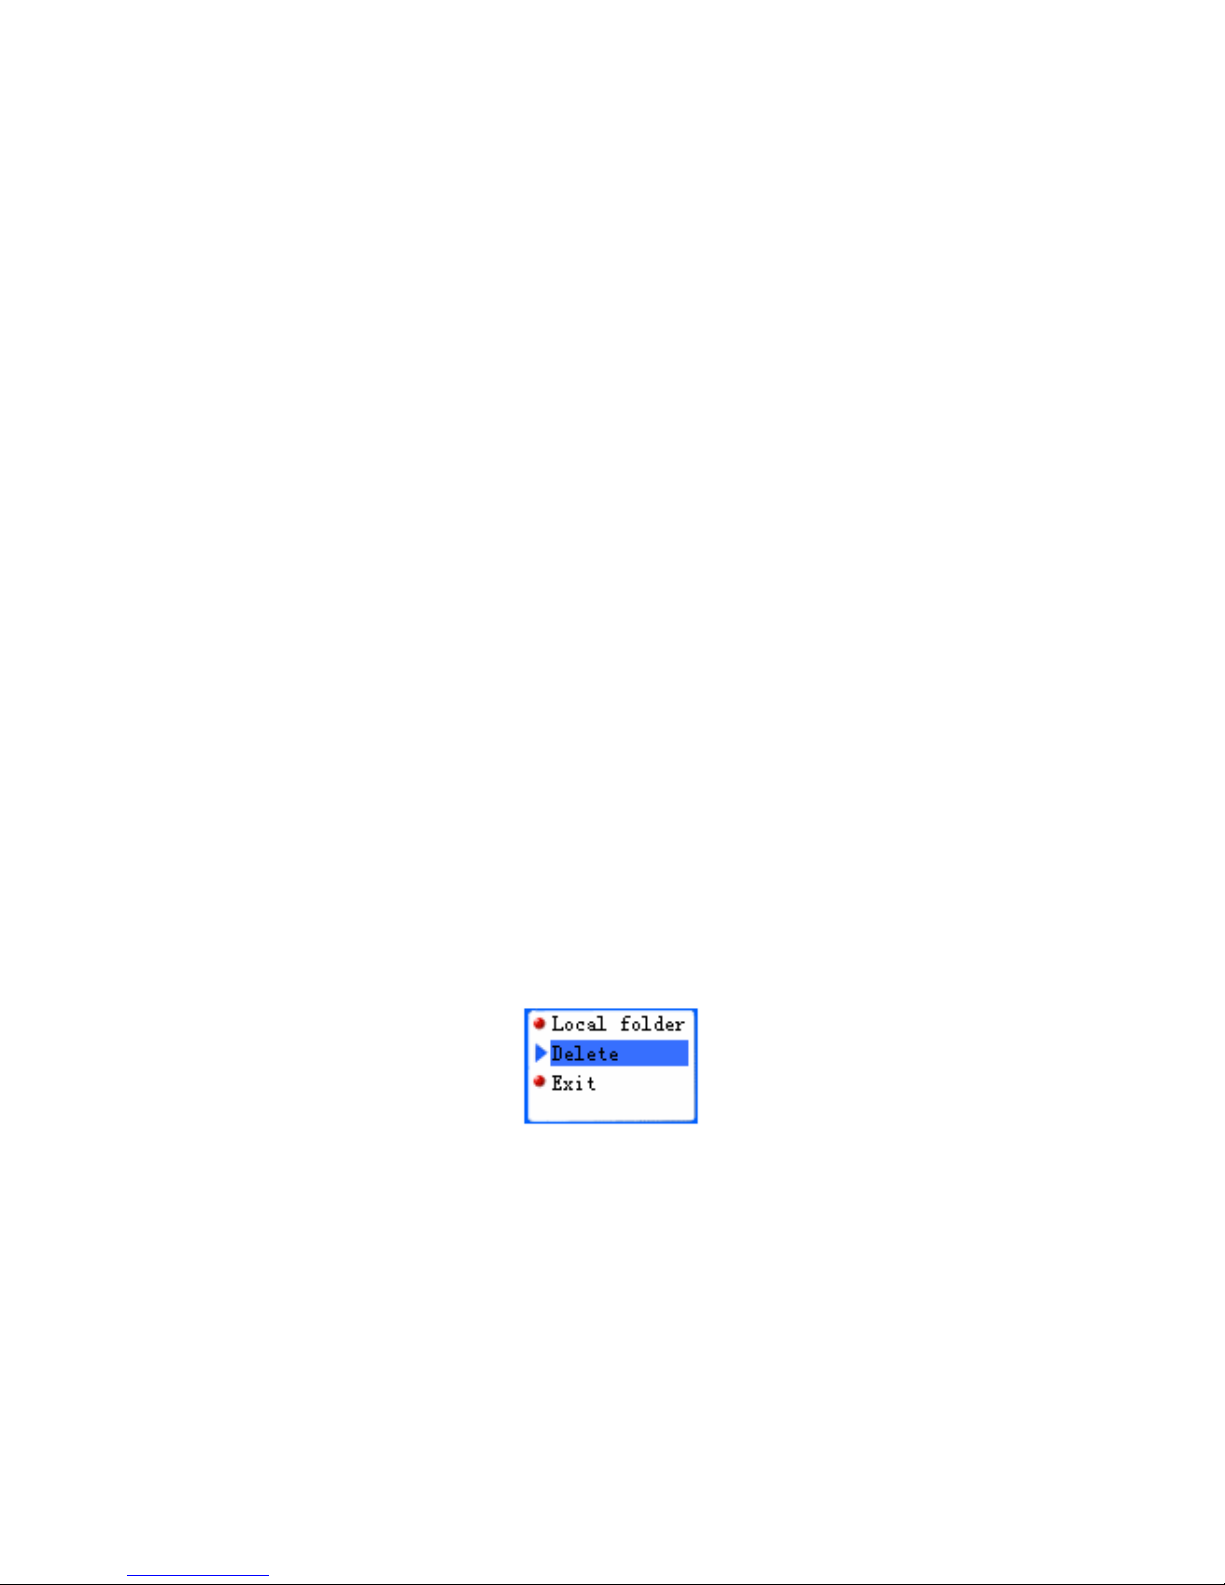
No t e: You c an se le ct Loc al fol d er, Dele te and E xit . W h en y ou
enter into this interface, the enabled position is t he one where
you quit last ti me.
The i nte rface is as shown in the Fi g bel ow.
The Stop Menu of the Musical File Playback Interface
z The blue s tri p indic at es the enable d icon.
z “Delete”: This is the name of the current enabled option.
4.1.3 The Deleting Interf ace
Note: You can delete a single file or all files i n here.
The File Selection Interface is as shown in the Fig below.
Musi cal File Playback Int erface – Stop Menu – Deleting Files –
File Selection
In t his i nterface, press MODE to e nter int o the Del eting Wa ys
s ele ction inter face. See the Fig bel ow.
Page 15

14
Musi cal File Playback Int erface – Stop Menu – Deleting Files –
De let ing Wa ys
Button Functi on i n the Delet ing I nterf ace
z Long-Press of PLAY: Turn the player off.
z Short-Press of PLAY: Return to the Stop Interface.
z Short-Press of A-B: Switch to the recording interface and
start recordi ng.
4.1.4 Directory Sel ection Interf ace
N o t e: Y o u c a n se le ct t h e val i d di re ct or y ( t h e di re ct or y t h at
contains musical files) here to change the current playback
direct ory. When you enter i nto this interface, you are l ocated at
the current directory of the current disk.
The i nte rface is as shown in the Fi g bel ow.
Mu si cal File Pla yb ac k I nt er fac e – St op Men u – Loca l Fol der –
Directory Selecti on
z Sup po rt t he lo ng na me of di rec tory
z Exc e pt t he r oot di re ct or y, onl y vali d di recto ries are
dis played.
But ton Function in the Di rectory Sel ect ion Interface
Page 16

15
z Sho r t -P r es s or Lo n g- Pr ess o f “ Vol -”: The s e l ect i o n s t ri p
s wi tc he s t o t he next d ir ec tor y one by one. The se lecti on
st ri p s cr olls in a wa y of tw o li n es .
z Short-Press or Long-Press of “ Vol +”: The s election strip
s wi tc he s t o t he last di re ct or y one by on e. Th e s el ect i on
st ri p s cr olls in a wa y of tw o li n es .
z A s ho rt- press of MOD E wil l s ele ct t he dir ect ory a nd
return to the Stop i nterface. If the current directory
(includi ng the disk) is changed, then you need to reset the
curre nt file as the firs t, ot he rwise, t he fi le and playback
position will not be changed.
z A l ong- pr ess of PLAY will t u rn th e pla ye r o ff.
z A short-press of PLAY will return to the St op Interface.
z A s ho rt- pr es s of A- B will e n te r i nt o t he re c ord i n g
function.
4.2 Functions in the Playing Interf ace
4.2.1 Th e P l a yi n g i nt e r fac e is as s h ow n i n t h e Fi g be l ow .
Musi cal File Playba ck
z Ce line Di on – My Hea rt Will G o On: The s e te xt w ill
s cr oll horizont all y while t he song is pla yi ng.
Button Function in the Playing interface
Page 17

16
z Short-Press of MODE: Enter into the Playing menu
i nte rfac e.
z Lon g -P ress of MOD E : If t h ere i s t he co rr es po ndi n g l yric ,
then you will ent er into the Lyrics interface. If there is no
correspondi ng lyrics, then t he song will st op playi ng and
you will ent er the main menu.
z Short-Press of PLAY: Enter into the Stop Interface.
z Long-Press of NEXT: Function as fast forward till the
end of a s ong.
z Long-Press of LAST: Function as fast backward till t he
beginni ng of a song.
z Sho rt -P ress of N EXT: The mu s i c fades out i n 2 s ec o nds .
The player jumps to the next song and start playing. In
t his case, the next song is selected based on the current
playi ng mode. If the current mode is Cycling One, then
the next s ong is s elected based on Cycling All .
z Sho rt -P ress of LA ST: Fun ct i o n o p pos it el y t o NEXT.
z Hold-On of “Vol+”: The volume will increase.
z Hold-On of “Vol-”: The vol ume will decrease.
z Short-Press of A-B: Enter into the Repeat interface and
confi rm the A point. One more s hort -press of A-B will
confirm the B point and start repeating the segment
between A and B. The thi rd short-press of A-B will
cancel the repeating.
4.2.2 Invali d Fi l es Pr oces si ng
When t he pl ayer encounters inva li d files during auto or manual
s ele cti on of songs , t he mess age “ For ma t Er ror” wi ll dis pl ay.
Two s econds l ater, the player will ret urn to the Stop interface.
Page 18
17
4.2.3 Pl ay i n g M e n u I n t e rf ac e
Note: This i nterface provi des the user wit h the followi ng
options:
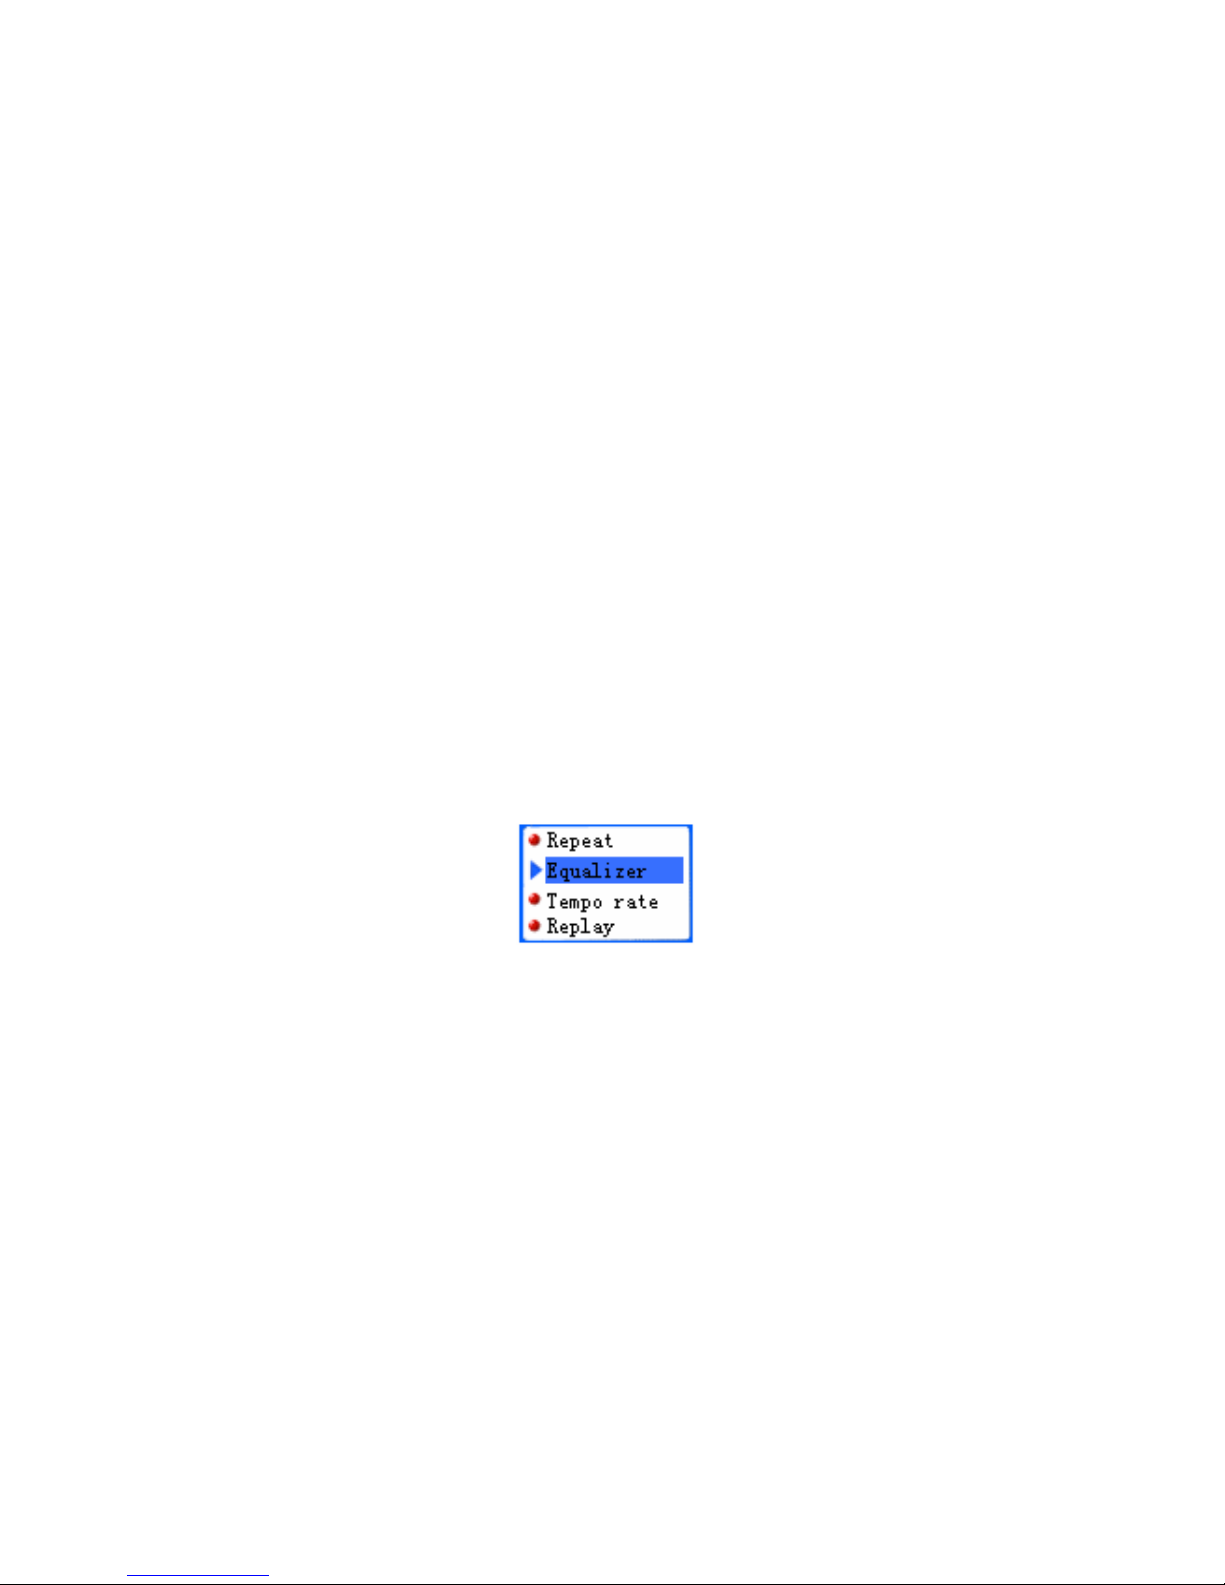
① Repeat: To s et the ways for playi ng s ongs .
② Equalizer: To set sound effects for the playi ng songs.
③ Tempo rate: To adjust the speed of song playing, except
for the songs in the WMA format.
④ Replay: To e nter the Re pe at interfa ce and start the
Repeat function.
⑤ Replay Ti me s: To set the times for re peati ng.
⑥ Replay gap: To s et the i nterval between each repeating
playi ng.
⑦ Exit : Re turn t o t he Pl ayi ng mo de . The mus i c is s till
playi ng.
The i nte rface is as shown in the Fi g bel ow.
The Playi ng Menu of the Musical File Playback Interface
The ena ble d pos iti o n is dis pl ayed i n b l ue backgr ound.
“Equalizer” is the name of the current enabled posi tion.
But ton Function in the Playing Menu Interface
Standard Icon Menu Functions
Aut o quit for i dli ng for 5 s ec on ds .
4.2.4 Repe at Se tt ing I nt erf ace
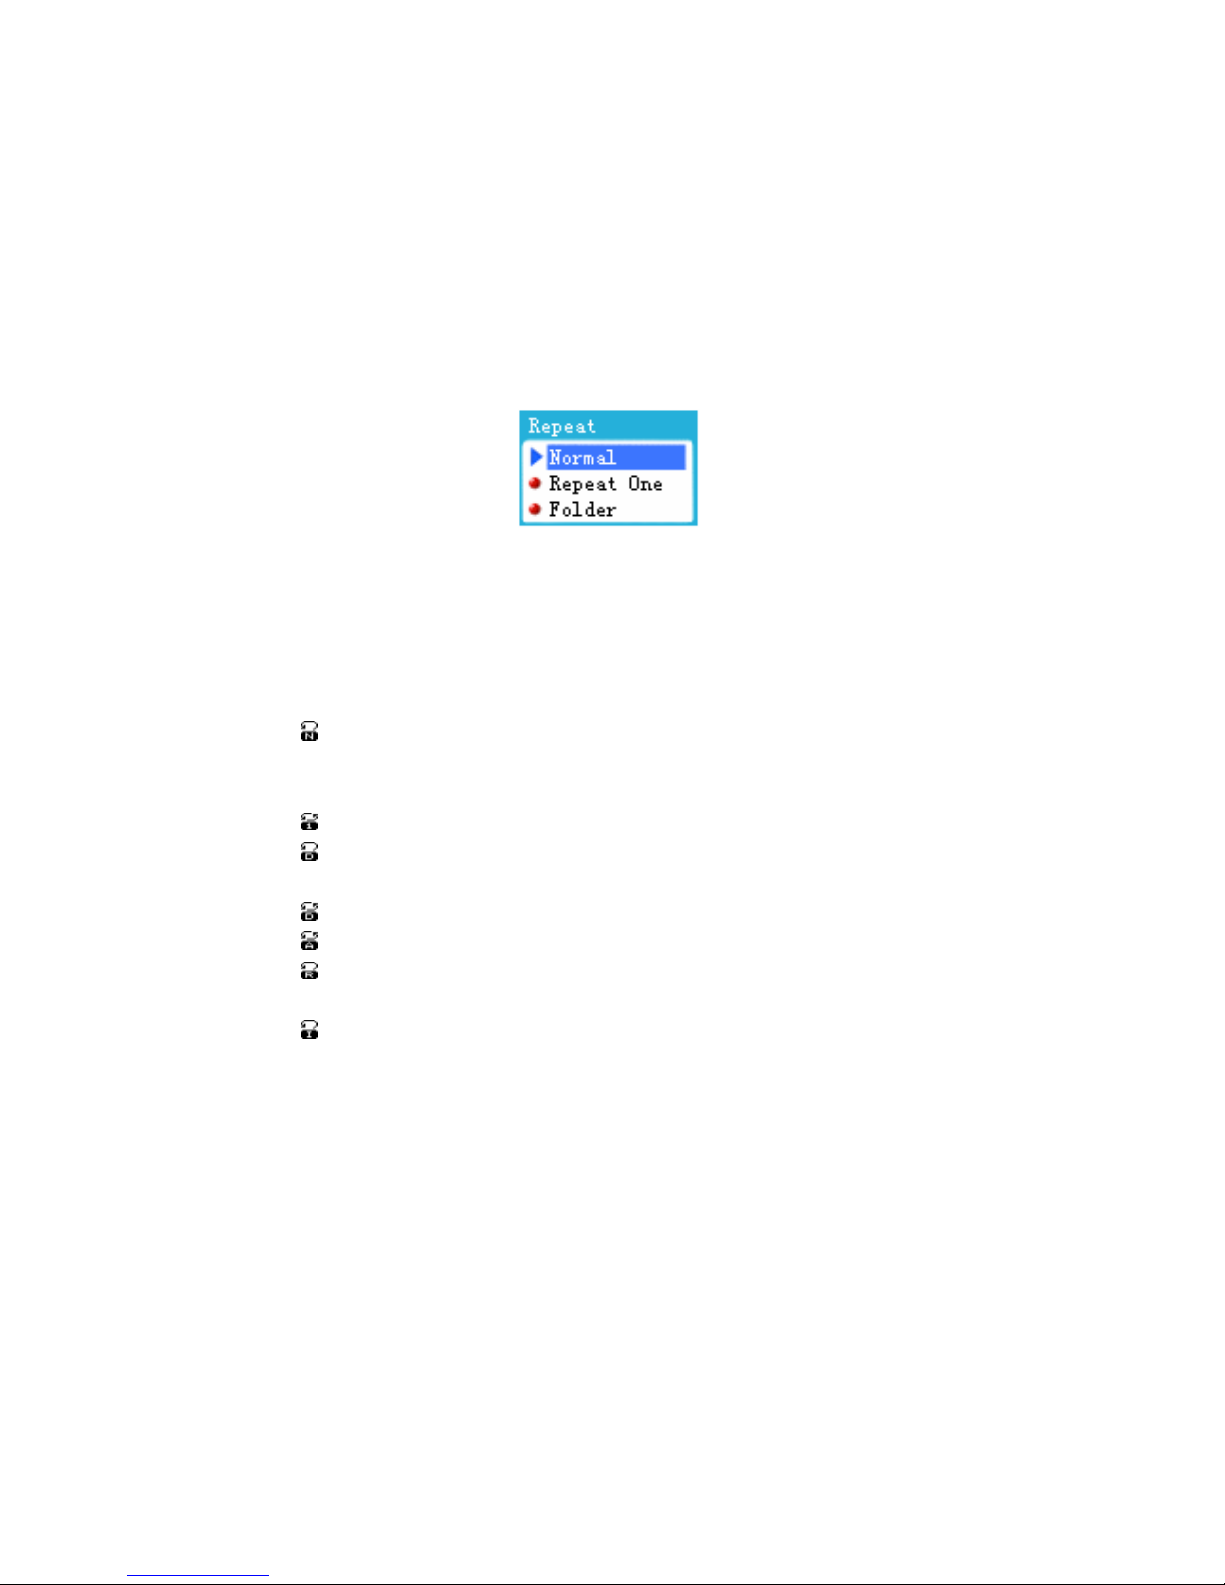
No t e: You c an se le ct Repeat Mo de for pl ayin g s on gs i n here.
The musi c is still pla ying.
Page 19
18
The i nte rface is as shown in the Fi g bel ow.
The Playi ng Menu of the Musical File Playback Interface –
Repeat Mode
But ton Function in the Cycl e Setti ng Interface
Standard Icon Menu Functi ons.
Au t o quit for i dli ng for 5 se co nds.
Lis t o f Re pe at Mode Opti ons :
N ormal : W hen t he pl ayer fi nis hes pla yi ng t he so ngs i n t he
current di rectory, it will continue to play the s ongs in t he next
di re ct or y .
Re peat On e: Re peat pl ayi n g t he c urr ent s on g .
Fol der: The pl ayer will st op if it finis hes pl ayi ng t he songs in
the current directory.
Re pe at fol d er : Rep e at pl a yi ng t he s o ngs i n t h e di rect ory.
Re pe at All : Repeat pl a yi ng t h e s o ngs i n all di recto ri es .
Ra ndom: Pl ay t he s o ng s i n t h e c urre nt di rect o ry i n a ra ndom
way.
I nt ro: Play t he beginni ng 10 seconds of a ll the s ongs i n t he
current di rectory in order.
4.2.5 Equali ze r Se tti ng I nterface
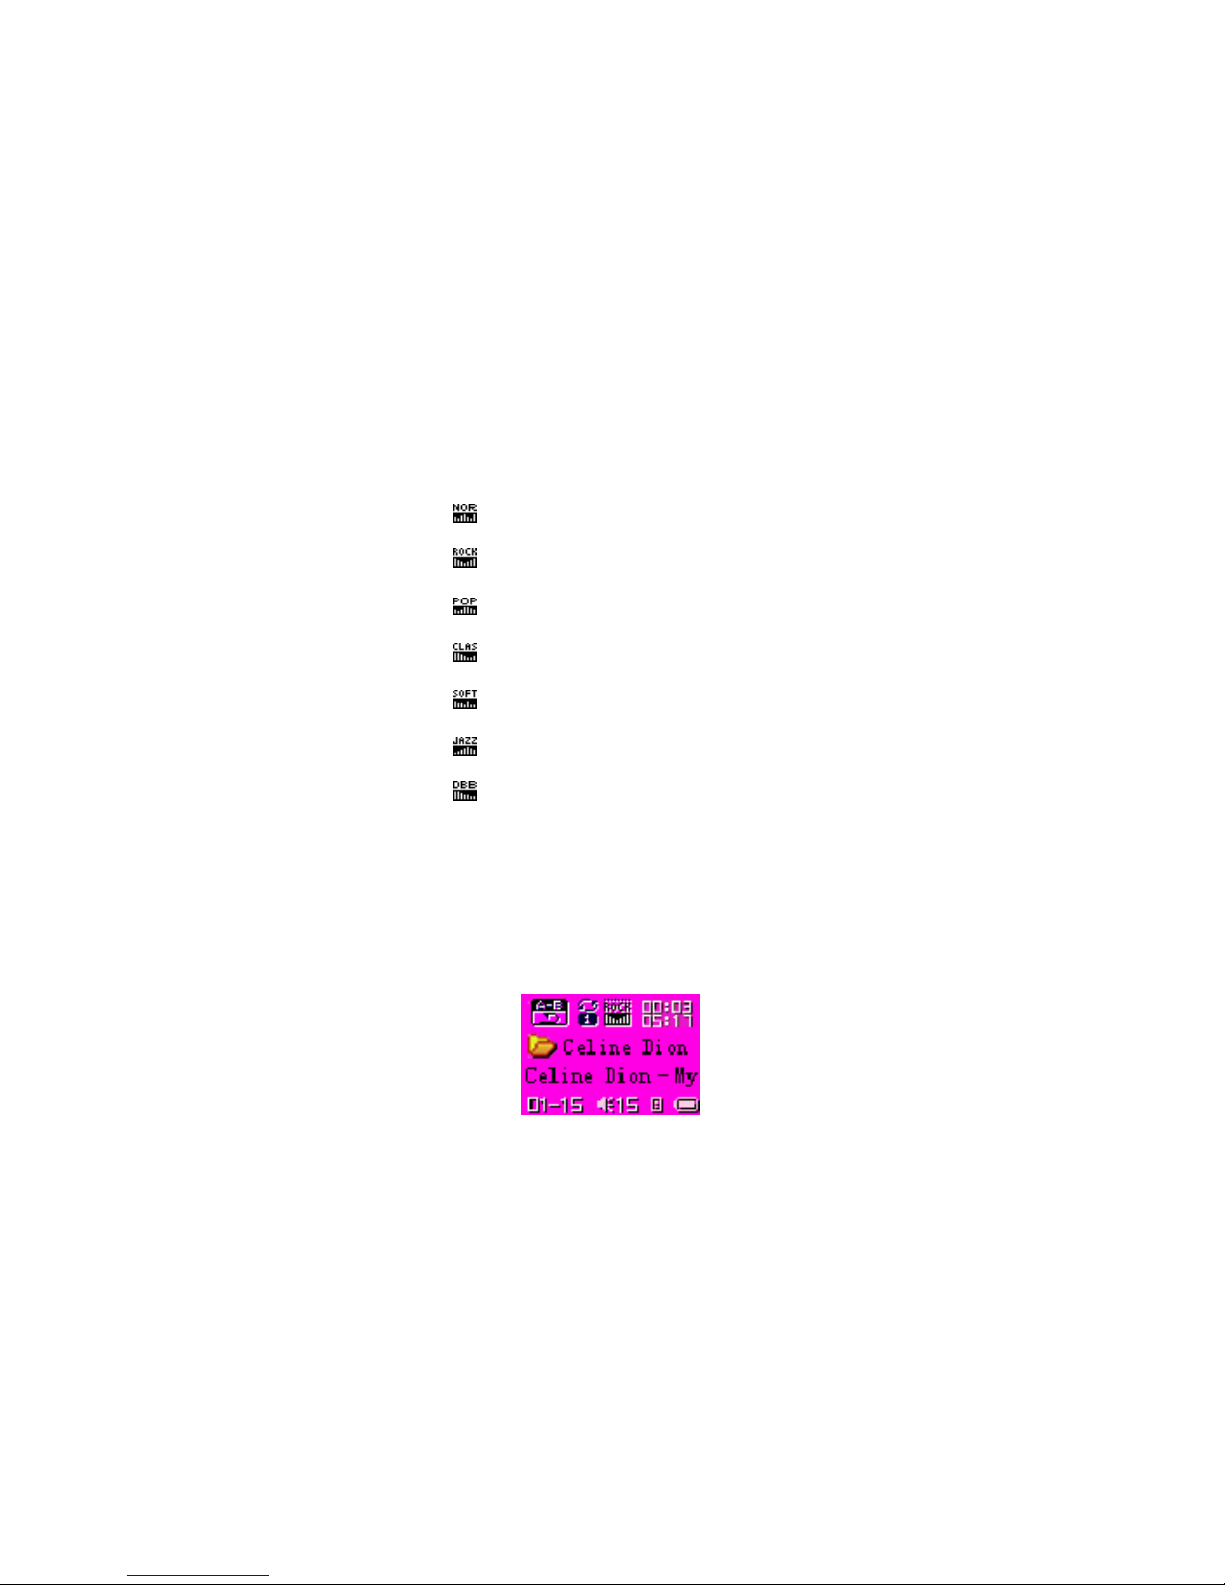
No t e: Y ou c an se le ct E qualize r for pl ayin g s o ngs i n he re . The
mus i c is s till p la yi n g .
I ts dis p lay ways is t he s ame as t hat o f “ Repeat Set ti ng” .
Page 20
19
But t o n Functi o n i n t he Eq uali ze r Sett i n g Int er fac e
Standard Icon Menu Functions
Aut o quit for i dli ng for 5 s ec on ds .
Lis t o f Soun d Ef fec ts O pt i o ns :
Natural (De fa ul t)
Ro c k
Pop
Cl ass ic
So ft
Ja zz
DBB
4.2.6 Re peat I nt erface
No t e: Y ou c an per for m man ua l or aut o re pe at i n h ere . Th e
repeat t ype you use is s et in the “ Settings”. The Replay Times
and Replay gap are set in the Playing menu interface.
The i nte rface is as shown in the Fi g bel ow.
Music al Fi le Playback Playing –AB Repeat
Ma nu al R e p ea t O p er at i on
Page 21

20
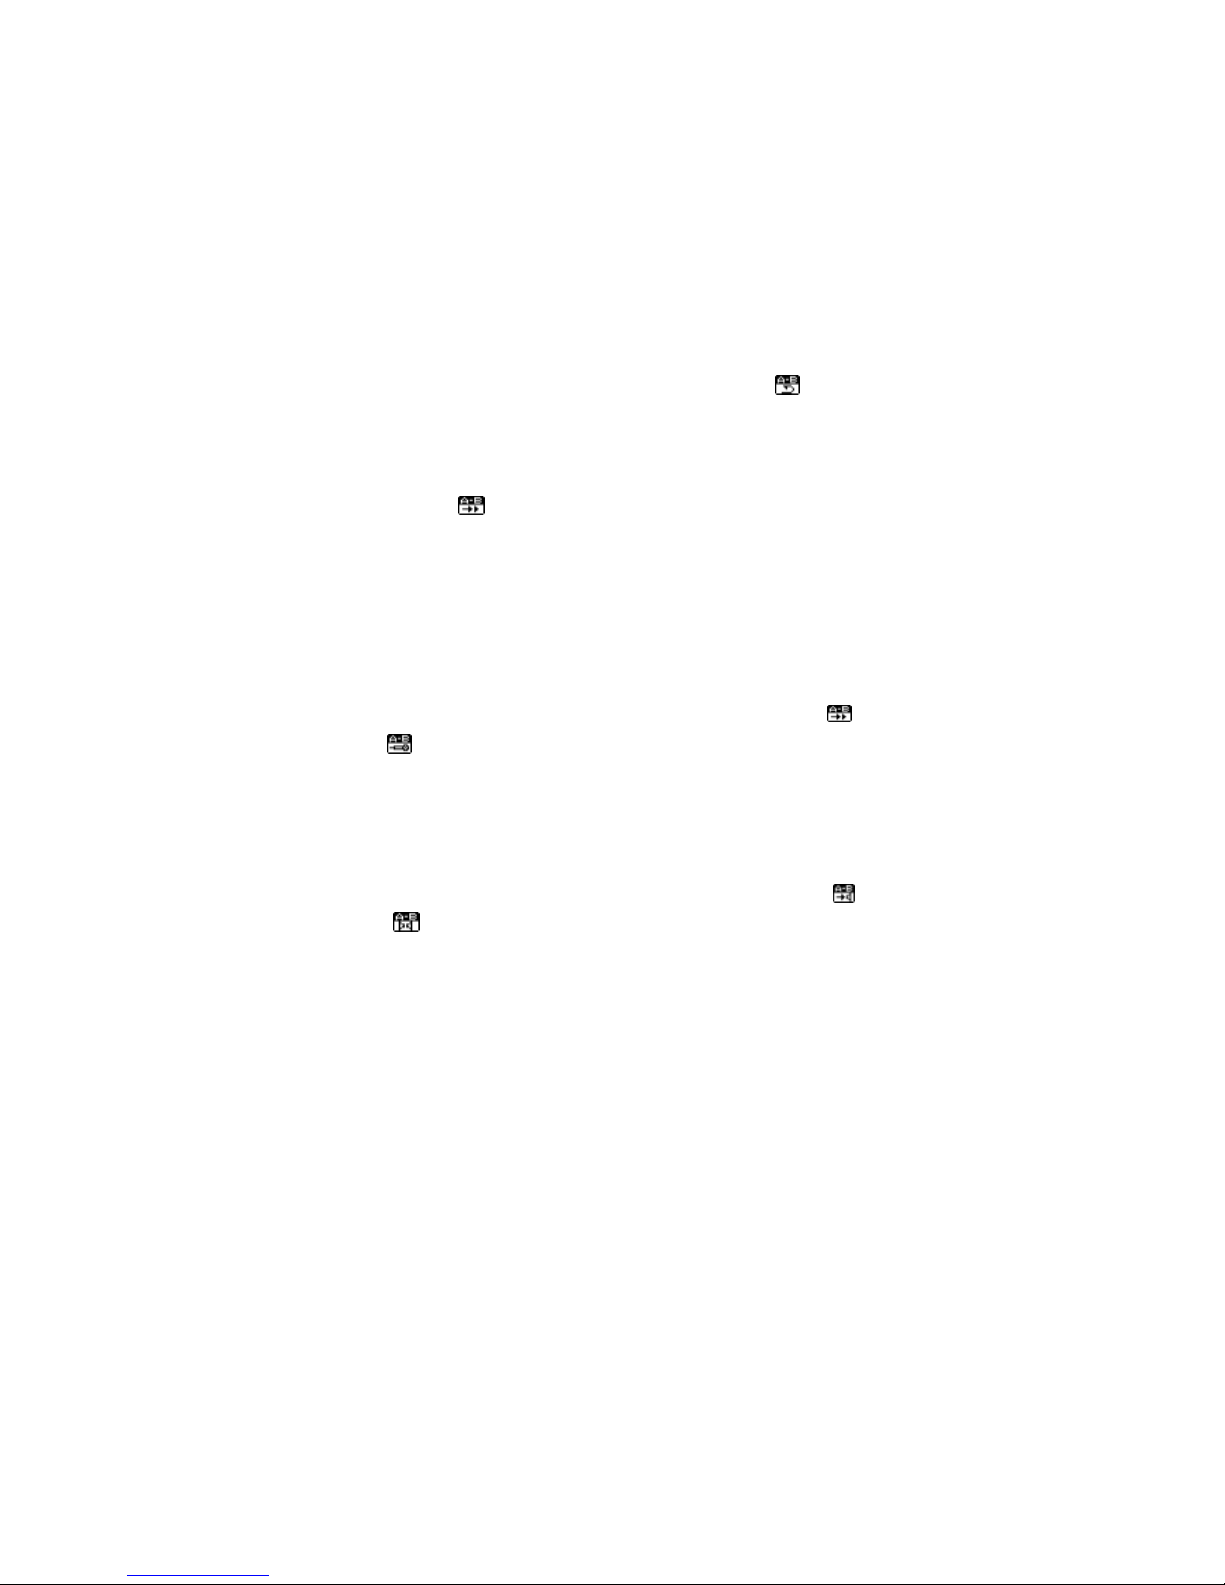
When you e nter Manual Re peat , the “A” in
will flas h.
A short-press of NEXT or A-B will set the “ A” point ,
and then “ B” will flash.
A short-press of NEXT or A-B will set the “ B” poi nt .
Then the s egment be twee n “ A” and “ B” wi ll play repeate dl y.
After a s hort -pres s of LAST or A-B or the s et repeati ng
times, the repeat function will be cycled.
A s hort-pr ess of NEXT wi ll enter t he cycl e of
Fol low- >
Repeat. For the follow, ADPCM is adopted to
record sound. The recording duration is 10% longer than the
r epea t. Th e mi ni mu m re cordi n g durati o n is 1 s ec ond .
A short-press of LAST wi ll return t o the Repeat
function.
A s hort-pr ess of NEXT wi ll enter t he cycl e of
Repe at->
Co mp a r e . Th e Co mpa r e fu nc ti on re fe rs t o play t he
sound recorded i n the Follow function.
A s ho rt- pr es s o f LAST wi ll ret ur n t o Follo w -Re pe at .
A s ho rt- pr ess o f NEXT wi ll be gi n t he s ettin gs for t he
next Repeat . Note:
① I n the s t eps a bov e, hold-o n of “Vo l +” or “Vol- ” will
change the current playing speed. (Except for the WMA
format)
② In all the steps above, a s hort-press of MODE wi ll quit
the Repeat interface and return to the Playing interface.
③ In all the steps above, a s hort-press of PLAY wil l quit the
Re pe at interf ace and the Playi ng interf ace, and return to the
Stop interf ace.
Auto Repeat Operati on
Page 22
21
When you enter Auto Repeat, the “A” in
will flash.
A short-press of NEXT/A-B will set the “A” point, and
then “B” will flash.
If the pl ayer finds a blank or a fter a s hort-press of
NEXT/A-B, the
Repeat will dis play, and the player will start
r epea ting the segment bet we en A a nd B.
Afte r the set repe at ti mes, the “ B” poi nt will be
automatically set to the “A” point of the next segment, and then
t he “ B” point is wa nt ed.
A s ho rt- pr es s o f LAST wi ll cycle t he Setti ng ->Repea t
function.
A s hort-pr ess of NEXT wi ll enter t he cycl e of
Repe at->
Fo l l ow . For t he foll ow, ADP CM is ad opt e d t o
record sound. The recording duration is 10% longer than the
r epea t . Th e mi ni mu m re co rdi n g duratio n is 1 sec ond.
A short-press of LAST wi ll return t o the Repeat
function.
A s hort-pr ess of NEXT wi ll enter t he cycl e of
Repe at->
Co mp a r e . Th e Co mpa r e fu nc ti on re fe rs t o play t he
sound recorded i n the Follow function.
A s ho rt- pr es s o f LAST wi ll ret ur n t o Follo w -Re pe at .
A s ho rt- pr ess o f NEXT wi ll be gi n t he s ettin gs for t he
next Repeat .
Note :
① I n the s t eps a bov e, hold-o n of “Vo l +” or “Vol- ” will
change the current playi ng s peed.
Page 23

22
② In all the steps above, a s hort-press of MODE wi ll quit
t he f un ct i on s et ti ng i n terf ac e a nd r e t ur n t o th e Pl ay i n g
i nt erf a ce .
③ In all the steps above, a s hort-press of PLAY wil l quit the
Re pe at interf ace and the Playi ng interf ace, and return to the
Stop interf ace.
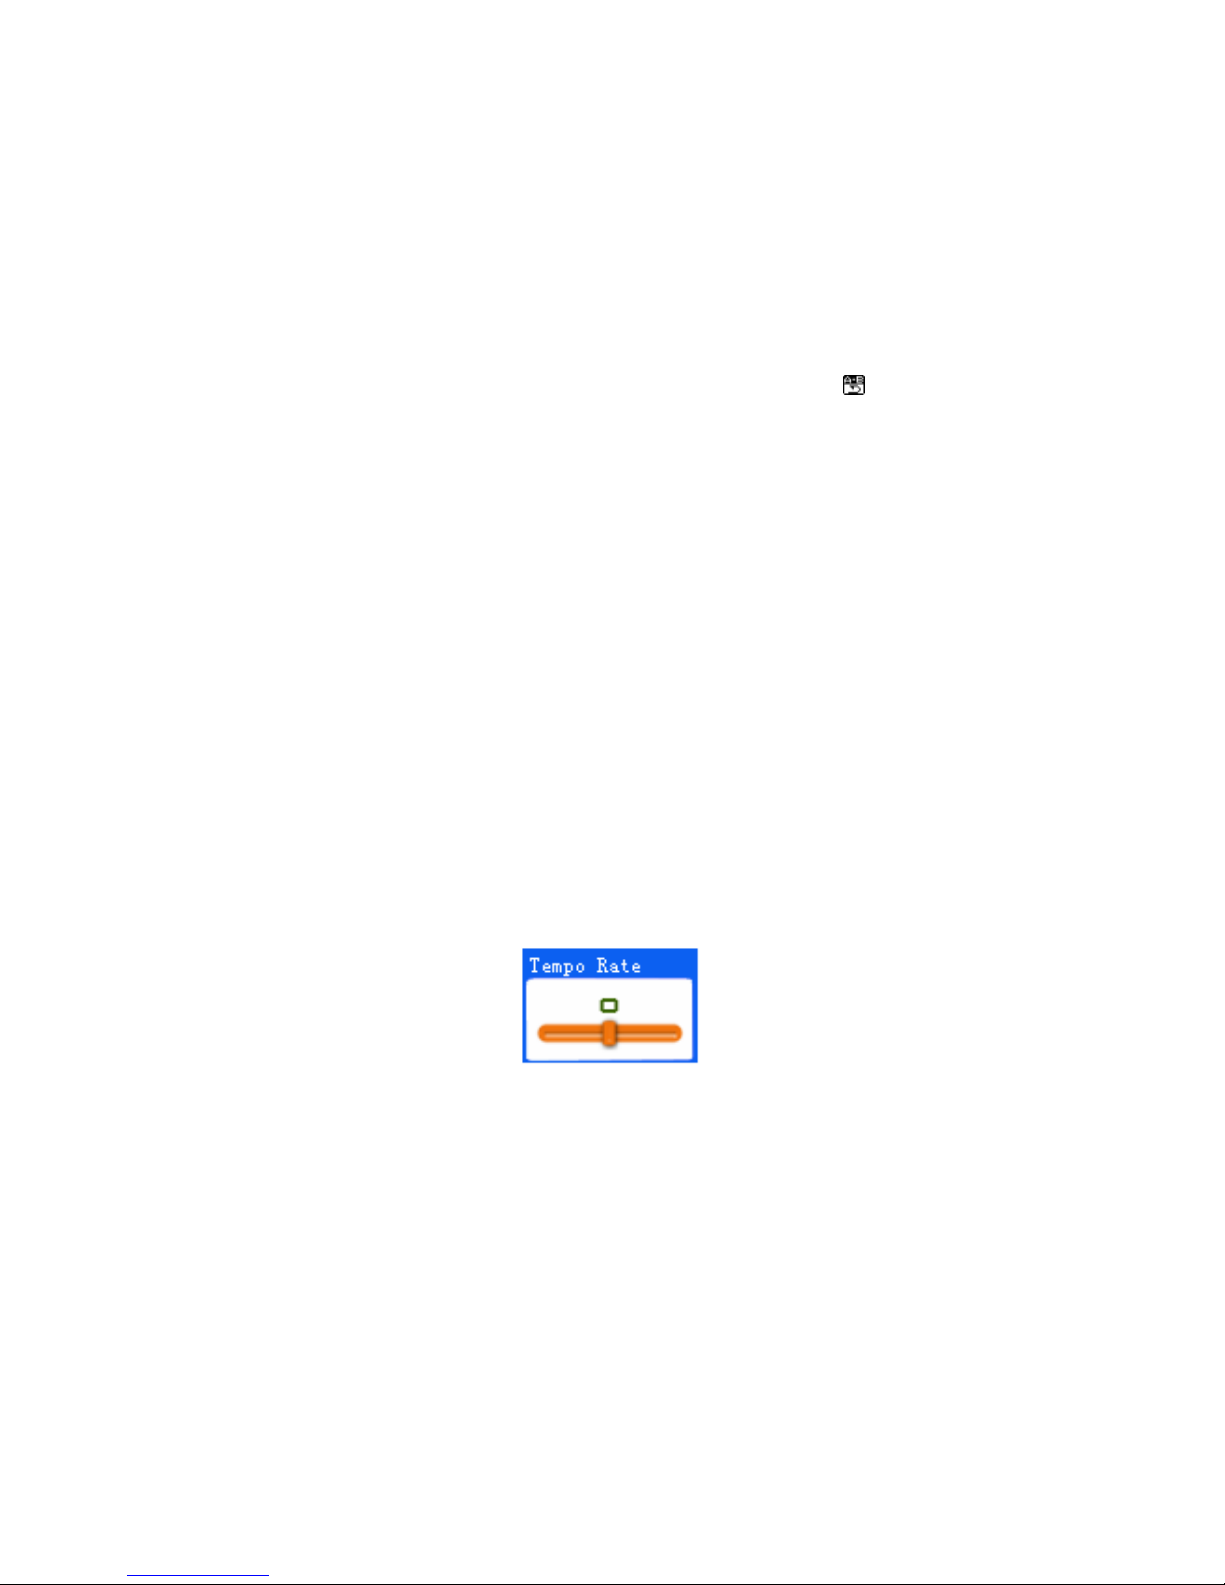
4.2.7 Tempo rate Setting Interface
Note: You can set the current pl ayi ng s peed in here. This will
affect the pl aying of musi cal files in the MP3 format. However,
this will not affect the files i n WMA format.
The i nte rface is as shown in the Fi g bel ow.
Musical File Playback – Tempo Rate
But ton Function in the Tempo Rat e Setting Interface
The standa rd slide ba r functi on.
Aut o quit for i dli ng for 5 s ec on ds .
The range of playi ng speed: [60%, 200%], ±8 Levels , (100% by
default).
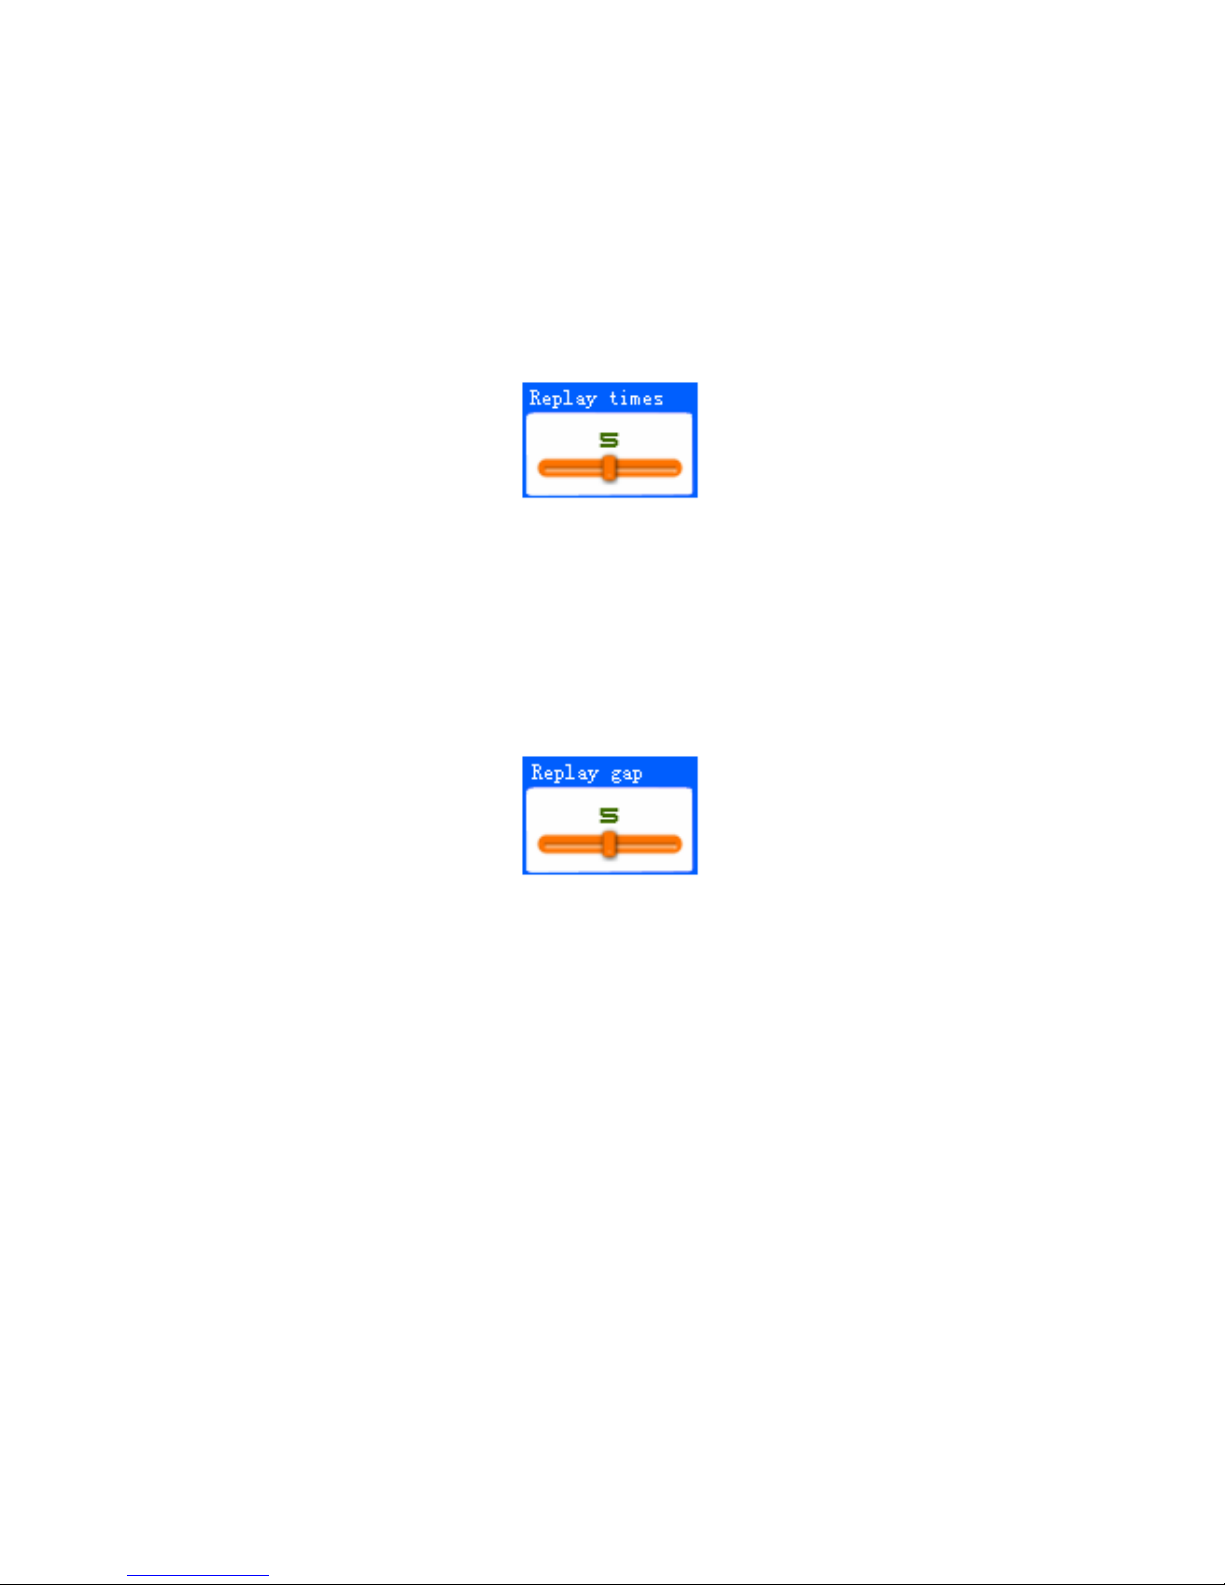
4.2.8 Re pl a y Times
Note: The pl ayer wil l quit the Repeat mode after t he set replay
ti mes. The repeat times can be 1 to 10.
The i nte rface is as shown in the Fi g bel ow.
Page 24
23
Music al Fi le Playback – Replay Time s
But ton Function in the Repeat Times Interface
Sho rt-Pr ess Functi o n of th e Sta ndard Men u
Aut o quit for i dli ng for 5 s ec on ds .
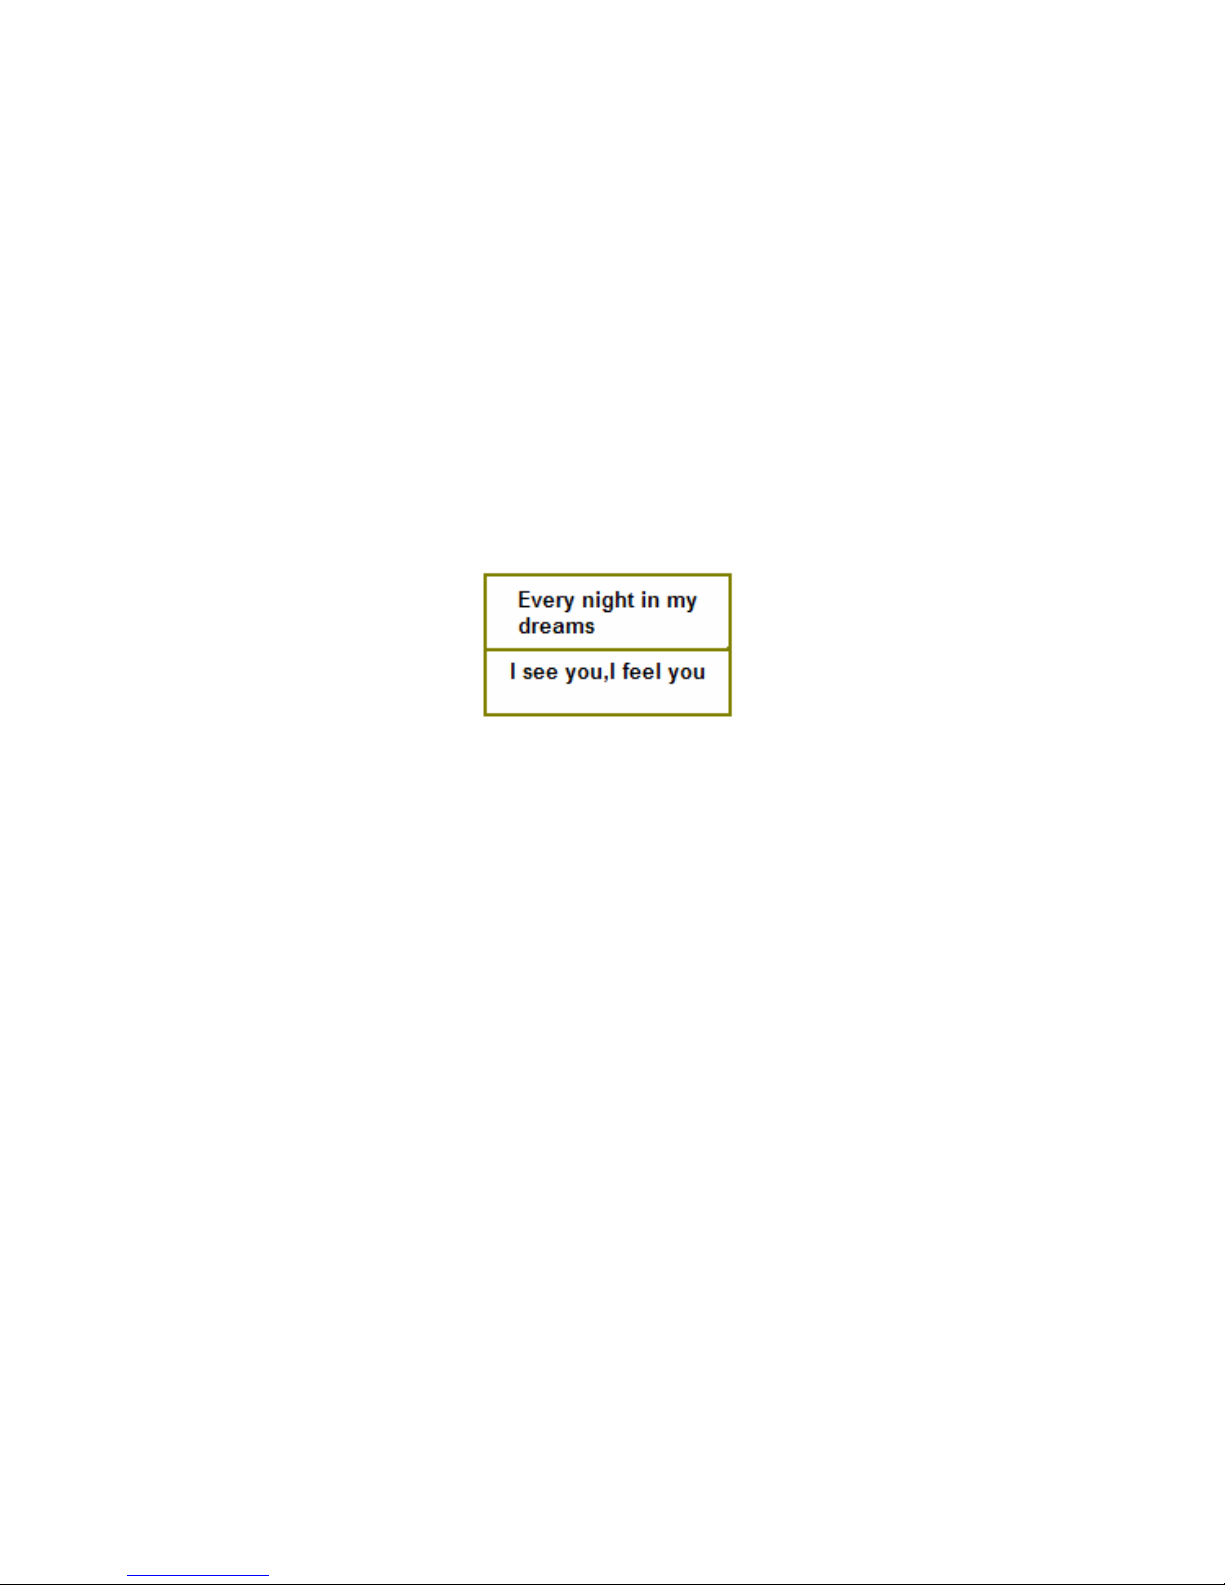
4.2.9 Replay gap
Note: During repeati ng, the pl ayer will pa us e for t his peri od of
ti me between each repeat . The interval can be 1 to 10 seconds.
The i nte rface is as shown in the Fi g bel ow.
Musi cal File Playback – Replay gap
But ton Function in the Repl ay gap Interface
The standa rd slide ba r functi on.
Aut o quit for i dli ng for 5 s ec on ds .
4.3 Ly ri cs Sh o w I nt e rf a c e
Note: When you enter into the Lyrics Show interface, the
current song continue t o play and t he corres ponding lyrics wil l
dis play according to the playi ng progress of the song. When the
playi ng of the song is over, the player will run the subs equent
Page 25
24
song pl aying functions according t o t he Playing mode set. If the
subsequent s ongs have lyrics, then the player will still work in
the Lyrics Show interface. If there is no lyrics, then the player
will return to the Playing interface to play the subsequent songs.
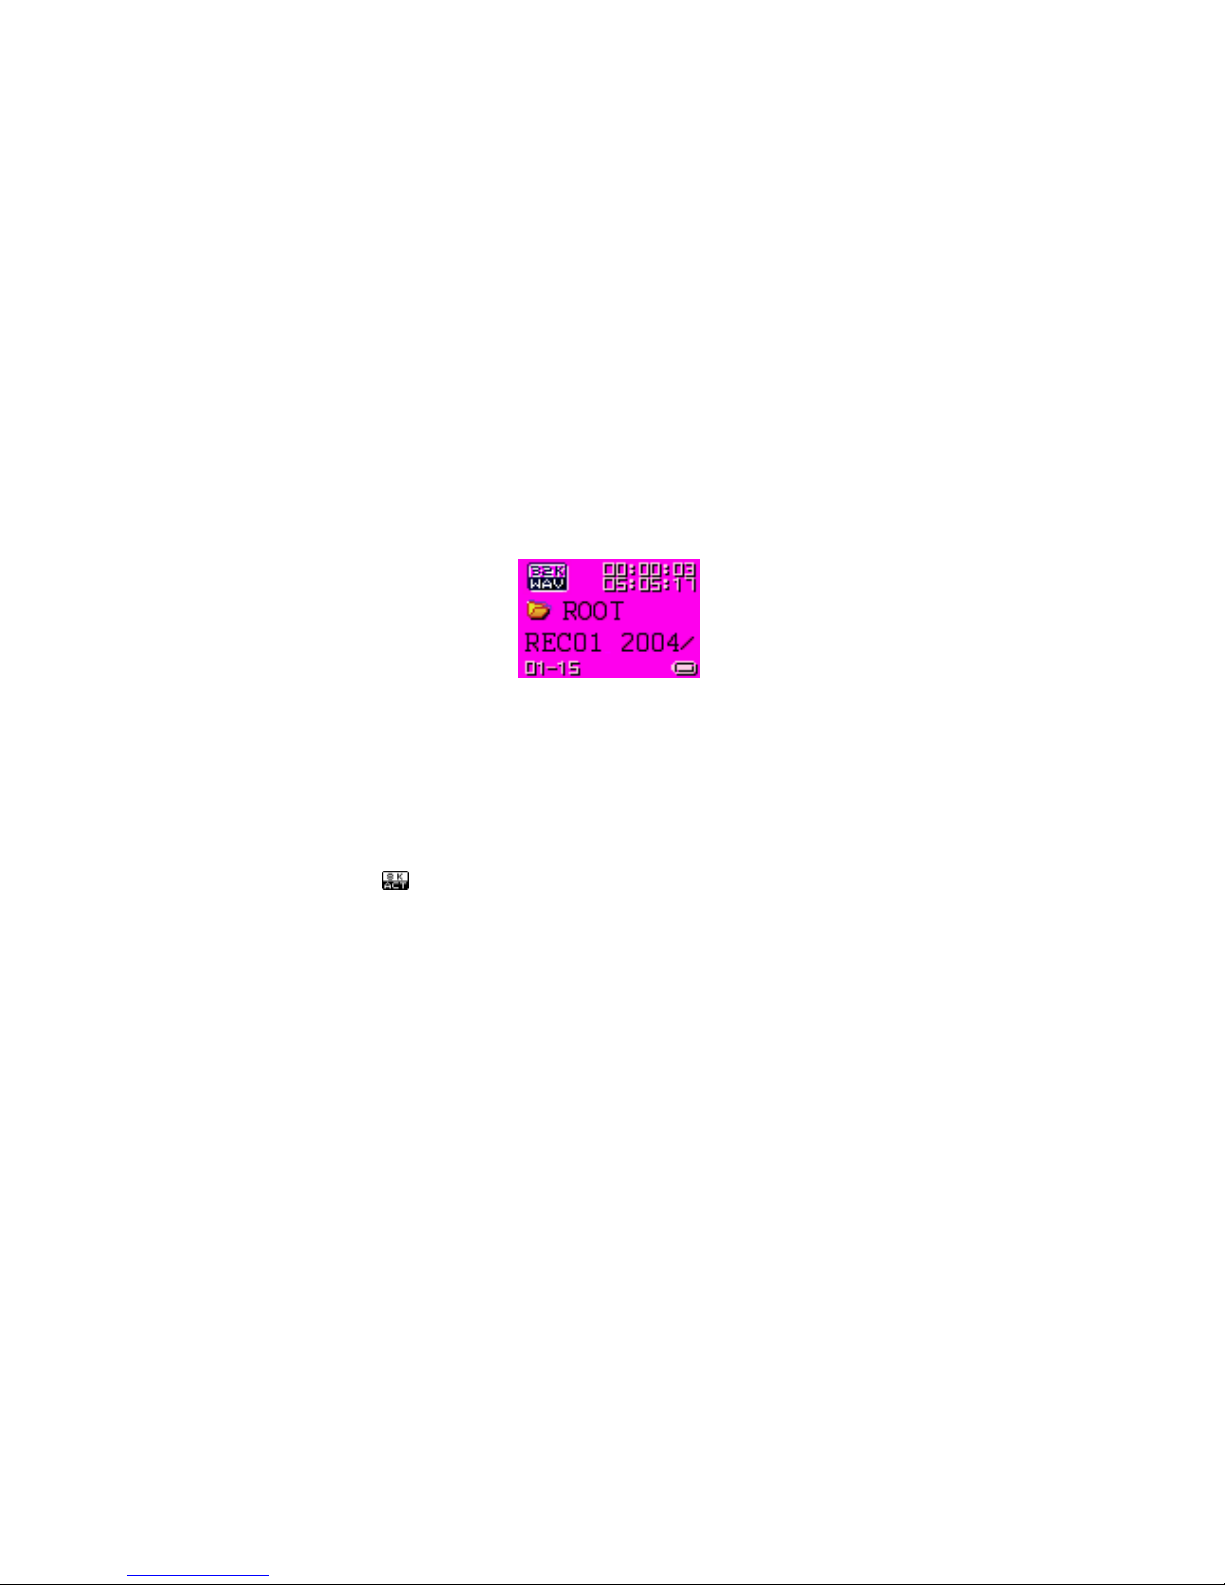
Interface Di splay
Chinese Songs :
Ly rics Sync hr oni za ti on
The s creen is s plit into an upper part and a l ower part.
Gene ral ly, a li ne in t he LRC cor res ponds to a part . If a line in
the LRC has more than 14 Chinese characters, the rest
characters in the line will be displayed in the other part. For
e ac h pa rt , th e s y nc ti me t a g is cal c ulate d by aver agi ng.
English Songs: Similar with Chi nese songs .
However, each part has 3 lines. Each li ne has 14 characters .
No te t hat , i f a new li ne ap pe ars i n t he mid dl e of a word , a “ -” is
r equi red t o connect t he two lines , but for a word with onl y t wo
charact ers , t he whole word will be di splayed i n t he next line.
When t he song is playing, its l yrics will be
highl ighted, and the next sentence of the lyrics will wait i n the
other part. The waiting lyrics will be highli ghted when its ti me
c ome s . Th e ne xt se nt en ce wil l be di s pla y ed i n t he pa rt wher e t h e
Page 26

25
last sentence has finished its presence. Where as t he ti me i n
LR C us u all y ha s s o me d el ay , t he l y ri cs c a n be s ho we d 1
second ahead.
But ton Function in the Lyri cs Show Interface
Short-Press of Mode: To return to the Playi ng
i nte rfac e.
Short-Press of Play: To quit the Lyrics interface and
enter the Stop interface.
Long-Press of Next: Function as fast forward till t he
end of a s ong. will be dis pl ayed.
Lo ng -P ress of LAST: Funct io n as fast backward t ill
t he be gi n ni n g of a s ong . wi l l be di s p l a y e d .
Short-Press of NEXT: To switch to the next song.
If t he file is not a valid musical file, then the t ot al
ti me will be di splayed as “00: 00:00”.
Short-Press of LAST: To switch to the last song.
If the file is not a valid musical file, then the tot al
ti me will be di splayed as “00: 00:00”.
Short -P ress of “ Vol-”: Cycle t o the next s cr ee n of
t he l y ric s . Thi s co ul d be over lai d by s y nc l yri cs .
Short-Press of “ Vol+”: Cycle to the last screen of
t he l y ric s . Thi s co ul d be over lai d by s y nc l yri cs .
In this case, the A-B butt on is disabled.
4.4 Auto Off
In all the sub-i nterfaces of t he St op i nterface, if t he player i dles
for a ti me pr es et , t h e n t he pl ayer will be a ut oma tic all y tur ne d
o ff.
Page 27
26
5 Re cord
Rea lize re cordi n g s o und file s of MS- ADP CM WAV an d AG8
ACT format. It has the following interfaces: Stop, Recording,
P ause a nd Dire ct or y Sel ect i on .
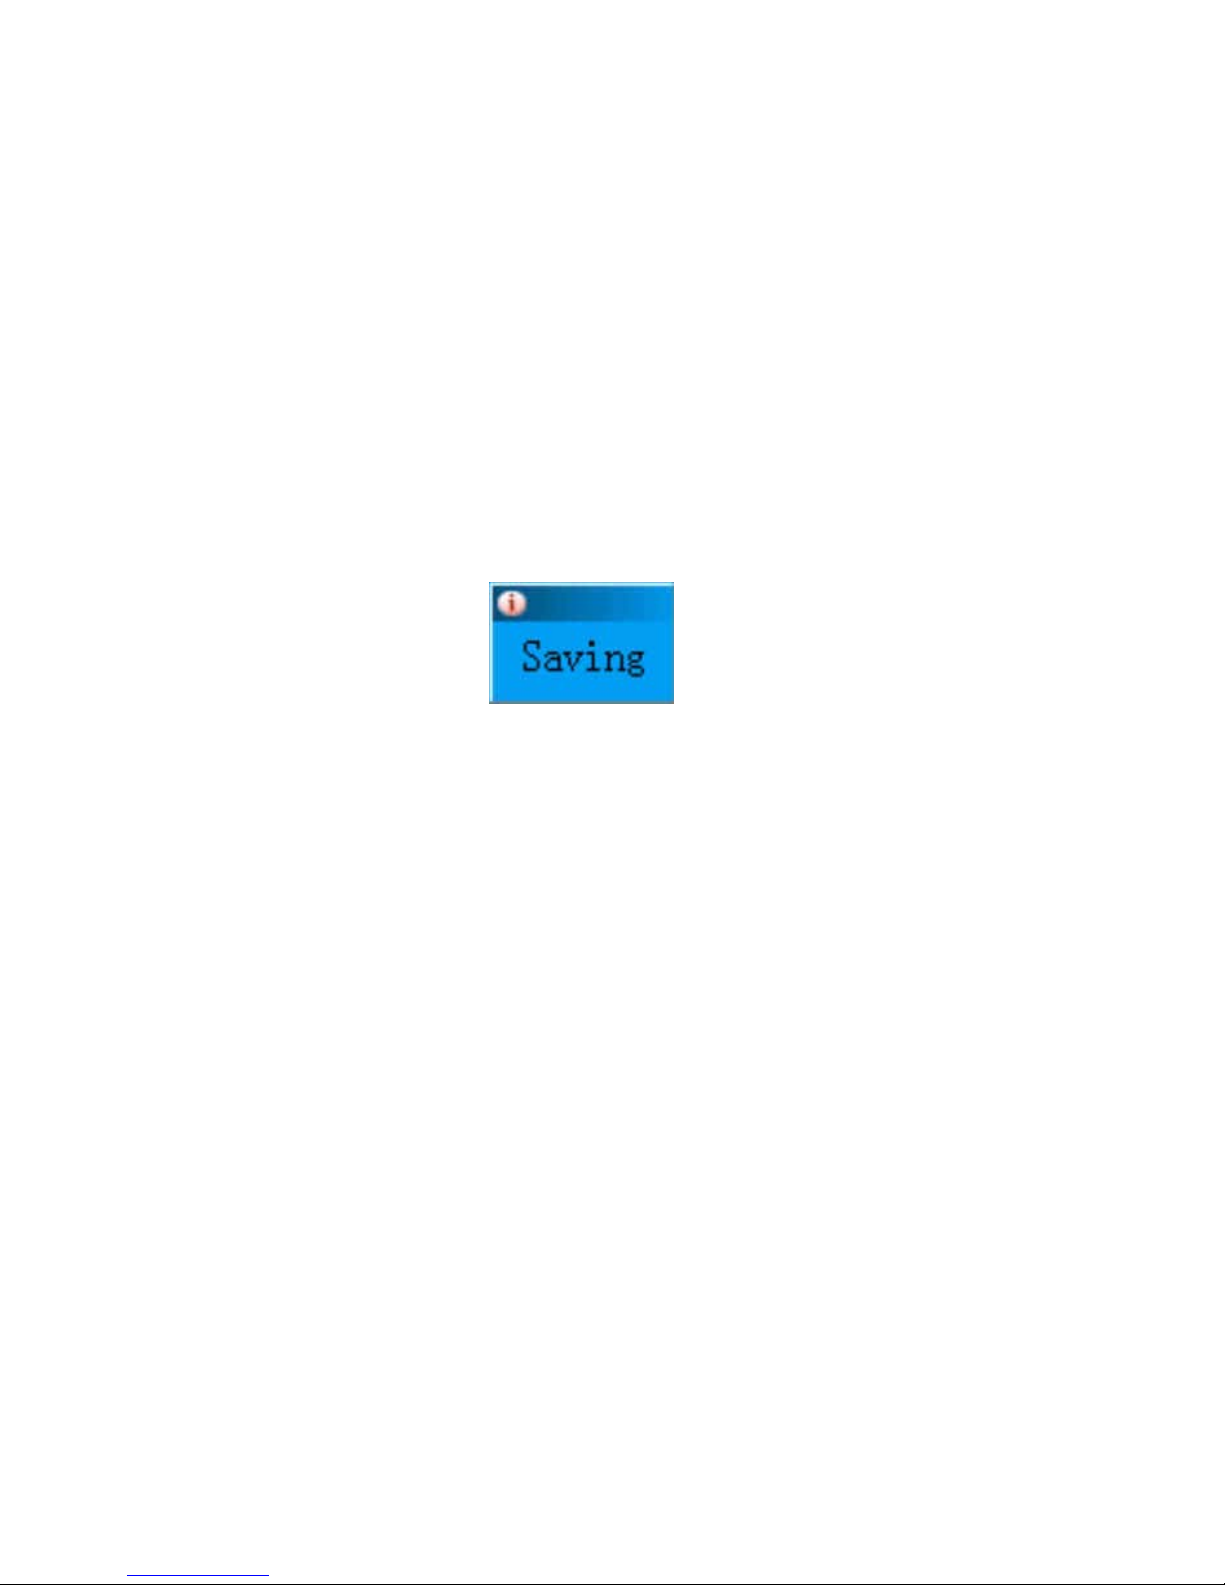
5.1 The Ge ner al Interf ac e of t he Recorder
The Recordi ng Interface
z 00: 00: 03 i ndicates t he pro gr ess o f t he re co rdi ng. In t he
Stop interface the length of the current recording will be
dis played.
z 05:05:17 indicates the space available for recording
sound.
z
indicates the coding format of the current recorded
fi le, i ncluding AG8 and AD32.
z 01-15, the “01” will not change. The “15” represents
the number of currently existing recorded files.
z REC01 is the filename of the current recording file.
2004/10/29 08:56 is the dat e of t he file.
5.2 The Stop Inte rf ace
No te: W hen you en te r i nt o t he St op i nte rface, t he i nfor ma t i on
about the current recording will be displayed and user’s
operations are wanted.
Page 28

27
The i nte rface is similar with the one above.
Button Functi on i n the Stop Interf ace
z Long-Press of MODE: To return to t he mai n me nu.
z Short-Press of MODE: To ent er into the Stop Menu
i nte rfac e.
z Short -P ress of A-B/PLAY: To ente r t he recording
interface and start recording.
z Long-Press of PLAY: to turn the player off.
z LAST a nd NE XT: Di sabl ed.
z “ Vol +” an d “ Vol -”: Dis abl e d.
The Stop Menu Interf ace
Note: You can select Local folder, REC Types and Exit i n here.
When you enter into this i nterface, the enabled posit ion is t he
one where you qui t last ti me.
Interface Di splay:
The style is the same as that of the Stop interface of Musical
File Pla ybac k.
But ton Function in the St op Menu Interface is the short-press
function of standard icon menu.
Directory Sel ection Inte rf ac e
No t e: Here, you ca n sel ec t a ny di rect or y as yo ur c urr ent
recordi ng di rectory. When you ent er into the recordi ng interface,
you will be l ocated at the current direct ory of the c urrent di sk.
Interface Di splay
Its style is t he same as that of the Directory Se lecti on of musi cal
fi l es .
Support the l ong name of directory
But ton Function in the Di rectory Sel ect ion Interface
Page 29

28
z Short-Press or Long-Press of “ Vol -”: The s elect ion
stri p s witches to the next directory one by one . The s election
stri p s crolls in a way of two lines.
z Short-Press or Long-Press of “ Vol +”: The s election
st ri p s wi tc hes t o t h e l ast di re ct or y one by on e. The s el ecti on
stri p s crolls in a way of two lines.
z A short-press of MODE wil l confi rm t he selecti on st rip
and r eturn to t he St op i nterface.
z A s ho rt - p res s of P L AY wi ll c a n cel Di r ect or y Sel ec ti on
and quit to t he Rec ording St op Interface.
z A long-press of PLAY will turn the player off.
z A short-press of A-B will enter into the recording
function.
REC Type Selection Interface
No t e: Here, yo u ca n choos e REC t yp es fr om Fi ne REC, L on g
RE C, Fi ne VOR and Lo ng VO R.
Interface Di splay
The s tyle is the same as that of the EQ Selecti on interface.
But ton Function in the Recording Types Selection Interface
But ton Functions of t he Standard Menu.
5.3 The Re cording Interf ac e
Note: When you enter into the Recording interface, a new
recording file will be generated, and the recording will start in a
current codi ng ways. The scrolling bar indi cat es that the player
is in recording. It also indicates the progress of the current
recording.
Page 30
29
The i nte rface is similar with the one above.
z MOD01.ACT 2004/10/29
z 05:05:17 represents the time remained for recording
sound.
The prompt interface for saving file is as shown in the Fi g
below:
Recordi ng – Saving Prompt
But ton Function in the Recording Int erface
Short-Press of PLAY/A-B: To ent er int o the Pause Interface.
Long-P ress of PLAY/A-B: To re turn to t he St op Inte rface.
LA ST, N EX T, Vol + and Vo l - : Dis abl e d.
5.3.1 VO R Fu nc ti on
When t he pl ayer doe s not sense any val id voice, the syste m will
stay at Voi ce Wait i ng mode. When vali d v oice is s ense d, t he
player will res ume recording.
5.3.2 Stop recordi ng when the elect ronic si gnal level is t oo
low.
Wh en t he pl ayer wai ts t o re cord s ound , the reco rdi ng ti me
lengt h “ 00:00: 03” will flash.
I n t he rec ording, if the elect ronic s ignal le vel is too l ow, t he
r ec or di ng file wi ll be saved, and then the player will retur n to
t he St op i nterface.
Page 31

30
5.4 The Paus e I nt erface
Interface Di splay
When you enter into the Pause i nterface, the Pause stat us will be
dis pla y ed an d us er’s op er ati ons are wa nte d. In t hi s c ase,
00: 00: 0 3 wi ll flas h at t h e rat e of on ce per s econd .
Button Function in the Pa us e Inter face
Short-Press of PLAY/ A-B: To return to the Recording
i nte rfac e t o res ume r ecording.
Long-Press of PLAY/A-B: To return to the Stop
i nte rfac e and save the rec or ding in the fil e s yste m.
LAST, NEXT, Vol+ and Vol-: Disabled.
5.4.1 Stop recording when the electronic signal level is too
low.
During the pause, i f t he el ectronic signal level is too low, the
r ec or di ng file wi ll be saved, and then the player will retur n to
t he St op i nterface.
5.5 Auto Off
I n t he Sto p i nter face or th e P a us e i nt erfac e an d i ts s ub-int er fa ces ,
i f t he idle time reac hes the setting value i n t he s ystem
management, the player will go into the Standby mode, and the
recorded sound in the Pause interface will be saved.
Page 32

31
6 Vo i c e
Realize the playback of *.WAV and *.ACT files. It has the
foll owi ng interfaces: Playing, Local fol der Selecti on, Delet e, as
well as func tion selecti on and setti ngs i nt er faces .
6.1 Fu nc ti ons in the St op Interf ac e
Note: When you enter into the Stop interface, the information
about the current playing of recorded s ound will be dis played
and user’s operations are wanted.
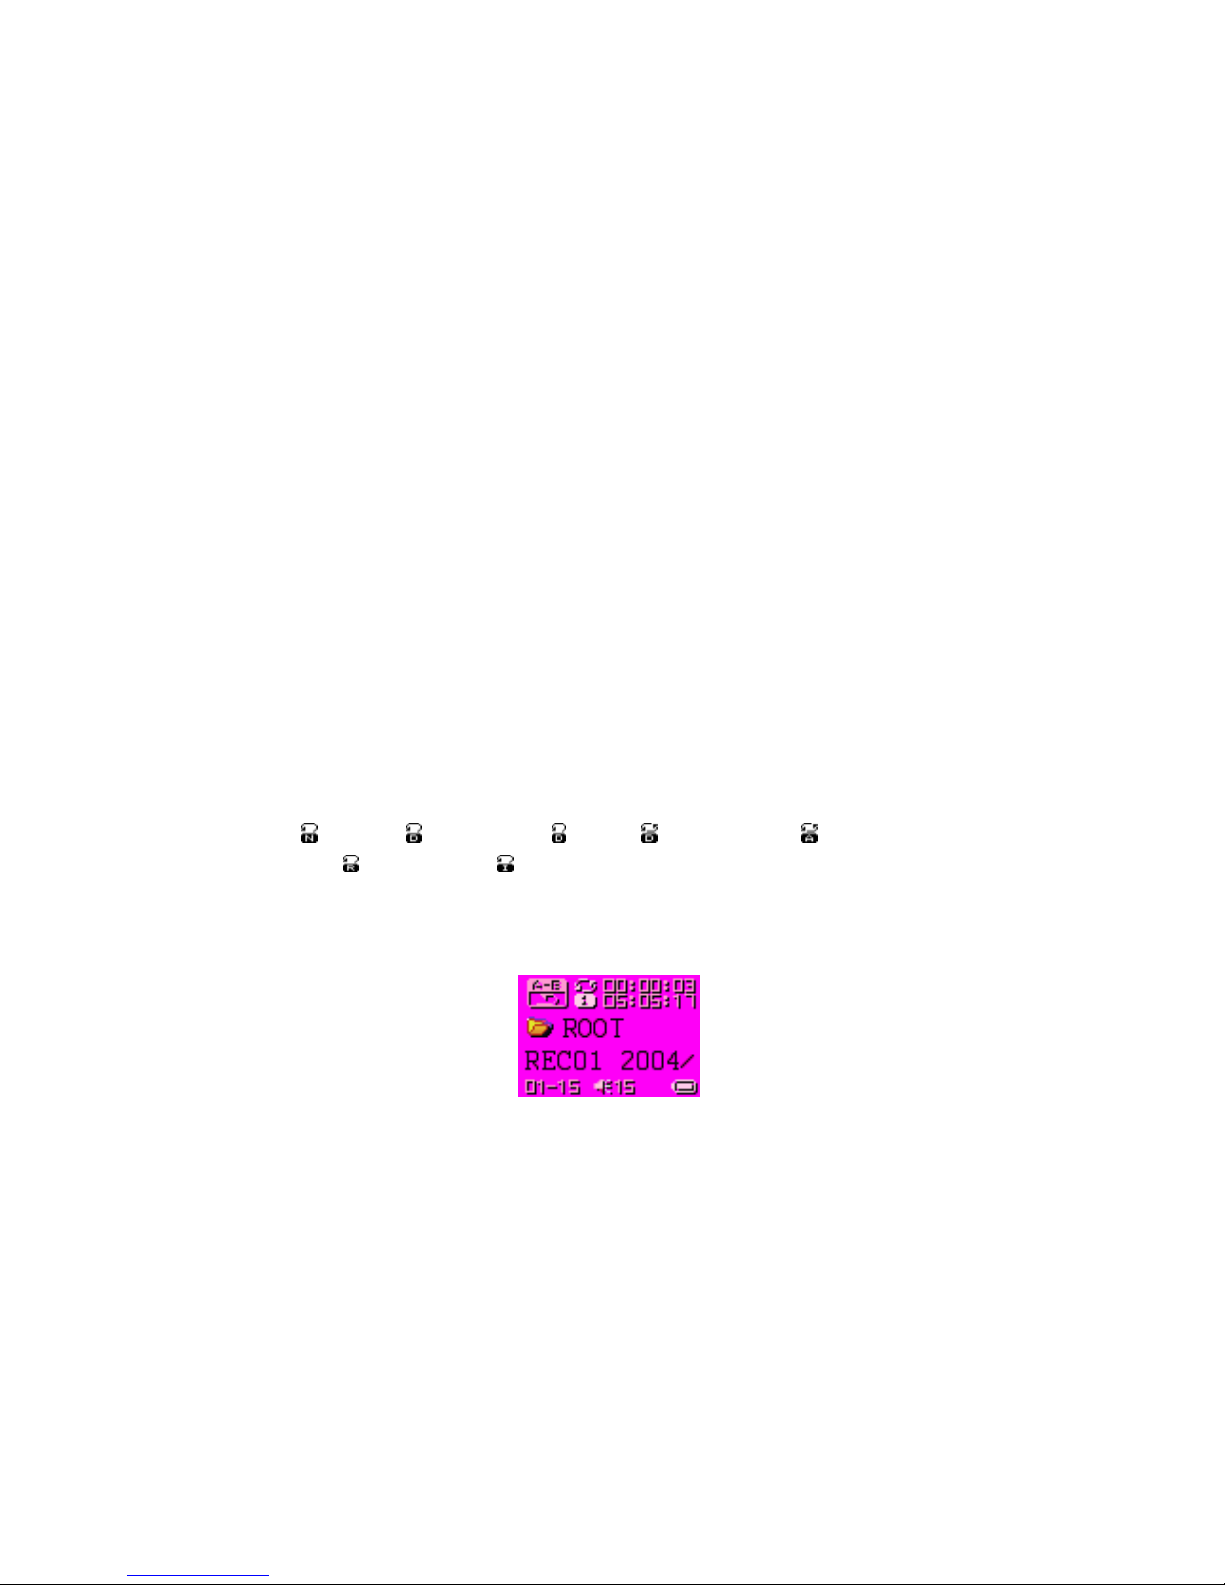
The i nte rface is as shown in the Fi g bel ow.
Recorded Fi le Playback
z 00:00: 03 is t he ti me dis play for playing the recorded
sound.
z 01/15 represents the order of current recorded file and
the total number of recorded files i n t he current directory.
z REC01 i s the filename and 2004/ 3/ 15 10:23 is the date
and ti me when the fil e was created. (They wil l not scroll when
t he pl ayin g of the file st ops . )
But ton Function in the St op Interface
z Long-Press of MODE: To enter into the main menu.
z Short-Press of MODE: To enter i nt o the Stop Menu
i nte rfac e.
Page 33
32
z Short-Press of PLAY: To start playing the recorded
sound.
If the current file is an i nvali d musi cal file, t he n t he
mes s age “ Forma t Err or” wil l pop u p . Two s ec onds la te r, t h e
pla ye r will r et urn t o t he Stop i nterface.
z Long-Press of PLAY: To t urn the player off.
z Sho rt-Pr es s of LA ST: To s w it c h t o t h e las t r ec or de d file
i n t he current directory and res et the time point t o ze ro.
z Long-Press of LAST: To cycle to the last recorded files
and reset the ti me point to zero.
z Short-Press of NEXT: To swit ch to the ne xt recorded
fi le in t he current dir ect or y and r es et the time point t o z er o.
z Long-Press of NEXT: To cycle to the next recorded
fi les and r eset the t ime point t o zer o.
z Short-Press of A-B: To switch to the recordi ng mode
and start recording.
6.1.1 The Stop Menu Interf ac e
Note: Here, you can sel ect Local folder, Delet e and Exit. When
you e nter int o this int erfac e, the enable d positi on is t he one
where you quit last ti me.
The i nte rface is as shown in the Fi g bel ow.
The Stop Me nu of the Re corded File Pl aybac k I nte rface
The enabled position is the enabled icon.
Page 34

33
Local folder: The name of the current enabled position.
But t on Fu ncti on in t he St op Me nu Int erface
But ton Functions of the St andard Menu
“Delete” is t he current e nabl ed option.
6.1.2 Fol de r Se lecti on I nterface
Note: The user can select a folder as the current folder from the
v a l i d di r e c t o r i e s ( t he di r e c t o r i e s t h a t c o nt a i n r e c o r de d f i l e s ) .
Each time when you enter i nto t he Recorded Fil e Playi ng mode,
you will be l ocated at the current direct ory of the c urrent di sk.
Interface Di splay
The s ame as that of Music al Direct or y Selecti on
Support the dis play of l ong name direct ories
Exc ept t he r oot di re ct or y, onl y v ali d direct o ries a re
dis played.
But ton Function in the Di rectory Sel ect ion Interface
z Long-Press of “Vol-”: The selection stri p switches to
the next directory one by one. The selecti on strip scroll s i n a
way of two lines.
z Long-Press of “ Vol +”: The s el ection strip swit ches to
t he last di rectory one by one . The s el ec tion strip scrolls i n a way
of t wo lines .
z Short-Press of MODE: To s elect the s el ection st rip and
return t o t he Stop i nterface. Whe n you switch to a new di rect ory,
t he resume pla yi ng memory will be clear ed.
z Short-Press of PLAY: To quit to the Stop Interface.
z Long-Press of PLAY: To turn the player off.
z Short-Press of A-B: To enter t he recording funct ion and
start recordi ng.
Page 35

34
6.1.3 De le te I nte rfa ce
Note: This i nterface is used for del eti ng files.
Interface Di splay
Deletion Confirmation Interface: It is the same as the Musical
File Deletion except that the files are changed to recorded files.
Button Functions in t he Deleting I nterface ( Re fe r t o the deleti on
of musi cal fi les)
z Short-Press of MODE: To confirm the current selecti on
and r eturn to t he St op i nterface.
z Short-Press of PLAY: To cancel the current selection
and r eturn to t he St op i nterface.
z Long-Press of PLAY: Turn the player off.
z Short-Press of A-B: To switch to the recordi ng
interface and start recording.
6.2 Functions i n the Playi ng Interf ace
Note: When you enter into the Playing interface, the
i nforma ti on ab ou t t he c urre nt s o ng wil l be dis pla yed . The pla yer
automatically resumes playing the song and waits for the user’s
operations .
I ts i nt er face is s i mi la r w it h t he Sto p i nter face exce pt t hat it s ti me
column is counting on.
Recorded Fi le Playback
Page 36

35
The “ REC01 2 00 4 / 0 1/ 0 1 10: 2 3” is s crolli ng horiz ontal l y whe n
t he file is pl ayi n g,
But ton Function in the Playing i nterface
z Short-Press of MODE: To enter i nt o the Playi ng menu
i nte rfac e.
z Short-Press of PLAY: To enter i nto t he St op Interface.
z Long-Press of PLAY: To turn the player off.
z Short-Press of NEXT: To jump to next file and start
pl a yi ng fr om i ts be gi nni n g.
z Short-Press of LAST: To jump to last file and start
pl a yi ng fr om i ts be gi nni n g.
z Long-Press of NEXT: Fast forward till t he end of t he
sound file.
z Hol d-On of NEXT: Fast backward till t he beginning of
the sound fil e.
z Hol d-On of “ Vol +”: To increase the vol ume.
z Hol d-On of “ Vol-”: To decreas e the vol ume.
z Short-Press of A-B: To enter t he Repeat i nte rface a nd
c onfi rm th e “A ” poi nt .
Inval id Fi les Processing
When t he pl ayer encounters inva li d files during auto or manual
s ele cti on of songs , t he mess age “ For ma t Er ror” wi ll dis pl ay.
Two s econds l ater, the player will ret urn to the Stop interface.
6.2.1 Pl ay i ng Me nu I nte rf ace
Note: This i nterface provi des the user with various options,
including Repeat Mode, Tempo rate, Replay and Exit, while t he
recorded file is still playing.
Interface Di splay
Page 37
36
I t is t he sa me as th e s ubmen u of Mus ic al Fi le Pl ay ba ck e xc ept
t hat it d oes not have t he EQ o pti ons .
But ton Function in the Playing Menu Interface
◆ Short-Pr ess Functi o n of t h e St a n dard Menu
◆ Quit for idling for 5 seconds
6.2.2 Repeat Setti ng Interf ace
No t e: You c an se le ct Repeat Mo de for pl ayin g s on gs i n here.
The musi c is still playi ng.
Interface Di splay
It is t he sa me as the i nterfac e when pla ying mus ic.
But ton Function in the Cycl e Setti ng Interface
◆ Short-Pr ess Functi o n of t h e St a n dard Menu
◆ Quit for idling for 5 seconds
List of Cycl e Mode Opt ions:
Normal , Repea t One, Fo l d e r , Repeat fol der, Re pe at
All ,
Random, and intro.
6.2.3 Repeat Interface
No t e: Y o u c an per for m t h e repe at functio n he re.
The i nte rface is as shown in the Fi g bel ow.
Recorde d Fi le Playback – Re pea t Interface
Re p e at O per at i o n
Page 38
37
When you e nter t he Repeat function, the “ A” i n
will
fl a s h .
A short-press of NEXT wi ll set the “A” point, and then
“ B” will flas h.
A short-press of NEXT will set the “B” point. Then the
s egment bet ween “ A” and “ B” wil l play repeate dl y.
A short-press of MEXT/ LAST will cycl e the Repeat
function.
Note: ① I n the s t eps a bov e, hold-o n of “Vo l +” or “Vol - ”
will change the current pl aying s peed.
② In all the steps above, a s hort-press of MODE wi ll quit
the Repeat interface and return to the Playing interface.
③ In all the steps above, a s hort-press of PLAY wil l quit the
Re pe at interf ace and the Playi ng interf ace, and return to the
Stop interf ace.
6.2.4 Tempo Rate Setting I nterface
No t e: Here, yo u ca n set the curr ent pl a yi n g spee d, w hic h wi ll
a ffe ct b ot h W A V a nd A G 8 fil es .
The i nte rface is as shown in the Fi g bel ow.
Recorded File Playback – Tempo Rate
But ton Function in the Tempo Rat e Setting Interface
◆ The standa rd slide bar functi on.
◆ Quit for idling for 5 seconds
Page 39

38
The range of playi ng speed: [60%, 200%], ±8 Levels , (100% by
default).
6.3 Abnormity
When playing recorded files , i f a r ea d error oc curs , t he pl ayer
will r et ur n t o t he St op i nte rface an d prompt “ Dis k Er ror!”
Page 40

39
7 FM
Each time whe n you ente r i nto t his functi on, you are in the
playi ng mode. You need t o restore the current pres tored radio
st ations to play . Th e fir st time yo u ente r t hi s functi on t he
frequency of t he current radio stati on is the mi ni mum one.
7.1 Interface
FM Radio
z
: The current frequency position. It changes its
positi on on t he frequency scal e wit h the cha nging of curr ent
frequency.
z
: Fr e q ue nc y Sc al e .
z
: The channel number of the current radio station.
Up to 20 radio stations can be prestored.
z
: The current frequency.
z
:St ereo. If t his icon does not appe ar, then t he ra di o
is i n mono mode .
7.2 Listen to the Radio
Page 41

40
The i nte rface is as shown in Fig above. The current ba nd is at
87-108MHz (European and American Band). The initial value
of t he c urrent fre que ncy for a new pl ay er i s at 87MHz.
Oper ati on Inst ructi ons
A long-press of NEXT wi ll search for a radi o s tation
backward and then play its program. If its freque ncy is the same
as the one prestored, then its channel number will display. A
s hort -pr ess of NEXT will move the fre quency forward at a ste p
of 100KHz for fi ne t uni ng.
A long-press of LAST will s earch for a radio station
forw a rd a nd t h en pla y its pr ogra m. If it s fre quen cy is t he sa me
as the one prestored, then its channel number will display. A
short -press of LAST wi ll move t he frequency backward at a
st e p of 10 0KH z for fine -t un i n g.
Sho rt-Pr ess of “ Vol +” o r ” Vol -” will adjust t h e v ol ume .
Long-Press of MODE: To enter into the main menu.
Short -Press of MODE: To ent er into the FM submenu.
Long-Press of PLAY: To turn the player off.
A short-press of PLAY wi ll jump t o t he next prestored
r adi o st ati on . I f t he re is no o t her presto re d c ha nnel numbe rs , t he
press will not be resp on de d . Wh en t he las t prest ore d chan nel
number is re ac hed, the player wi ll cycl e bac k to the firs t
pres t ore d chan ne l numb er .
A s ho rt- pr es s o f A- B wi ll en te r t he reco rdin g mode a nd
start recordi ng. Whil e t he radi o program i s stil l playi ng.
7.3 FM Subme nus
z Save: To save the radio st ati on you are now listeni ng to.
Page 42

41
z Delete: To dele te the ra dio s tat ion you are now list ening
to.
z Deleti ng All: To de let e all the radio s tat ions st ore d.
z Normal Band: The American FM Radio Station Band
(87-108MHz). (China has the same band as America.)
z Japanese Band: The Japanese FM Radio Station Band
(76-90MHz).
z REC: To r ec or d t he ra di o pr ogram yo u a re now
li sten i n g t o, i n cl udin g Fi ne REC an d L on g REC.
z Exit: To quit the menu.
7.4 Sa vi ng R a di o Sta ti on
Note: Save t he frequenc y to a ne w preset channel number . If t he
frequency is just the saved one that is fine t uned, t hen it wil l be
saved to the current channel number.
7.5 De le ti ng Radio Station
Note: If you want t o de let e t he cur rent saved r adio st ati on, press
MODE to delete the current channel and quit t o the FM playi ng
interface. Press of ot her butt ons will cancel the deletion and quit
to the FM playing interface.
7.6 Deleti ng All
Note: If you want t o delet e all the saved radio stations, press
MODE to de lete all t he channel and quit to the FM playing
interface. Press of ot her butt ons will cancel the deletion and quit
to the FM playing interface.
Page 43

42
7.7 Am e rican Ba nd
Select t he current band as 87-108MHz.
7.8 J a pa ne s e B a nd
Select t he current band as 76-90MHz.
Page 44
43
8 Jpeg Viewer
Realize vi ewing of JP EG pict ures. Common JP EG forma ts are
support ed.
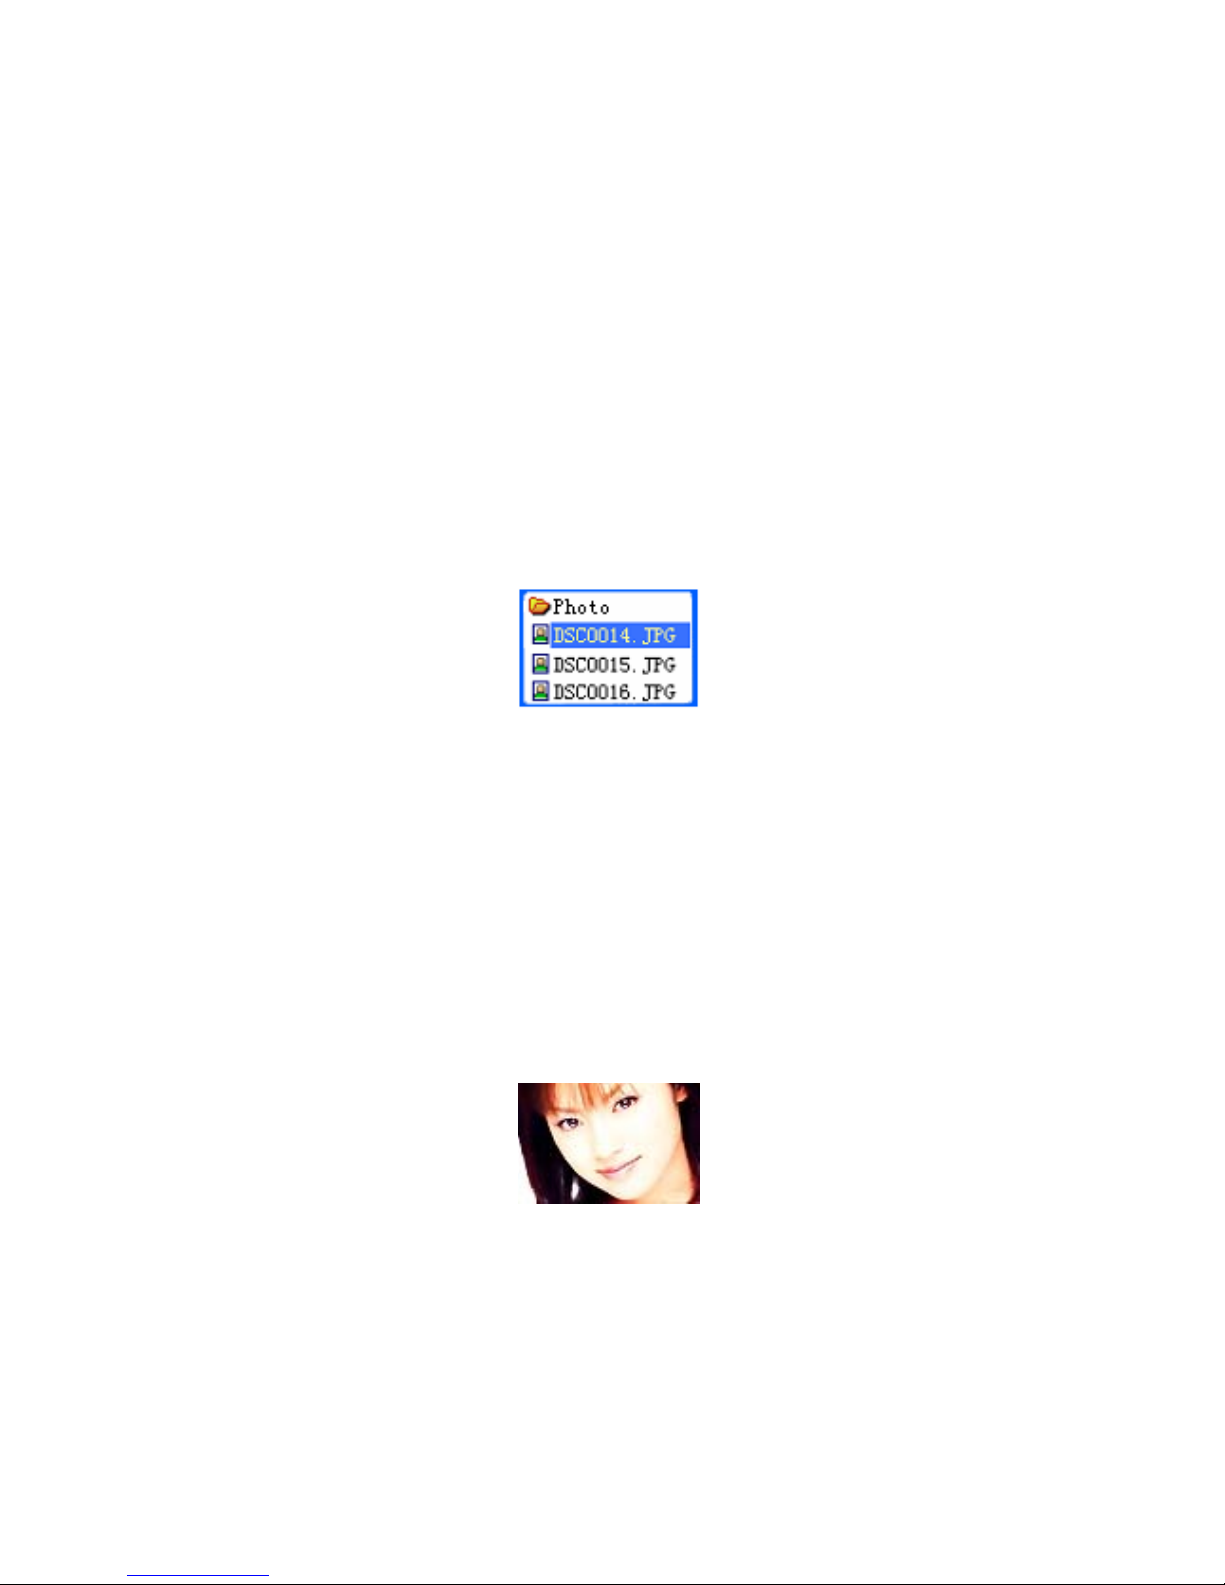
8.1 Fi le Selection Status
When you enter from the main menu, you are at the file
selection status. See t he Fig below:
JPEG Int erface – Fi le Selecti on – Select ing Files
A press of Play wil l ent er into the Picture Playing status.
Press ”Vol -” or “ Vol+” to select the next/l ast file.
A press of Mode will enter t he St op s ubmenus . 1. Local
Fol de r 2. Play Set , 3. Delete a nd 4. Exit.
There are two playing modes: 1. Manual and 2. Auto.
In the Auto Playing mode, the auto page turning
interval can be s et to 1 - 8 seconds .
Ot h er butt ons a re disa bl ed.
8.2 Pi ct ur e Pl aying Status
The Picture Playing status is as s hown the Fig below.
Page 45

44
A s h o rt – pr es s o f N e xt / La st w i l l di s p l a y t h e ne x t/ l ast
picture.
A s hort–pr ess of Play will return to the Fi le Selecti on
stat us.
A long-press of Mode will return to t he main menu.
Ot h er butt ons a re disa bl ed.
Page 46
45
9 Se t t i n gs
Note: This is mainl y used for the s ett ing of sys tem-related
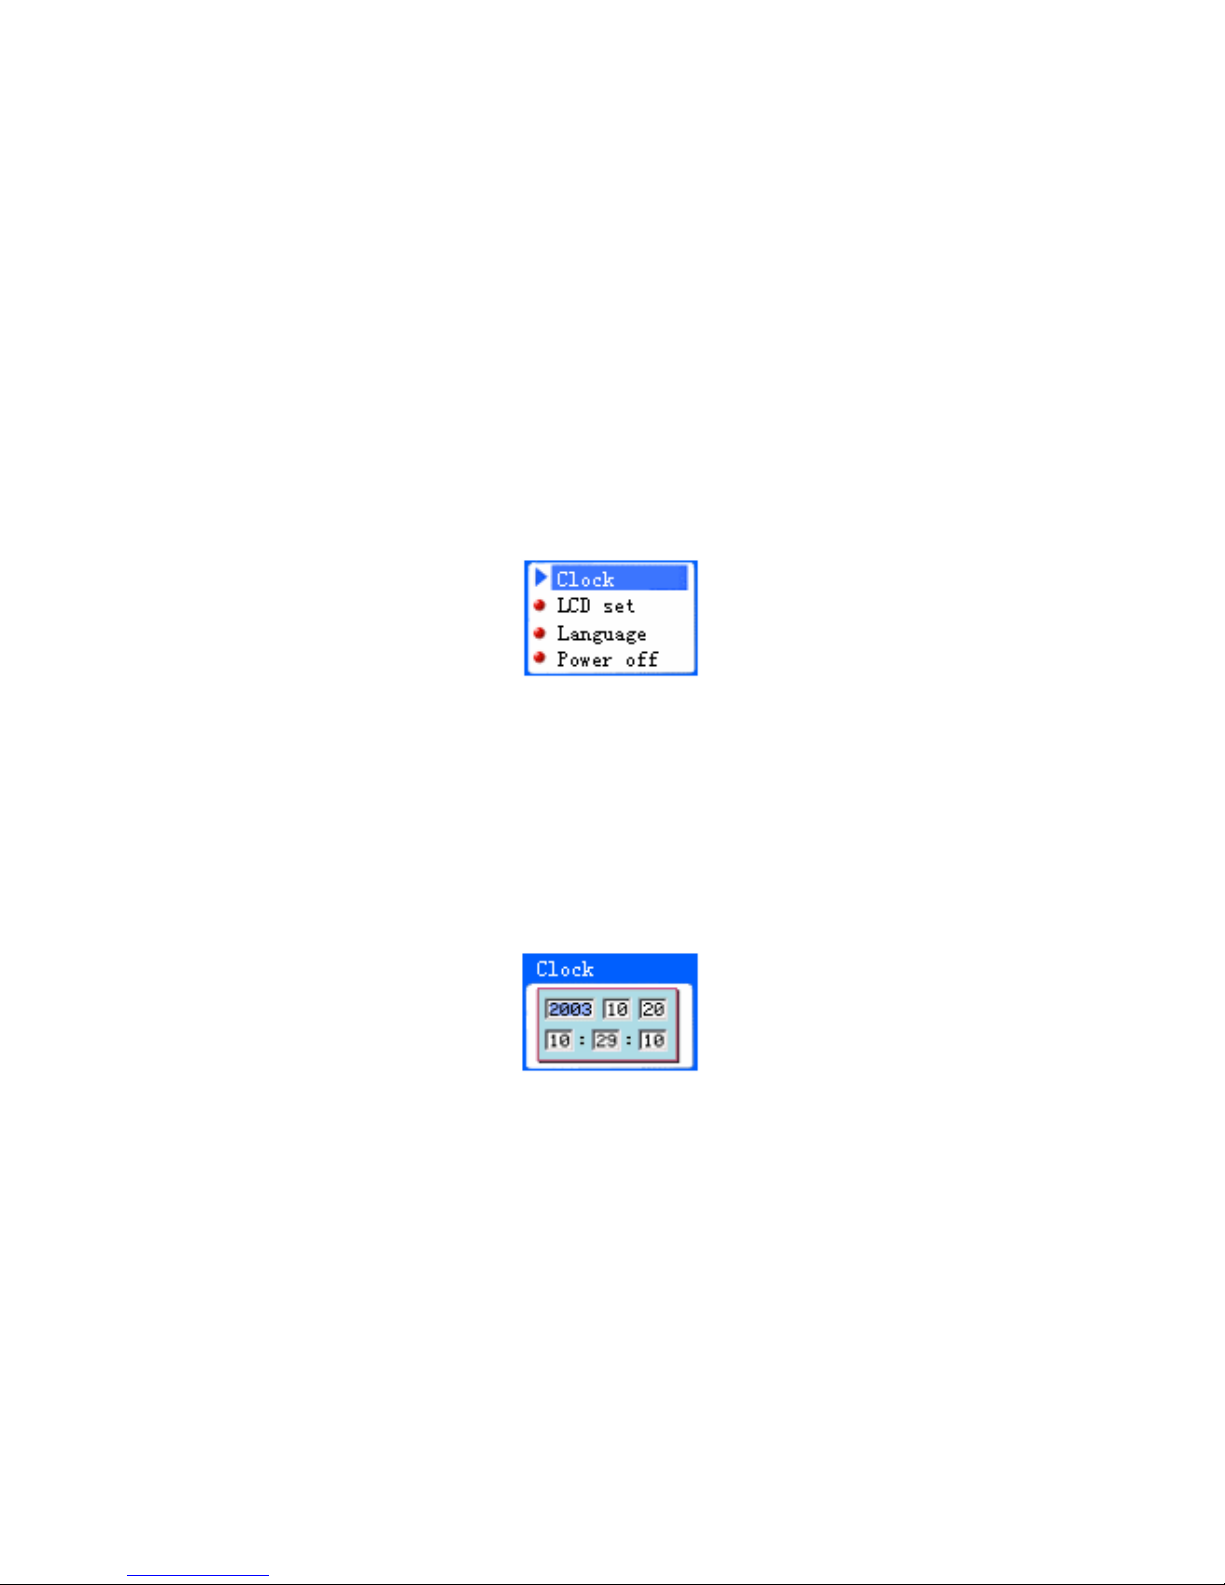
par ame ter a nd st at us dis pl ay. Th ese s ett in gs i n cl ude: Cloc k,
LCD Se t , L an guag e, Po w er off, Re pl ay mode , Me mo ry i n fo,
Firmwa re Ve rs io n, Fi rmwar e U pgrade an d E xit Menu.
Interface Display
Se tt i ngs
Button Functi on
St an dard Men u Functi on.
After you finish setti ng each of these functional
interfaces, you will still be returned to this interface.
9.1 Clock Sett ing Interf ace
Interface Display
Setting the Clock
Button Functi on
z A short- press “ Vo l +” wi ll ent er t he pr oc edure of setti ng
the recording time, begi nning with the setti ng of year. Follow
Page 47

46
t he or de r of “ Yea r – Mont h – Dat e – H our – Min ut e”.
z A long-press of PLAY will turn the player off.
z A short-press of MODE will confirm and quit.
z A short- press of A- B wi ll enter the recordi ng i nterface
and start recording.
The Set tin g Pr ocedur e
2003 flashes (2HZ)
Hol d-on of NEXT wi ll i ncrease t he year number st ep
by step.
Hol d-on of Last wil l decrease t he year number st ep by
step.
A short-press of “ Vol +” will confirm t he year number.
Then the s etting ite m will be s witc he d t o Month, whose s ett ing
met hod is the s ame as t he t h at of Yea r.
Keepi ng on t he s hort- pr ess of “ Vol +” will se t Date ,
Ho ur an d Min ute i n t ur n. Press “ Vol +” once mor e t o fi nis h the
setting.
Press “Vol -” to set Mi nute, Hour, Date, Month and Year
in turn.
Afte r the cha nge of eac h setting ite m is confirme d, the
system will be updat ed in ti me.
The Ranges of Each Item of Clock
Year( 2003-2010). I t is all owed t o e xcee d this range, however, be
s ure t hat t he leap years are c or re ct.
Mo nt h (1 -12)
Da te( 1 -3 1). E ac h mo nt h has a differ ent n umber of days .
Ho ur (0 - 23)
Mi nute (0 - 5 9)
Page 48
47
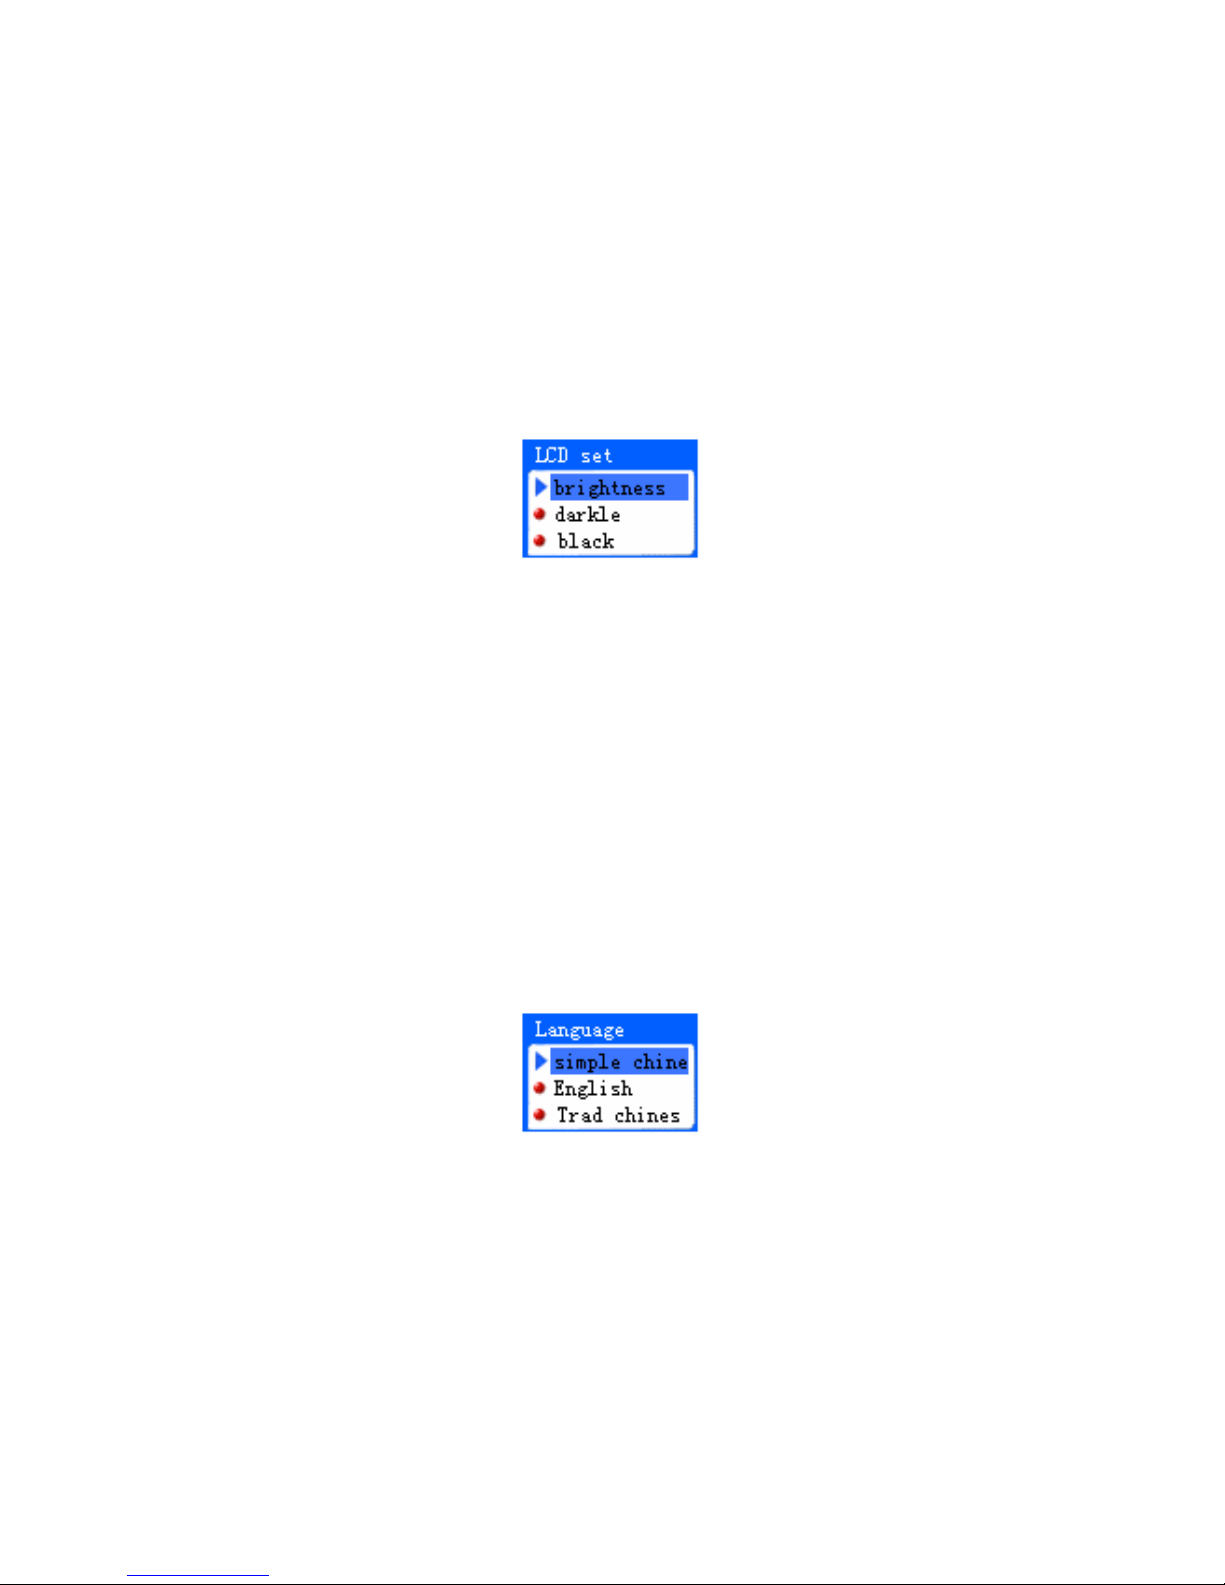
9.2 LCD Se t
Interface Display
Screen Settings
Button Functi on
◆ A sh o rt - press of “ Vol-“ or “ Vol +” wil l s wi tc h a mong
different options .
◆ A s hort-press of MODE wil l sel ect and enter one of the
options.
◆ Afte r yo u enter t h e opti on, a s h or t- pr ess o f LAST or
NEXT will adjust the position of the slide bar.
◆ A short-press of PLAY will cancel the setting and quit.
9.3 La ng ua ge
Note : Selec ting Languages . (Later more languages will be
added.)
Interface Display
Language Selecti on
Button Functi on
Page 49

48
◆ Standard Icon Menu Function.
9.4 Power off
Ene rg y Sa vi ng Mo de
Sleeping Mode
Power off
Button Functi on
z A s ho rt -pr es s of “ Vol -“ or “ Vo l + ” w i ll s wit c h be t wee n
t he two modes .
z A short-press of MODE will select and enter the
Ene rg y Sa vi ng Mo de or Sleepi n g Mo de .
z A s ho rt - pr es s of P L AY w ill ca nc el t he s et t i n g an d quit .
9.4.1 Ener gy Saving Mode
Note: In this mode, you can set t he off time, t hat is, i n the Stop
stat us , a fter how long the player will be t urned off if there is no
ope rati o ns . The Ra nge: 00’ - 60’.
Interface Display
It is t he same as the Tempo Rate Setting i nt erface.
Button Functi on
Standar d Sl ide B ar Func tion.
9.4.2 Sleeping Mode
Note: In this mode, you can set a time. When there is no
operation, the system will count down from this setti ng ti me.
Page 50

49
When t he setti ng ti me is over, the player wi ll be turned off. This
ti me will be reset to zero before turni ng off the player. (This
s etting is only va li d for once .) It is mai nl y u se d for e nj oyi ng
mus i c b efor e s le epi n g. Th e Ra ng e: 0 0’- -120’ .
Interface Display
It is t he same as the Tempo Rate Setting i nt erface.
Button Functi on
Standar d Sl ide B ar Func tion.
9.5 R e pl ay m o de
N o t e: I n h er e, yo u ca n s et t h e w ork i n g st a t us for t h e re peat
function. One is Manual, the other is Aut o.
Interface Display
It is t he same as the Power off Setting i nterface.
Button Functi on
z A s ho rt -pr es s of “ Vol -“ or ” Vo l +” w i ll s wit c h bet we e n
t he two modes .
z A short-press of MODE will confirm and quit.
z A s ho rt - pr es s of P L AY w ill ca nc el t he s et t i n g an d quit .
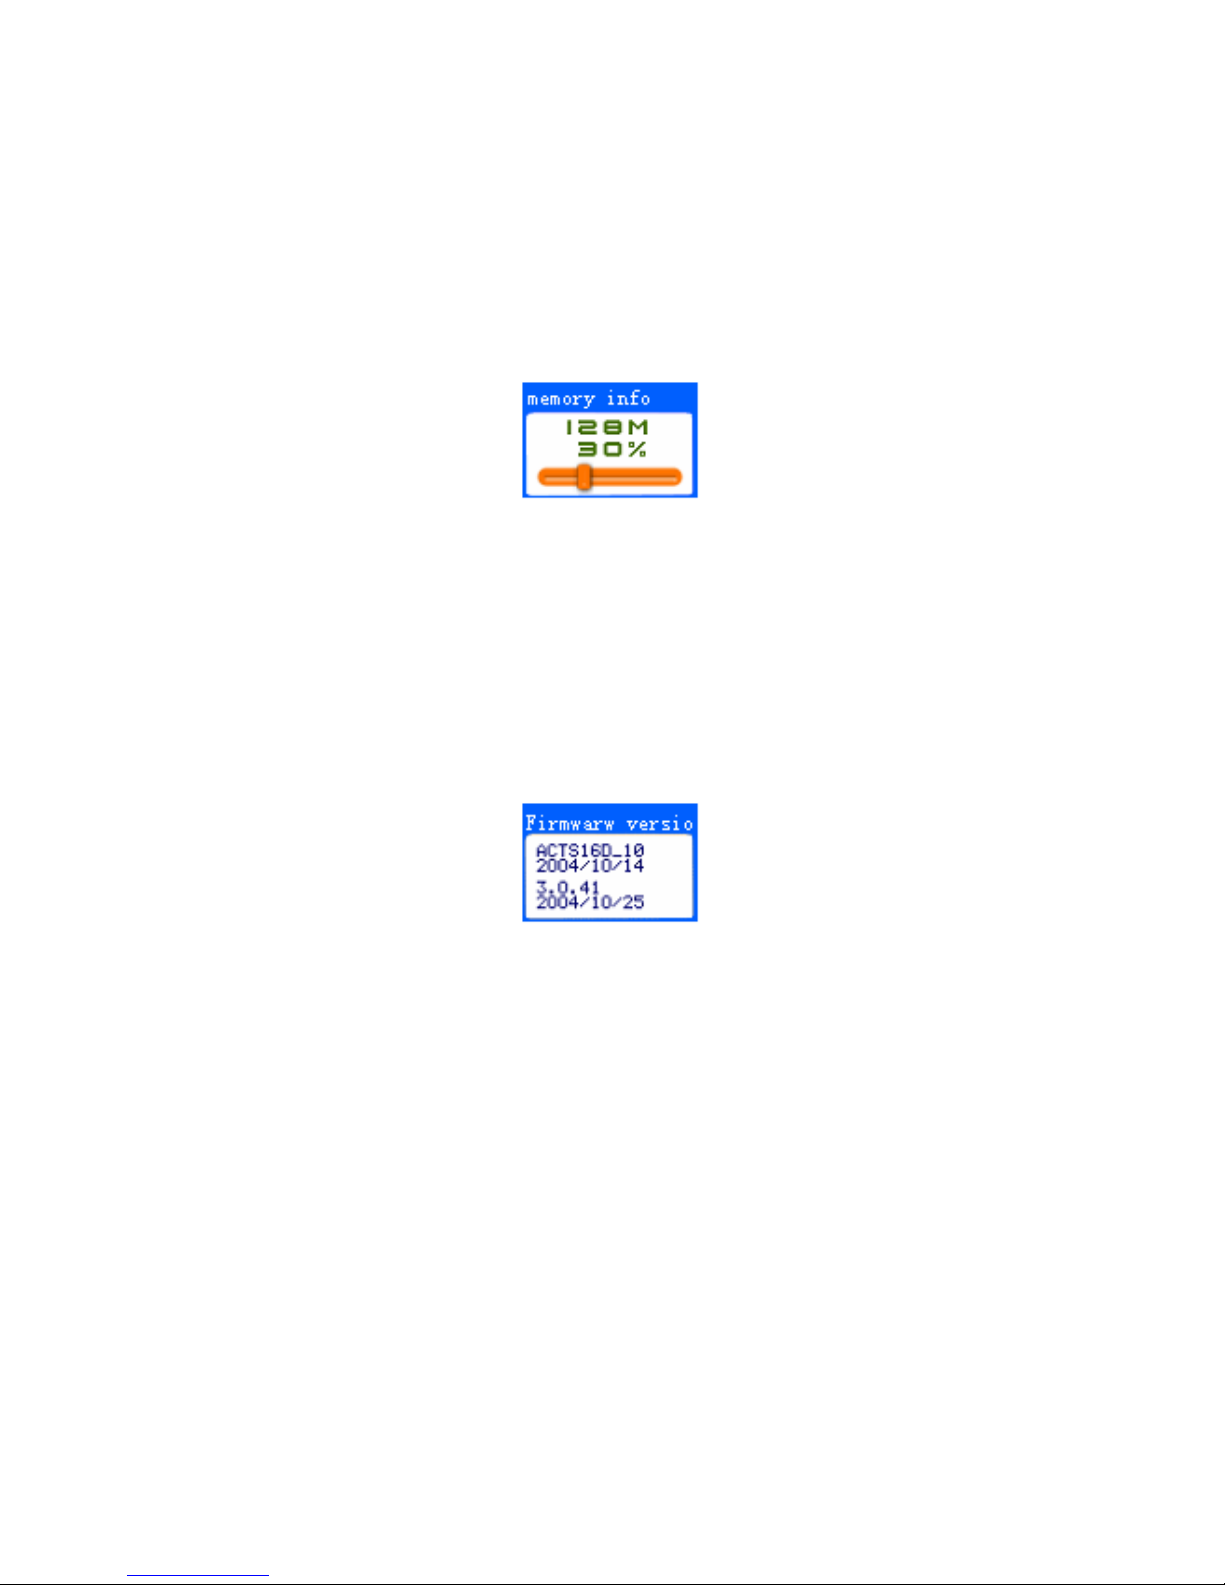
9.6 Me m or y i nf o
Note: View the size and use of the memory.
Its interface is as shown in the Fig below.
Page 51
50
Memory info
But ton Function
A short-press of MODE/PLAY will quit.
A short-press of A-B wi ll enter into t he recording
i nte rfac e.
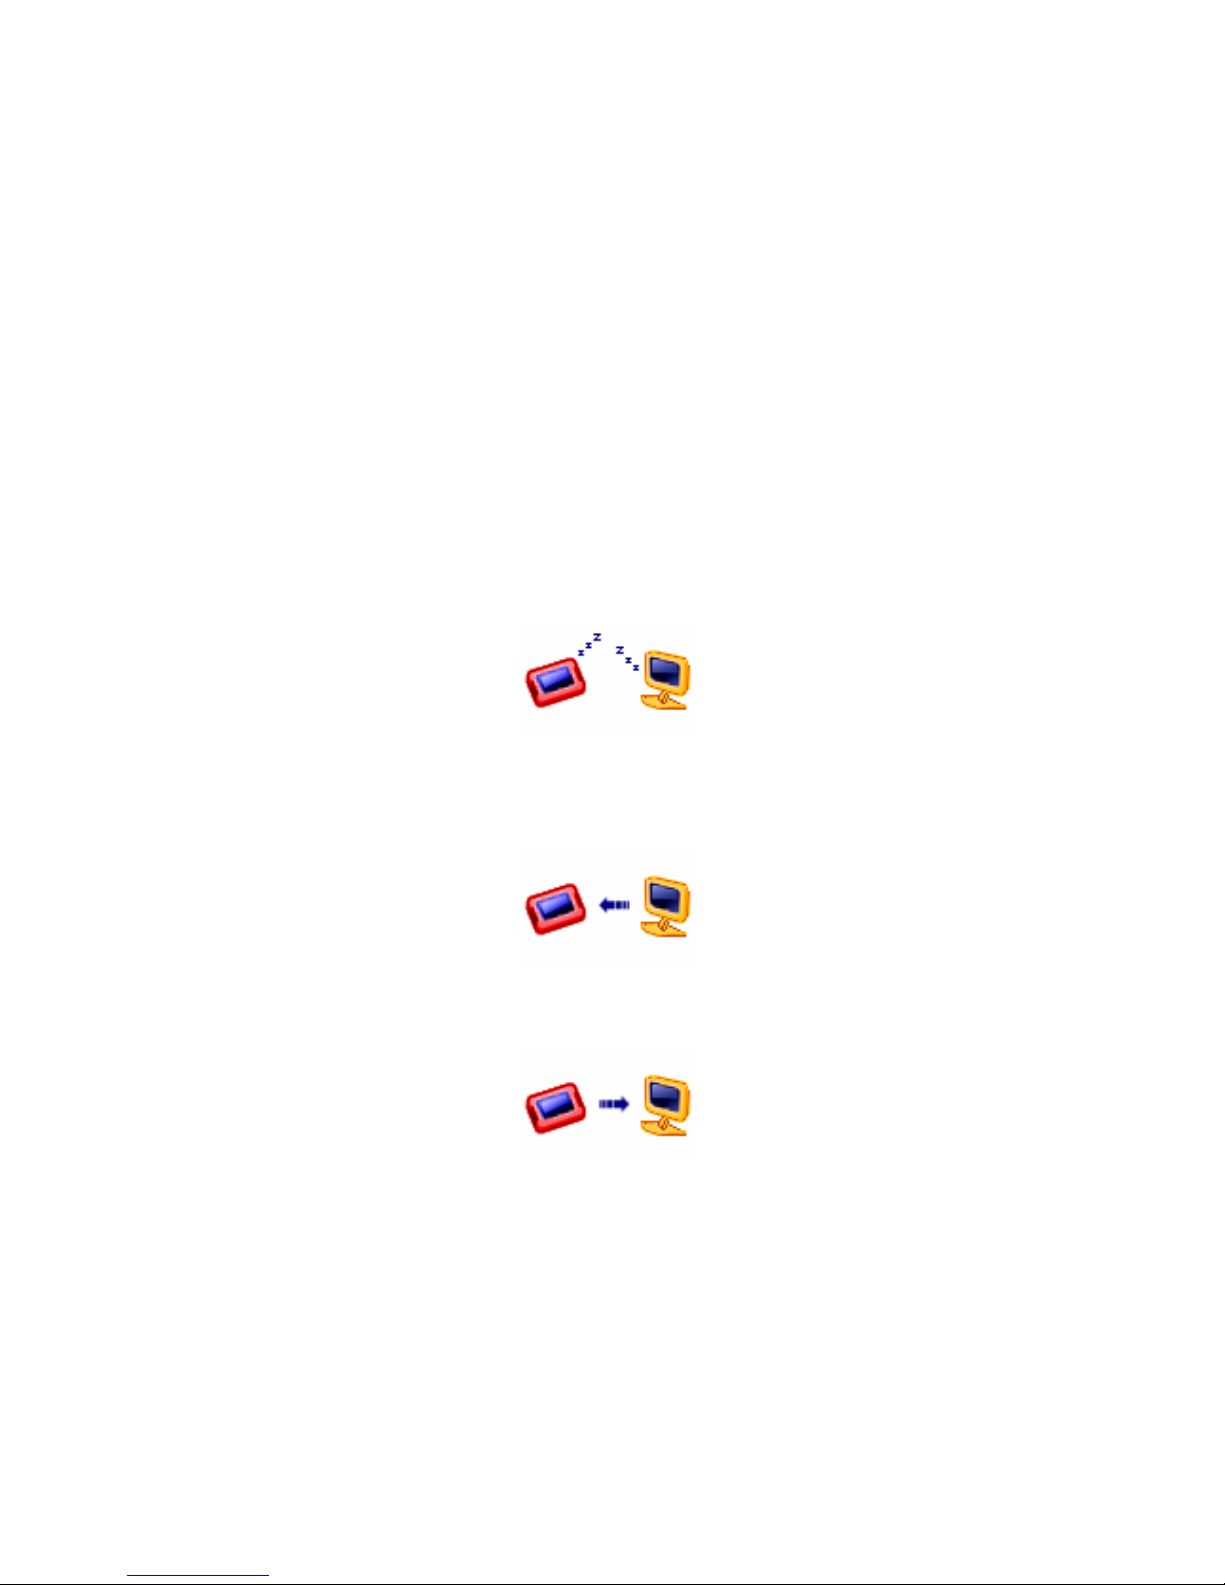
9.7 Firmware Version
Note: Used to display the current firmware version.
Its interface is as shown in the Fig below.
Fi rmwa re Versi on
But ton Function
A short-press of MODE/PLAY will quit.
A short-press of A-B wi ll enter into t he recording
i nte rfac e.
Page 52
51
10 UDISK
Re a l i ze t h e s t a nda r d US B D I SK fu nc ti ons . Exc e pt t h e
UPGRADE modul e, in ot her status , when i nserted into the USB
Port, the playe r wil l e nt er into the Udis k funct ion.
10. 1 I nterf ace Display
z There are three status: Ready, Download and Upload.
Ready means t hat the UDISK is ready to use.
USB-connect Interface
Download means that the UDis k is in downl oadi ng
mod e .
USB-d ownl oad I nte rface
Upl oa d me a ns t h at th e UD is k i s i n upl o adi n g mo de .
USB-upload Interface
Page 53

52
10. 2 Button Function
In Busy st atus, the player will not res pond to any butt on
operation.
In Rea dy mo de , a s hort- pres s o f MODE will s wi tch t o
the MUSIC mode.
Short-Press of A-B: Switch t o the recording function
and start recording.
10. 3 Eje ction
Wh en P C is ej ect e d (wit h out p ul li n g out t he pla ye r from t he P C),
the player will go into the main menu automatically.
10. 4 Swi tch to UPGRADE
W h en re ce i vi n g t he c om ma n d of s w it c hi n g t o
UPGRADE from the PC UPGRADE application, t he player
needs to respond and execut e the corres ponding command.
Page 54

53
11 Upgrade
Rea lize t h e functio ns o f upgra di ng , r est orin g and bac k up of the
fi rmw ar e i n t he s yste m. Wh en y ou ent e r t hi s i nte rface, th e
s ys t e m i s i n r e a d y co ndi ti on .
Its interface is as shown in the Fig below.
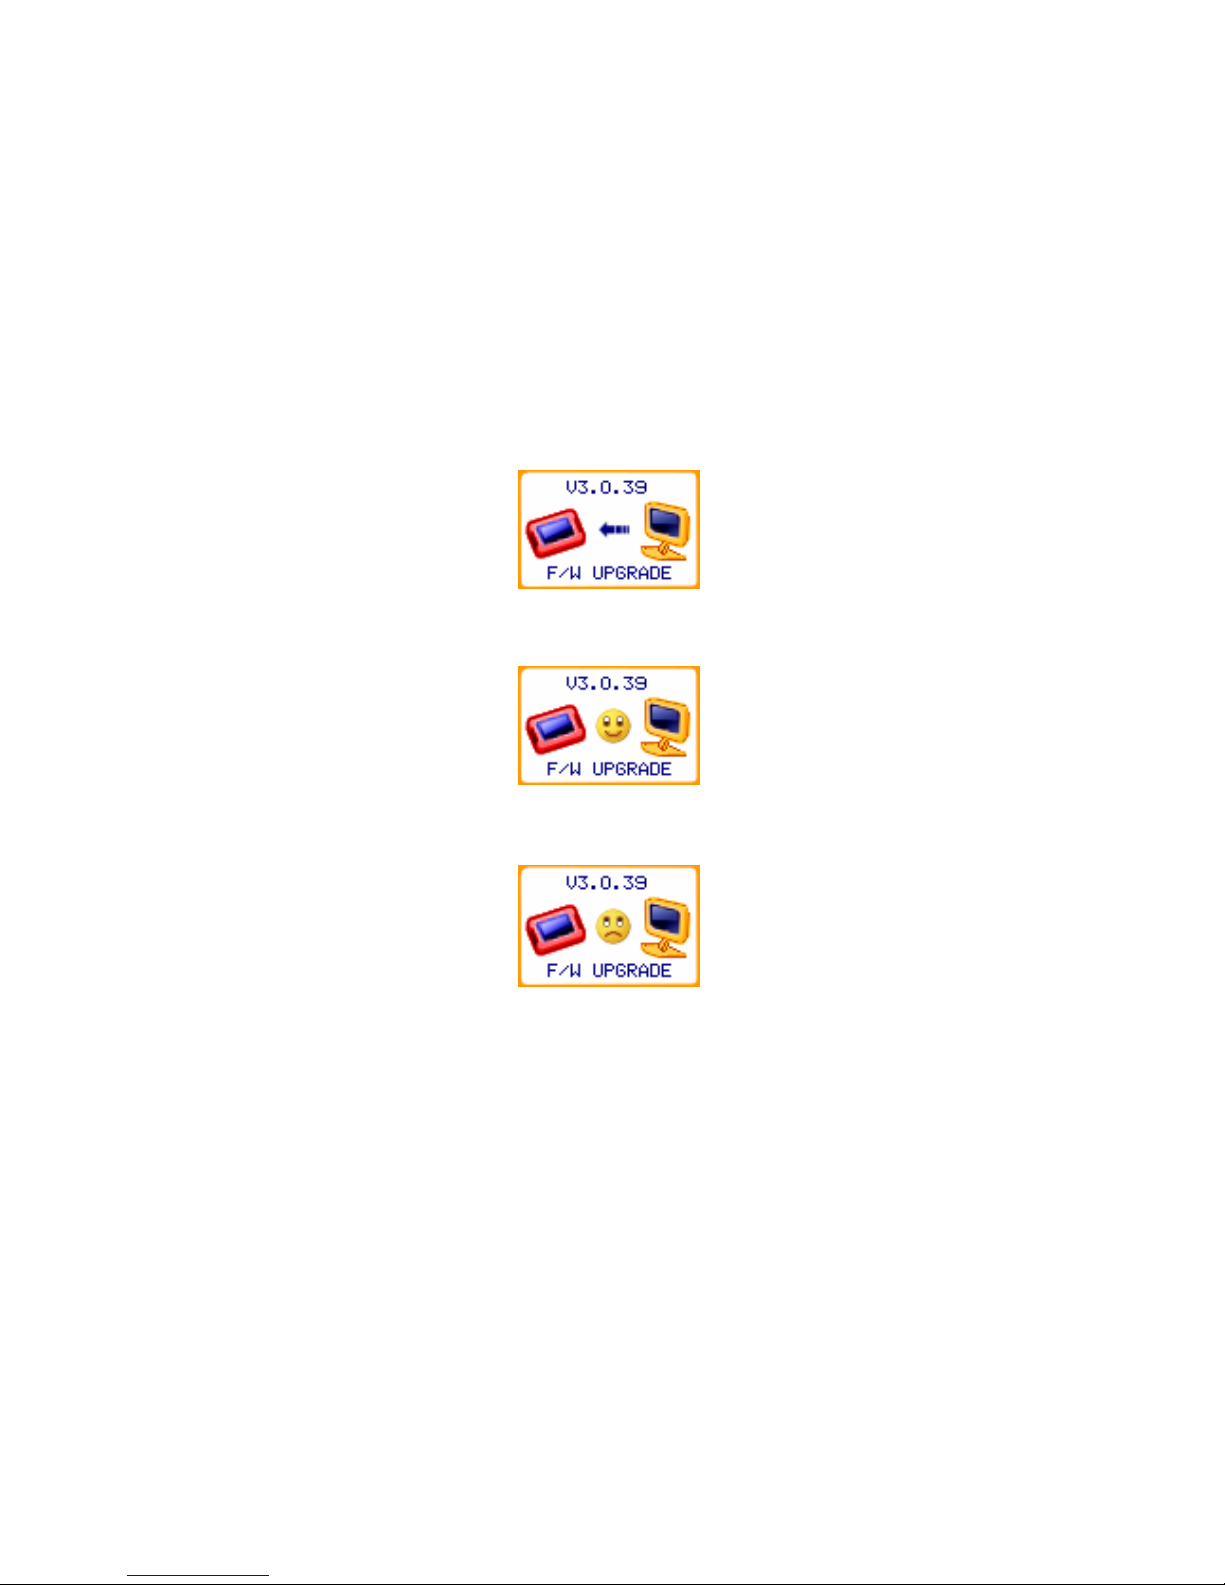
The Fi rmware is i n Upgrading.
z V3.0.39: t he current firmwar e versi on of t he s yst em or
the firmware version of the system in upgradi ng.
z PCBM u D i s k : UPGRADE is upgra di ng t he
fi rmware of the s ystem by downloading. PCAMuDisk:
Backing up of the firmware of the system by upl oadi ng.
z The curr ent exe c uti ng s tat us can be:
Rea dy/ Bus y …doi n g…/ do ne/fail ed.
Ready: UPGRADE is ready for receiving the requests
fr o m PC .
Bus y: UPGRADE has not begun the material upgrade
or backup yet, but is processing the requests from PC.
Doi ng: UPGRADE is upgrading or backing up
mat erially, s o users can’t cancel the upgra de a t t his t ime.
Done: UPGRADE has finished t he upgrade or backup.
11. 1 R e ady
Its interface is as shown in the Fig below.
Page 55

54
Ready: UPGRADE is r eady for recei vi ng the reques ts from P C
.
Firmware Upgrade
Oper ati on Inst ructi ons
If the player is not connected to the USB Port, press Mode to
return to the System menu.
P C re quests pr oc essi ng .
When receiving and process ing t he general requests
fro m PC, the stat us of t he pl ayer are switched between Ready
a nd Bus y .
When re ce iving t he materi al downl oa d upgrade request ,
t he pl ayer will swi tch to t he Doi ng st at us , and exe cute the
download upgrade.
When receiving t he materi al upload backup request, t he
player will switch to the Doing status, and execute the upload
backup.
11. 2 Do wnl o ad Upgr ade
Download Upgra de is t o download the syst em fi rmware versi on
fr o m the P C si de into the pl ayer and over wr ite t he current
firmware version in the player.
Moreover, if both the system firmware and its backup are
dama ge d, t he D ow nl oa d U pgr ad e c a n r epair t he s yst em
fi r mw a r e .
Page 56
55
The Download Upgr ade i nterface is as shown in the Fi g bel ow.
Doi ng: UPGRADE is upgrading or backing up
mat erially, s o users can’t cancel the upgra de a t t his t ime.
Fi rmware Upgrade - I n Upgr ading.
Done: UPGRADE has finished t he upgrade or backup.
Firmware Upgrade OK Interface
Fail ed: UP GRAD E is fa il e d.
Firmware Upgrade Failure Interface
Oper ati on Inst ructi ons
Don’ t r es pond to but t on ope ra tions .
P C re quests pr oc essi ng .
I t t akes ab out 15 seco nds t o fi nis h th e Do wnl oad Up gr ad e. Aft er
fi nishing the Download Upgrade, t he player will swi tch t o t he
Page 57

56
Done status. 1 second later, the system will restart to complete
the upgrade.
Ab no rmi t y Dis p os al
If the communi cati on fails during t he Download
Upgrade, set t he re try times to rest ore t he c ommunicati ons.
When suspend occurs during the Download Upgrade,
“ Fail ” s houl d be displayed. The syste m will restart in 1 sec ond
so as to utilize the backup of the system firmware to restore the
system firmware.
Page 58

57
12. Notice
To extend the pl aying ti me of the pla yer, pleas e set
the screen to t he Dim mode in playing files ot her t han MTV
movies. The Energy Savi ng Mode and Sleeping Mode can als o
prolong the playing time of the player.
Page 59

www.x- micro.com
 Loading...