

Page 1
HALO ANGELMATCH-USER GUIDE
OVERVIEW
1
HALO AngelMatch can be used anywhere and anytime to confirm the match between a mother and
her baby. A simple press of a button provides instant audible and visual confirmation.
HALO AngelMatch can be easily expanded at any time by adding more Mother tags and Wrist tags.
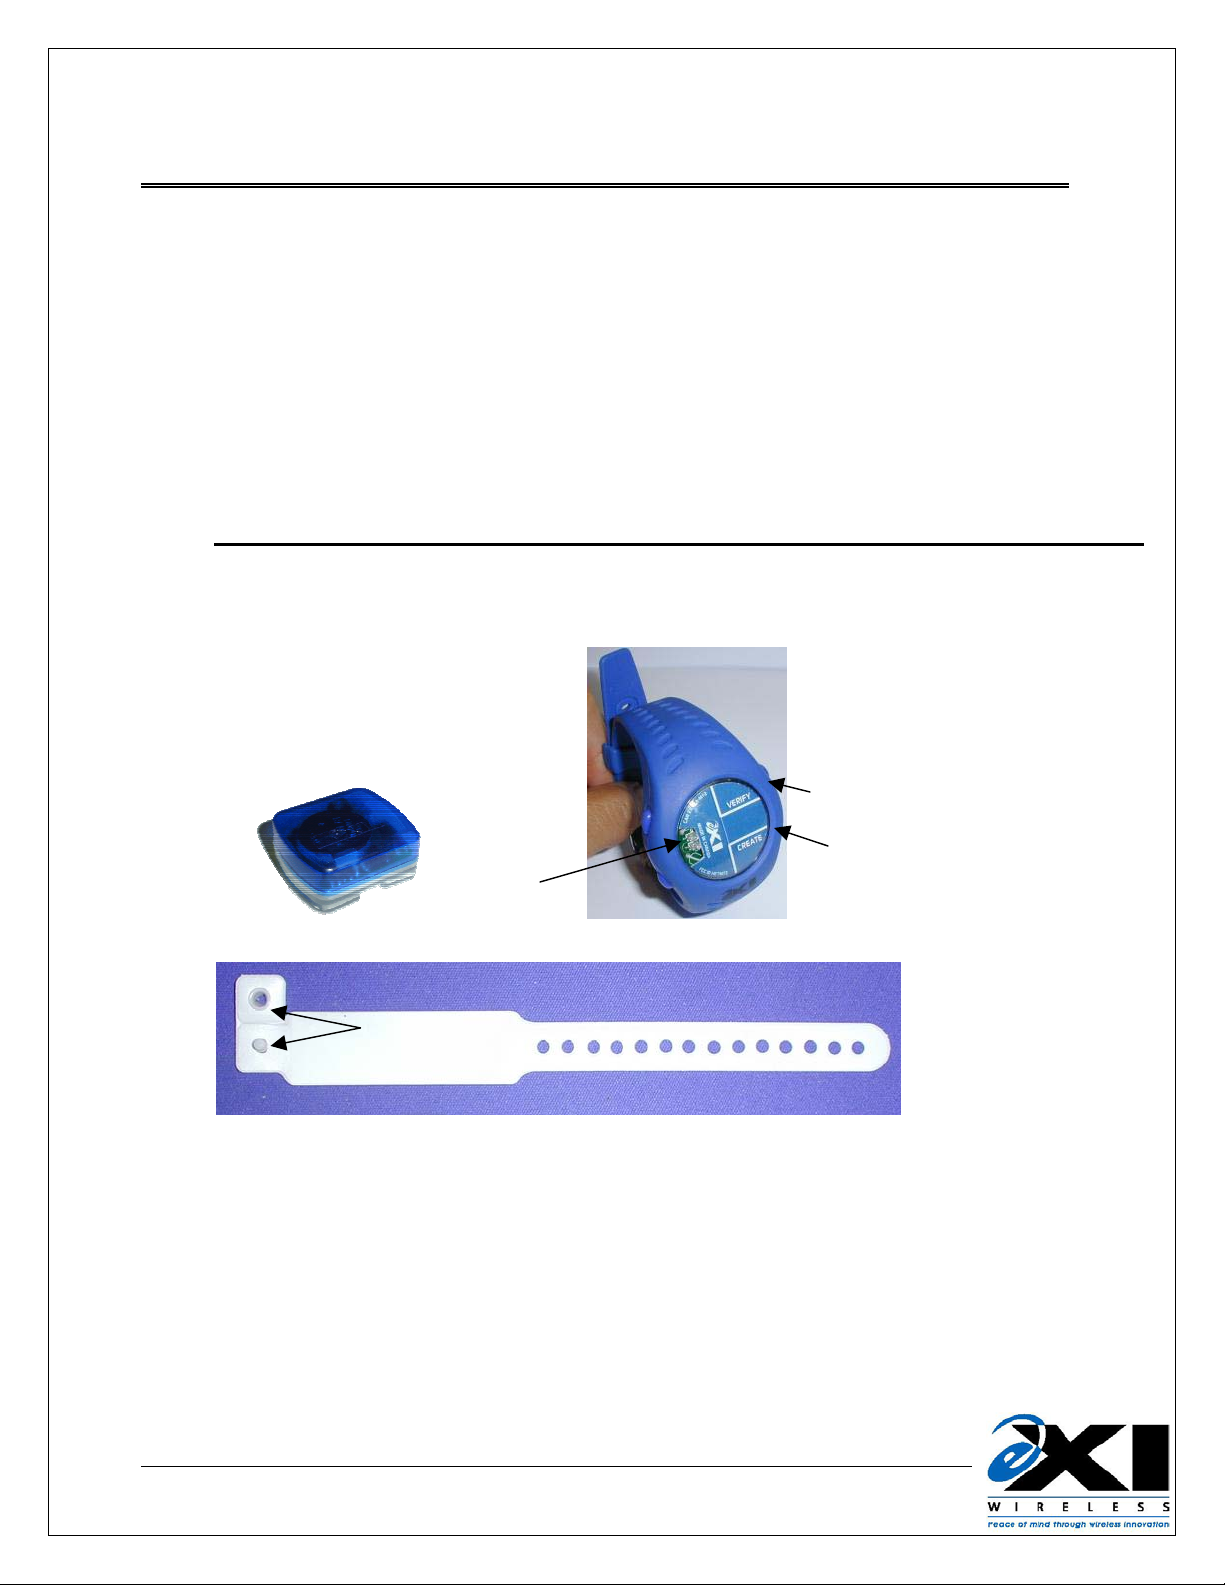
COMPONENTS:
HALO AngelMatch requires a Wrist Tag and a Mother tag:
Verify Button
Create Bond
LEDs
Wrist tag Mother Tag
Securing pin
& flap
Wrist Tag Strap
Extra Wrist Tag straps can be ordered through your dealer or eXI. Alternatively, they can be ordered directly from
the manufacturer. Please contact your dealer or eXI for more information.
980-000036-000R1.00
Page 2
HALO ANGELMATCH USER GUIDE
BONDING MOTHER TAG WITH THE WRIST TAG
2
The first step is to bond the Mother Tag with the Wrist Tag(s).
The Mother Tag has the capability of handling multiple births (twin, triplets etc.) and can be bonded
with up to eight Wrist Tags.
1. When the mother and the baby/babies are ready, take one mother tag and as many
Wrist Tags as are required.
2. Attach the Wrist Tag to the baby*.
3. Press both buttons (Create and Verify) on the Mother Tag and hold them pressed down
for 5 seconds. The LED briefly displays a red light but will then start flashing green.
4. When five seconds have passed, the tag beeps and a solid red light is displayed. Release
the Create button, but keep the Verify button pressed down; a solid green light is now
displayed.
5. After releasing the Create button, you now have five seconds to press the Create button
again. Both the green and the red LEDs will start flashing and the tag is now in bonding
mode.
6. Without letting go of the button, place the Wrist Tag so that it is within 12 inches of the
Mother Tag. The Mother Tag will now bond with the Wrist Tag.
7. A beeping sound will confirm the successful bond between Mother tag and Wrist Tag. The
Mother Tag will briefly display a green light to confirm the bond.
8. If more than one Wrist Tag is to be bonded with the same Mother tag, make sure that
the Mother tag button is kept pressed down. Do not release buttons between Wrist
Tags**. Point the Mother Tag to the next Wrist Tag to be bonded.
9. When all tags are successfully bonded with the Mother tag, let go of the button on the
Mother Tag.
*Note: The bonding can be done either before or after attaching the tag to the infant, depending
on preference and hospital policies and type of tags (Wrist Tag should be attached prior to
bonding.)
**Note: If the button is released by mistake before all tags are bonded, the process has to be
started over from the beginning. During the bonding process of multiple Wrist Tags, keep them
about three feet from each other.
980-000036-000R1.00
2
Page 3

HALO ANGELMATCH USER GUIDE
ATTACHING THE TAG TO THE BABY
3
Hold the tag with the top (Blue)
uppermost and thread the strap through
one Tag arm, across the bottom of the
Tag and through the other arm.
Place the strap around the baby’s wrist
or leg and insert the securing pin in an
appropriate position on the strap.
Fold over the securing flap and
press firmly so that the securing pin
snaps in place.
Make sure the strap is not
restricting circulation, or it will
potentially cause chaffing.
980-000036-000R1.00
3
Page 4

HALO ANGELMATCH USER GUIDE
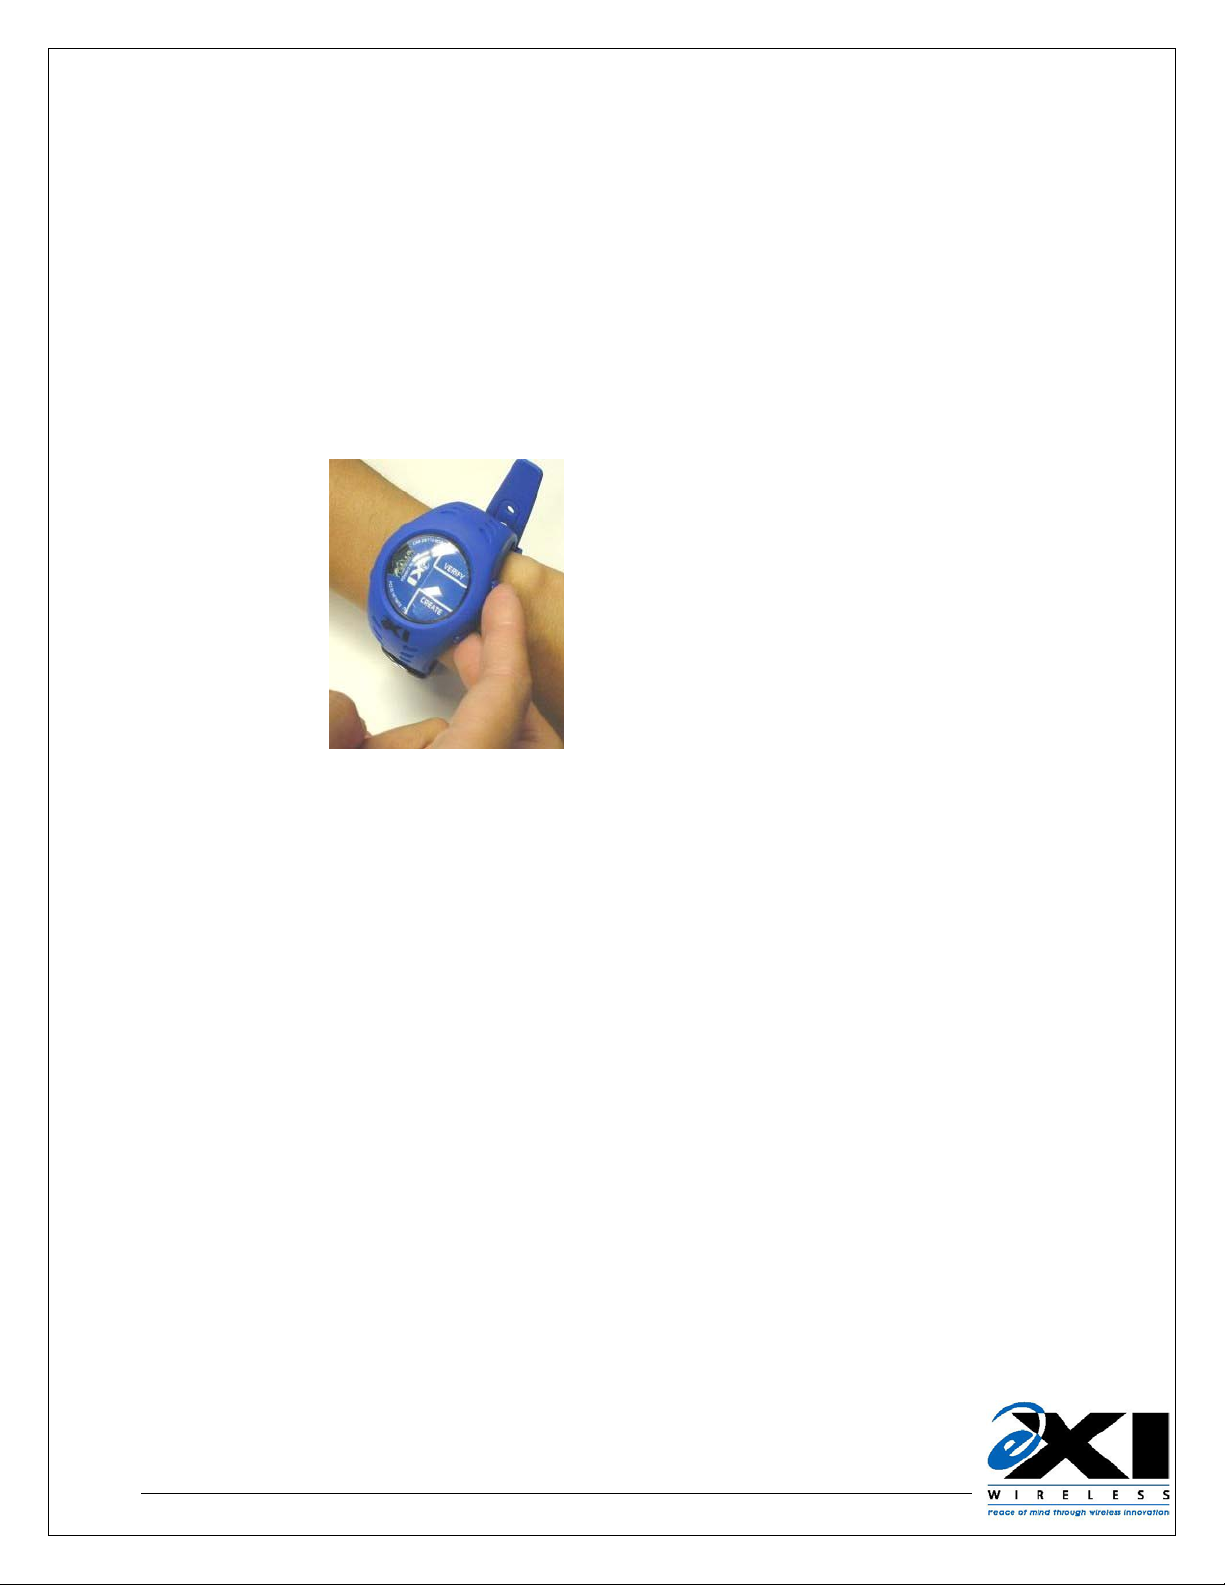
MATCHING MOTHER WITH BABY
4
Anytime and anywhere the mother or hospital staff want to confirm the match between the mother
and a baby, the following steps apply:
Bring the baby and the mother tags together so that they are within 12 inches of proximity.
12 inches
Press the Verify tag button and release.
If there is a match, a ‘good match’ melody will play and the LED on the mother tag will
display a green light.
If there is a mismatch, a ‘bad match’ melody will play and the LED on the mother tag will
display a red light. Take immediate action according to hospital policies and procedures.
980-000036-000R1.00
4
Page 5

HALO ANGELMATCH USER GUIDE
DISCHARGE
5
When the mother and the baby are ready to leave the hospital, simply release the Wrist Tag by
cutting the strap.
The Wrist Tag(s) will remain bonded with the mother tag until the next bonding process, which will
clear the mother tag memory and enter new tag(s). It is recommended that the mother tag is rebonded with the Wrist Tag(s) every time HALO AngelMatch is assigned to a mother and her baby.
To clean the Mother Tag and Wrist Tag, please follow Care Guidelines below.
CARE GUIDELINES
6
The Wrist Tag is fully submersible in water (up to 5 ft) and will withstand cleaning.
Use one of the following cleaning methods:
METHOD 1
Scrub each tag with germicidal solution for approximately 60 seconds. Note: Phenolic or
iodine based solution is preferred
Wipe each tag individually (using a new alcohol wipe for each)
Allow tag to dry for 30 seconds
METHOD 2
Use cold sterilization in Cidex or Totacide Note: Do not immerse tags for more than 30
minutes
METHOD 3
Use gas diffusion sterilization methods. Note: Battery leakage may occur if tags are
exposed to heat in excess of 57°C (135°F)
The Mother tag can be cleaned by spraying a germicidal solution over the tag and then
wiping it down using individual alcohol wipes for each tag. The mother tag should not be fully
submersed in water.
The Tag straps are single-use and disposable. Upon discharge of the baby, the strap is
released by cutting it with scissors.
Important: Tags are incompatible with disinfectants containing Glycol Ether.
980-000036-000R1.00
5
Page 6

HALO ANGELMATCH USER GUIDE
FCC Regulations
This device complies with Part 15 of the FCC Rules. Operation is subject to the following two
conditions: (1) This device may not cause harmful interference, and (2) This device must accept any
interference received, including interference that may cause undesired operation.
Any changes or modifications not expressly approved by the party responsible for compliance could
void the user’s authority to operate the equipment.
eXI Wireless Systems Model No.: Wrist Tag
IC: 28771031940 FCC ID: HE7 ETG
* This device complies with Part 15 of the FCC Rules. Operation is subject to the
following two rules: (1) This device may not cause harmful interference, and (2) This
device must accept any interference received, including interference that may cause
undesired operation.
eXI Wireless Systems Model No.: MTAG2
IC: 2877A-MT2. FCC ID: HE7MT2
Made in Canada
* This device complies with Part 15 of the FCC Rules. Operation is subject to the
following two rules: (1) This device may not cause harmful interference, and (2) This
device must accept any interference received, including interference that may cause
undesired operation.
Made in Canada
eXI systems are designed to assist staff in providing a high degree of safety for people and therefore should only be used as a
component of a comprehensive security program of policies, procedures, and processes. As with every security system, eXI highly
recommends regular system operational checks to verify functional integrity.
© 2004 eXI Wireless Systems Inc. All rights reserved. eXI, eLink, and all respective logos are either trademarks or registered
trademarks of eXI Wireless Systems Inc.
Specifications subject to change without notice.
eXI Wireless Systems Inc. · 100-13551 Commerce Parkway, Richmond, BC Canada V6V 2L1 · Phone (800) 667-9689 · Fax (604)
207-7765 · www.exisystems.com
980-000036-000R1.00
6
 Loading...