

Xiva music M8 User Manual
Welcome
Congratulations on your purchase of XiVA’s musicm8, and welcome to the XiVA community. Because the XiVA team have done their utmost to ensure that your musicm8 is of the
highest quality, your machine should provide you with years of excellent service as the heart
of your digital home.
What is musicm8?
musicm8 is a Network Attached Storage solution to securely store music, movie and
picture les on a typical home network, with a usable storage capacity of 1TB (terabyte),
that’s up to 350,000 mp3 songs or a million 1Mb photographs.
Simple NAS devices are in signicant demand as home storage needs grow. However, musicm8 is a world rst by using XiVA’s proven CD conversion technology; musicm8 incorporates a slot load CD drive and CD recording engine.
For a user who wants to store all their media on a network device, this provides the means
to simply insert and record a CD unattended, with no PC required and have it available to all
their music devices and PCs throughout the home without any conguration or set up.
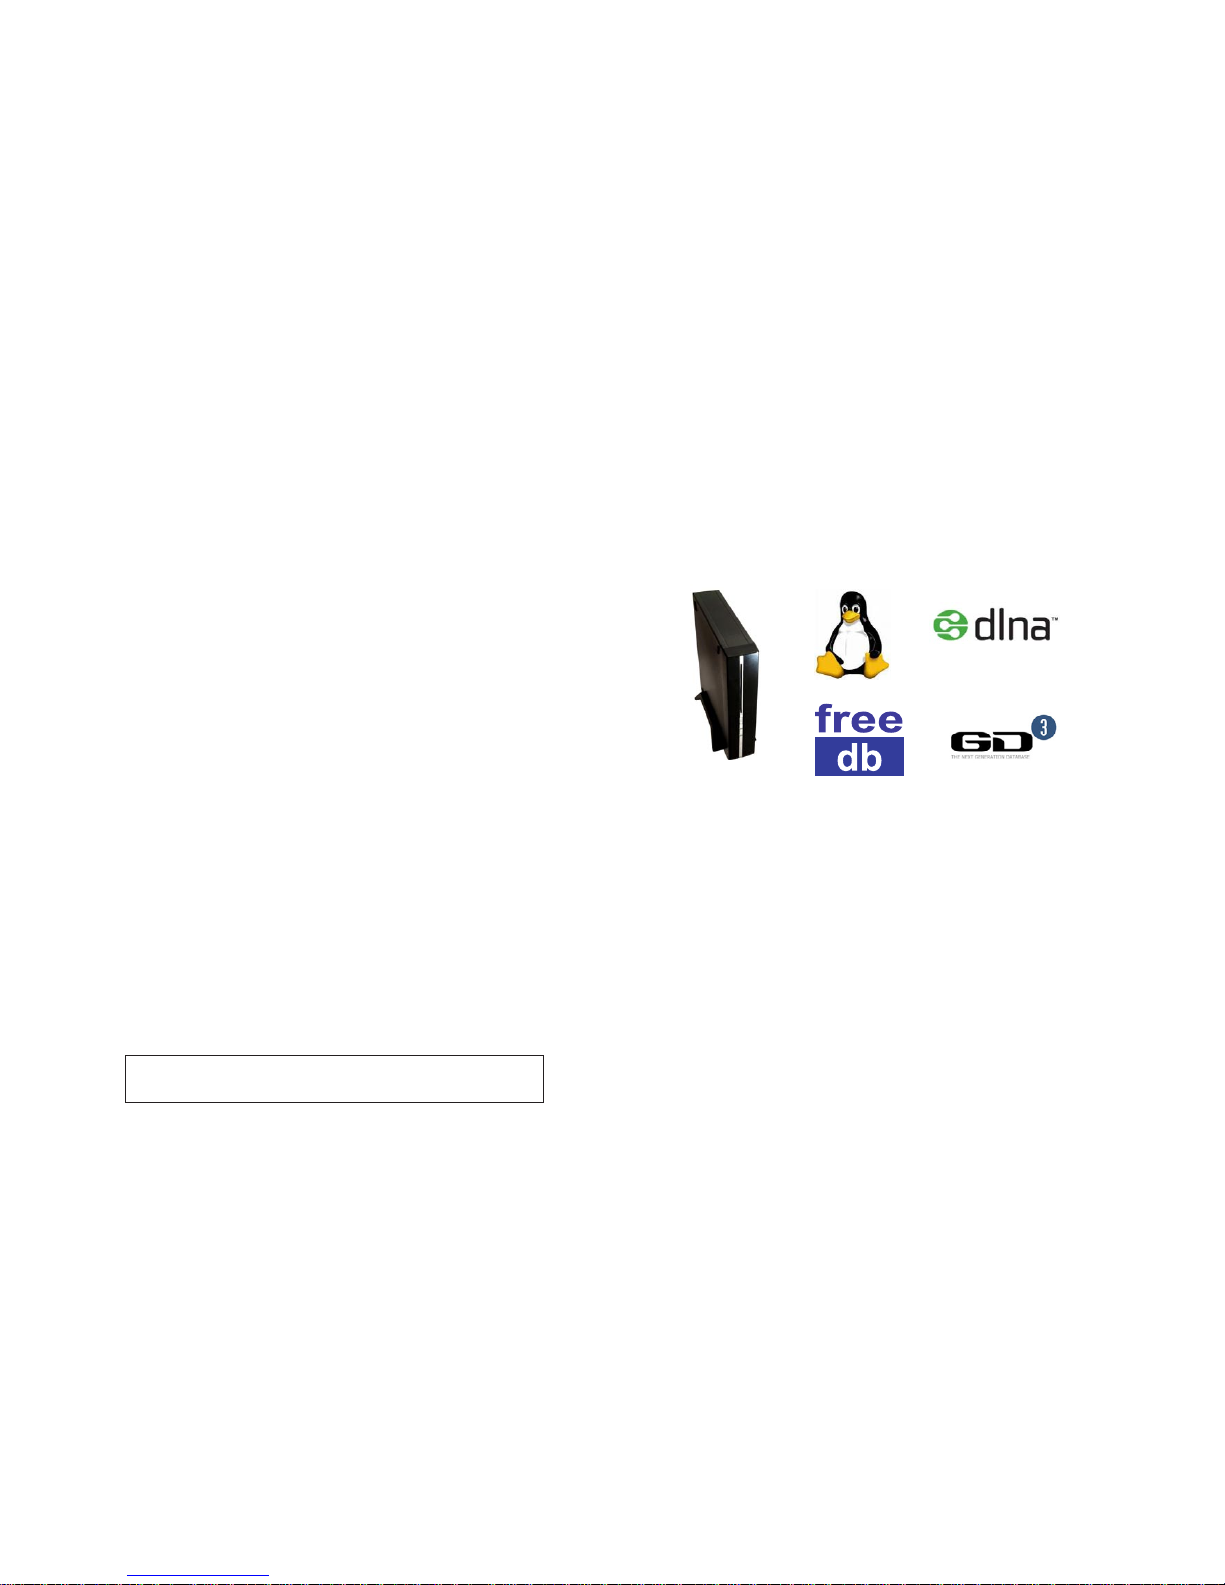
Compatible devices
Archos - Buffalo - B&O - Denon - D Link - iTunes - iPod - Linn DS - Logitech - MCE - Naimnet
Netgear - Philips - Pinnacle - PS3 - Roku - Slim Devices - Sonos - Sony - Xbox 360 - Yamaha
and any media player or device that can browse a network share.
This manual includes guides for brands which have been tested with the musicm8, in the
Conguring Media Players section on page 11. For other brands, please see the manufac-
turer’s User Guide.
Contents
Set Up ........................................................................................................ 1
The Home Page ..........................................................................................7
Using the Main Features ..............................................................................9
Backing Up and Recovery........................................................................... 10
Backup ................................................................................................10
Automated Backup ...............................................................................10
Recovery .............................................................................................10
Conguring Media Players .......................................................................... 11
TwonkyMedia .......................................................................................11
SlimDevices SqueezeCenter 7.3 .............................................................12
Firey .................................................................................................. 13
iTunes .................................................................................................14
Windows Media Player ..........................................................................14
Linn DS Series ......................................................................................15
Nokia N800 .......................................................................................... 15
Wii ......................................................................................................16
Sonos ..................................................................................................17
Importing photos from your camera ........................................................... 19
Using a Wi-Fi Photo Frame ......................................................................... 19
Manage Podcasts ...................................................................................... 20
Buying Music from Amazon ........................................................................ 21
Conguring Photo and Video Sharing .......................................................... 22
Accessing your musicm8 across the Web ..................................................... 23
Advanced Settings ..................................................................................... 26
Recording Settings................................................................................26
Metadata Options .................................................................................26
Run Script ...........................................................................................28
Network Conguration ..........................................................................29
Adding Wireless Support .......................................................................31
FAQ & Troubleshooting .............................................................................. 32
Specication and Features ......................................................................... 36
Licensing .................................................................................................. 37
Warranty .................................................................................................. 38
Note: page references in this manual are hyperlinks. When viewing the pdf on
a computer, you can click a page number to be taken straight to that page. You
can congure Adobe Reader with a Prev button to return where you came from.

XiVA musicm8 User Guide
1
Set Up
What’s in the box?
musicm8•
Power supply and cable•
Ethernet cable•
What you need
A way to plug your musicm8 into your home network; a direct connection into
your router or network switch is perfect, but you can treat your musicm8 like a
computer and plug it into any other Ethernet connection in your home.
If you need to place your musicm8 in a room which does not have an Ethernet
socket, we recommend you use a ‘Homeplug’ device, for example:
http://catalog.belkin.com
Note: a broadband connection is required. Dial-up internet connection is not sup-
ported.
Please ensure that the disc slot is not obstructed. When a disc has been
recorded, it is automatically ejected from the slot. If the slot is blocked
when the disc is ejected, this can result in damage to the drive.
musicm8 Default Settings
Your musicm8 has been precongured with XiVA’s recommended default settings,
for ease of use and quick set up.
Default Encoder Settings: MP3 320 kbps
musicm8 Default Shares
\\musicm8\shared\Muslc
\\musicm8\pictures
\\musicm8\shared\Playlists (used exclusively by Squeezecenter)
\\musicm8\video
\\musicm8\databackups
These settings can be changed and shares can be added and removed at any time
using the musicm8 web interface.
XiVA musicm8 User Guide
2
Set Up in 4 Quick Steps
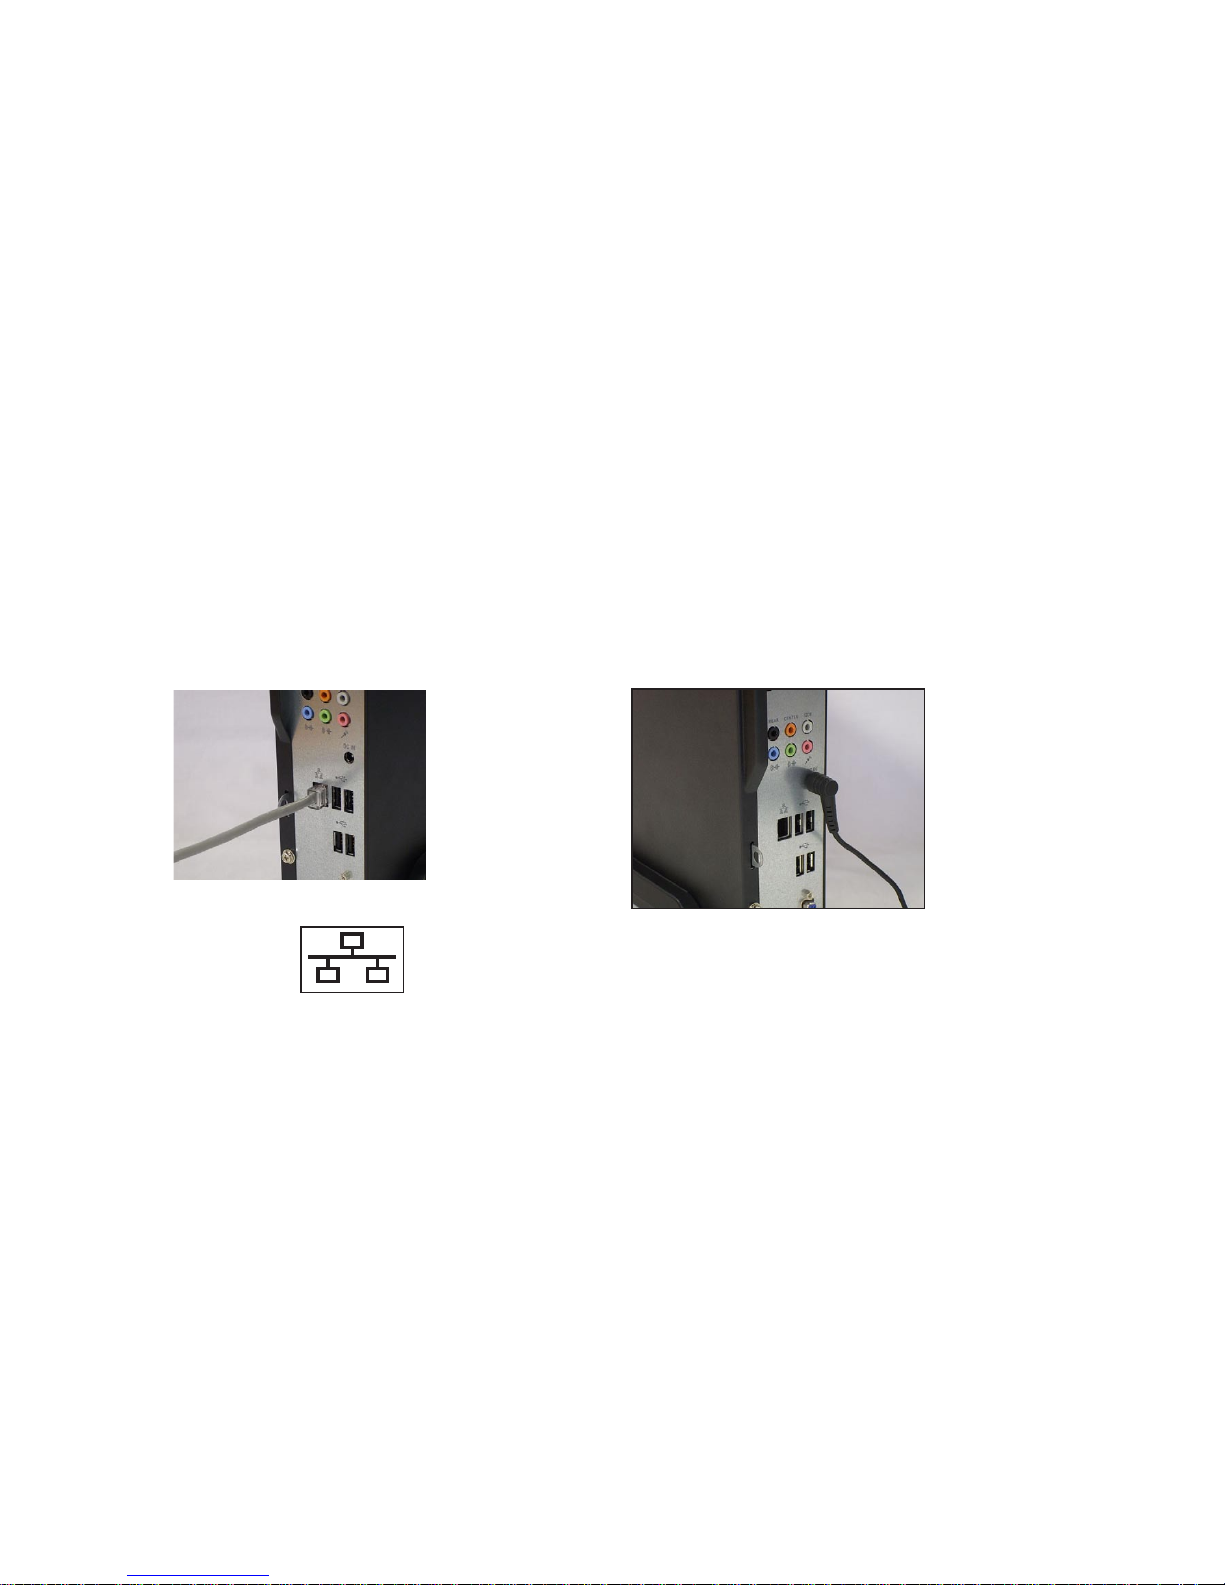
Step 1 - Connecting the unit up.
Connecting the Ethernet cable to the musicm8
Connect your supplied Ethernet cable to a spare port on your router.
Then connect it to your musicm8 as shown below. Do this before you plug the
power supply into your musicm8.
If you are unsure where to connect your Ethernet cable to your musicm8, the port
is marked on the back of your unit with the LAN network symbol
When connected, you should see a green light on your musicm8 network port.
Connecting the power supply to your musicm8
Connect your power supply to a mains power socket. (Plugs vary in each country)
Connect the power supply output to your musicm8 unit.
Your musicm8 power connection is labelled DC IN and is located near the middle
on the rear of your unit.
Note that the audio sockets (blue, green, orange, etc.) on the front and
rear of the unit are not used.
XiVA musicm8 User Guide
3
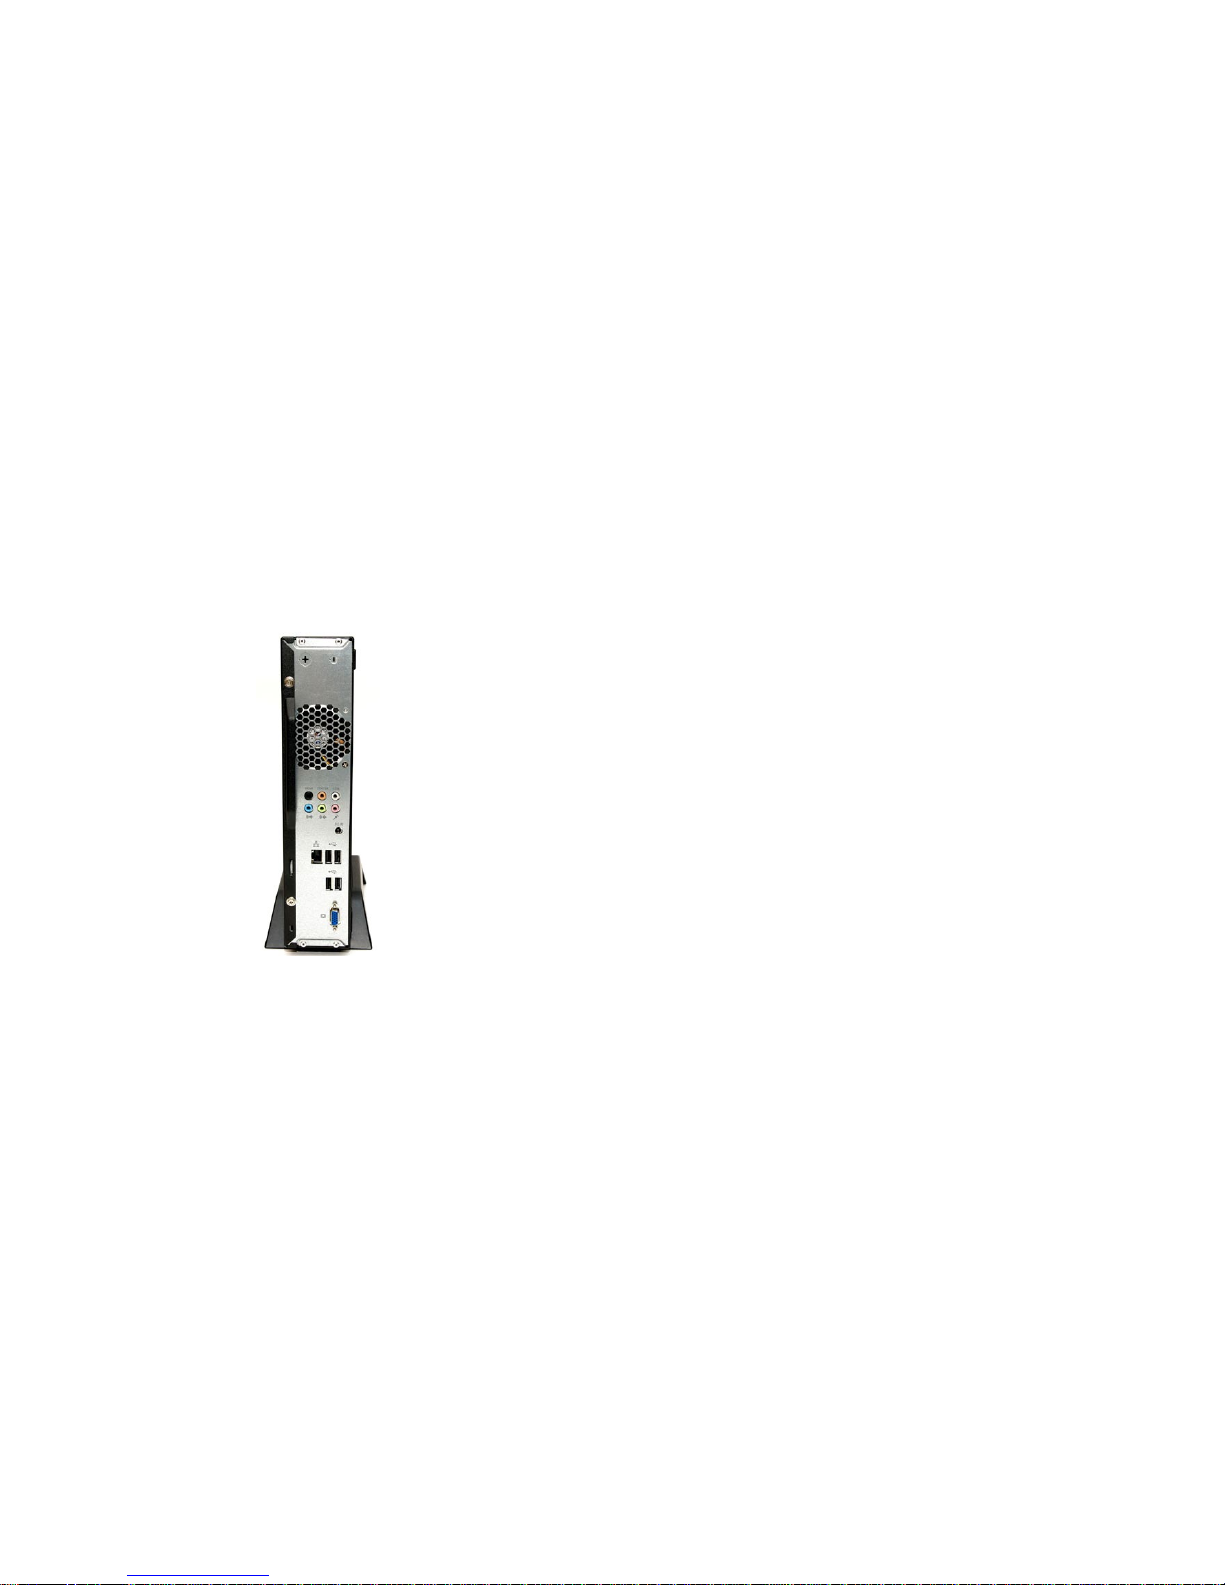
musicm8 Rear Panel
Note:
In most cases only the network LAN port connection will be used.
USB connections can be used to back up your media collection. See the Backup
section on page 10.
Use of the USB connections for any other purpose is not supported.
Power up your musicm8
Press the power button briey to turn on your musicm8.
The power button is located just below the cd slot on the front of the unit.
You will see the small, blue light on the front of the unit glow when it turns on.
After a few moments, your musicm8 will beep to let you know that it has started
up.
For most media players no further conguration of musicm8 is required.

XiVA musicm8 User Guide
4
Set Up in 4 Quick Steps
Step 2 - Optional
Congure your musicm8 with the web interface
Depending on your operating system and network setup, there are a few ways to
connect to the musicm8 web interface.
Open a web browser - Internet Explorer, Firefox, and Safari are all great
choices - and verify that you have an active Internet connection by visiting any
website (we recommend checking out www.XiVA.com).
Note: Google Chrome is not yet supported.
Then, in the location bar of your web browser, type “musicm8” (without
quotes) and choose “go” or hit enter on your keyboard. You will then be
prompted for a user name and password which is:
Username: admin
Password: musicm8
If you do not see the web interface appear in a few moments, try typing
“musicm8.local” or “//musicm8” into the location bar. Again; no quotes.
You may have to directly type the IP address of your musicm8 into the
location bar instead. If this is the case, and you don’t know your musicm8’s IP
address, you can download the XiVA IP Tool from:
XiVA.com/musicm8/downloads/musicm8iptool.zip
If the musicm8 web interface does not appear after following these
steps, please refer to the Troubleshooting Guide on page 32.
Step 3
Recording your rst CD with musicm8
Recording CDs is quick and easy - just insert the disc, with the label on the right,
into your musicm8 and walk away!
In a few minutes, your musicm8 will beep and gently eject the disc. A few moments after that, your CD will have been encoded and be available for playback via
your selected media player.
Make sure nothing is blocking the disc slot. If the unit ejects the CD and
the slot is obstructed, the drive could be damaged.
Out of the box, music will be recorded in MP3 format, compressed to 320kbps. If
you would prefer your music to be compressed and stored differently, please refer
to the Recording Settings section on page 26.
Note: recorded music may not show up immediately in your UPnP device such as
Twonky. This may be because your device is congured to scan for new media
too infrequently. For more information, please see page 33.
XiVA musicm8 User Guide
5
Set Up in 4 Quick Steps
Step 4 - Optional
Connecting to your musicm8’s shared folders
musicm8 is a server which makes your media available throughout your home.
It does this by storing and accessing your media through shared folders, as
well as letting you listen to your music through a wide range of media players.
After successfully connecting your musicm8 to your network, it’s easy to connect
to your musicm8’s shared folders.
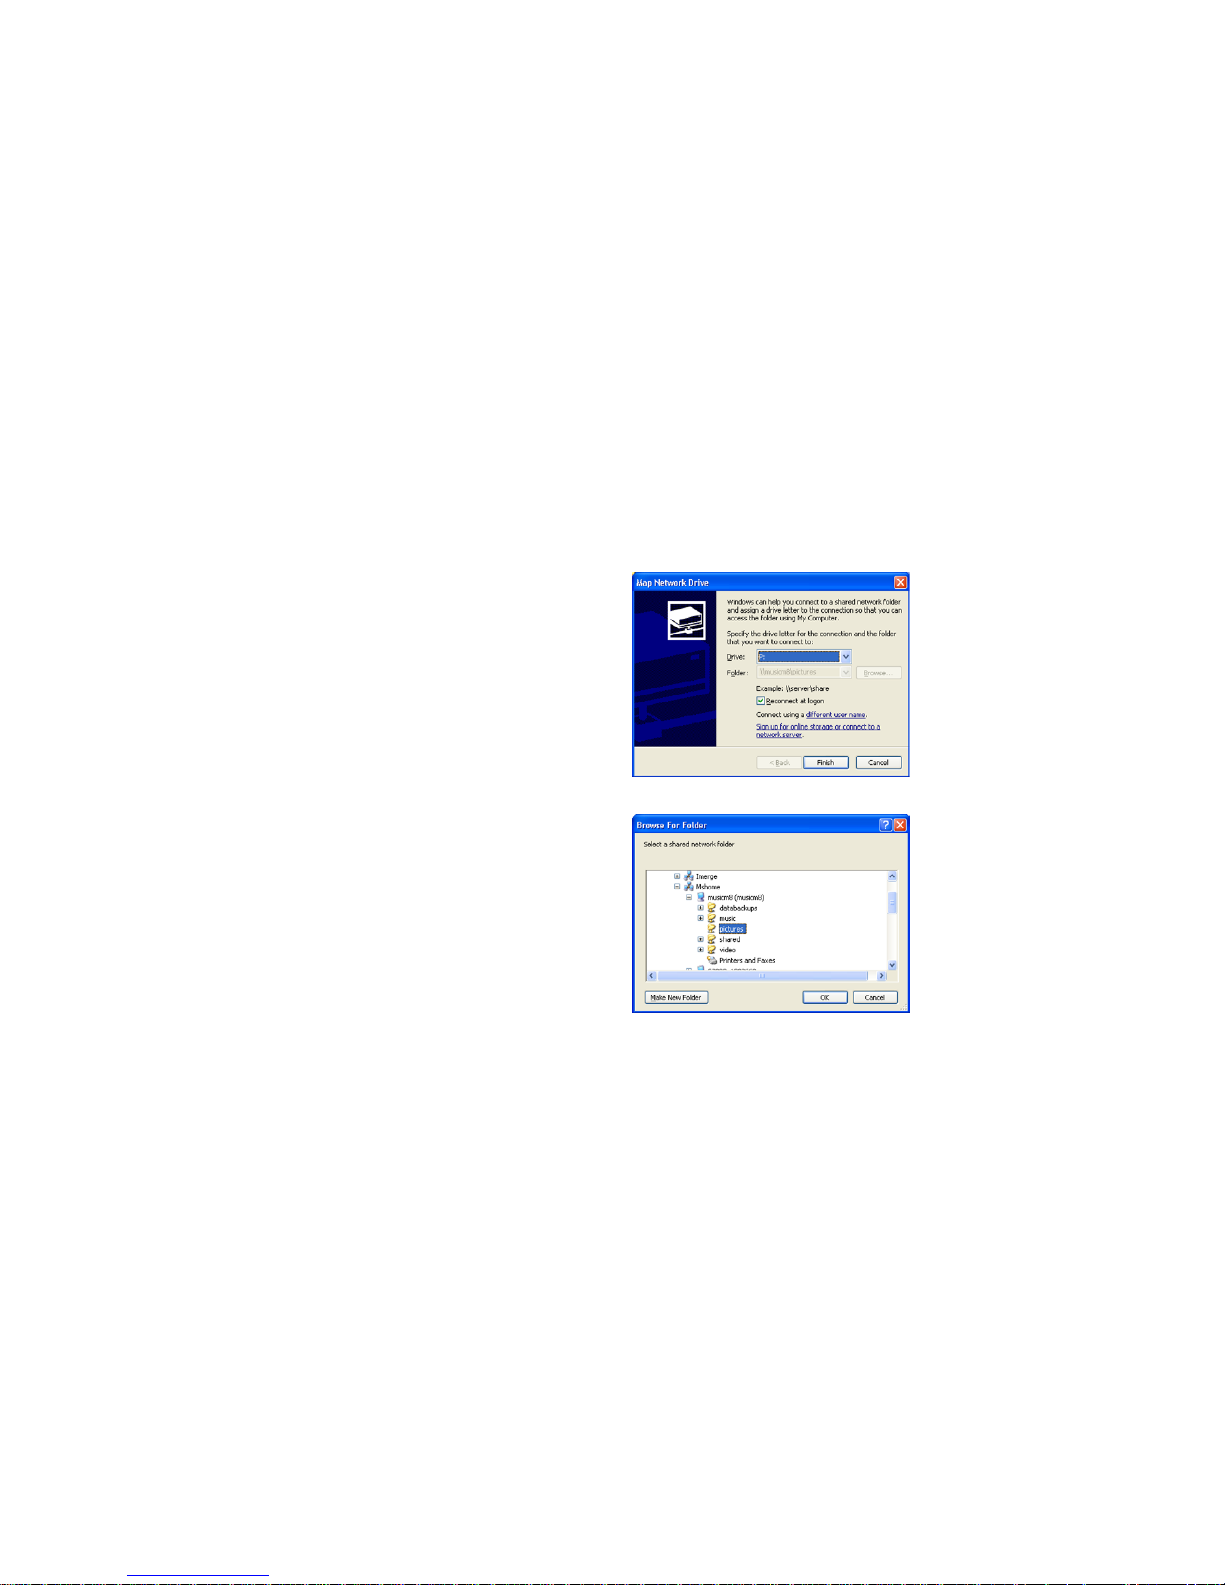
Microsoft Windows XP and Vista
For quick access to your shares, click My Computer and when Windows Explorer
opens, type \\musicm8 into the address bar. You will see folders with titles such
as Shared on musicm8 and Pictures on musicm8 listed.
For permanent, easy access, right-click on your chosen share. for example,
pictures, and select Map Network Drive.
Choose a drive letter, perhaps P: for pictures, from the drop-down list.•
The Folder box should show \\musicm8\pictures•
In the dialogue box that opens navigate to the share you want to become •
permanently available, in this case, pictures.
Click • OK to accept that and return to the Map Network Drive window.
Check the • Reconnect at logon box and then click Finish.

XiVA musicm8 User Guide
6
Simple Conguration Settings
Setting the Date and Time
Open the Miscellaneous menu and click Set date and time.
Set the system date and time by changing the values in the drop down menus and
clicking the Update button.
Switching Password Protection on and off
Open the NAS menu and click Password Off to turn it off, or Password On to
turn it on.
To Update your XiVA Software
From the Updates menu on the left sidebar, select Check for Updates to see if
there is a more recent version of the software for your musicm8.
To download and apply any available automatic updates, click Auto Updates.
When you then click Download and Apply All Updates the unit will update
itself to the latest version and reboot automatically.
To check for the latest software updates available for musicm8, click the Check
for Updates option on the left sidebar, or visit
http://www.xiva.com/musicm8
Follow the steps listed to download and install updates.
Now your pictures share will always appear in Windows Explorer as your P: drive.
Mac OS X
Navigate to your musicm8 by selecting Go from your desktop.
Select Connect To Server. You will be prompted to enter the address of
musicm8.
In most cases smb://musicm8 will take you to your musicm8 shared folders.
In some cases you may need to enter the IP address of
your musicm8. When prompted for the address type
smb://192.168.1.20 or whatever your musicm8 IP address is.
XiVA musicm8 User Guide
7
Using the Interface
Getting to the Interface is as simple as opening your browser and typing
musicm8. If you’re using a Mac, type musicm8.local. You will be prompted for
a username - admin - and password - musicm8.
The Home Page
Most of the major functions are in the basic menu; click Show Advanced Menu
to view all available options. Each is detailed within this manual.
Top Navigation Bar
View Photos – will open a photo gallery page with a slide show effect.
Play Music – will open the Fireplay music player to allow you to play all of your
music from any computer on your LAN. NOTE: this playout is password protected
with the password musicm8 – the username is admin.
The top navigation bar also allows you to congure and use the additional servers
installed on your musicm8 device. Please refer to Conguring Media Players
with your musicm8 on page 11 before changing these settings.
Twonky – Opens the Twonky vision pages should you need to set any advanced
options.
Squeezecenter – opens the Squeezecenter pages should you wish to change any
advanced options.
Firey – opens the Firey media server pages for advanced conguration of the
Fireplay music player.
Please ensure you know what you are doing when viewing the server pages –
changing these options from the precongured defaults could affect the perform-
ance of your system!
Startup
Your musicm8 has been designed to be completely reliable, especially if you take
advantage of the USB Backup feature. One aspect of ensuring this is that every
30 reboots, it performs a system check to ensure your media is safe and secure.
If you have a large media collection, this can take several minutes.

XiVA musicm8 User Guide
8
Browse Media
Located in the left sidebar, the Browse menu gives access to all the music, video
and pictures stored on your musicm8.
To access your music, select Browse Music from the menu. Your music collection
will be displayed in a directory listing all artists. To select an artist, click on their
name. Clicking on a track will open your favourite media player.
To download a track choose Save As.
For the best browsing experience, XiVA recommends using Squeezecenter or
TwonkyMedia, but you can use your preferred media player.
The Browse Playlist option is used exclusively by Squeezecenter.
Copying your music from your computer to musicm8
After connecting to your musicm8’s shared folders using the previous steps, it’s
easy to copy music already on your computer to the musicm8. By copying your
existing music to your musicm8 share you are now enabling your music to be
shared over your home network for playback via a wide selection of media players.
Simply select the les and/or folders you want to copy, copy them and paste them
into your musicm8 shared folder.
Windows 2000, XP, Vista
Go to the les or folders of music that you want to copy.•
Highlight your chosen le or les. If you need to highlight more than one, you •
can hold down the CTRL or Shift keys on your keyboard or drag a box around
the les you wish to copy.
Once highlighted, you can either right-click one of the highlighted les and •
select Copy, or if you’re in My Computer or Windows Explorer you can click
Edit at the top of the window and choose Copy.
Move to the • Shared folder on your musicm8 and either right-click in the folder
and choose Paste, or click Edit and Paste.
Mac OS X
Go to the les or folders of music that you want to copy.•
Highlight your chosen le or les. If you need to highlight more than one, you •
can hold down the Command (Apple) or Shift keys on your keyboard or drag a
box around the les you wish to copy.
Once highlighted, you can either right-click (Control-click) one of the high-•
lighted les and select Copy, or you can click Edit at the top of the window
and choose Copy.
Move to the • Shared folder on musicm8 and either right-click in the folder and
XiVA musicm8 User Guide
9
choose Paste, or click Edit and click Paste.
Using the Main Features
To Record a Disc:
Insert the disc into the drive; provided there is an internet connection, musicm8
will record it and then eject it automatically once the recording is complete.
Make sure the disc slot is not obstructed or it could be damaged when
the disc is ejected.
If the CD is not successfully looked up on the internet, it will appear in your music
library under Unknown.
To Backup
Connect your backup drive to any spare USB socket. There are USB sockets on
the back of the unit and also hidden behind the slim, spring-out panel on the
lower left front of the unit. Press and release the group of six small bumps near
the power switch to open the panel.
From the Main menu select Space. After about 30 seconds, when the screen
has refreshed, it will tell you whether or not your drive is compatible and has been
successfully connected.
Open the NAS menu, select Backup and press OK at the dialog box.
To set to Flac
Go to Advanced Menu > Encoding Options , check the Flac box and press
update.
To set up a Sonos system
From the Sonos Desktop Controller Music menu, select Set Up Music Library
and type //musicm8, then press OK.
To set up a Squeeze Box
Go to your Squeeze box > Settings > Music Library and hit OK when you see
‘musicm8’ displayed
To view in iTunes
Open iTunes and from the left panel select musicm8. All of your iTunes-compat-
ible music will be displayed.
Add a favorite podcast feed
From Basic Menu > Manage Podcasts, copy and paste your feed into the text
box and hit Add.
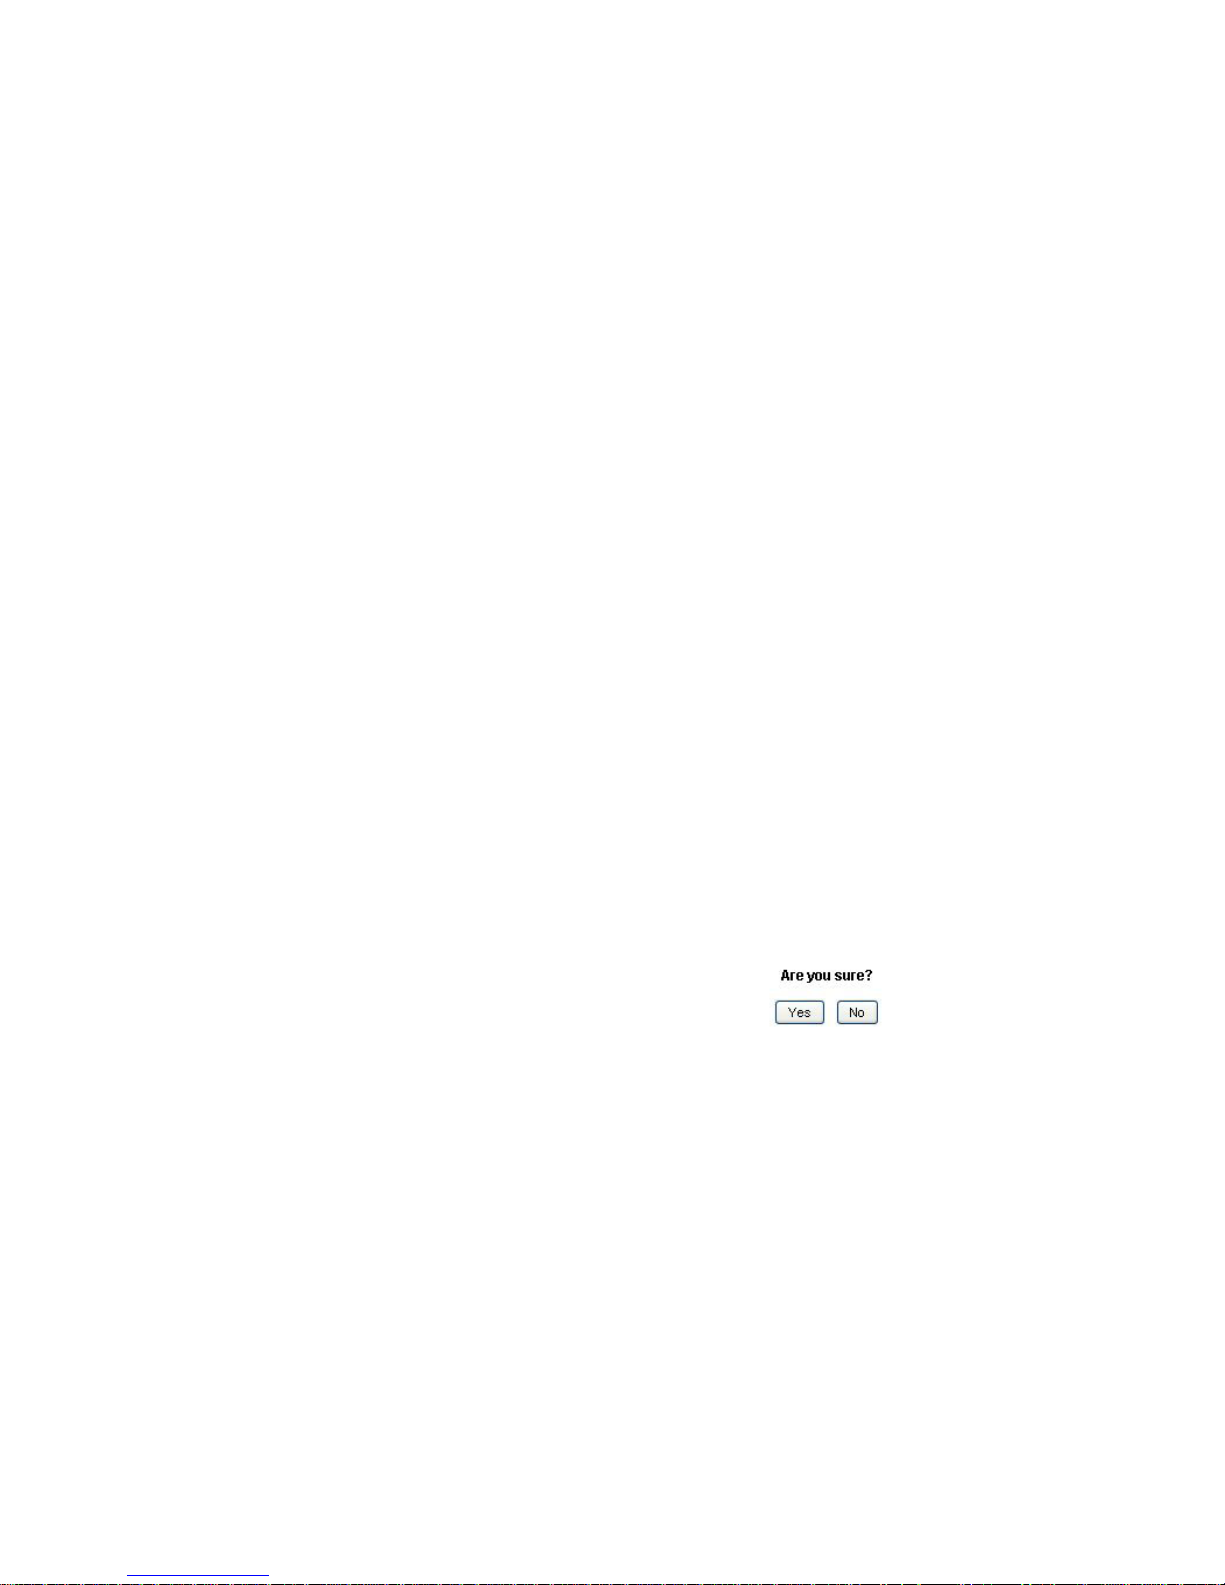
Power Off
This option allows you to power off your musicm8.
You will be prompted for conrmation. To power off click Yes.
To return to main menu select No.
XiVA musicm8 User Guide
10
Backing Up and Recovery
IMPORTANT: It is your responsibility to maintain a backup of the media
content held on the musicm8.
Backup
Backup musicm8 allows you to perform a complete backup of you musicm8
contents to a USB hard drive.
To perform a back up you must rst connect a USB hard drive. You may use most
off the shelf USB devices formatted as FAT32.
Most USB drives come preformatted as FAT32 but check with your manufacturer if
you are unsure.
Select Space from the Main menu to see whether your drive is compatible.
On the Main menu, click NAS and select Backup Now.
Select Backup Now?
You will see the message Backing Up musicm8...
Please be patient as this may take a long time. You can continue to use the
musicm8 while the backup is running.
To view progress, just click the Space option on the menu and you will see a
progress bar.
All les will be backed up to a folder called musicm8 on your selected USB hard
drive.
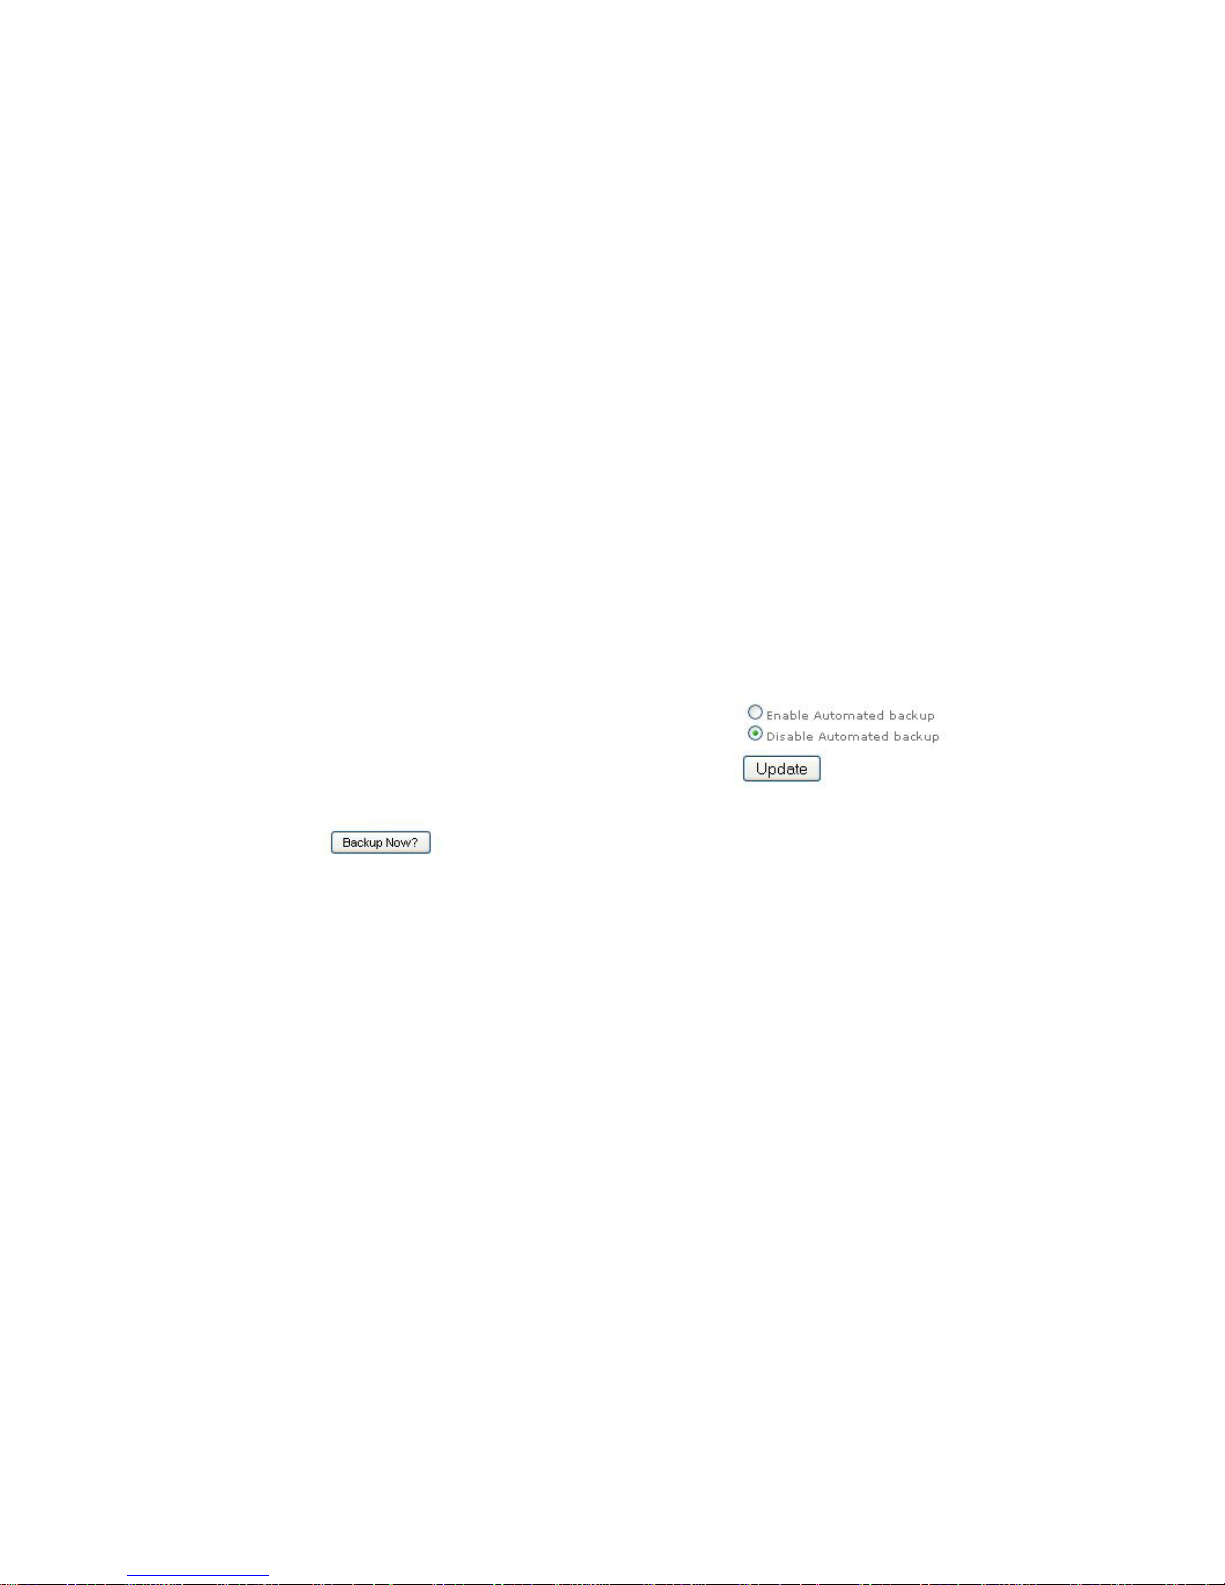
Automated Backup
Your musicm8 can perform a scheduled backup your media to a USB hard drive
formatted as FAT32. When Automated Backup is enabled for the rst time, your
musicm8 will back up its complete contents to the USB hard drive. Please allow
time for this process to complete.
Once the initial backup is complete, your musicm8 will check every 15 minutes for
new or changed les and back them up automatically.
Select Automated Backup from the NAS menu. Check the Enable Automatic
Backup radio button.
Recovery
Recovery is as simple as a Drag ‘n Drop.
Plug the USB drive to which you backed up your media, into your personal •
computer.
Open Windows Explorer (the Finder on a Mac) and navigate to the USB drive.•
Select the media you want to recover.•
Either drag it to the required location on your musicm8 or copy and paste it. •
Your musicm8 should appear as another drive to which you can navigate.
Once your media have been copied, you can continue to use them as before.•
Further information about accessing shared folders can be found in the
Connecting to your musicm8’s shared folders section on page 5.
XiVA musicm8 User Guide
11
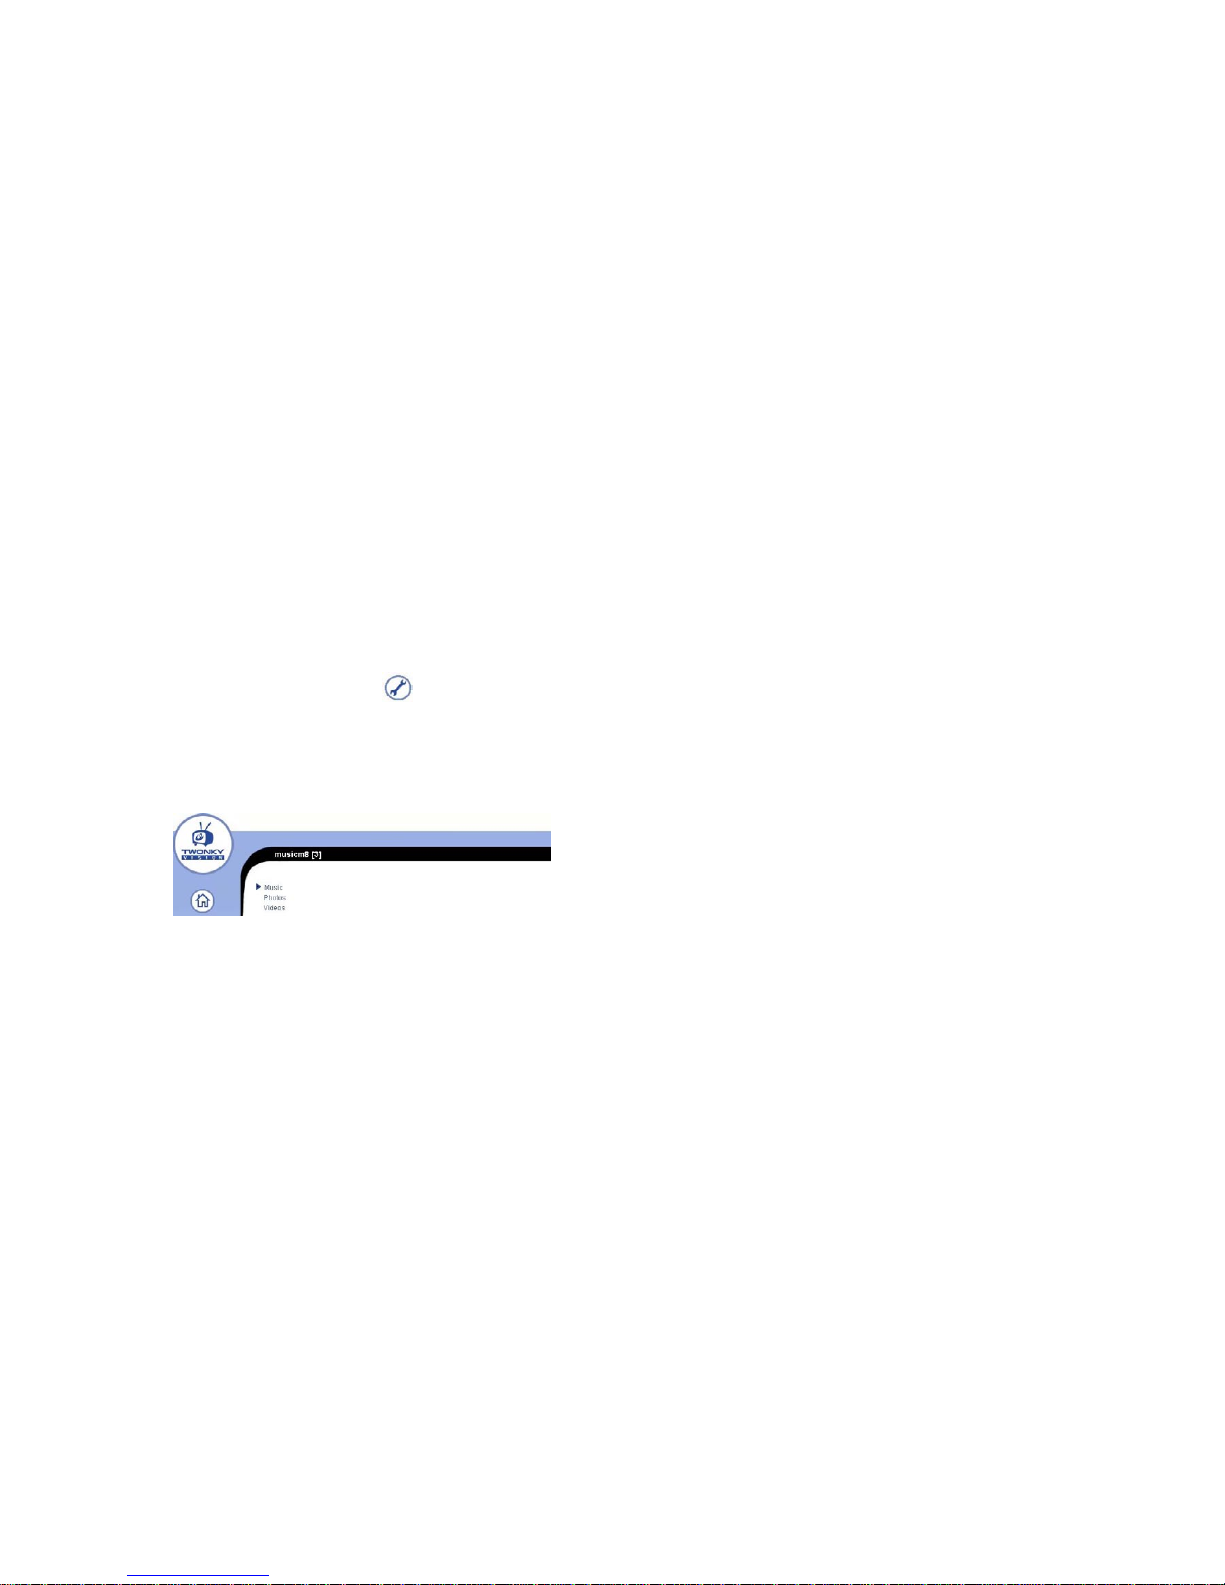
Conguring Media Players
TwonkyMedia
Note: Twonky is pre-congured. No additional conguration is required to serve
your music to a wide selection of media players. However, you may wish to have
Twonky scan the musicm8 for recently added media les more or less often.
Select • Twonky from main musicm8 web interface.
On the Twonky Home Page, click the • spanner icon.
Twonky Server set up page will be displayed.•
From the Twonky Server set up menu select • Sharing from the Basic Set Up
tab.
Content Location 1 will be listed with the default path to your musicm8 music •
share: /media/Music
If you wish to add another collection click • Browse on Content location eld 2.
Browse to the collection you want to add.•
Select • Rescan Content Directories and then Save Changes.
Twonky Server is now congured.
Twonky has been congured to rescan your music collection every 5 minutes to
allow for optimal user convenience.
You can manually congure your rescan interval by selecting Server Set Up
then select Sharing from the Basic Set Up tab. Here you will see the Rescan
in Minutes menu. Enter the interval in minutes that you want Twonky to rescan
your selected folders.
Notes:
Reducing the rescan interval too much might degrade performance of your •
musicm8.
Twonky only rescans for new media at the rescan interval. As a result, there •
can be a delay between recording media and its showing as available to your
media players.
You can nd which version of Twonky you are currently running from the main
Twonky UI.
Further Twonky setup information and troubleshooting steps are available from the
Support section of the Twonky Media web interface.
 Loading...