


Micro Dome IP
XIP- MD01 TIGER
User’s Manual
Ver. 1.7

1
Table of Contents
1. Overview ................................................................................................................................ 2
1.1 Features ...................................................................................................................... 2
1.2 Package Contents ....................................................................................................... 3
1.3 Dimensions .................................................................................................................. 4
1.4 Installation (For Rugged Camera) ................................................................................ 5
1.5 Connectors .................................................................................................................. 7
2. Camera Cabling ..................................................................................................................... 8
2.1 Connect Ethernet Cable............................................................................................... 8
2.1.1 Indoor Camera ............................................................................................. 8
2.1.2 Rugged Camera ........................................................................................... 9
3. System Requirements ............................................................................................... 11
4. Access Camera ................................................................................................................... 12
5. Setup Video Resolution ...................................................................................................... 15
6. Configuration Files Export / Import ................................................................................... 16
Appendix A: Technical Specifications ................................................................ ...................... 17
Appendix B: Delete the Existing DC Viewer .............................................................................. 23
Appendix C: Setup Internet Security ......................................................................................... 24

2
1. Overview
The Full HD Multiple Streams Compact Fixed Dome IP TIGER, Camera is
capable of serving real-time streaming and makes image quality more smoothly.
In addition to MJPEG real time streaming, this camera develops H.264 codec to
apply for high resolution digital broadcast. With compact and sophisticated
mechanical design, the Full HD Multiple Streams Compact Fixed Dome IP
Camera is easy installed and aesthetic.
1.1 Features
Progressive Scan CMOS Sensor
Quad Stream Compression-
H.264 Baseline / Main / High Profile + MJPEG
Multi-language Support
Tampering Alarm
Wide Dynamic Range
Motion Detection
Privacy Masks
Smart Picture Quality / 3D Noise Reduction
Vertical View Mode (Image rotation by 90 degrees)
Network Failure Detection
Weatherproof Dongle Cable*
Weatherproof (IP66 international)*
MicroSD Support
ONVIF Support
(*) Optional
3
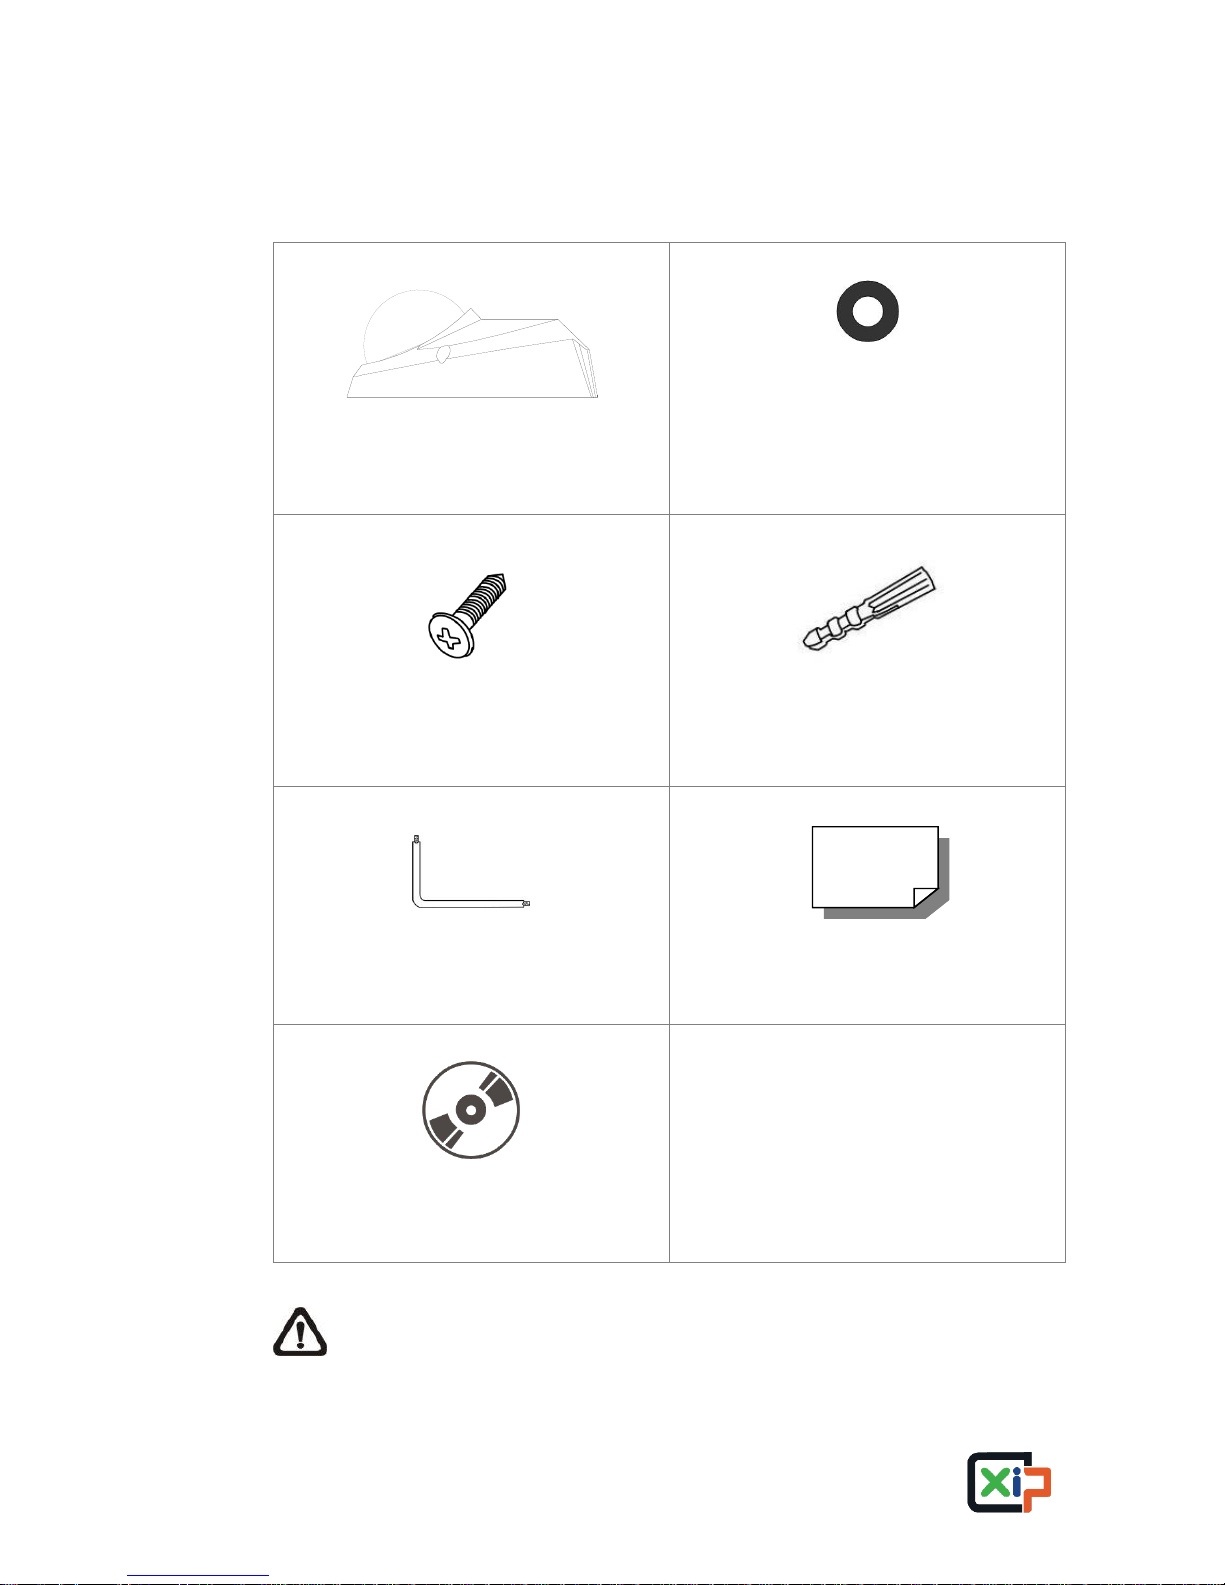
1.2 Package Contents
Please check the package contains the following items listed below.
Indoor Camera /
Rugged Camera (with Cable)
Rubber Washer (x1, Casing)
Rubber Washers (x3, Baseplate)
(Rugged Camera only)
Self-tapping screws (x3)
Plastic Anchors (x3)
Security Torx
Quick Guide
CD
NOTE: The supplied self-tapping screws are for soft substances /
materials such as wood. For other installation environments such as
cement wall, it is required to pre-drill and use plastic anchors before
fastening the supplied self-tapping screw on the wall.

4
1.3 Dimensions
The dimensions of the camera are shown below.
5
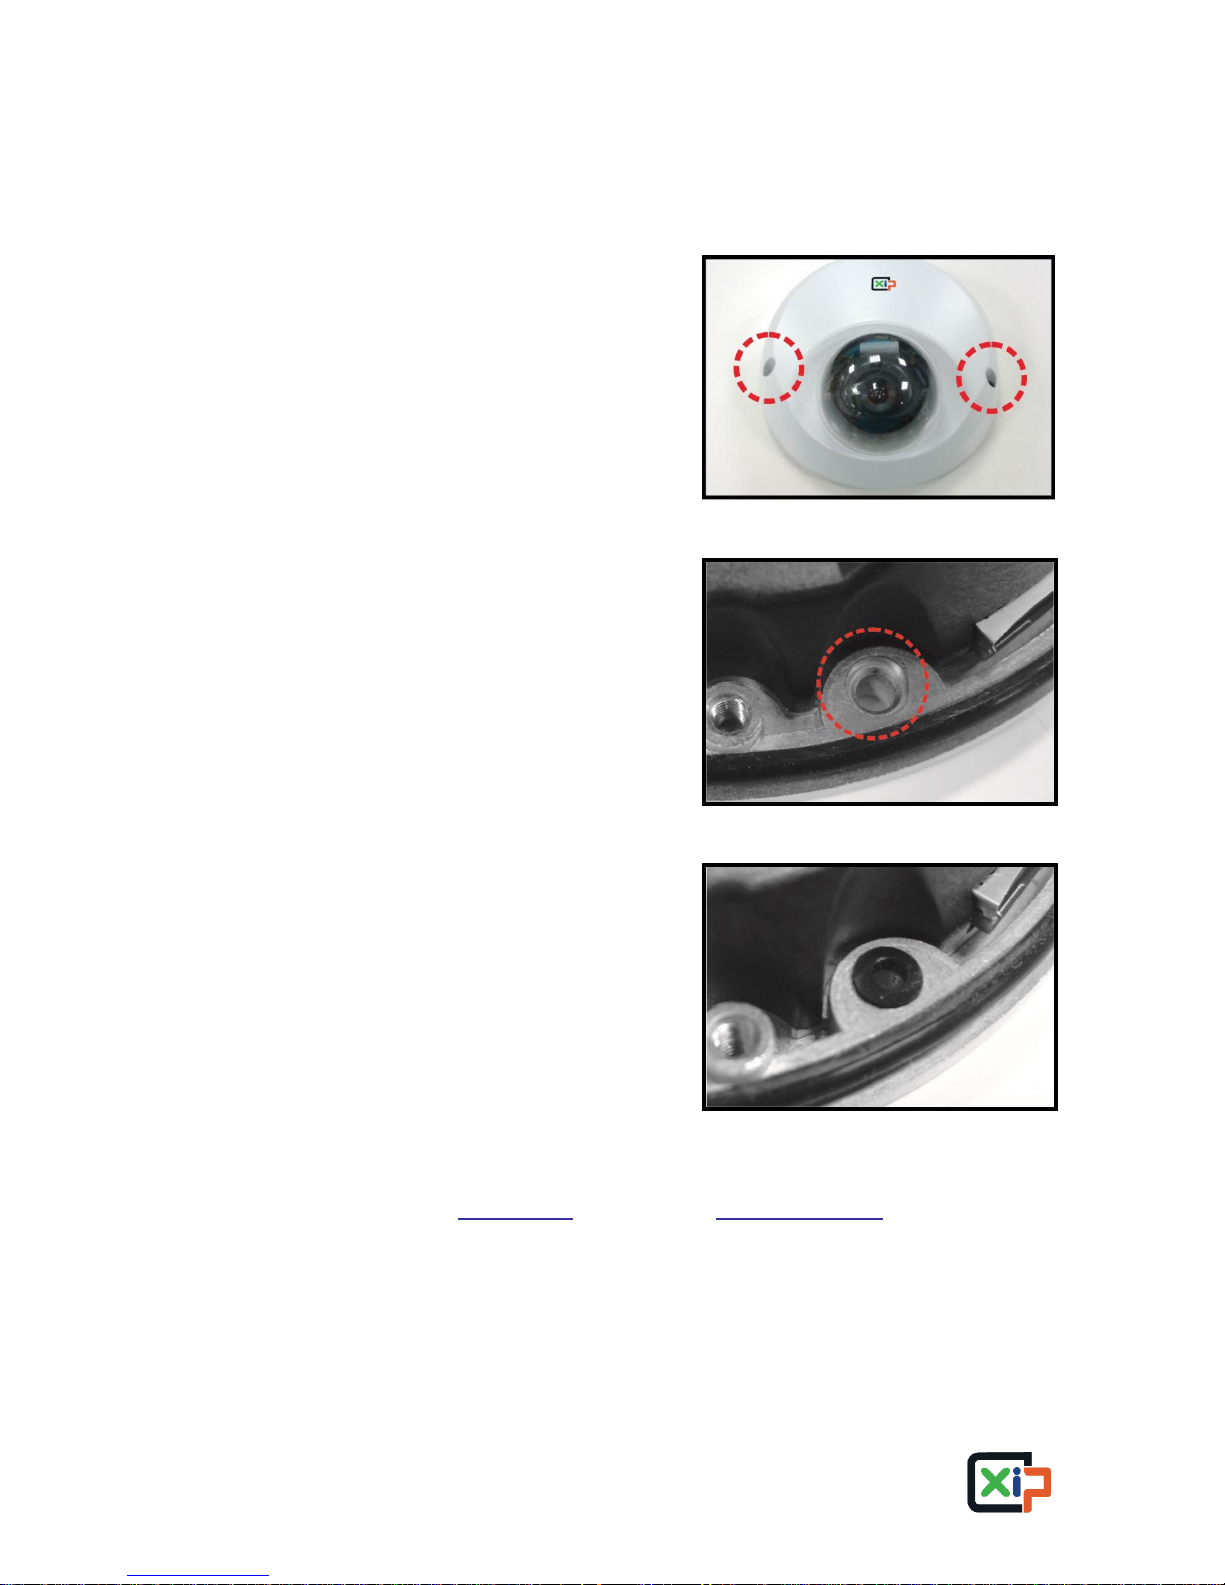
1.4 Installation (For Rugged Camera)
Please follow the steps below to install the rugged camera.
Step 1:
Loosen the two security screws of the
camera and detach the dome cover.
Step 2:
At the two sides of the base plate, place
a rubber washer on the screw hole
shown in the right figure.
Step 3:
Place the camera at the installation
location. Then attach the camera to the
ceiling by fastening the supplied screws
to the screw holes with the rubber
washers.
Step 4:
Refer to section Connectors and chapter Camera Cabling for camera lens
adjustment and cable connection.

6
Step 5:
Attach the dome cover back to the
camera and fasten the two security
screws.

7
1.5 Connectors
The diagram below shows the reset button, lens, microSD card slot and various
adjusting screws of the camera. Definition for each will be given as follows.
No.
Designation
Description
1
Reset Button
Press the button with a proper tool for at least 20
seconds to restore the system.
2
Lens
Rotate the lens right/left to adjust focus
3
Focus Fixed Screw
Loosen the screw to adjust the lens
4
Tilt Fixed Screw
Loosen the screw to adjust tilt angle
5
microSD Card Slot
For video recording storage
NOTE: It is not recommend to record with the microSD card for 24/7
continuously, as it may not be able to support long term continuous data
read/write. Please contact the manufacturer of the microSD card for
information regarding the reliability and life expectancy.
 Loading...