

Ximeta NetDisk Mini MNU10-40, NetDisk NDC10-120, NetDisk Mini MNC10-80, NetDisk Mini MNU10-80, NetDisk NDC10-160 User Manual
...
User Manual
For Windows 2000/XP and Windows 98 SE/ME
NetDisk, NetDisk Mini & NetDisk Office
Powered by Technology
www.XIMETA.com

NetDisk® User Manual NetDisk Direct Attached Storage / NDAS®
XIMETA, Inc.
15251 Alton Parkway
Irvine, CA 92618
United States of America
(949) 753-7900
Software Release Statement
NetDisk User Manual for Windows XP, Windows 2000, Windows ME and Windows 98 SE
Software Version 2 and 3, released 2004, made in the U.S.A.
Trademark Statement
NetDisk® , NDAS® and XIMETA™ are trademarks of XIMETA, Inc., registered in the U.S.A
and other countries. All other trademarks are the property of their respective owners.
Copyright Statement
Copyright © 2003 – 2004 XIMETA, Inc. All rights reserved world. Reproduction, translation,
transformation or adaptation in any manner without prior written permission of XIMETA, Inc. is
strictly prohibited.
License Statement
The software described in this document is furnished under a license agreement. The software may be used only in accordance with the terms of the license agreement
Warranty Statement
XIMETA, Inc. reserves the right to revise this publication and to make changes to the content
hereof without the obligation of XIMETA, Inc. to notify any person of such revision or changes.
XIMETA, Inc. provides this publication “as is” without warranty of any kind, either express or
implied, including but not limited to the implied warranties of merchantability or fitness for a
particular purpose.
XIMETA, Inc 2 www.XIMETA.com

NetDisk® User Manual NetDisk Direct Attached Storage / NDAS®
Table of Contents
1 Introduction ···················································································································4
1.1 User Manual ...........................................................................................................4
1.2 NetDisk / NetDisk Mini / NetDisk Office Models Covered By This User Manual ...........4
1.3 Package Contents ...................................................................................................4
1.4 System Requirements .............................................................................................5
1.5 NetDisk Setup Overview .........................................................................................5
2 Cable Installation ··········································································································· 6
2.1 NDAS Mode ...........................................................................................................6
2.2 USB Mode ..............................................................................................................7
3 NetDisk Software Installation ·························································································8
3.1 For Windows XP and Windows 2000 ........................................................................8
3.2 For Windows 98 SE and Windows ME .....................................................................8
3.3 NetDisk Administrator ..............................................................................................9
4 NetDisk Registration ···································································································· 10
4.1 Add / Register a New NetDisk ................................................................................ 10
4.2 Using NetDisk ....................................................................................................... 11
4.3 Sharing NetDisk .................................................................................................... 12
5 NetDisk Status and Mode Indicator ·············································································· 13
5.1 Changing from Read / Write Mode to Read Only Mode ............................................ 14
5.2 Changing from Read Only mode to Read / Write Mode ............................................ 14
6 Introduction to NetDisk Administrator Tool Menu ························································ 15
7 NetDisk Functions ······································································································· 15
8 Advanced NetDisk Functions ······················································································· 16
8.1 Introduction to Aggregation .................................................................................... 16
8.2 Introduction to Mirroring ......................................................................................... 16
8.3 Requirements for Aggregating / Mirroring ................................................................ 16
8.4 Instructions for Aggregating / Mirroring Two NetDisks .............................................. 16
8.4.1 Disable NetDisk ..................................................................................... 16
8.4.2 Aggregate / Mirror NetDisk ..................................................................... 17
8.4.3 Enable NetDisk ...................................................................................... 18
8.4.4 Format NetDisk ...................................................................................... 19
8.4.5 Enable NetDisk for Other Users .............................................................. 19
8.4.6 Unbind NetDisk ...................................................................................... 19
9 Formatting NetDisk ······································································································ 21
9.1 Initialize NetDisk ................................................................................................... 21
9.2 Partition NetDisk ................................................................................................... 22
10 NetDisk Uninstall ········································································································· 24
10.1 Uninstall …………………………………………………………………………………………24
11 FAQ ······························································································································ 25
12 Troubleshooting ·········································································································· 34
13 Regulatory Statements ································································································ 39
14 Product Warranty ········································································································· 40
15 Additional Information and Assistance ········································································ 44
XIMETA, Inc 3 www.XIMETA.com

NetDisk® User Manual NetDisk Direct Attached Storage / NDAS®
Chapter 1 Introduction
Congratulations on your purchase of NetDisk / NetDisk Mini / NetDisk Office.
- Network storage via Ethernet made possible through NDAS technology!
1.1 User Manual
- This User Manual is intended to help you install the NetDisk product(s) quickly and easily
onto your Personal Computer or Ethernet Network and begin using it immediately.
1.2 NetDisk / NetDisk Mini / NetDisk Office Models Covered By This User Manual
This User Manual includes information on the following models:
NetDisk
- NDU10-80
- NDU10-120
- NDU10-160
- NDU10-250
- NDC10-80
- NDC10-120
- NDC10-160
- NDC10-250
NetDisk Mini
- MNU10-40
- MNU10-80
- MNC10-40
- MNC10-80
NetDisk Office
- NOU10-120
- NOC10-120
1.3 Package Contents
The following items are included in the NetDisk / NetDisk Mini / NetDisk Office packages:
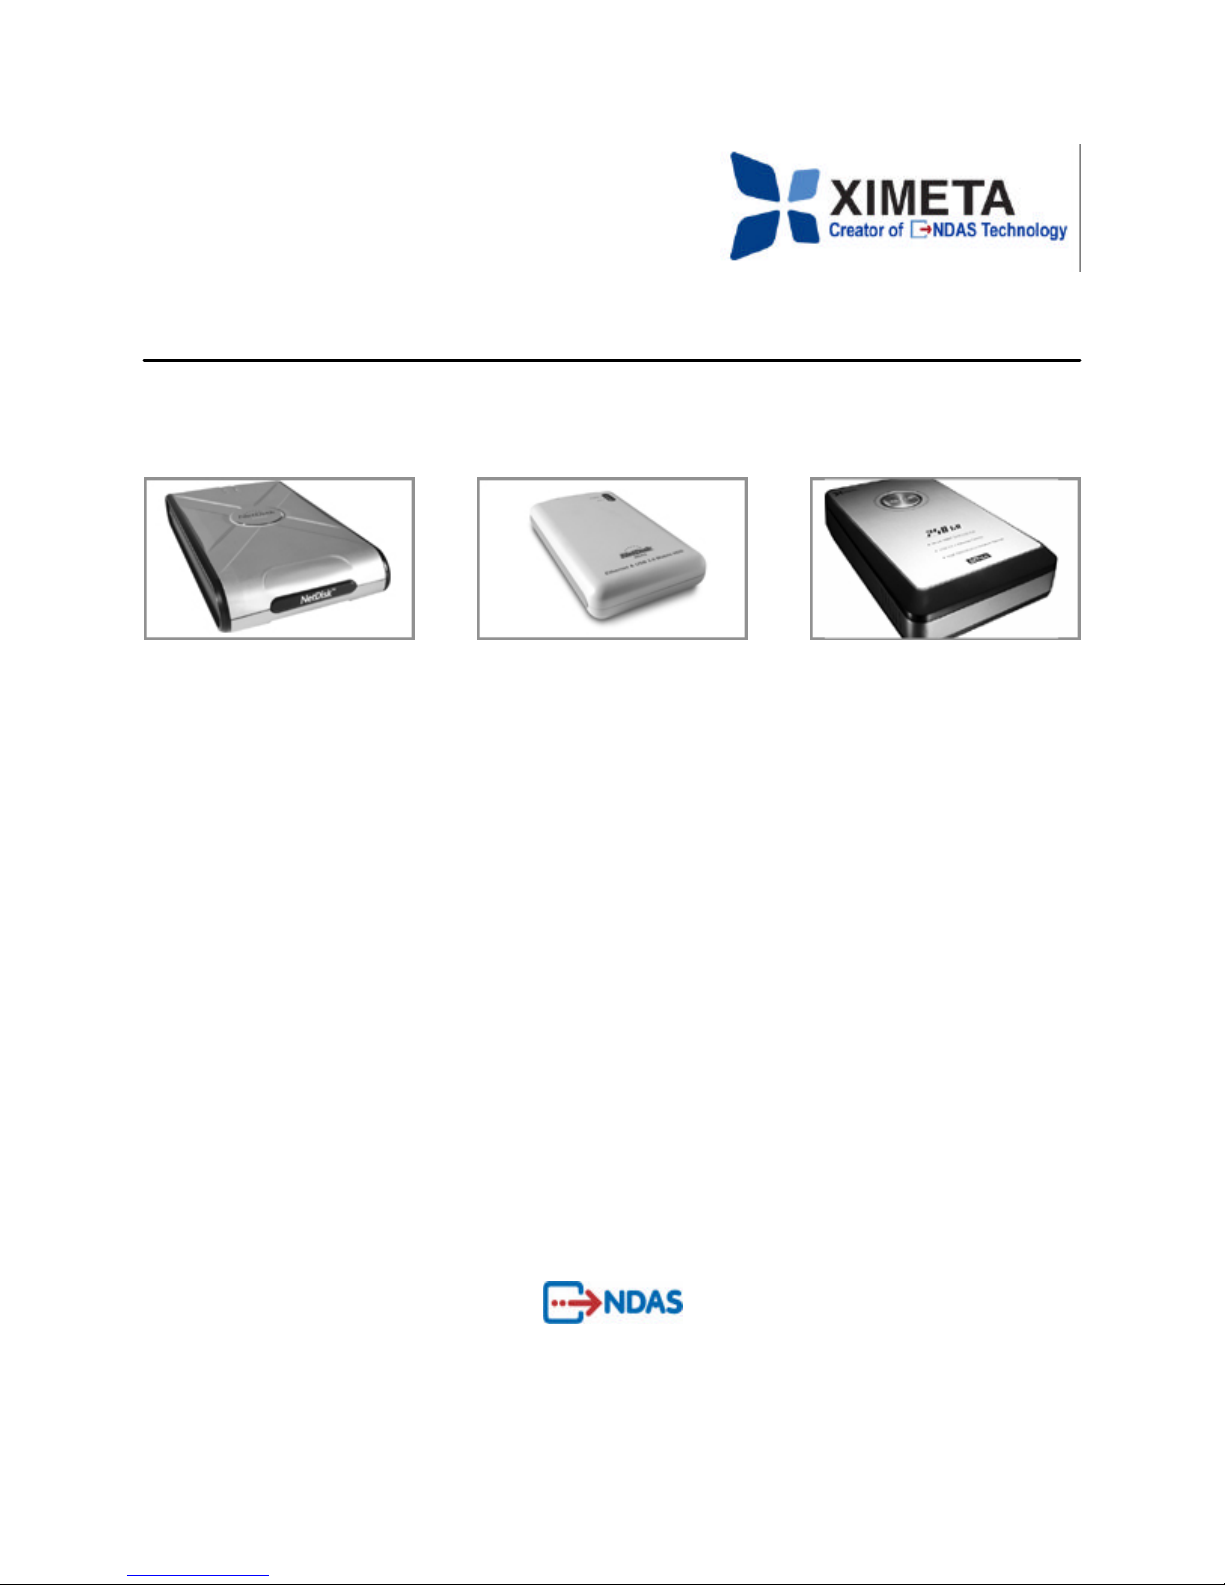
NetDisk Office NetDisk Mini NetDisk
or or
Software Installation CD
Ethernet Cable
XIMETA, Inc 4 www.XIMETA.com
Power Adapter and Power Cord
USB Cable
NetDisk® User Manual NetDisk Direct Attached Storage / NDAS®
1.4 System Requirements
Windows® 98SE / ME / 2000 / XP
- 233 MHz Pentium® II or higher
- 64 MB RAM (128 MB recommended)
- USB 1.1 Port (USB 2.0 recommended)
- CD-ROM drive for installation
- 100Base-T full duplex switch for NDAS mode (for NetDisk and NetDisk Mini Only)
Mac® OS X
- Mac OS X 10.3 or greater
- 128 MB RAM (256 MB recommended)
- USB 1.1 Port (USB 2.0 recommended)
- CD-ROM drive for installation
- 100Base-T full duplex switch for NDAS mode (for NetDisk and NetDisk Mini Only)
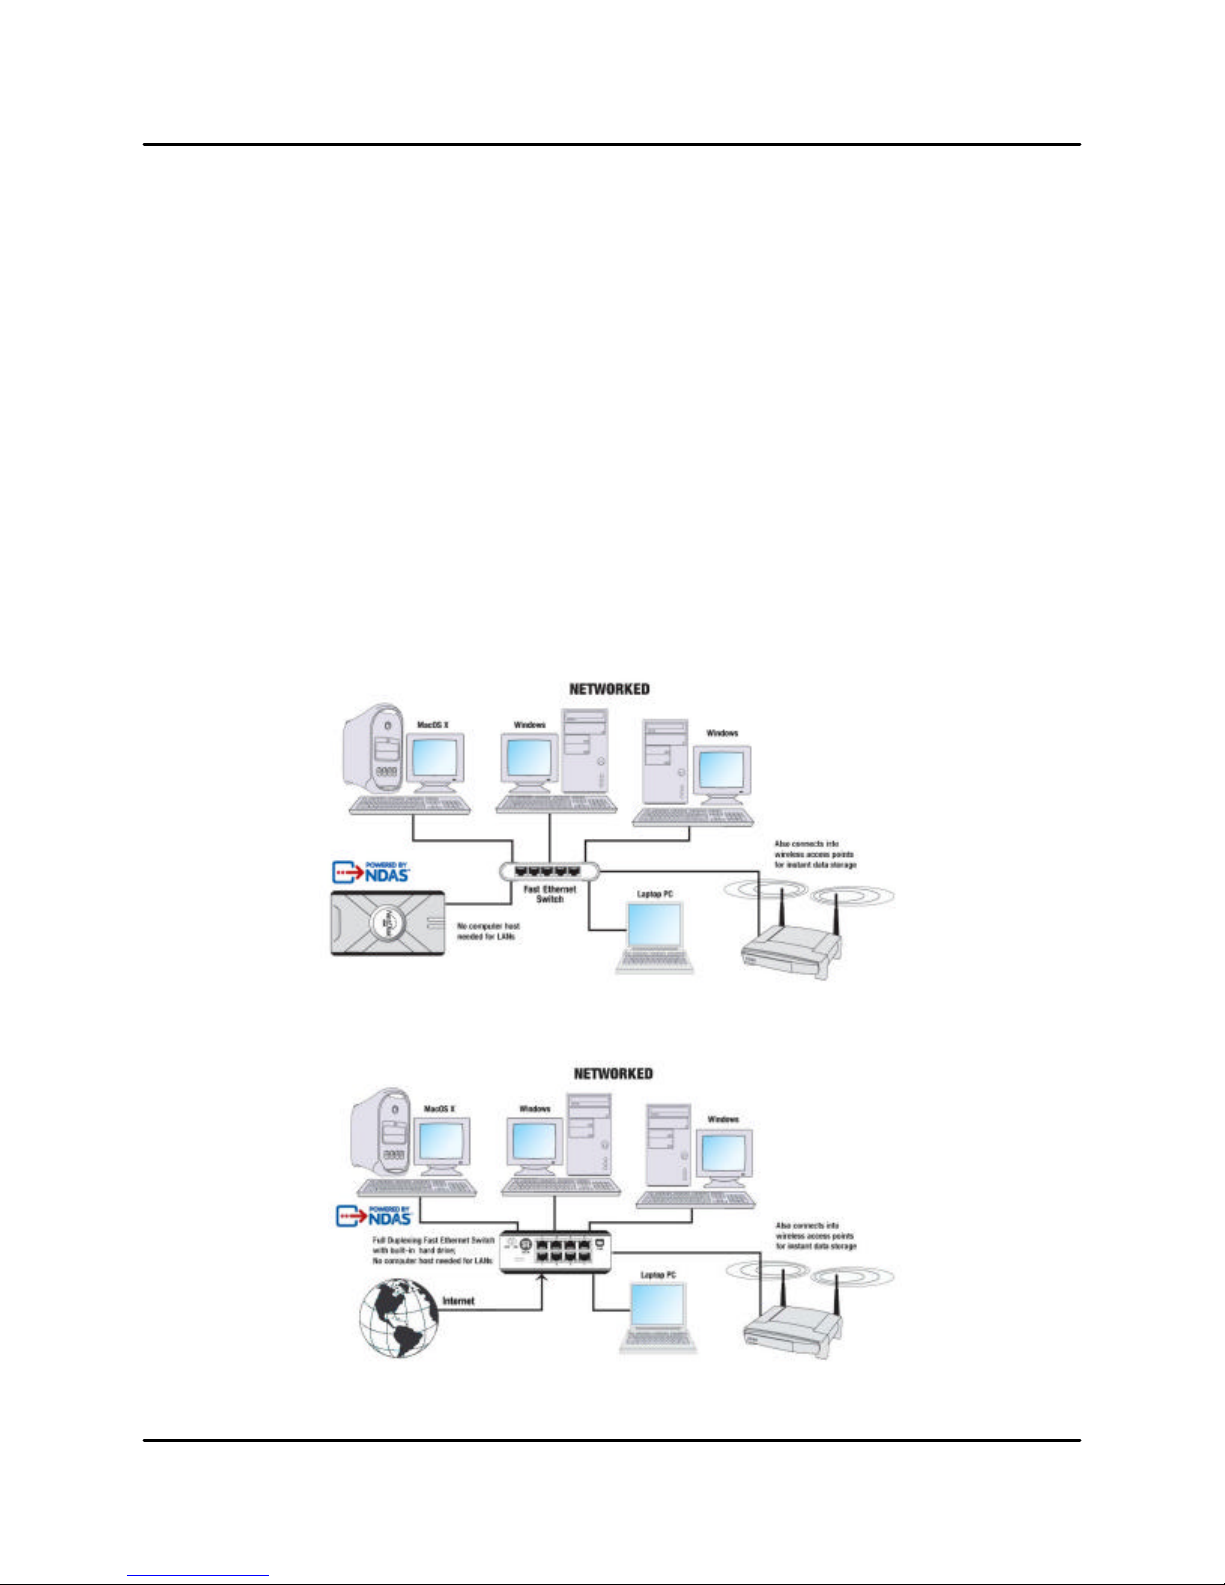
1.5 NetDisk Setup Overview
NetDisk / NetDisk Mini
NOTE: NetDisk Office includes a built-in switch.
XIMETA, Inc 5 www.XIMETA.com
NetDisk Office

NetDisk® User Manual NetDisk Direct Attached Storage / NDAS®
Chapter 2 Cable Installation
Warning
- Do not connect USB cable and Ethernet cable at the same time.
2.1 NDAS Mode
NetDisk and NetDisk Mini
1. If your NetDisk has dip switches on the rear panel, flip both dip switches down.
2. Connect the included Ethernet cable from the Ethernet port on NetDisk to a switch
(100 Base -T).
Wireless users: Connect NetDisk to your wireless router or access point
with included Ethernet cable.
3. Make sure the power connector is firmly attached to the NetDisk and connect the
power adapter to a power source.
4. If your NetDisk has an On/Off switch, slide the On/Off Switch to ON position.
NetDisk Office
1. Connect your Local Area Network (LAN) cable to one of the eight NetDisk Office
Switch ports. This connection provides network access from your LAN or router to
the NetDisk Office.
2. Connect the included Ethernet cable from one of the Switch ports on NetDisk Office
to your PC.
Wireless users: Connect NetDisk to your wireless router or access point
with included Ethernet cable.
2. Make sure the power connector is firmly attached to the NetDisk and connect the
power adapter to a power source.
4. Slide the On/Off Switch to ON position.
XIMETA, Inc 6 www.XIMETA.com

NetDisk® User Manual NetDisk Direct Attached Storage / NDAS®
2.2 USB Mode
NetDisk and NetDisk Office
1. If your NetDisk has dip switches on the rear panel, flip both dip switches up.
2. Connect the included USB cable from USB port on NetDisk to your PC’s USB port.
3. Make sure the power connector is connected firmly to the NetDisk and connect the
power adaptor to a power source.
4. If your NetDisk has an On/Off switch, slide the On/Off Switch to ON position.
NetDisk Mini
Without external power
1. Connect the included USB cable from the USB port on NetDisk Mini to your
PC’s USB port(s). To ensure continuous power flow please connect both connectors with your host computer.
2. Slide the On/Off switch to OFF position.
With external power
1. Connect the included USB cable from the USB port on NetDisk Mini to your
PC’s USB port(s). Only one cable is required to be connected with your host
computer when using an external power source. It does not matter which connector you choose to connect.
2. Slide the On/Off switch to ON position.
XIMETA, Inc 7 www.XIMETA.com

NetDisk® User Manual NetDisk Direct Attached Storage / NDAS®
Chapter 3 NetDisk Software Installation
3.1 For Windows XP and Windows 2000
Installation of NetDisk software is simple and easy. Insert the included “NetDisk Installa
tion CD” into your CD-ROM Drive and select the Drive Sharing and NetDisk Mode. Easy
and simple instructions will guide you through the installation.
NetDisk Mode:
NDAS Mode
- Select NDAS Mode to share NetDisk
with users on the network
USB 2.0 Mode
- Select USB Mode to use NetDisk as
a portable external HDD for your PC
Drive Sharing Mode: Select a Drive Sharing Mode that is best for your environment.
Multi-OS Mode:
- NetDisk can be shared by a mixed net -
work of Windows 98/ME/2000/XP and
Mac computers
- Multiple PCs can have Read Only
access simultaneously
- Write access is assigned to one user at
a time and is passed from one user to
another
- Fastest performance
Multi-Write Mode:
- Windows XP/2000 only environment
- Multiple PCs can have Read and Write
access simultaneously
3.2 For Windows 98 SE and Windows ME
For the latest software and drivers, visit www.XIMETA.com
NDAS Mode
Insert the included “NetDisk Installation CD” into your CD-ROM Drive. Easy and simple
instructions will guide you through the installation.
USB 2.0 Mode
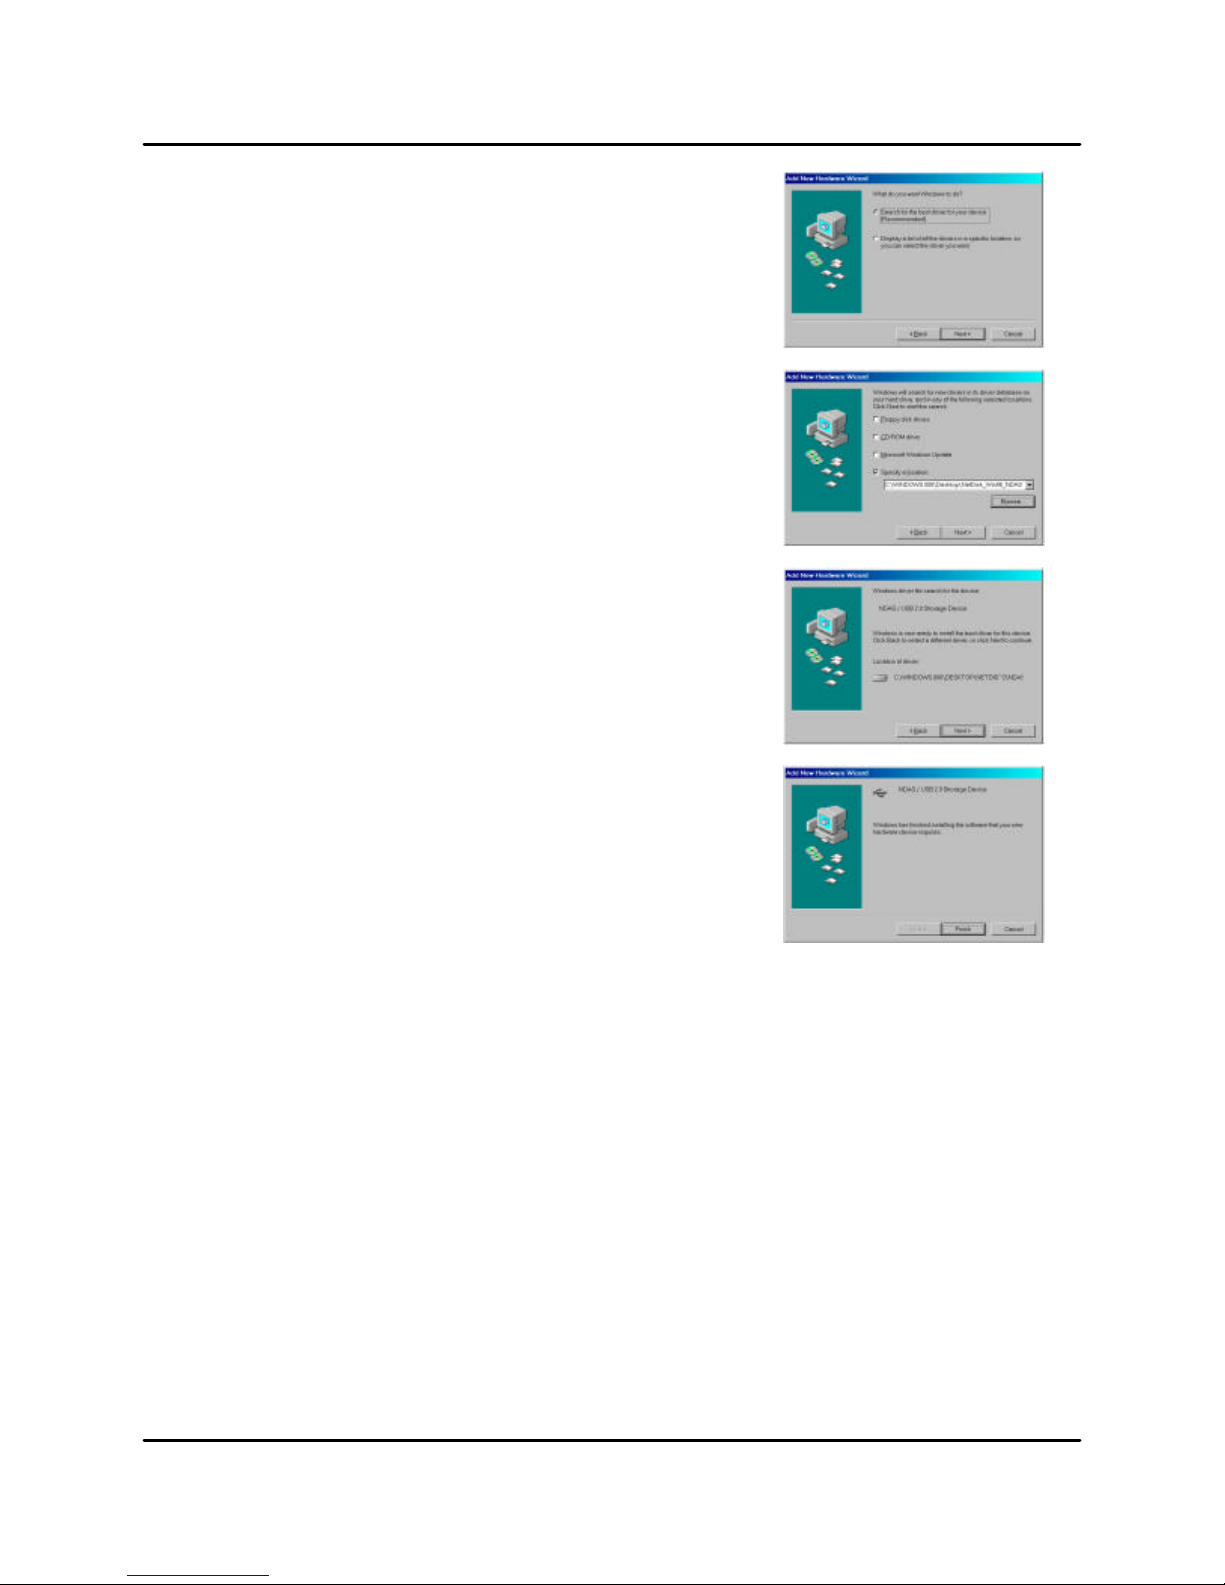
Follow the instructions below:
Step 1
- If this is your first time installing NetDisk, Add
New Hardware Wizard will appear. Click Next
and follow further instructions.
- Otherwise, NetDisk will be listed as a local drive
on My Computer. Driver letter and name may
vary between Personal Computers.
XIMETA, Inc 8 www.XIMETA.com
NetDisk® User Manual NetDisk Direct Attached Storage / NDAS®
Step 2
- Select Search for the best driver for
your device.
- Click Next.
Step 3
- Select Specify a location and click Browse
button.
- From the Browse for Folder window, search
for NDASUSB folder and click OK.
- Once the location is set, click Next from the
Add New Hardware Wizard window.
Step 4
- Click Next..
Step 5
- Driver has been successfully installed,
click Finished.
3.3 NetDisk Administrator
When software installation is completed, you will find a NetDisk Launcher Icon on your desktop
screen and a NetDisk Administrator Tool icon on the system tray.
- NetDisk Launcher (desktop icon) activates and loads the NetDisk Administrator Tool onto
the system tray.
- NetDisk Administrator Tool (system tray icon) performs the following functions:
- Refresh NetDisk Status
- Add a NetDisk
- Display Software Version
- Enable Read / Write Access
NOTE: NetDisk Launcher is used only on Windows XP and Windows 2000.
XIMETA, Inc 9 www.XIMETA.com
- Enable Read Only Access
- Disable a NetDisk
- Edit NetDisk Name
- Display NetDisk Properties
NetDisk® User Manual NetDisk Direct Attached Storage / NDAS®
Chapter 4 NetDisk Registration
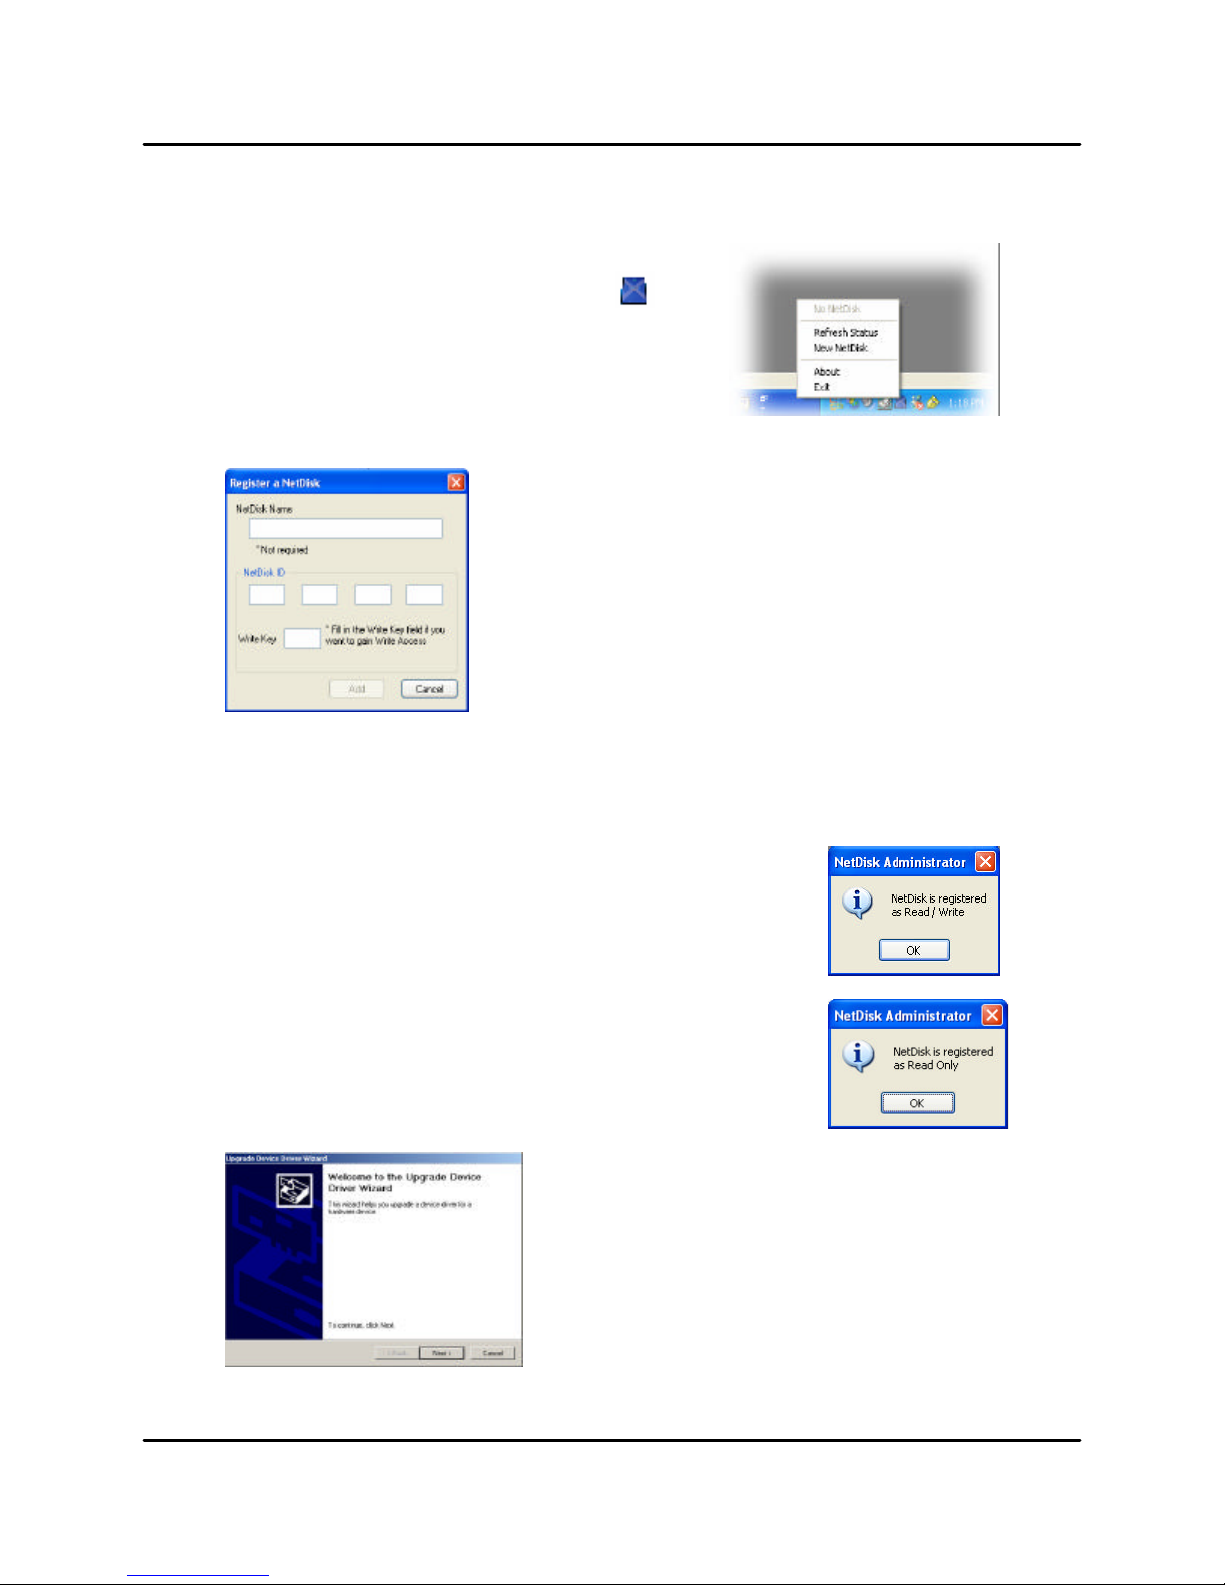
4.1 Add / Register a New NetDisk
1. Click NetDisk Administrator Tool Icon
located on the system tray.
2. Select New NetDisk.
3. Register a NetDisk.
- NetDisk Name: (optional) Select a name for your
NetDisk
- NetDisk ID: Enter the 20-digit NetDisk ID located on
the bottom of your NetDisk.
- Write Key: (optional) Enter the 5-digit Write Key
located on the bottom of your NetDisk.
Write Key must be registered to write to NetDisk.
NOTE: NetDisk ID and Write Key do not contain the letter O. Please use the number
0, for all 0’s.
4. Click Add.
5. Click OK to confirm the NetDisk registration.
- If the Write Key was entered in the previous step,
the NetDisk is registered as Read / Write Mode.
- If the Write Key was not entered in the previous step,
the NetDisk is registered as Read Only Mode.
6. Found New Hardware Wizard
- This window may or may not appear.
- If the window appears, follow the instructions and
install the new NetDisk.
XIMETA, Inc 10 www.XIMETA.com
NOTE: For Windows 2000, Upgrade Device Driver
Wizard will appear instead.
NetDisk® User Manual NetDisk Direct Attached Storage / NDAS®
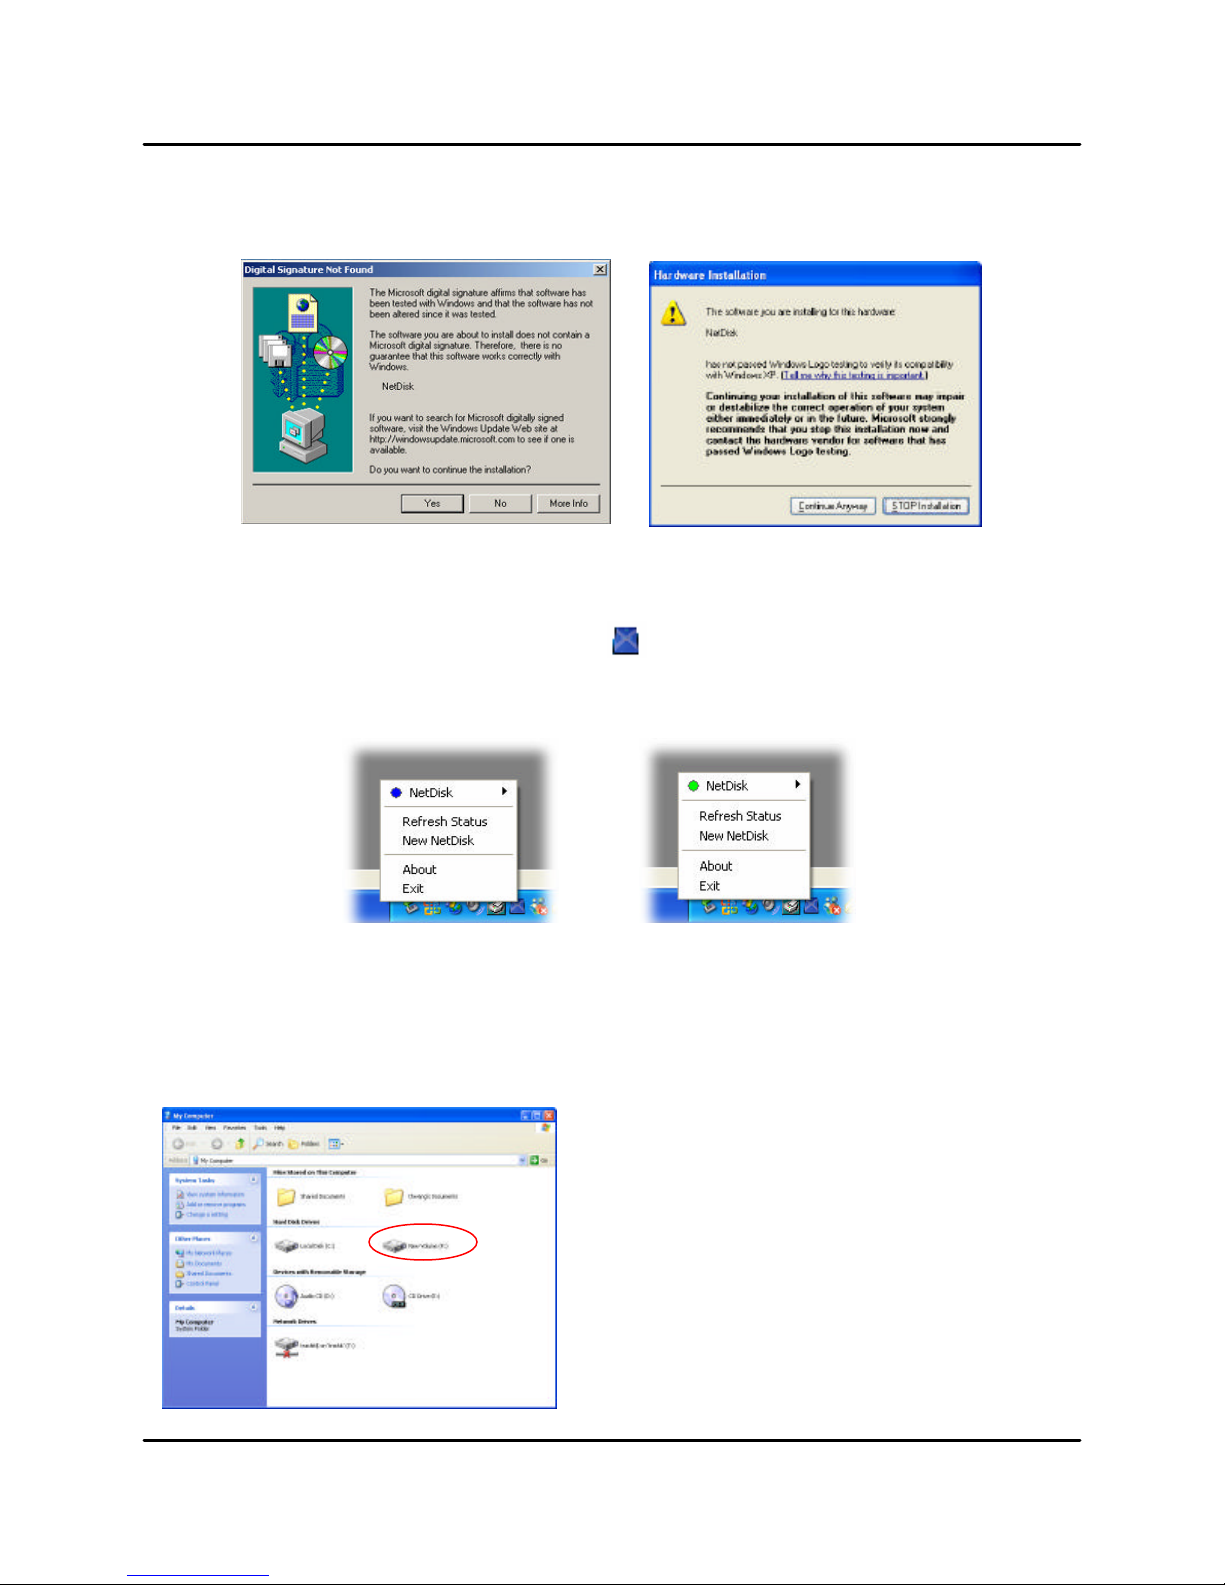
7. Windows Logo Testing window.
Windows 2000 Windows XP
Click “Yes” Click “Continue Anyway”
8. Registration is completed.
- Click NetDisk Administrator Tool to see the registered NetDisk.
Read/Write Mode Read Only Mode
4.2 Using NetDisk
Now that you have successfully installed NetDisk, it’s time to familiarize yourself with using the
NetDisk. NetDisk is located in My Computer as a local drive. Drive letter and NetDisk name
may vary between Personal Computers.
You can use NetDisk like a local drive on your PC.
- Drag and drop files to NetDisk.
- Copy and paste data to NetDisk.
- Make and delete folders.
- Share files and folders.
- Backup your data
XIMETA, Inc 11 www.XIMETA.com

NetDisk® User Manual NetDisk Direct Attached Storage / NDAS®
4.3 Sharing NetDisk
- Once NetDisk is connected to your network, it can be accessed from any computer on
your LAN.
- To share NetDisk, the following must occur:
Windows 2000/XP Environment:
- All computers and NetDisk must be on the same LAN.
- NetDisk must be connected via Ethernet or Wireless Access Point.
- To share Read and Write access, all computers on the network using the
Net Disk must have the NetDisk driver version 3.x.x installed.
- NetDisk must be registered onto each computer.
Mixed Environment with Windows and Mac:
- All computers and NetDisk must be on the same LAN.
- NetDisk must be connected via Ethernet or Wireless Access Point.
- To share NetDisk each computer on the network must install the corresponding
NetDisk Driver.
- On Windows XP/2000, install NetDisk driver v2.4 (do not use 3.x.x).
- On Windows 98 SE/ME, install NetDisk Driver 1.x
- On Mac OSX, install NetDisk driver 1.x
- NetDisk must be registered onto each computer.
- Write access is assigned to one user at a time and is passed from one
user to another.
NOTE: NetDisk is preformatted in NTFS. In order to use NetDisk in mixed
environments, NetDisk must be formatted in FAT32. If you use the “Disk
Management” utility in Windows XP or 2000 to format your NetDisk , then
your NetDisk will be re-formatted in NTFS. NTFS is not a compatible file system format with Mac and Windows 98SE, thus your computers on these OS
will not recognize NetDisk. You can use a third party format utility to choose
the file format your NetDisk is formatted in.
Warning:
† Do not perform disk operations (format, partition and chkdsk) when multiple
PCs are connected.
† NetDisk can be formatted, partitioned, chkdsk, aggregated or mirrored only
when one PC is connected.
† When sharing NetDisk between Windows 2000 and Windows XP, perform
chkdsk.
XIMETA, Inc 12 www.XIMETA.com
NetDisk® User Manual NetDisk Direct Attached Storage / NDAS®
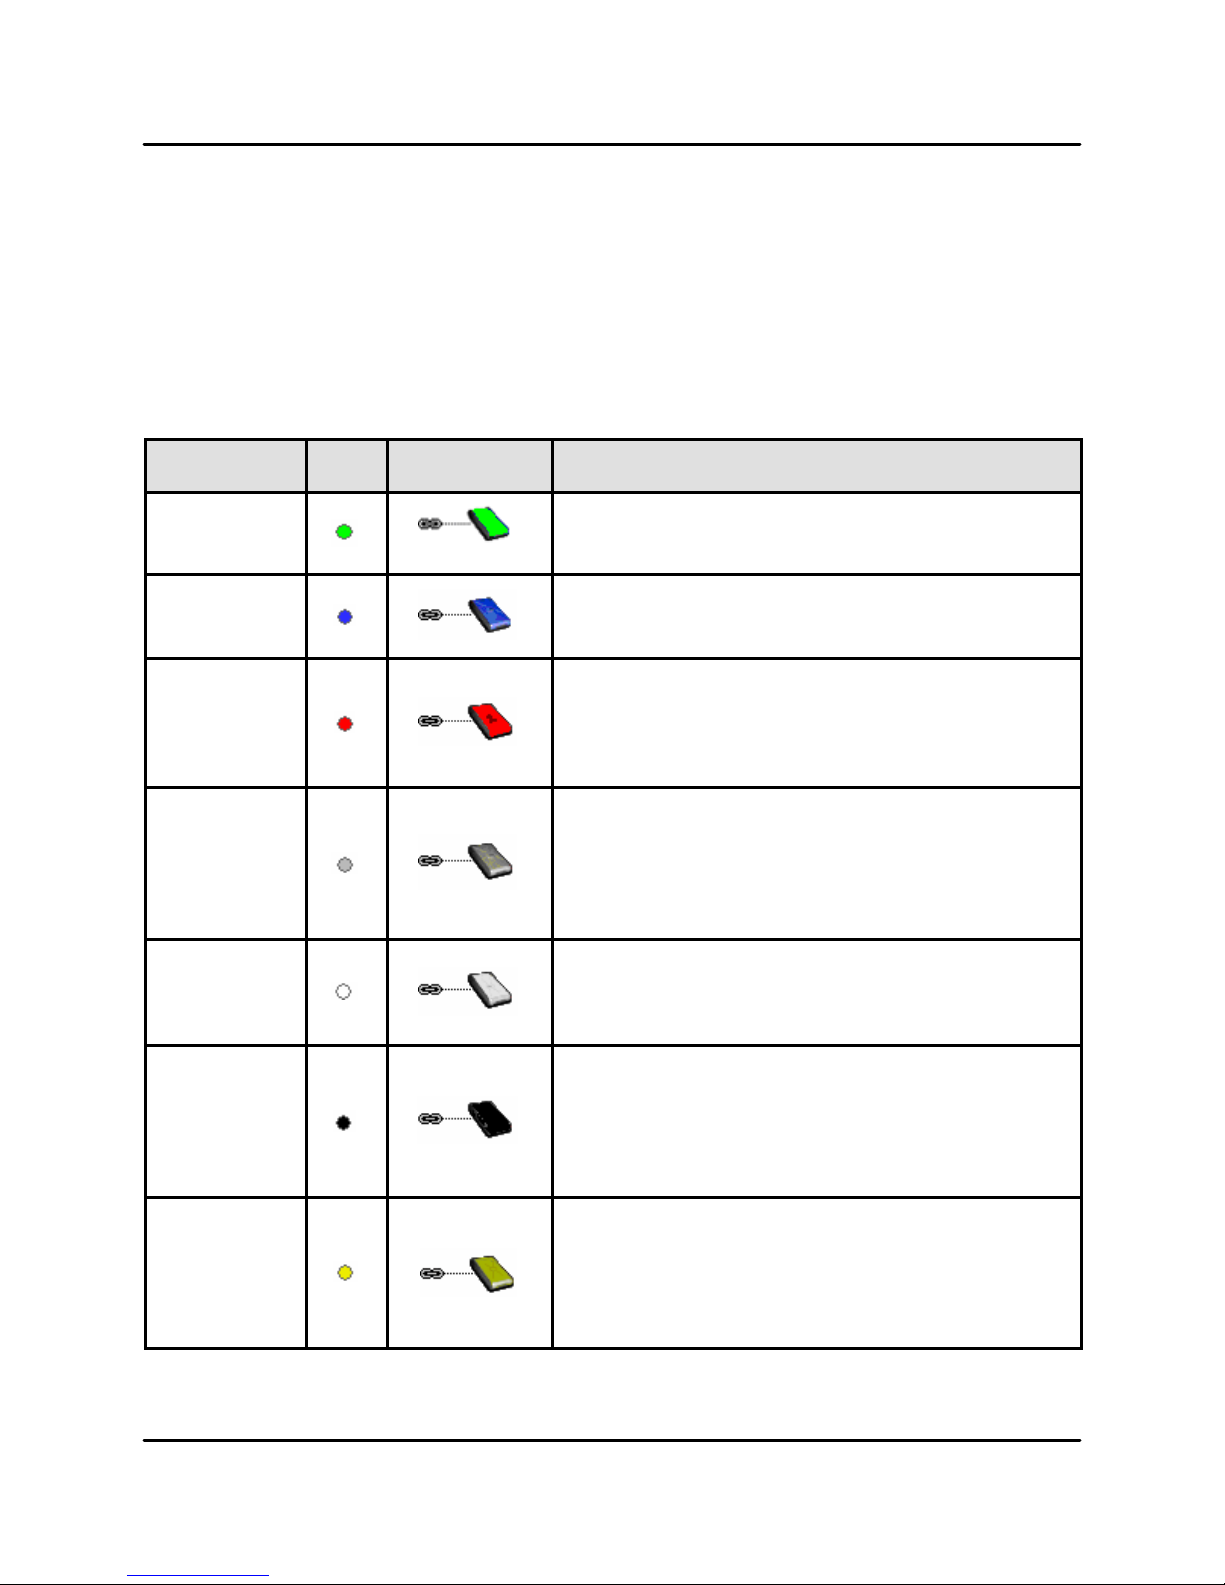
Chapter 5 NetDisk Status and Mode Indicator
NetDisk provides users with six basic modes.
Below is a chart describing each of the NetDisk Modes and the icons that correspond with
each mode.
NetDisk
Color
Icon NetDisk Icon Mode / Meaning
Green
Blue
Red
Gray
White
Black
Read Only Mode
- Users can only read from NetDisk.
Read / Write Mode
- Users can read and write to NetDisk.
Unrecognized Mode
- NetDisk cannot be used.
- You can only remove this NetDisk from your
computer or view its property.
Disabled Mode
- NetDisk is disabled from your computer.
- NetDisk can be enabled back to Read Only Mode,
Read/Write Mode or removed from the PC
- NetDisk can be Aggregated or Mirrored.
Busy Mode
- NetDisk is busy performing a task or an
application is using NetDisk.
Disconnected Mode
- NetDisk is not connected to the network.
- Power Cord, Ethernet Cord or USB Cord is
unplugged. Once the cord is connected, you can
resume NetDisk use.
Yellow
XIMETA, Inc 13 www.XIMETA.com
Bound Mode
- Bound disk used for Aggregation and Mirroring
only.
- You can only remove it from your computer or
view its property.
 Loading...