

Ximeta NDU10-80, NDU10-160, NDU10-120 Installation Manual
NetDisk
TM
Installation Guide

NetDisk Installation Guide
XiMeta, Inc.
Irvine, California
Copyright © 2003, All rights reserved. Reproduction in any manner or
translation without prior written permission of XiMeta, Inc. is strictly prohibited.
Warranty
XiMeta, Inc. reserves the right to revise this publication and to make changes
to the content hereof without the obligation of XiMeta, Inc. to notify any
person of such revision or changes. XiMeta, Inc. provides this publication “as
is” without warranty of any kind, either express or implied, including but not
limited to the implied warranties of merchantability or fitness for a particular
purpose.
FCC Compliance Statement
Any changes or modifications not expressly approved by the party
responsible for compliance could void the user's authority to operate the
equipment.
INFORMATION TO USER
This equipment has been tested and found to comply with the limits of a Class B digital
device, pursuant to Part 15 of the FCC Rules.
These limits are designed to provide reasonable protection against harmful interference
in a residential installation.
This equipment generates. uses and can radiate radio frequency energy and,
if not installed and used in accordance with the instructions, may cause harmful
interference to radio communications However, there is no guarantee that interference
will not occur in a particular installation.
if this equipment does cause harmful interference to radio or television reception.
which can be determined by turning the equipment off and on, the user is encouraged
to try to correct the interference by one or more of the following measures:
- Reorient Relocate the receiving antenna
- Increase the separation between the equipment and receiver.
- Connect the equipment into an outlet on a circuit difference from that to which
the receiver is connected.
- Consult the dealer or an experienced radio/TV technician for help.
2

License
The software described in this document is furnished under a license
agreement. The software may be used only in accordance with the terms of
the license agreement.
All trademarks are the property of their respective owners.
3
Congratulations on your purchase of the NetDisk Network Direct
Attached Storage Solution.
This NetDisk Installation Guide is intended to help you install the product
quickly and easily.
The NetDisk Installation Guide is intended for individual users who need to
install and support one or more NetDisk on their PC’s and network. The
NetDisk Installation Guide assumes a basic understanding of PC’s and
networks.
Please follow these instructions to setup your NetDisk on your network so you
can begin using it immediately.
Models Covered By This Guide
This NetDisk Installation Guide includes information on the following models:
NDU10-80 •
• • NDU10-120
NDU10-160
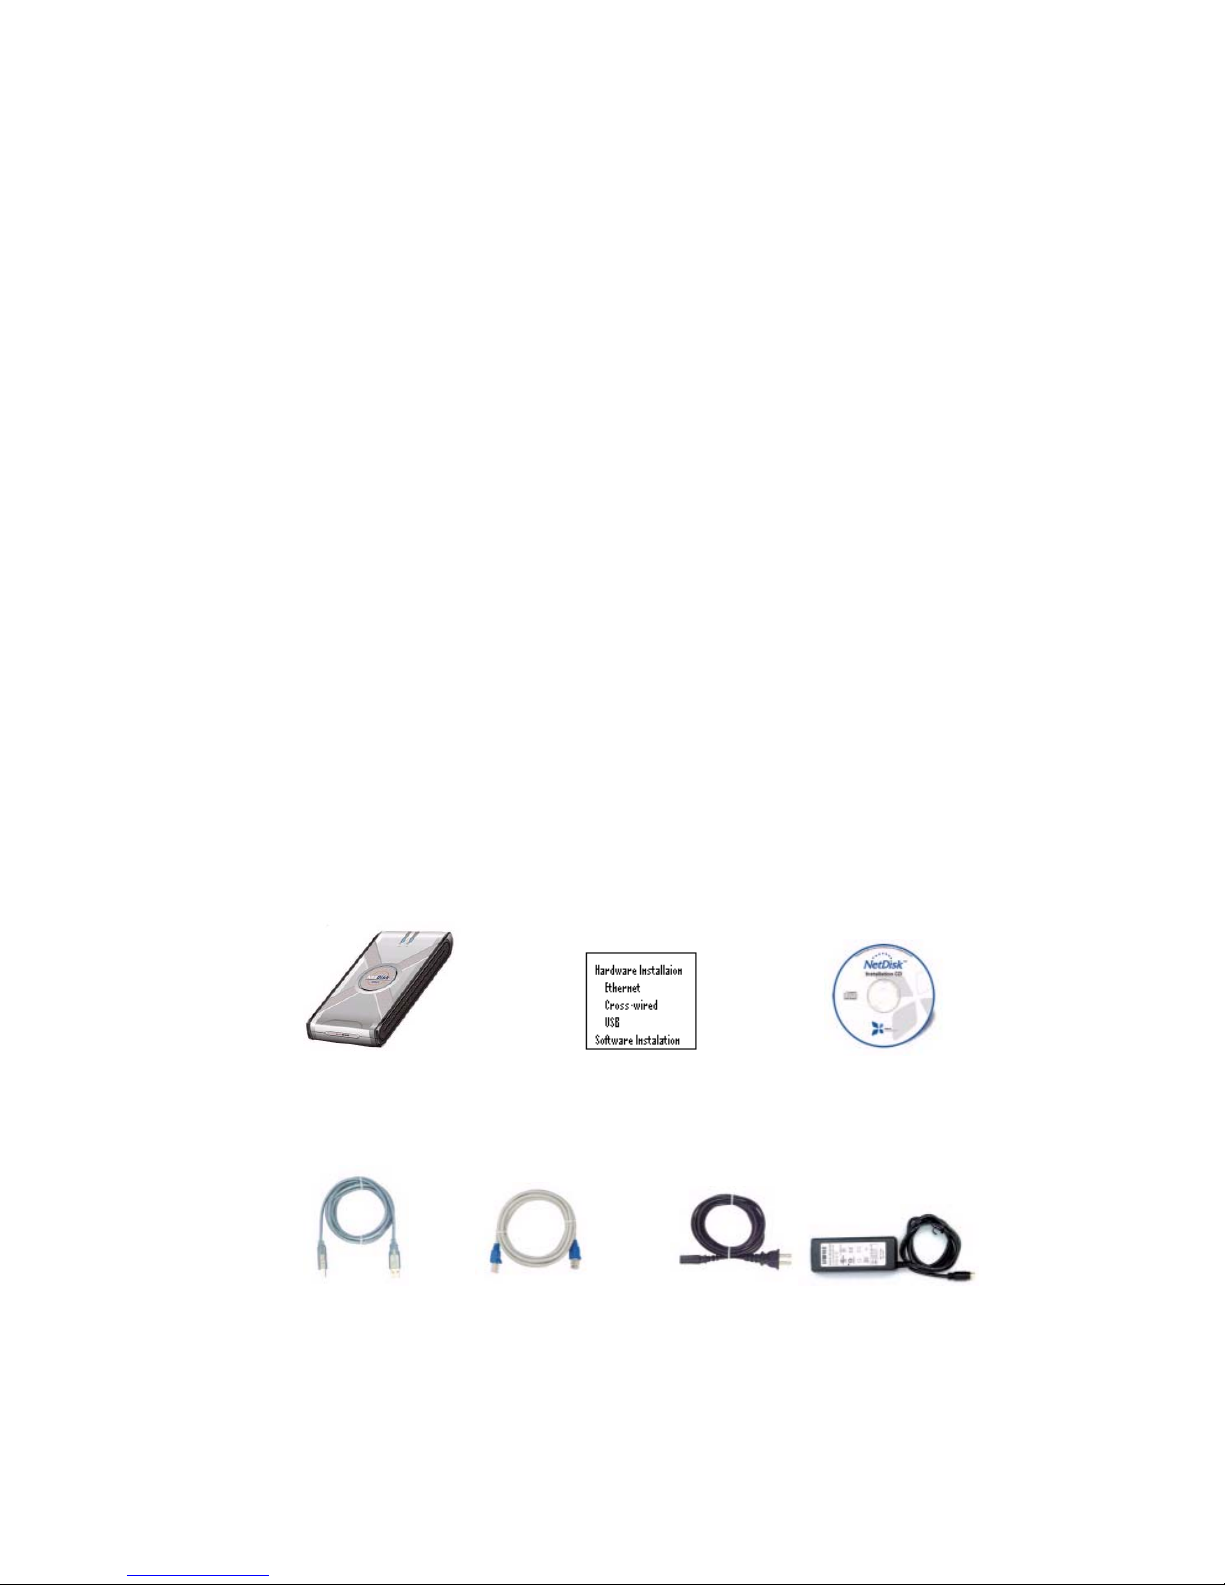
Package Contents
NetDisk Quick Install Guide Software Installation
Ethernet Cable USB Cable Power Adapter and Power Cord
4
CD-ROM

Table of Content
Preface 3
Network Requirements
Wired Network Users 5
Wireless Network Users 5
USB Users 5
Software Requirement 5
Hardware Installation
Installation for Network Users 6
Installation for Cross-wired Ethernet Users 7
Installation for USB Users 8
Software Installation 9
NetDisk™ Registration 12
NetDisk™ Mode
Read/Write (RW) 15
Read Only (RO) 20
Installation of New NetDisk 26
Add NetDisk 28
Change READ ONLY to READ/WRITE 30
Change READ/WRITE to READ ONLY 32
Aggregation
Bind 33
Unbind 40
Mirroring
Mirroring 43
Undo Mirroring 51
Partition NetDisk 52
Initialize NetDisk 57
NetDisk Uninstall 59
Trouble Shooting 60
Contact Information 62
5

Network Requirements
Wired Network Users
Fast Ethernet LAN (100BASE-T / 802.3u)
- 100 mbps or higher is recommended for best data transfer rate.
Wireless Network Users
Wi-Fi WLAN (802.11a or 802.11g)
- 54 Mbps or higher is recommended for best data transfer rate.
USB Users
- USB 2.0 or higher is recommended for best data transfer rate.
Software Requirement
- NetDisk software supports Windows 2000/XP.
- Windows 2000 users should install USB 2.0 driver if it is not installed
already. The driver is included on the NetDisk CD.
6
Hardware Installation
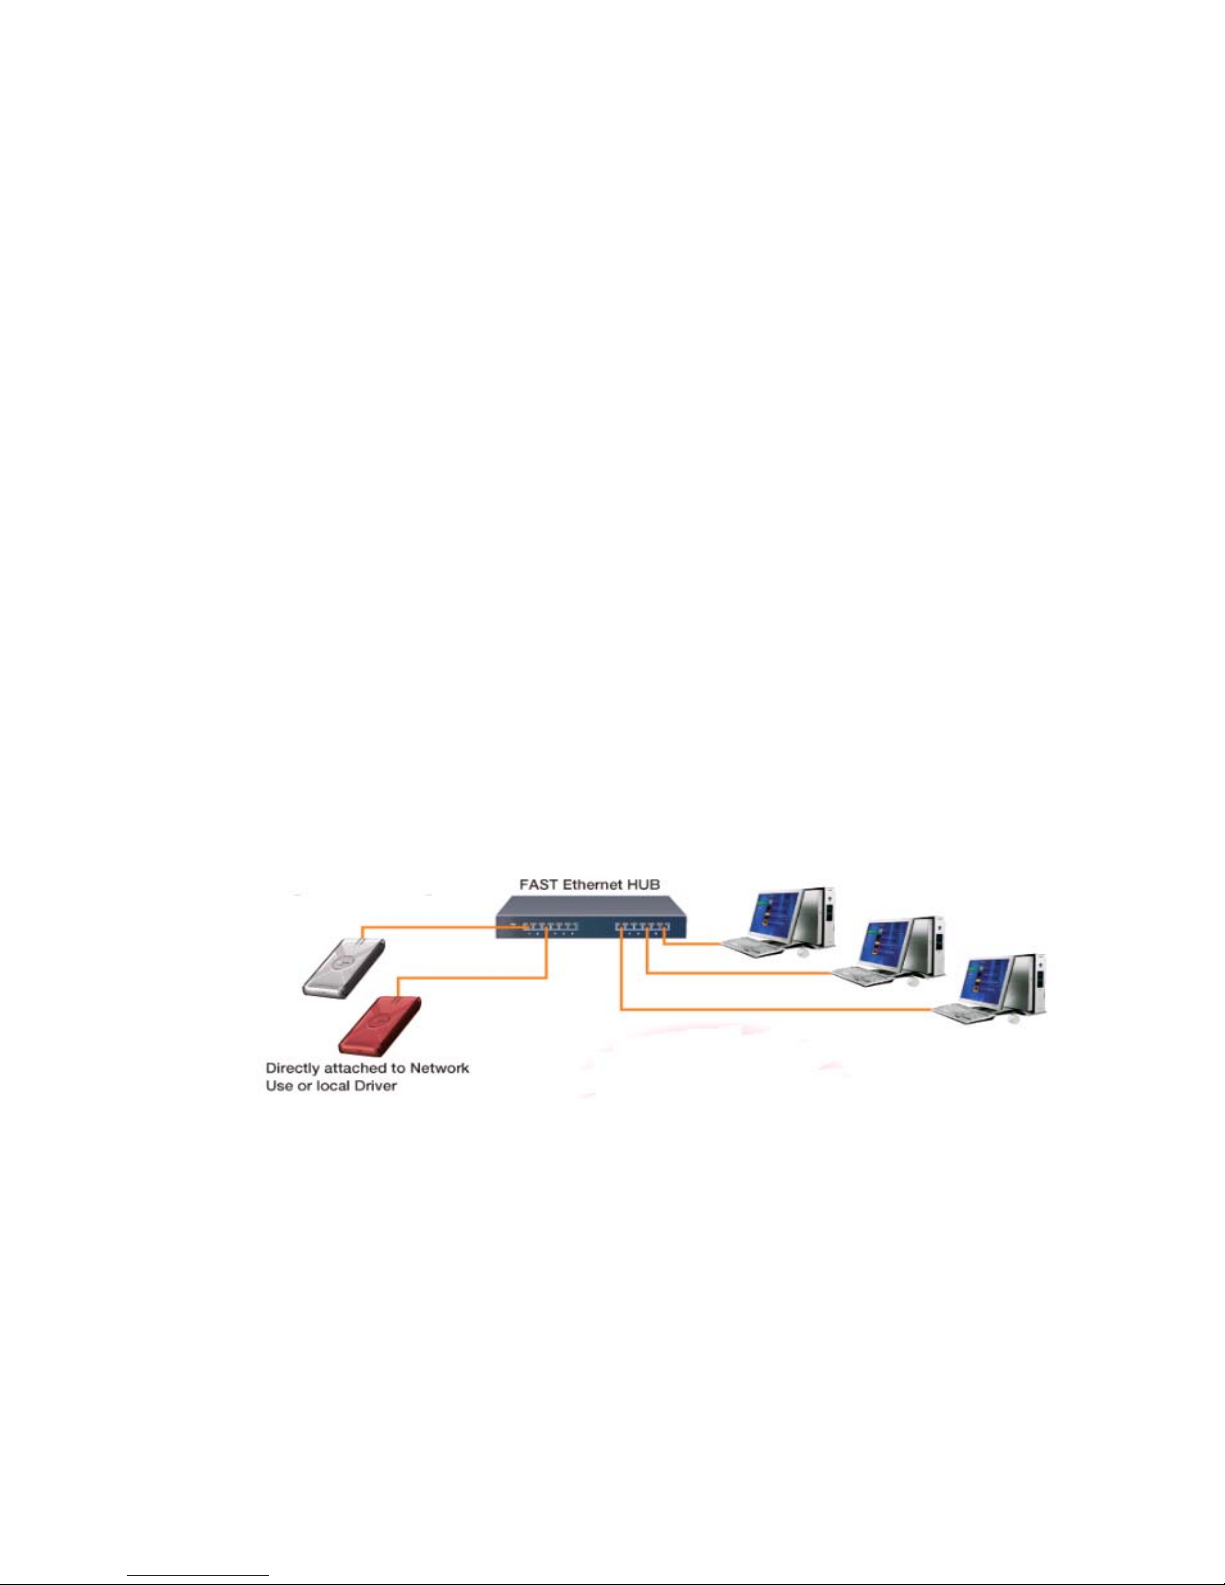
Installation for Network Users
To use NetDisk as Network Direct Attached Storage via Ethernet connection:
1. Connect Power Adapter to NetDisk™ and plug Power Cord into the power
outlet.
2. Connect one end of the Ethernet LAN Cable into Hub or Router, the other
end into NetDisk LAN Interface (RJ45Jjack).
3. Once the NetDisk is connected to the LAN, the LED will light up indicating
power and data traffic.
4. To add more NetDisk, please repeat steps 1 - 3. You can add as many
Net Disk’s as your Hub or Router has ports.
5. Toggle switch on NetDisk should be on Ethernet. Toggle switch is located
next to USB port.
7

Installation for Cross-wired Ethernet Users
To use NetDisk as NetDisk Direct Attached Storage via Ethernet connection:
1. Connect Power Adapter to NetDisk™ and plug Power Cord into the power
outlet.
2. Connect one end of the Cross-wire Cable into the PC’s Ethernet port and
the other end into the NetDisk Ethernet port.
3. Toggle switch on NetDisk should be on Ethernet. Toggle Switch is located
next to USB port.
4. Once the NetDisk is connected to USB, the LED will light up indicating
power and data traffic.
8

Installation for USB Users
To use NetDisk as USB 2.0 External Hard Disk Drive:
1. Connect Power Adapter to NetDisk™ and plug Power Cord into the power
outlet.
2. Connect one end of the USB Cable into the PC’s USB port and the other
end into the NetDisk USB port.
3. Toggle switch on NetDisk should be on USB. Toggle Switch is located
next to USB port.
4. Once the NetDisk is connected to USB, the LED will light up indicating
power and data traffic.
9
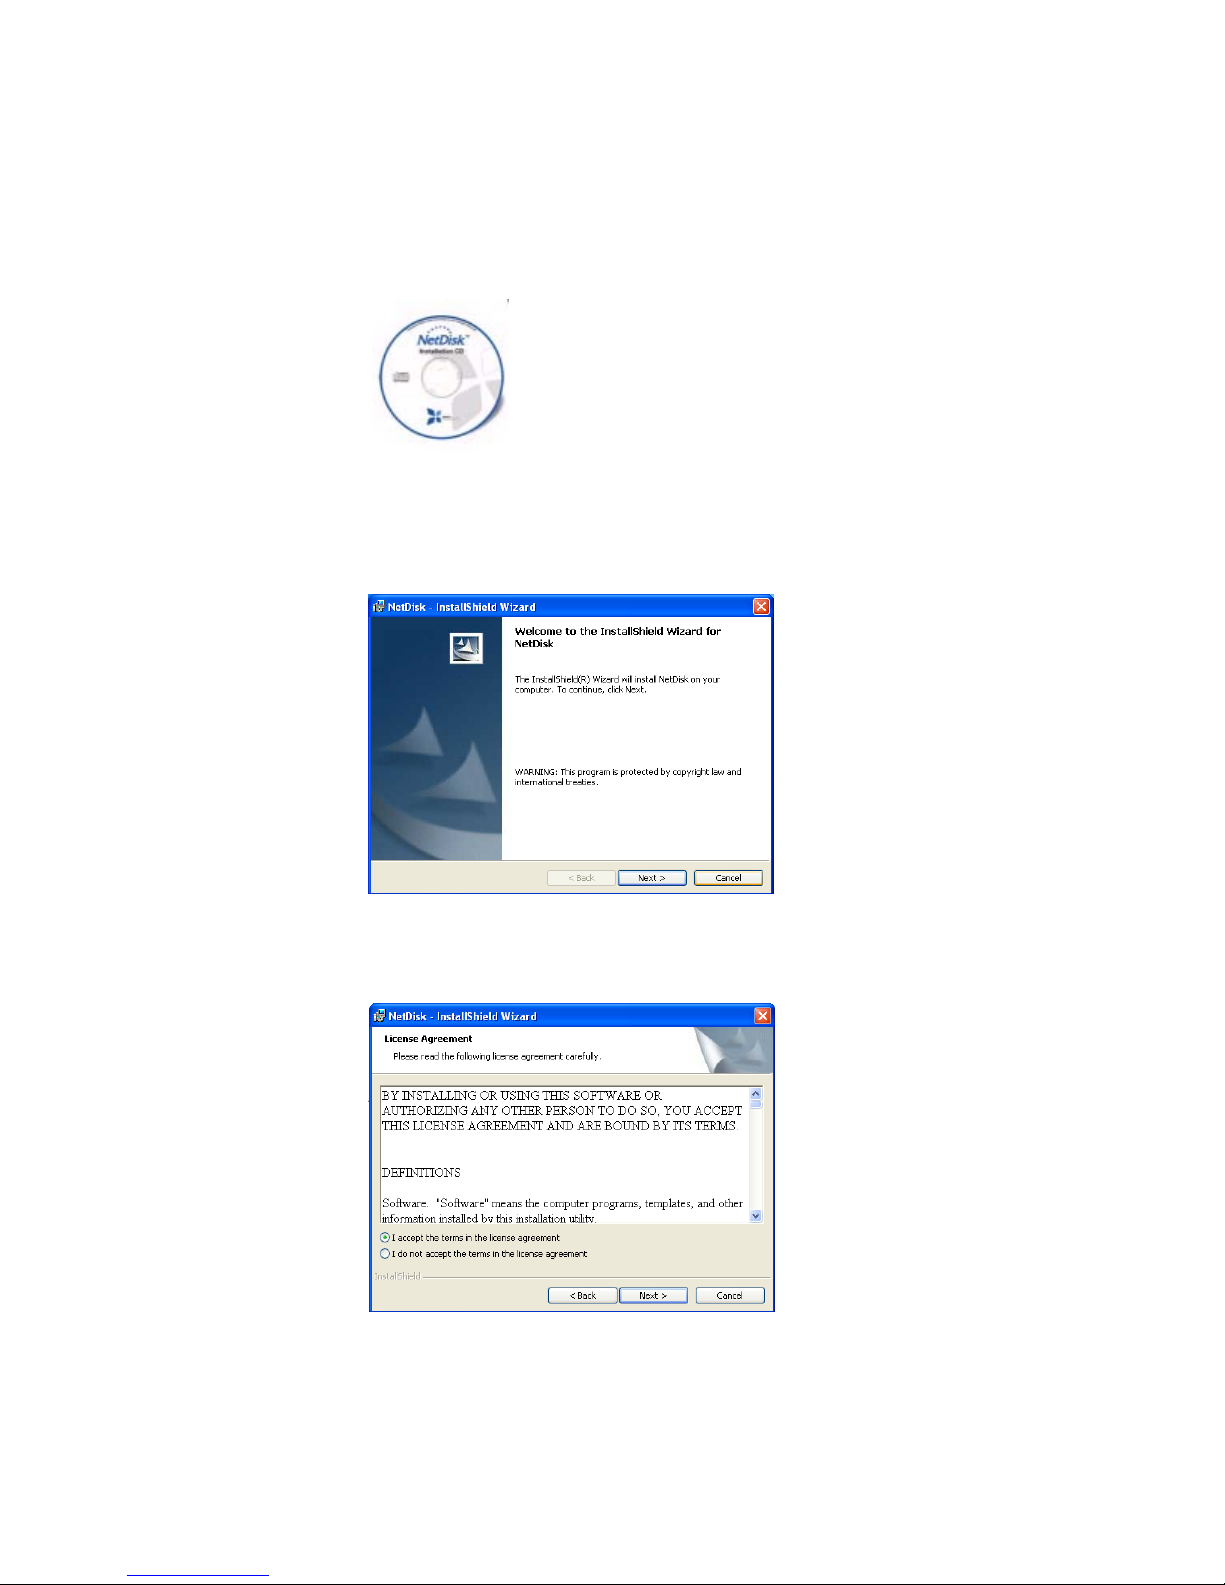
Software Installation
A. Insert the Software Installation CD-ROM included in the box into the CD
ROM drive.
B. Welcome to the InstallShield Wizard for NetDisk will appear on the
screen. Click Next.
C. License Agreement will appear on the screen. Select I accept the terms
in the license agreement then click Next.
10
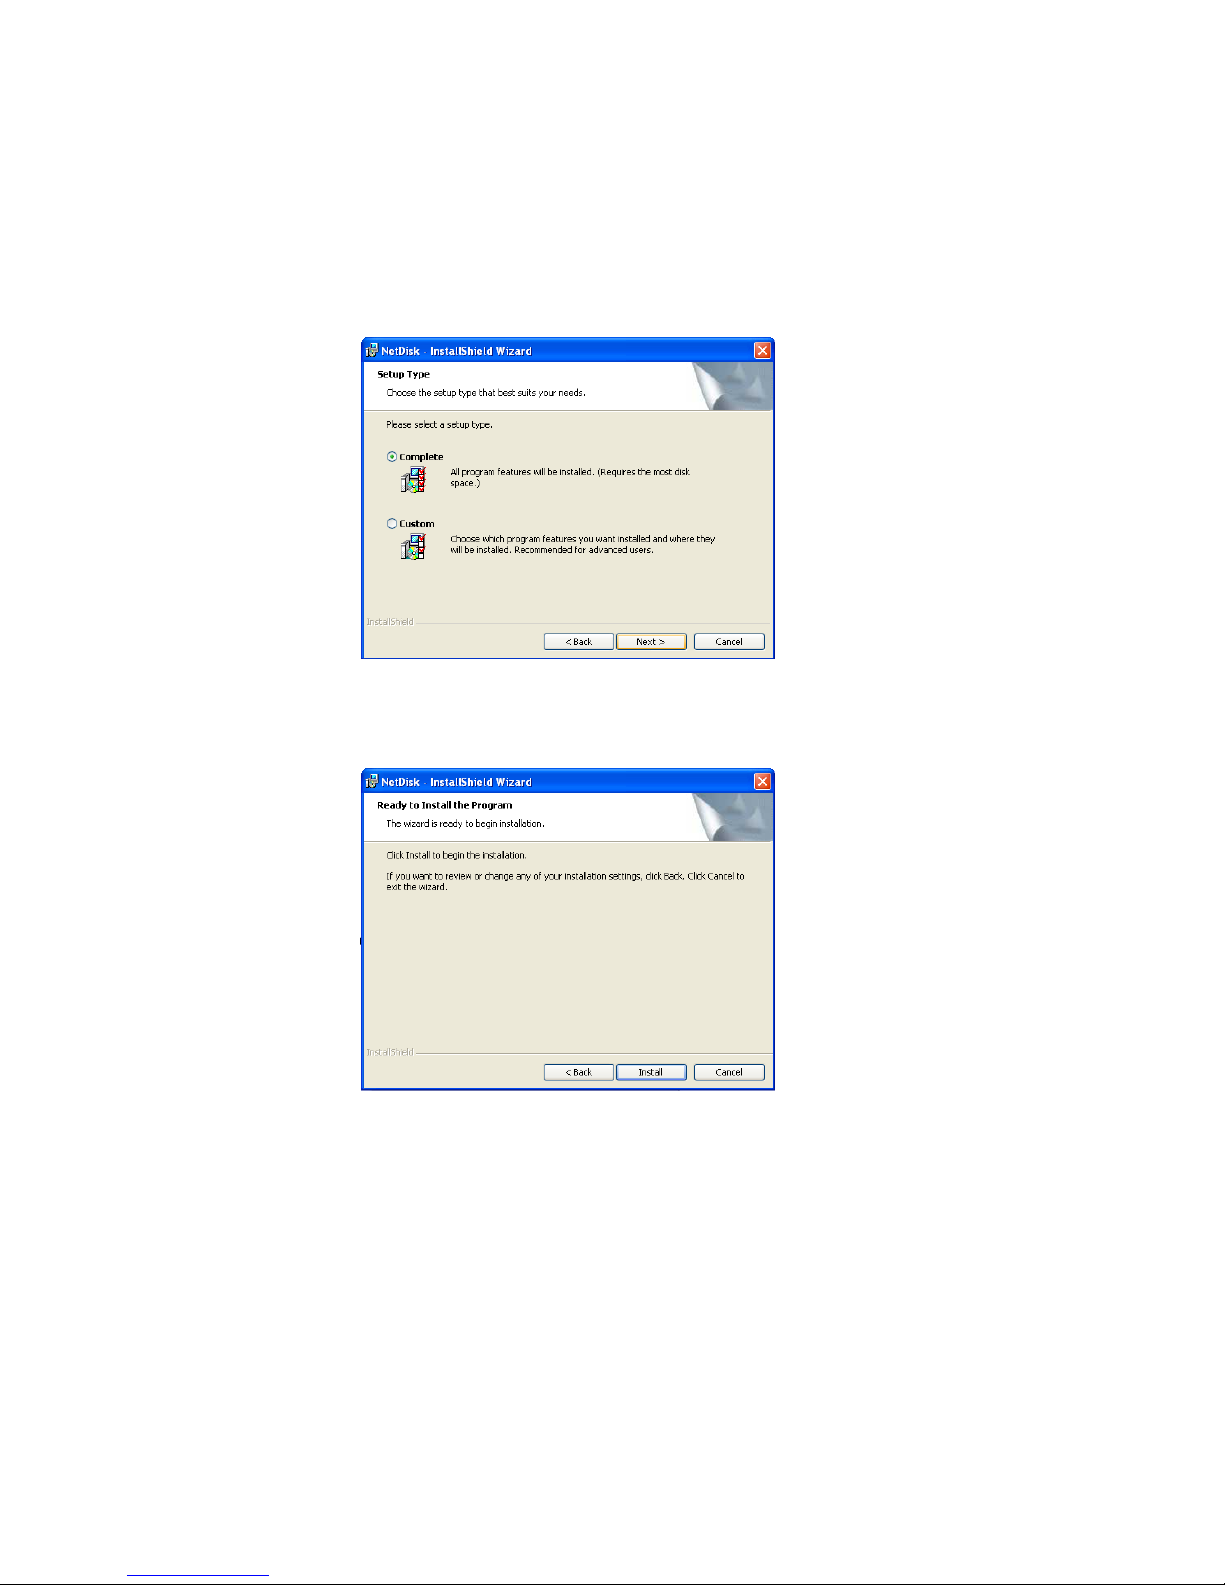
D. Setup Type:
a. General Users - Select Complete and then click Next.
b. Advanced Users - Select Custom and then click Next.
E. Ready to Install the Program will appear on the screen. Click Install.
11
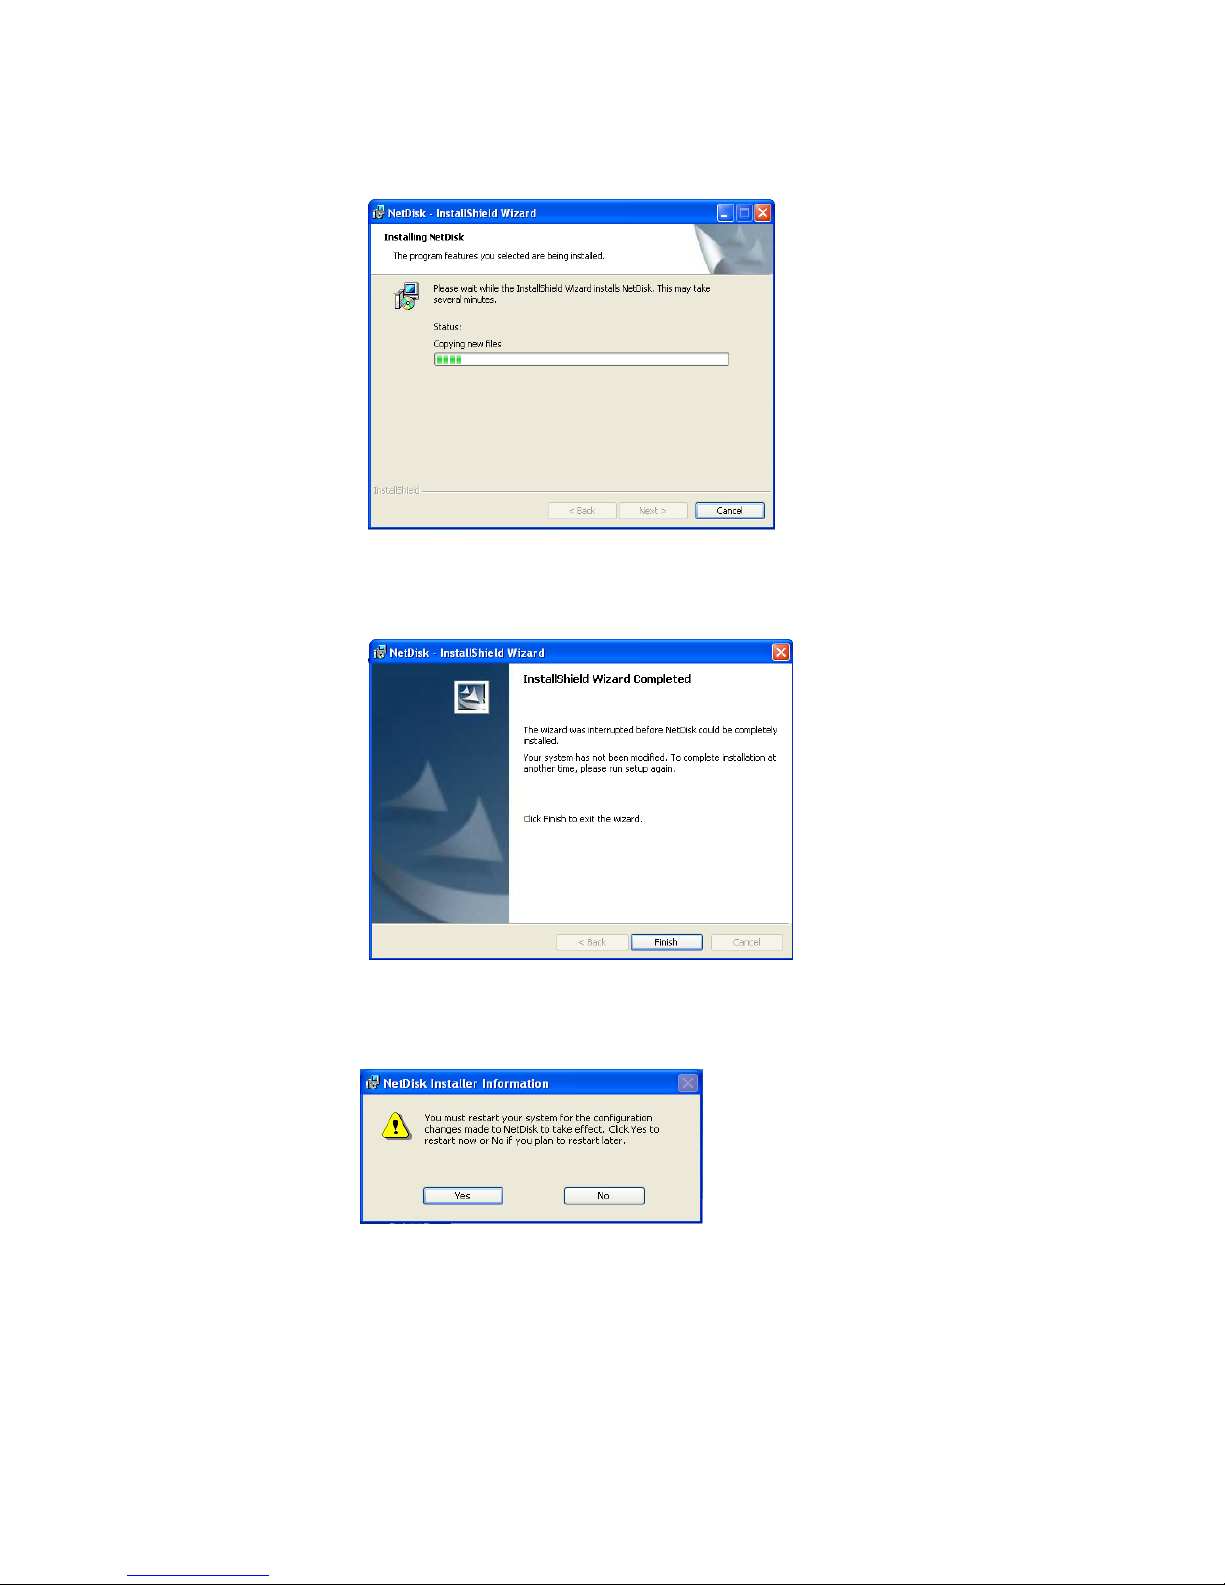
F. InstallShield Wizard is being installed.
G. Installation is completed. Click Finish.
H. You must restart your computer for the changes to take effect. Click Yes.
12
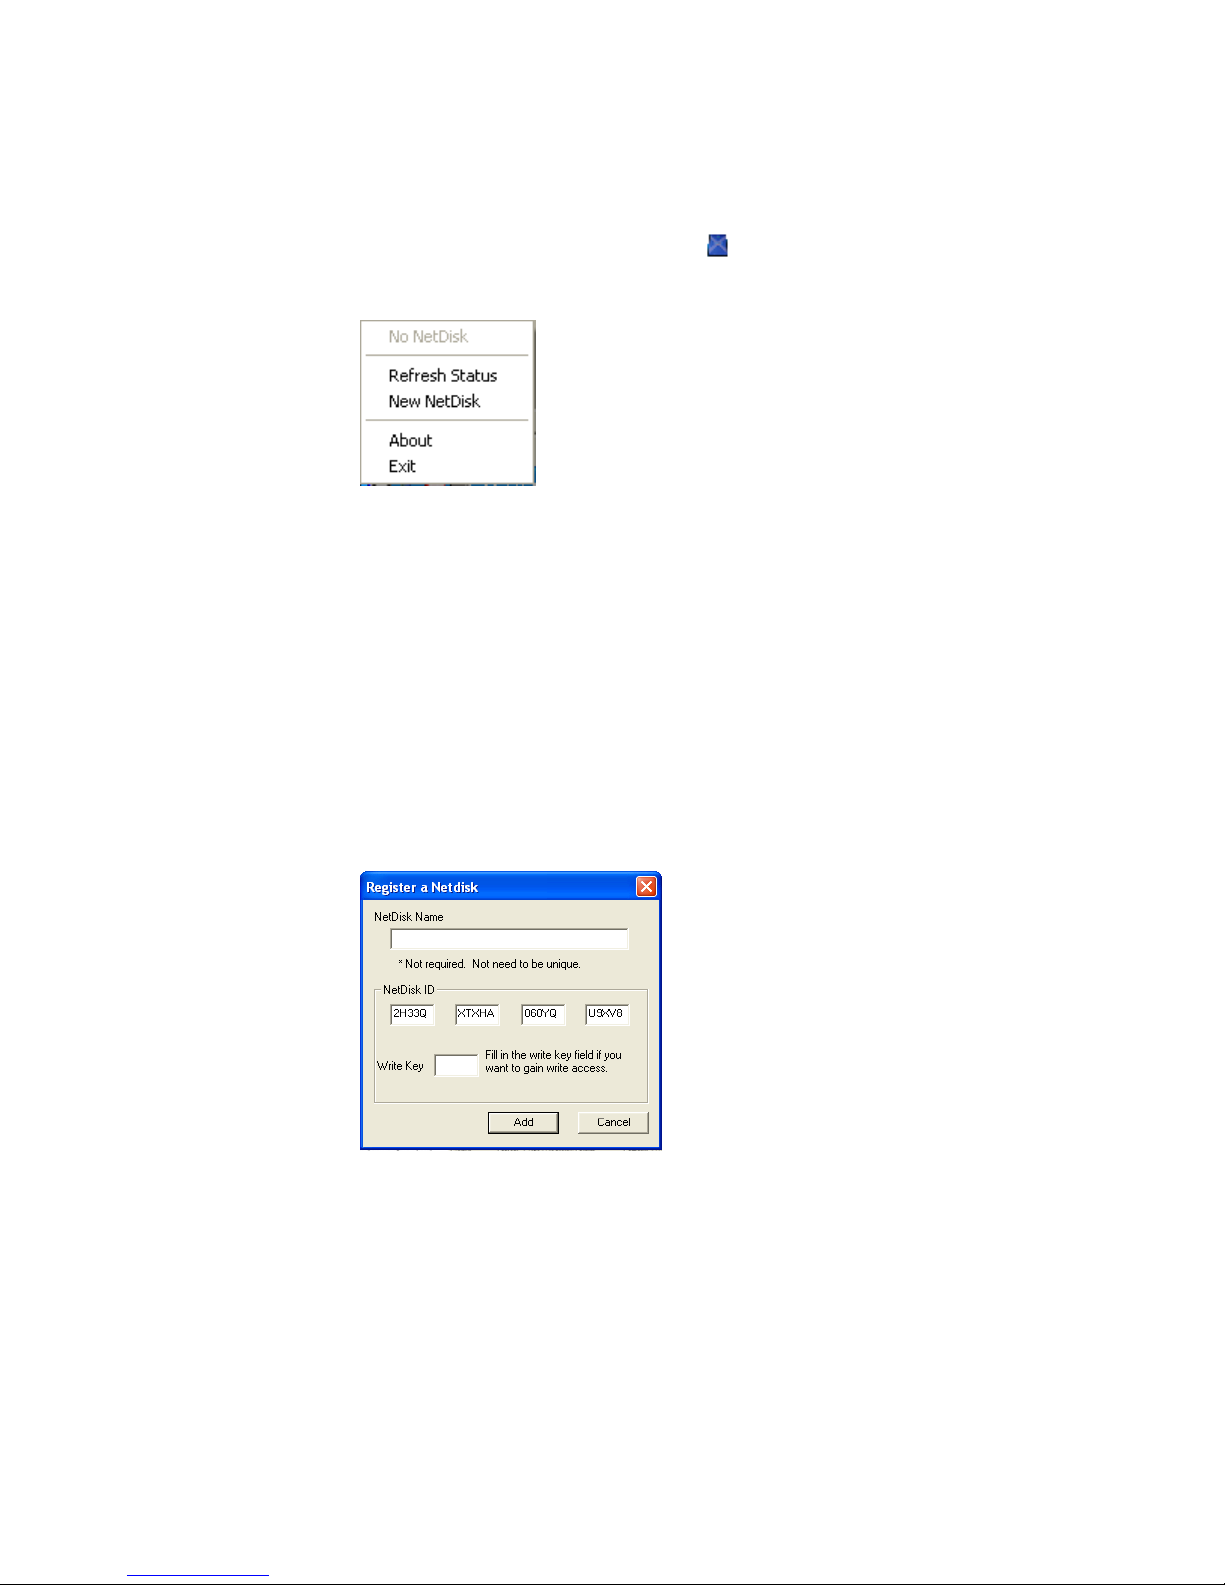
NetDisk™ Registration
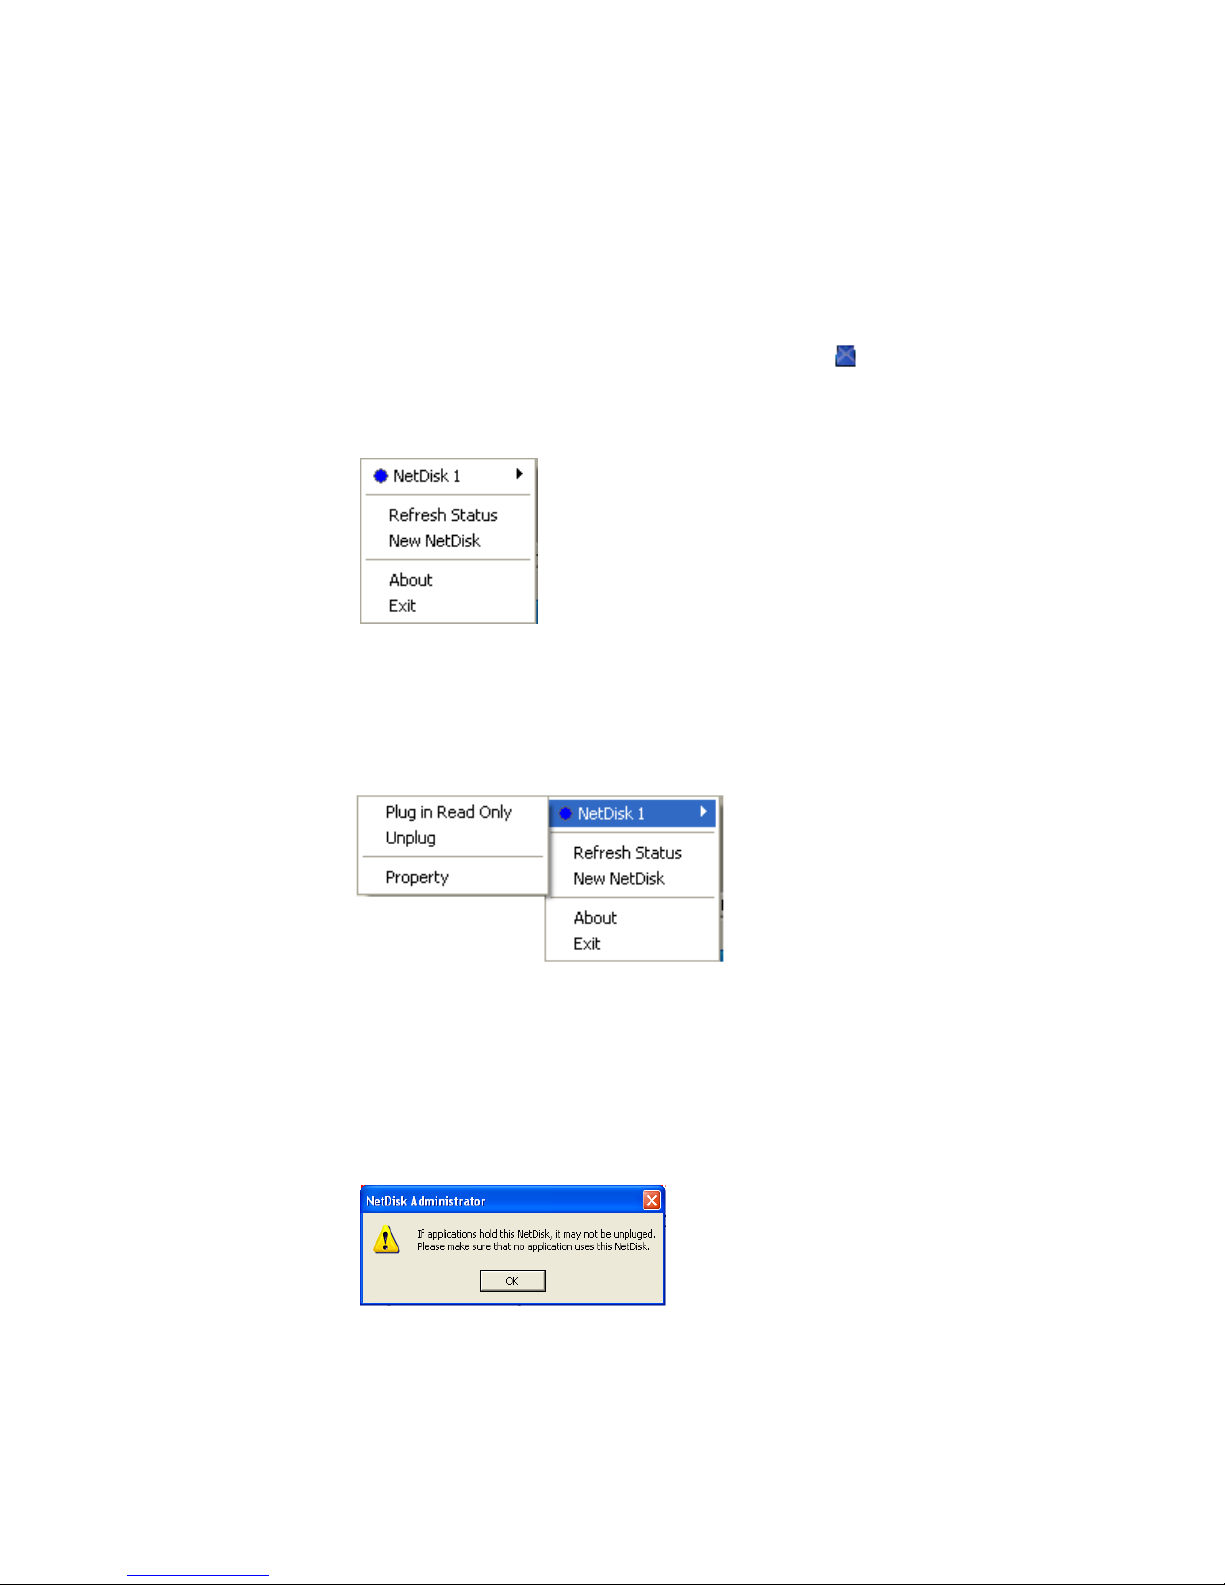
1. Click NetDisk™ Administrator Tool Icon
corner of your screen. A menu box, just like the one below, will appear:
2. Click New NetDisk.
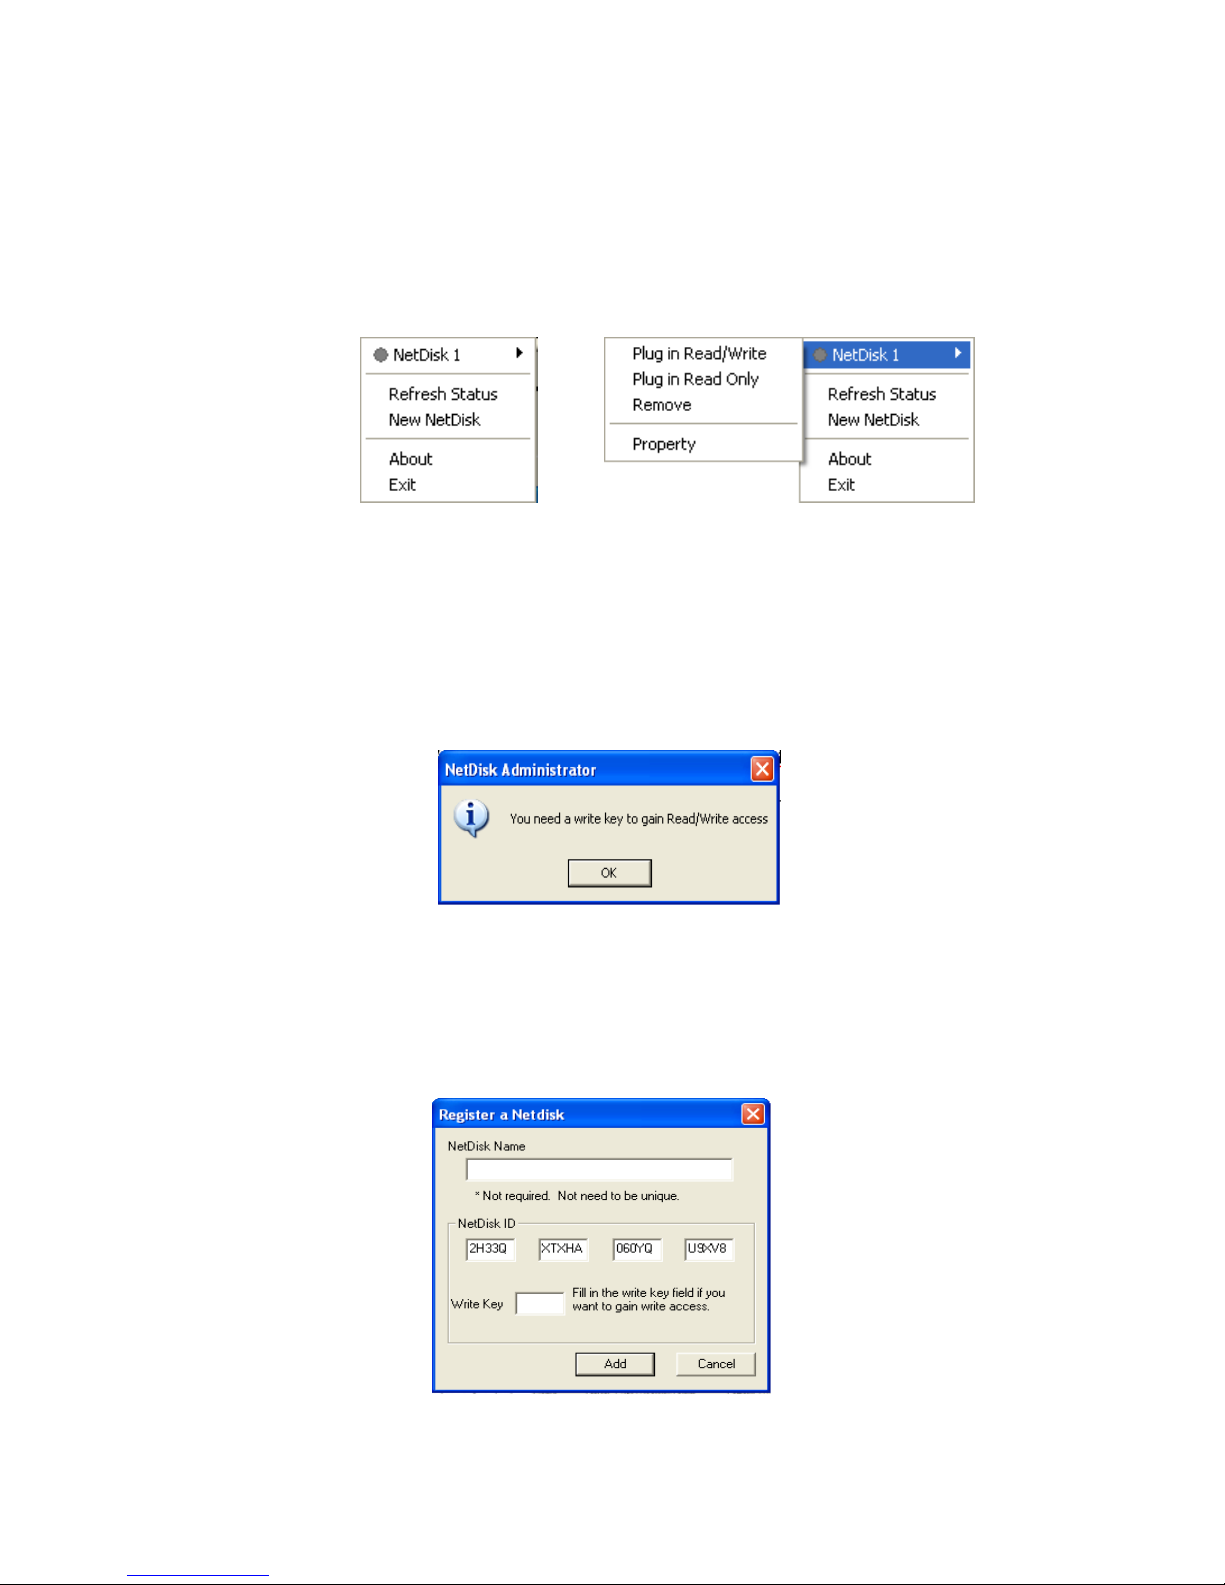
3. Register a NetDisk: Enter NetDisk ID. NetDisk Name is optional.
NetDisk ID and Write Key can be found on the bottom of the NetDisk.
NOTE: Write Key is needed for Read/Write access to NetDisk.
Read/Write allows users to write and read to and from NetDisk.
Add button will be enabled only when the right NetDisk ID is entered.
Click Add.
located on the bottom right
4. NetDisk Administrator window will appear confirming the NetDisk you
just registered.
NOTE: If another user has Read/Write privilege of the NetDisk you just
registered, you will be registered as Read Only even if you entered the
Write Key. You can later switch to Read/Write by following the Change
READ ONLY to READ/WRITE on 30.
i. If the Write Key was entered in the previous step, the NetDisk is
13
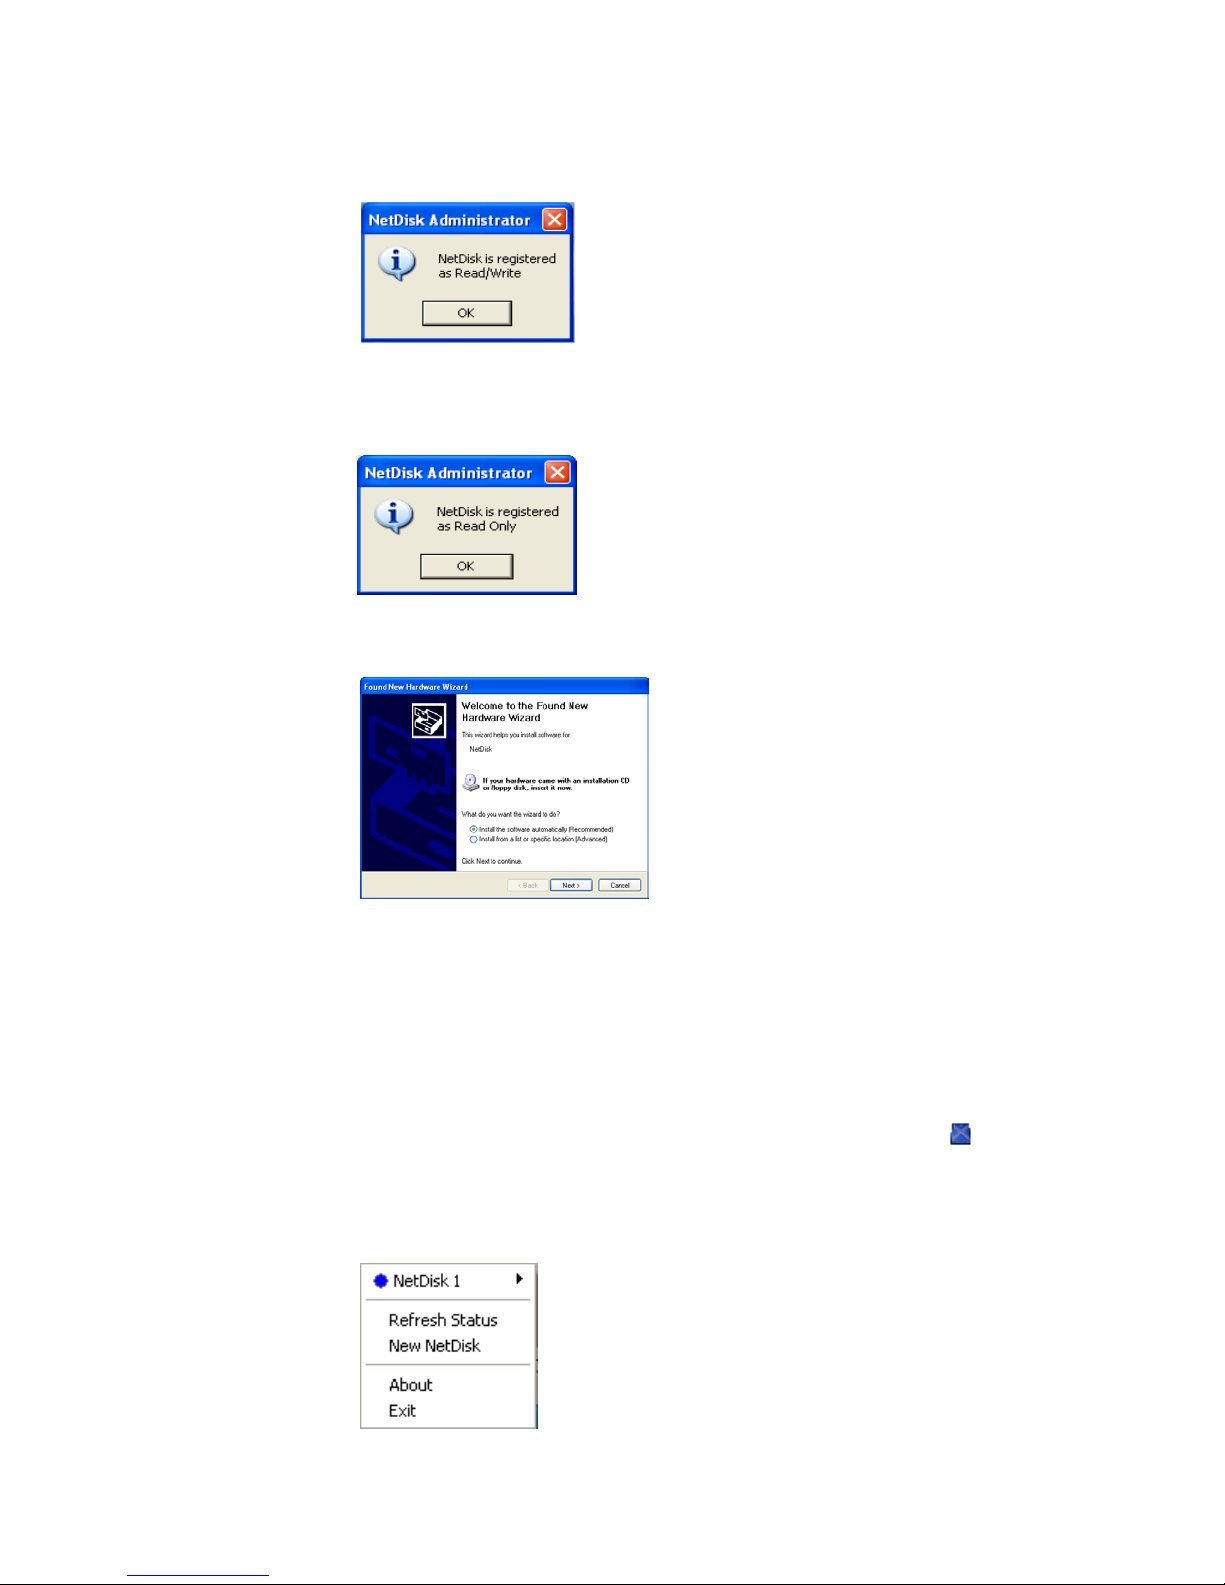
registered as Read/Write.
ii. If the Write Key was not entered in the previous step, the NetDisk is
registered as Read Only.
5. Found New Hardware Wizard:
If you are registering a new NetDisk, Found New Hardware Wizard will
appear. See Installation of New NetDisk on 26 and follow the
instructions.
If you are re-registering a NetDisk that has been removed before, Found
Hardware Wizard may not appear. Just continue to the next step.
6. Registration is completed. Click NetDisk™ Administrator Tool
to
see the registered NetDisk.
i. NetDisk with Read/Write mode.
14

ii. NetDisk with Read Only mode.
15
NetDisk™ Mode
Once NetDisk is successfully installed, you will be able to Read Only or
Read/Write to NetDisk. Write privilege is given by entering the Write Key
during the registration step.
To access NetDisk, click NetDisk™ Administrator Tool
1. Read/Write – Read/Write mode is indicated by a Blue Circle.
.
NOTE: White circle means the NetDisk is being used by someone else.
A White NetDisk has same functionalities as a Gray NetDisk.
A. NetDisk - Place the cursor on the word NetDisk to view the functions.
i. Plug in Read Only - Enables you to change NetDisk mode from
Read/Write to Read Only.
ii. Unplug - Disables writing and reading to and from NetDisk.
When you select Unplug, a warning window will appear. Click Ok.
If the NetDisk is being used by any applications, NetDisk will not be
unplugged. In this case, wait until all the applications are finished
using NetDisk. Then try unplugging it again.
16
NOTE: If you still cannot unplug after several attempts, reboot
your computer. This may occur when unseen programs are still
using the NetDisk.
Unplugged NetDisk is indicated by Gray Circle.
a. Once a NetDisk is unplugged, NetDisk can be enabled back
to Read Only or Read/Write by selecting Plug in Read
Only or Plug in Read/Write.
NOTE: If you are enabling Read/Write and did not enter
Write Key in previous registration, the system will ask you to
enter Write Key.
Click Ok.
b. Edit a NetDisk will appear.
Enter the correct Write Key, then click Ok.
17
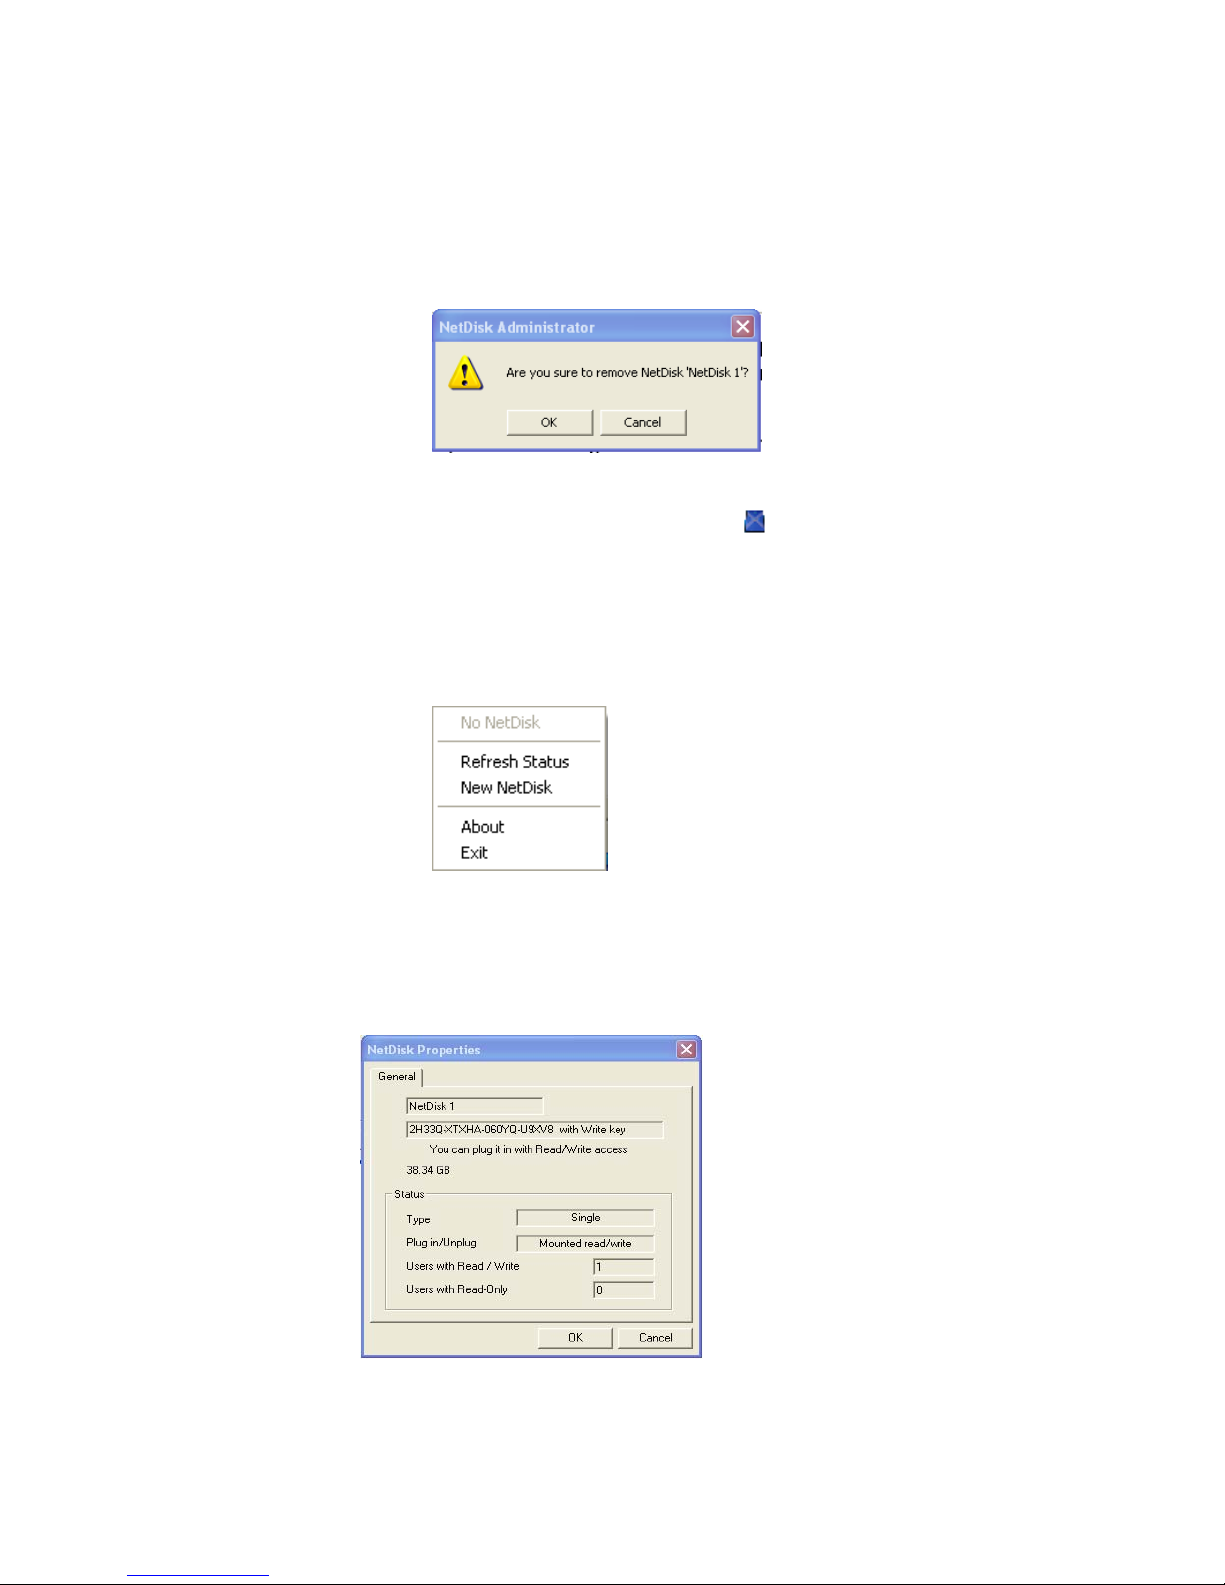
c. From unplugged mode, NetDisk can also be removed using
Remove.
When you click Remove, warning window will appear. If you
want to continue removing NetDisk click OK.
To check whether the NetDisk has been removed, click
NetDisk™ Administrator Tool
.
The removed NetDisk will be no longer visible.
The word No NetDisk indicates that there is no NetDisk
registered in your computer.
NOTE: If you want to add a NetDisk, see NetDisk™
Registration on 12.
iii. NetDisk Properties - Display properties of NetDisk.
18
B. Refresh Status - Updates the status of NetDisk that are connected to
the network.
NOTE: If a NetDisk gets displayed by black colored NetDisk, it means
network cable or power cable of the NetDisk is disconnected. This will
cause operations of other NetDisk to be slowed down. We
recommend you remove the Black NetDisk and re-register.
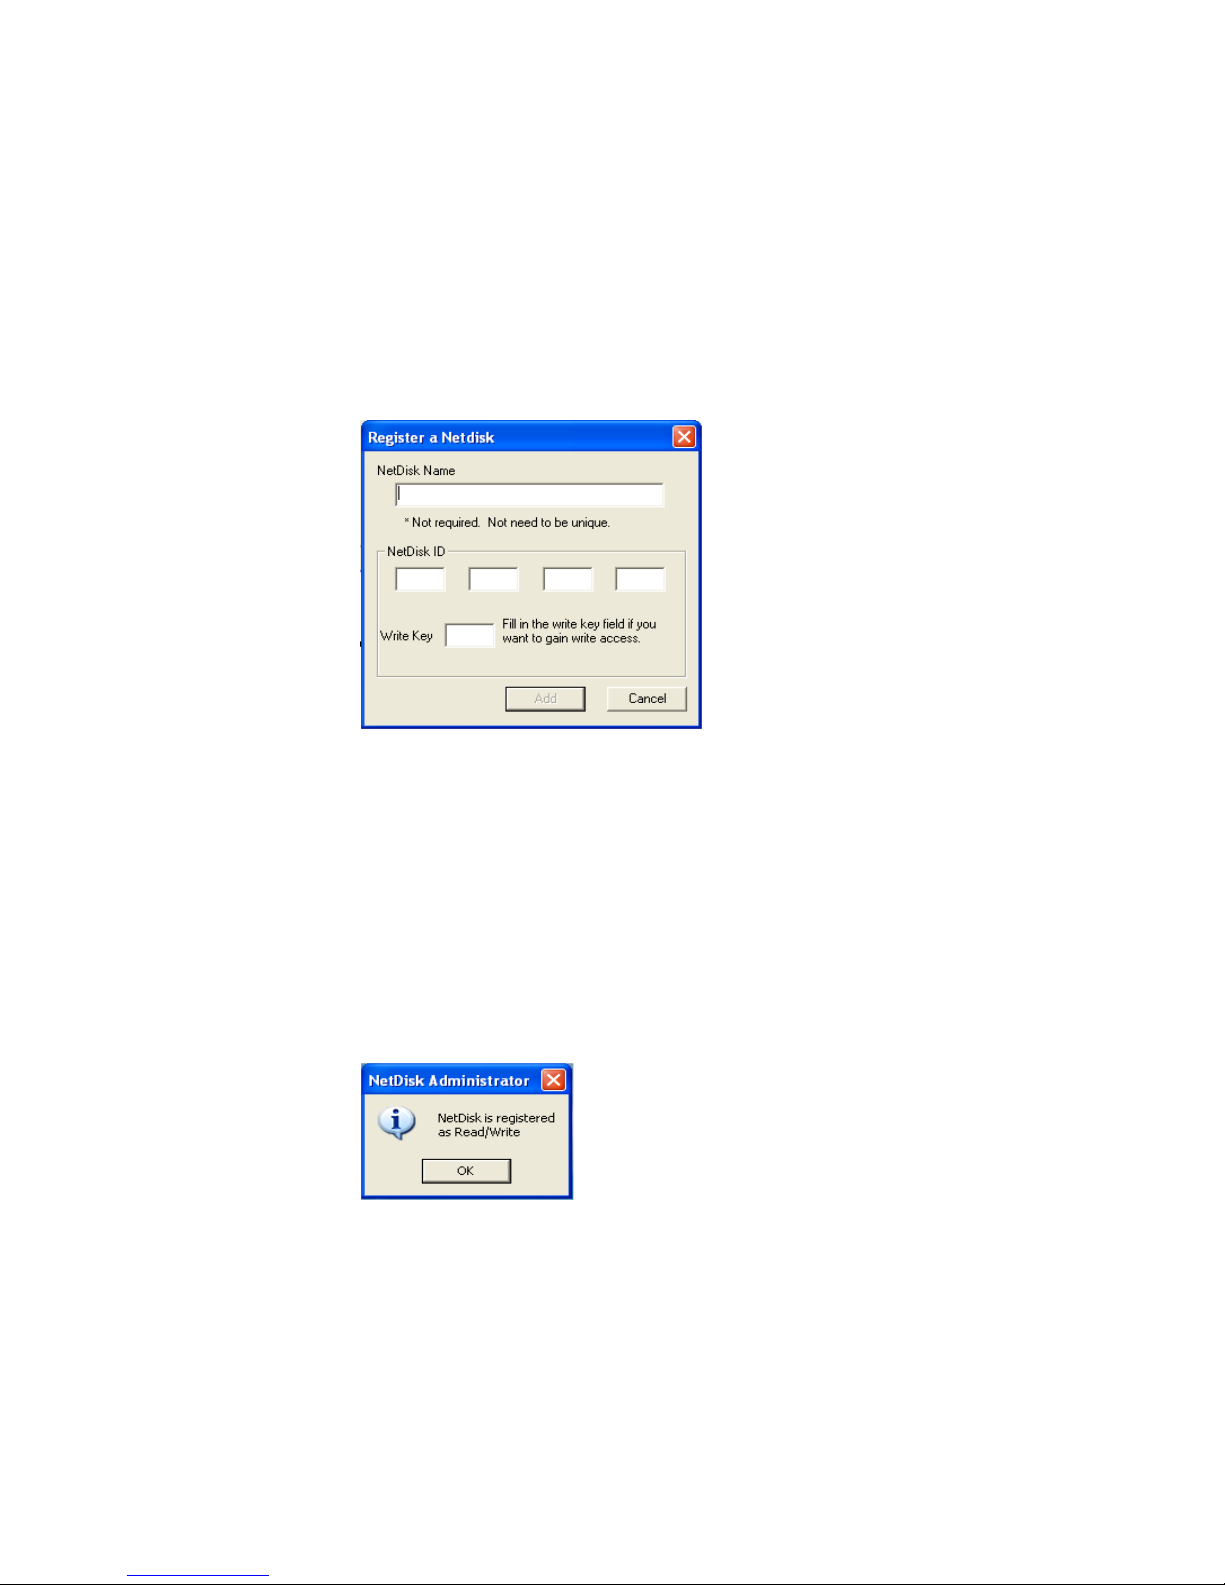
C. New NetDisk – Registers new NetDisk to your computer.
Enter NetDisk ID if you want to just read from NetDisk.
Enter both NetDisk ID and Write Key if you want to gain Read/Write
access of NetDisk.
Once you register the NetDisk, NetDisk Administrator will appear
confirming the registered NetDisk.
i. If the Write Key was entered, the NetDisk is registered as
Read/Write.
ii. If the Write Key was not entered, the NetDisk is registered as Read
Only.
19
 Loading...