

Page 1
XIEGU
G1M
Four bands HF transceiver
XIEGU Tech
User manual
V1.0.0-(Beta)
Page 2

Catalogue
1
General parameters 2
Panel Introduction 3
Operation 5
Page 3

2
Parameters
Receiving frequency:0.5~30MHz(Continuous)
Transmitting frequency: 3.5~4.0MHz
7.0~7.3MHz
14.0~14.35MHz
21.0~21.45MHz
Operating mode: SSB/CW
Receiving sensitivity: 0.35uV @12dB SINAD
Receiving dynamics: 90dB
Transmit power: 5W @13.8V DC
Spurious suppression: ≥45dB
Frequency stability: ±2.5ppm (30 minutes after turning on the power)
Audio output power: 0.5W
Operating Voltage: 12~15V DC
stand-by current: 0.5A @Max
Transmitting current: 2.5A @Max
Case size:: 97*40*155 (mm)
Page 4

3
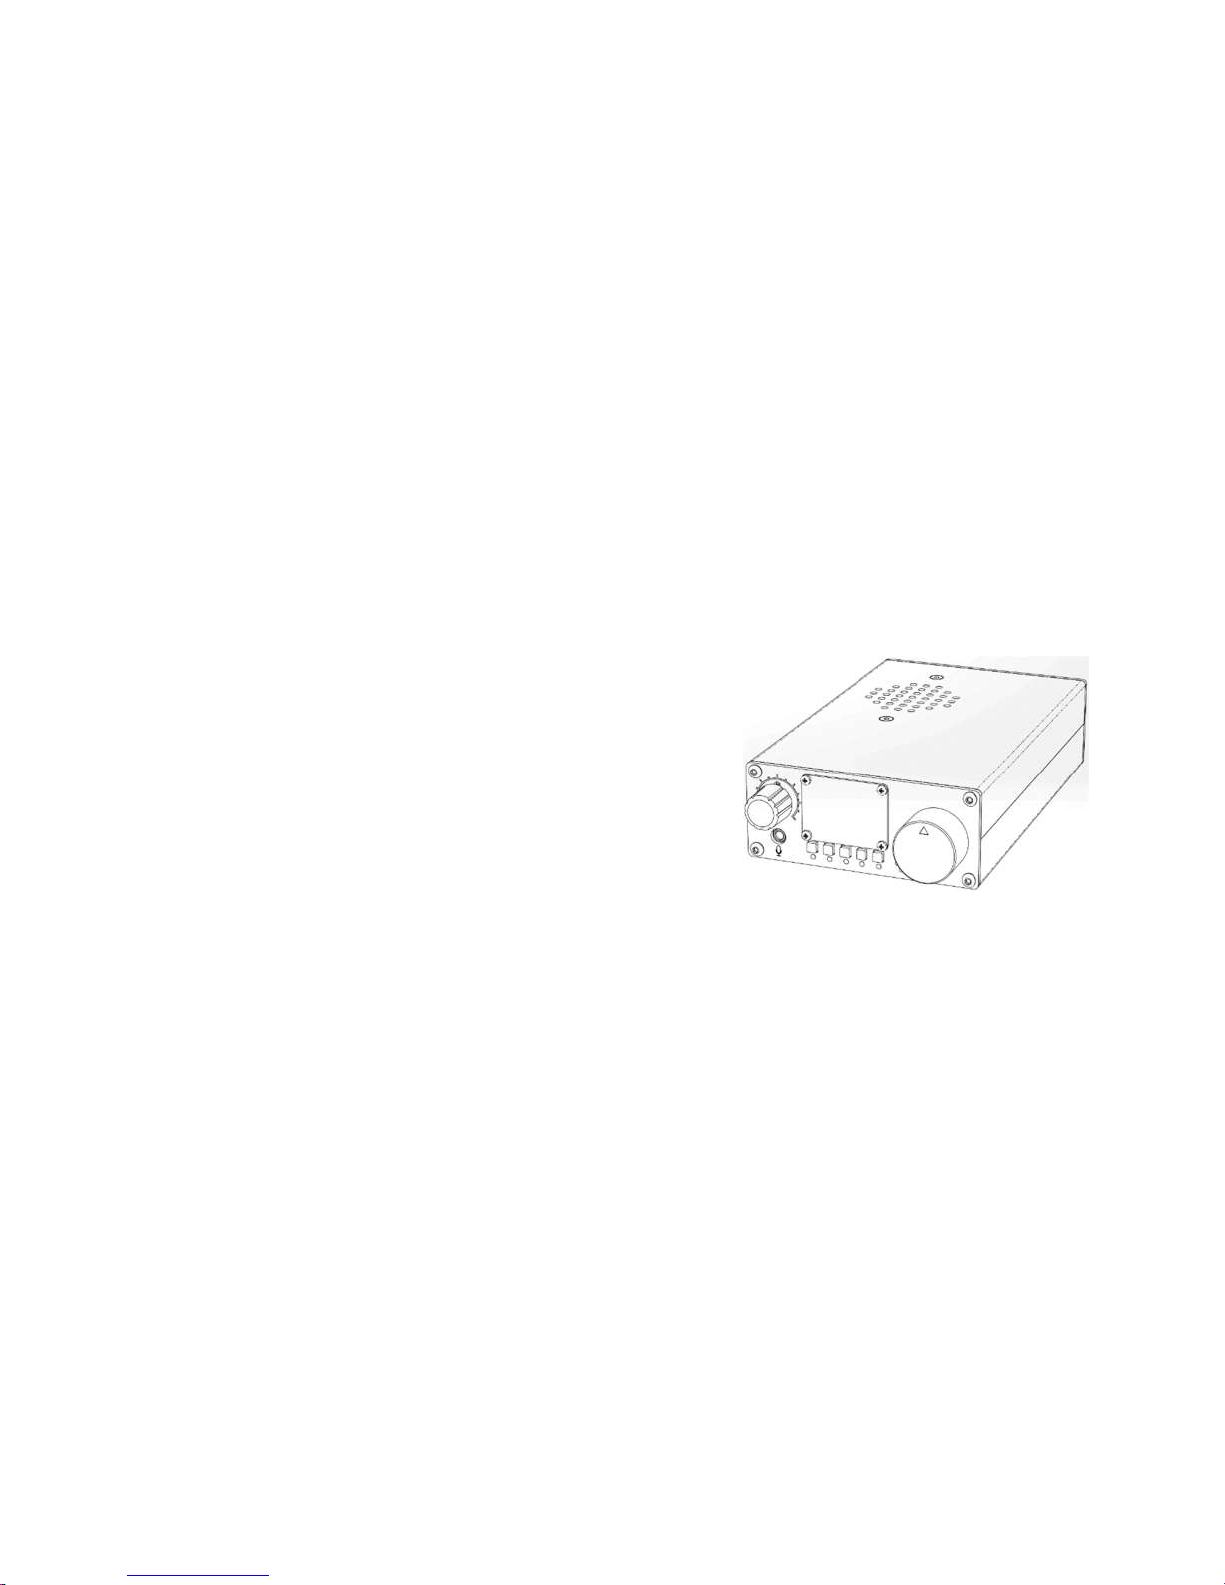
Front Panel
开关/音量
手咪插口
主旋钮
多功能按键
显示屏
Switch/volume
Mic socket
Multi-function button
Main knob
Screen
Page 5

4
Rear panel
① Power socket ⑤ ACC Interface
② External speaker socket ⑥Antenna interface
③ CW Key Interface ⑦Ground terminal
④ Computer communication interface
①
②
③
④
⑤
⑥
⑦
Page 6

5
Operation
Page one menu
TS+: The frequency stepping is shifted to the left by one;
MD: Mode selection. After pressing, they are respectively LSB-USB-CW;
A/B: switching of voltage controlled oscillators VFOA and VFOB;
A=B: Set VFOB to the same VFOA setting;
TS-: the frequency stepping is shifted to the right by one;
Page 7

6
Page two menu
V/M: frequency mode and channel mode
switching;
MC: Clearing the current channel storage in
channel mode;
V>M: When the current channel is empty, the
currently set frequency, mode and other
information are stored in the current channel;
Page 8

7
Page three menu
PRE: The switch of the preamplifier. When the
preamplifier is turned on, the small white point
before the PRE in the upper left corner of the
screen will be displayed, indicating that the
preamplifier is turned on; when the preamplifier is
turned off, the white point becomes hollow.
ATT: Switch of the pre-fader.
SPL: Inter-frequency transceiver.
Page 9

8
Page four menu
RIT:RIT: After the frequency fine adjustment is turned on, rotate the frequency knob to fine-tune the frequency.
When the RIT is turned off, the fine-tuning data is automatically cleared;
MUT: system prompt tone mute switch;
KYR: Key mode selection. Optional manual, automatic, and left-hand mode and right-hand mode.
Button: Short press this button to lock the keyboard and frequency knob, and the locked
symbol is displayed in the upper right corner; press and hold this button to enter the project menu
setting interface.
Page 10

9
Project menu description
Note: Please do not change the settings of the project menu at will, so as not to cause the rig
to work abnormally!
Press and hold the "LK/SYS" button for 2s to enter the project menu setting interface.
In the project menu mode, turn the encoder knob to select the option. When you want to select a certain setting function, after
the encoder is rotated to the current item, press the encoder button to enter the setting state, the leftmost button and the most
The right button is to move the current step. Turn the frequency knob to perform the selected digit increase and decrease
operation.。
01.IF OFST: IF setting;
02.LSB BFO: LSB mode BFO frequency setting;
03.USB BFO: USB mode BFO frequency setting;
04.CW BFO: CW mode BFO setting;
Page 11

10
05.CW TONE: CW mode side tone tone setting;
06.CW TDLY: CW transmission delay setting;
07. KYR SPD: Automatic telegraph key transmission rate setting;
08.TXP TIM: Long-term protection time setting, in seconds;
09.BRITNES: screen brightness setting;
10.CNTRST: screen contrast setting;
11.FBND TX: Non-amateur frequency prohibition of launch settings;
12.DDS CLK: DDS clock setting;
13.DDS MLT: DDS multiplier setting;
14.RST ALL: The project menu parameters are reset. Select this item, set 0 to 1, exit the item, press the LK/SYS
button, rotate the frequency knob, select yes, press the frequency knob again to exit the project
menu, then switch the machine again, the setup parameters of the project menu will be restored. To
the default parameters.
★ After all settings have been adjusted, press the frequency knob to exit the item, then press the “LK/SYS” button.
The system prompts whether to save the settings and displays “NO” and “Yes”. Rotate the frequency knob to
select the corresponding item and press it again. The frequency knob exits the project menu..
Page 12

11
Copyright 2018
Chongqing Xiegu Technology Co., Ltd. reserves all rights to this manual, and reproduction of any
part of this manual is prohibited without permission.
------------------------------------------------------------------------------------------------
V1.0.0(Beta)
1010160206-C
 Loading...