

XIDU PhilBook User Manual

XIDU PhilBook
User Guide
WWW.XIDU-E.COM
All pictures and illustrations in this document are for your
reference only and may differ from the final product.

2
CONTENTS
LAYOUT
3-4
USING YOUR DEVICE FOR THE FIRST TIME
5-7
HOT KEY FUNCTIONS
8
TOUCHPAD & GESTURES
9-10
POSITIONING THE DEVICE
11
USING HEADPHONES / BASIC OPERATIONS
12-13
GETTING STARTED WITH WINDOWS 10
14-15
NARRATOR MODE / SYNCHRONIZING YOUR DEVICE
16
COPY MUSIC, PHOTOS AND VIDEOS
17
TAKING CARE OF YOUR XIDU PhilBook
17
RESETTING YOUR DEVICE
18
SPECIFICATION
19
FREQUENTLY ASKED QUESTIONS
20-23
IMPORTANT SAFETY INFORMATION
24-29
WARRANTY
30
3
LAYOUT
3
5.
1
2
4
6
7
8
9
10
11
13
14
12

4
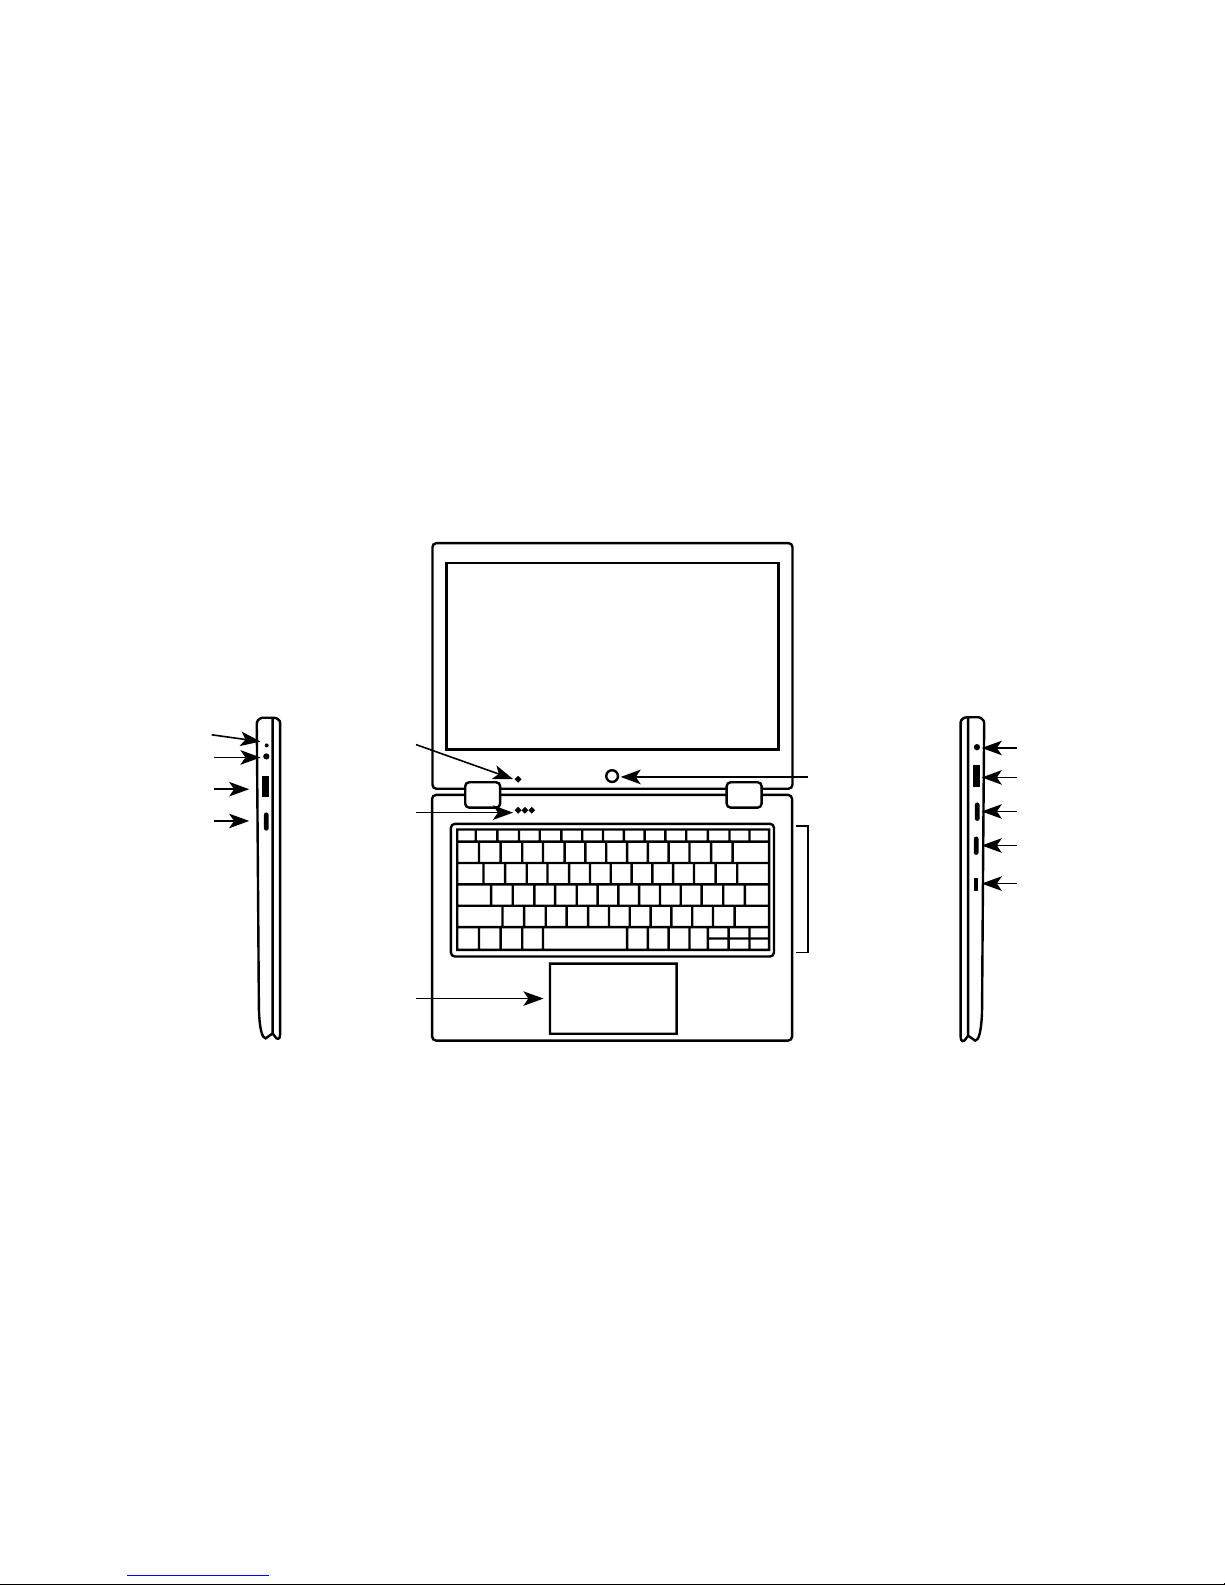
FEATURE FUNCTIONALITY
1. Microphone Records sounds. Provides sound input while making calls using web-based applications
2. Camera Capture a front view picture or record videos. Use while making video calls
3. Power light Indicates that the power is on
4. Keyboard Enter letters, numbers, and symbols.
5. Precision Touchpad Functions like a computer mouse.
6. DC Indicator
Indicates that the DC is connected and the XIDU PhilBook is charging
7. DC-In Socket Connect the supplied power adapter for charging the battery
8. USB port Connect optional USB devices
9. Mini HDMI port
Connect HD television via optional Mini HDMI cable and switch the display to a wider screen
(not included)
10. Audio port (3.5 mm)
Connect a headset, headphones, microphones, or other audio equipment to listen to stereo
sound, record audio, or make web phone calls
11. USB port Connect optional USB devices
12. MicroSD card slot Reads and writes files stored on a MicroSD card
13. Power button Press and hold to turn the device on or off. Press to turn the display on or off
14. Keyboard Lock Locks the keyboard functions when in tablet mode
5
USING YOUR DEVICE FOR THE FIRST TIME
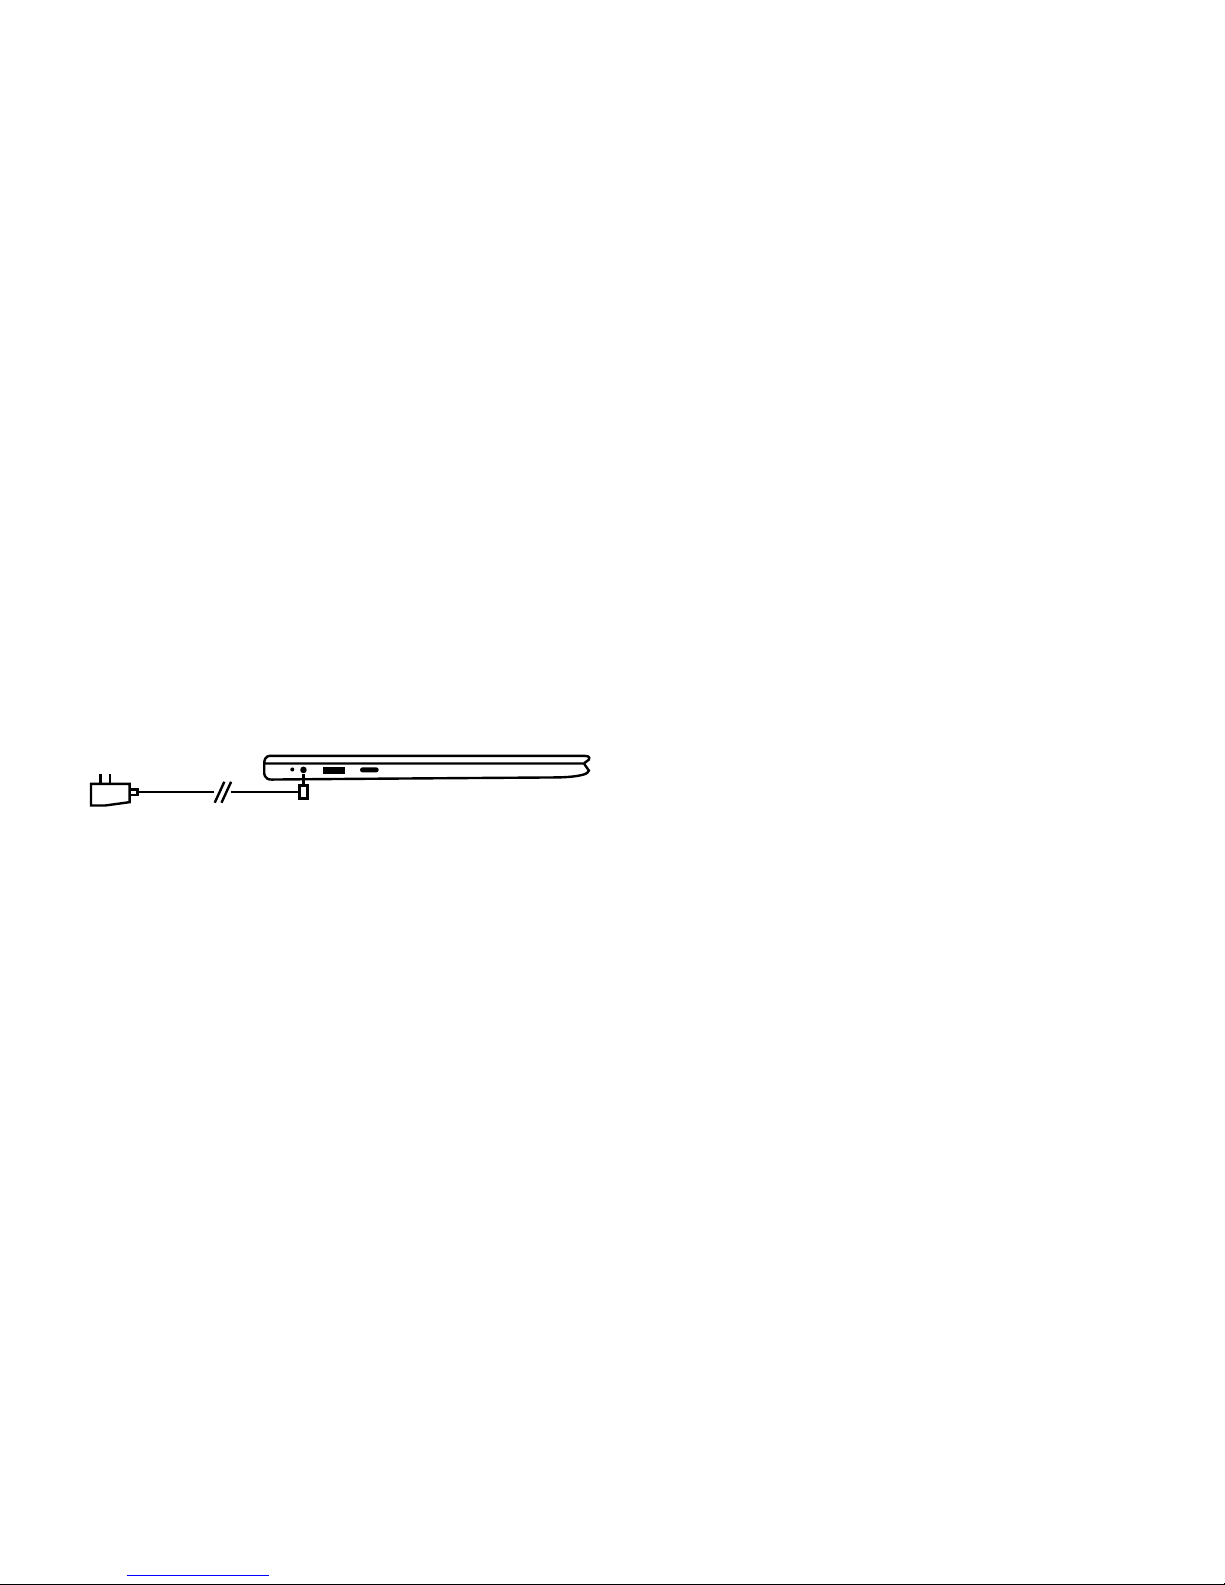
CHARGING THE DEVICE
You might need to charge the battery before using your
XIDU PhilBook.
1. Plug the power adapter into the DC-In socket;
2. Connect the power adapter to an electrical outlet and
charge the device until the battery is fully charged.
Note:
1. The battery is not fully charged when you unpack
your device;
2. A fully discharged battery takes about 5 hours to
fully charge;
3. When the battery is being charged, the LED indicator light
is flashing red. When the battery has been fully charged,
the LED indicator light is red.
Caution:
1. Charge the battery in an ambient temperature of
0°C to 35°C;
2. Use the supplied power adapter only, to charge your
device. Using unauthorised power adapters may severely
damage your device.

6
USING YOUR DEVICE FOR THE FIRST TIME
TURNING ON/OFF
TURNING ON THE DEVICE
Note: This XIDU PhilBook has been preinstalled with
Windows.
You will need to perform an initial setup before the XIDU
PhilBook can be used.
1. Press and hold the Power button for 2 seconds to turn
your device on. The lock screen will appear;
2. The device is now ready for use.
Note: If the login screen is not enabled in Windows, you will be
taken directly from the lock screen to the start screen.
TURNING OFF THE DEVICE
You can turn off the device in two ways:
1. Press and hold the Power button for a minimum of
4 seconds;
2. Swipe-down the shutdown confirmation screen to the
bottom edge of the display to turn off the device.
CONNECT TO WI-FI
Turning On/Off Wi-Fi:
1. Select the Wi-Fi icon in the notification area, in the
lower-right corner of the screen, to view the available
Wi-Fi hotspots;
2. Select available Wi-Fi icon to establish a connection.
Connecting to a network:
1. Select the Wi-Fi icon in the notification area, in the
lower-right corner of the screen, to view the available
Wi-Fi hotspots;
2. Select an available network from the list and
select Connect;
3. Input the password, if necessary, then select Connect
to begin an internet connection.
7
USING YOUR DEVICE FOR THE FIRST TIME
Inserting a MicroSD Card
1. Align the MicroSD Card so that the pins are pointed toward
the card slot;
2. Push the MicroSD Card into the card slot until it locks
into place.
Removing a MicroSD Card
Caution: Removing the MicroSD Card while it is in use may
cause data loss or result in application errors. (Ensure all data
is saved to the MicroSD Card before removing.)
1. Select the Tray button in the notification area, in the lowerright corner of the screen;
2. Select Safely Remove Hardware;
3. Select Eject XXXX SD Card. A message will appear
confirming that the MicroSD Card can be safely removed. If
a warning message appears stating that the MicroSD Card
cannot be removed, ensure all data transfers involving the
MicroSD Card are complete;
4. Press down the MicroSD Card to release it;
5. Slide the card out after it ejects from the MicroSD
Card slot.
* MicroSD card is not included. Use only compatible memory
cards. Incompatible memory cards may damage to the
XIDU PhilBook and corrupt the data stored on the card.

8
HOT KEY FUNCTIONS
FN+F1 Sleep mode FN+F7 Play/Pause Track
FN+F2 Web browser homepage FN+F8 Previous Track
FN+F3 Touchpad On/Off FN+F9 Next Track
FN+F4 Decrease the volume FN+F10
Temporarily halt the actions of the
program being run
FN+F5 Increase the volume FN+F11
Enable/disable the Insert function
FN+F6
Mute the XIDU PhilBook
FN+F12 Capture Screenshot
9
TOUCHPAD & GESTURES
Touchpad
The keyboard comes with a precision Touchpad which can be
used as a built-in mouse. Place and drag your finger on the
Touchpad to move the mouse pointer across the screen.
The bottom of the Touchpad can be used as the left and right
mouse-click.
Gestures
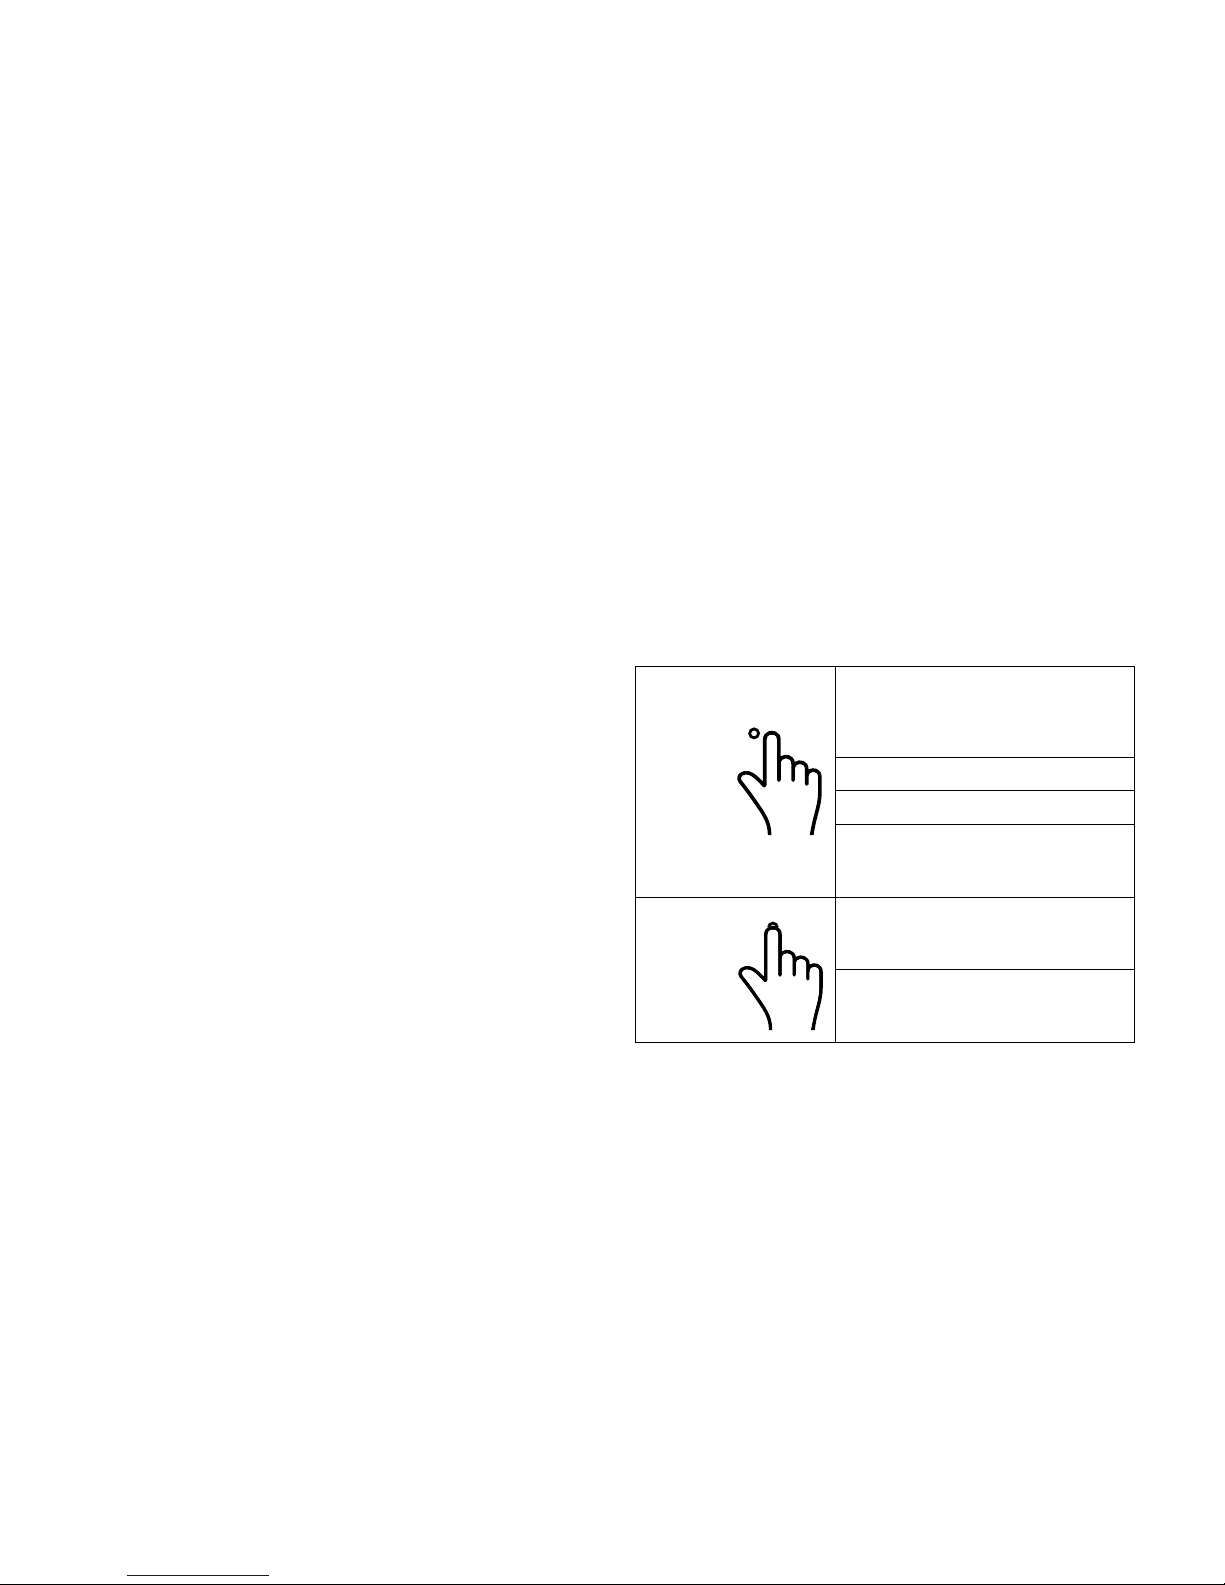
Your XIDU PhilBook has a multi-touch display. You can
touch the screen to operate the tablet.
Touch
Tap gently on
the display
with your
fingertip
Select items on the screen,
including options, entries, images
and icons;
Start apps;
Touch buttons on the screen;
Input text using the on-screen
keyboard
Touch & Hold
Touch & hold
your finger
on the
display
Display detailed information about
an item;
Open the context menu of an item
to perform further actions
10
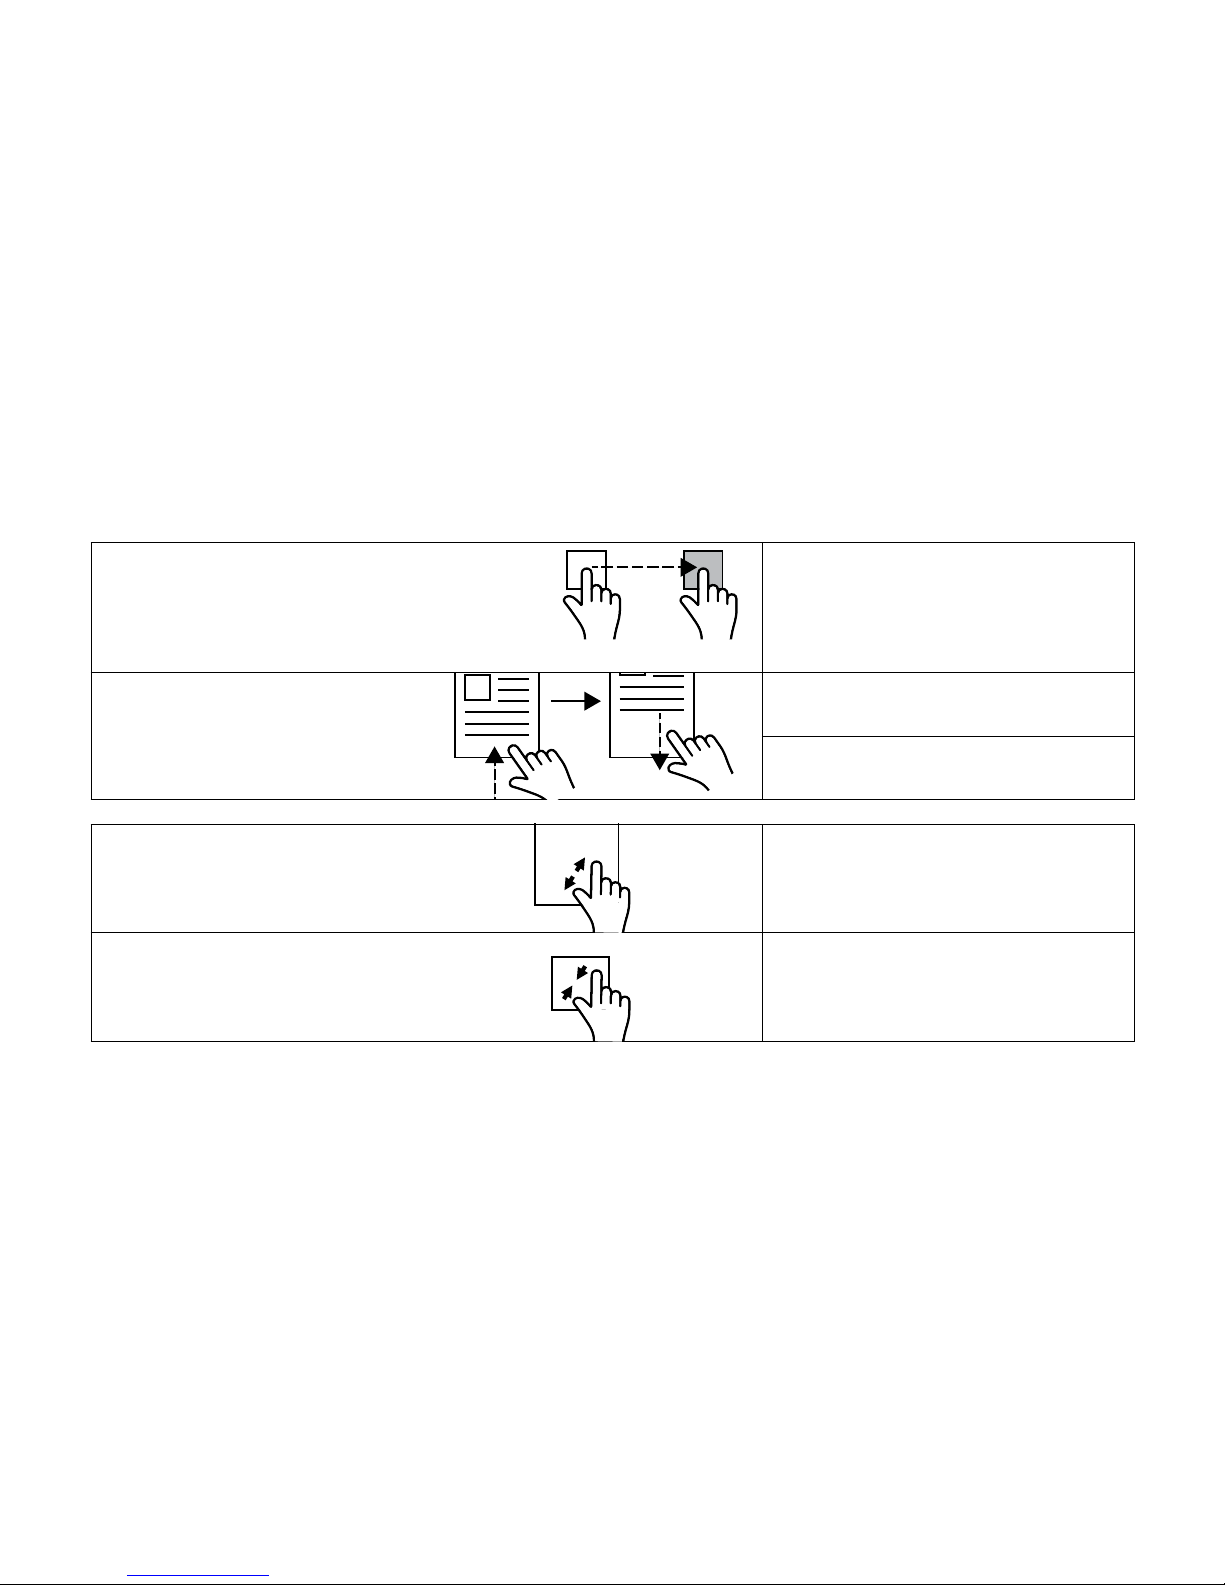
Touch
1. Touch & hold your finger on an item on the screen;
2. Keeping your finger in contact with the display,
move your fingertip to the desired location;
3. Take your finger off the display to drop the item in
the desired location
Move items such as images and icons on
the screen
Swipe or Slide
Touch & hold your finger on the display
Scroll through the Start menu, web pages,
lists, entries, photos and contacts
Close an app (swipe the app downwards
towards the bottom of the screen)
Zoom in
Touch the display with two fingers and
then move the fingers apart
Enlarge the view of an image or web page
Zoom out
Touch the display with two fingers and
then move the fingers closer
Reduce the view of an image or web page
 Loading...