

Page 1
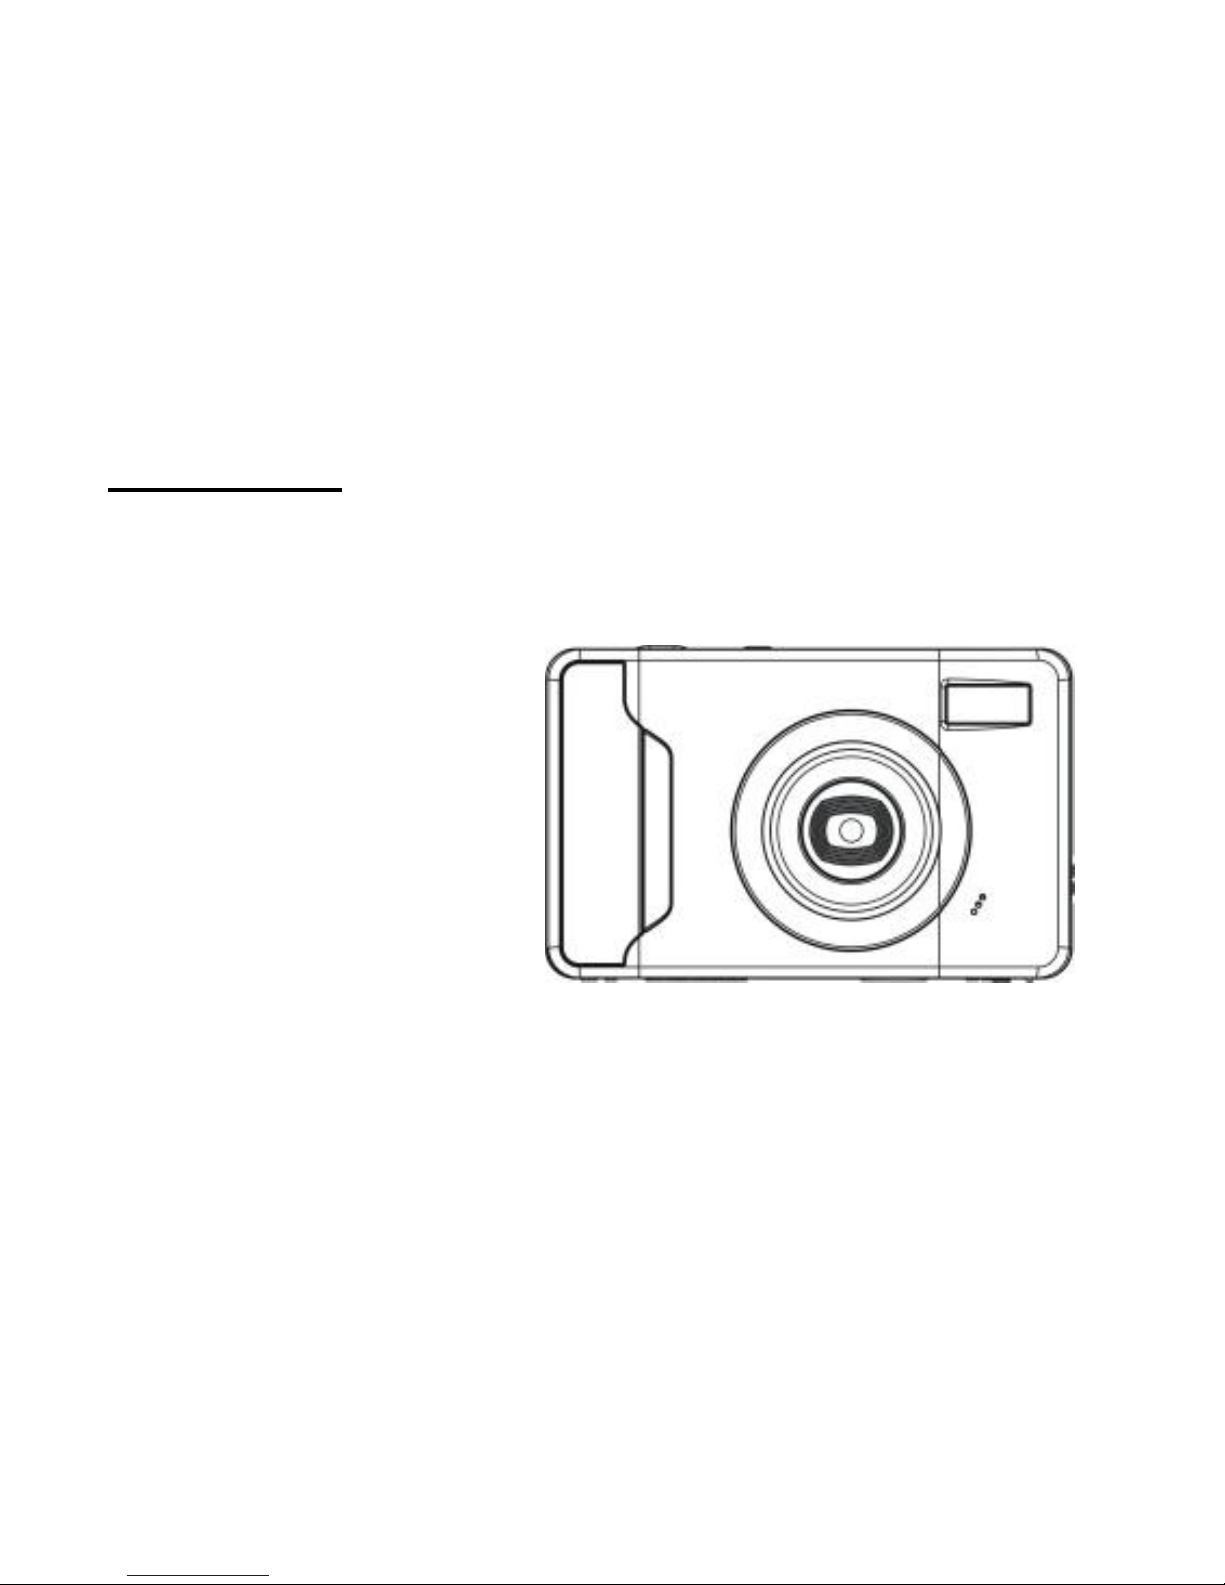
Digital Camera User’s Manual
CD500DTGF
Please read this manual carefully before using
and keep it for future reference
Page 2

Table of content
Introduction....................................................................................................................................................2
Key Features..................................................................................................................................................2
What Your Camera Includes..........................................................................................................................2
Computer System Requirement for Windows 2000/XP...............................................................................3
Computer System Requirement for Windows Vista.....................................................................................3
Computer System Requirements for Macintosh...........................................................................................3
Quick Look at Your Camera..........................................................................................................................4
The Mode Switch...........................................................................................................................................5
Main Icons on the LCD..................................................................................................................................6
Prepare Your Camera for use........................................................................................................................8
Install battery..................................................................................................................................................8
Install SD memory card.................................................................................................................................9
Starting Your Digital Camera.......................................................................................................................10
Taking Photos...............................................................................................................................................10
Install PhoTags Express Software...............................................................................................................25
Everything you need to get the most from your photos..............................................................................27
Download photos to your PC.......................................................................................................................28
Photags Express software owner manual...................................................................................................31
Viewing Videos on Your Computer..............................................................................................................32
Maintenance of Your Digital Camera...........................................................................................................32
Appendix A: Technical Specifications..........................................................................................................32
Appendix B: Troubleshooting....................................................................................................................33
Page 3

Introduction
Thank you for purchasing this kind of Digital Camera. Not only can you take good quality digital
photos and videos but you can also use your camera as a removable disk. Everything you need to take
quality photos and videos is included with your camera. Please read this manual carefully before using.
Key Features
Ÿ Digital Video resolutions-640x480 Pixels (VGA), 320x240 Pixels (QVGA).
8.1 mega pixels camera with choice of 6digital camera resolutions- 3264X2448Pixels (8M),
3648X2048Pixels (HD 7M) , 2592X1944Pixels (5M) , 2048X1536Pixels (3M) ,
1920X1080Pixels (HD 2M) 640X480Pixels (VGA)
Ÿ 2.4 inch TFT LCD
Ÿ 8x Digital Zoom function
Ÿ Anti-Shake function
Ÿ SD memory card slot accepts SD compatible memory card up to 8GB.
Ÿ Built in Flash
Ÿ PhoTags Express software for managing and enhancing your photos, printing, sending
photos by e-mails and much more.
What Your Camera Includes
Ÿ Digital Camera
Ÿ PhoTags Express software installation CD
Ÿ USB cable
Ÿ User’s manual
Ÿ Strap
Ÿ Hop pocket
Page 4

Computer System Requirement for Windows 2000/XP
To be able to download photos and videos to your PC you will need the following minimum configuration:
Ÿ Pentium processor or above with Windows 2000, XP
Ÿ 128 MB RAM, more than 125MB free disk space.
Ÿ Available USB Interface
Ÿ CD-ROM Drive
Ÿ Recommended screen resolution 1024 X 768 pixels or higher.
Ÿ 16-bit color or higher display adaptor.
Computer System Requirement for Windows Vista
To be able to download photos or videos to your PC you will need the following minimum configuration:
Ÿ Windows Vista
Ÿ 800MHz processor and 512 MB of system memory
Ÿ 20GB hard driver with at least 15GB of available space
Ÿ Support for Super VGA graphics
Ÿ Available USB Interface
Ÿ CD-ROM Drive
Computer System Requirements for Macintosh
Ÿ Power Macintosh G3 500 MHz or higher
Ÿ Mac OS X version 10.2.6 or later
Ÿ 128 MB or more available system RAM (256 MB recommended), 150 MB free disk space
Ÿ 800 x 600 or higher-resolution monitor displaying millions of colors
Note: This hardware is plug and play compatible when used on a Mac, however, the included software
can be used on Windows operating systems only.
Page 5

Quick Look at Your Camera
Page 6
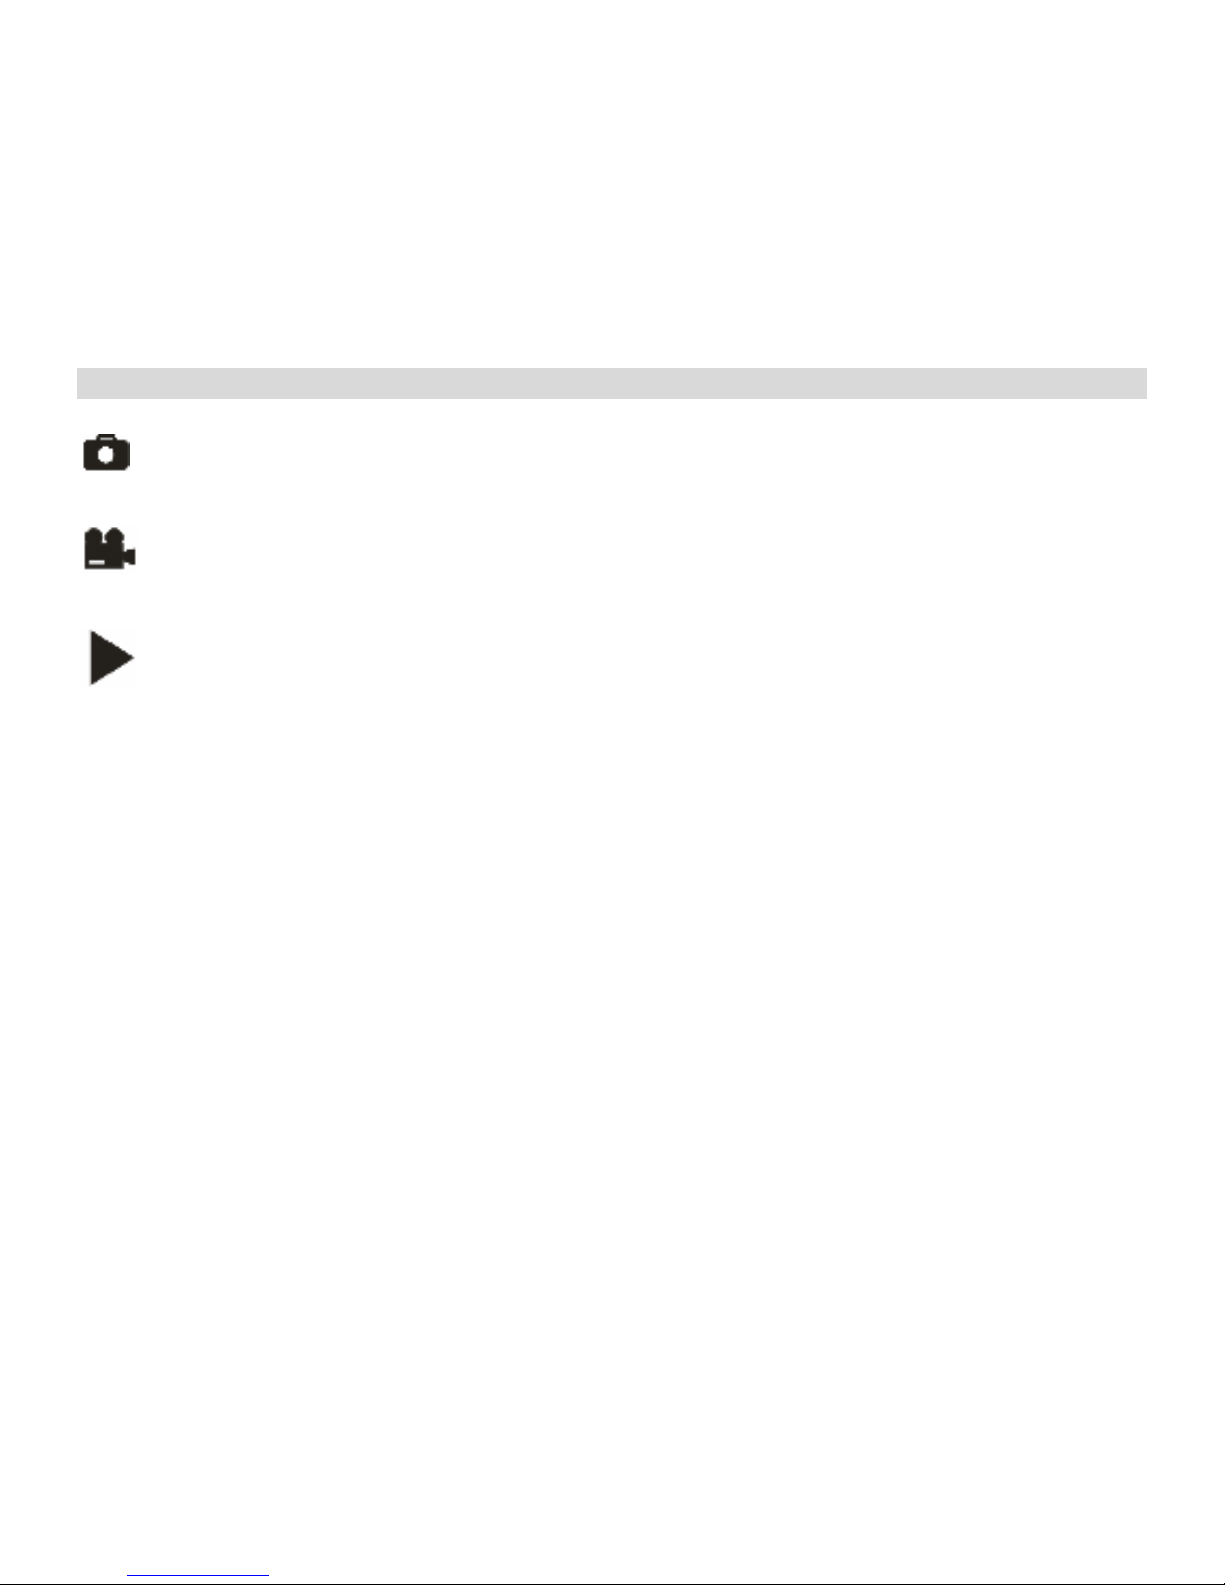
The Modes of Digital Camera
There are 3 modes on your camera.
• Camera Mode:
Take still photos
• Video Mode:
Capture video files
• Playback Mode:
View, print, edit photos and view videos
Page 7
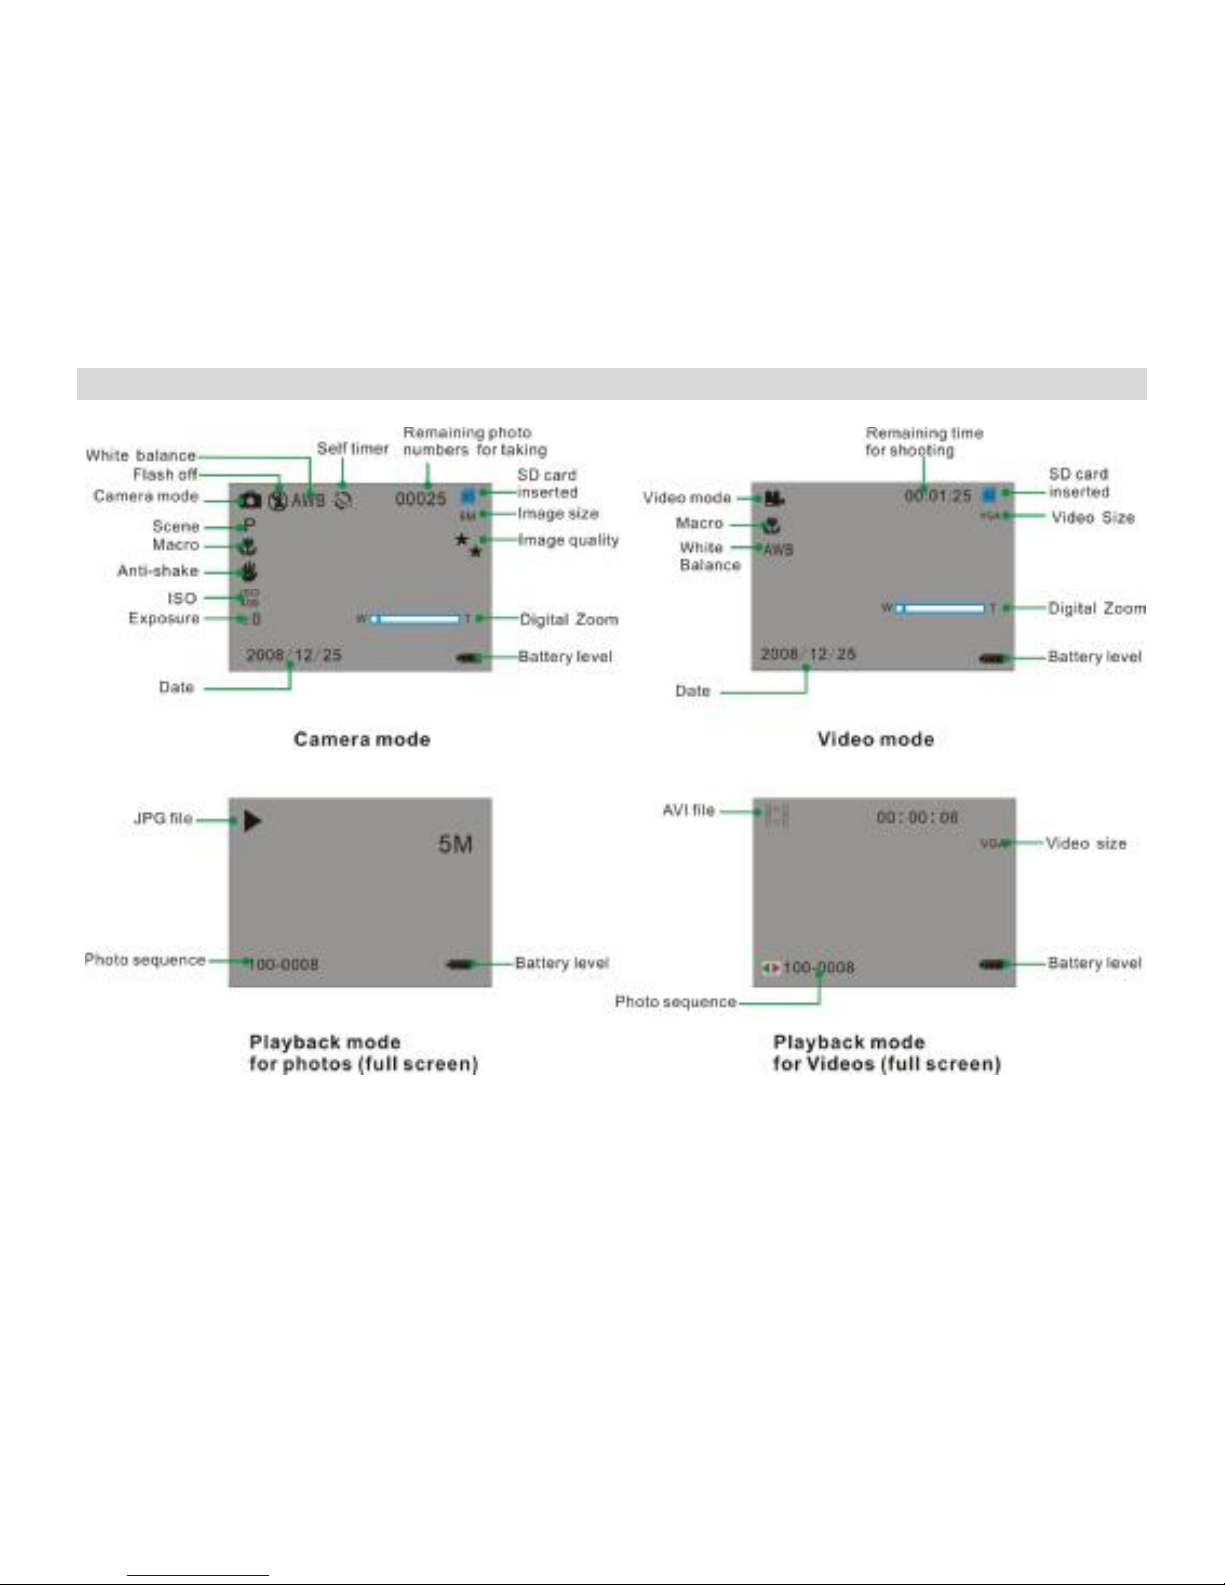
Main Icons on the LCD
Page 8

Battery power level
Full battery power
Medium battery power
Low battery power
Photo quality
Normal quality
Fine quality
Super quality
Flash
Force Flash
Auto
Red eye reduction
No Flash
Modes
Camera Playback
Video
Scenes
Auto Night Portrait Night Scenery
Portrait Scenery Sport
Party Beach High Sensitivity
Self-timer On(10s)
Self-timer On(2s)
Digital Zoom
Protect
Protect On
White Balance
Auto Incandescent
Fluorescent Cloudy
Daylight
Anti-Shake
Anti-Shake on
Anti-Shake off
Macro/Far function
Macro capture
Far capture
Page 9

Prepare Your Camera for use
Install battery
Your digital camera requires 3 AAA batteries for power, please refer to the following illustration as correct
installation method:
1. Slide and open the battery door.
2. Insert the battery correctly as the correct polarity facing up with the battery cover.
3. Close the battery door.
Note:
1. “Low battery” will show on the LCD when battery is insufficient and your camera will be off.
2. Please uninstall your battery when you don’t intend to use your camera for a long time to forbid
them leakage and corrosion.
Page 10

3. Your digital camera will be off when the battery is insufficient.
4. The photos will be lost when the camera off or open the battery door, transfer the test
photos/videos to PC as often as possible.
5. Do not mix old and new batteries.
6. Do not mix alkaline, standard (carbon-zinc), or rechargeable (nickel-cadmium metal
hydride) batteries.
Install SD memory card
This camera supports any compatible SD memory card up to 8GB. Limited internal memory is only for
you to take test photos, these photos will be lost when you turn off your camera or remove the batteries.
For normal use, an SD memory card needs to be inserted. Please refer to the below diagram for correct
installation method:
Locate the SD memory card slot, insert an SD memory card as above, until you feel and hear a “Click”
sound. When the icon appears on the LCD screen this indicates that your SD card is installed
correctly.
Note:
1. After the SD memory is inserted successful, “Move to card” will appear on the screen, the photos
you have taken will be stored on the SD memory card.
Page 11

2. Formatting will delete all data on the SD memory card including protected data.
3. Don’t remove the SD card during formatting as this may damage the card and render it unusable.
4. Download the photos/videos to your PC and delete the photos and videos from your SD Card in
order to continue using your camera.
Starting Your Digital Camera
Your digital camera has 3 modes - Camera mode, Video mode and Playback mode.
Camera mode is for you to take still photos. You can shoot video files while in Video mode. In Playback
mode you can preview photos/videos, delete, rotate, protect, crop and print your photos.
Power on
Press the Power button once to turn on your camera. The LCD will light up and it will sound a “beep”, this
indicates your camera is turned on and ready for use.
Power off
Press the Power button once to turn off your camera. When there is insufficient battery power, your
camera will be off automatically after a moment.
Camera Mode
Taking Photos
You can compose your shot using the LCD screen. Hold the camera steady and press the shutter button
to take the photo. There will be a short delay while the camera saves the photo to memory.
After each photo is shot (when the camera returns to icon mode) the numbers of photos left to shoot at
this resolution is displayed on the top right of the LCD screen.
When the camera's memory (photo capacity) is full, the LCD screen will display a message “Memory
Full Insert a SD memory Card to Transfer and Take More Photos!”
Page 12
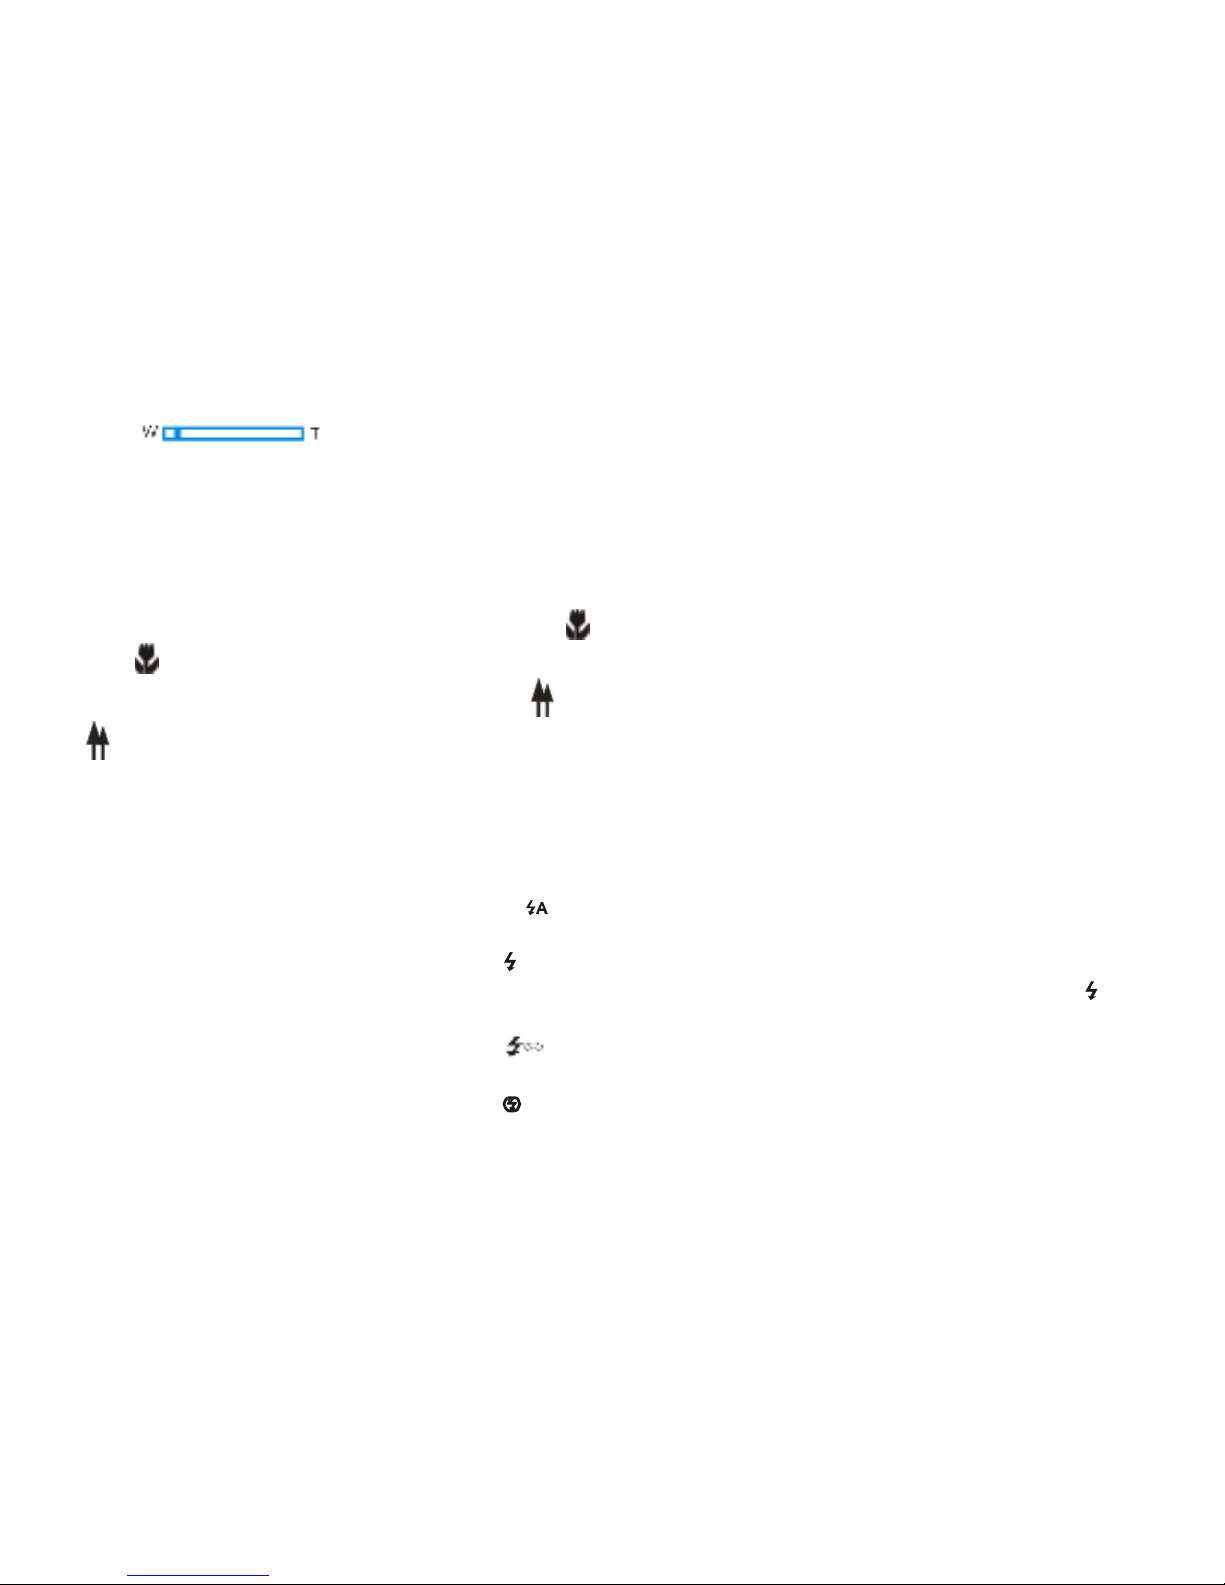
Digital Zoom function
You can magnify your subject using the digital zoom. Use the T and W buttons to adjust the zoom. The
icon will show on your LCD screen. Press the T button to zoom in on your subject.
Push the W button to zoom back out.
Macro/Far shooting
The camera has the function that capture object in very near distance or very far distance per your
request.
Macro shooting: slide the Macro/Far switch to position which is on the left side of the camera, until
icon appears on the LCD screen, it indicates the macro shooting is on.
Far shooting: slide the Macro/Far switch to position which is on the left side of the camera, until icon
appears on the LCD screen, it indicates that the far shooting is on.
Flash
In low light conditions it is best to use the built-in flash. You can also use the flash to compensate for
backlight conditions.
To set the flash:
Press the Up button repeatedly until the icon shows on the LCD screen. This will activate the
automatic flash.
Press the Up button repeatedly until the icon appears on the LCD-++ screen. This means the flash
function has been "forced on" (manual flash). If the flash is not ready, a LED will light up and the icon
will flash repeatedly - wait until the flash is ready before taking a photo.
Press the Up button repeatedly until the icon shows on the LCD screen. The red eye reduction is
open.
Press the Up button repeatedly until the icon appears. This will turn off the flash function.
Self-Timer
You can include yourself in a photo by using this feature to delay the time between your pressing the
Page 13
shutter and when the photo is actually taken. It is recommended that you use a tripod when you use the
self-timer.
1. Press Down button repeatedly to select or seconds self timer.
2. Press the shutter button to start a 10 or 2 second count down. After 10 or 2 seconds the photo will
automatically be taken.
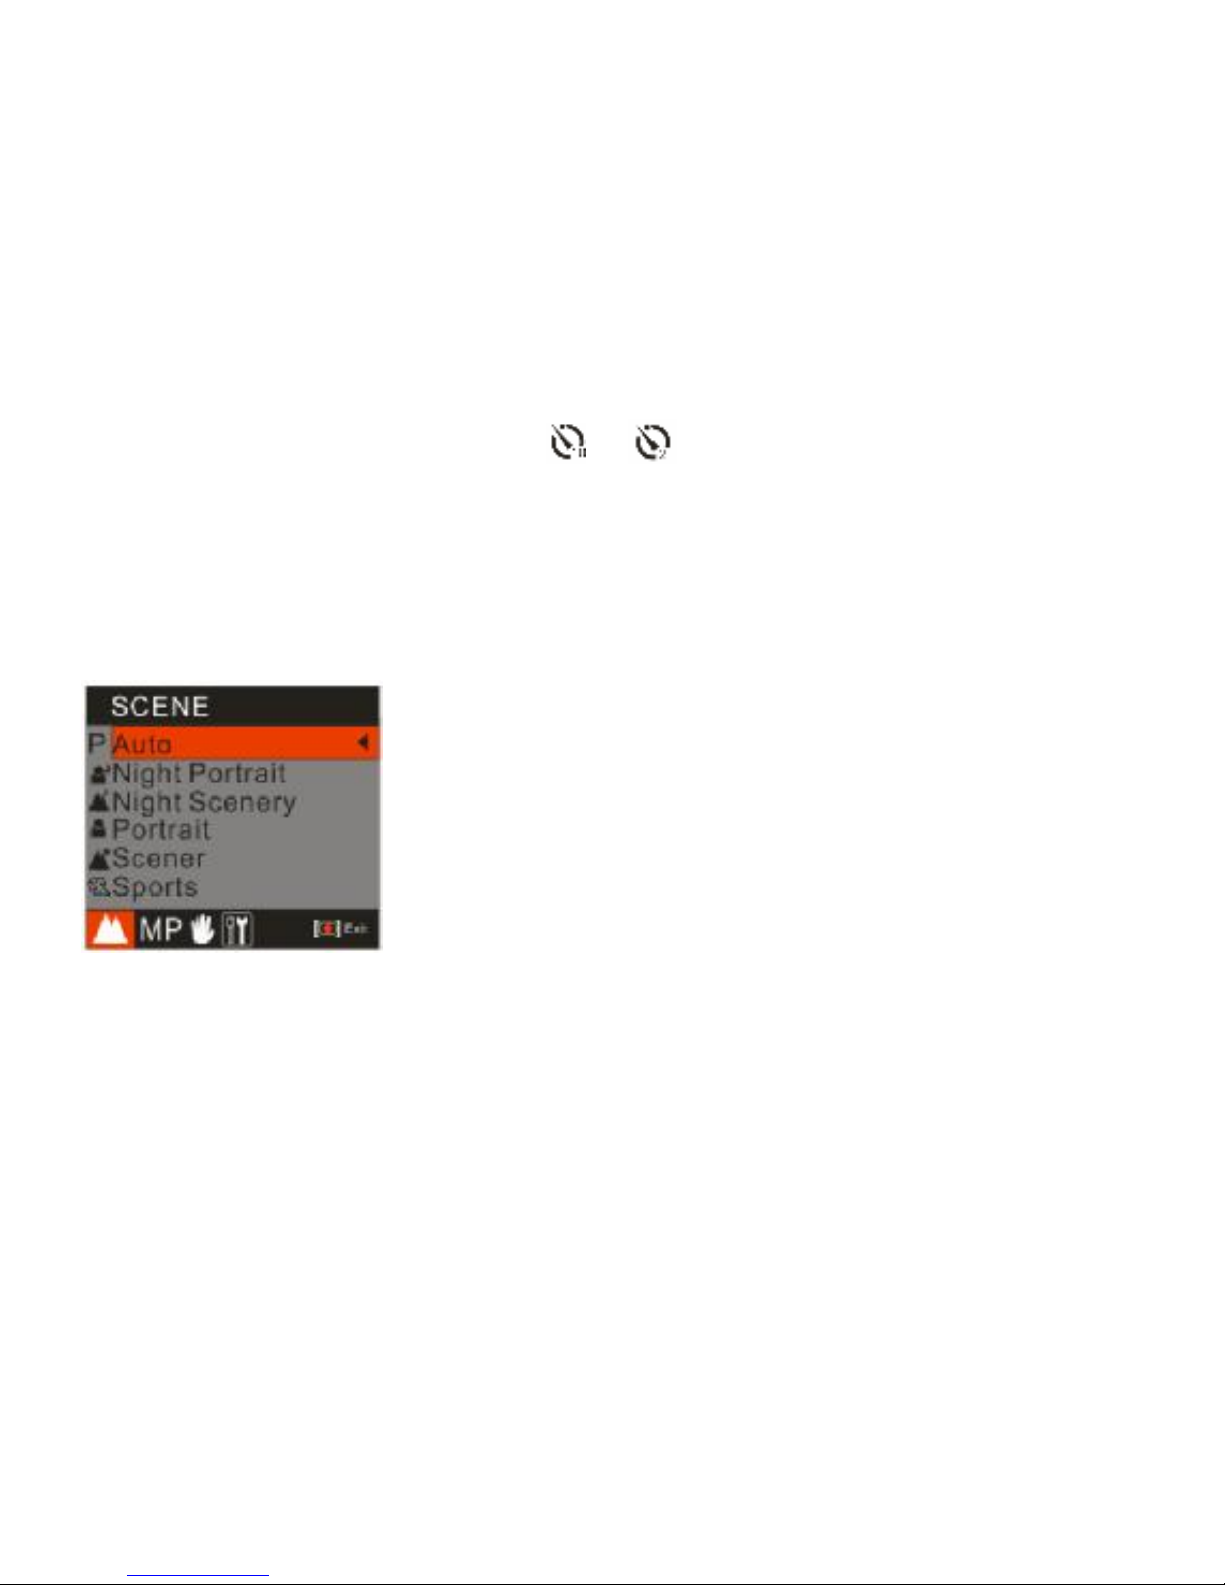
Scene
Your camera supplies many scenes for you to take photos in almost any environment. Scene included
with your camera are Auto, Night Portrait, Night Scenery, Portrait, Scenery, Sport, Party, Beach or High
Sensitivity. You can choose your best scenery according to your light and environmental conditions.
1. Press the Menu/OK button.
2. Press Up/Down button to select scene per your requirement.
3. Press Menu/OK button to confirm and exit to standby mode.
Image Size
The image size and quality settings determine the number of photos that can be saved and the amount
of memory required for each photo. The higher of the photo quality the more memory it will take. The
image size and quality will also affect the maximum size you can print your photo effectively. To set the
Image size:
Page 14
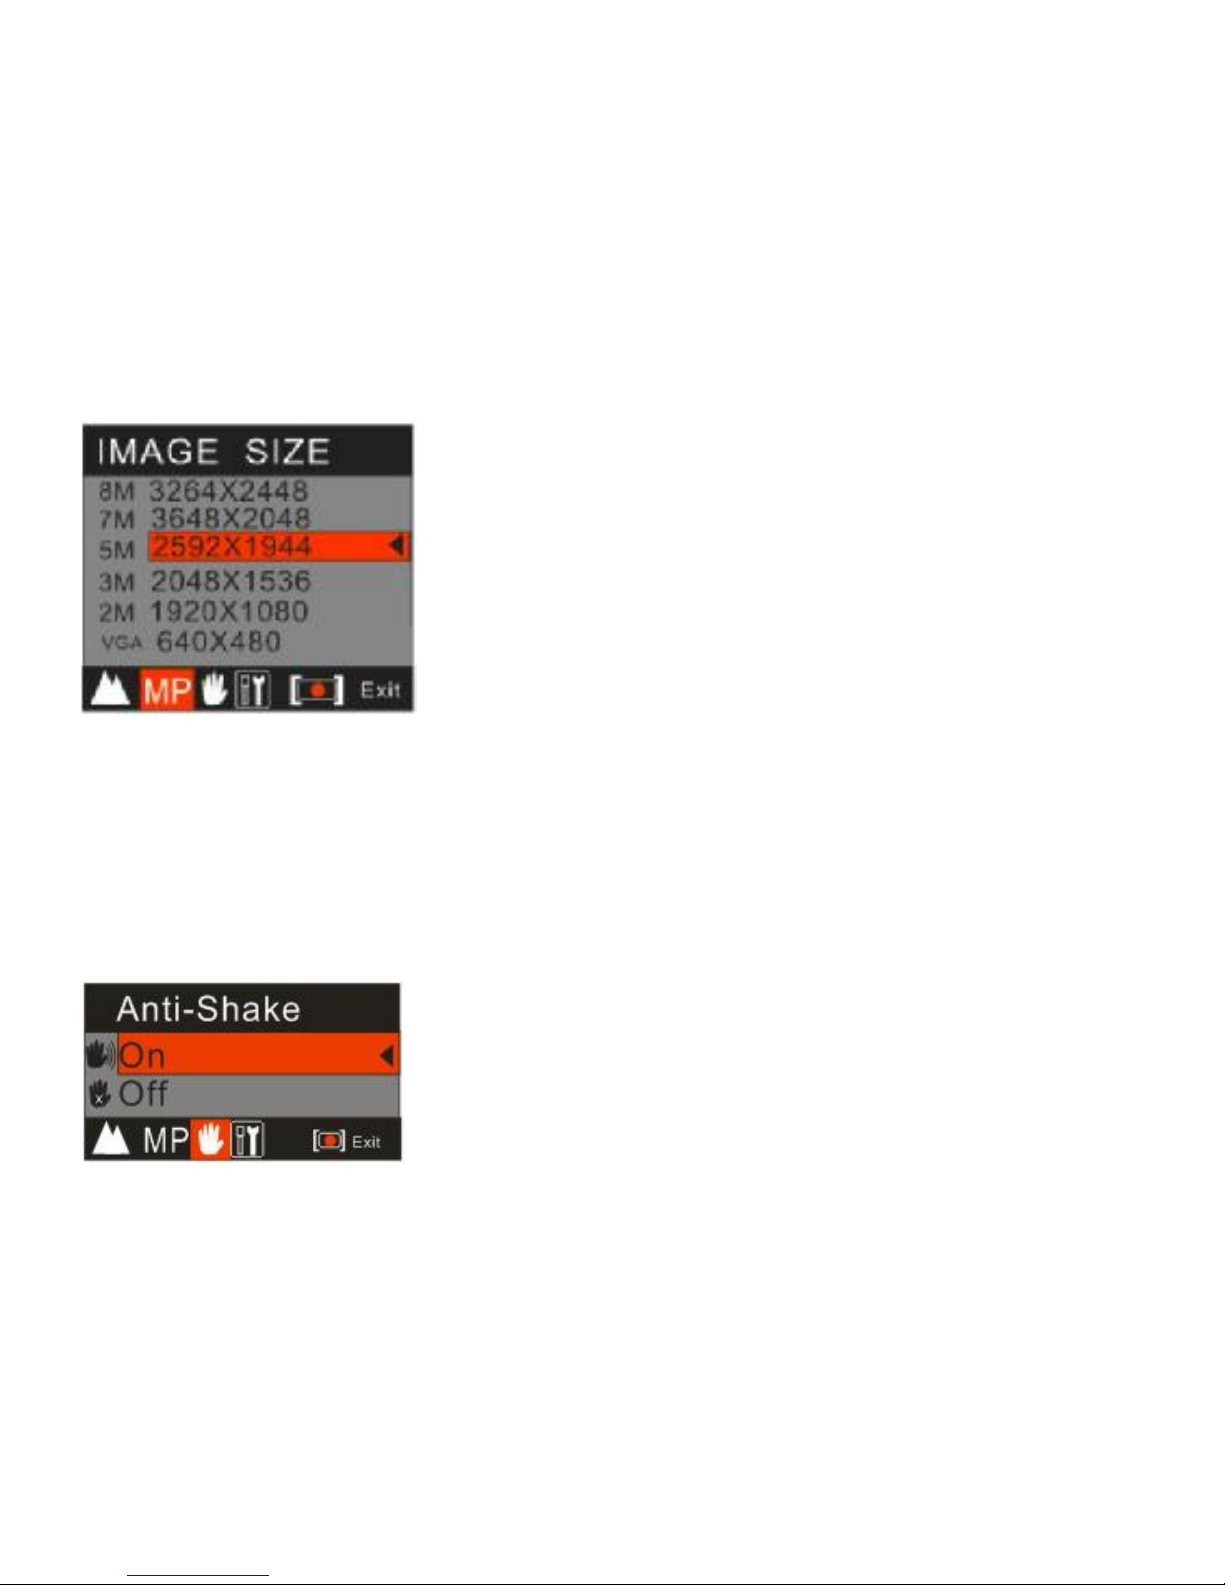
1. Press the Menu/OK button.
2. Press Right/Left button until you select the Image Size.
3. Press the Up/Down button to select the desired image size.
4. Press Menu/OK button to confirm and exit to standby mode.
Note: The image size icon will show on the LCD screen.
Anti-Shake
Your Digital Camera has a function that prevents photos coming out blurry as a result of trembling or
shaking when taking the photo. Because of this function, you are not required to use a tripod and take
good quality photos. To set as below:
1. Press the Menu/OK button.
2. Press Right/Left button to select the Anti-Shake menu.
3. Press the Up/Down button to select ON.
Page 15
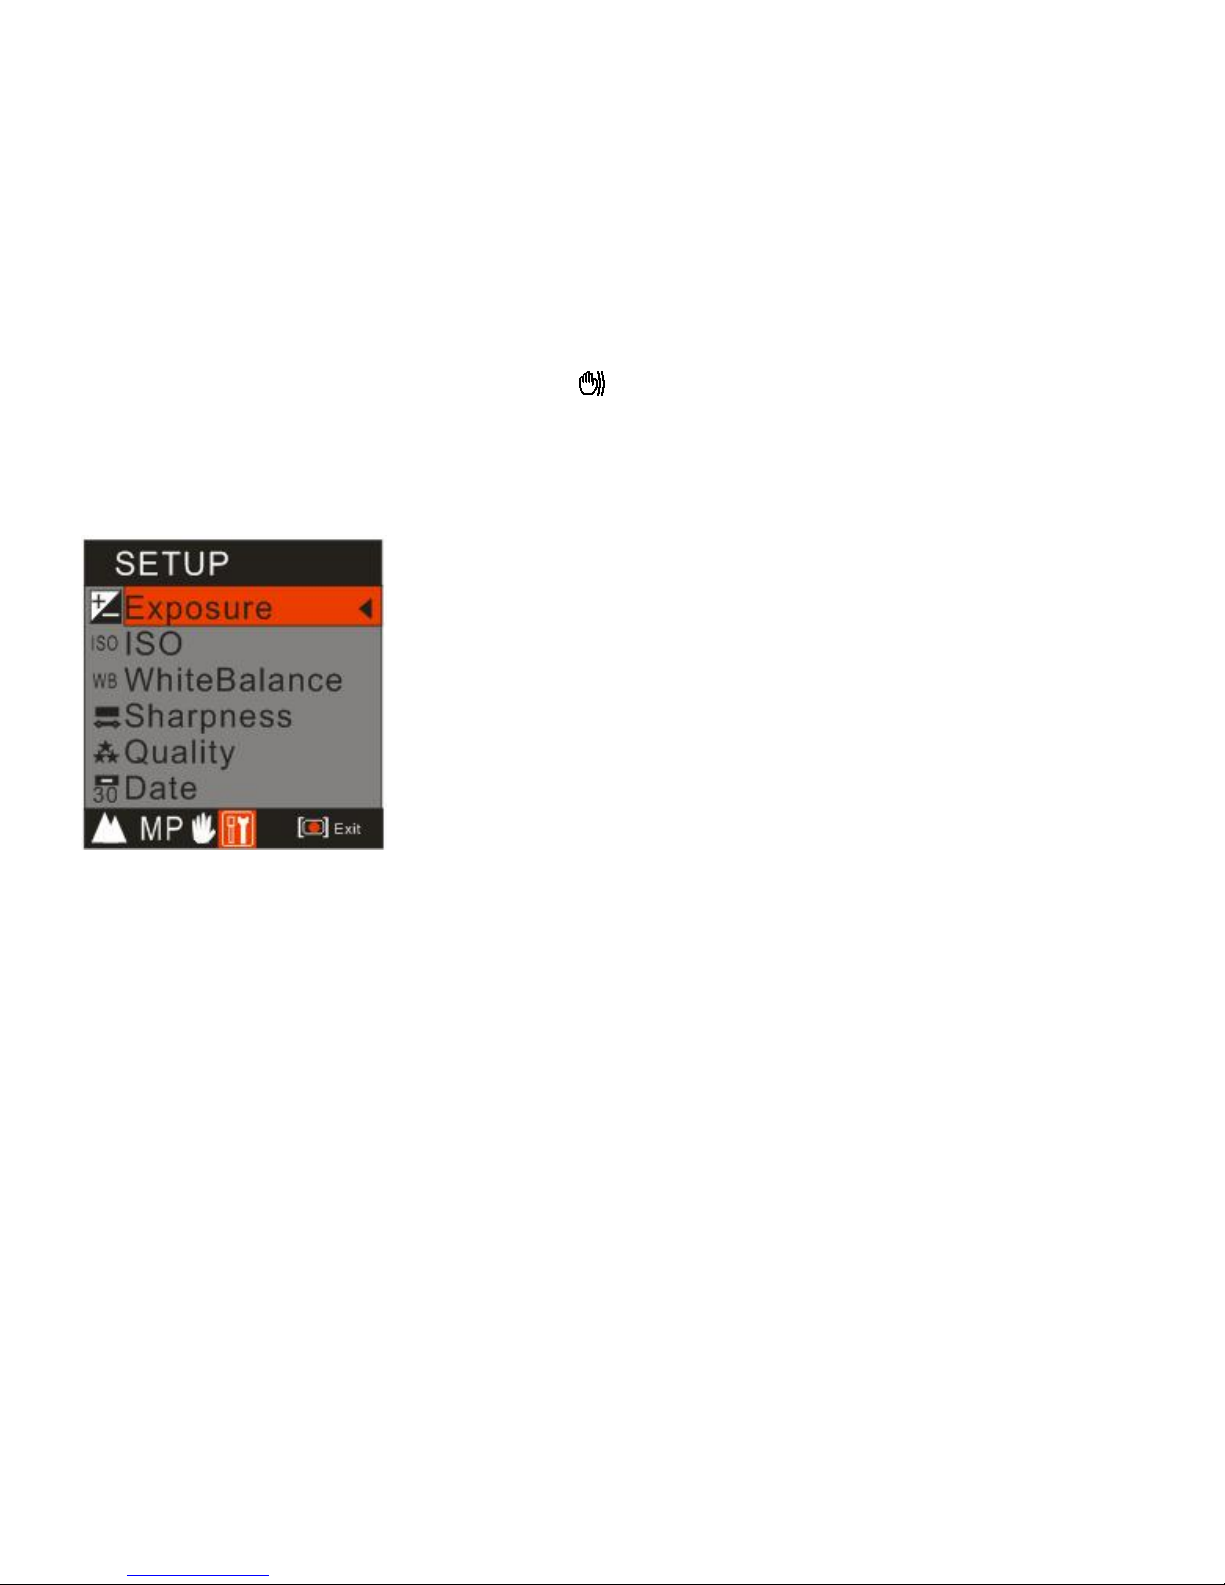
4. Press the Menu/OK button to confirm. The icon will appear on the LCD screen.
Setup Menu
You can set Exposure, White Balance, Sharpness, Quality, ISO, Date, Auto Power off, Language,
Frequency, Format and Default Setting. Operate this Setup as below:
1. Press the Menu/OK button.
2. Press the Right/Left button until you select Setup menu.
Exposure
This setting allows you to control the brightness of your images.
1. Press the Up/Down button until you select Exposure.
2. Press Menu/OK button.
3. Press the Up/Down button to select the exposure value (from +3 to -3).
4. Press Menu/OK button to confirm and exit to standby mode.
ISO
This is a special function that allows you to compensate the light conditions when the light source is not
good and also you do not wish to use a flash or tripod. As a first choice using a flash light or a tripod is
best in order to compensate for the light conditions but you can also use the ISO feature. When you want
to use ISO sensitization, please choose the low value ISO to prevent spots or blotches appearing on your
Page 16

photo.
1. Press the Up/Down button until you select ISO.
2. Press Menu/OK button.
3. Press the Up/Down button to select Auto/100/200/400.
4. Press Menu/OK button to confirm and exit to standby mode.
White Balance
This setting allows the camera to adjust the color of your photos according to the color of your light
source.
1. Press the Up/Down button until you select White Balance.
2. Press Menu/OK button.
3. Press the Up/Down button to select Auto/Daylight/Cloudy/Incandescent/Fluorescent.
4. Press Menu/OK button to confirm and exit to standby mode.
Sharpness
This setting allows you to adjust the sharpness of your images, making edges more or less distinct.
1. Press the Up/Down button until you select Sharpness.
2. Press Menu/OK button.
3. Press the Up/Down button to select Normal/Sharp/Soft.
4. Press Menu/OK button to confirm and exit to standby mode.
Quality
The quality of your photos also affects the number of shots you can take. A HIGH setting means you can
take fewer photos, but they will be of better quality. The default value is STANDARD.
1. Press the Up/Down button until you select Quality.
2. Press Menu/OK button.
3. Press the Up/Down button to select Super/Fine/Normal.
4. Press Menu/OK button to confirm and exit to standby mode.
Note: After you confirm, the quality icon will show on the LCD. instead of normal quality,
Page 17
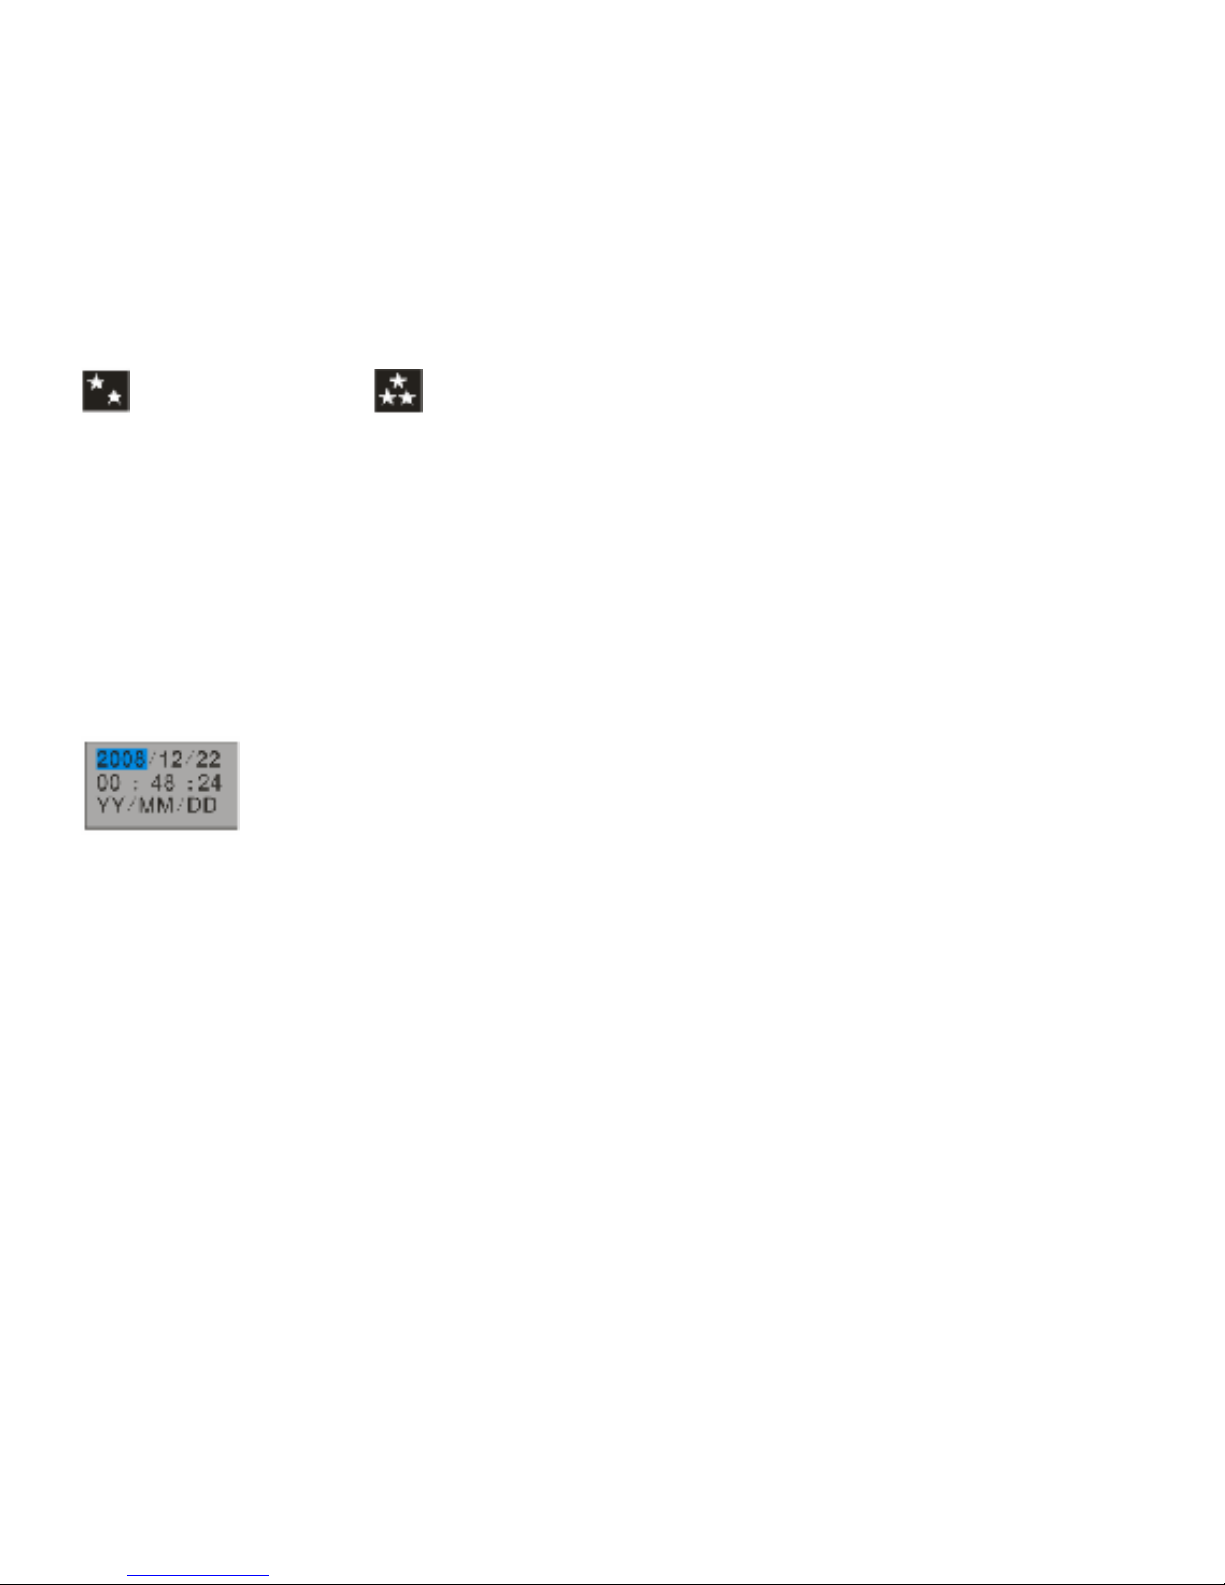
instead of fine quality, instead of super quality.
Date
This allows you to set the system time which will be displayed on the photos.
1. Press the Up/Down button until you select Date.
2. Press Menu/OK button.
3. Press the Up/Down button to select On/Off/Set Date.
4. Press Menu/OK button to confirm.
Set date:
1. Press the Menu/OK button to enter Set date option.
2. Press the Right/Left button to select the date and time you want to set.
4. Use Up/Down button to set the digit.
5. Press Menu/OK button to confirm current setting.
Auto Power off
By default, if your camera is idle for 60 seconds it will automatically be powered off. Use the Auto off
option to change this setting
1. Press the Up/Down button until you select Auto Power Off.
2. Press Menu/OK button.
3. Press the Up/Down button to select 1 Minute/2Minutes/3Minutes/Off.
4. Press Menu/OK button to confirm and exit to standby mode.
Language
Your digital camera supports only English for this version, please refer to the latest version for more
languages.
Page 18
Frequency
1. Press the Up/Down button until you select Frequency.
2. Press Menu/OK button.
3. Press the Up/Down button to select 50Hz/60Hz.
4. Press Menu/OK button to confirm and exit to standby mode.
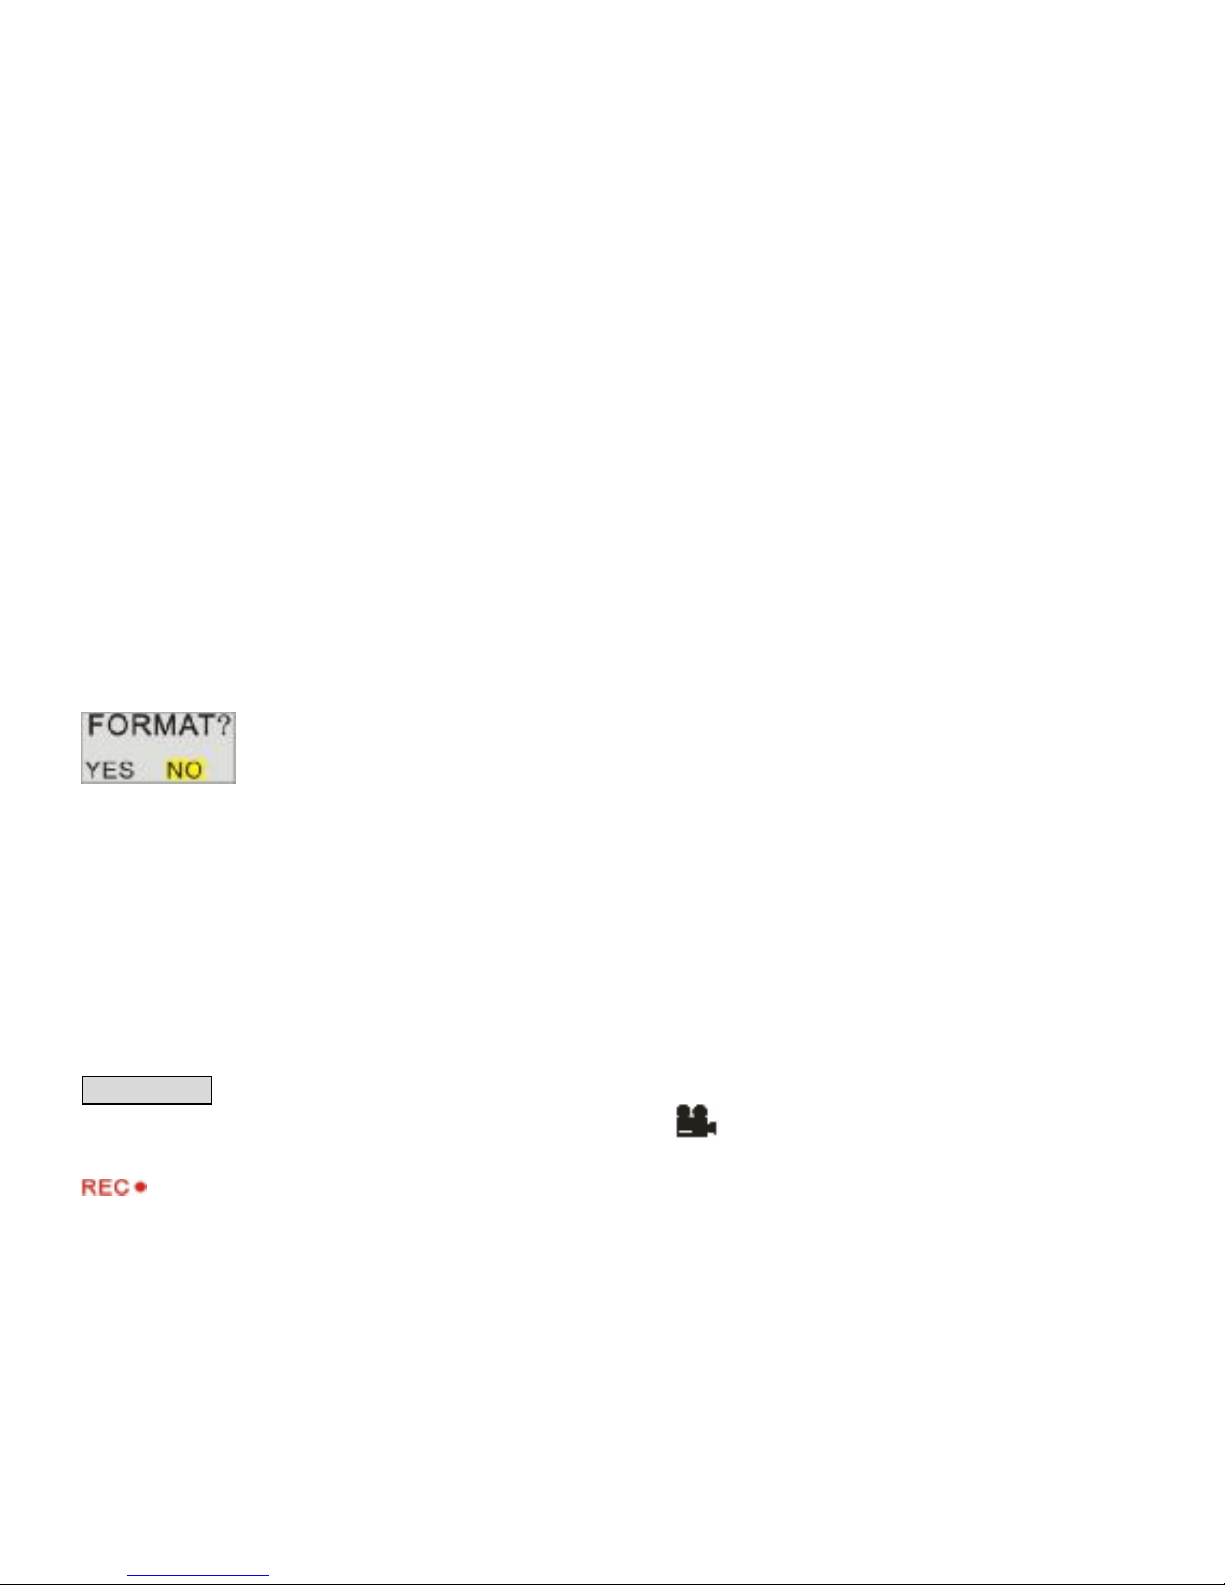
Format
This function will format the memory card and will erase all files in memory including files that have been
protected.
1. Press the Up/Down button until you select Format.
2. Press Menu/OK button.
3. Press the Up/Down button to select OK/Cancel.
4. Press Menu/OK button to confirm.
5. Press Left/Right button to select Yes/No.
6. Press Menu/OK button to confirm and exit to standby mode.
Default Setting
You can restore your camera to original settings from factory.
1. Press the Up/Down button until you select Default Setting.
2. Press Menu/OK button.
3. Press the Up/Down button to select OK/Cancel.
4. Press Menu/OK button to confirm and exit to standby mode.
Video Mode
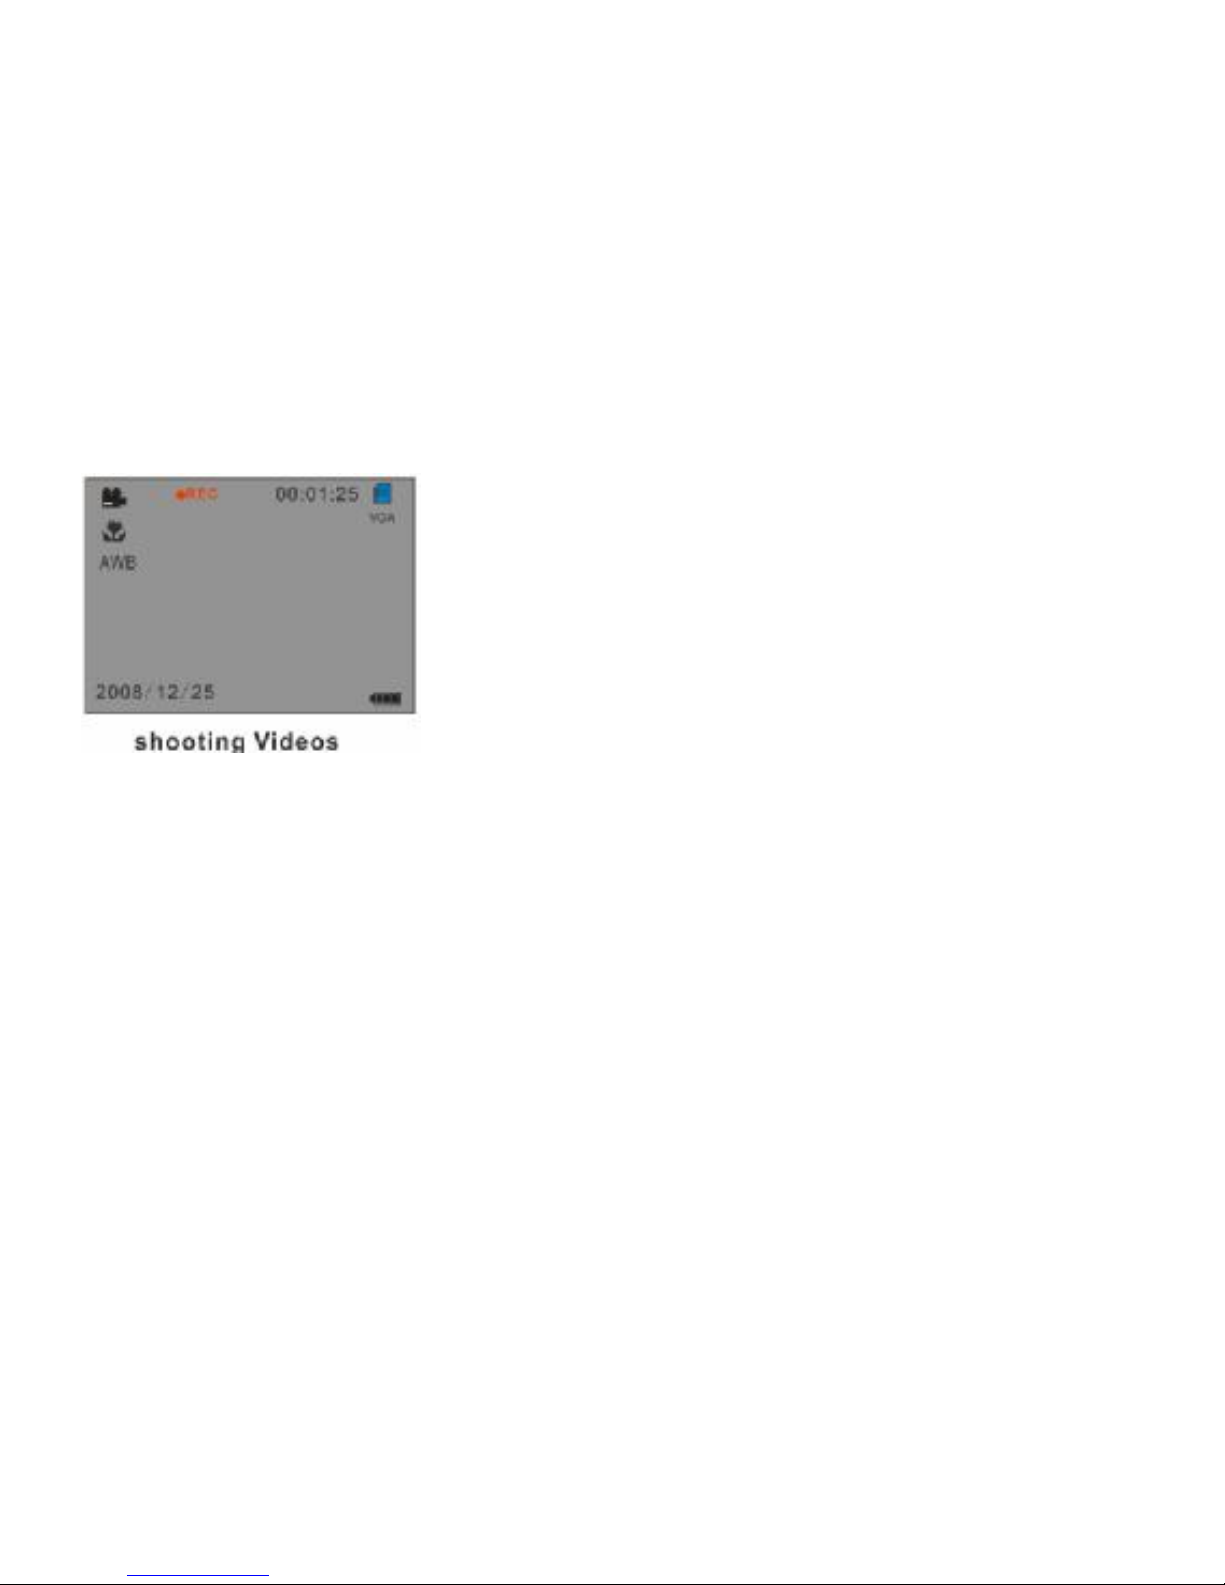
Press Mode button repeatedly to select Video mode. The icon will appear on the LCD screen.
Press the Shutter button to shoot videos, the elapse time will be shown on the LCD screen and icon
will flash on the LCD screen.
Page 19
Note:
1. You must insert a SD memory card to expand capacity and shoot videos.
2. “Insert a SD memory Card” will be shown on the screen when you press the shutter button if without
SD memory card inserted.
Press the Shutter button again to stop and save this file in AVI format.
You can play this AVI file in playback mode or on your computer using Quick Time and Windows Media
Player.
You can select different White Balance for shooting.
1. Press the Menu/OK button.
Page 20
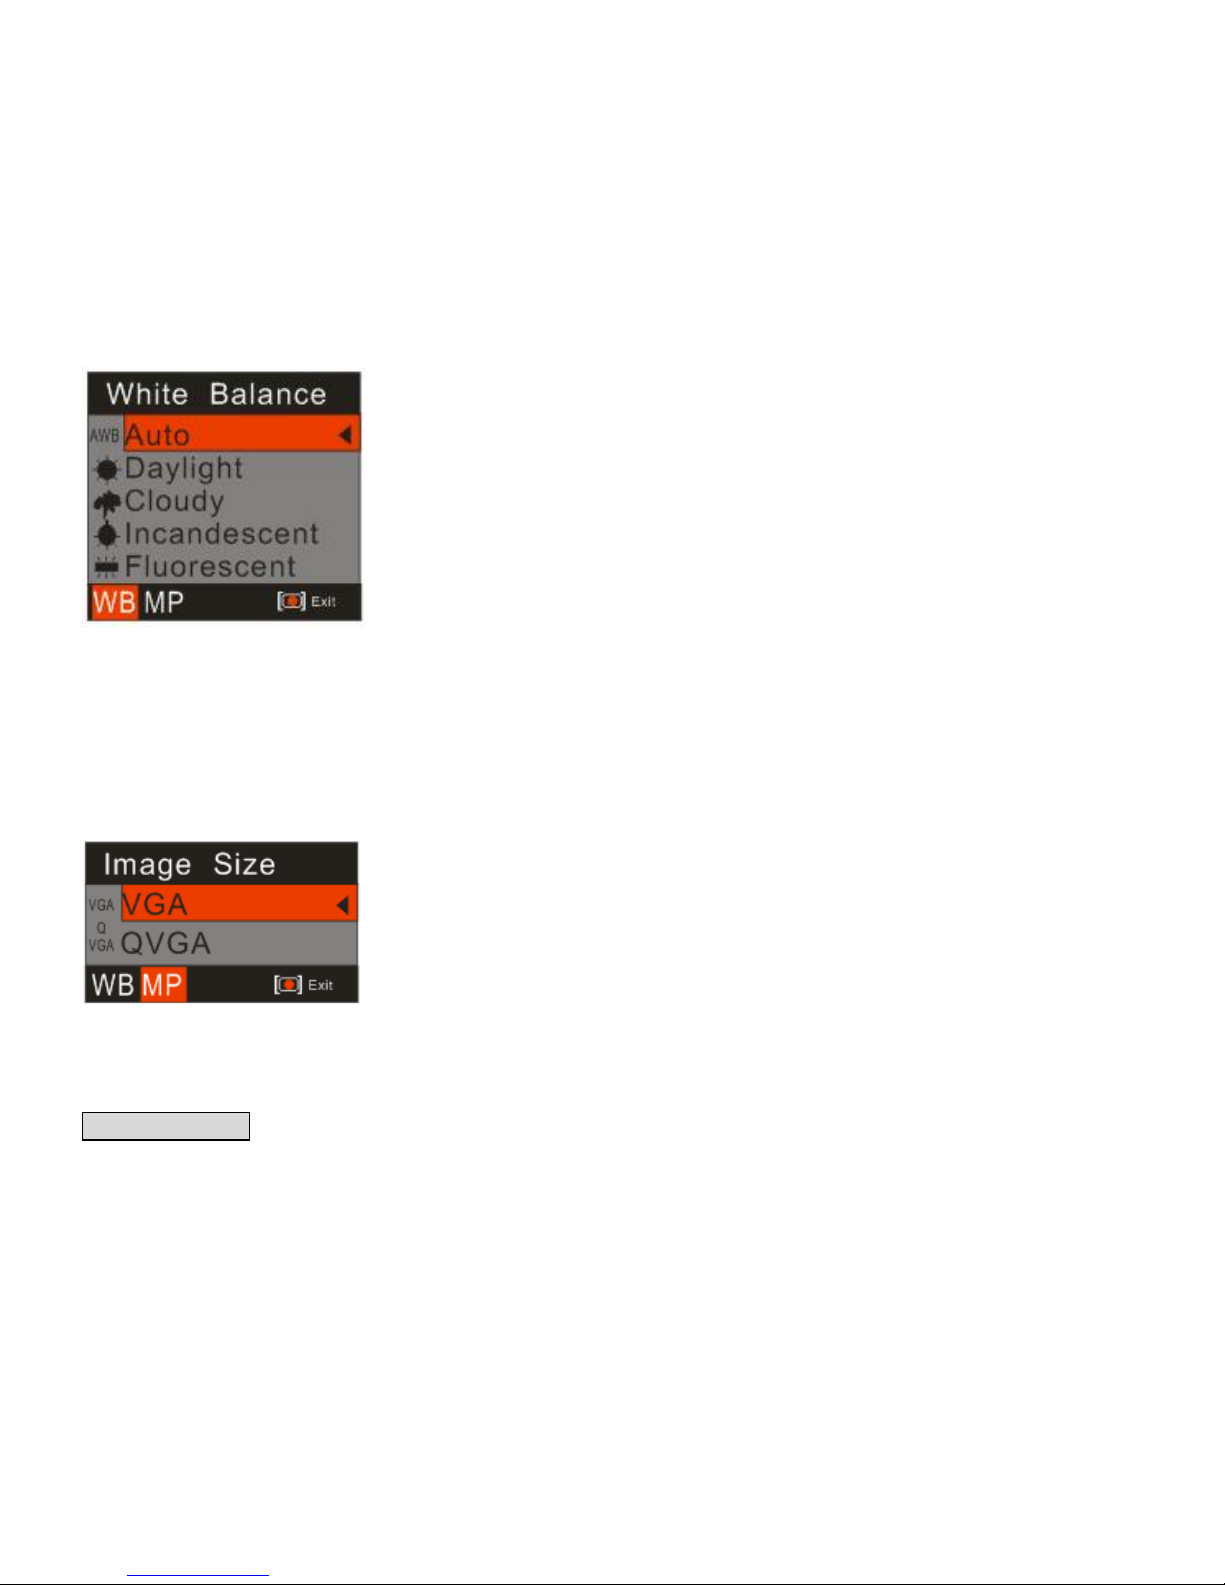
2. Press the Up/Down button to select an option from the menu.
3. Press the Menu/OK button to confirm. The corresponding icon will appear on the LCD screen.
Image Size
Your camera supports 2 video resolutions- 640x480 (VGA) pixels, 320x240 (QVGA) pixels.
1. Press the Menu/OK button.
2. Press Right/Left button to select Image size.
3. Press the Up/Down button to select Image Size.
4. Press Menu/OK button to confirm and exit to standby mode.
Playback Mode
Press Mode button to select Playback mode. You can preview the photos and videos you have recorded.
In Playback mode you can rotate, protect, delete and crop your photos and you can protect and delete
Page 21
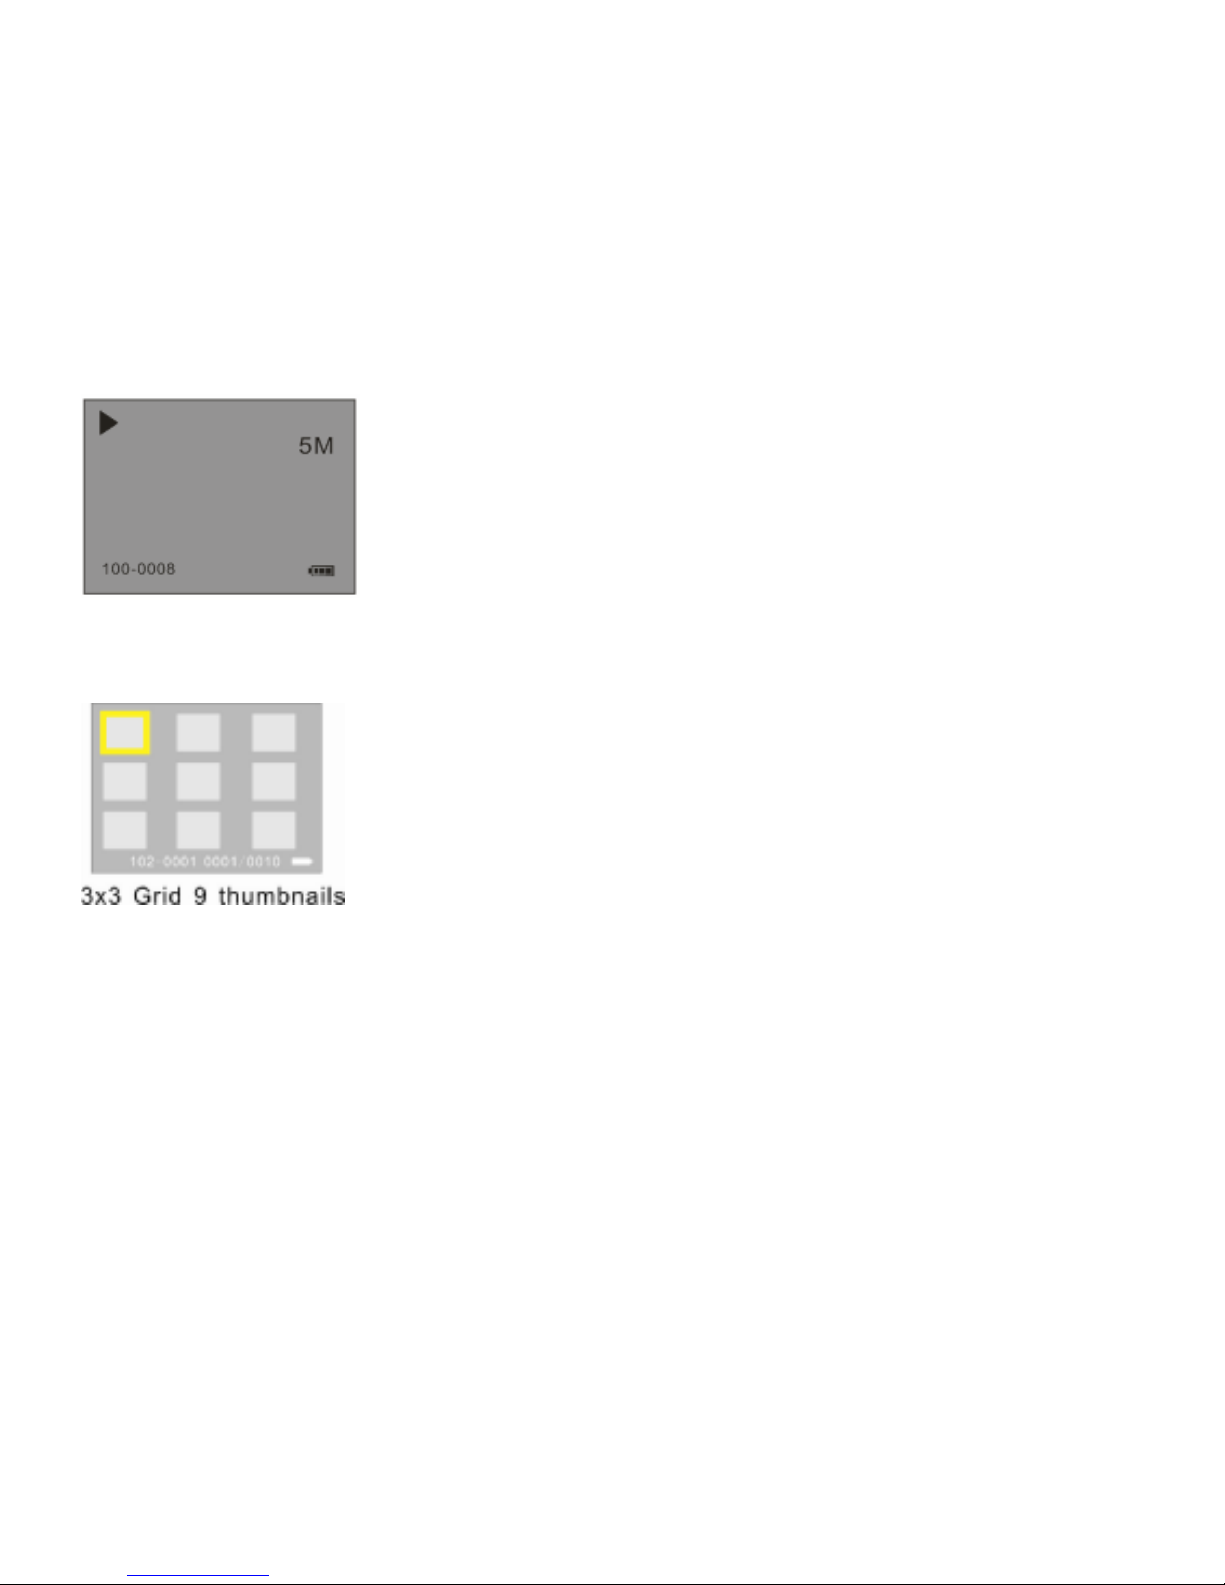
video clips. You can also print photos directly from your camera using PictBridge.
NOTE: The message, “No File” will be displayed on the LCD screen if there are no photos/videos in your
camera.
Thumbnail display
When the camera is in the Playback Mode and the monitor is displaying an image, pressing the W button
will take you to the thumbnail display. Reversely, Press the T button or Menu/OK button again to display
the photo in full screen.
Repeatedly pressing the T button to magnify the photos, and press the Up/Down button to preview the
photo in zoom in mode.
Page 22
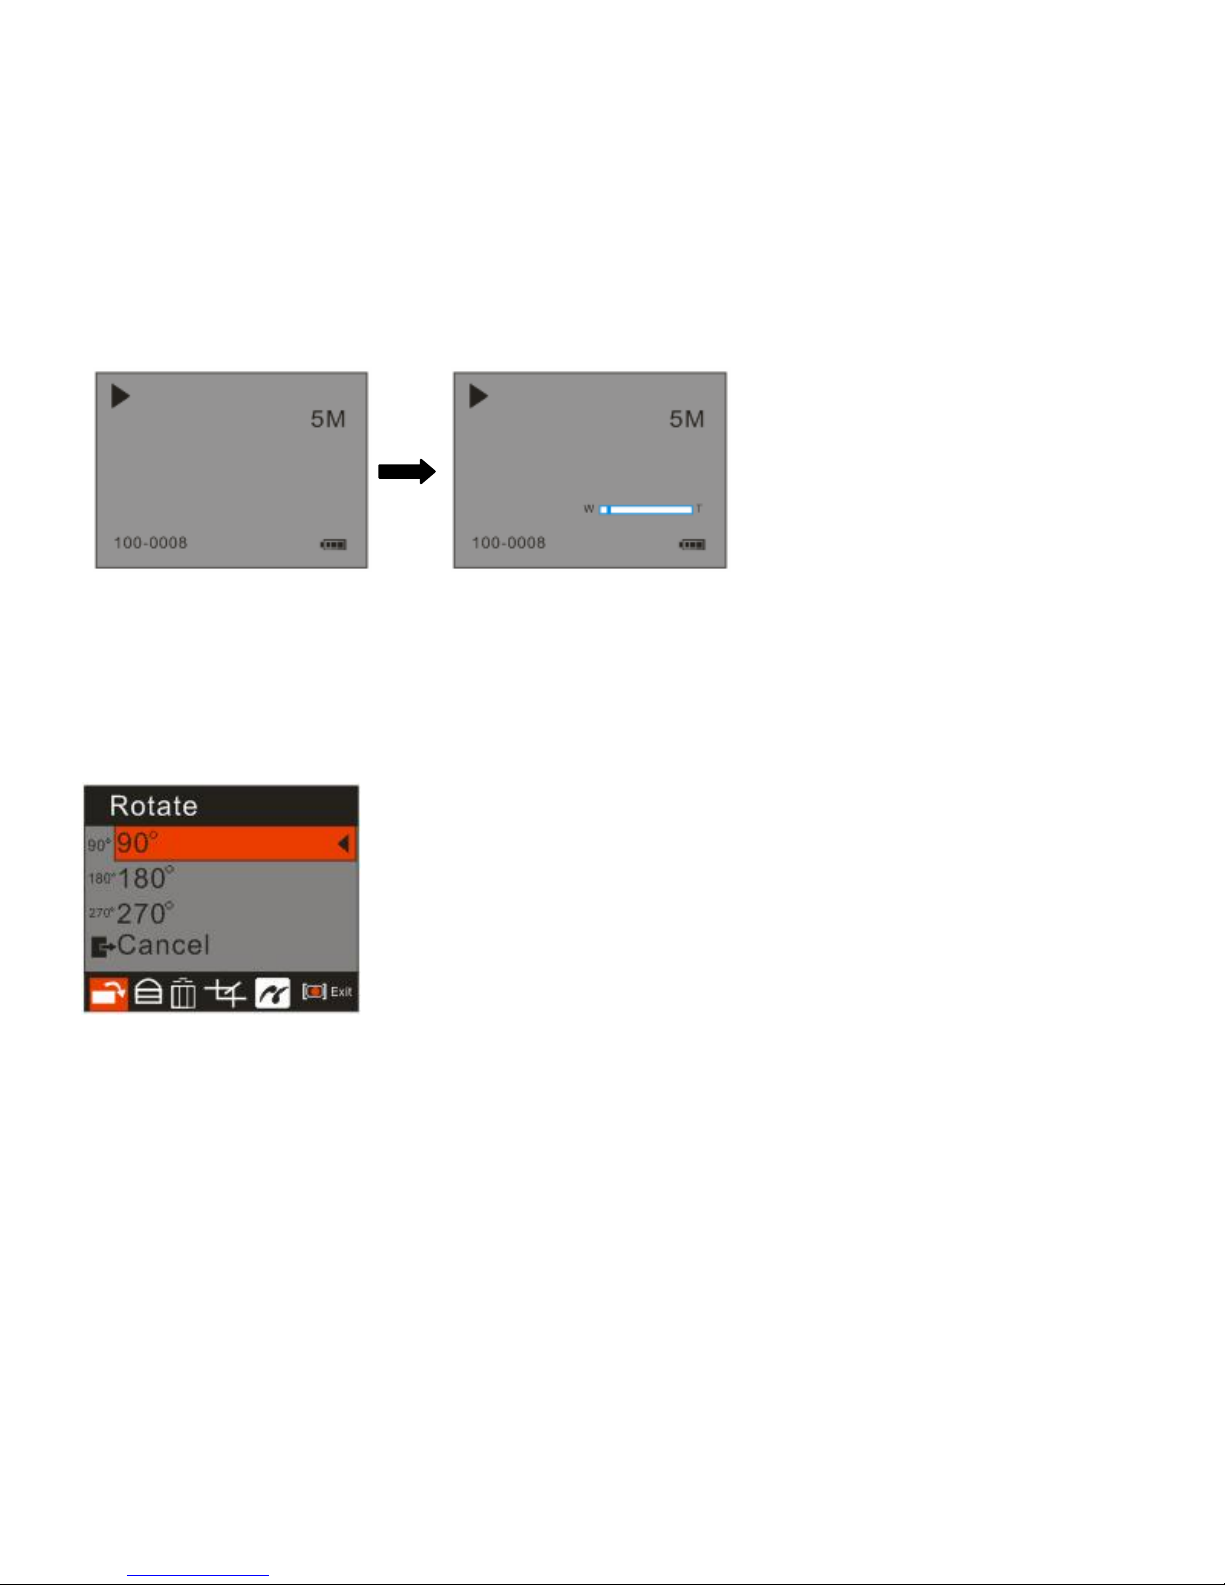
Press W button to zoom back out.
Note: you can not zoom in the AVI video files.
Operation for still photos
Select the still photo you want to delete, rotate, protect, crop or print.
Rotate
1. Press the Menu/OK button.
2. Press Up/Down button to select how much degrees you want to rotate.
3. Press the Menu/OK button to confirm.
Note: you can not rotate a protected file which “File Protect” appears on the screen.
Protect
You can protect your photos/videos from accidental deletion by selecting the “ lock” feature.
Page 23
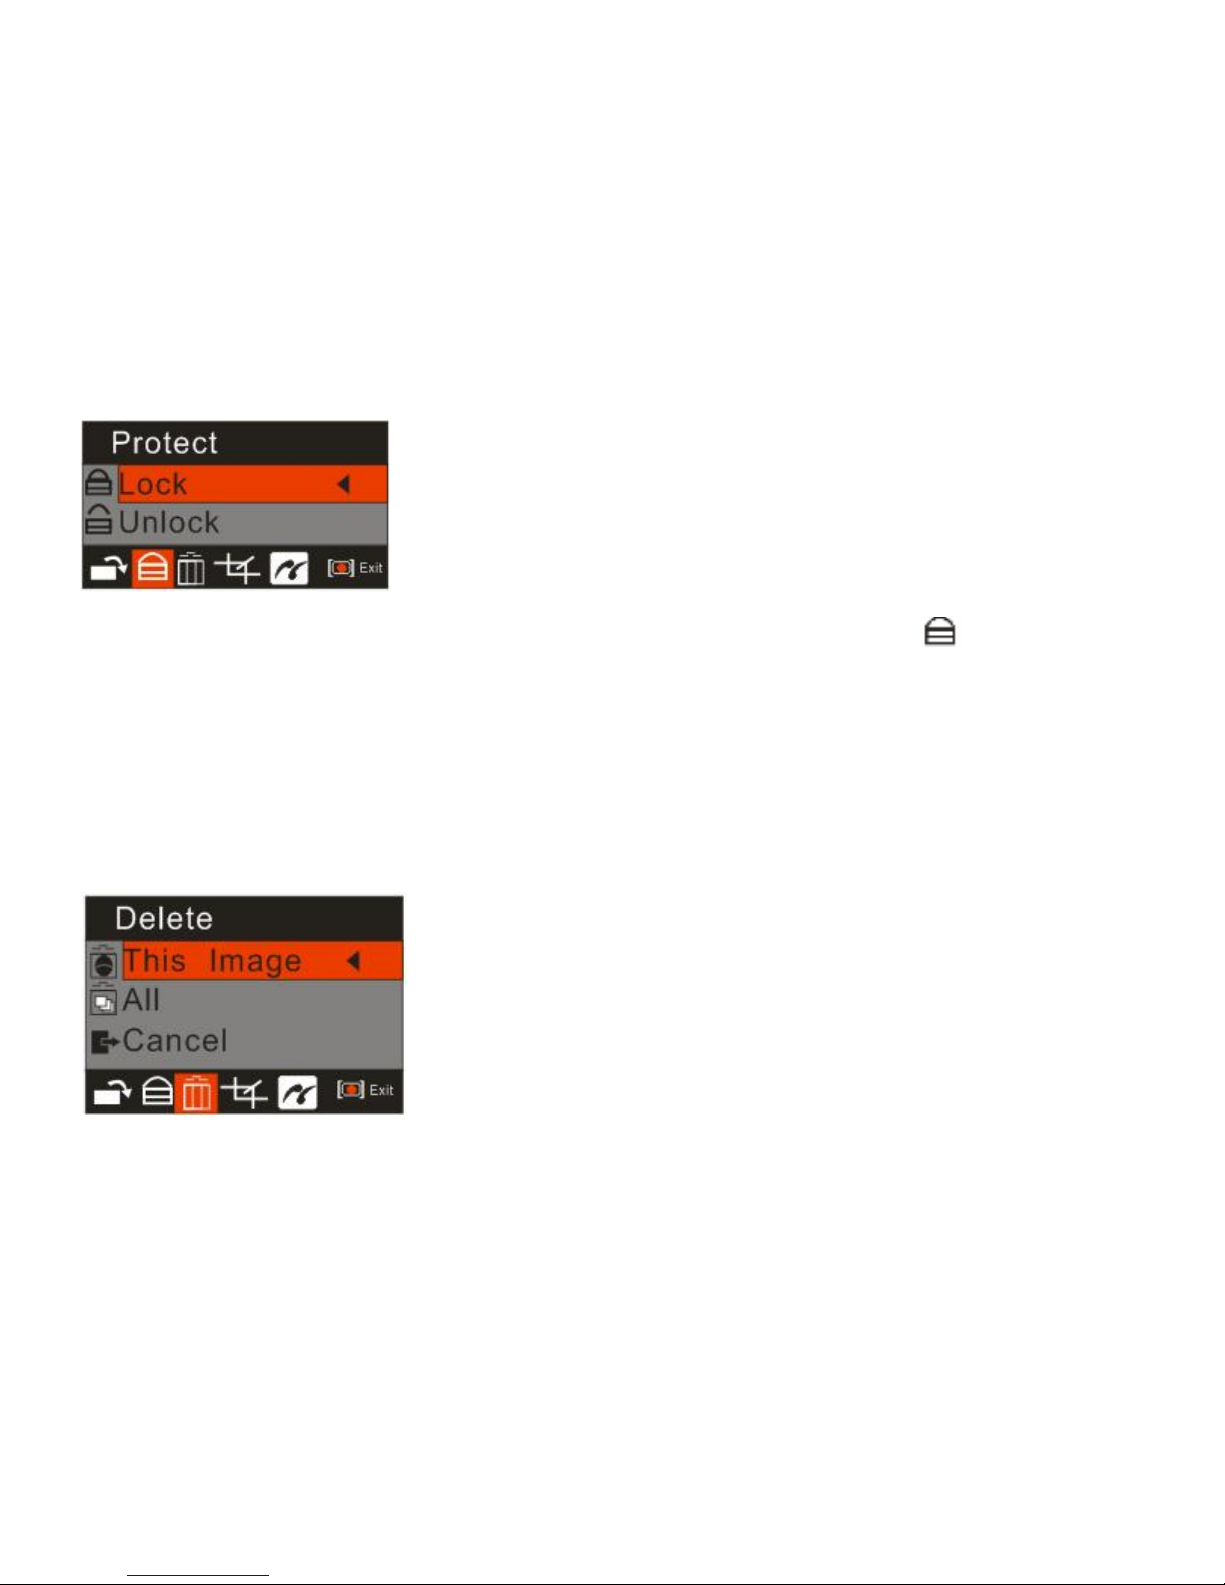
1. Press the Menu/OK button.
2. Press Right/Left button to select Protect menu.
4. Press the Up/Down button to select “Lock”.
5. Press the Menu/OK button to confirm and Shutter button to exit. A lock icon will be shown on
the LCD.
Note: At step 4 to select “Unlock” and press the Menu to unlock the current file.
Delete
Delete unwanted photos and videos at any time in order to free up memory. You can delete one image or
video clip at a time and delete all except the unprotected photos and videos that are currently recorded
on the memory card.
1. Press the Menu/OK button.
2. Press Right/Left button to select Delete menu.
4. Press the Up/Down button to select This Image: delete current photo/video you selected; ALL:
delete all unprotected photos; Cancel to exit.
5. Press the Menu/OK button to confirm deletion.
Page 24
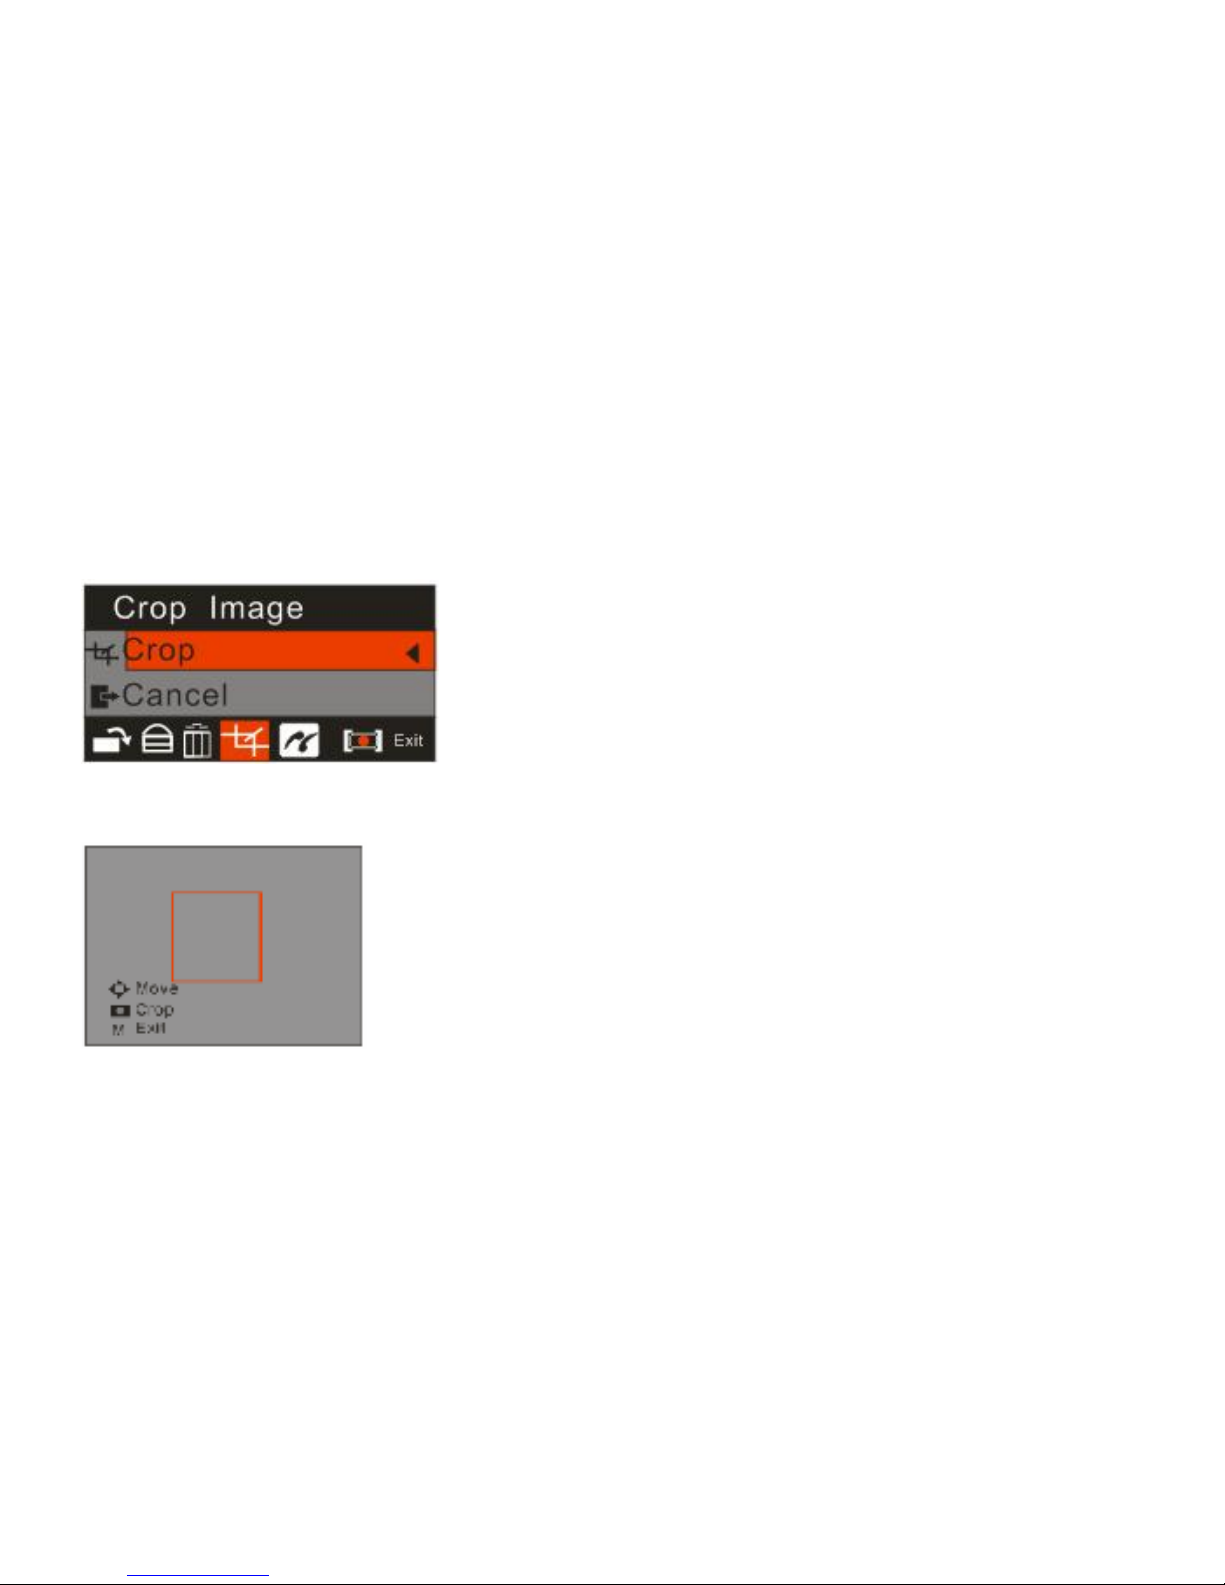
6. Press the Right/Left button to select “Yes” or “No” and press the Menu/OK button to confirm.
Crop Image
Crop your photos to show only a specific portion of an image or to highlight certain focal points. The Crop
feature lets you zoom in on an image and then save that part of the image as a new photo.
1. Press the Menu/OK button.
2. Press Right/Left button to select Crop Image menu.
4. Press the Up/Down button to select Crop or cancel.
5. Press the Menu/OK button to confirm.
6. Press T/W button to magnify the rectangle to select an area as a new file.
7. Press the Up/Down/Right/Left button to select an area.
8. Press the Shutter button.
9. Press the Shutter button again to confirm and save it as a new photo or you can press Menu/OK
button to exit.
Page 25
Print
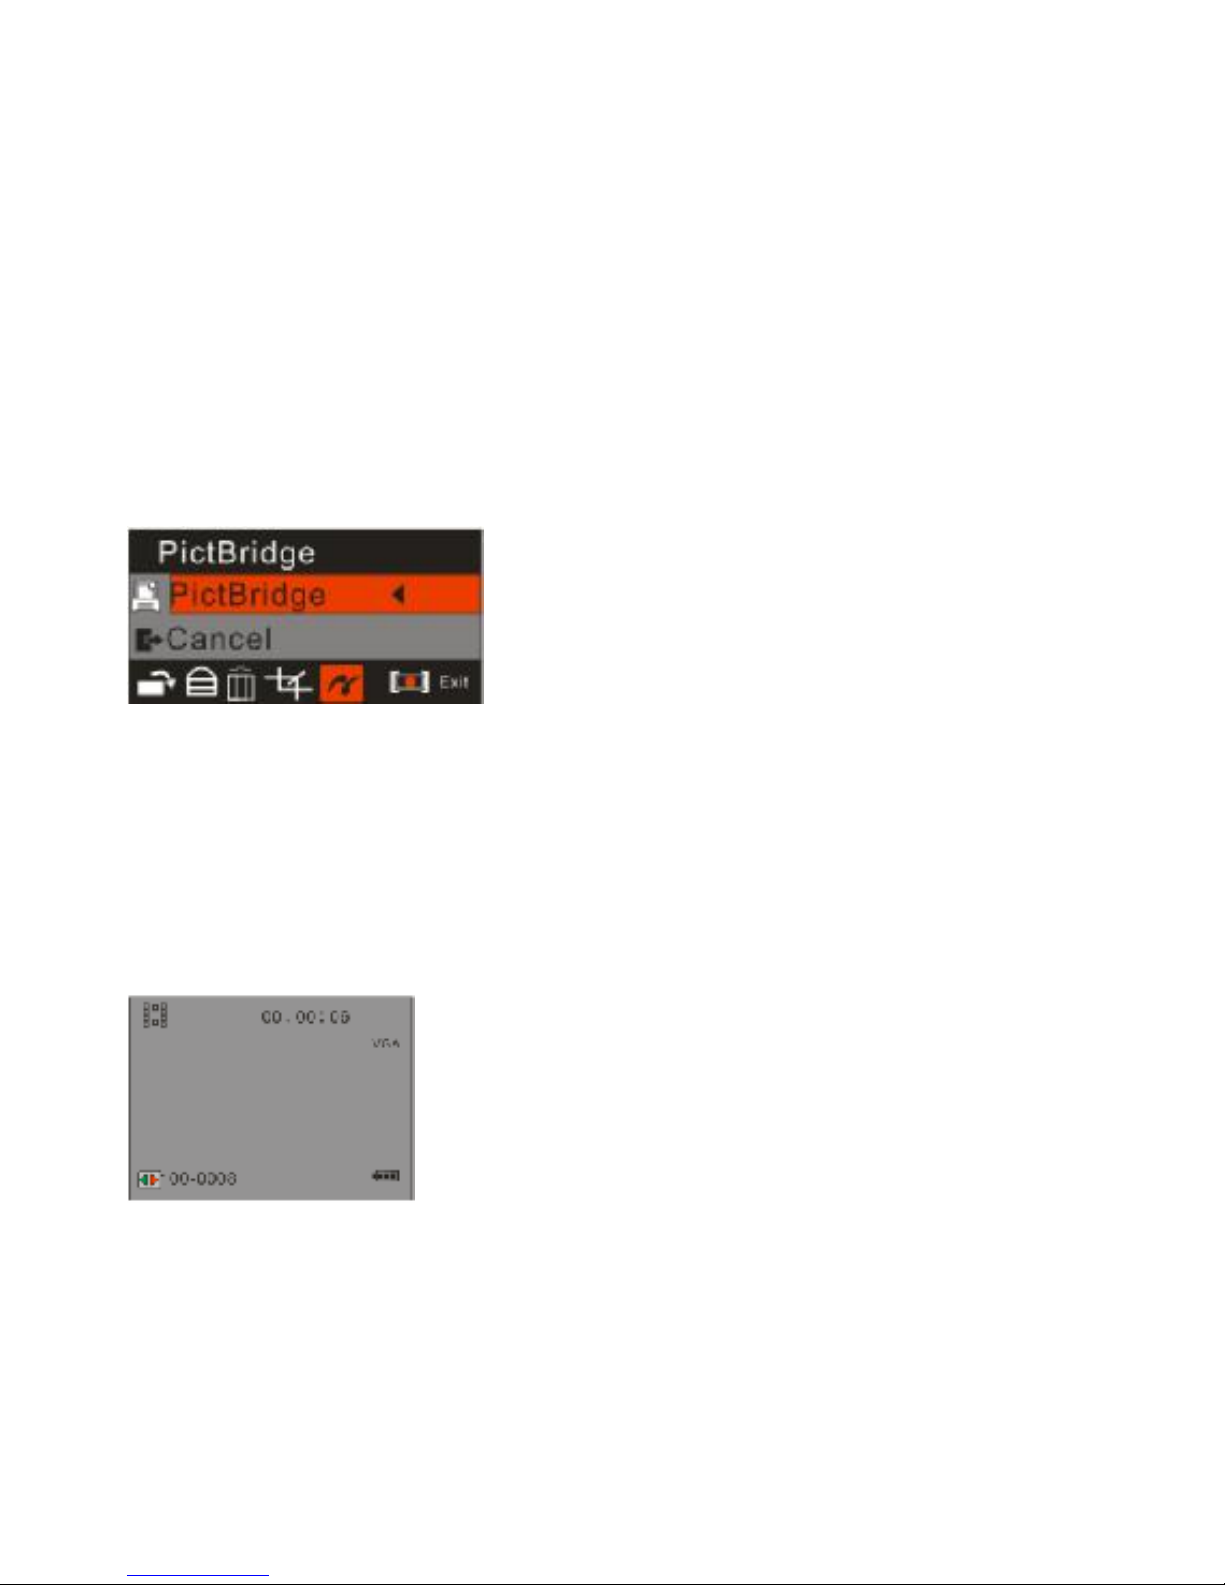
Your camera allows you to print the photos with a compatible printer. The operation as explained below:
1. In playback mode, select the photo you want to print by pressing Left/Right button.
2. Press the Menu/OK button
3. Press Right/Left button to select Print menu.
4. Press the Up/Down to select PictBridge.
5. Press the Menu/OK button to confirm. The LCD screen will now show:” please connect to device”.
6. Connect your camera to the compatible printer with the USB cable for printing.
7. the following message will appear on the LCD “Please wait”. And then, “this image”, ”select image”
option appear.
8. Press the Up/Down button to select “this image” ,then press the "OK" button to start printing with
showing “printing”
9. You select the Photo is printing successful.
Playing the AVI video file
1. Select an AVI video file you wish to play.
Page 26
2. Press Shutter button to play current AVI file.
3. Press Shutter button again to pause.
Note: For how to protect, delete photos, please refer to Operation for still photos.
Install PhoT
ags Express Software
NOTE: Make sure that your camera is not connected to the computer.
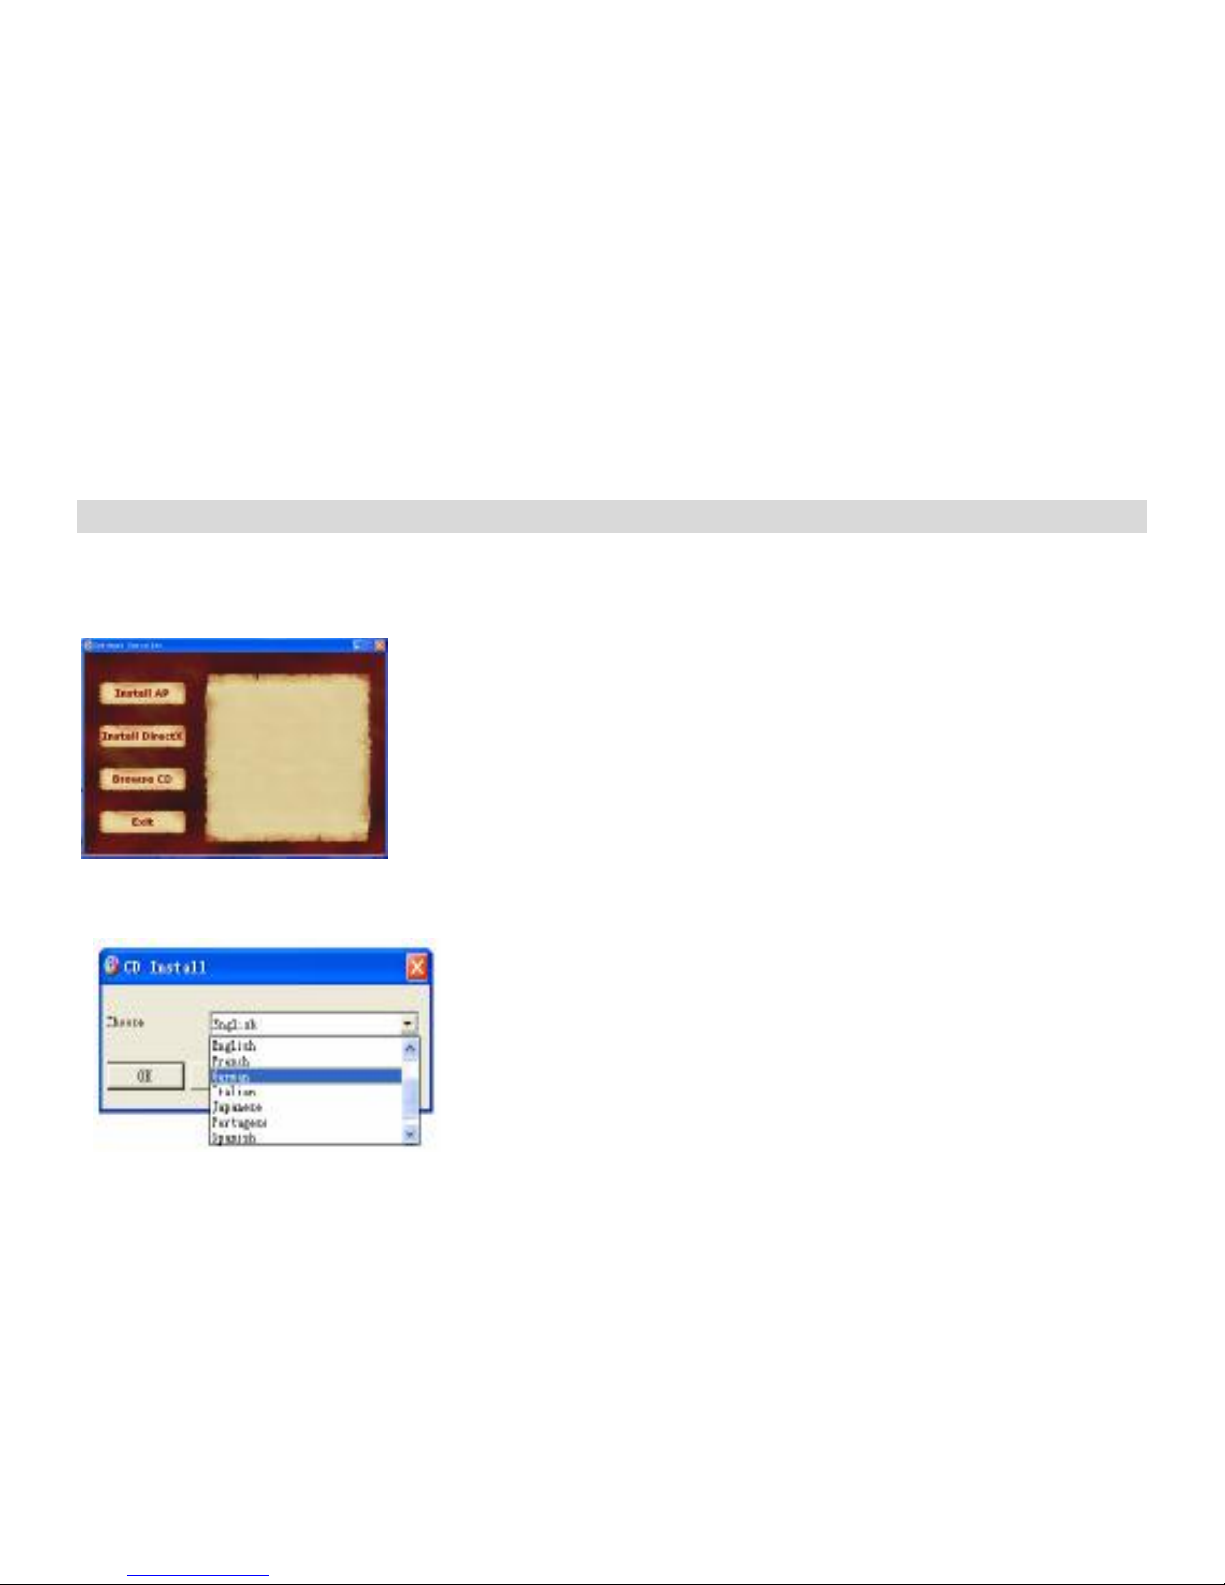
Insert software CD to your computer. After a few seconds, there will be shown an installing main window
on the screen.
You can “install AP”, “Install DirectX”, “Browse CD”, and “Exit” in this installing main window.
Install Photags Express
Click on the “Install AP” to start installing process. The language window will be shown on the screen and
you can choose the language you want to use.
And then the installer window will be shown as below.
Page 27
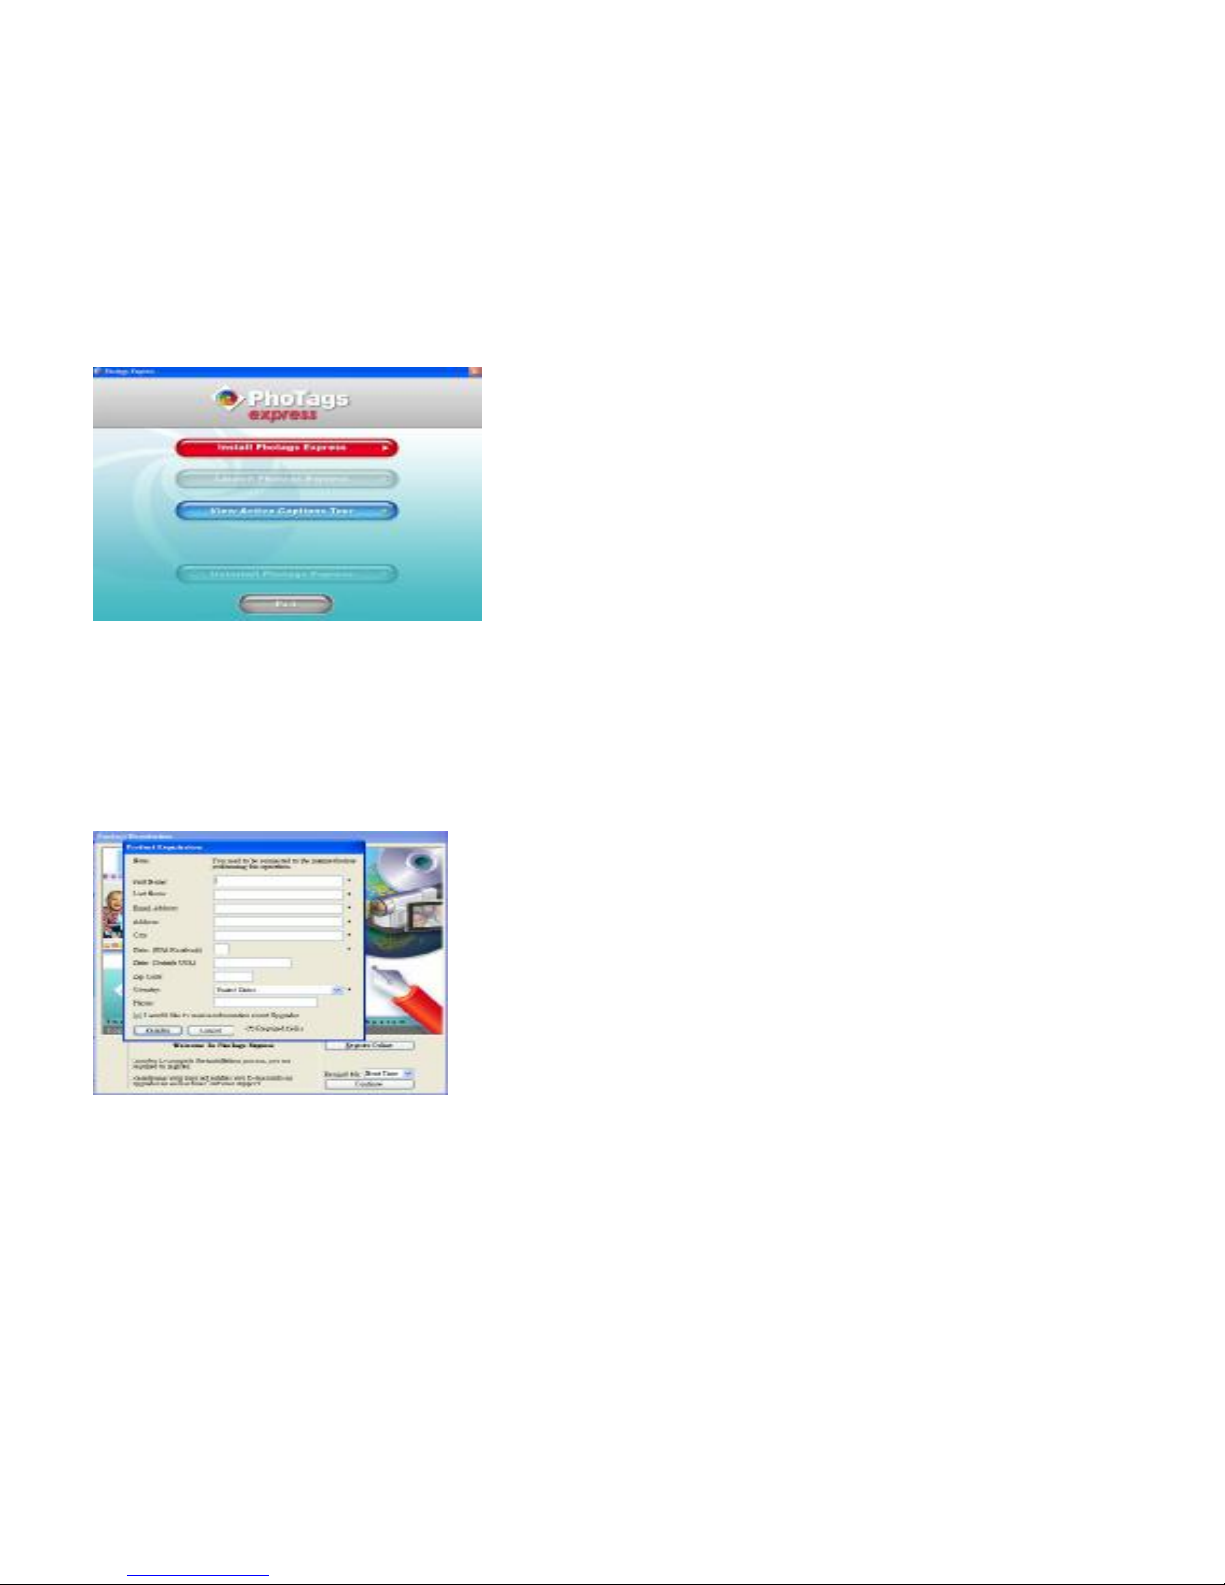
After you click “Install Photags Express” button, there will be showing some windows that help you to
finish the installing. You are only required to follow the description and click the buttons that it’s defaulted
by the software.
Register online
Click “Register online” button to have a registration. Or you can directly click “Continue” for registration
next time.
After this step, the main window will appear on the screen.
Page 28
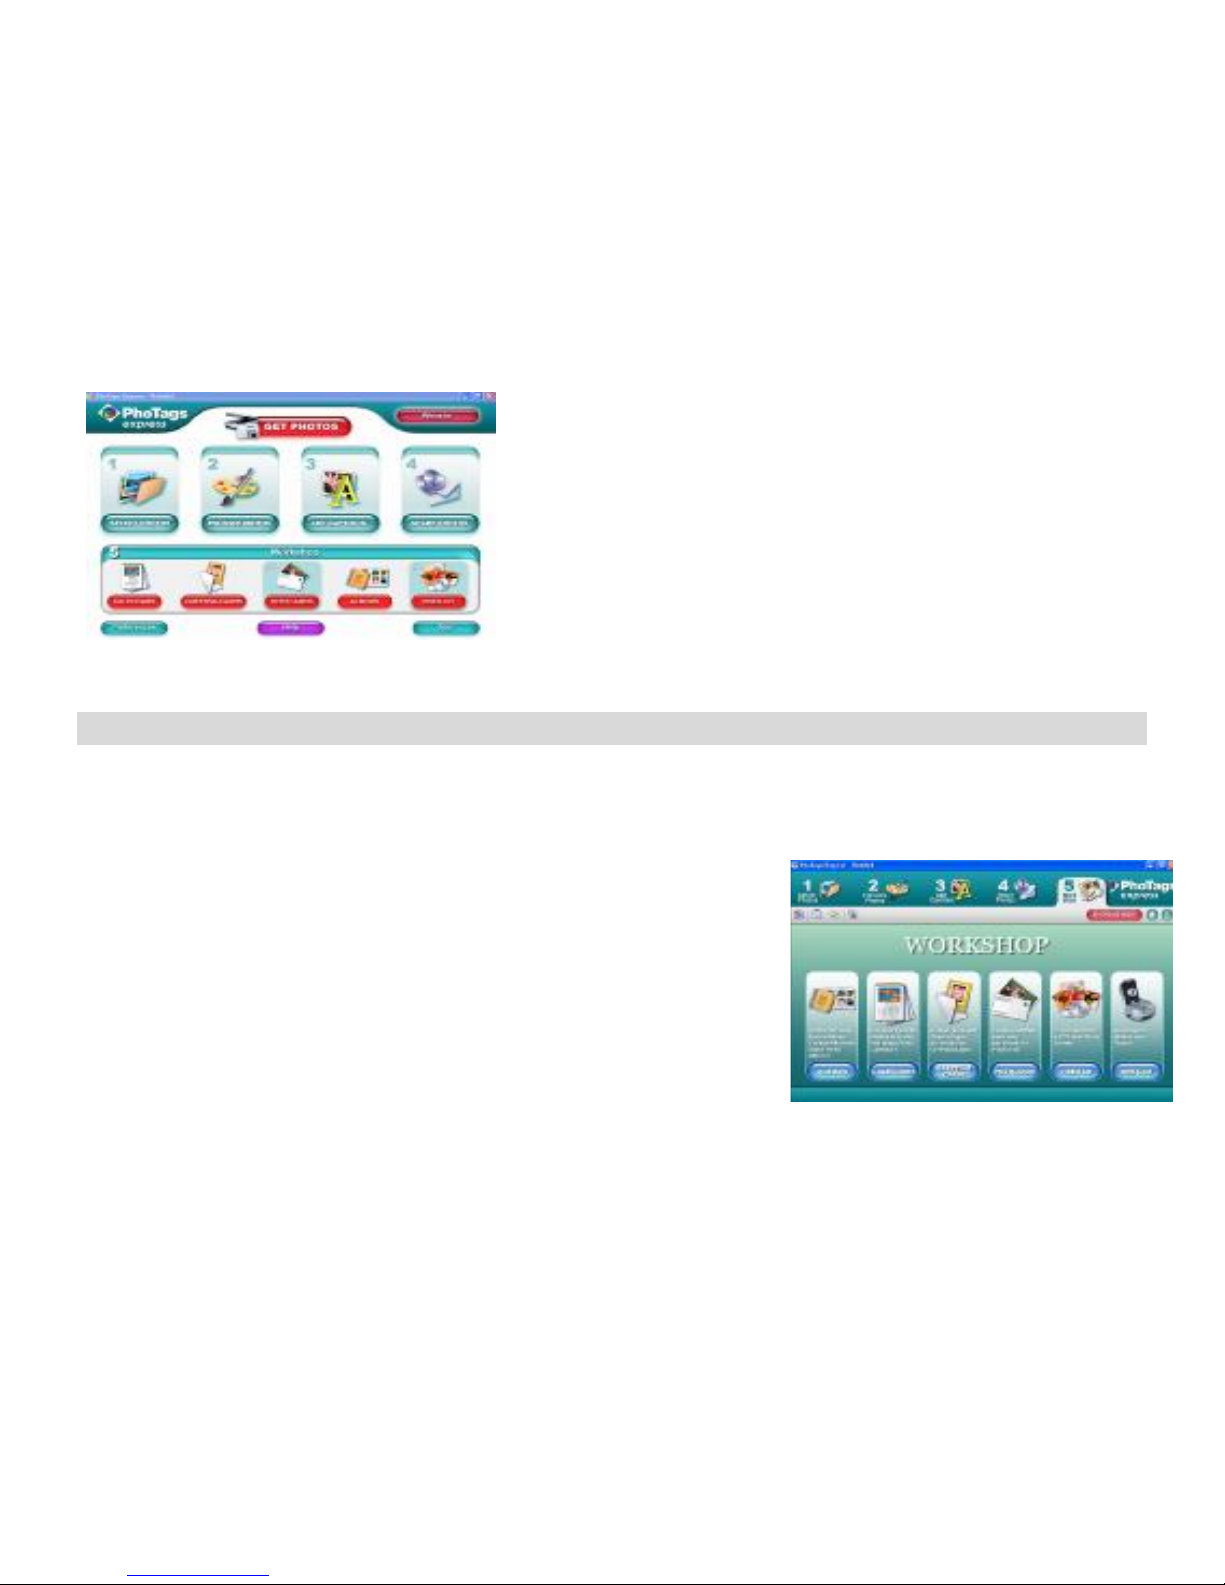
Everything you need to get the most from your photos
1. Select photos
Select the photos that you download from your camera. And edit it in the software.
2. Edit photos
Click the “ Enhance photos”, “Add captions” from the main window to edit your ideal photos.
3. Share photos
Share your photos via “E-mail”, “Printing”, and “Create HTML web”
to uploading online.
4. Workshop
Create “Calendars”, two sides “Greeting cards” and “Postcards” on
standard photo paper. You can purchase “Album” and “Video CD”.
Two additional workshop project online at any time and create
Photo Album and slide shows on CD that can be viewed on your
PC and VCD for viewing on your TV using your DVD player.
Page 29

Download photos to your PC
Turn on your camera, connect your camera to the computer correctly with USB cable, a “MSDC” will
show on the LCD screen. The screen of PC will be shown a window (Removable Disk H:) as below:
NOTE: Now you can copy the photos to your computer with two methods as below:
1. Download photos directly from windows
Choose “copy pictures to a folder on my computer” on the Removable Disk (H:) window. After you click
“OK”, there will be shown some windows on the screen step by step, you are only required to follow the
description and click the buttons that are defaulted by the system to finish transferring.
Or you can:
1. Click on the START button in Windows.
2. Click on the MY COMPUTER Icon on the desktop.
3. Your memory card will appear as a REMOVABLE STORAGE DEVICE.
4. Click on the REMOVABLE STORAGE DEVICE to view the images. The images are stored in the
subfolder called DCM100.
5. You can now copy and paste the images to any directory you choose.
2. Download photos using Photags Express
Double click the Photags Express icon on the desktop to launch the application.
Click the “Get Photos” button on the main window.
Page 30
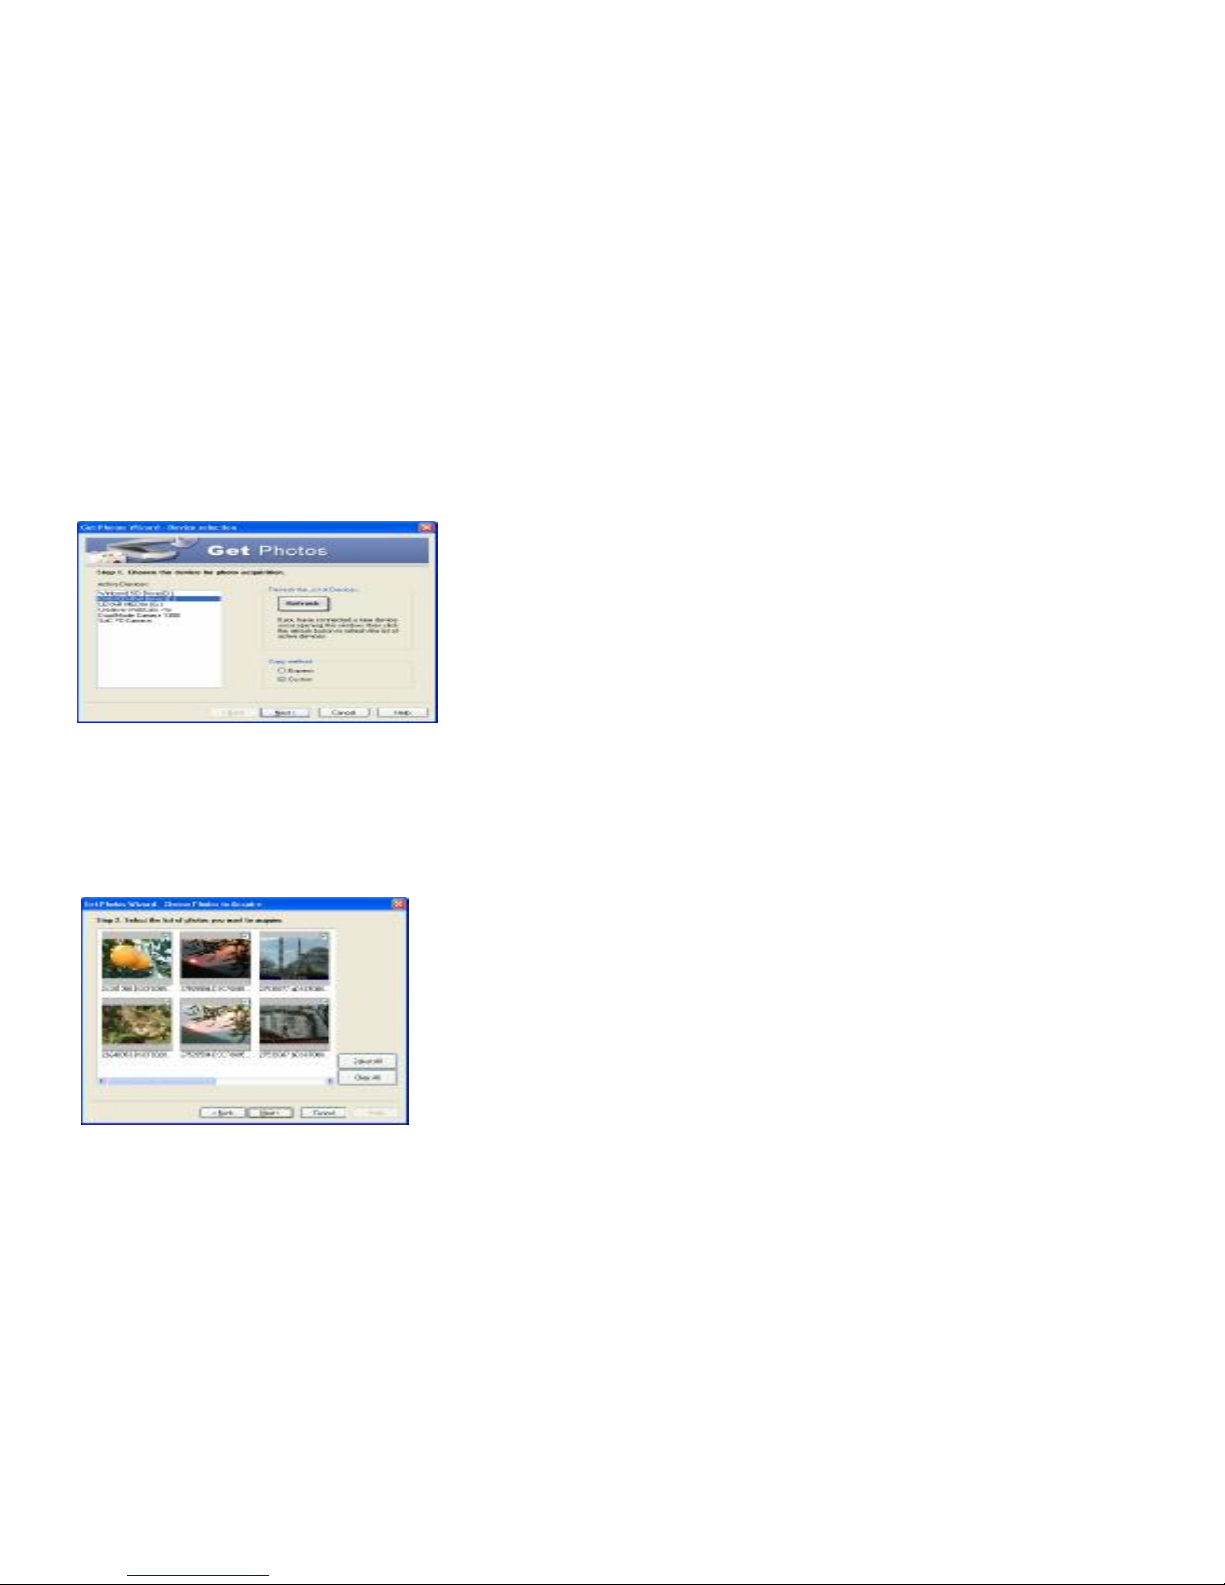
The “Get Photos” wizard mode will appear on the screen, you can select “custom copy” to download
photos with your individuation.
Or you can select “Express” option to download all photos to the computer without the option of selecting
photos. In this mode you will not see a preview of the photos transferred.
Custom copy
This mode is used to manually select the photos you wish to copy to your computer.
The “Device selection” mode will appear. Both your camera and the memory card will each appear in the
“Active Devices” list
Select “Custom copy” click “Next” to continue.
Note: At this moment, you can select “Express” option to copy all photos to your computer.
Select your photos click “Next” to continue.
Page 31

Add active captions to the picture. With this feature you can add a date, keywords and categories. Click
“Next” to continue.
Choose a position where you want to place the photos. Click “Finish” to copy the photos to the location
you selected.
Note:
All of the picture you imported will appear in the “Select Photos” main window. And now, you can edit
your photos per your idea, and then download it to your computer. For how to edit the photos, you can
refer to the Quick Start guide in the Photags Express.
Page 32

Photags Express software owner manual
You can edit, printing, sharing photos with Photags Express. You can operate it as following step to know
how to use Photags Express:
Launch the Photags Express.
Click “tour” button on the main window to view how to use the photags Express in detail.
Attention:
If Photags Express can not upgrade the DirectX automatically, you can manually install the DirectX
in the CD before using the
Camera, otherwise ,if the edition of DirectX in the windows operation is less than 8.1,then the AVI file
can not be played.
Click here
Page 33
Viewing Videos on Your Computer
To view a video clip double click on a video file, this will open Windows Media Player.
Maintenance of Your Digital Camera
The digital camera is a delicate device. Please handle your camera with care to avoid damaging it.
Appendix A: Technical Specifications
Image Sensor CMOS Sensor
Page 34
Appendix B: Troubleshooting
Image Resolution
6digital camera resolutions
-
3264X2448Pixels (8M),
3648X2048Pixels (HD 7M) , 2592X1944Pixels (5M) ,
2048X1536Pixels (3M) , 1920X1080Pixels (HD 2M),
640X480Pixels (VGA)
Video Resolution 640X480pixels(VGA),320X240pixels(QVGA)
File Format JPEG/AVI
External Memory SD / MMC Card (up to 8GB)
LCD Display 2.4 Inch TFT LCD
Lens f=7.23mm, F2.8
Zoom Yes
Exposure -3.0EV ~ +3.0EV
White Balance Auto, Daylight, Cloudy, Incandescent , Fluorescent
ISO Auto/100/200/400
Scene
Auto/Night Portrait/Night
Scenery/Portrait/Scenery/Sport/Party/Beach/High Sensitivity
Flash Auto /Force/red eye reduction/Off
Self-timer 2 or 10 sec delay
Anti-Shake Yes
PictBridge Yes
Interface USB 1.1
System Requirements Window 2000/XP/ Vista/ Mac OS X (10.2.6 or higher)
Battery 3*AAA
Working Temperature 0~40 ℃
Page 35

Q: I have taken photos but my computer does not recognize my camera. What do I do?
A:
First, ensure that you have in fact taken photos. Press the Shutter button a few times to take some
sample photos and then try downloading them again.
It is also recommended that you have an SD card inserted in the camera.
Secondly, always use the USB cable that came together in the package with the camera.
The USB cable needs to be inserted in a free USB slot on your computer.
Thirdly, give your computer time to recognize that the device is inserted. If need be, refresh the device
options list until you see the removable device appearing.
If the computer does not recognize your device it may mean that your computer does not meet the
minimum system requirements.
Please see the System Requirements section of this manual. If your computer does not match these
requirements then it is possible that you will not be able to transfer the photos and videos from your
camera.
A00-090908
 Loading...