

EN
USERS MANUAL
WINDECKSTR. 4 | 83250 MARQUARTSTEIN - GERMANY
Tel. +49(0) 86 41- 69 48 - 60 | www.x-gloo.com | info@x-gloo.com

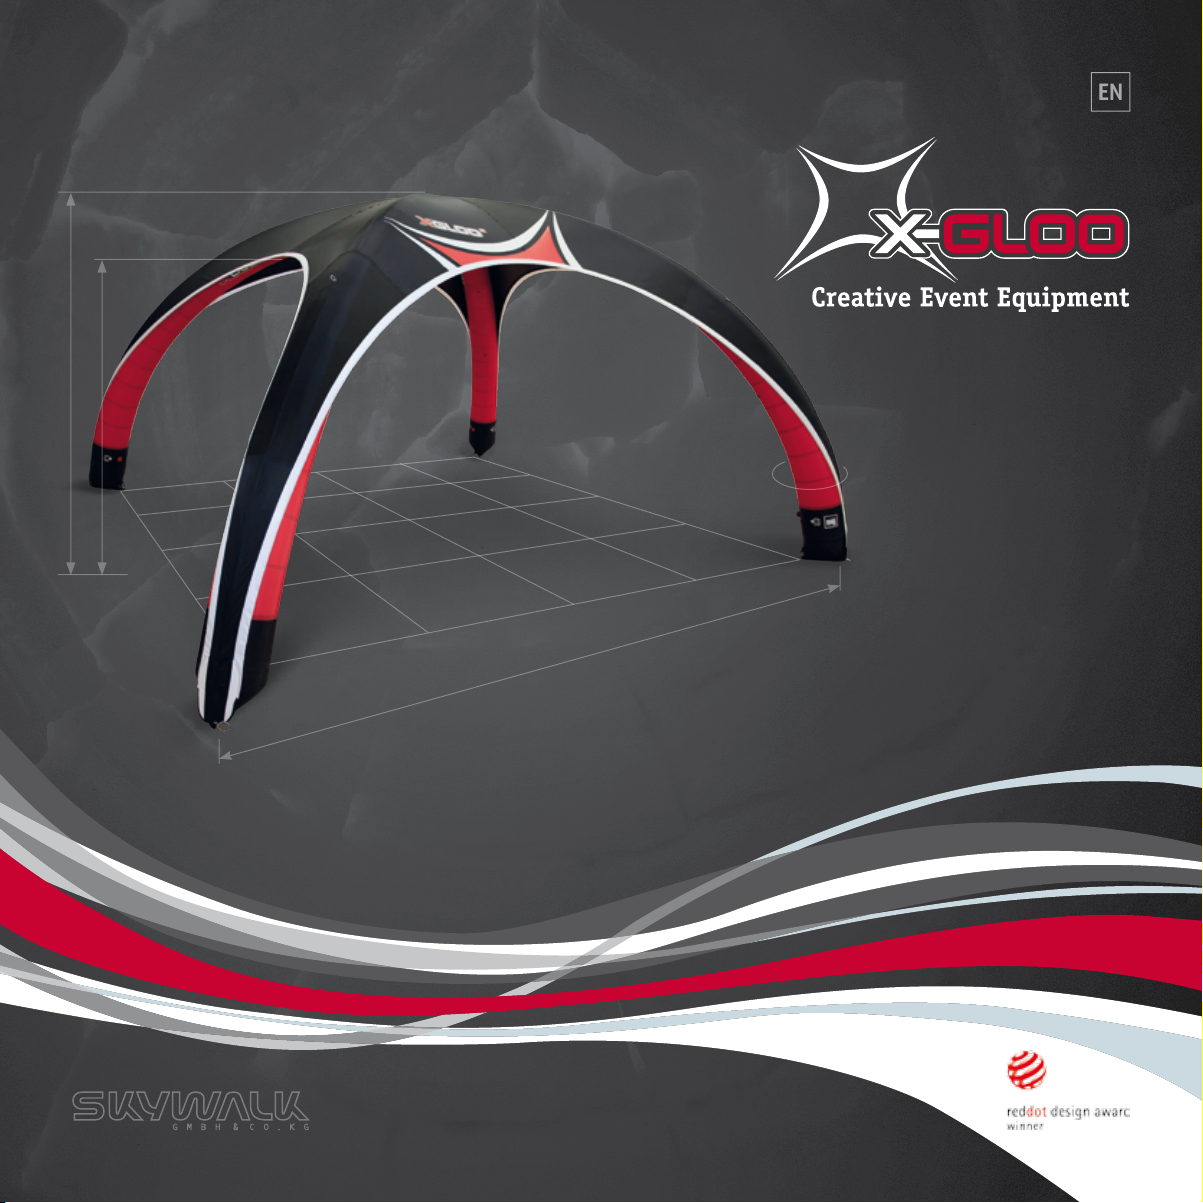
THANK YOU FOR YOUR TRUST
Skywalk GmbH & Co. KG congratulates
you on the purchase of your X-Gloo,
the modular lightweight tent system
without compressors and poles.
In order to guarantee the perfect
operation, optimal function, long
product life and your personal safety
and the safety of your guests, please
note the following:
Before you use your X-Gloo for the first
time, read these operating instructions
carefully and follow the safety
indications.
All functions, maintenance and repairs
should only be carried out to the
degree described in these operating
instructions.
Please contact your X-GLOO Team for
repairs exceeding these instructions!
2
If you loan your X-Gloo Event Tent to
another person, please pass on these
instructions and make sure that the
person is fully advised regarding the
technical aspects of the X-Gloo Event
Tent, in order to avoid faulty operation.
Skywalk GmbH & Co. KG - Windeckstraße 4 - 83250 MARQUARTSTEIN | GERMANY
If you have any further questions,
we are always happy to assist you:
Service Hotline
+49 (0)8641-6948-60

TABLE OF CONTENTS
TECHNICAL DATA 4
STANDARD DELIVERY 5
SPECIAL INSTRUCTIONS 6
SETUP 8
1. Lay out the Matrix ..........................8
2. Test the Valves
3. Inflate
Inflation with the Hand Pump
Inflation with the Electric Pump
Bravo OV10/Bravo 2000
Inflation with the Bravo
Turbo Max 12 V for car battery
Setup using the Protection Foil
............................................8-9
.................................8
..........8
....................8
.........8
........9
STABILISATION 10
Stabilisation with Water Ballasts .. 10
Stabilisation with Sand Ballasts
Stabilisation with
Water Ballast Barrels
Stabilisation with the
Anchoring Set
........................ 12
.................................... 13
.... 11
ELEMENTS 14
Side Walls ........................................... 14
Tunnel Part
Canopy and Canopy Banner
LED Lighting Kit
......................................... 16
............. 16
................................ 17
BLOCK-BUILDING SYSTEM /
X-GLOO MATRIX 18
TAKEDOWN 20
CLEANING 20
REPAIR 21
Bladder Repair ................................... 21
Replacement of the
Protection Strip
Bladder Replacement
................................. 21
....................... 22
X-RELAX 25
Tel. +49(0) 86 41- 69 48 - 60 | www.x-gloo.com | info@x-gloo.com
3
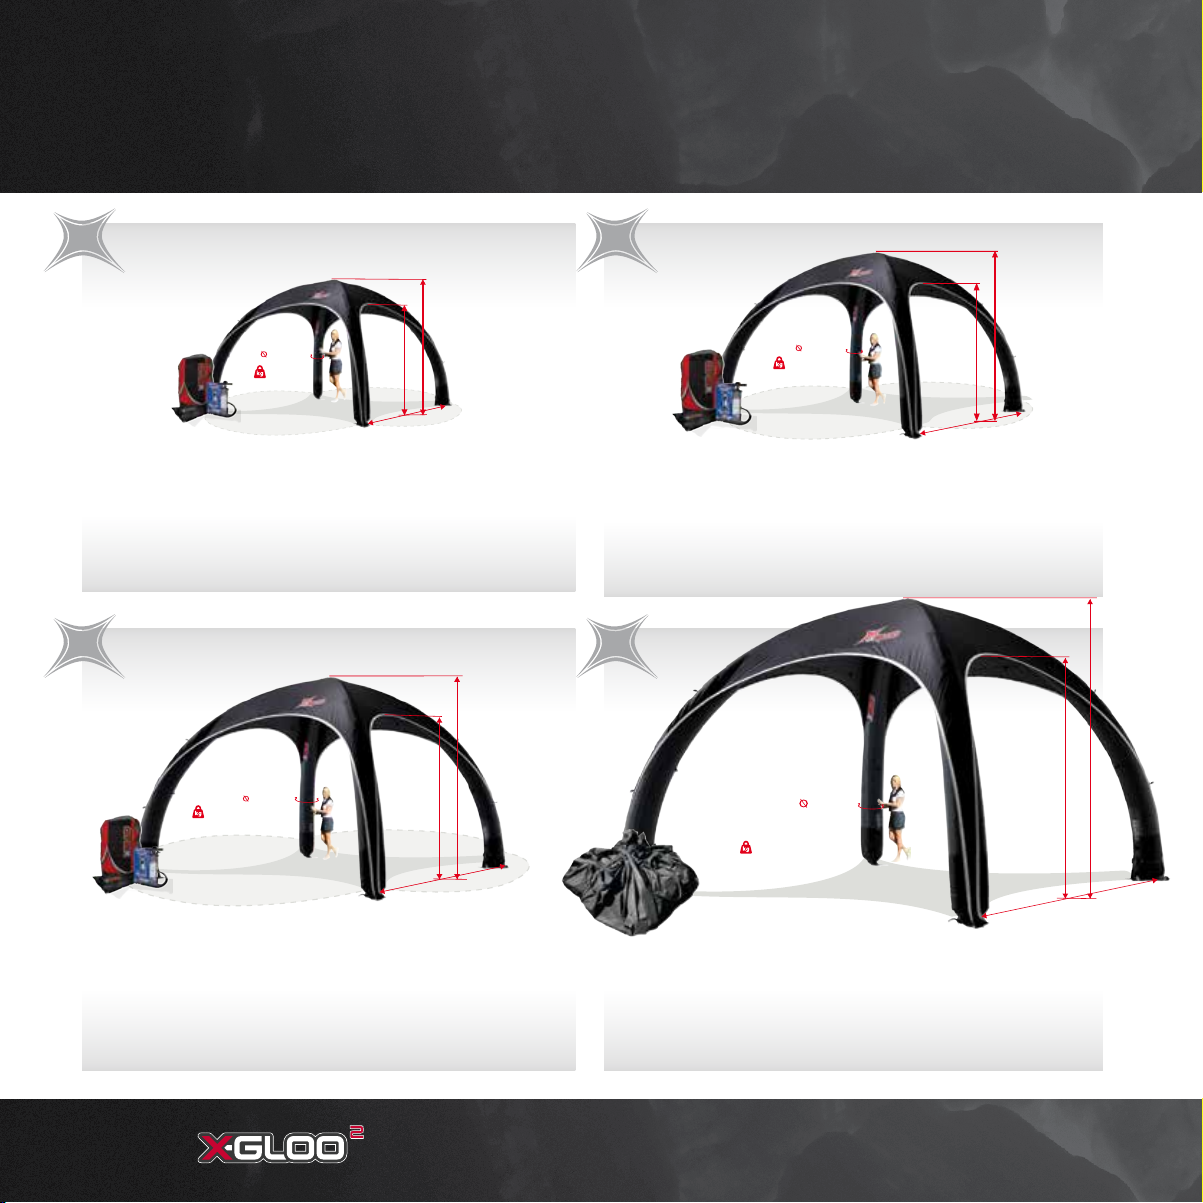
TECHNICAL DATA
4 m
ca. 13,3 kg
ca. 7,23 m2
ca. 23 m2
ca. 2,0 m
ca. 2,38 m
ca. 25 cm
4 m
ca. 13,3 kg
ca. 11,3 m2
ca. 35,7 m2
ca. 7,23 m2
ca. 23 m2
ca. 31 cm
5 m
ca. 2,0 m
ca. 2,38 m
ca. 2,5 m
ca. 3 m
ca. 25 cm
ca. 18,8 kg
4 m
ca. 3,0 m
ca. 13,3 kg
ca. 22,5 kg
ca. 16,27 m2
ca. 11,3 m2
ca. 35,7 m2
ca. 51,34 m2
ca. 7,23 m2
ca. 23 m2
ca. 31 cm
ca. 3,57 m
6 m
5 m
ca. 2,0 m
ca. 2,38 m
ca. 2,5 m
ca. 3 m
ca. 25 cm
ca. 37 cm
ca. 18,8 kg
4x4
Exterior side length ....... ca. 4 m
ca. 25 cm
ca. 13,3 kg
ca. 23 m2
Entrance height .......... ca. 2,0 m
Total height ...............ca. 2,3 m
Covered area
without Side Walls........... 7,23 m
with 4 Canopies ............ca. 23 m
6x6
ca. 22,5 kg
Exterior side length ....... ca. 6 m
Entrance height .......... ca. 3,0 m
ca. 51,34 m2
ca. 37 cm
ca. 16,27 m2
Total height .............ca. 3,57 m
Covered area
without Side Walls......... 16,27 m
with 4 Canopies ....... ca. 51,34 m
5x5
ca. 7,23 m2
Tube diameter ............ca. 25 cm
Weight without Walls ca. 13,3 kg
Setup ........
Hand Pump .....................15 min
2
Electric Pump .................3-5 min
2
Operating pressure
Tube diameter ............ca. 37 cm
Weight without Walls . ca. 22,5 kg
Setup ........
Hand Pump .....................30 min
2
Electric Pump ............. 10-15 min
2
Operating
pressure ........
*This data serves primarily as information, since the operation of the Overpressure Valves is automatic.
4 m
ca. 2,38 m
ca. 2,0 m
ca. 3,0 m
6 m
*
0,18 bar/2,6 PSI
*
0,2 bar/3 PSI
ca. 3,57 m
ca. 31 cm
ca. 18,8 kg
ca. 35,7 m2
Exterior side length ....... ca. 5 m
Entrance height .......... ca. 2,5 m
Total height ..................ca. 3 m
Covered area
without Side Walls...... ca. 11,3 m
with 4 Canopies ......... ca. 35,7 m
8x8
ca. 43 cm
ca. 42 kg
Exterior side length .. ca. 7,85 m
Entrance height ........ ca. 3,94 m
Total height ...............ca. 4,8 m
Covered area ...........ca. 30,3 m
Tube diameter ............ca. 43 cm
ca. 11,3 m2
2
2
2
ca. 3 m
ca. 2,5 m
5 m
Tube diameter ............ca. 31 cm
Weight without Walls ca. 18,8 kg
Setup ........
Hand Pump .....................23 min
Electric Pump ............... 7-10 min
Operating pressure
ca. 30,3 m2
*
0,2 bar/3 PSI
ca. 7,85 m
ca. 3,94 m
Weight without Walls .. ca. 42 kg
Setup with Electric Pump .. 25 min
Operating
*
pressure
............ 0,35 bar/5 PSI
ca. 4,8 m
4
Skywalk GmbH & Co. KG - Windeckstraße 4 - 83250 MARQUARTSTEIN | GERMANY

STANDARD DELIVERY
X-GLOO MATRIX WITH ACCESSORIES
4x4, 5x5 AND 6x6 MODELS
1x - X-Gloo Multifunction Transport Bag (1)
1x - Hand Pump (2)
1x - Side Wall Bag (3)
1x - Anchoring Line Set (4)
1x - Manual and Quick User Guide (5)
1x - Closing Rod for X-Gloo 5x5/6x6 (6)
1x - X-Gloo Repair Kit (contents below)
X-GLOO MATRIX WITH ACCESSORIES
8x8 MODEL
1x - Quick Pack Sack (7)
1x - Hand Pump (2)
3x - Side Wall Bag (3)
1x - Anchoring Webbing Set (8)
1x - Manual and
Quick User Guide (5)
1x - Closing Rod (6)
1x - Setup Support Bar (9)
1x - X-GLOO Repair Kit
(contents below)
7
1
2
5
3
4
6
9
8
X-GLOO REPAIR KIT
1x - Replacement Bladder (10)
1x - Replacement Protection Strip (11)
1x - Replacement Overpressure Valve (12)
1x - Adhesive Repair Patches (13)
1x - Fixing Element Tool (14)
1x - Allen Wrench (15)
Tel. +49(0) 86 41- 69 48 - 60 | www.x-gloo.com | info@x-gloo.com
10
14
12
11
13
15
5

SPECIAL INSTRUCTIONS
GRAPHICS/DESIGN
• A transparent effect can occur (especially with background
light) with different tent color combinations (e.g. light Roof
color and dark Tubes). This should be taken into consideration
by customers when designing the X-Gloo. If in doubt, please
consult your X-GLOO professional.
• With sewn application on different cloths, there is an area of
overlap of ca. 5-10 mm where the cloth is sewn together. This
results in a color change in the area of the overlap.
SET-UP
• Do not exceed the specified maximum air pressure.
• The X-Gloo is not intended for long-term outdoor use and should
be inspected for wear or damage after every event.
• If small folds form inside the Tubes when inflating, it is helpful
with the larger tents to gently shake the Tube during the
inflation process. This will help keep the inner Bladder in the
correct position assuring proper inflation.
• The X-Gloo should be deflated in winds exceeding 60 km/h (The
first sign of overload is when the Roof begins to compress).
When high wind force is expected (gusts of more than 50-60
km/h for the 4x4, 5x5, or 6x6; and more than 40 km/h for the
8x8) the tent must be secured and anchored.
!
PLEASE NOTE: If Side Walls are completely zipped in to a 6x6
tent, a force of almost 500 kg is the result. For this reason,
please pay special attention to the following points:
- According to the ground surface, you may require longer or
additional stabilisation materials.
- Additionally, you must attach Anchoring Lines to all Shoulder
Loops (found on the outside of each Tube)!
- Our smaller Water Ballasts (ideal for use on hard ground
surfaces) may not be sufficient for securing your tent against
strong wind gusts. Refer to our Wind Resistance Certificate to
determine whether Water Ballast Barrels are required.
- Winds stronger than 60 km/h can lead to structural damage of
the tent and this damage is no longer covered by the warranty.
- If weather conditions deteriorate dramatically, all Overpressure
Valves should be opened immediately and the tent deflated.
Additionally, the deflated tent should be weighted down.
- In general, the Protective Strips on the bottom of the Tubes
are exposed to more wear and tear on rough surfaces due to
the movement of the tent from wind.
OPERATION
Keep open fires and heat sources away from the X-Gloo.
FIRE PROTECTION CLASSIFICATION:
• Description of Norms:
- DIN 4102-B1 (Abb.: B1) Controls testing and requirements on
the reaction to fire of building materials. German norm, used
in most European countries.
- CPAI 84-95, Section 6 Specification of the American
Association of Sailcloth Materials for the assessment of flameretardant materials used in (event-) tents. Due to the fact
that the the X-Gloo is in use worldwide at tradeshows as an
innovative event tent, we reserve the right not to certify the
tent according to the national norms of each country. The
certification according to CPAI 84 fulfills the international
requirements for flame resistance in tent products and
includes similar test criteria like DIN 4102-B1 or NFP 925017M2.
• When the tent is used in sandy terrain, avoid getting sand grains
in the Tubes or in the Pump
• Keep the Valves free of sand and dirt particles and clean them if
necessary, since this can cause faulty operation and pressure loss.
• The tent can be damaged by the penetration of sharp objects
(e.g. knives, tools) in the Tubes causing leakage and loss of
pressure. Handle the X-Gloo with appropriate care.
• Avoid extreme variations in temperature (day and night) or
long-term use. This can lead to loss of air pressure, requiring
reinflation of the tent.
6
Skywalk GmbH & Co. KG - Windeckstraße 4 - 83250 MARQUARTSTEIN | GERMANY

Procedure in the case of pressure loss:
• FIRST close all Valves TIGHTLY!
• If pressure loss continues, blow out the Overpressure Valves to
remove all dust or dirt particles.
• If pressure loss still continues, the quickest solution is to remove
the Bladder and replace it, as a damaged Bladder is likely the cause.
- If the damage is visible on the Bladder and the damaged
area is smaller than 1 cm -> Apply the Adhesive Repair Patch
included in the Repair Kit.
- If the damaged area cannot be found, spray some soap suds
onto the inflated Bladder surface so that the escaping air
bubbles are visible and the damage can be located. Then
apply the Adhesive Repair Patch to repair the Bladder.
STORAGE
• Avoid pressure spots (e.g. do not lean on the tent with your
knees while folding the tent up).
• Store the X-Gloo in a dry location and at temperatures not
exceeding 40° celsius.
• Do not pack or store the X-Gloo when damp or wet, since this
can cause the formation of mold spots and discoloration.
• At temperatures lower than 0° celsius, folding can lead to
damage of the components. Take special care with the Window
Walls in low temperatures and pack them carefully.
• Never store the X-Gloo in an automobile in direct sunlight.
The intense heat can cause the Window Walls to stick together
irreversibly, or may cause permanent damage to the cloth.
!
Important information for digitally-printed parts!
Digital printed elements must be stored in dry condition!
CAUTION: If the elements are stored while still damp, the
ink from the printed material can bleed and the printing can
become permanently damaged! We are unable to accept liability.
MAINTENANCE, CLEANING, REPAIR
All kinds of repairs can be done in our workshop in Marquartstein
or in the Service Center in Las Vegas, Nevada. We can also take
care of special requests (additional straps, velcro strips, etc.) at
our facility.
• Maintenance and repair should be carried out only by X-GLOO or
by an authorized Service Center.
• The X-Gloo should be periodically inspected for chafe marks and
damage and promptly repaired.
• In order to avoid damage of the material coating, first attempt
to remove dirt and stains using a soft, dry brush or microfiber
cloth. Only if necessary use a small amount of mild alkaline
solution mixed with water. Avoid the use of solvents, washing
machines or steam cleaning.
• Re-waterproofing is not possible.
MATERIALS
• Bleaching of the material is possible with extended UV
exposure (e.g. at high altitude or extended setup time). White
wall material tends to yellow from UV exposure, and is easily
stained when contacted with dust and dirt. All of the materials
currently implemented in the X-Gloo have been subjected to
extensive material testing. It is practically impossible to state
when exactly a color change could become visible, since the
influencing factors vary strongly. However: All cloths change
in color with extensive UV exposure! According to expert
knowledge, with proper care the X-Gloo will show only minimal
color change after many years of use. The range of use will not
be limited.
• The materials used (and therefore, the entire tent) are
waterproof.
Tel. +49(0) 86 41- 69 48 - 60 | www.x-gloo.com | info@x-gloo.com
7
SETUP
1. LAY OUT THE MATRIX
Spread the X-Gloo Matrix out in the area intended for setup. Try to
make sure that the tube endings of the X-Gloo are positioned
approximately where you want them once the tent is inflated. This
way you can avoid having to reposition or handle the tent again.
8x8 ONLY: Zip in the Middle Wall
Since the entrance height of an assembled X-Gloo 8x8 is very high,
we recommend zipping in the Middle Wall before inflating the tent.
!
PLEASE NOTE: Only the outer side of the Middle Walls are
equipped with a Zipper Rain Protector. If you should choose to
attach the Middle Wall with the outer side facing inwards (so
that a logo printed on the outside is be visible from the inside of
the tent for example), the waterproof quality of the tent in the
area of the zipper can not be guaranteed.
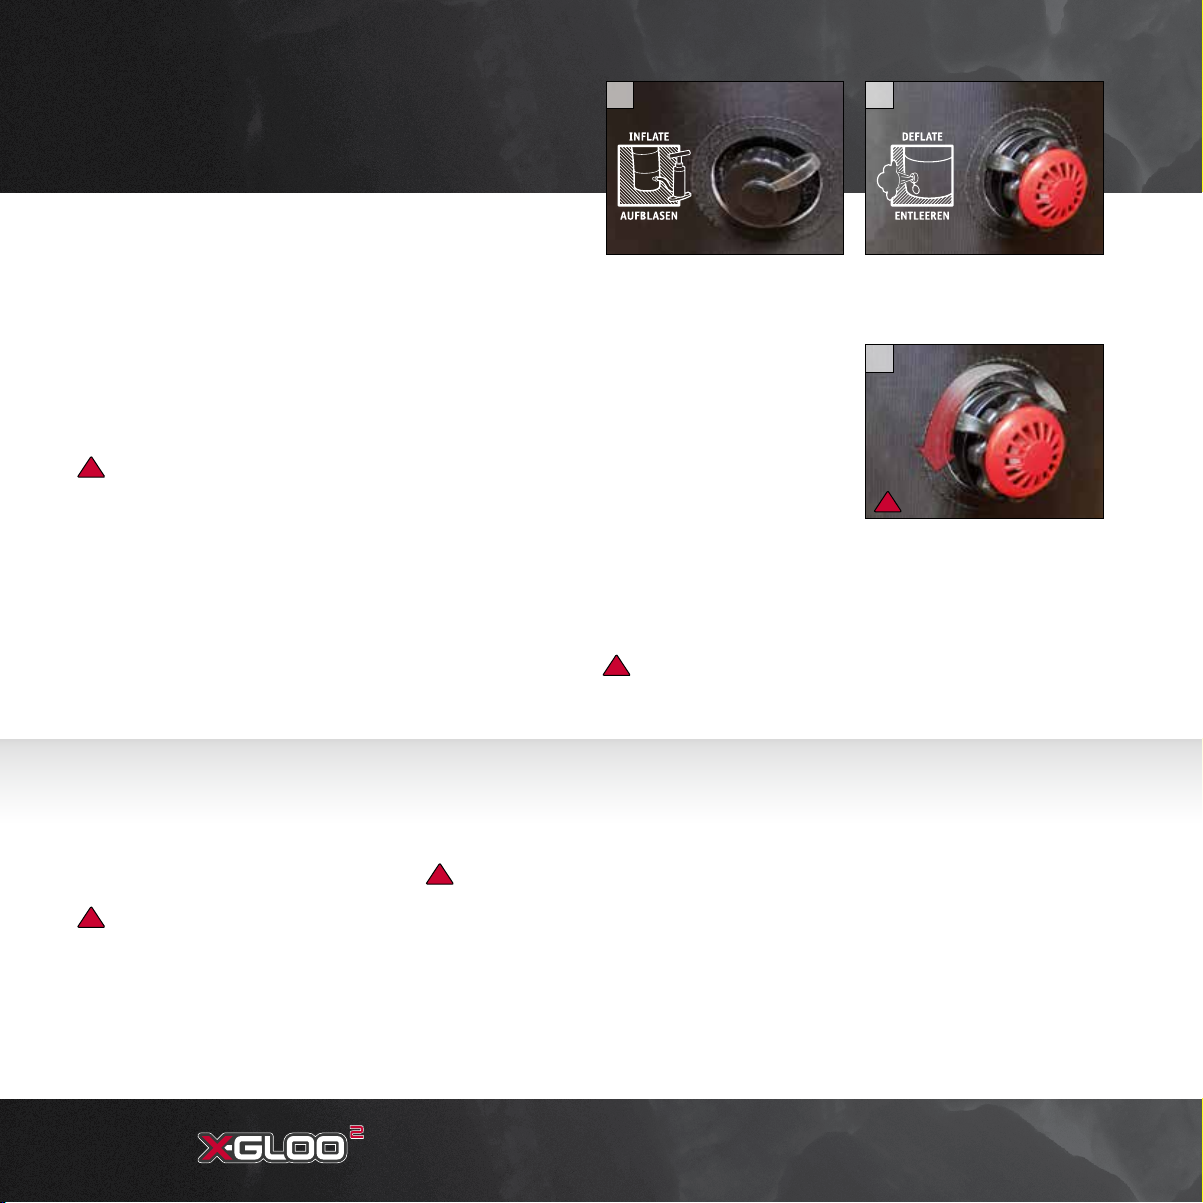
2. TEST THE VALVES
INFLATION VALVE: The Inflation Valves are air-tight and permanently welded to the Bladder inside each Tube. Each Inflation Valve
consists of a rubber check valve and a threaded valve cover (1).
1 2
The check valve inside the housing prevents air from escaping. In
order to prevent dirt from entering, the valve cover is screwed onto
the housing after inflation is complete.
OVERPRESSURE/DEFLATION
VALVE: Beside the Inflation
Valve you will find a red Overpressure Valve (2) which opens
automatically as soon as the
Bladder is properly pressurized.
To deflate the Tubes, unscrew
the housing of each Overpressure
Valve by turning it counterclockwise (3).
The function of each Overpressure Valve should be tested before
inflation. To do this, unscrew the housing and make sure that the
spring can be pushed in. Tightly close each valve after testing.
!
PLEASE NOTE: Sand and dirt can clog the spring inside the
Overpressure Valve so that the function is negatively influenced.
3
!
Inflation with the Hand Pump
The standard Hand Pump included in
delivery is equipped with different valve
sockets and an air hose. Do not kink or
press down on the air hose, to avoid air
leakage or damage!
!
PLEASE NOTE: See the notation on the
hose connection:
Inflate | Deflate
8
Inflation with the Electric Pump Bravo
0V10* and Bravo 2000*
Screw the hose (included in delivery) to the
correct opening on the pump.
PLEASE NOTE: See the notation on the
!
hose connection:
IN = Inflate | OUT = Deflate
Stick the plug into the outlet. Please note
that the Bravo 2000 has a booster, which can
be turned on with the switch. Please read and
folllow the operating instructions included
with the Bravo OV10 and Bravo 2000.
*120V and 230V models available.
Inflation with the Bravo Turbo Max
for 12V automobile battery
The Bravo Turbo Max can be connected to a
12V automobile battery. To avoid draining
your battery, make sure that it is fully
charged or that the vehicle is running while
operating the pump. Please read and follow
the operating instructions included with
the Bravo Turbo Max.
Connect the cable clamps to the respective
connections of the battery (red = +, black = -)
and adjust the pressure control to 3 PSI.
Skywalk GmbH & Co. KG - Windeckstraße 4 - 83250 MARQUARTSTEIN | GERMANY
 Loading...