

Xerox XEScan, XEScan Reflection, XEScan Reflection Plus, XEScan Reflection 1.5 Operator manual
Page 1

Operator manual XEScan/XEScan
Reflection/XEScan Reflection
Plus/XEScan Reflection 1.5
Software Version/Manual Version 1.5/1.5
Issued 1/2004
Software and hardware specifications as well as companies’ respective brands used in this manual are
generally subject to protection by trademark, label or patent.
SCP Software GmbH
Auf der Hüls 120
D-52068 Aachen
Tel: (0241) 9 68 30 - 0 Fax: (0241) 9 68 30 – 10
http://www.scp.de Email: info@scp.de
© 1996 – 2003 SCP Software GmbH
Portions Copyright (C) 2001 artofcode LLC. All rights reserved.
Portions Copyright (C) 1996, 2001 Artifex Software Inc. All rights reserved.
Portions Copyright (C) 1988, 2000 Aladdin Enterprises. All rights reserved
This software is based in part on the work of the independent JPEG Group.
Portions Copyright (C) 1998 Soft Horizons. All rights reserved.
"Licensed under U.S. Patent No. 4,558,302 and foreign counterparts. Purchase of this software does not authorize
user to use any other product or perform any other method or activity involving use of LZW unless separately licensed
by Unisys Corporation."
Depending on your license, not all described options may be available.
Page 2

Product Matrix
Feature Matrix XEScan and XEScan Reflection 1.5
XEScan
Monochrome Scan
to file
Color Scan to file*
Monochrome Scan
to print
Basic color Scan to
print*
Professional color
Scan to print*
Archive N/A
Batch and
composing
Color filter archive
Label N/A
Output options N/A ●
Output subsystem N/A ●
Use full paper width
(step and repeat)
● ● ● ●
● ● ● ●
● ● ●
● ●
●
N/A
●
N/A ●
XEScan
Reflection Mono
●
●
●
XEScan
Reflection
XEScan
Reflection Color
Plus
Raster RIP N/A ●
HPGL RIP N/A Optional
Postscript RIP N/A Optional
Printer driver
licenses incl.
Additional licenses
XES 88xx
Additional licenses
X2 or HP
* color scanner required
N/A 1 XES 88xx 1X2 or HP 1 X2 or HP
N/A Optional Optional Optional
N/A Optional
2
Page 3

Content
Product Matrix .............................................................................................................................................. 2
XEScan/XEScan Reflection, the multi-talent for digital color copies and scans .................................... 7
Packing List .................................................................................................................................................. 8
Hardware Requirements .............................................................................................................................. 9
Recommended System Configuration ............................................................................................................ 9
Software Requirements .................................................................................................................................. 9
Program Installation..................................................................................................................................... 10
Keycode Entry .............................................................................................................................................. 15
Hardware Configuration............................................................................................................................... 16
Scanner .......................................................................................................................................................... 16
Installing Printers ............................................................................................................................................ 17
Calibration ...................................................................................................................................................... 19
Deleting Installed Printers............................................................................................................................... 21
Preferences ................................................................................................................................................... 22
General........................................................................................................................................................... 22
Warning options.............................................................................................................................................. 22
Label............................................................................................................................................................... 23
Accounting...................................................................................................................................................... 23
Email .............................................................................................................................................................. 24
User administration......................................................................................................................................... 25
Archive ........................................................................................................................................................... 26
Connection .................................................................................................................................................. 17
Medium ....................................................................................................................................................... 17
Hardware..................................................................................................................................................... 17
Print Job...................................................................................................................................................... 18
Target Dialog............................................................................................................................................... 19
Edit media parameters............................................................................................................................. 29
Reset media parameters.......................................................................................................................... 20
Edit size correction .................................................................................................................................. 20
Edit RIP size correction............................................................................................................................ 20
All............................................................................................................................................................. 20
None ........................................................................................................................................................ 20
Invert selection......................................................................................................................................... 20
Printing the Targets..................................................................................................................................... 20
Scanning the Targets .................................................................................................................................. 20
Export to Library.......................................................................................................................................... 21
Import from Profile Library........................................................................................................................... 21
Making Prints................................................................................................................................................ 27
First Settings................................................................................................................................................... 28
Selecting a Color Mode ............................................................................................................................... 28
Scanner / DPI.............................................................................................................................................. 28
Scan Mode .................................................................................................................................................. 28
General........................................................................................................................................................... 29
Original Size................................................................................................................................................ 29
Printer ......................................................................................................................................................... 30
Medium ....................................................................................................................................................... 30
Output ......................................................................................................................................................... 30
Number of Copies ....................................................................................................................................... 30
Automatics (Quality Settings) ...................................................................................................................... 31
Brightness ................................................................................................................................................... 32
Manual Filters.............................................................................................................................................. 32
Output Options ............................................................................................................................................... 33
Margins ....................................................................................................................................................... 33
Trim Lines ................................................................................................................................................... 33
Print Label ................................................................................................................................................... 33
Nesting........................................................................................................................................................ 34
Alignment .................................................................................................................................................... 34
Paneling ......................................................................................................................................................... 35
3
Page 4

Panel Size (Width/Height) ........................................................................................................................... 35
Overlap and Gluing Marks........................................................................................................................... 36
Making the First Copy ................................................................................................................................. 36
Reprint ..................................................................................................................................................... 36
Presets ........................................................................................................................................................... 37
Preview.......................................................................................................................................................... 38
Scan Pre-View ............................................................................................................................................ 39
Automatic Deskew ...................................................................................................................................... 39
Set AOI / Cropping ...................................................................................................................................... 39
Reset AOI Setting ....................................................................................................................................... 39
Edit AOI....................................................................................................................................................... 39
Zoom to AOI / Cropping .............................................................................................................................. 40
Zoom in / Zoom out ..................................................................................................................................... 40
Select Panels .............................................................................................................................................. 40
Roll Preview ................................................................................................................................................ 40
Filter Editor ................................................................................................................................................... 41
Function and Structure of the Filter Editor ...................................................................................................... 41
Filter Editor in Color Mode........................................................................................................................... 44
Histogram Window ......................................................................................................................................... 44
Black and White Points (Contrast).................................................................................................................. 44
Automatically Setting the Black and White Points ....................................................................................... 44
Manually Setting the Black and White Points.............................................................................................. 44
Method for Background Correction................................................................................................................. 45
Gamma (Brightness/Color Intensity)............................................................................................................... 45
Special Filters ................................................................................................................................................. 45
Scan Resolution ............................................................................................................................................. 46
Filter Editor in Grayscale Mode................................................................................................................... 47
Histogram Window ......................................................................................................................................... 47
Black and White Points................................................................................................................................... 47
Automatically Setting the Black and White Points ....................................................................................... 47
Manually Setting the Black and White Points.............................................................................................. 47
Method for Background Correction................................................................................................................. 48
Gamma........................................................................................................................................................... 48
Special Filters ................................................................................................................................................. 48
Scan Resolution ............................................................................................................................................. 48
Filter Editor in Black and White Mode ........................................................................................................ 49
Base Type Selection....................................................................................................................................... 49
Contrast.......................................................................................................................................................... 49
Background Removal ..................................................................................................................................... 49
Output............................................................................................................................................................. 49
Scan Resolution ............................................................................................................................................. 50
Import Raster or Vector Files ...................................................................................................................... 51
HPGL Files .................................................................................................................................................... 53
Pen Settings ................................................................................................................................................... 53
Pen Parameters from File ........................................................................................................................... 53
User-Defined Pen Parameters .................................................................................................................... 53
Change Pen Color....................................................................................................................................... 53
Save / Load Pen Parameters ...................................................................................................................... 54
Rotate Print..................................................................................................................................................... 54
Preview........................................................................................................................................................... 54
Enlarge / Reduce ........................................................................................................................................ 55
Move Section .............................................................................................................................................. 55
Scan to File ................................................................................................................................................... 56
Scanner .......................................................................................................................................................... 56
Scan Mode .................................................................................................................................................. 57
Scanner Configuration ................................................................................................................................ 57
Original Size ................................................................................................................................................... 57
File Format and File Name ............................................................................................................................. 58
Excursus: File Formats ............................................................................................................................... 59
Further Options............................................................................................................................................... 60
Copy Size and DPI ......................................................................................................................................... 60
4
Page 5

Automatic Filters............................................................................................................................................. 60
Contrast....................................................................................................................................................... 61
Manual Filters ................................................................................................................................................. 61
Scan into Email............................................................................................................................................. 62
Scanner .......................................................................................................................................................... 62
Scan Mode .................................................................................................................................................. 63
Scanner Configuration ................................................................................................................................ 63
Original Size ................................................................................................................................................... 63
File Format and Addressing............................................................................................................................ 64
Copy Size and DPI ......................................................................................................................................... 64
Automatic Filters............................................................................................................................................. 64
Contrast....................................................................................................................................................... 64
Manual Filters ................................................................................................................................................. 65
Archive .......................................................................................................................................................... 66
Introduction in Working with pgf Files ............................................................................................................. 67
Menu Fields in the Archive Window................................................................................................................ 67
Back / Forward ............................................................................................................................................ 67
Up ............................................................................................................................................................... 67
Cut / Copy / Paste ....................................................................................................................................... 67
Delete.......................................................................................................................................................... 67
Properties.................................................................................................................................................... 67
View ............................................................................................................................................................ 67
Insert Current .............................................................................................................................................. 67
RIP to File ................................................................................................................................................... 68
Scan Image... .............................................................................................................................................. 70
Editor........................................................................................................................................................... 69
Rotate Image............................................................................................................................................... 69
Print Set ...................................................................................................................................................... 69
Print Image.................................................................................................................................................. 69
Print and RIP............................................................................................................................................... 69
PGF Editor..................................................................................................................................................... 70
Functions in the Overview Window................................................................................................................. 71
File .............................................................................................................................................................. 71
Save Picture ............................................................................................................................................ 71
Print Picture ............................................................................................................................................. 71
Scan Picture ............................................................................................................................................ 71
Close Editor ............................................................................................................................................. 72
Mode ........................................................................................................................................................... 72
Mark Area ................................................................................................................................................ 72
Set Skew Points....................................................................................................................................... 72
Text Mode................................................................................................................................................ 72
View ............................................................................................................................................................ 72
Zoom in.................................................................................................................................................... 73
Zoom out.................................................................................................................................................. 73
Arrange Spy Window ............................................................................................................................... 73
Edit.............................................................................................................................................................. 73
Undo ........................................................................................................................................................ 73
Area ......................................................................................................................................................... 73
Despeckling ............................................................................................................................................. 73
Rotate ...................................................................................................................................................... 74
Skew........................................................................................................................................................ 74
Mirror Area............................................................................................................................................... 74
Options........................................................................................................................................................ 74
Unit .......................................................................................................................................................... 74
Scale to Gray ........................................................................................................................................... 74
Hide Spy Window .................................................................................................................................... 74
RGB Editor .................................................................................................................................................... 75
Import and Export Functions........................................................................................................................... 75
Load ............................................................................................................................................................ 75
Save............................................................................................................................................................ 75
Scan............................................................................................................................................................ 75
Viewing Functions .......................................................................................................................................... 76
Zoom........................................................................................................................................................... 76
Zoom to Window Size ................................................................................................................................. 76
Edit Functions................................................................................................................................................. 76
5
Page 6

Undo ........................................................................................................................................................... 76
Horizontal / Vertical Mirroring ...................................................................................................................... 76
Rotate ......................................................................................................................................................... 76
Reverse....................................................................................................................................................... 76
Despeckling................................................................................................................................................. 77
Manual Deskew........................................................................................................................................... 77
Crop ............................................................................................................................................................ 77
Print Set......................................................................................................................................................... 79
Functions........................................................................................................................................................ 79
File .............................................................................................................................................................. 80
Load Print Set .......................................................................................................................................... 80
Add Print Set............................................................................................................................................ 80
Save Print Set.......................................................................................................................................... 80
Close Print Set Window ........................................................................................................................... 80
Edit: Management of Composing Function ................................................................................................. 80
Up / Down ................................................................................................................................................ 80
Print Set Selection ................................................................................................................................... 80
View ............................................................................................................................................................ 81
Pre-View .................................................................................................................................................. 81
Show Roll Pre-View ................................................................................................................................. 81
Refresh .................................................................................................................................................... 81
Show Button Caption ............................................................................................................................... 81
Actions ........................................................................................................................................................ 82
Print ......................................................................................................................................................... 82
Insert Current........................................................................................................................................... 82
Import PGF File ....................................................................................................................................... 82
Scan Picture ............................................................................................................................................ 82
Delete ...................................................................................................................................................... 83
Comment Field............................................................................................................................................ 83
Copy Count Control..................................................................................................................................... 83
Distance ...................................................................................................................................................... 84
Subsystem .................................................................................................................................................... 85
Software Installation ....................................................................................................................................... 85
System Configuration ..................................................................................................................................... 85
Subsystem Configuration................................................................................................................................ 85
Job Processing ............................................................................................................................................... 87
Info................................................................................................................................................................. 88
Keycode Entry ................................................................................................................................................ 88
Online Registration ......................................................................................................................................... 88
Check for Update............................................................................................................................................ 88
Help ................................................................................................................................................................ 88
Scanner Help.................................................................................................................................................. 88
About .............................................................................................................................................................. 89
Jasper Software License.............................................................................................................................. 90
6
Page 7

XEScan/XEScan Reflection, the multi-talent for digital color copies and scans
The copy system XEScan/XEScan Reflection opens up a whole new dimension of digital copying.
XEScan/XEScan Reflection combines high-quality scanning technology and a system solution meeting
customers' demands for a digital copier system.
A system solution encompassing the complete range of digital copying for color as well as b/w copies,
XEScan/XEScan Reflection is easy to use and offers a variety of options.
The outstanding performance features are:
• High speed copying, scanning and ripping in color, grayscale and black & white
• Excellent detail precision through modern scanning technology
• Automatic repeat - multiple copies may be made from one input scan
• Excellent color fidelity through new 3D filter technology and automatic filter function
• Presets buttons for direct loading of scans and settings
• Manual filter mode allows custom-made filters
• Output of raster and vector files through file import
• Output of picture details
• Scan to file
• Scan to email
• Accounting feature
• Archiving
• Optimized paper and time saving batch processing
• Easy use
7
Page 8

Packing List
Please check that your XEScan/XEScan Reflection package is complete. The package should include a CD-ROM
containing the XEScan/XEScan Reflection software and your personal keycode. In the envelope with the printedon license agreement you will find a hardware module (Dongle/Hardlock). If one or more of these components
should be missing, please contact your distributor or dealer.
8
Page 9

Hardware Requirements
Recommended System Configuration
To use XEScan/XEScan Reflection's full capabilities, you will need a PC with a 800 MHz processor, a 512 MByte
RAM for color copies or 256 MByte RAM for monochrome copies and a 20 GB ultra-wide SCSI hard drive or EIDE drive. Furthermore you need a Unibrain FireBoard 400 and a standard VGA display with a 100% Windows
compatible video driver.
Software Requirements
Operating Systems
For the XEScan/XEScan Reflection software we recommend Windows 2000 as the operating system. You may
also employ Windows 98 SE, Windows NT4 or Windows XP as the operating system.
Note:
In order to install and to remove the program, you will have to be logged in as Administrator on the computer. If a
user has “Power User” or lower privileges, Windows denies the installation of the program.
In order to work with the program, the currently logged in user has to be provided with “Full Control” on his
working directory. In case of a normal installation, this should be the directory the program is installed to.
9
Page 10

Program Installation
Please connect the hardlock to the first parallel port of your computer. Be sure you have activated this port in your
BIOS. The settings for LPT1 should be "Bidirectional" or better.
Insert the CD into your CD-ROM. If you have activated Autostart, the installation program should run
automatically.
Otherwise please go to your desktop, select the CD-ROM drive and open it. Please start the SETUP.EXE by
double-clicking it.
The language selection screen will appear. This selection dialog will be in the language of your Operating system,
the further installation will continue in the selected language.
The splash screen as well as a setup dialog will appear.
10
Page 11
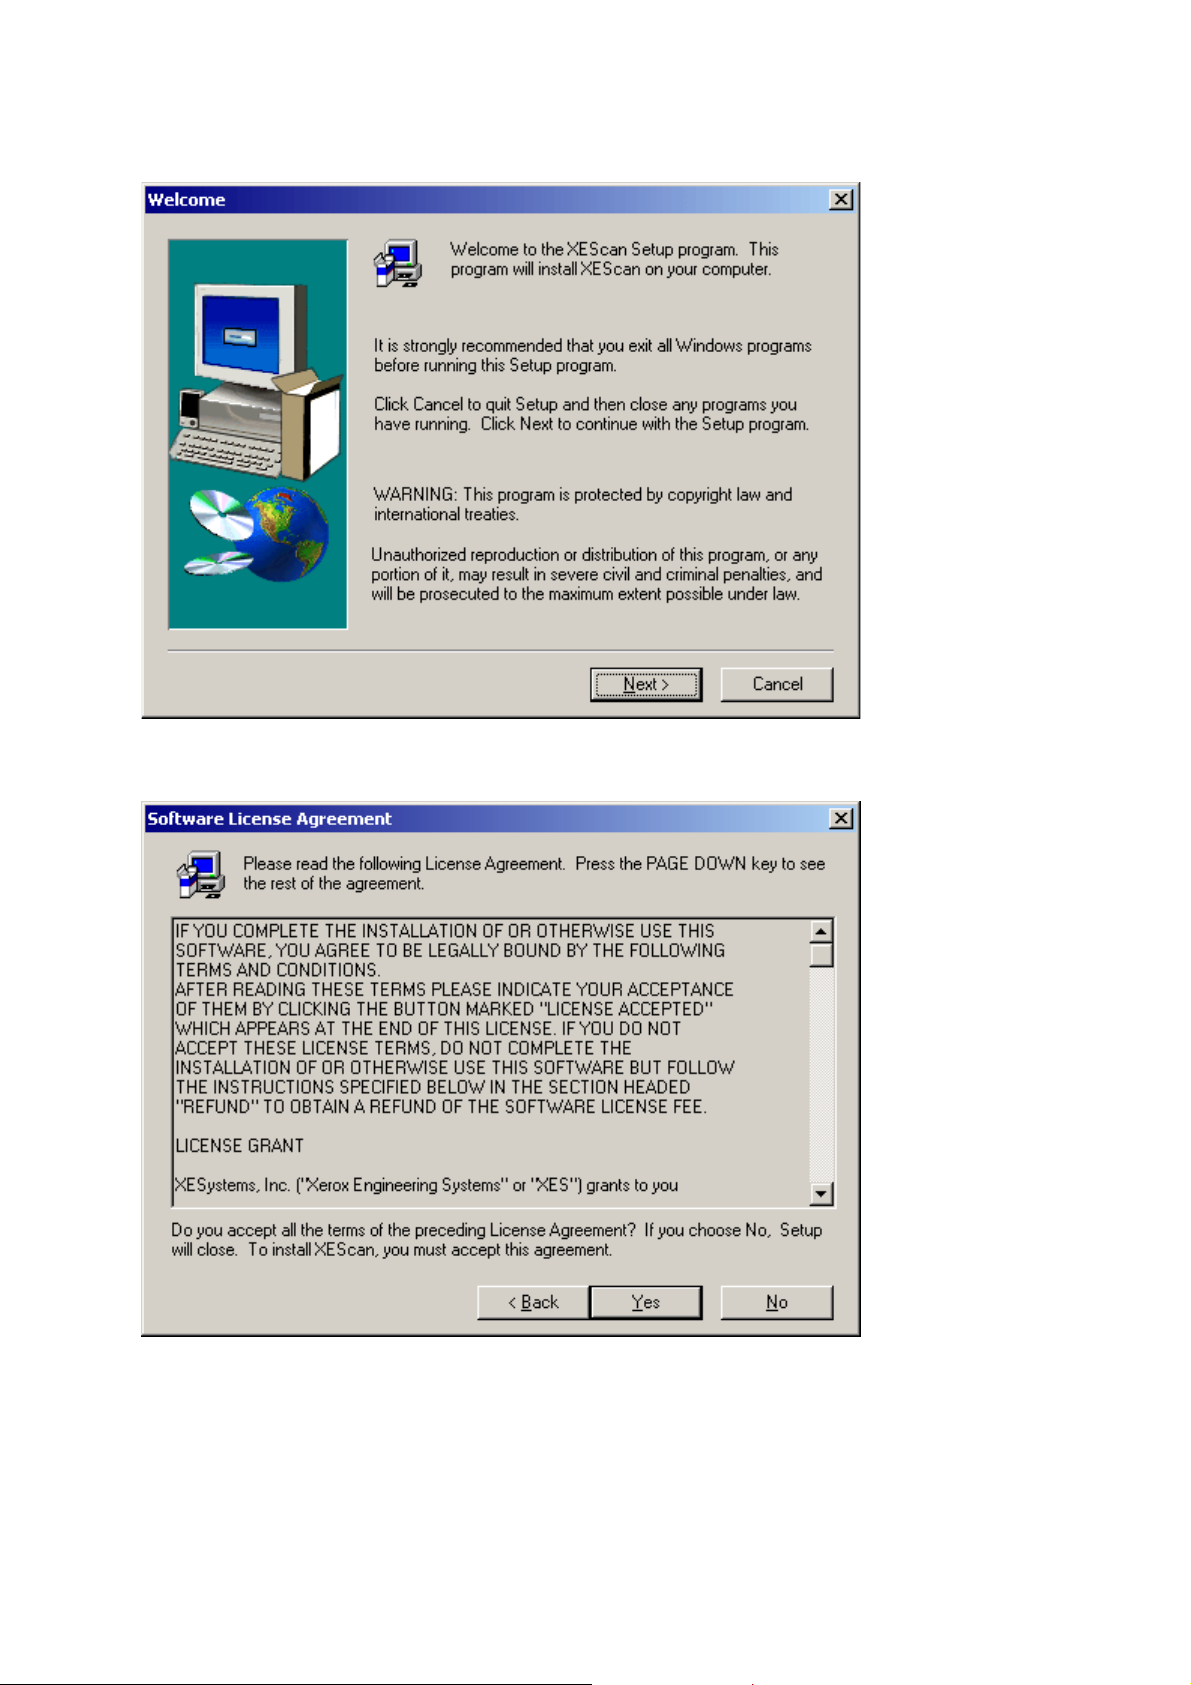
The Welcome screen follows. Please click on Next to get to the software license agreement:
If you accept the displayed license, please select Yes, otherwise select No to exit the setup.
11
Page 12

In the next menu please select where you want to install the program. If you are not sure which folder to choose,
leave the default settings. As these settings are different for each version or Service pack of the software, no
other software will be overwritten.
In the next menu please select the type of setup. You may choose between Typical, Compact or Custom.
The typical setup is recommended for most installations. You should choose the compact version if you want to
install only the necessary parts of the software. This will leave out all optional files. If you select the custom setup
you will be able to choose the options you want to install from a list – recommended for the advanced user.
If you choose the custom setup, you will have to activate or deactivate the components for the installation in the
following dialog:
12
Page 13
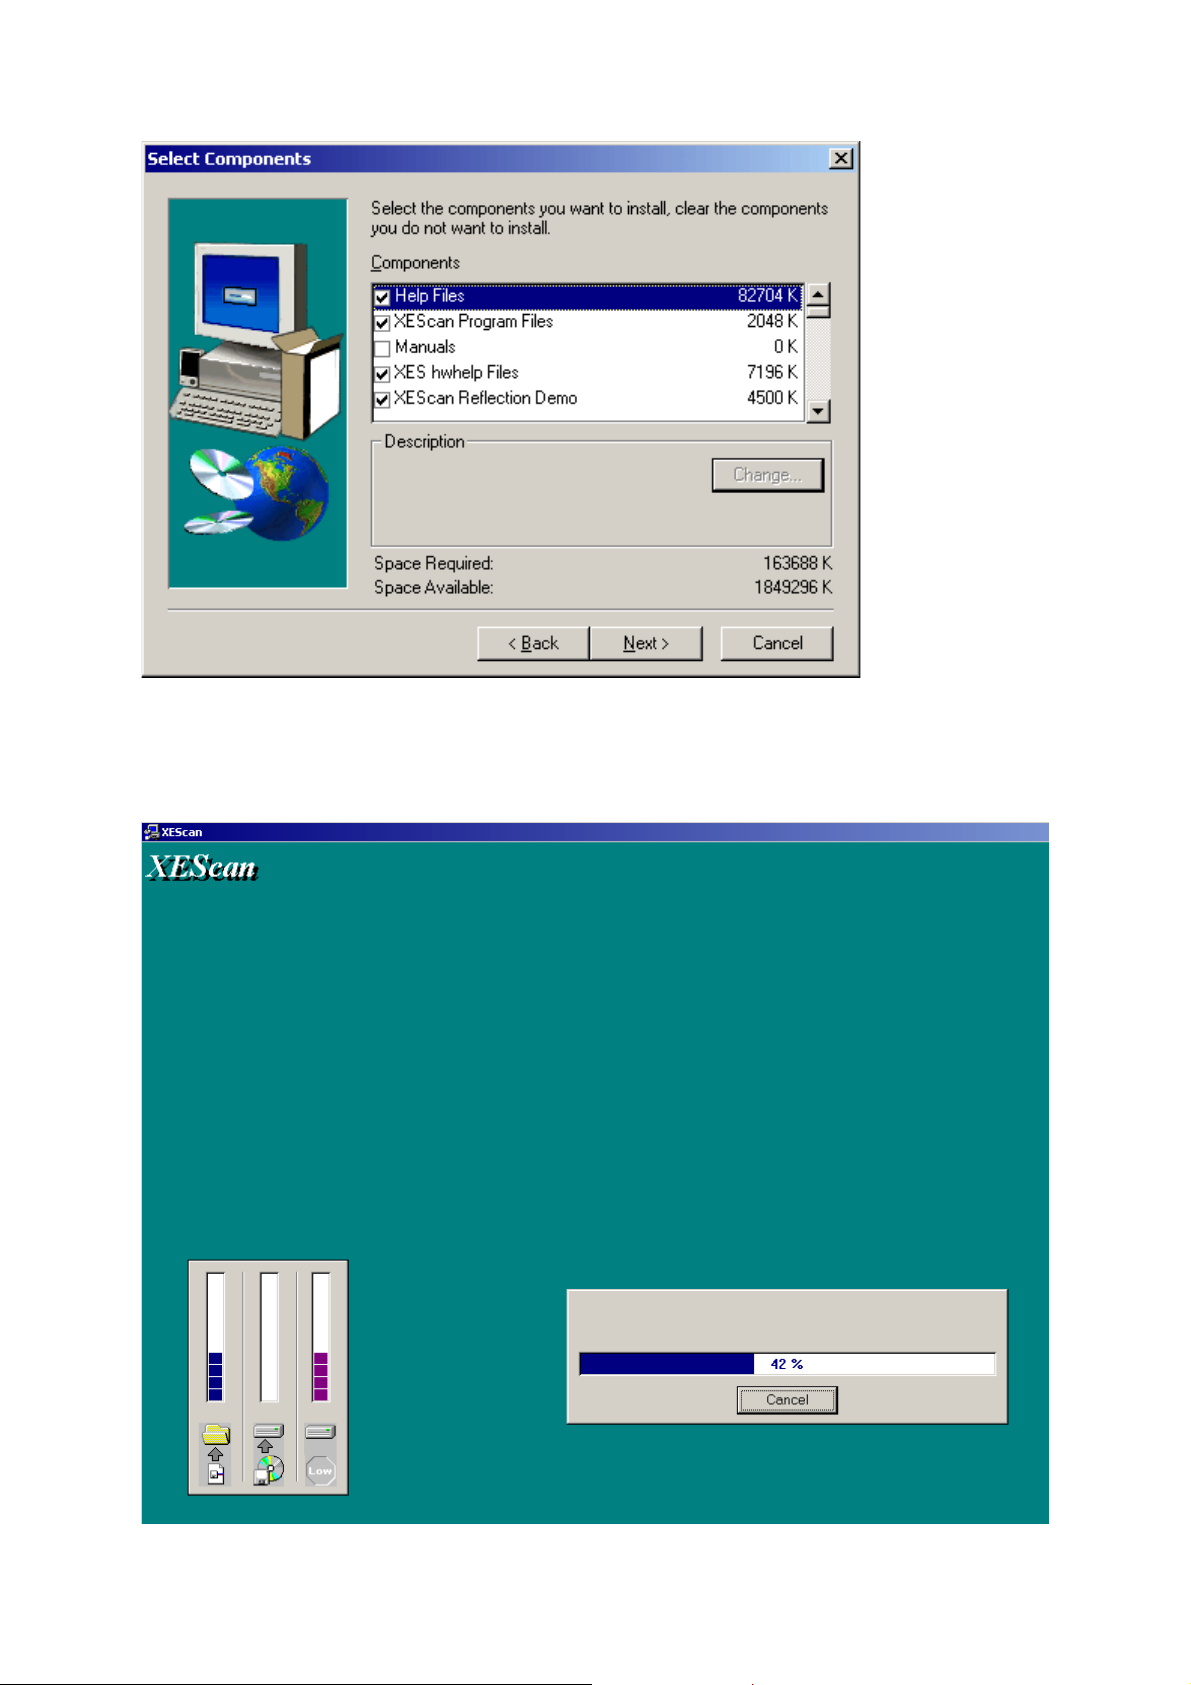
After selecting Next the installation procedure will start. During the installation a progress bar will appear showing
the percentage of progress. If the progress bar will reach 100% the installation is done. The windows on the right
shows - from left to right - the transmission form the CD-ROM to the hard disc, the amount of data stored on the
CD-ROM and the disk space on the hard drive.
13
Page 14

After XEScan has been installed, click Finish for completing the setup. This step will get you back to Windows.
14
Page 15
Keycode Entry
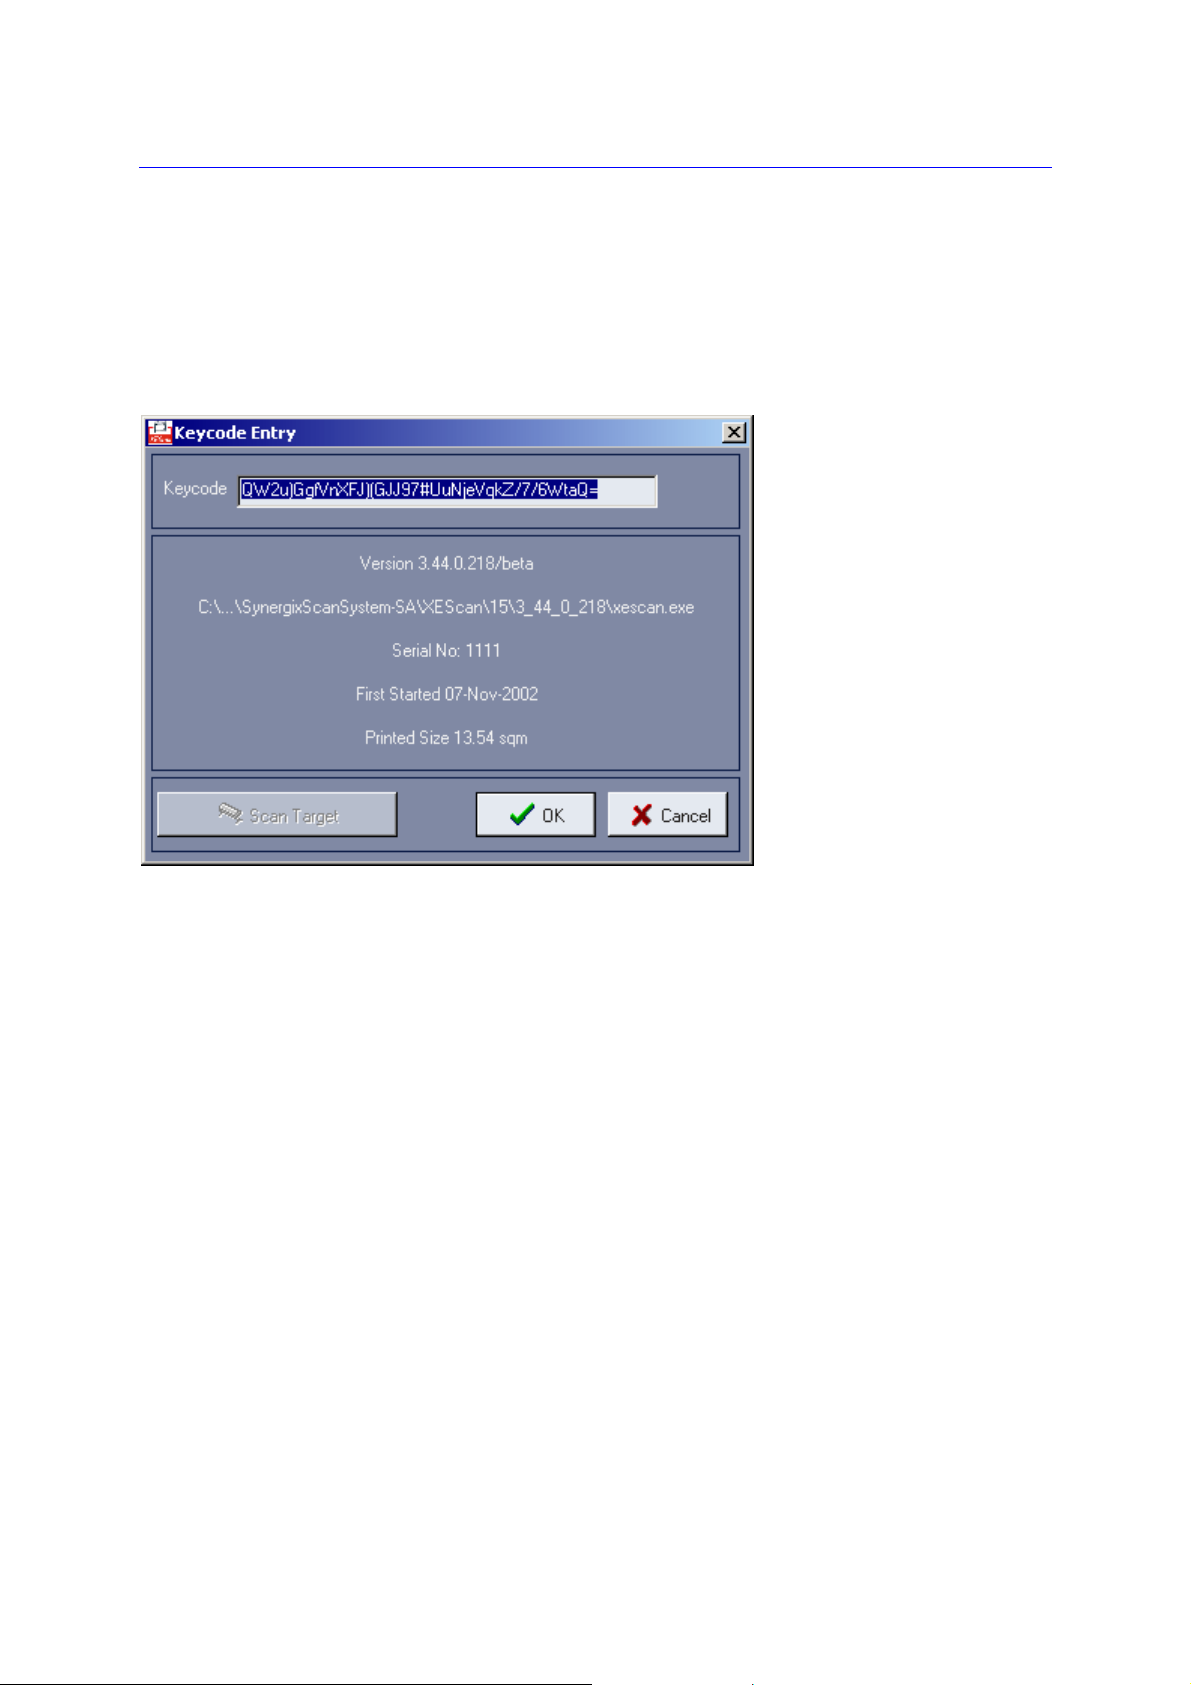
Start the program with a double click on the program icon on your desktop. The dialog Keycode Entry will
automatically appear. In order to work with the full version of XEScan/XEScan Reflection you will have to enter
your personal keycode. The keycode is part of your XEScan/XEScan Reflection package.
The XEScan Reflection Demo does not require a keycode or a hardlock.
Under Keycode enter your personal XEScan/XEScan Reflection keycode. The keycode is part of your
XEScan/XEScan Reflection package. If you enter it manually, bear in mind it is case sensitive! The keycode
symbols will be displayed in red until the keycode is complete and error-free.
If you prefer entering the keycode with a keycode target, proceed as follows. Place the target in the scanner; the
target arrow must point towards the scanner. Click then on Scan Target. Place the target in the scanner and click
on Scan target. If the target is obliquely positioned in the scanner, an error message will appear. Place the target
at right angles with the scanner and repeat the registration process.
The keycode target is always black and white and may thus be sent by fax. However, the dark margins resulting
e.g. from fax transmission may disrupt the target reading. In this case, cut the paper margins along the marked
lines and repeat the process.
After registration the program has to be restarted.
15
Page 16

Hardware Configuration
At first start, after you have licensed the software with your keycode, the Hardware dialog will appear on the
screen. Please proceed now with the selection and configuration of scanner and printers.
Scanner
In this field the identification of the installed scanner type is displayed. You will get to the scanner configuration
using the button to the right of the scanner name. These settings are device-dependent. The color of the LED
depicted on the button shows the state of operation the scanner is in.
• no response
• warming up
• error
• operational
Highlight a scanner and click the button Scanner Configuration to get to the scanner dialog. Select a scan job
and, if ICC profiles are available to you, enter the corresponding path.
Confirm with OK to return to the Hardware dialog and install your printers.
16
Page 17

Installing Printers
(XEScan Reflection only)
Highlight the printer type you want to select in the field Available Printers and then click on the red arrow. You can
also double-click on the printer. You will then proceed to the printer configuration wizard.
This assistant will take you step by step through the installation and calibration of your printer.
Connection
In this first window you can enter your preferred type of connection.
If you connect to the printer via SCSI directly, you should select SCSI.
In order to achieve maximum performance it is recommended to choose Output System. The output subsystem
works as a spooler for the SCSI printer. You should select a spooling folder either on a local hard disc or on a
remote computer if you want to install the output subsystem on another PC.
Medium
Here you can select the paper types you want to work with. All paper types with the indication "User defined" can
be renamed by double-clicking on the entry. You can use the context menu (right mouse click) to make the
selection easier.
Hardware
As the calibration depends on the media that are used, you need to enter which media are currently in your
printer. The picture on the left shows the position of the rolls in the printer (roll 1 and roll 2). Please be sure to
enter the sizes and the media selection correctly.
17
Page 18
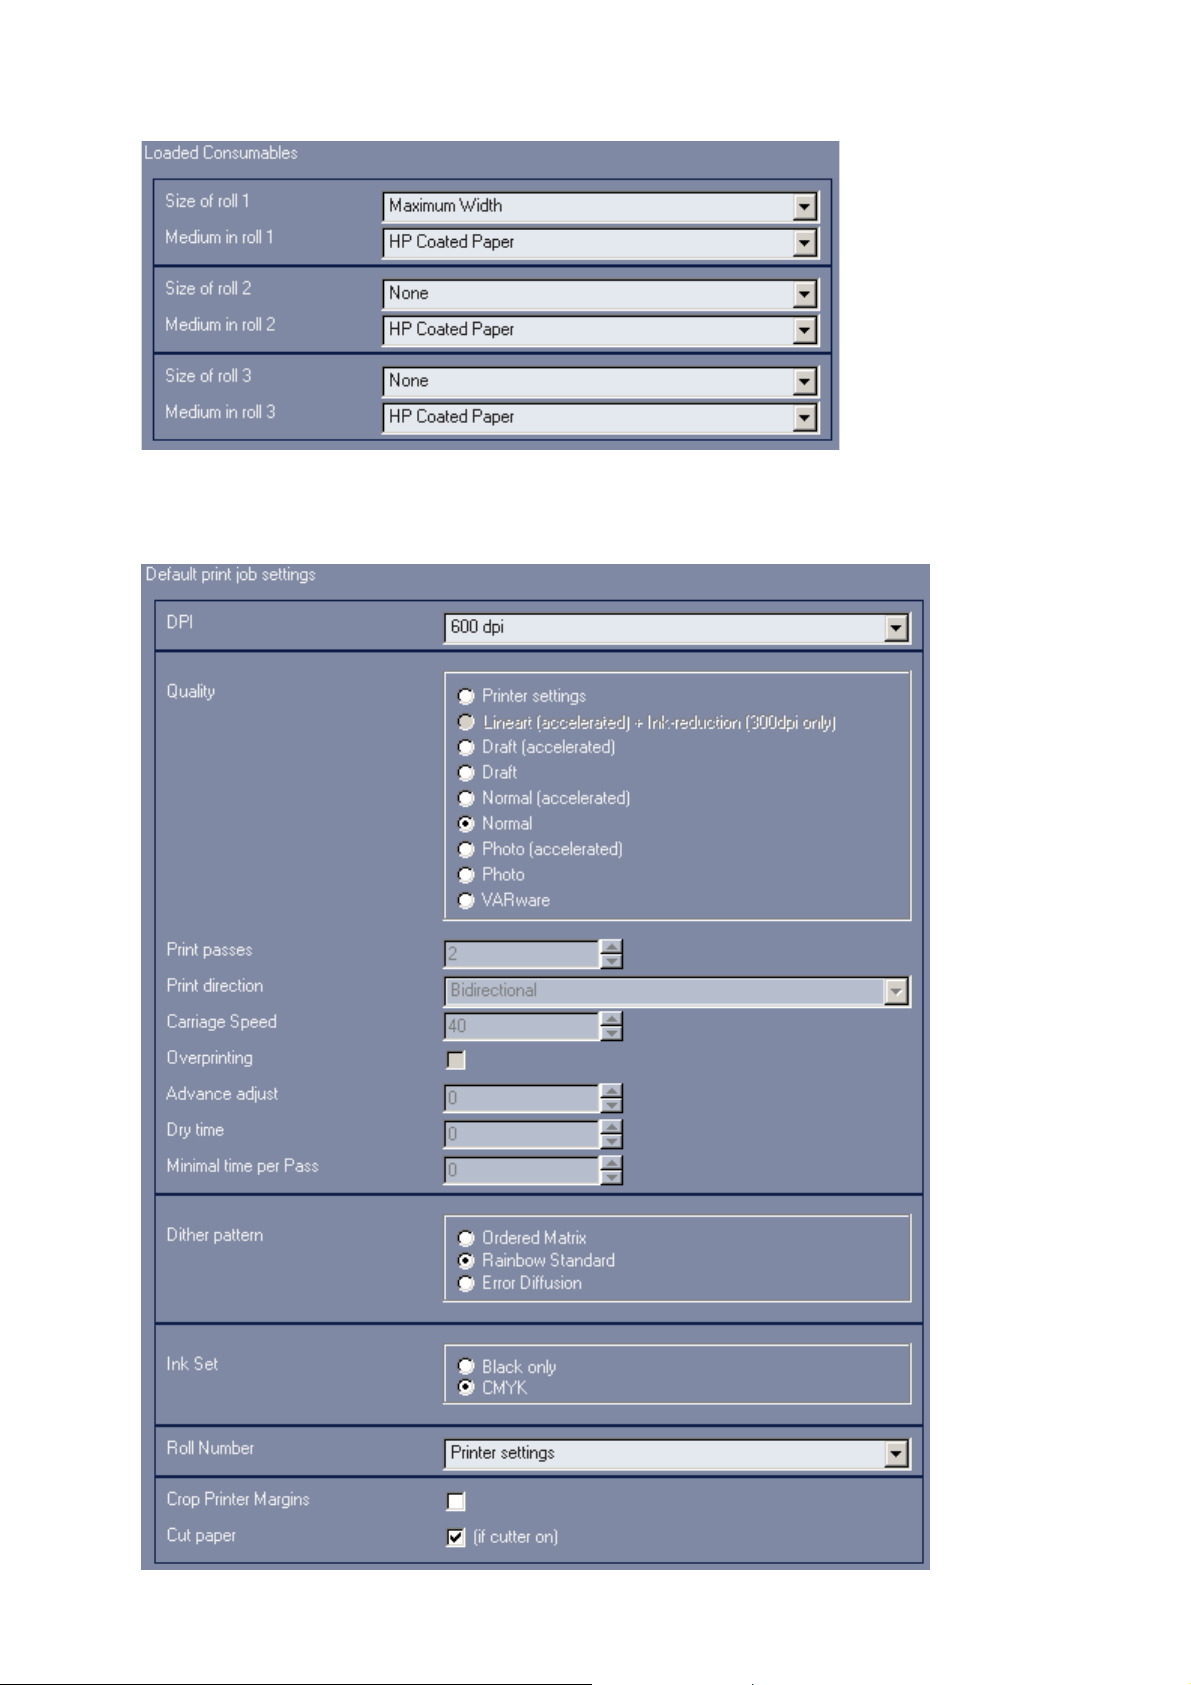
Print Job
Device-specific settings as well as different print and quality modes are to be set in this device-dependent dialog.
18
Page 19
Calibration
(XEScan Reflection only)
Your system is now about to be calibrated. This ensures both color matching and length correction. Therefore a
calibration is recommended for color and black and white systems alike. It is recommended to perform all
calibrations as some printer settings will otherwise not allow copying.
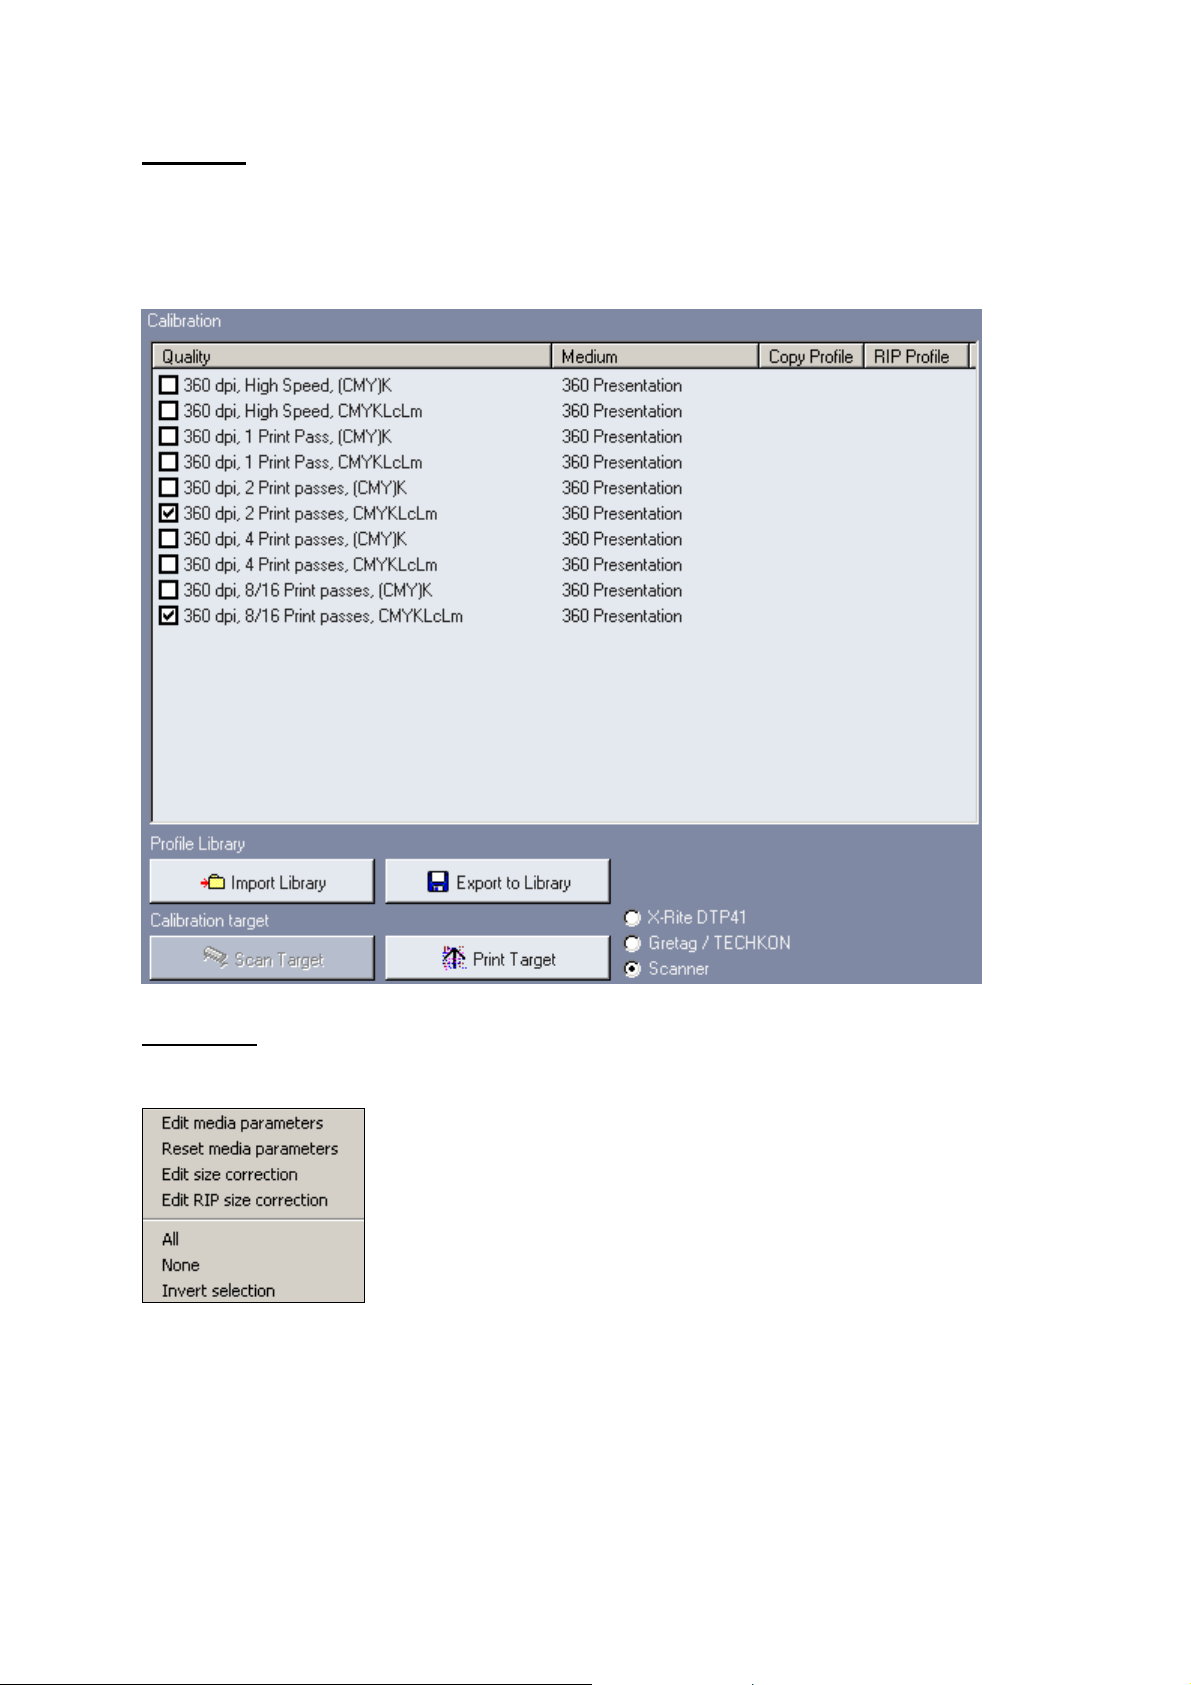
Target Dialog
After a right-click on the quality settings the following dialog is shown:
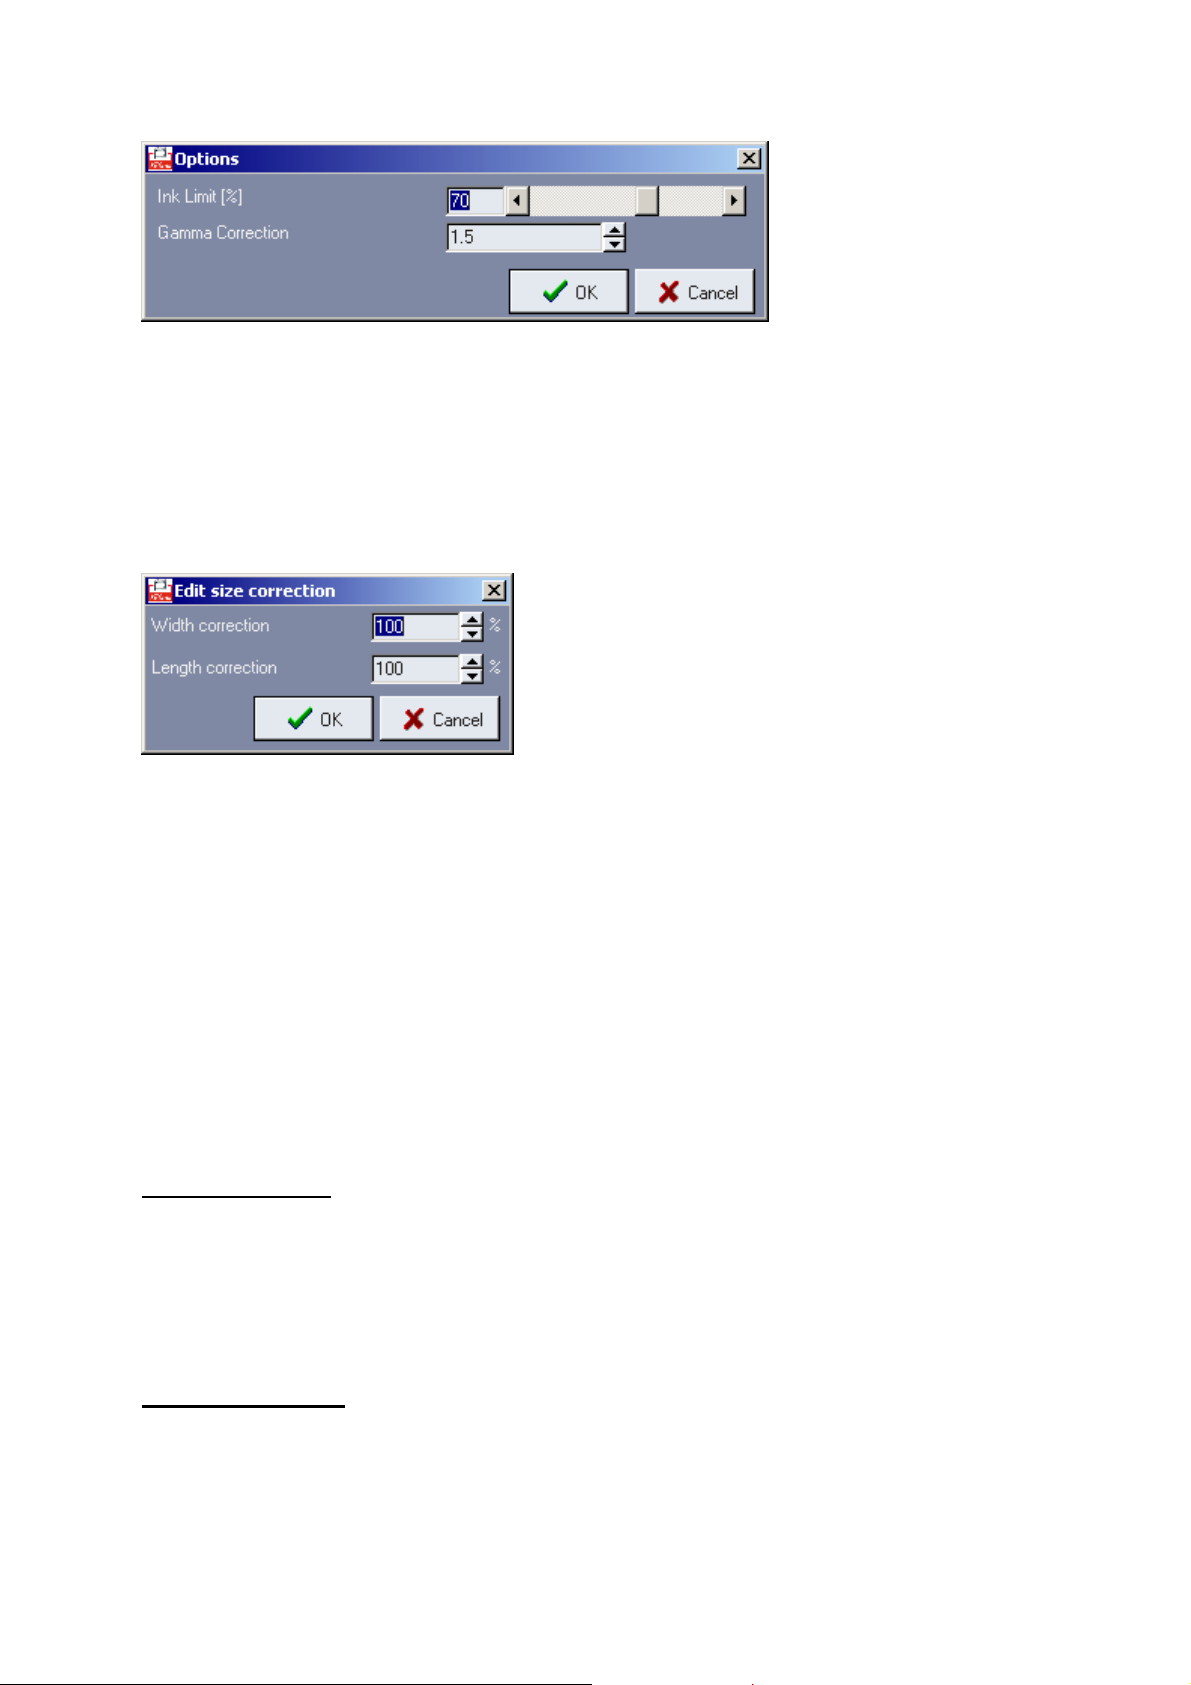
Edit media parameters
Under certain circumstances it may be necessary to change the default media parameters Ink-limit or Gamma.
But this is usually not necessary, and an incorrect value can lead to a color mismatch of original and copy. Please
print the file grayscale.TIFF from the XEScan installation folder with the settings GAMMA=1.0 and Ink-limit=100%.
Please adjust the ink limit so that the dark gray areas are still distinguishable. The darkest area must be totally
black.
Keep this setting. Then change the GAMMA value, until the brightness of 50% GREY is exactly in the middle of
the range between 100% WHITE and 100% BLACK.
19
Page 20
Reset media parameters
The parameters will be reset to the default values.
Edit size correction
Correction factors for width and length are automatically calculated during color calibration. These factors can be
changed manually for copying and RIP in the rare case when the automatic size recognition fails to work. This is
usually not necessary and can lead to a size mismatch of original and copy if a wrong value is entered.
Edit RIP size correction
Edit RIP size correction works like the aforementioned function but only applies to import files.
All
If you select All, all check boxes will be activated.
None
With None you can deactivate all check boxes with a single click.
Invert selection
Through this function all active check boxes will be deactivated and vice versa.
Printing the Targets
(XEScan Reflection only)
You will be able to print different targets according to the selected output options and media types. Please check
or uncheck the boxes to calibrate your system with the desired targets. Then click on the button Print Target. The
targets are then printed on the selected printer. They consist of an area with an arrow surrounded by a white
frame, trim lines and a print label.
Scanning the Targets
(XEScan Reflection only)
With some combinations of ink type and print medium a dry time may be necessary!
Please cut the targets at the trim lines so that they are no longer visible. Do not cut off the white frame! The white
frame around the main part of the target must be at least 0.5 inch.
20
Page 21

You can then scan the targets in any order. Please insert the target into the scanner. The arrow on the target
must point towards the scanner. Then click on Scan Target. Please be sure to stage the target in mid position.
After a successful calibration the date of calibration appears in the window (behind the selected combination).
Repeat this process for all printed targets. Leave the wizard by clicking on the button "Finish".
Export to Library
(XEScan Reflection only)
In order to backup your calibration data or to move your calibration to another system where the same scanner
and printer are attached you can export the calibration data to profile libraries.
In the calibration dialog click on Export to Library. This will open a list for all performed calibrations of the current
printer. Only those which are checked in the list will be exported.
Import from Profile Library
(XEScan Reflection only)
With this function you can import calibrations that were made on another system or were saved for backup
purposes. Open the printer specific profile library and mark the calibration data you want to import.
Deleting Installed Printers
(XEScan Reflection only)
Below the field Installed Printers in the Setup window you will find the button Delete printer.
To activate this function, select the desired printer under Installed printers, and then click on the bin. This function
is also available using the context menu (right mouse button).
21
Page 22
Preferences
Under Preferences you will determine default settings in the tabs General, Warning Options, Label, Accounting,
Email, User Administration and Archive.
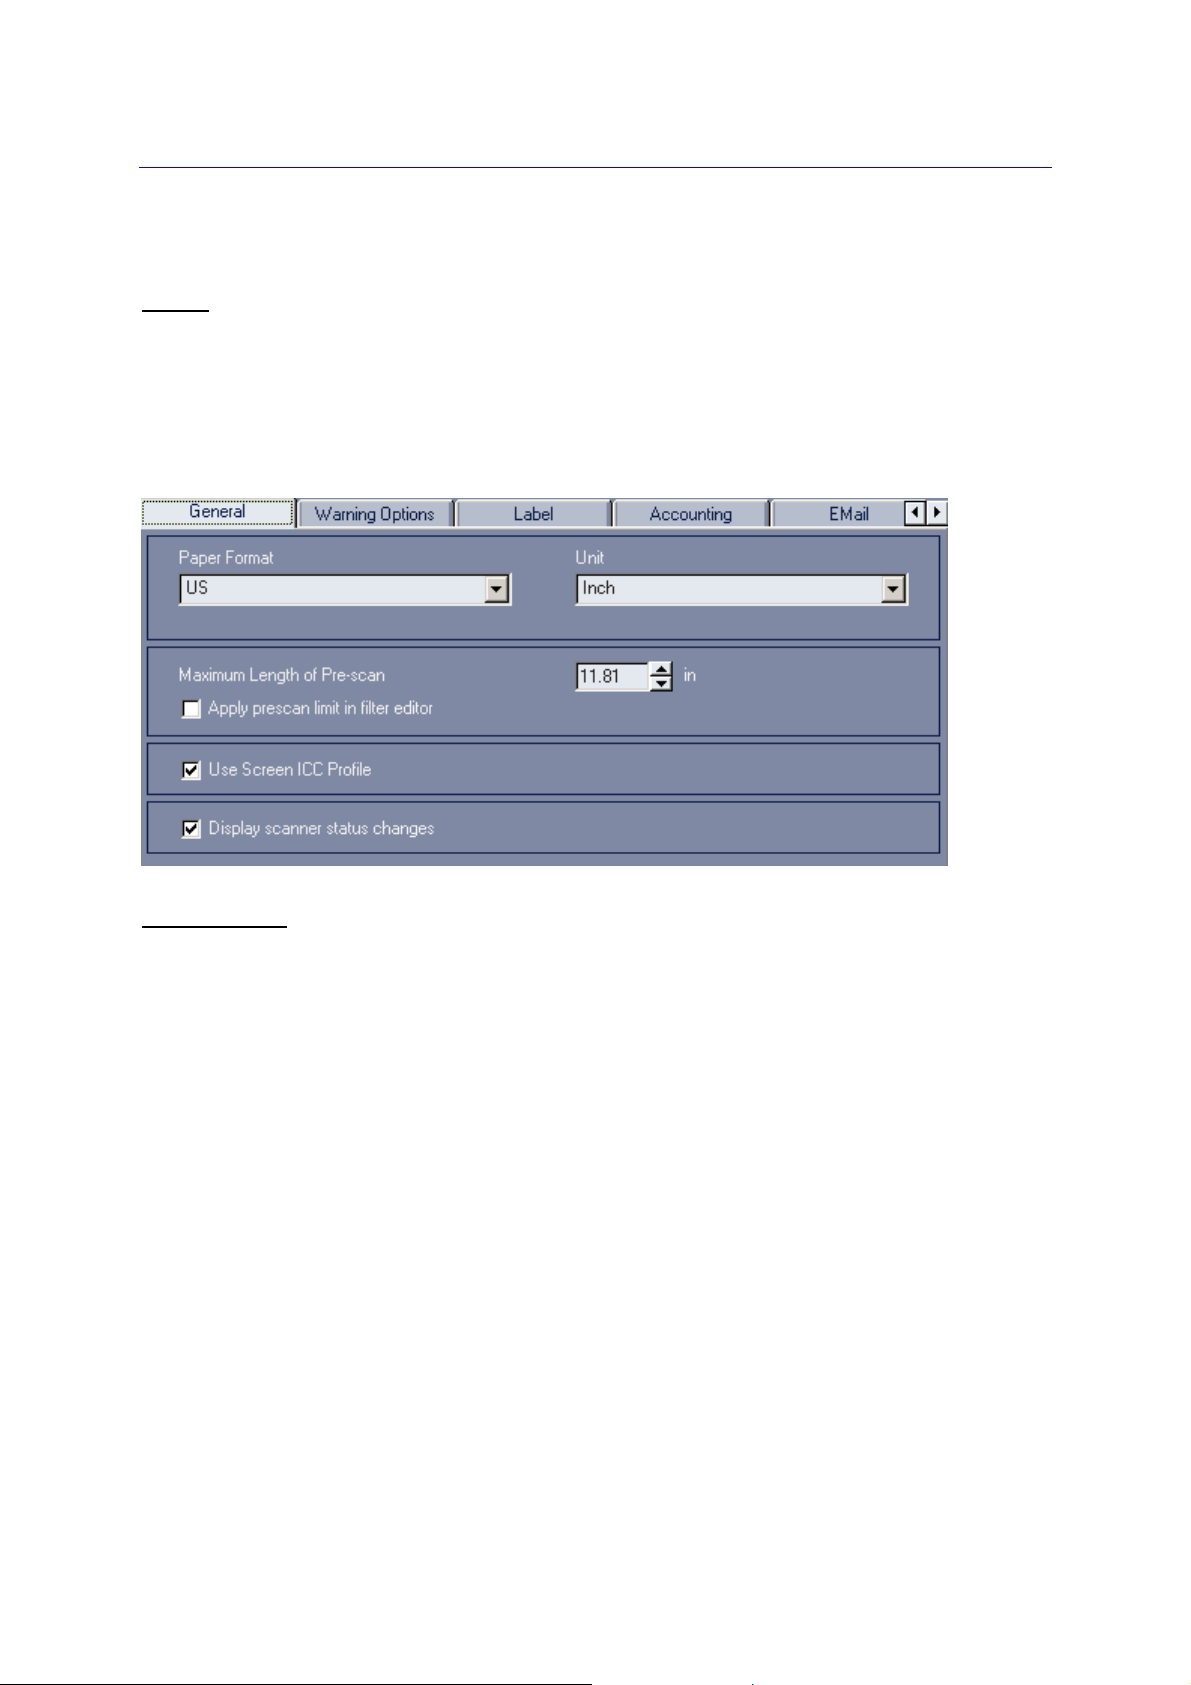
General
Under Paper format, select between ISO and US standard formats.
As a unit you can choose to work with size entries in millimeter or inch.
If you only want to scan a part of your documents, enter the size of the prescan under Maximum Length of PreScan. This input can be applied to the editor.
If ICC profiles are available for your screen activate the corresponding control box. ICC profiles are only
supported by Windows 98, and Windows 2000 and newer operating systems!
If you want changes of scanner status to be displayed, activate the corresponding check box.
Warning Options
The warning options can be activated for the following operations:
• Paneling
• Subsequent Scaling (printing from the archive with a scaling factor)
• Nesting
• Margins (from a certain size in mm)
• Copies (from a certain number of copies)
• Gamma
• Mirroring
• Disk space (free capacity of your hard disk in MByte)
• Scan resolution (warning when using a fixed dpi value)
• Scanned file already exists
• Calibration is too old (number of days)
• Size Correction
• Scanned file raw size
• Output dpi
If the warning options are activated, a corresponding warning message is shown on the screen before the scan or
copy process starts. It is then possible to change the output options or continue the process.
22
Page 23

Label
(XEScan Reflection only)
Under the tab Label you can individually determine the information the standard label is supposed to contain. The
standard label may also be turned off completely at this point. To do this, deactivate the control box Print label.
Accounting
Accounting is an important tool for billing the copies made or the evaluation of statistics. By activating the control
box Accounting, the most important data is saved in a log file. This data can easily be exported to Excel to be
reprocessed. Of course, Excel must be installed on the PC to use this feature. The Excel file will be stored in the
23
Page 24
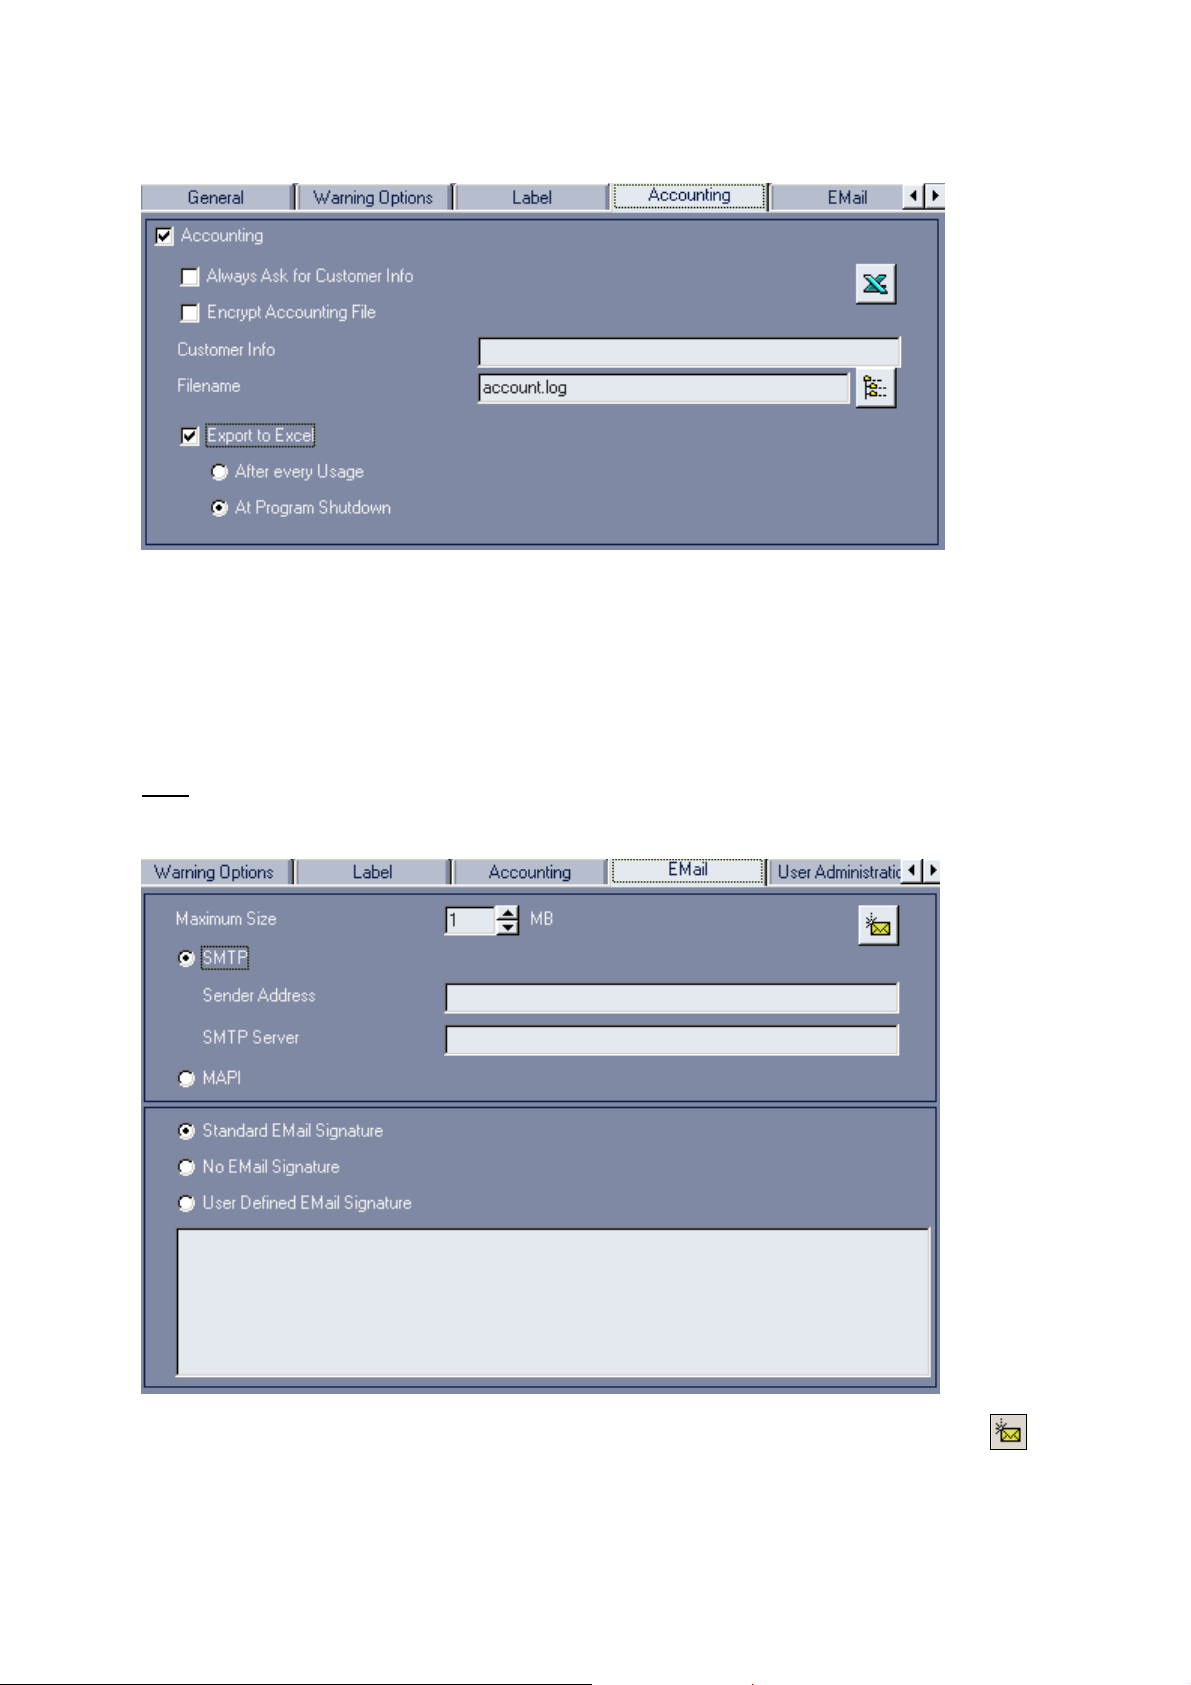
same folder as the account log file.
The text in the field Customer Info is written to the log file at each scan, scan-to-print or RIP operation.
In combination with the option Always Ask for Customer Info the user will have to store his user name, customer
name or any other text information in the log file.
Depending on how the data is supposed to be postprocessed, we recommend opening several log files, e.g. one
per day or per month or until the next billing date.
EMail
In this window you can configure your system for email scanning.
If you are using a SMTP Server, we recommend you to send an email with the Button Send test email
your own address. If this works properly, your system is correctly configured.
Under Maximum size you can determine from which file size on you will be warned before the email is sent.
The installation of a MAPI server depends on your operating system. Please refer to your Windows system
24
to
Page 25
manual.
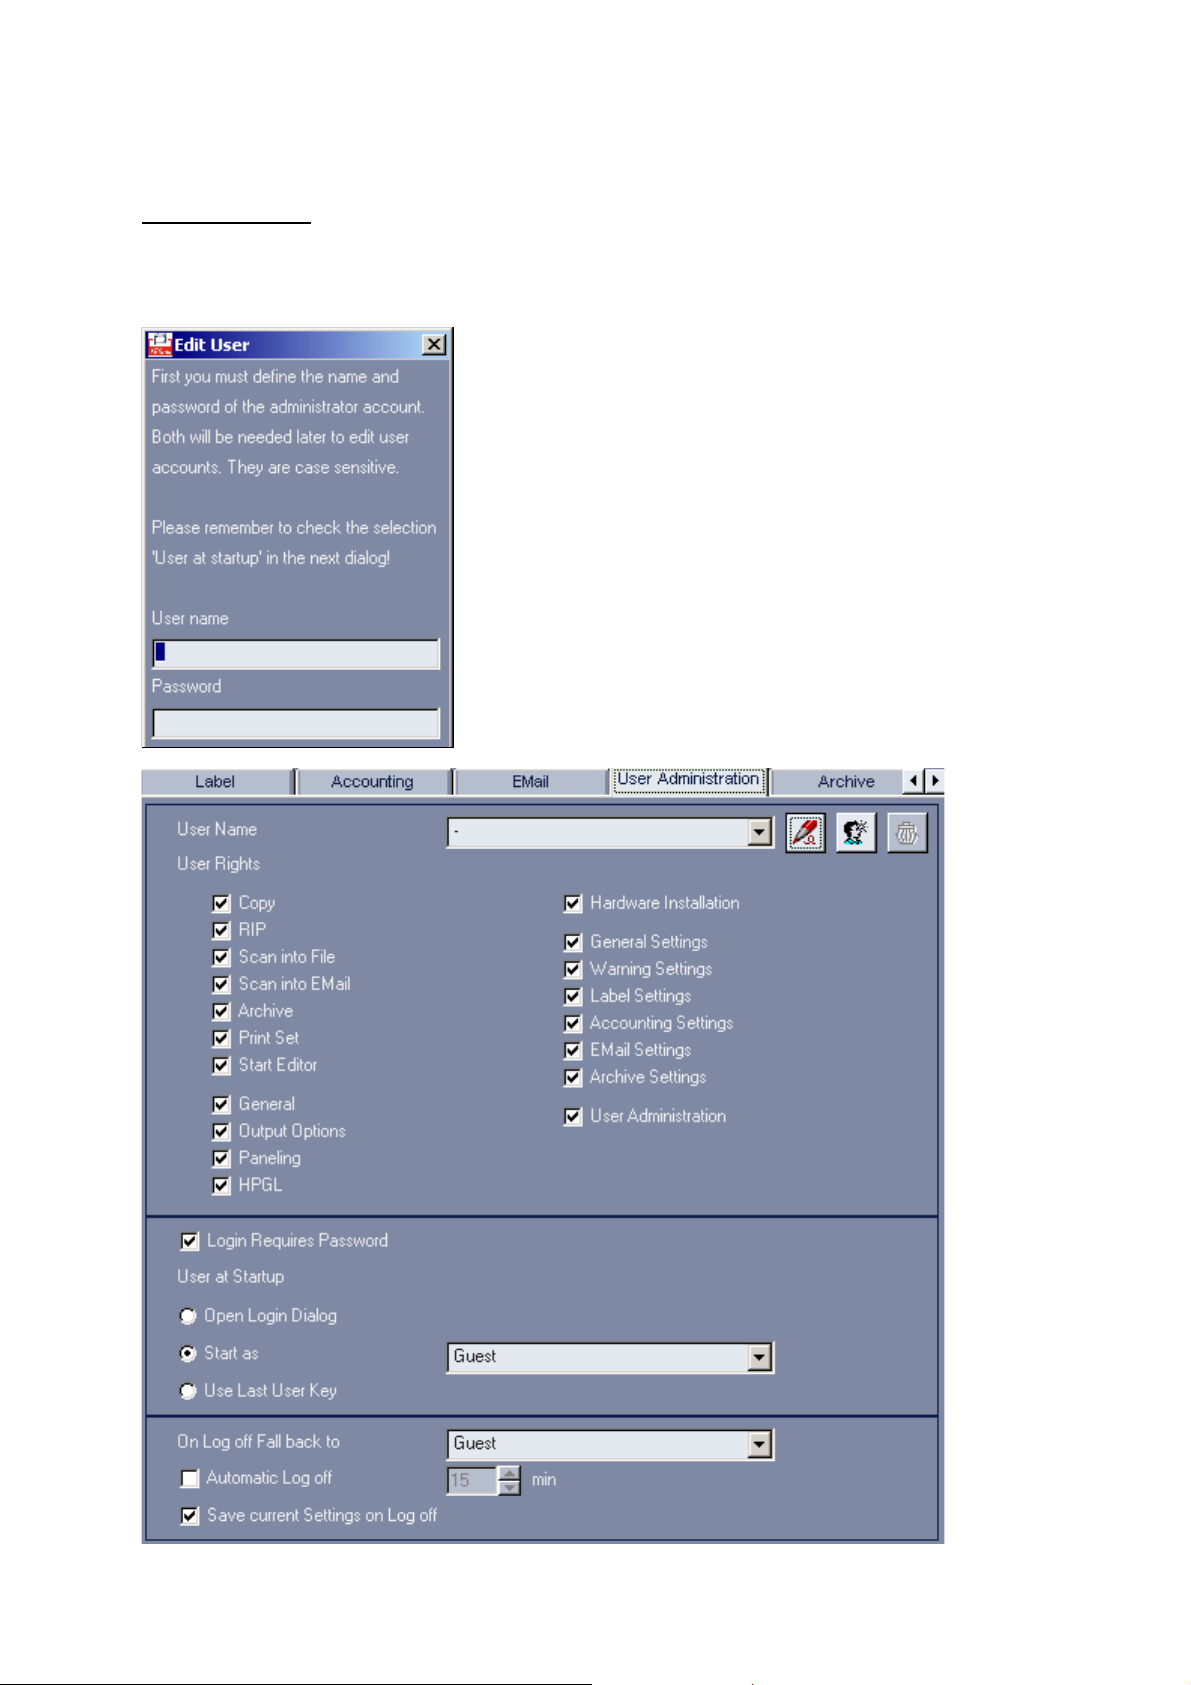
User administration
Please note that immediately after the installation a user with the symbolic name "_" is logged on with all
administrator's rights. You will be prompted to replace this user key with your own account. Please note that the
user key has the function of a password.
25
Page 26
As an administrator you can then create user accounts with different user rights with the button New User. New
users will initially get the same rights as the currently selected user.
You can also delete users completely with the bin.
In the section User at Startup you can select if a user key is requested at program start or which default user is
logged in. Additionally you can choose if the programs should log in the last user.
With regards to the log off you can select which user is logged in after the current user has logged out. Typically
this should be a user with restricted rights. You may also state the time of inactivity after which a user is
automatically logged off.
You can also choose to save the parameters of the user logging out so that the following user can work on with
these settings. When this option is not selected, the user who will log in will work with the settings specified by the
administrator.
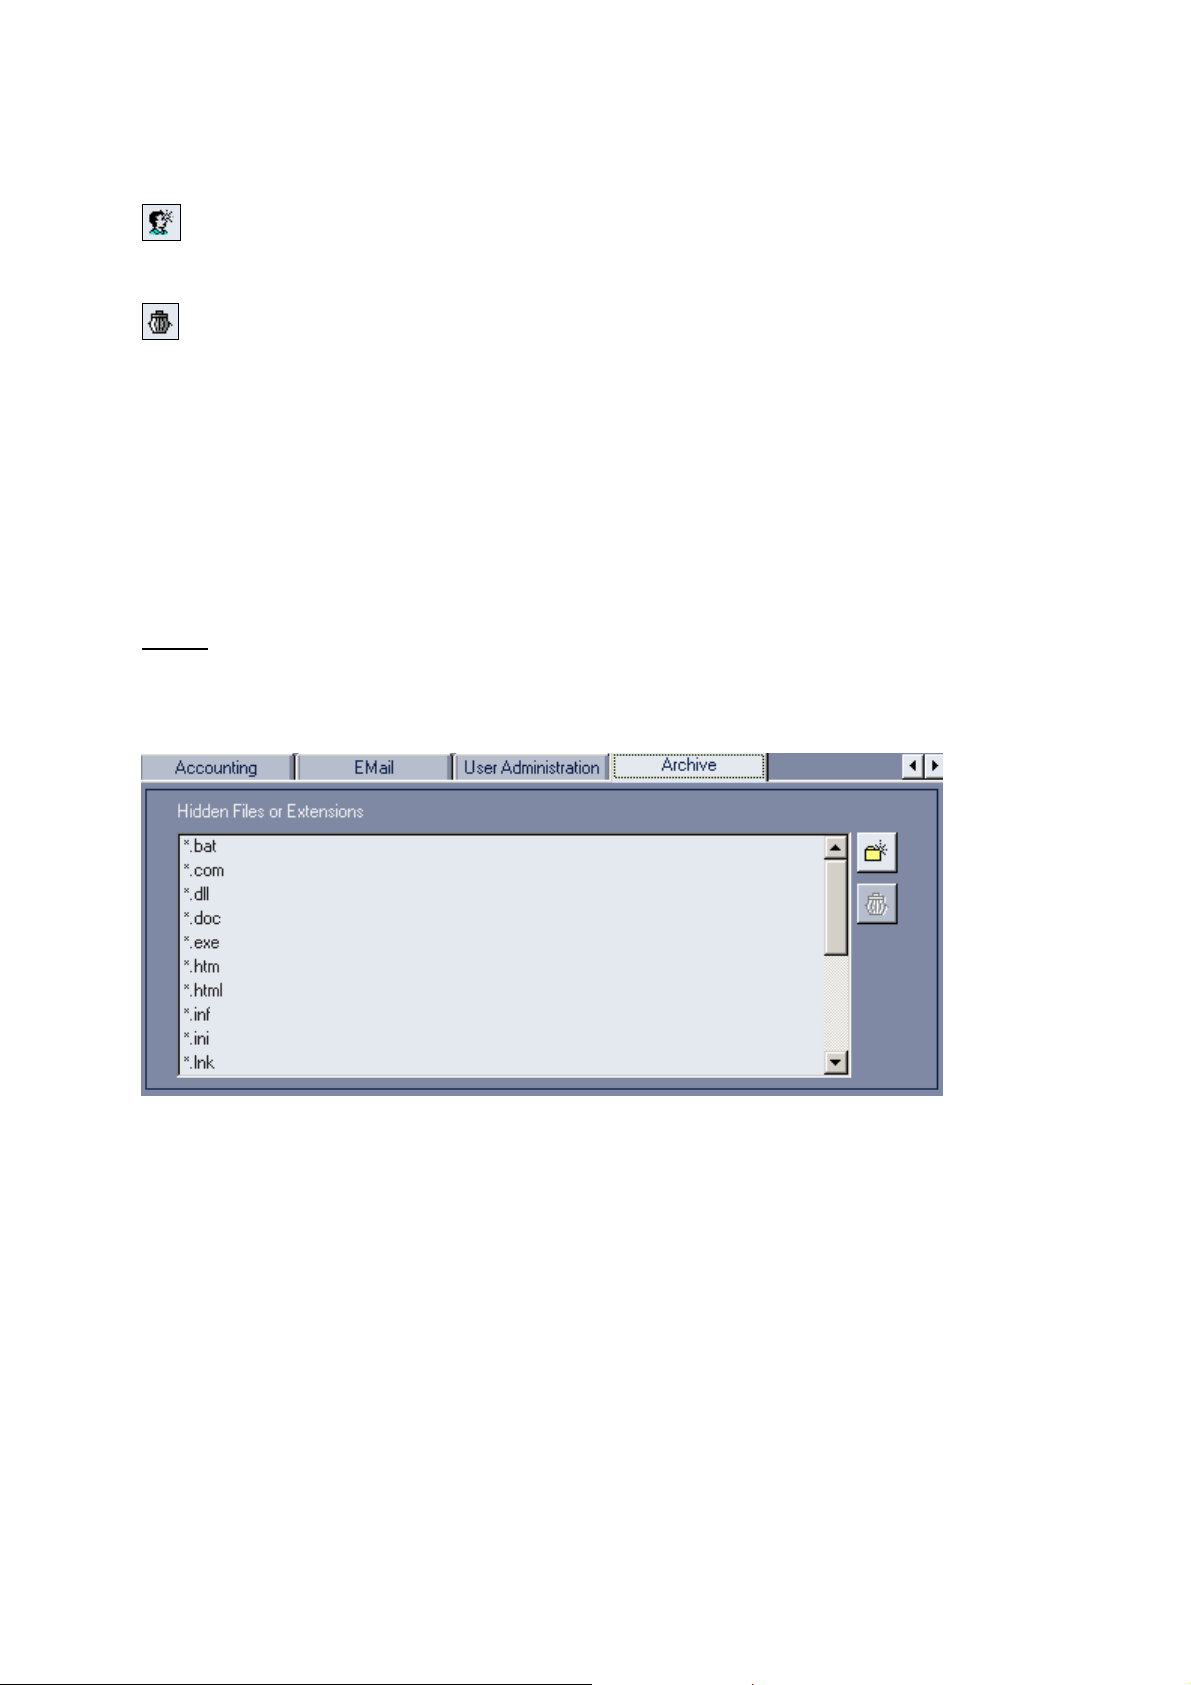
Archive
In this tab you can select which file extension should not be displayed. The most common ones are predefined.
With the icons “Add File or Extension” and “Delete File or Extension”, you can quickly append or erase files or
extensions.
26
Page 27

Making Prints
(XEScan Reflection only)
This chapter is intended as a detailed description of the XEScan / XEScan Reflection interface in copy mode. We
will give you step by step directions so that you can immediately work with XEScan/XEScan Reflection.
In our example we will be assuming that you would like to make a 1:1 copy of an ISO-DIN A4 original.
27
Page 28
First Settings
Selecting a Color Mode
Please select if you want to perform a color copy, a grayscale copy or a black & white (monochrome) copy.
Nota bene: depending on your scanner features and software license some modi may not be available.
Scanner / DPI
Check the scanner is operational. The button depicted as a LED is a control field for the scanner. The color of the
LED on the button shows the state of operation the scanner is in:
• operational
• error
• warming up
• device not found
If the scanner LED is not green, move your mouse over the scanner name to obtain the error message.
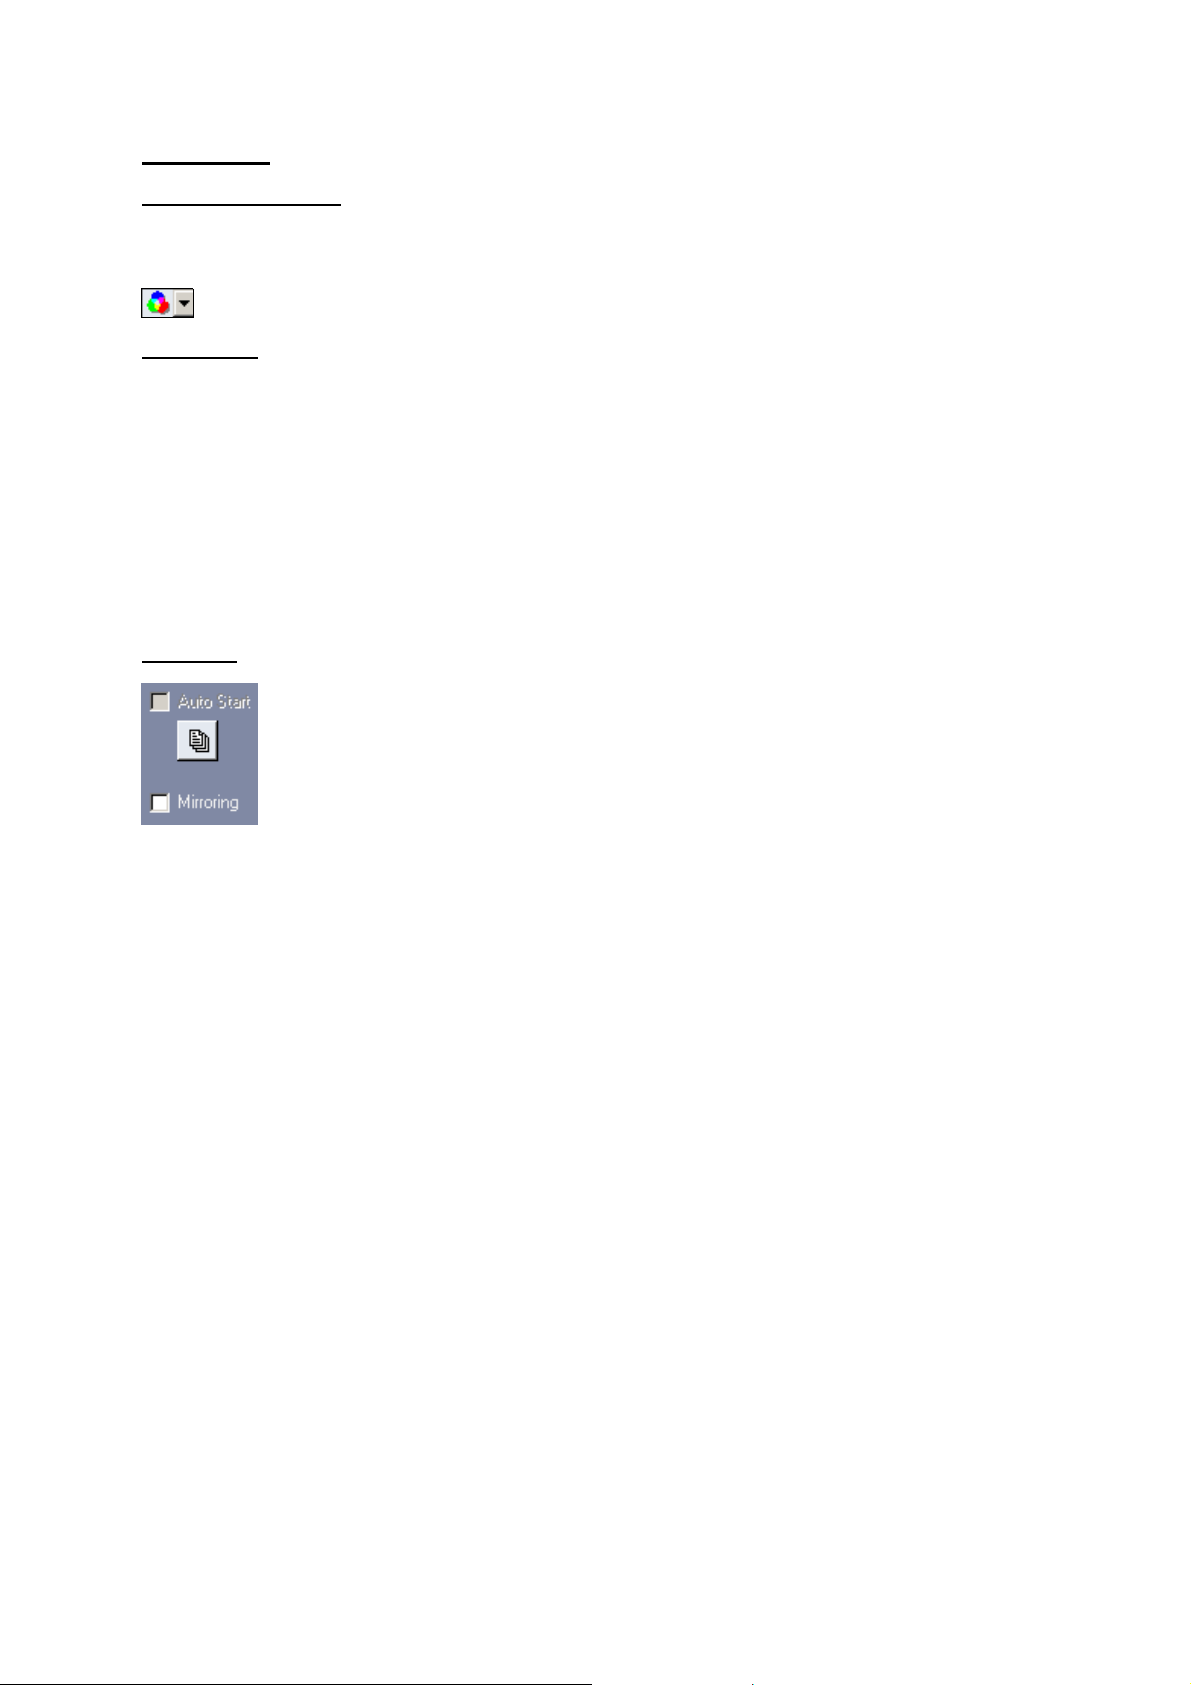
Scan Mode
Autostart
Autostart is intended to ease document scanning. If you activate this function, scanning will start when documents
are inserted in the scanner.
Batch
If you scan similar documents it may not be necessary to do a preview for each document in order to set the
parameters for the automatic mode. So you may click the button to be in batch mode. In this mode a preview is
only done for the first document, the parameters being used for all following documents to speed up the scanning
of a batch of similar documents.
When the button is pressed and the first scan has been done the user will no longer be able to change either the
settings for document size or document type or the scan mode (bw/grey/color). (The user can leave the batch by
releasing the button or by changing to a different program mode (RIP/STF/STP/STEmail).
Mirroring
Select Mirroring if you want to mirror the image.
28
Page 29

General
After successfully installing XEScan/XEScan Reflection and first-time hardware installation, start the program by
double-clicking the XEScan/XEScan Reflection program icon. You will get to XEScan//XEScan Reflection main
window (tab General).
Original Size
The next step is to enter the size of the original that is to be copied under Original Size. Please take note of the
maximum scan width of your scanner! For standard sizes this is done easiest using the speed button or the
context menu. When using the context menu, move the mouse to the entry field Original Size and press the right
mouse button. A menu will appear with a selection of paper sizes.
Under Configuration / Preferences you might want to change the paper format and the unit for size display before
proceeding.
Depending on the scanner type the options Automatic Width and Height Detection will be available.
Now select DIN A4 portrait. Alternatively you can enter the size in mm or inches using the keyboard or alter it with
the arrow keys.
29
Page 30

Printer
Check you have entered the correct output device in the Printer field. If you want to print the copy on another
printer choose an output device from the combo box.
Click this button within the printer field to configure your printer:
The dialog for the printer configuration is device-dependent. In our example, you could select under Loaded
Consumables the size of the inserted roll, while you could determine print-specific settings under Print Options
such as e.g. quality mode and dpi.
Medium
Check you have selected the correct paper type under Medium. If you want to print the copy on another paper
type select the desired medium from the combo box. If the medium has not been calibrated yet, you will not be
able to copy and will have to calibrate the paper type under Configuration / Hardware.
IMPORTANT: The copy process can only be started with a calibrated medium.
Output
The entered input values will be transferred automatically into the field Print size. When you alter a value under
Copy Size (width or length), the second value increases or decreases automatically. This ensures that the aspect
ratio remains constant when a copy is enlarged or reduced. Since we will not do an output enlargement or
reduction in our example, it is not necessary to change the output size in mm or in a percentage.
Number of Copies
By default the number of copies is set to 1. If you want to make several copies right away, alter the number
correspondingly.
If you make more than one copies you also have the option to make a test copy first. Set the number of copies to
1. If the copy is correct, change the number of copies accordingly, and click on the menu field Reprint (in the
30
Page 31

lower part of the main window).
Automatics (Quality Settings)
With the button Automatic the program determines the correction of the black and white point and creates a
dynamic filter depending on the document you scan. The creation of a custom made filter is not necessary. From
the combo box to the right of to the button Automatic select the type of original. With this setting you preselect the
type of original you want to copy. Depending on the selected mode, different lists of filters will be displayed.
Color and grayscale mode
• Maps
This mode is best suited for maps with rastered areas of color and text (no photos). Good text reproduction is
achieved through a high black point correction. In order to descreen the areas of color the adaptive special filter
Descreen 1 is used.
• Photos
We recommend this setting for photographic originals. Using this automatic mode, a careful black and white point
correction is set. An editing of the original with sharpeners and softeners will not take place.
• Line/Text
Use this mode for pure lineart (technical drawings), where reproduction of the edge sharpness is important. This
mode uses the special filter Descreen2.
• Prints
This is a universal automatic for different mixed originals such as e.g. brochures with photos and text. The black
point is not set as high as in map mode to prevent photos from being denatured. However, text will be less dark.
• CAD plots
This filter is best suited for originals that have been printed on an inkjet printer.
• Unchanged
With the setting Unchanged neither a filter nor a black and white point correction is applied.
Black and White Mode
• Line/Text
This mode should be used to copy documents mainly consisting of line drawings and/or text.
• Blueprints
Please use this mode to copy blueprints - blue background and white lines.
• Bluelines
This mode is suitable to copy documents which have blue lines on nearly white background.
• Pencil
Use this mode to copy low-contrast lineart originals, such as pencil drawings.
• Photos
We recommend this setting for photographic originals. Using this automatic mode, a careful black and white point
correction is set. An editing of the original with sharpeners and softeners will not take place.
• Graphics
Use this mode to copy documents which contain mainly graphics - like charts.
31
Page 32

• Unchanged
With the setting Unchanged neither a filter nor a black and white point correction is applied.
After selecting the suitable automatic b&w mode please select the submode:
Brightness
The brightness of the copy is influenced with the slider control for Contrast. When using normal originals, we
recommend setting the value of the slider to 0. Moving the slider to the left (negative values) will result in a copy
darker than the scanned original, while moving the slider to the right (positive values) results in a brighter copy.
You may also enter the numeric value in the input field on the right. If you want to reset the value back to 0, you
may use the reset button (to the left of the slider).
Manual Filters
You can create new filter or change existing ones.
Before you create a new filter, change to the desired mode (color, grayscale or b&w) in the main window General.
Select New and you will get to the corresponding filter editor.
After you have optimized all settings with regard to your input, you can save this filter under a new name. To
avoid possible confusion, filter names can only be used once.
If you want to change a filter, you first have to select it in the tab General under Manual Filter. Select then Change
with the speed button or the command under Filter.
Depending on the type of filter, you will automatically get to the filter editor for color, grayscale or black and white.
Enter all changes and click on Save. The program suggests the same name as the filter name. If you accept the
suggestion and exit the dialog with OK, the program overwrites the "old values". If you change the filter name, a
new filter is created automatically. The filter *Current* is a temporary filter containing the current settings. These
values can be changed as well. If you wish to save the current settings to the filter archive, you have to enter a
new filter name.
If you made a filter and returned to the main interface of your software, you can still save it into a file. To activate
Save, you have to select the temporary filter *Current* and select Save (speed button or command under Filter).
To save the current settings to the filter archive you have to enter a new filter name.
Further details referring to creating, changing and saving filters are described in the chapter Filter Editor.
32
Page 33

Output Options
(XEScan Reflection only)
Please note that all settings made under Output Options will remain the same until they are changed. All output
options can be deactivated with the menu item Reset under File.
Margins
In the field Margins you may set additional white margins. The size of these margins can individually be set in mm
for the left, right, top and bottom. However, the maximum print width of the initial copy decreases by the additional
white margins. If you want a continuous white margin of 20 mm, just activate the check box Borders equal and set
the width of the left margin to 20 mm.
Trim Lines
(XEScan Reflection only)
When working with copies with a white background or additional white margins, it is particularly hard to cut the
edges at a right angle to each other. In the field Margins you may activate the check box Trim Lines. A thin cutting
frame will be added to the output.
Print Label
If you activate the check box Print Label, additional information such as date, time, output device, scan and print
dpi, scaling etc. will be printed. The standard label can be configured under Configuration / Preferences / Label.
Enter the text in the entry field (e.g. customer, employee etc.). You may use the history for frequently used label
entries.
33
Page 34

Nesting
If you need to print several copies and at least two copies will fit into the available print width, the copies will
automatically be printed next to each other if you select Nesting.
Distance
Under Distance you can determine the size of the white area in between the copies in mm.
Use Full Paper Width
If you activate the menu field Use Full Paper Width, as many copies as will fit on the paper width will be printed,
without regard to the total number of copies that has been entered under Count.
Autorotate
When using this output function, the copy will be rotated when paper can be saved during the output of the copy.
Alignment
If the output size of the copy is smaller than the available print width of the printer, you can select how the copy is
to be printed: left-aligned, right-aligned or centered. Besides, an offset can be entered in mm for the left and rightaligned output.
34
Page 35

Paneling
(XEScan Reflection only)
For large format outputs, such as posters or presentations for fairs and exhibitions, it is necessary to divide the
copy into several panels. As soon as the required output size exceeds the maximum print width or the maximum
print length of a printer, certain settings in the tab Paneling are necessary.
Panel Size (Width/Height)
You may choose whether paneling is to be done for the width, the height or for both directions. To do this, activate
the corresponding check box(es).
You may enter either a fixed size in mm or a number of panels. If you enter a number under Count given, you will
see a correspondingly high number of magenta-colored borders appear on the preview.
Calculate
To make paneling as easy as possible, click on the button Calculate.
XEScan Reflection calculates then for the width the number and maximum size of panels including the overlap
entered. Under Size given the maximum print width of the selected printer is indicated and under Count given the
number of panels is entered. If the output size or the output device is changed in the main window, you
must click on the menu field Calculate once again to calculate the panels. The entered values are then
immediately updated. You may of course change the suggested values manually.
Example
The poster to be printed is supposed to be 4000 mm wide. The maximum output width of the printer is 900 mm.
If you enter 900 mm under Size given (width), four 900mm-wide panels and one 400 mm-wide panel will be
printed.
35
Page 36

If you enter "5" under Count given, five 800mm-wide panels will be printed.
Overlap and Glueing Marks
An overlap in mm can be entered. The overlap is added on the "right side" of the Width, and at the "bottom" of the
Height. If you set the maximal print width of the printer under Size given, it is reduced by the selected Overlap.
If you click on the menu field Glueing Marks, a mark will be set at the beginning of the overlap. The glueing marks
can only be defined in connection with an overlap.
Making the First Copy
When all settings are done correctly, the menu field Copy will be displayed in green. Place your original in the
scanner and click on Copy or use the function key F8.
Please note: you will only see the preview if you have clicked on the Preview button first. If no preview is available
the preview will show an empty window.
The original will now be scanned and the data will be transmitted to the printer.
Reprint
It is often helpful to do a test copy first. You can check if the contrast and brightness settings are correct, or you
may want to change the output options. You can only select a different printer if you have configured several
identical printers in your system.
36
Page 37

Presets
All settings that are entered under General, Output Options and Paneling can be saved into the directory Presets
with File / Presets / Save. These Presets can be opened for different customers or projects and reloaded on
demand with File / Presets / Load.
These presets can be linked for instant access to the four buttons on the left side of the main window. To do this,
click on the presets buttons with the right mouse button. The following context menu will appear:
Select Assign Current Settings to name, save and assign the actual settings to the appropriate button.
With Select Preset File you may load saved settings and assign them to a button. The file extension indicates if
the settings belong to Scan to File or Scan to Email.
To change the order of the buttons or delete some parameters, go to the Preset Button Configuration via File /
Presets / Preset button configuration. The following dialog will appear, in which you may load or remove presets
and assign some to the buttons.
37
Page 38

Preview
The preview is very useful as you can see the results of any alterations on the original.
38
Page 39

Scan Pre-View
A Rescan is required for each preview, when you want to change the original size in the window General or use a
new original.
Automatic Deskew
With this function an obliquely positioned image can be adjusted horizontally.
In this mode the setting of an AOI is not possible.
Set AOI / Cropping
You can define and edit any area in the preview. The size of the defined area is then entered as the output size in
the window General. To set an area of interest, or AOI, draw a rectangle around the desired section, keeping the
left mouse button pressed.
The selected area can be enlarged and reduced in any direction. To do this, move the mouse pointer to an edge
of the rectangle until a double-arrow appears. Move this arrow in the desired direction with the left mouse button.
To move the section, click into the AOI and move the rectangle to the new position keeping the left mouse button
pressed.
Reset AOI Setting
With this function you can delete the selection of the area of interest.
Edit AOI
Instead of dragging the AOI manually, you can determine its width and height and its position exactly. Right-click
in the preview and select Edit AOI in the context menu. You may change the size of the AOI and/or the offset
where the AOI begins. In addition you can enter a scaling factor.
39
Page 40
Zoom to AOI / Cropping
With this menu item - or the corresponding button - only the selected area will be displayed in the print preview.
Zoom in / Zoom out
With Zoom in the preview or the area of interest is displayed enlarged by 100%. Zoom out resets the preview to
its original size and will only be active after an enlargement.
The functions Zoom to AOI / Cropping and Zoom in do not trigger a rescan. If the result looks uneven, grainy, you
may do a manual rescan: the preview will then be rescanned at higher resolution.
Select Panels
(XEScan Reflection only)
If you enter a number under Count given in the tab Paneling, you will see the arrangement of the panels on your
image, including the overlap. The preview of the panels is also possible in combination with the area of interest.
You have the option to print single panels. Each panel is displayed with a magenta-colored border. Just click on
the corresponding panels to activate or deactivate them.
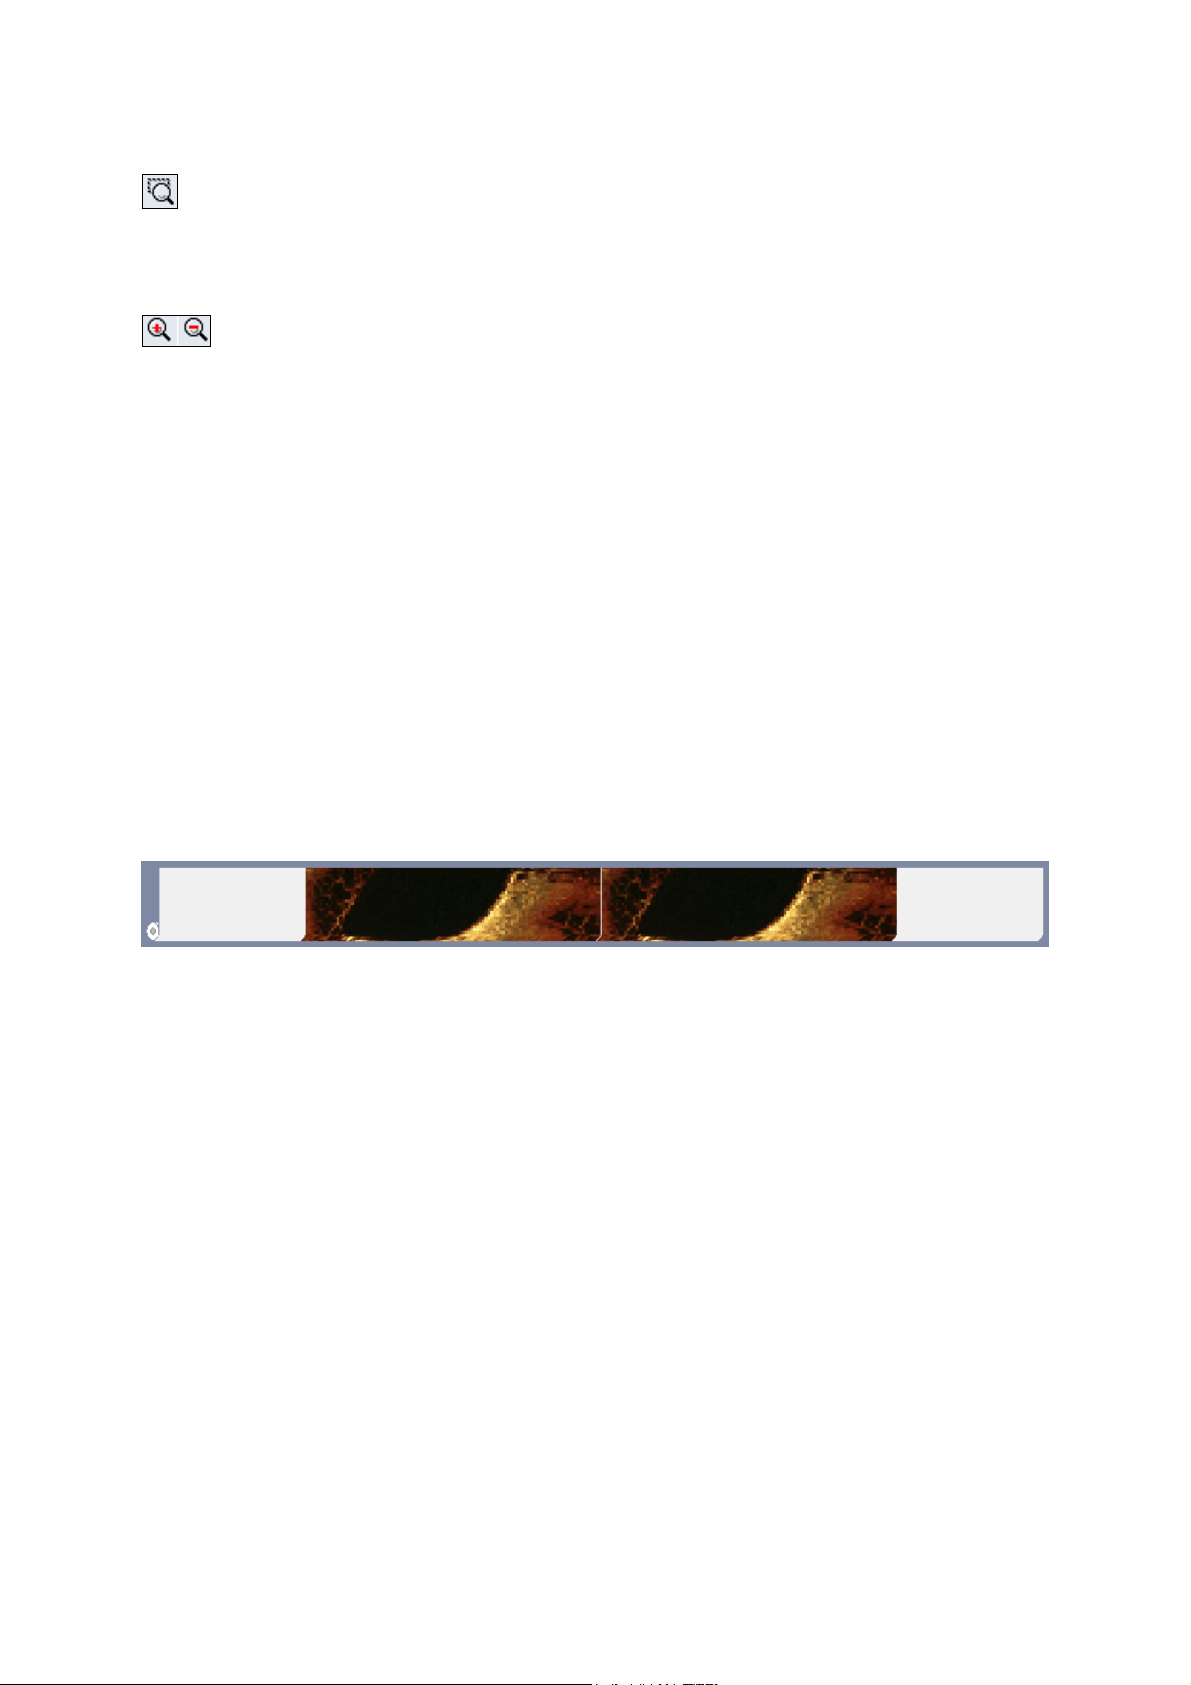
Roll Preview
(XEScan Reflection only)
The roll preview is displayed below the print preview. The roll preview shows the alignment (right, left or centered)
of the copy and the number of copies that fit on the roll width.
40
Page 41

Filter Editor
Function and Structure of the Filter Editor
The filter editor is a central tool, which will help you achieve optimal results even with difficult originals. The filter
editor will give you a preview of the copy on the screen. Each altered setting - e.g. black and white point
correction, gamma value, input, background correction etc. - is immediately displayed on the screen.
That way unnecessary test prints are avoided, since the optimal parameters can be determined before the output
is done. With difficult originals we recommend to save the current parameter settings as a filter for similar copy
processes.
You will get to the filter editor by activating the button New under the tab Manual filter in the main window.
To change an already existing filter select the filter that is to be changed in the window General and click on the
menu field Change.
The name of the loaded filter or the indication “New filter” is displayed in the title bar of the window.
41
Page 42

With a mouse click on the button Preview, the complete original will be scanned with low resolution and two
windows will appear: overview and zoom. The complete scan is displayed in the overview window, which can be
enlarged, reduced and placed anywhere on the screen.
The area selected by the frame you see in the overview is displayed in the zoom window. You can move the
frame to any position to see details of the scan.
42
Page 43

If you now change one of the parameters, e.g. contrast, threshold or edge sharpness, the results of your altered
settings can be seen in the preview and the zoom window at once. Thus, you can easily find the optimal values
for "difficult sections" without having to print elaborate test copies.
After you have optimized the settings, click on OK to transfer the current settings to the temporary filter *Current*.
With the menu field Save you can save the current settings as a filter. The new filter is automatically transferred to
the filter archive and can be used for later processes.
43
Page 44

Filter Editor in Color Mode
The Histogram Window
In the histogram window the x-axis shows the brightness values and the y-axis the frequency of occurrence of
each RGB-value. The left side of the x-axis represents values of low intensity (black), while the right side shows
values of high intensity (white).
Black and White Points (Contrast)
For an optimal contrast adjustment, the black and white points can be set. The contrast filters determine two
points for each color channel (red, green, blue). Every color value below the first point will be interpreted as black.
Similarly, each color value above the second point is seen as white. This shall ensure that the scanned original
contains a "pure" white without a gray haze, and a "pure" black with full saturation. The values ranging between
the two points will be transformed to the full contrast range of 0 to 100 % to guarantee an optimal color
reproduction.
Below the histogram window the color bars corresponding to the RGB-values (red, green, blue) are displayed.
Their length represents the active range of the contrast filter. The empty area to the left of each color bar shows
which range is set to 100 % black, the empty area to the right of each color bar represents pure white.
The black point (left side) is set with the left mouse button; the white point (right side) with the right mouse button.
Usually all three color bars are moved together. However, you may explicitly enable or disable the control of each
primary color.
Automatically Setting the Black and White Points
For most applications it is sufficient to let the program determine the black and white points automatically, using
the Suggest button.
Manually Setting the Black and White Points
For all colors
To set the black and white points for all colors simultaneously, the check boxes for Red, Green and Blue must be
activated. Set the black point with the left mouse button and the white point with the right mouse button.
44
Page 45

For each single color of the Histogram
You have the option to set the black and white points for each single color. To do this, click on each color in the
color selection menu separately and drag the white point with the right mouse button to the value where the peak
of the respective color in the histogram is most pronounced. The activated color is displayed in the color field (box
above the RGB menu fields). This way you can set the white point for all three primary colors as well as for mixed
colors. The black point for contrast enhancement can also be determined individually for each color. However, we
recommend setting the black point to the same value for each color.
Color Pickers for Black and White Points
You may also adjust the contrast with the color pickers for the black (left to the histogram) and the white points
(right to the histogram). Click on the color picker for the black point and select a black area in the image by
drawing a box around the area you want to define as the black or white point, keeping the mouse button pressed.
The averaged color value of the selected area will be assigned to the black point, and automatically corrected.
Proceed likewise for the white point choosing a white area in the image.
Method for Background Correction
Under Method you can choose between Color preservation and Contrast enhancement. The background
correction is strongly dependent on the black and white points and the sort of the original that has been scanned.
Contrast enhancement is suited for printed originals, photos and imported graphic files (RIP) with low black and
white point corrections.
Color preservation is recommended for technical drawings, maps or mixed originals with strong black and white
point corrections.
Gamma (Brightness/Color Intensity)
When performing a gamma correction, both the white and black points remain constant. Only the brightness, or
color intensity, of the values between the points will be enhanced or lowered. When setting the gamma values
you can choose between the color models RGB (red, green, blue) or CMY (cyan, magenta, yellow).
Usually, all three color values are changed simultaneously. If you want to change each color value separately,
deactivate the check box to the right of the RGB or CMY values. The gamma value is set to a standard of 1.000
for all colors. With the Reset button all changes that have been done are cancelled and the values are set back to
their original values.
Special Filters
With difficult originals we recommend working with special filters in order to achieve an optimal print quality. You
may choose from Soften, Sharpen and Descreen. If you do not want to use a special filter, choose None from the
combo box.
Descreen
Descreen combines the advantages of the two filters Soften and Sharpen. Therefore, these filters are best suited
for rastered originals. Depending on the raster of the original either the special filter Descreen 1 or Descreen 2
can be more effective.
Soften
With the help of this filter the image sharpness is reduced by smoothing the color transitions of clearly defined
image lines and shaded areas. The functions Soften and Soften More are excellent for photos and only differ in
the intensity of their effect.
45
Page 46

Sharpen
If your image is blurry, you may use this filter to enhance the image sharpness. This filter increases the contrast
between bright and dark pixels and significantly enhances the edge sharpness for text and lines. With the filters
Sharpen more and Sharpen most the intensity of the edge sharpness can be increased even more.
Scan Resolution
From the combo box Scan Resolution select the dpi value you would like to scan with. The list of dpi values
depends on the device used and is different for each scanner type. We recommend accepting the standard value
“Automatic”. XEScan uses the optimal dpi value for scanning, depending on the device and the scaling factor
used.
46
Page 47

Filter Editor in Grayscale Mode
The Histogram Window
In the histogram window the x-axis shows the brightness values and the y-axis the frequency of occurrence of
each grayscale value. The left side of the x-axis represents values of low intensity (black), while the right side
displays values of high intensity (white). The black point (left side) is controlled with the left mouse button,
whereas the white point (right side) is set with the right mouse button.
Black and White Points
For an optimal contrast adjustment, the black and white points can be set. A contrast filter determines two points
for each grayscale value. Every grayscale value below the first point is interpreted as black. Similarly, each
grayscale value above the second point is seen as white. This adjustment ensures that during scanning a "pure"
white without a gray haze and a "pure" black with full saturation is read. The values between the two points will be
transformed to the full contrast range of 0 % to 100 % to achieve an optimal reproduction of the grayscale values.
Automatically Setting the Black and White Points
For most applications it is sufficient to let the program determine the black and white points automatically, using
the Suggest button. The program sets the black point where it spotted the darkest pixel and sets the white point at
the highest intensity.
Manually Setting the Black and White Points
Set the black point with the left mouse button and the white point with the right mouse button or with the color
pickers at each side of the histogram.
47
Page 48

Method for Background Correction
Under Method you can choose between Color preservation and Contrast enhancement. The background
correction is strongly dependent on the black and white points and the sort of the original that has been scanned.
Contrast enhancement is suited for printed originals, photos and imported graphic files (RIP) with low black and
white point corrections.
Color preservation is recommended for technical drawings, maps or mixed originals with strong black and white
point corrections.
Gamma
When performing a gamma correction, both the white and black points remain constant. Only the brightness and
intensity of the grayscale values between the points will be enhanced or lowered. The gamma value is set to a
standard of 1.000.
Special Filters
With difficult originals we recommend working with special filters in order to achieve an optimal print quality. You
may choose from Soften, Sharpen and Descreen as the special filters. If you do not want to use a special filter,
choose None from the combo box.
Descreen
Descreen combines the advantages of the two filters Soften and Sharpen. Therefore, these filters are best suited
for rastered originals. Depending on the raster of the original either the special filter Descreen 1 or Descreen 2
can be more effective.
Soften
With the help of this filter the image sharpness is lessened by smoothing the color transitions of clearly defined
image lines and shaded areas. The functions Soften and Soften More are excellent for photos and only differ in
the intensity of their effect.
Sharpen
If your image is blurry, you may use this filter to enhance the image sharpness. This filter increases the contrast
between bright and dark pixels and significantly enhances the edge sharpness for text and lines. With the filters
Sharpen more and Sharpen most the intensity of the edge sharpness can be augmented even more.
Scan Resolution
From the combo box Scan Resolution select the dpi value you would like to scan with. The list of dpi values you
will get is device-dependent. We recommend accepting the standard value “Automatic” as XEScan uses the
optimal dpi value for scanning, depending on the device and the scaling factor used.
48
Page 49

Filter Editor in Black and White Mode
Base Type Selection
Please select the type of document in the upper list box. Depending on this selection you can choose further
special modes in the lower box.
Contrast
With the contrast slider you can arbitrarily change the contrast. In the window Zoom you will immediately see
each change on the screen.
Background Removal
You may perform a background removal. If you select "Fixed", the same parameters are used for the entire
document. If you select "Dynamic", the parameters are adapted according to the content of the original. The level
of this adaptation can be changed using the input box "Aggressiveness".
Output
Threshold
Using threshold, the scanner reads several lines and then defines different thresholds for bright and dark areas.
With the variability slider you can determine how many different thresholds are to be defined
49
Page 50

Error Diffusion
The black and white pixels are arranged in order to form grayscale patterns, depending on the location of the
neighboring pixels.
Scan Resolution
From the combo box Scan Resolution select the dpi value you want to scan with. The selection of the dpi values
is device-dependent. We recommend accepting the standard value “Automatic” as XEScan uses the optimal dpi
value for scanning, depending on the device and the scaling factor used.
50
Page 51

Import Raster or Vector Files
(XEScan Reflection only)
With the speed button RIP mode or the corresponding function under File you can import raster and vector files,
enter different settings and print directly.
You will first get to the window Open. Using the field Look in you can change to the directory or the external
device where the file to be printed should be loaded from. If you click on the desired file, it is transferred to the
field Filename. The field Type of Files serves as a filter. If you select e.g. PCX here, only files with this extension
will be displayed. If you then click on the menu field Load, the window General appears. Here you can still change
the output size or the scaling factor, the printer type, the medium and count as well as the output options. If you
then confirm with OK or press the function key F8, the file will be printed. Using the menu field Rescan you can
take a look at the file in the preview window before printing it. Here you have the option to select or print only a
specific area or do a paneling.
If your operating system allows, you can determine via the button Edit ICC options whether a special profile
should be used.
51
Page 52
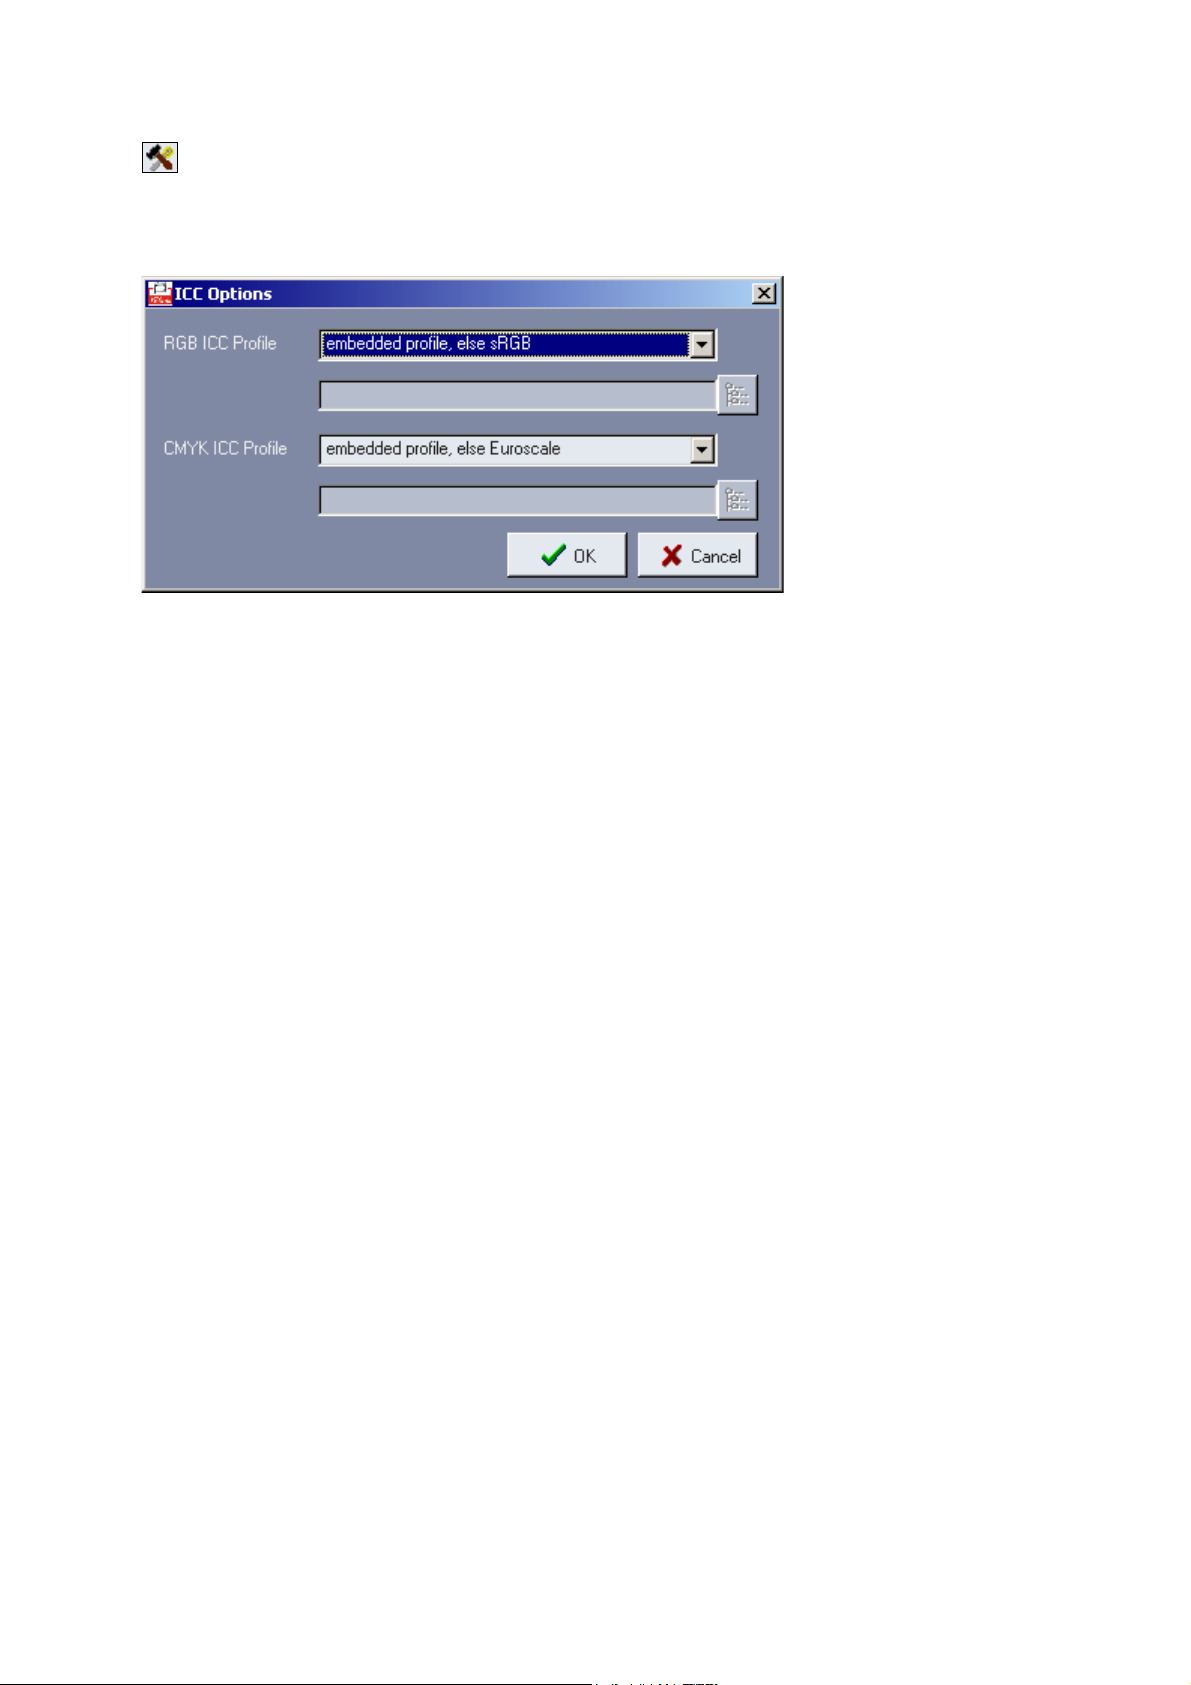
Depending on the color space you can use different ICC profiles or determine a path to a profile. You can specify
different ICC profiles for RGB and CMYK sources. With postscript files you have to choose the most suitable color
space.
52
Page 53

HPGL Files
If you are working with HPGL files (vector files) the tab HPGL will be available from the main window.
Pen Settings
Pen Parameters from File
With HPGL/2 files you have the option to save the pen width and pen color in the file. XEScan Reflection
determines the pens used, the defined pen widths in mm and the pen color as an RGB value from the file. These
parameters are entered in the field Pen parameters from file. They only serve as additional information and can
not be altered. If you would like to transfer one or all of the determined parameters for the print-out, activate the
menu fields Paper size as set in file / Use pen widths as defined in the file / Use pen colors as defined in the file in
the lower part of the HPGL window.
User-Defined Pen Parameters
In the block User-defined pen parameters on the right-hand side, you can alter the line thickness and RGB colors
and overwrite the values determined from the file. If you are working with a HPGL file (not HPGL/2), you have to
coordinate the pen width and the pen color in any way. These files can only be edited when the menu fields Use
pen widths as defined in the file / Use pen colors as defined in the file are not activated. The user-defined pen
parameters can be saved or loaded if required using the icons in the lower part of the HPGL window.
Change Pen Color
To change the color values click on the box to the right of the RGB value of the corresponding pen. The window
53
Page 54

Color appears on the screen.
Select one of the 48 basic colors and then confirm with OK. The selected color is assigned to the corresponding
pen. Repeat this process for each color. With the menu field Define Custom colors you can define more color
tones and save or assign them to the corresponding pen as User-defined colors.
Save / Load Pen Parameters
You have the option to save the altered pen parameters of the file for later applications using the icon Save. The
parameters will then be saved under the filename (e.g. customer, employee or project) with the addition "pen".
Using the icon Load, the parameter file can be reloaded at any time.
Use Count as Specified in Plot
If you want to keep the number of copies set in the plot, activate this check box.
Rotate Print
The combo box offers the alternatives to rotate the file by 90°, 180° or 270°.
Preview
If you click on the button Preview, you will get to the window “HPGL view of...”. The HPGL file is displayed with
the current settings (line thickness, colors, rotate file etc.). The status line in the lower part of the window shows
the size of the window as well as the size of the drawing in mm.
You can enlarge a detail from the preview. Draw a rectangle with the left mouse button and click the menu field
Zoom In. To return to the full image, click Zoom Out.
54
Page 55

Enlarge / Reduce
If you want to check details of the drawing, you have the option to enlarge sections. To do this, draw a rectangle
with the left mouse button and click on menu field Zoom in. This can be repeated several times. With the menu
field Zoom out, the drawing can progressively be reduced again.
Move Section
With the cursor keys to the right of the menu field Zoom out, you can move the enlargement half the size of the
section to the right, left, up or down. With the rhombus in the middle, the complete picture of the drawing (full
picture) is recovered.
55
Page 56

Scan to File
With this menu item you can directly scan into a file and save in any directory on your hard disk or on an external
device. With the button Scan into file mode or the corresponding item under File you will get to the window Scan
to file.
Scanner
At the top of the window you will find the name of the selected scanner and its current state of operation, given by
the color of the depicted LED:
• no response
• warming up
• error
• operational
If you move the mouse cursor over the LED you will get additional information about the scanner status (balloon
help).
56
Page 57

Scan Mode
You can select color, grayscale or b&w mode from the drop-down menu.
Scanner Configuration
With the speed button Scanner configuration you will get to the scanner dialog.
Centered
If you select Centered, you will stage document in centered position; if this is not checked, you will have to stage
them to the right side.
Document
Select the rewind and unload options.
Scan speed
Select the transmission rate and the speed.
Scanner help
If you click at scanner help, you will get to additional hardware information.
Original Size
Under Original Size enter the size of the original that is to be scanned. Click the right mouse button in the entry
field or the left mouse button on the button Set size to obtain a list of common DIN or ISO sizes.
57
Page 58

File Format and File Name
Under File format you can choose between different file formats, which can be configured with the button Options.
Depending on the file format you can select different file format options.
Please note: dependent on the color mode not all file formats will be available. The file formats you will not be
able to select will be displayed with red letters.
For example, TIFF in color mode will show the following option dialog:
58
Page 59

File Formats
When you select a file format, you should bear in mind that some are lossyless, while others achieve a high
compression by leaving out some (not necessary) image information.
JPEG is the preferred file format for transferring photographs and true color images (millions of colors) over the
Internet because files can be compressed to a fraction of their original size. This compression is lossy, i. e. image
data is discarded and cannot be retrieved. It supports 24 bits of color information, and is most commonly used for
photographs and similar continuous-tone bitmap images. The JPEG file format stores all color information in an
RGB image, then reduces the file size by compressing it or saving only the color information that is essential to
the image. (For reference to the legal dispositions, see page 90)
GIF is used mainly for computer generated graphics and is limited to 256 colors. It uses lossyless compression
(LZW). GIF is recommended neither for color photographs nor images with a multitude of tones and colors.
PNG (Portable Network Graphics) is a true color file format that uses lossyless compression and has some
features associated with GIF files (e.g. interlacing, transparency).
BMP is the native image file format that works with Microsoft's Paint program included under Windows. This
format can be opened by both Windows and DOS platforms as well as in major image editing programs. BMP
images can be saved in millions of colors, although this is more than is humanly perceptible for display on monitor
screens.
EPS (Encapsulated PostScript) is a metafile format that can be employed for vector or bitmap images. The EPS
file format can be used on a variety of platforms, including Macintosh and Windows. When you place an EPS
image into a document, you can scale it up or down without information loss. This format contains PostScript
information and should be used when printing to a PostScript output device. The PostScript language, which was
developed by Adobe, is the industry standard for desktop publishing software and hardware. EPS files can be
graphics or images of whole pages that include text, font, graphic, and page layout information.
PDF files are similar to PostScript files in that they are platform-independent and contain information that allows
the scaling of the fonts and objects in the file. There are additional features, however, that aid in the exchange of
documents. PDF files store metrics and information about the fonts used to create the file without including the
fonts themselves. If a receiver of a PDF file does not have a called for font on his system, the Acrobat software
simulates the absent fonts with a special Multiple Master font from Adobe. There are two Multiple Master fonts
with characteristics that allow them to be used to simulate almost any typeface. PDF files are also stored and
transmitted as compressed files, and may contain various navigational enhancements to the original file (like
bookmarks and links) to aid in its viewing. There is also the capability to cut out sections of a PDF file for pasting
into other applications, and simple searches that can be performed on the textual content of the file.
TIFF (Tag Interchange File Format) is a tag-based format that was developed by Aldus (now Adobe). TIFF, used
for bitmap images, is compatible with a wide range of software applications and can be used across platforms
such as Macintosh, Windows, and UNIX. This format is complex, so TIFF files are generally larger than GIF or
JPEG files. TIFF supports lossyless LZW (Lempel-Ziv Welch) compression.
TGA is widely used by high-end paint programs and ray tracing packages. It can handle images with up to sixteen
million unique colors. The TGA format was designed for use on systems that use MS-DOS color applications.
TGA files may be saved compressed (run length encoded) or not compressed. Since Windows does not
recognize 16 x 32 bits per pixel, some applications will treat them as 24 bits per pixel. A 16-bits-per-pixel image
will be upgraded to 24 bits per pixel, and a 32-bits-per-pixel image will be downgraded to a 24-bits-per-pixel
image. This procedure will not affect the image since the 8 extra bits of a TGA 32-bits-per-pixel file are used to
store Alpha or transparency information.
CALS files are used for document imaging and therefore only store black-and-white, 1-bit image data. CALS Type
I files only store a single image per file and the data is always compressed using the CCITT Group 4 encoding
algorithm. CALS Type II files may stored multiple images per file, the image data may be tiled, and tiles stored as
raw data or as data compressed using CCITT Group 4 encoding.
59
Page 60

Under Filename you find the path of the standard file name Default and the current file format as the extension. If
you do not enter a filename, by default the scan is saved under Default.
Further Options
Increment Name File
Activate this check box if you want your files to be automatically numbered. This is a useful function if you are to
work in batch mode.
Rotate
With this option, you will have your file rotated by 90°. Rotate cannot be performed if you selected the automatic
format recognition.
Load to Editor
You can choose to load your file in the editor directly after scanning. To do so, tick the box Load to Editor. This
option does not work if you activated the batch mode.
Copy Size and DPI
Enter the size or the scaling factor as well as the dpi value for the output in the fields Output size and DPI.
By default, the original size entered is taken as the copy size. The copy size can be increased or reduced by a
percentage. To this end, you may enter a percentage or select one from the list you get through the context
menu. You may of course enter the desired copy size directly in mm. The copy width or length always changes
proportionally.
You will get to the window for factor scaling with Alt and M or with the context menu from the percentage entry
field:
Automatic Filters
Please select the type of document.
You can choose further special modes in the black and white mode.
60
Page 61

Contrast
With the slider control Contrast you may influence the contrast of the copy. When using normal originals, we
recommend setting the value of the slider to "0". Moving the slider to the left (negative values) will result in a copy
darker than the scanned original; moving the slider to the right (positive values) will give a brighter copy.
Manual Filters
All filters that were saved in the filter archive are displayed in the drop-down list under Manual Filter. Depending
on the active mode, only the corresponding filters will be displayed. The filter *Current* is a temporary filter
featuring the current settings in the filter editor. With the buttons Change and New you will get to the filter editor.
In black and white mode you will be able to choose among further options in the filter editor.
61
Page 62

Scan into Email
With the speed button Scan into Email Mode or the corresponding menu item under File you can directly scan into
an email. Settings are made under Configuration / Preferences / EMail.
Scanner
At the top of the window you will find the name of the selected scanner and its current state of operation, given by
the color of the depicted LED:
• no response
• warming up
• error
• operational
If you move the mouse cursor over the LED you will get additional information about the scanner status (balloon
help).
62
Page 63

Scan Mode
You can select color, grayscale or b&w mode from the drop-down menu.
Scanner Configuration
With the speed button Scanner configuration you will get to the scanner dialog.
Centered
If you select Centered, you will stage document in centered position; if this is not checked, you will have to stage
them to the right side.
Document
Select the rewind and unload options.
Scan speed
Select the transmission rate and the speed.
Scanner help
If you click at scanner help, you will get to additional hardware information.
Original Size
Under Original Size enter the size of the original that is to be scanned. Click the right mouse button in the entry
field or the left mouse button on the button Set size to obtain a list of common DIN or ISO sizes.
63
Page 64

File Format and Addressing
Under File format you can choose between different file formats, which can be configured with the button Options.
The option dialog is device-dependent.
It is recommended to use JPEG as the output format for emails because it achieves maximum compression.
Please note that many mail-servers restrict the file size of email attachments.
Use the Recipient entry field to enter the address the email will be sent to. You may indicate the subject of the
email in the Subject field.
Copy Size and DPI
Enter the size or the scaling factor as well as the dpi value for the output in the fields Output size and DPI.
You can enter a scaling factor manually or select a predefined one from the context menu. You will get to the
window for factor scaling with Alt and M or with the context menu from the percentage entry field:
Automatic Filters
Please select the type of document in the drop-down list.
You can choose further special modes in the black and white mode.
Contrast
With the slider control Contrast you may influence the contrast of the copy. When using normal originals, we
recommend setting the value of the slider to "0". Moving the slider to the left (negative values) will result in a copy
darker than the scanned original; moving the slider to the right (positive values) will give a brighter copy.
64
Page 65

Manual Filters
All filters that were saved in the filter archive are displayed in the drop-down list under Manual Filter. Depending
on the active mode, only the corresponding filters will be displayed. The filter *Current* is a temporary filter
featuring the current settings in the filter editor. With the buttons Change and New you will get to the filter editor.
In black and white mode you will be able to choose among further options in the filter editor.
65
Page 66

Archive
(XEScan Reflection only)
The archive is designed similarly to the Windows Explorer of your operating system. The intuitive structure makes
the printing, importing and editing of files easy. The archive is the place where to store ready-to-print images
which include the dithering and color correction for a certain printer or printer group. The archive is not meant to
store images which still need adjustments in size or filtering.
The batch-printing feature is also based on archive files.
To get to the archive, click the Archive speed button or the corresponding item under File or use the function key
F5.
Importable files are displayed under the tab Import Files, while archived files are shown under the tab
Processed/Ripped. You can drag and drop importable files to the tab Processed/Ripped to start a file import.
66
Page 67

Introduction in Working with PGF Files
Page files with the extension pgf contain the image data in a special format. Since the image data is already
dithered it can be instantly sent to the printer. Pgf files can be backuped easily, they can be printed in batch
modus and the special features of the editor can be used. But, as the data is dithered, some output options may
no longer be available.
Functions in the Archive Window
All actions are invoked from the speed buttons or the items in the menu bar. When the mouse pointer is on the
individual buttons, a short help message about its function appears.
Back / Forward
With these menu fields you can change back or forward to the directory that was used last. The history to the right
of each button enables to pick up folders quickly.
Up
With Up you will move up one directory in the directory structure. In order to get back to the initial directory, click
on the menu field Back as often as necessary.
Cut / Copy / Paste
Use Copy or Cut to copy or move a file or a directory, e.g. to save the data of your archive on an external device.
Mark the corresponding file or directory and click on the menu field Copy or Cut to move the data. In the archive
move to the desired directory or drive and then click on the menu field Paste.
Delete
Using the menu field Delete, the selected file is moved into the recycle bin. If files have been deleted accidentally,
they can be moved back into the archive with "drag and drop".
Properties
A click on this icon leads to the window Properties, which contains important information on the selected file. In
this window you can assign different file attributes in several tabs.
View
Under View you can select how the symbols are to be displayed: large, small, as a list or with details. You can
switch to a different view by using the combo box or by clicking on the menu field View. Under Details you will get
important information on the file e.g. date of creation or date of last change, file and output size, and the output
device.
Insert Current
67
Page 68

To archive the last or current copy, click on the menu field Insert current. The file is then placed in the archive.
RIP to File
With this function you will turn a selected file into a pgf file. The function is enabled when you have selected a file.
After evoking the function, the window RIP file and archive appears.
If your operating system allows, you will be able to determine a special profile via the button Edit ICC options.
Depending on the color space you can use different ICC profiles or determine a path to a profile.
With postscript files you have to choose the most suitable color space.
Furthermore you can change the copy size or the scaling factor, the printer and the medium. During file import
you can select an automatic mode or a manual filter. The field Use Color Management gives you the option to
deactivate the color calibration (3-D filter) during file import. If you then confirm the dialog with OK, the file will be
transferred to a pgf file. This file gets a symbol and the initial filename and can be printed or edited at any time.
68
Page 69

Scan Image
With this menu item you can start a scan process and determine how the data is to be proceded:
Scan and RIP the scanned data will be stored in the archive
Scan into File the scanned data will be stored in a file; different file formats are available
Scan into Email the scanned data will be sent via email; different file formats are available
Copy the scanned data will be printed
Copy and RIP the scanned data will be printed and stored in the archive
Editor
(XEScan Reflection b&w mode only)
Archived files can be edited with the internal SCP editor. Highlight the file you intend to edit and click the Editor
button or the corresponding menu item under Actions.
Rotate Image
Using the menu field Rotate image the archived files can be rotated by 90°, 180° or 270°. You can select the
degree of rotation in the combo box to the right of the menu field. After the rotation process, a new file is created
bearing the same filename but with the addition "rotated".
Print Set
When you call up this function, a window will open, containing the files you selected.
Print Picture
In the archive highlight the file you want to print. Then click on the icon Print picture. Only the printer the archived
file has been created for can be used for the output. You will automatically reach the tab General and be able to
alter different output options. However, a later scaling of archived files can result in quality losses. In the tab
General the selected file appears as a preview. With this preview you can avoid mix-ups. If you then confirm with
OK the output process is started.
Print and RIP
Only the printer the archived file has been created for can be used for the output. You will automatically reach the
window “General” and be able to alter different output options (number of copies, additional white margins,
paneling etc.). However, a later scaling of archived files can result in quality losses.
If you decide to save your changed archive data, please use the button Save parameters.
69
Page 70

PGF Editor
(XEScan Reflection only in grayscale and b&w modes)
The editor can also be used to process archived copies and scans. To do this, click on the thumbnail of the
archived scan, and click on the Editor icon. The editor is started and the selected scan from the archive appears
in the overview window.
In the editor two windows will appear. The overview window shows the complete scan (see picture above). In the
spy window you will see details enlarged. Place the mouse pointer on a detail in the overview window and you will
see an enlargement in the zoom window. You can change the size and position of the overview and spy window
to your liking.
When you exit the program the current screen settings will be saved for the next program start.
70
Page 71

Functions in the Overview Window
All actions that can be invoked from the speed buttons of the editor are also accessible from the menu bar. We
have listed the functions in order of their appearance in the menu bar. When a function has a corresponding
speed button, its icon will be illustrated.
File
Under File you have the options to save or directly print the edited files, scan originals or exit XEScan Reflection's
editor.
Save Picture
The edited file can be saved directly on the hard disk or an external device using through this function.
Print Picture
When you have clicked on Print Picture, a window with the tabs General, Output Options and Paneling opens.
Here the output options Scaling, Count, Margins, Nesting, Label and Mirror can be set or altered as usual. For
very large prints or posters the tab Paneling is available.
Scan Picture
With Scan Picture you can scan directly from the editor and edit immediately. The tab General opens. Enter the
input and output size or the scaling in %, select the printer and medium on which you want to print the scan.
Depending on the input activate the corresponding menu field for a grayscale or black and white scan. The
selection of the filters under Automatic or Manual Filter is identical for both copying and scanning. Then start the
scan process with the button OK. The scanned original is displayed in the overview window of the editor and can
be processed further.
71
Page 72

Close Editor
With Close Editor you can close the editor and return to XEScan Reflection main window or to the archive. If, by
accident, the file had not been saved, answer with “cancel” to the safety inquiry that will appear before the editor
closes.
Mode
Under Mode you can activate the menu items Mark area or Set 2 Skew points / 3 Skew points as well as Text
mode / Insert text.
Mark Area
Open a rectangle in the overview window keeping the left mouse button pressed. With Edit / Area the marked
area can then be deleted, cut, inverted, blackened or, with View / Zoom in, enlarged on the screen. If you only
want to print the AOI, you have the option to assign it a fixed DIN or ISO size. Click the right mouse button in the
overview window; a list will appear from which you can select the desired size.
The selected area can be arbitrarily moved, enlarged or reduced with the mouse. Its size is displayed as Picture
size in the status line in the lower part of the overview window. When you want to remove the selection, click in
the overview window with the left mouse button on any point outside the marked area.
Set Skew Points
With the skew-function an obliquely scanned image can be adjusted.
It is recommended to use 3 skew points - this will avoid a possible distortion of the image and will allow the
function Skew and crop. It might be easier to deskew with two skew points first, then - if you are familiar with this
feature - use the 3-skew points method.
To adjust the image you can choose between two and three skew points. To position the skew points, follow the
actual position of the mouse pointer (red cross) in the spy window. To set the skew points click first with the left
mouse button on a starting point, and then set a second reference point in horizontal and/or vertical direction. If
the reference points are not set correctly, the buttons for skewing will remain gray. The number of reference
points depends on whether you have selected the function with two or three skew points. The skew points are
marked with blue crosses. Then click on the button Skew and the image is straightened out.
With the button Skew and crop the image is straightened out and cut at the same time. This function requires you
to set three skew points.
Text Mode
If you want to insert a text into your scan, you first have to change into text mode. Draw a rectangle keeping the
left mouse button pressed. Using the mouse, the marked area can be moved, enlarged and reduced. Then click
on the menu field Insert Text and enter the desired text.
View
Under View, you can incrementally enlarge the marked area in the overview window. By default the menu item
72
Page 73

View is deactivated and only activated by selecting a region in the preview window.
Zoom in
To enlarge a picture detail mark the area you want to enlarge by drawing a rectangle around it. Then select View /
Zoom in or click on the corresponding speed button.
Zoom out
With Zoom out the initial image is again shown in the overview window. The function Zoom out is only active
when an enlargement of the region has been done.
Arrange Spy Window
You can set the position of the spy window to the left, right, at the top or bottom of the window.
Edit
Undo
With this function the last action (e.g. rotate, mirror, cut image) that was performed can be undone.
Area
There are several options under this menu item. You can delete, crop, blacken, invert the selected area or insert a
text in it.
(delete, crop and insert text)
When you have activated the text mode (see menu item Mode) and selected Insert text you can enter any text. If
you then evoke the context menu, you will be able to change, delete, adjust or, with Font, change the font and
font size. As soon as you exit Text Mode / Insert Text, e.g. click on the menu field Mark Area or Save Picture, the
text is merged into the picture.
Despeckling
This function eliminates dirt particles that have been scanned in. You can choose between the grades Fine and
Coarse. In most cases Fine should be sufficient. Please note that when selecting the setting Coarse detail
information of the scan might get lost.
73
Page 74

Rotate
The complete image can be rotated by 90°, 180° or 270° to the left. Depending on the output device paper can be
saved when using this function.
Skew
You can only click this menu item when two or three skew points have been set. Three skew points are necessary
to skew and cut the image. If you only want to adjust an obliquely scanned image, you can choose between two
and three skew points.
Mirror Area
With this function the selected region will be mirrored. If no region has been selected in the overview window, the
complete image will be mirrored.
Options
Unit
The unit you want to work with is set in the menu bar in the main window. In the editor, however, you can
temporarily switch between mm, inch or pixel. The current unit is displayed in the status line of the overview
window.
Scale to Gray
For performance reasons the scanned image is displayed by default with low resolution in the mode Middle. If you
activate the menu item Scale to Gray / Median, the display will be shown in a higher resolution. This will enable
you to detect details and fine structures easily.
Hide Spy Window
You can switch the spy window on or off.
74
Page 75

RGB Editor
In the RGB-editor you will have the following commands to work with.
Import and Export Functions
Load
You will first have to open the desired file. Click on the Load icon: a directory dialog will appear. The icons and
the drag and drop menus at the top of the window will facilitate the search for the desired file in the directory.
Under Filetype select an extension or a file type if you want to search the file through a filter: Only the files
corresponding to the selected file type will be displayed. The color model and the default or user-defined
settings of the selected file are loaded in the editor.
Save
When you click the Save button, a dialog opens, in which you have here to determine a folder, a filename and
a file format. Under Options you can enter quality settings such as color resolution and Palette. Indeed, this
function calculates an automatic color palette. It saves the content of the editor to the specified filename or
options.
Scan
When you click on the button Scan in Editor, the corresponding window appears, in which you can make
settings as usual:
75
Page 76

Viewing Functions
Zoom
The editor is in Zoom mode when an image was scanned or loaded with the load function. Hence, the zoom
mode button is pressed and the mouse pointer turns to a magnifying glass when on the copy:
There are several ways of invoking the Zoom function:
Zoom in or out by clicking on the corresponding buttons.
Or left-click to magnify the image and right-click to scale it down. This action can be performed several times.
When you left-click on a particular area several times, it becomes the focus of the enlarged image.
If you want only a detail to be zoomed in on, draw a rectangle with the left mouse button around the desired
area. The magnified area is then centered in the active window.
Scroll bars appear when the image does no longer fit on the actual window surface.
Zoom to Window Size
This function is active when at least one action was carried out. Click on the icon to reset its best resolution.
Edit Functions
Undo
Undo will only reverse the last action.
Horizontal / Vertical Mirroring
Images can be mirrored on the horizontal or vertical axis.
Rotate
You have the possibility to rotate images by 90° and 180° to the left, 90° to the right. By default, the image will
rotate to the left by 90°. If you open the menu, you can choose one of three values:
Thereafter the arrow icon shows which action was last carried out, for example "rotate by 180°". If you then
click on the icon, the last action will be performed anew.
Reverse
If you click on Reverse, you will obtain a color negative of your image. That is to say that the original colors
76
Page 77

are replaced by their complementary colors:
Despeckling
The Despeckling button is only active when you work with black and white files.
Manual Deskew
Press the Deskew icon in the toolbar to activate the function. The mouse pointer shows deskew points when
on the image:
In order to define a line, you can position point A and point B by clicking on two different spots on the image or
proceed as follows: click the mouse button for point A without releasing it, then move the pointer to the desired
point and release it for point B. You will see the line as you search for point B. The points you set are
displayed as crosses. You can redefine the settings by placing another point that will be point B. Consequently
the former point B turns to point A.
When two points are set, the Deskew button displays an active feature:
You can now click on the active button to enable the Deskew process. The Zoom function is now active and
the mouse pointer accordingly changes to a magnifying glass when on the image.
The maximum shearing angle is 30°. You can read the angle value at the bottom of the window. When you
exceed this limit, the red arrow is no longer displayed in the Deskew icon.
Crop
To remove image parts with Crop, first press the Crop icon in the toolbar to activate the function. Now the
mouse pointer, when on the image, shows a rectangle:
You can define an area by pressing the left mouse button on a corner point, holding it while you drag a
rectangle and releasing it on the second corner point or simply place two corner points with two individual leftclicks.
When you have selected an area, the Crop icon displays an active feature:
Click then on the Crop button to invoke the crop process.
While selecting an area, the position of the pointer on the abscissa and ordinate is displayed at the bottom of
the window and, as you move the mouse, you can see the rectangle lines move correspondingly.
77
Page 78

Depending on the position of the mouse pointer in the selected area, one of the two following symbols
appears:
The cursor is on one of the area´s edges. Drag the arrow to modify its width or height.
The cursor is within the area, allowing to move it to any point in the active window.
A new area can be defined after a click outside the frame. This click sets the first corner point of the rectangle.
At the bottom of the window you can read: the position of the cursor, the positions of point A and point B as
well as the size of the selected area:
78
Page 79
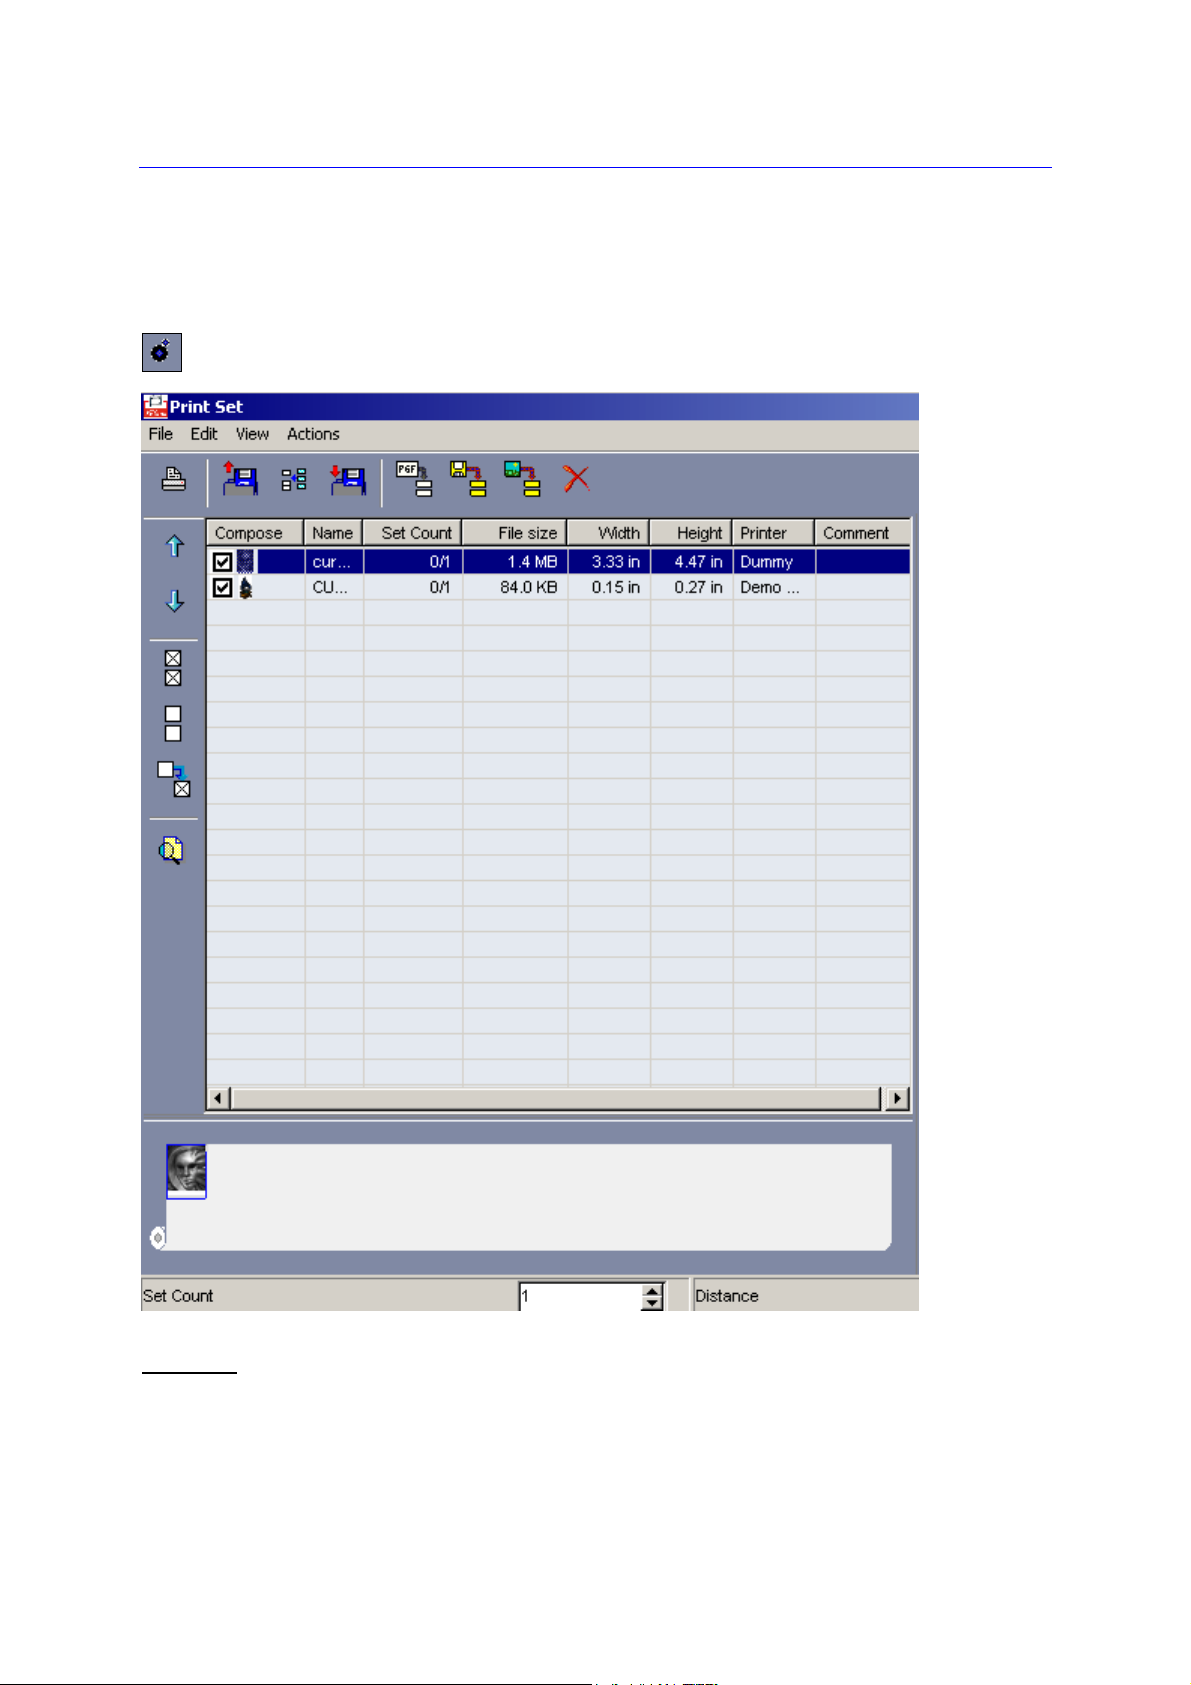
Print Set
(XEScan Reflection only)
The Print Set mode allows the successive printout of pgf files. The number of copies and some print parameters
can still be altered. To get to the Print Set window highlight one or more files in the archive and select the
corresponding speed button. Or drag and drop pgf files from the archive into the batch window.
Functions
The actions you invoke from the speed buttons are accessible from the menu bar. You will find these functions
listed above in order of their appearance in the menu bar, illustrated by their corresponding speed buttons.
79
Page 80

File
Load Print Set
With this menu item you can load saved print sets.
Add Print Set
With this menu field you can add existing jobs to the selected ones.
Save Print Set
With this menu item you can save and name your print set.
Close Print Set Window
With Close Print Set you will quit the window.
Edit: Management of Composing Function
You will see check boxes in the first column (Compose). When selected, the corresponding files will be
composed, i.e. the outputs will be automatically placed next to each other for an optimal use of paper width.
Up / Down
The jobs in the batch window are processed and printed in the order of their entry. You may change their order or
priority by selecting a job and clicking on Up or Down until the job is at the desired position or with drag and drop.
Print Set Selection
Now you have three other possibilities to make your selection (If no jobs are highlighted, all jobs will be done).
• You can select all files
• You can cancel your selection
80
Page 81

• You can invert your selection
View
Pre-View
This function is activated when you have selected a file. If you then click the icon or select the menu item, the file
preview will appear. A number of settings can still be varied in the tabs General, Output Options and Paneling.
Show Roll Pre-view
The roll preview is displayed below the list of batch entries. The preview shows the placement of the composed
copies as well as the number of copies.
Refresh
This function carries out an update.
Show Button Caption
Select this function to display, or not, the speed buttons with a short description of their respective functions.
81
Page 82

Actions
Print
When you have completed or checked all settings, click on Start batch. One job after the other will be processed.
Insert Current
With this menu field the last copy or the last scan worked on will be added to the batch job.
Import PGF File
With the menu field Import PGF-files pgf files can be imported into the batch.
Scan Picture
You can also scan directly into the batch. To do this, click on Scan Picture. A dialog appears in which you can
enter the familiar output options such as original size, scaling, output device, medium, quality settings etc.
After entering the scan settings click on OK. The original will be read and you will be asked for the name of the
pgf file and will have to save it.
82
Page 83

Delete
With Delete or the context menu you can remove the selected file from the batch window.
Comment Field
Into the comment field you can enter a text for every batch job, which will be saved with the batch job.
Copy Count Control
You will see two numbers in the column Set count.
83
Page 84

The first number indicates how often the job has already been printed, whereas the second number shows how
often the job is to be printed. The latter number is determined in the field Batch count at the bottom of the window.
Distance
You may specify the distance between the images that are composed. By default the distance is "0".
84
Page 85

Subsystem
(XEScan Reflection only)
The subsystem only serves as an output system, and offers the option to work even faster and more effectively
with XEScan Reflection. With the XEScan Reflection system the scanned data is placed in a common poll
directory. The subsystem polls the scan data from the spooling folder and processes the print jobs in sequence.
The subsystem cannot be used with the Batch-Composing function.
Software Installation
If you are working with a Windows NT, 2000 or ME operating system, you will have to log in as an administrator
before installing the subsystem. Exit all other applications and insert the XEScan Reflection CD into the CD-ROM
drive.
If Autostart is activated in your operating system, the installation program is started automatically. Should the
Autostart function be deactivated, click on Start / Settings / Control Panel and then on Software, menu button
Install.
When using the Standard installation of XEScan Reflection, the subsystem is automatically installed as well.
When the installation is finished you will find an icon to start the subsystem on your desktop.
System Configuration
In XEScan under Configuration / Hardware install the printer connected to the subsystem and enter a path for the
poll directory. To do this, click the red arrow: you will get to the window Connection. Activate the button Output
System.
If you choose the installed printer for the subsystem in XEScan Reflection's main window, all copies will be
automatically placed as print jobs in the common poll directory. If the poll directory does not exist yet, it will
automatically be opened by the program with the first copy that is to be saved.
Subsystem Configuration
You will reach the hardware dialog via Configuration / Configuration.
85
Page 86

In the window Hardware under Poll directory enter the path for the common poll directory or accept the suggested
path: "C:\SPOOL\".
Both systems must have user rights for the poll directory!
Then, as usual, install the printer type that is connected to your subsystem. Enter the settings in the tab
Connection.
86
Page 87

Job Processing
Start the subsystem and switch on the printer. Once print jobs are placed in the poll directory by your XEScan
Reflection system, they will successively be processed and printed by the subsystem. All settings such as Count,
Scaling, Output options etc. are set by the XEScan Reflection system when creating the jobs. The job processing
can be interrupted or restarted with the menu bar or the speed buttons. You can change the output priority of
individual jobs using the arrow keys. Processing the jobs can be stopped using the Esc key.
In the subsystem interrupted or failed copy jobs are displayed in the lower part of the window. These failed copy
jobs can be sent to the printer once again using the menu field Restart job.
To delete a job from the spool queue, highlight it and click the trash can.
Clicking at the magnifying glass will give information on the error that occurred.
87
Page 88

Info
Keycode Entry
Under Keycode enter your personal XEScan/XEScan Reflection keycode. The keycode is part of your
XEScan/XEScan Reflection package. You can enter it manually or with the help of keycode targets. For a detailed
description, see page 15.
Online Registration
When you have entered your keycode and restarted your computer, the confirmation dialog will automatically
appear. Provided your PC is linked to the Internet, you will be able to connect directly with the SCP server. The
following data will be transmitted:
• the language of your software
• the name of the software
• its version number
• its serial number
• the date of installation
Please follow the hints on the web site.
Check for Update
(not in XEScan Reflection Demo)
With this menu item you can connect to the SCP server. To check for an update, the following data are
transferred:
• Your language
• The name of your SCP software
• The version number of your software
Please follow the hints on the web site.
Help
Under Help you will find an index from which different topics can be looked up. Alternatively you can reach the
help section by using the function key F1.
Scanner Help
If you need information on your scanner, you may consult the scanner help. It contains a detailed description of
the operating and maintenance of your device. This help register is found under
C:\Programme\XESystems\SynergixScanSystem-SA\XEScan\11\hwhelp\eng\hh_start.htm
88
Page 89

About
(not in XEScan Reflection Demo)
Under About you will find the version number of your software and the serial number of the hardlock (dongle).
89
Page 90

JasPer Software License
Copyright (c) 1999-2000, Image Power, Inc. and the University of British Columbia, Canada.
Copyright (c) 2001 Michael David Adams.
All rights reserved.
IMAGE POWER JPEG-2000 Public License
Whereas:
Permission is hereby granted, free of charge, to any person (the "User") obtaining a copy of this software and
associated documentation, to deal in the JasPer Software without restriction, including without limitation
the right to use, copy, modify, merge, publish, distribute, sublicense, and/or sell copies of the JasPer Software (in
source and binary forms), and to permit persons to whom the JasPer Software is furnished to do so, provided
further that the License Conditions below are met.
License Conditions
A. Redistributions of source code must retain the above copyright notice, and this list of conditions, and the
following disclaimer.
B. Redistributions in binary form must reproduce the above copyright notice, and this list of conditions, and the
following disclaimer in the documentation and/or other materials provided with the distribution.
C. Neither the name of Image Power, Inc. nor any other contributor (including, but not limited to, the University of
British Columbia and Michael David Adams) may be used to endorse or promote products derived from this
software without specific prior written permission.
D. User agrees that it shall not commence any action against Image Power, Inc., the University of British
Columbia, Michael David Adams, or any other contributors (collectively "Licensors") for infringement of any
intellectual property rights ("IPR") held by the User in respect of any technology that User owns or has a right to
license or sublicense and which is an element required in order to claim compliance with ISO/IEC 15444-1 (i.e.,
JPEG-2000 Part 1). "IPR" means all intellectual property rights worldwide arising under statutory or common law,
and whether or not perfected, including, without limitation, all (i) patents and patent applications owned or
licensable by User; (ii) rights associated with works of authorship including copyrights, copyright applications,
copyright registrations, mask work rights, mask work applications, mask work registrations; (iii) rights relating to
the protection of trade secrets and confidential information; (iv) any right analogous to those set forth in
subsections (i), (ii), or (iii) and any other proprietary rights relating to intangible property (other than trademark,
trade dress, or service mark rights); and (v) divisions, continuations, renewals, reissues and extensions of the
foregoing (as and to the extent applicable) now existing, hereafter filed, issued or acquired.
E. If User commences an infringement action against any Licensor(s) then such Licensor(s) shall have the right
to terminate User's license and all sublicenses that have been granted hereunder by User to other parties.
F. This software is for use only in hardware or software products that are compliant with ISO/IEC 15444-1 (i.e.,
JPEG-2000 Part 1). No license or right to this Software is granted for products that do not comply with ISO/IEC
15444-1. The JPEG-2000 Part 1 standard can be purchased from the ISO.
THIS DISCLAIMER OF WARRANTY CONSTITUTES AN ESSENTIAL PART OF THIS LICENSE. NO USE OF
THE JASPER SOFTWARE IS AUTHORIZED HEREUNDER EXCEPT UNDER THIS DISCLAIMER. THE
JASPER SOFTWARE IS PROVIDED BY THE LICENSORS AND CONTRIBUTORS UNDER THIS LICENSE ON
AN ``AS-IS'' BASIS, WITHOUT WARRANTY OF ANY KIND, EITHER EXPRESSED OR IMPLIED, INCLUDING,
WITHOUT LIMITATION, WARRANTIES THAT THE JASPER SOFTWARE IS FREE OF DEFECTS, IS
MERCHANTABLE, IS FIT FOR A PARTICULAR PURPOSE OR IS NON-INFRINGING. THOSE INTENDING TO
USE THE JASPER SOFTWARE OR MODIFICATIONS THEREOF FOR USE IN HARDWARE OR SOFTWARE
PRODUCTS ARE ADVISED THAT THEIR USE MAY INFRINGE EXISTING PATENTS, COPYRIGHTS,
TRADEMARKS, OR OTHER INTELLECTUAL PROPERTY RIGHTS. THE ENTIRE RISK AS TO THE QUALITY
AND PERFORMANCE OF THE JASPER SOFTWARE IS WITH THE USER. SHOULD ANY PART OF THE
JASPER SOFTWARE PROVE DEFECTIVE IN ANY RESPECT, THE USER (AND NOT THE INITIAL
DEVELOPERS, THE UNIVERSITY OF BRITISH COLUMBIA, IMAGE POWER, INC., MICHAEL DAVID ADAMS,
OR ANY OTHER CONTRIBUTOR) SHALL ASSUME THE COST OF ANY NECESSARY SERVICING, REPAIR
OR CORRECTION. UNDER NO CIRCUMSTANCES AND UNDER NO LEGAL THEORY, WHETHER TORT
(INCLUDING NEGLIGENCE), CONTRACT, OR OTHERWISE, SHALL THE INITIAL DEVELOPER, THE
UNIVERSITY OF BRITISH COLUMBIA, IMAGE POWER, INC., MICHAEL DAVID ADAMS, ANY OTHER
CONTRIBUTOR, OR ANY DISTRIBUTOR OF THE JASPER SOFTWARE, OR ANY SUPPLIER OF ANY OF
SUCH PARTIES, BE LIABLE TO THE USER OR ANY OTHER PERSON FOR ANY INDIRECT, SPECIAL,
INCIDENTAL, OR CONSEQUENTIAL DAMAGES OF ANY CHARACTER INCLUDING, WITHOUT LIMITATION,
DAMAGES FOR LOSS OF GOODWILL, WORK STOPPAGE, COMPUTER FAILURE OR MALFUNCTION, OR
90
Page 91

ANY AND ALL OTHER COMMERCIAL DAMAGES OR LOSSES, EVEN IF SUCH PARTY HAD BEEN
INFORMED, OR OUGHT TO HAVE KNOWN, OF THE POSSIBILITY OF SUCH DAMAGES. THE JASPER
SOFTWARE AND UNDERLYING TECHNOLOGY ARE NOT FAULT-TOLERANT AND ARE NOT DESIGNED,
MANUFACTURED OR INTENDED FOR USE OR RESALE AS ON-LINE CONTROL EQUIPMENT IN
HAZARDOUS ENVIRONMENTS REQUIRING FAIL-SAFE PERFORMANCE, SUCH AS IN THE OPERATION OF
NUCLEAR FACILITIES, AIRCRAFT NAVIGATION OR COMMUNICATION SYSTEMS, AIR TRAFFIC CONTROL,
DIRECT LIFE SUPPORT MACHINES, OR WEAPONS SYSTEMS, IN WHICH THE FAILURE OF THE JASPER
SOFTWARE OR UNDERLYING TECHNOLOGY OR PRODUCT COULD LEAD DIRECTLY TO DEATH,
PERSONAL INJURY, OR SEVERE PHYSICAL OR ENVIRONMENTAL DAMAGE ("HIGH RISK ACTIVITIES").
LICENSOR SPECIFICALLY DISCLAIMS ANY EXPRESS OR IMPLIED WARRANTY OF FITNESS FOR HIGH
RISK ACTIVITIES. USER WILL NOT KNOWINGLY USE, DISTRIBUTE OR RESELL THE JASPER SOFTWARE
OR UNDERLYING TECHNOLOGY OR PRODUCTS FOR HIGH RISK ACTIVITIES AND WILL ENSURE THAT
ITS CUSTOMERS AND END-USERS OF ITS PRODUCTS ARE PROVIDED WITH A COPY OF THE NOTICE
SPECIFIED IN THIS SECTION.
91
 Loading...