

Page 1

Phaser® 6250 Color Laser Printer
2-Sided Printing
This topic includes:
■ "Automatic 2-Sided Printing" on page 2-26
■ "Binding Preferences" on page 2-27
■ "Manual 2-Sided Printing" on page 2-29
■ "Manual 2-Sided Printing Using Tray 1 (MPT)" on page 2-30
Automatic 2-Sided Printing
Your printer must be a 6250DP, 6250DT, or 6250DX to perform automatic 2-sided printing.
Guidelines
To print a 2-sided document, verify that you are using the following weight ranges:
Weight Tray
65–163 g/m2 (37–60 lb. Cover)
65–130 g/m2 (17–32 lb. Bond)
120–163 g/m2 (81–110 lb. Book)
(Glossy Coated Paper)
120–163 g/m
(Thin card stock)
2
(81–110 lb. Book)
Tray 1 (MPT)
Trays 2-4
All Tra ys
Tray 1 (MPT)
Caution
DO NOT use any specialty media, envelopes, or labels for automatic 2-sided printing.
Damage caused by automatically printing specialty media using the duplex unit is not
covered under the Xerox warranty, service agreement, or Total Satisfaction Guarantee.
For best results with automatic 2-sided printing, do not use heavy toner coverage on the evennumbered pages of your print job.
Copyright © 2003 Xerox Corporation. All Rights Reserved.
2-26
Page 2
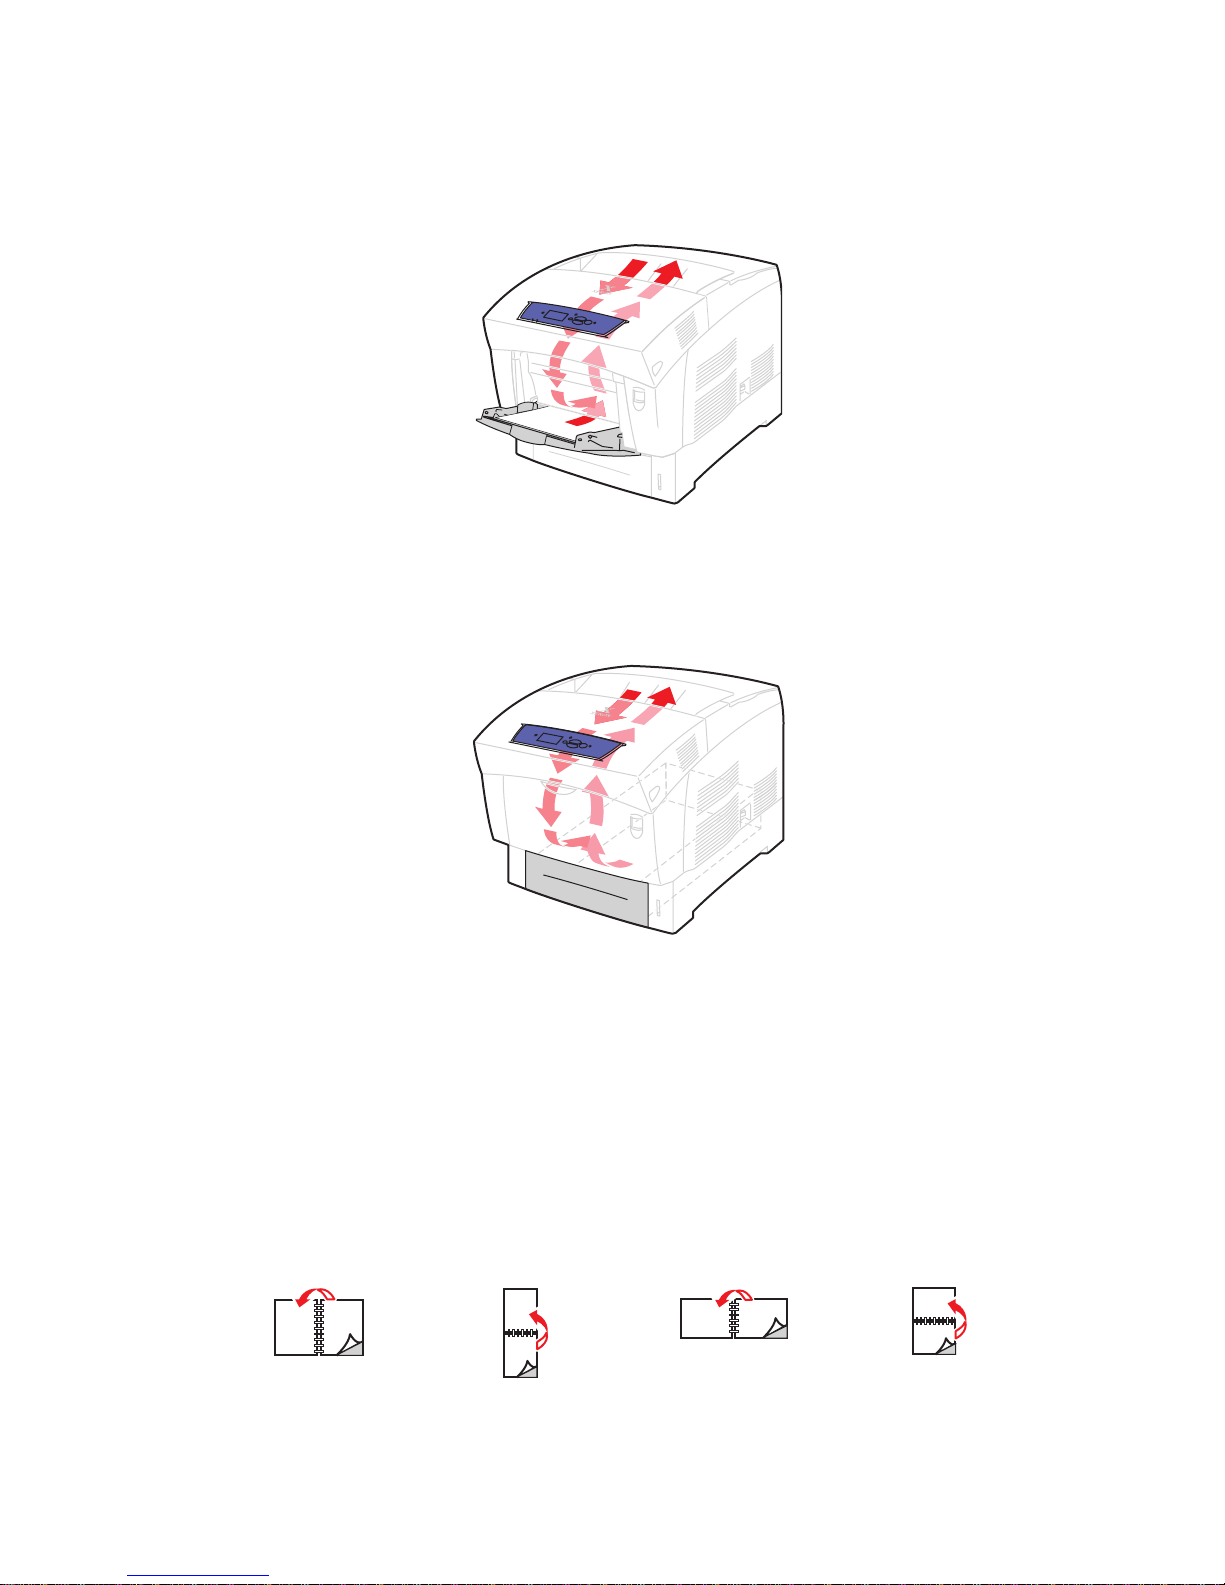
Tray 1 (MPT) Paper Path
2
The following graphic displays the printer’s paper path:
Trays 2-4 Paper Path
The following graphic displays the printer’s paper path:
2-Sided Printing
6250-09
Binding Preferences
Use the printer driver to select Portrait or Landscape orientation for the images on the page.
When you print 2-sided jobs, select the binding preference which determines how the pages
turn.
Portrait
Bind on Side Edge
Flip on Long Edge
Portrait
Bind on Top Edge
Flip on Short Edge
Landscape
Bind on Side Edge
Flip on Short Edge
Phaser® 6250 Color Laser Printer
2-27
6250-091
Landscape
Bind on Top Edge
Flip on Long Edge
Page 3

2-Sided Printing
PH
To perform automatic 2-sided printing:
1. Insert paper into the tray. For more information see the “Basic Printing” topic in this
section. Place the side to be printed with the odd-numbered pages face down with the top
of the page at the back of the tray. If using paper with pre-punched holes, place the holes
toward the right side of the tray when you are facing the front panel.
6250-058
Caution
If you change the type of paper in a tray, you must change the paper type on the front
panel to match the paper that you loaded. If you fail to do this, print-quality
problems can occur and the fuser can be damaged.
2. In the printer driver:
■ Select the appropriate tray.
■ Select the orientation.
■ Select 2-sided printing as described in the table below.
3. Click OK to accept the printer driver settings, then click OK to print.
Setting the Printer Driver for 2-Sided Printing
Operating System Steps
Windows 98 or
Windows Me
Windows 2000,
Windows XP, or
Windows Server 2003
Windows NT 1. Select File, then select Print.
1. Select File, then select Print.
2. Click Properties.
3. Select Setup, then select Print 2 Sides.
4. Select or deselect Bind On Top Edge.
1. Select File, then select Print.
2. Click Properties.
3. Select either Flip On Long Edge, or Flip On Short Edge in Print On
Both Sides (Duplex) on the Layout tab.
2. Click Properties.
3. Select either Long Edge, or Short Edge in Print On Both Sides
(duplex printing) on the Page Setup tab.
Phaser® 6250 Color Laser Printer
2-28
Page 4

Setting the Printer Driver for 2-Sided Printing (Continued)
Operating System Steps
Mac OS 9 1. Select File, then select Print.
2. Select Layout.
3. Select Print on Both Sides.
4. Click the Binding icon that matches the edge to bind.
2-Sided Printing
Mac OS X, version
10.1 (and higher)
1. Select File, then select Print.
2. Select Duplex.
3. Select Print on Both Sides.
4. Click the Binding icon that matches the edge to bind.
Manual 2-Sided Printing
Guidelines
If the printer does not have automatic 2-sided printing capability, or you want to print on a
paper type that cannot be automatically printed on two sides, print manually on both sides of
the paper by following the procedures in this section.
■ Use any tray for manual 2-sided printing.
■ For best opacity and feed reliability, use Plain Paper that is 90 g/m
heavier paper.
■ Increase the top margin on side 1 to at least 12 mm (0.48 in.).
■ You must print all the odd-numbered pages first. Reinsert the printed pages in the same
tray from which the odd-numbered pages were taken, then print the even-numbered pages.
■ Do not use heavy toner coverage on side 1 of a manual 2-sided print job.
■ 2-sided printing on specialty paper can shorten the life of printer components.
2
(24 lb. Bond) or
Print quality may be degraded on the second side of manual 2-sided printing jobs. For best
results, follow the prompt on the front panel to perform manual 2-sided printing (duplex
printing).
Phaser® 6250 Color Laser Printer
2-29
Page 5

2-Sided Printing
Manual 2-Sided Printing Using Tray 1 (MPT)
Printing Side 1
1. Insert paper into Tray 1 (MPT). For more information, see the “Basic Printing” topic in
this section. Place the side to be printed facedown with the top of the page entering the
printer first. If using paper with pre-punched holes, place the holes toward the right side
of the tray when you are facing the front panel.
6250-072
Caution
If you change the type of paper in a tray, you must change the paper type on the front
panel to match the paper that you loaded. If you fail to do this, print-quality
problems can occur and the fuser can be damaged.
2. In the printer driver, select Tray 1 (MPT).
3. Send the job to the printer so that the odd-numbered pages (side 1) are printed.
Printing Side 2
1. Insert the printed paper with side 1 faceup, and the top of the page at the back of Tray 1
(MPT). If using paper with pre-punched holes, the holes toward the left side of the tray
when you are facing the front panel.
PHASER 6250
6250-056
Phaser® 6250 Color Laser Printer
2-30
Page 6

2-Sided Printing
2. In the printer driver, select Tray 1 (MPT) as the paper source.
3. Send the job to the printer so that the even-numbered pages (side 2) are printed.
Manual 2-Sided Printing Using Trays 2-4
Printing Side 1
1. Insert paper into the tray . Place the side to be printed faceup with the top of the page at the
front of the tray. If using paper with pre-punched holes, place the holes toward the right
side of the tray when you are facing the front panel.
6250-041
2. In the printer driver, select the tray containing the paper.
3. Send the job to the printer so that the odd-numbered pages (side 1) are printed.
Printing Side 2
1. Insert the printed paper with side 1 facedown, and the top of the page at the front of the
tray. If using paper with pre-punched holes, place the holes toward the left side of the tray
when you are facing the front panel.
6250-040
2. In the printer driver, select the tray containing the paper.
3. Send the job to the printer so that the even-numbered pages (side 2) are printed.
Phaser® 6250 Color Laser Printer
2-31
 Loading...