


Phaser
®
6200

저작권
© 2002, Xer ox Corporation.All Rights Reserved .
물의 내용은
Xerox Corporation의 승인
없이는 어떤 형태로든 재생산될 수 없습니다
미국의 저작권법에 의해 비간행물 권리를 보호 받습니다.본 출판
.
저작권 보호에 의해 주장되는 권리는 저작권을 취득할 수 있는 모든 형태의 자료와 현재 제정법과 사법에 의해 허용되거
나 이하에서 인정되는 정보를 포함하며, 제약 없이, 스타일, 서식, 아이콘, 화면 디스플레이 등과 같은 화면 상에 표시
되는 소프트웨어 프로그램에서 생성되는 자료를 포함합니다
®
XEROX
TekColor
, The Document Company®, stylized X, CentreWare®, DocuPrint®, Made For Each Other®, Phaser®, PhaserShare®,
®
아이콘 및
WorkSet
®
은
Xerox Corporation의 등록
PhaserSMART™, PhaserSy m ™, Phase rTools™, 및 TekColor™
®
, Acrobat®, Acroba t® Reader®, Illustrator®, PageMaker®, Photos hop®, PostScript®, ATM®, Adobe Garamond®,
Adobe
®
Birch
, Carta®, Mythos®, Quake® 및 Tekton
IntelliSelect™는 Adobe Systems Incorporated나 그
®
Apple
, LaserWriter®, LocalTalk®, Macintosh®, Mac® OS, AppleTalk®, TrueType2®, Apple Chancery®, Chicago®, Geneva®,
Monaco
®
및 New York
®
은 등록 상표이며
®
은 등록 상표이며
자회사의 상표이며 특정 지역에서는 등록 상표입니다
QuickDraw™는 Apple Computer Incorporate d의
Marigold™ 및 Oxford™는 AlphaOmega Typography의
Avery™는 Avery Dennison Corporation의
PCL
®
및 HP-GL
®
은
Hewlett-Packard Corporation의 등록
Hoefler Text는 Hoefler Type Foundry가
®
ITC Avant Guard Gothic
Zapf Dingbats
®
은
, ITC Bookman®, ITC Lubalin Graph®, ITC Mona Li sa®, ITC Symbol®, ITC Zapf Chancery® 및 ITC
International Typeface Corporation의 등록
상표입니다
디자인했습니다
.
상표입니다
이름은
. infoSMART™, PhaserPort™, PhaserPrint™,
Xerox Corporation의
상표입니다
, Adobe Jenson™, Adobe Brilli a nt Screens™ 기술 및
상표입니다
상표입니다
.
.
상표입니다
.
.
상표입니다
.
.
.
.
Bernhard Modern™, Clarendon™, C oronet™, Helvetica™, New Centur y Schoolbook™, Optima™, Pal a tino™, St em pel
Garamond™, Times™ 및 Univers™는 Linotype-Hell AG 및 그
®
MS-DOS
TrueType
및 Windows®는
®
형식의
Wingdings™는 Microsoft Corporation의
TrueType은 Apple Computer, Inc의 등록
Microsoft Corporation의 등록
상표입니다
Albertus™, Arial™, Gill Sans™, Joanna™ 및 Times New Roman™은 Monotype Corporation의
®
는
Antique Olive
M. Olive의 등록
Eurostile™은 Nebiolo의
®
및 NetWare®는
Novell
®
및
Sun Microsystems®는
Sun
Incorporated의 등록
Incorporated가 독점
®
UNIX
는
X/Open Company Limited를 통해 독점
NERGY STAR
E
결정했습니다
상표입니다
사용권을 갖고 있습니다
®
파트너인
. E
NERGY STAR
상표입니다
Novell, Incorporated의 등록
Xerox Corpo ration은 이
상표입니다
.
.
Sun Microsystems, Incorporated의 등록
. SPARCstation™은 SPARC International, Incorporated의
.
사용권을 가진 미국과 기타 국가에서의 등록 상표입니다
제품이 에너지 효율성에 대한
이름 및
로고는 미국의 등록 상표입니다
자회사의 상표입니다
상표입니다
제품입니다
.
상표입니다
.
.
. WingD in g s는 Microsoft Corporation의
상표입니다
.
상표입니다
. SPARC®는
SPARC International,
상표이며
NERGY STAR
E
의 지침을 충족하는 것으로
.
상표이며
.
Sun Microsystems,
.
이 제품은
이 제품은 미국 특허권
John Halleck이
4,558,302 하에
작성한
SHA-1
코드를 사용하며, 이 코드는 이 작성자의 승인 하에 사용됩니다
허가된
LZW의
기타 표시는 관련 회사의 상표 또는 등록 상표입니다
Phaser 6200 컬러
PANTONE이
Manuals(PANTONE 컬러 참조
PANTONE 컬러
다.승인된 사용 계약의 최신 목록은
프린터에 의해 생성된
PANTONE
확인한 단색 컬러 표준과 일치하지 않을 수도 있습니다.정확한 컬러는 최신
설명서)를 이용하십시오
시뮬레이션은 승인된 본 제품의
Pantone 사용 계약
Pantone, Inc에
실행을 포함합니다
.
.
®
컬러는 4가지 또는 3가지 컬러 프로세스 시뮬레이션이며
PANTONE Color Reference
.
소프트웨어 패키지로 구동할 때만 얻을 수 있습니
문의하십시오
.
.

목차
목차
목차목차
리소스
오류 메시지
인쇄 품질 진단
교정
용지 걸림
일반 프린터 유지 보수
토너 카트리지 교체
. . . . . . . . . . . . . . . . . . . . . . . . . . . . . . . . . . . . . . . . . . . . . . . . . . . . . . .1
. . . . . . . . . . . . . . . . . . . . . . . . . . . . . . . . . . . . . . . . . . . . . . . . . . . . . . . . . . . . . . . 1
. . . . . . . . . . . . . . . . . . . . . . . . . . . . . . . . . . . . . . . . . . . . . . . . .2
. . . . . . . . . . . . . . . . . . . . . . . . . . . . . . . . . . . . . . . . . . . . . . . . . . . . . . . . .3
. . . . . . . . . . . . . . . . . . . . . . . . . . . . . . . . . . . . . . . . . . . . . . . . . . . . .4
용지 걸림 예방
용지 걸림의 원인은 무엇입니까
정착기에 용지 걸림
양면 인쇄 유니트에 용지 걸림
다용도 용지함에 용지 걸림
정합 롤러에 용지 걸림
용지함에 용지 걸림
. . . . . . . . . . . . . . . . . . . . . . . . . . . . . . . . . . . . . . . . . . . . . . . . . . . . . . . . . 5
? . . . . . . . . . . . . . . . . . . . . . . . . . . . . . . . . . . . . . . . . . . 5
. . . . . . . . . . . . . . . . . . . . . . . . . . . . . . . . . . . . . . . . . . . . . . . . . . . . . 5
. . . . . . . . . . . . . . . . . . . . . . . . . . . . . . . . . . . . . . . . . . . . . 7
. . . . . . . . . . . . . . . . . . . . . . . . . . . . . . . . . . . . . . . . . . . . . . . . 8
. . . . . . . . . . . . . . . . . . . . . . . . . . . . . . . . . . . . . . . . . . . . . . . . . . . 9
. . . . . . . . . . . . . . . . . . . . . . . . . . . . . . . . . . . . . . . . . . . . . . . . . . . . 11
. . . . . . . . . . . . . . . . . . . . . . . . . . . . . . . . . . . . . . . . . .14
프린터 외부 청소
농도 센서 청소
. . . . . . . . . . . . . . . . . . . . . . . . . . . . . . . . . . . . . . . . . . . . . . . . . . . . . . 14
. . . . . . . . . . . . . . . . . . . . . . . . . . . . . . . . . . . . . . . . . . . . . . . . . . . . . . . . 15
. . . . . . . . . . . . . . . . . . . . . . . . . . . . . . . . . . . . . . . . . . . .17
이미징 유니트 교체
정착기 교체
. . . . . . . . . . . . . . . . . . . . . . . . . . . . . . . . . . . . . . . . . . . . . . . . . 2 0
전송 롤러 교체
급지 롤러 교체
재포장 지시 사항
색인
. . . . . . . . . . . . . . . . . . . . . . . . . . . . . . . . . . . . . . . . . . . . . . . . . . . . . . . .29
. . . . . . . . . . . . . . . . . . . . . . . . . . . . . . . . . . . . . . . . . . .18
. . . . . . . . . . . . . . . . . . . . . . . . . . . . . . . . . . . . . . . . . . . . . . . .23
. . . . . . . . . . . . . . . . . . . . . . . . . . . . . . . . . . . . . . . . . . . . . . .25
. . . . . . . . . . . . . . . . . . . . . . . . . . . . . . . . . . . . . . . . . . . . . .27
저작권
© 2002 Xerox Corporation. All Rights Rese rv ed. i

Phaser ® 6200
리소스
리소스
리소스리소스
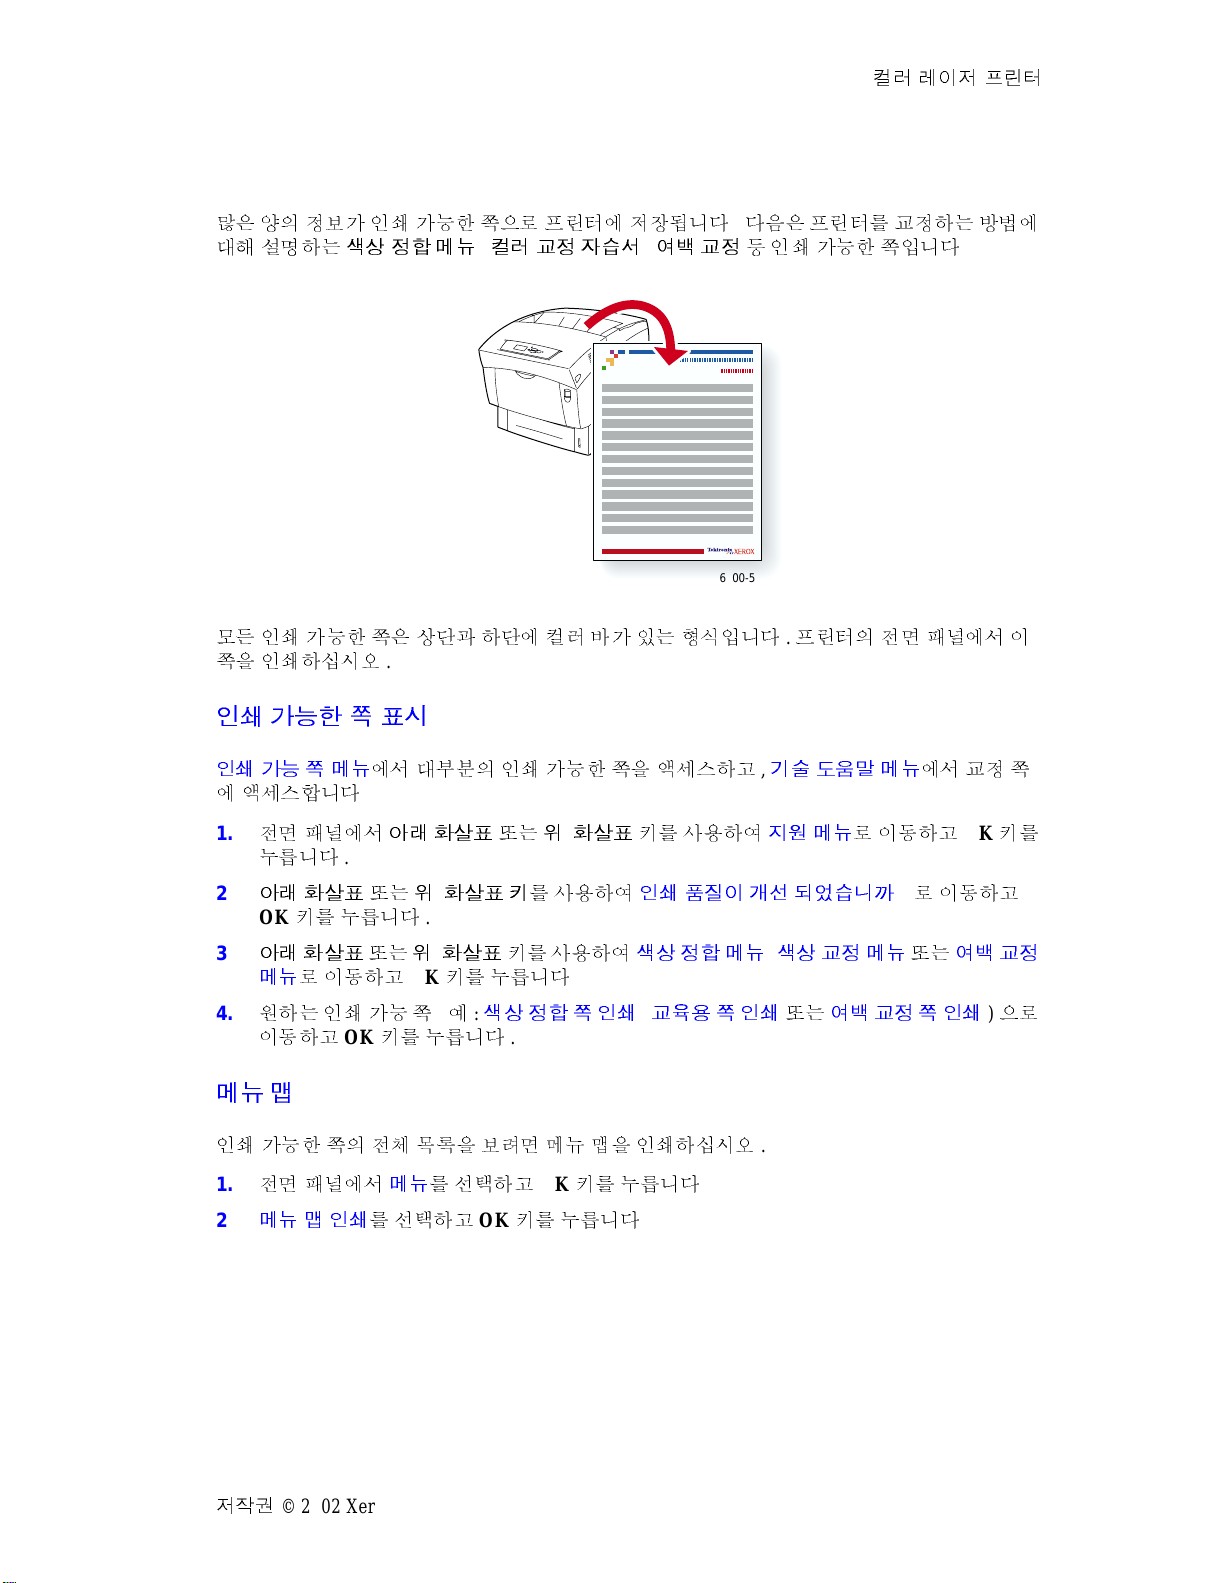
많은 양의 정보가 인쇄 가능한 쪽으로 프린터에 저장됩니다.다음은 도움말을 볼 수 있는 리소
스를 나열하는 도움말 설명서로
인쇄가 가능합니다
.
6200-51
컬러 레이저 프린터
모든 인쇄 가능한 쪽은 상단과 하단에 컬러 바가 있는 형식입니다.프린터의 전면 패널에서 이
쪽을 인쇄하십시오
.
인쇄 가능한 쪽 표시
인쇄 가능 쪽 메뉴에서
1.
전면 패널에서 아래 화살표 또는 위화살표 키를 사용하여 인쇄 가능 쪽 메뉴로
OK
키를 누릅니다
2.
아래 화살표 또는 위화살표 키를 사용하여 도움말을 인쇄하십시오 같이 원하는 인쇄 가능
한 쪽으로 이동하고
인쇄 가능한 쪽의 전체 목록을 보려면 메뉴 맵을 인쇄하십시오
다음과 같이 이 쪽에 액세스합니다
.
OK 키를
누릅니다
.
.
이동하고
.
오류 메시지
프린터에 문제가 있으면 전면 패널 디스플레이
와 문제를 해결하는 방법에 대한 자세한 내용을 보려면 i단추
Phaser 6200
(1)에
오류 메시지가 표시됩니다.오류 메시지
(2)를
누르십시오
OK
.
12
저작권
© 2002 Xerox Corporation. All Rights Reserved. 1
6200-69

PHASER® 6200 COLOR PRINTER
Help Guide
Resources
CentreWare® Internet Services (IS)
Printer management tool that helps System Administrators:
• Configure and manage multi-vendor printers.
• Provide remote diagnostics and troubleshooting for printer problems.
• Monitor printer and consumable status.
• Hotlink to software updates and Technical Support.
CentreWare IS uses TCP/IP to communicate directly with the printer's embedded web server and runs on any
computer with a web browser.
To launch CentreWare IS, enter your printer's IP address in a web browser (xxx.xxx.xxx.xxx). The IP address is
listed on your front panel. To view the IP Address on the front panel, highlight Printer Identification and press OK.
For detailed information on CentreWare IS software, refer to its online help.
PhaserSMARTTM (English Only)
Automated printer diagnostics and troubleshooting through the web and your web browser.
Launch CentreWare IS: From a web browser, enter your printer's IP address. Select Support. Select the
Technical Support link to access PhaserSMART.
For Windows: From your Phaser printer driver properties, select the Troubleshooting tab. Select the
PhaserSMART Technical Support web link.
infoSMART
This is the same troubleshooting knowledge base used by Xerox Customer Support. Provides solutions for
printer issues, such as error codes, print quality, media jams, software installation, networking, and more.
www.xerox.com/officeprinting/infoSMART
TM
(English Only)
Interactive Documentation CD-ROM
Detailed printer information in the form of topics, instructions, and videos. Information includes printer setup,
networking, loading trays/paper, driver and printer features, troubleshooting, and support.
Front panel
The front panel offers a suite of tools along with information pages to help solve print-quality, paper feed,
supplies, and printer administration problems.
Page 1 of 3
Button
You can press the Information button at any time to get additional information about the message displayed
on the front panel.
Printable pages
To print a Menu Map, navigate the front panel and its menu items:
1. Select Menus and press OK.
2. Select Print Menu Map and press OK.
Driver help
If you are using Windows 95/98, Windows 2000/XP, or Windows NT, install the driver from your printer's software CDROM and access the printer driver to:
• Link to relevant web sites from the Troubleshooting tab.
• View information about the printer features on the driver tabs by clicking the Help button on the tab.
• View troubleshooting information by clicking a Help button, then selecting the Troubleshooting Guide.
Troubleshooting
Paper jams
PhaserSMART
After you launch PhaserSMART, select the Troubleshooting Guide to help identify your printer's problem. If your printer
detects a jam error, PhaserSMART will point you to a specific solution. Otherwise, select Media Jams for PhaserSMART
to lead you to the best solution.
Interactive Documentation CD-ROM
For paper jams and error messages, see the Troubleshooting section.
Driver help
In the Troubleshooting Guide, refer to Error Messages for Paper Jams.
Print-quality problems
Ensure the paper type selected in the front panel matches the paper loaded in the trays and the Multi-Purpose Tray
(MPT). Tray settings can be found by selecting Printer Setup Menu and then Tray Setup Menu.
The following table provides a list of printable pages that are accessible from the Support Menu
and Improve Print Quality?:
Condition Printable page
For additional paper tips: Print Paper Tips Page
To troubleshoot print-quality symptoms: Print Diagnostic Pages
To correct colors: Print-Quality Tips Page
Page 2 of 3
PhaserSMART
After you launch PhaserSMART, select the T roubleshooting Guide to help identify your printer's problem. Starting with
Print/Image Quality Issues, PhaserSMART will walk you through a decision tree to resolve print-quality problems.
Interactive Documentation CD-ROM
For print-quality problems, see the Troubleshooting section.
Networking problems
Printable pages
To obtain information on printer options, configurations and settings:
1. On the front panel, highlight Printable Pages and press OK.
2. Scroll to Print Configuration Pages and press OK.
To obtain information on network, parallel and USB connections and setting:
1. On the front panel, highlight Menus and press OK.
2. Scroll to Connection Setup Menu and press OK.
3. Scroll to Print Connection Setup Page and press OK.
Interactive Documentation CD-ROM
For network setup and troubleshooting, see the Networking section.
Replacing consumables
Interactive Documentation CD-ROM
Refer to the Support section for instructions and videos that walk you through the replacement of consumables.
Instruction Sheets
Each consumable comes with instructions included in the original packaging.
Web links
To link to product and supplies information, download printer
drivers, view documents, and access support information:
To access the troubleshooting knowledge base
used by Xerox Customer Support staff:
To link to a color resource for tools and information, such as
interactive tutorials, color printing templates, helpful tips, and
customized features to meet your individual needs:
To view technical support information:
www.xerox.com/officeprinting
www.xerox.com/officeprinting/infoSMART
www.colorconnection.xerox.com
www.xerox.com/officeprinting/6200support
To order Xerox supplies:
To find your local sales and support center:
Page 3 of 3
www.xerox.com/officeprinting/6200supplies
www.xerox.com/officeprinting/contacts
인쇄
인쇄 품질
인쇄인쇄
품질 진단
품질품질
진단
진단진단
Phaser® 6200
컬러 레이저 프린터
많은 양의 정보가 쪽으로 프린터에 저장됩니다.다음은 인쇄 품질 문제의 해결 방안을 설명하는
인쇄 가능한 인쇄 품질 진단 쪽입니다
모든 인쇄 가능한 쪽은 상단과 하단에 컬러 바가 있는 형식입니다.프린터의 전면 패널에서 이
쪽을 인쇄하십시오
.
.
6200-51
인쇄 가능한 쪽 표시
인쇄 가능 쪽 메뉴에서
다음과 같이 이 쪽에 액세스합니다
.
1.
전면 패널에서 아래 화살표 또는 위화살표 키를 사용하여 인쇄 가능 쪽 메뉴로
OK
키를 누릅니다
2.
아래 화살표 또는 위 화살표 키를 사용하여 진단 쪽 인쇄 같이 원하는 인쇄 가능한 쪽으로
이동하고
OK
.
키를 누릅니다
.
메뉴 맵
인쇄 가능한 쪽의 전체 목록을 보려면 메뉴 맵을 인쇄하십시오
1.
전면 패널에서 메뉴를
2.
메뉴 맵 인쇄를
선택하고
선택하고
OK
OK
키를 누릅니다
키를 누릅니다
.
.
.
이동하고
저작권
© 2002 Xerox Corporation. All Rights Reserved. 2
Test Pattern A 600 x 600
Test Pattern A 600 x 600
P 6200 P 6200P 6200 P 6200
P 6200 P 6200 P 6200 P 6200
P 6200 P 6200
P 6200 P 6200
P 6200 P 6200
P 6200 P 6200
8 mm
8 mm
192 mm
PHASER® 6200 COLOR PRINTER
Diagnose Print Quality
Problem
Dark Lines/Smudges or Streaks-
All Colors
Black and/or colored areas appear on the page in
all colors and/or in non-print areas.
Repeating Defects
Marks or voids recur uniformly in only one color.
Marks of any color or voids recur uniformly in all colors
and/or in non-printed areas.
Solution
1. From the printer's front panel Support Menu select Improve
Print Quality?, then select Print Paper Tips Page and
press OK.
2. Ensure the paper you are using is the correct type for the
printer and is properly loaded.
3. Ensure the paper loaded in the tray matches the paper
type selected on the printer's front panel and in the
printer driver.
4. From the printer's front panel Support Menu select Improve
Print Quality?, then select Remove Print Smears and press
OK. Three cleaning pages will run through the printer.
5. If the problem continues, replace the Imaging Unit.
1. Replace the Imaging Unit if defects occur
every:
23.3 mm (.91 in.)
28.5 mm (1.12 in.)
62.0 mm (2.44 in.)
131.8 mm (5.19 in.)
2. Replace the Transfer Roller if defects occur every:
63.6 mm (2.5 in.)
3. If the defect occurs every:
82.25 mm (3.24 in.)
a. From the printer's front panel Support Menu select
Improve Print Quality?, then select Remove Print
Note: Print the Repeating Defects
Page for guides to identify defect.
Color Misregistration
Color has shifted outside of the designated area
or has been superimposed over another color
area.
Smears and press OK.
b. If the problem continues, replace the Fuser.
1. Ensure the printer is on a solid, level, flat surface.
2. If the horizontal registration is off:
a. From the front panel Support Menu, select Improve Print
Quality?, and press OK.
b. Select Color Registration Menu and Press OK.
c. Follow the instructions on the Color Registration Page
just printed.
Abc Defg Hijk
Abc Defg Hijk Lmnop
Qrstuvw XYZ
123456789
Abc Defg Hijk Lmnop
Qrstuvw XYZ 123456789
P 6200 P 6200 P 6200 P 6200
P 6200 P 6200 P 6200
261 mm
3. If the vertical registration is off:
a. Turn the printer off and then back on to correct.
Page 1 of 3
Problem
Solution
Incomplete Fusing
Toner appears to be pulled off print, or is
easy to rub off.
Image Offset
Toner appears to have been pulled off the page and
placed about 82.25 mm down the page from where it
should be.
1. From the printer's front panel Support Menu select
Improve Print Quality?, then select Print Paper Tips Page.
2. Ensure the paper you are using is the correct type for the
printer and is properly loaded.
3. Ensure the paper loaded in the tray matches the paper type
selected on the printer's front panel and in the printer driver.
4. If the problem persists, select the appropriate Tray Setup
Menu for the tray you are using and set the paper type to
the next heaviest type of paper. Refer to the Paper Tips
Page for media types and weight.
Note: To access the Paper Type Menu, open
and close the selected paper tray or re-insert
the paper loaded in the MPT. The front panel
will then prompt you to select the paper type.
1. From the printer's front panel Support Menu select Improve
Print Quality?, then select Print Paper Tips Page and
press OK.
2. Ensure the paper you are using is the correct type for the
printer and is correctly loaded in tray.
3. Ensure the paper loaded in the tray matches the paper type
selected on the printer's front panel and in the printer driver.
4. If the problem persists, select the appropriate Tray Setup
Menu for the tray you are using and set the paper type to
the next lightest type of paper. Refer to the Paper Tips
Page for media types and weight.
Note: To access the Paper Type Menu, open
and close the selected paper tray or re-insert
the paper loaded in the MPT. The front panel
will then prompt you to select the paper type.
Page 2 of 3
Problem
Solution
Printing Is Too Light or Too Dark
in All Colors
Transparency Print Quality
Possible Print Quality defects occurring on
Transparency media such as:
Light and/or Dark spots
Smeared Toner
Light Bands on print
1. Try a different Color Matching mode. From the printer's front
panel Support Menu select Improve Print Quality?, then
select Print-Quality Tips Page. and press OK.
Note: The TekColor Correction set to Automatic provides the
best results for most documents.
2. If the print is too light, verify that the printer driver Print
Quality Mode or Front Panel Defaults is not set to Draft
Mode.
3. Adjust the light or darkness levels. From the front panel
Support Menu select Improve Print Quality?, then select
Calibrate Colors Menu, then selet Print Tutorial Page. Follow
the procedure for Lighten/Darken Colors.
Use only Phaser® 6200 Transparency.
Using non-Phaser® 6200 Transparencies may cause printquality problems or damage the printer's Fuser.
Damage caused by using non-supported media will not be
covered under the warranty, service agreement or Total
Satisfaction Guarantee.
For a list of Transparency part numbers, refer to the printer's
Paper Tips Page.
See www.xerox.com/officeprinting/infoSMART on the world wide web for more on-line support information.
Page 3 of 3
교정
교정
교정교정
Phaser® 6200
컬러 레이저 프린터
많은 양의 정보가 인쇄 가능한 쪽으로 프린터에 저장됩니다.다음은 프린터를 교정하는 방법에
대해 설명하는 색상 정합 메뉴, 컬러 교정 자습서, 여백 교정 등 인쇄 가능한 쪽입니다
6200-51
모든 인쇄 가능한 쪽은 상단과 하단에 컬러 바가 있는 형식입니다.프린터의 전면 패널에서 이
쪽을 인쇄하십시오
.
.
인쇄 가능한 쪽 표시
인쇄 가능 쪽 메뉴에서
에 액세스합니다
대부분의 인쇄 가능한 쪽을 액세스하고,기술 도움말 메뉴에서
.
교정 쪽
1.
전면 패널에서 아래 화살표 또는 위화살표 키를 사용하여 지원 메뉴로
누릅니다
2.
아래 화살표 또는 위 화살표 키를
OK
3.
아래 화살표 또는 위화살표 키를 사용하여 색상 정합 메뉴, 색상 교정 메뉴 또는 여백 교정
메뉴로
4.
원하는 인쇄 가능 쪽(예: 색상 정합 쪽 인쇄, 교육용 쪽 인쇄 또는 여백 교정 쪽 인쇄)으로
이동하고
.
키를 누릅니다
이동하고
OK
키를 누릅니다
.
OK
키를 누릅니다
사용하여 인쇄 품질이 개선 되었습니까?로 이동하고
.
.
이동하고
메뉴 맵
인쇄 가능한 쪽의 전체 목록을 보려면 메뉴 맵을 인쇄하십시오
1.
전면 패널에서 메뉴를
2.
메뉴 맵 인쇄를
선택하고
선택하고
OK
OK
키를 누릅니다
키를 누릅니다
.
.
.
OK
키를
저작권
© 2002 Xerox Corporation. All Rights Reserved. 3

PHASER® 6200 COLOR PRINTER
Color Registration Menu
The Color Registration Menu allows you to adjust the printer's cyan, magenta and yellow against black to ensure that the
colors are properly aligned.
Steps:
You can adjust the settings from -7 to +7 units. (left to right). See the images on the left. 0 is always the printer's current
color registration setting.
1. From the printer's front panel Support Menu, scroll to Improve Print Quality? and press OK.
2. Scroll to the Color Registration Menu and press OK to print this page.
3. To adjust the color registration, select Adjust Cyan and press OK.
a. Using the page just printed, select the number for the heaviest
Cyan area.
b. The Cyan lines above that number should form a straight line with the black lines.
c. Enter that number by using the Up Arrow or Down Arrow keys and press OK.
4. Repeat steps a through c for Adjust Magenta and Adjust Yellow.
Note: The adjustment value entered is stored and is now the new 0 positon for that color. Repeat the process until all
three colors are aligned at the 0 position.
5. Reprint this page to verify the adjustment.
-7-6-5-4-3-2-1 0+1+2+3+4+5+6+7
-7-6-5-4-3-2-1 0+1+2+3+4+5+6+7
Page 1 of 1
-7-6-5-4-3-2-1 0+1+2+3+4+5+6+7
PHASER® 6200 COLOR PRINTER
0
123
456
7
8
91011
12
13
14
151617
18
19
20
212223
24
25
26
27
28
29
303132
33
34
35
36
37
38
3940
41
42
43
44
45
46
47
48 49
50
51
52
53
54
Color Calibration Tutorial
Overview
Color calibration procedures adjust the printer for optimal color output. Color settings may need adjustment upon initial
printer set-up or when toners and imaging units are replaced. There are two procedures: Lighten/Darken Colors and
Balance Colors. If the overall image appears either too light or dark, use the Lighten/Darken Colors procedure. If a finer
adjustment of the primary colors (cyan, magenta and yellow) are needed, continue with the Balance Colors procedure.
Lighten/Darken Colors
The Lighten/Darken Colors procedure uniformly increases or decreases each primary color (cyan, magenta, yellow and
black) to produce a lighter or darker image.
Procedure:
1. Select Lighten/Darken Colors from the Calibrate Colors Menu and press OK. Use the printed Color Reference Page
to evaluate the lightness/darkness of the image. The printer's current Lighten/Darken Value is listed on the page.
2. Use the Up Arrow and Down Arrow keys to change the value from -5 (lightest) to 5 (darkest) and press OK.
3. The Color Reference Page automatically prints using the new lighten/darken value. Repeat this procedure until you
achieve the desired result.
4. To finish the procedure select one of the following:
Accept Changes and Continue: Saves the new value and returns to the Calibrate Colors Menu.
Accept Changes and Exit: Saves the new value and returns to the Main Menu.
Discard Changes and Exit: Returns to the Main Menu without saving
Balance Colors
The Balance Colors procedure sets the balance between the primary colors (cyan, magenta and yellow) to simulate black.
Each of the color balance pages (like the page illustrated on the right) contains a
large cluster of circles, numbered from 0 to 54, that vary in hue.
The center circle (0) should match or appear to blend with some portion of its
surrounding hexagonal gray ring. The circle can show a color shift if one or more
of the colors are printing with a different density. For example, if cyan is printing
lighter than normal, the circle will appear redder.
Procedure:
1. Select Balance Colors from the Calibrate Colors Menu; The Light Color Balance page prints automatically.
2. Follow the steps on the Light Color Balance page until the desired adjustment is achieved.
3. Follow the steps on the Dark Color Balance page until the desired adjustment is achieved.
Light Color Balance Adjustment
Page 1 of 1

PHASER® 6200 COLOR PRINTER
Calibrate for Margins
The Calibrate Margins Menu allows you to adjust the printer's imaging area relative to the edges of the paper. The
imaging area is shown as a dashed rectangle; the printer will not print outside this rectangle.
Step 1. Adjust Side 1 Margins. To move the dashed rectangle to the postion you want it on the page:
1. From the printer's front panel Support Menu, scroll to Improve Print Quality? and press OK.
2. Scroll to the Calibrate Margins Menu and press OK. Select Print Calibrate Margins Page and press OK to print this
page.
3. To move the dashed rectangle you see on the page printed to the position you want, use the front panel menu
items Adjust Side 1 "A" Margin and Adjust Side 1 "B" Margin as illustrated below.
4. Reprint this page to verify the adjustment.
You can adjust the settings from -40 to +40 units. The thickness of the rectangle's dashed lines is 1 unit. 12 units move
the rectangle 1 mm. The maximum distance the rectangle can be moved (-40 to +40) is 6.7 mm.
A+
Phaser 6200 Color Printer
Calibrate Margins
Phaser 6200 Color Printer
Calibrate Margins
Phaser 6200 Color Printer
Calibrate Margins
B- B+
Phaser 7700 Color Printer
Calibrate Margins
A-
Increase Adjust Side 1 "A"
Margin setting to move up.
Decrease Adjust Side 1 "A"
Margin setting to move down.
Decrease Adjust Side 1 "B"
Margin setting to move left.
Increase Adjust Side 1 "B"
Margin setting to move right.
Step 2. If the printer has the duplex option, adjust Side 2 Margins.
1. With Side 1 facing you, hold the print up to a strong light. Note the shadow of the solid lines printed on Side 2.
2. Use the front panel menu items Adjust Side 2 "A" Margin and Adjust Side 2 "B" Margin to move the Side 2 solid
lines until they align with the Side 1 rectangle. Reprint to verify your adjustment.
Phaser 6200
Cal
+
A
-
B
-
A
B
Phaser 6200
Cal
+
Page 1 of 1

Phaser® 6200
용지
용지 걸림
용지용지
이 섹션에는 용지 걸림을 발생시키는 원인 및 용지 걸림을 예방하는 정보뿐만 아니라 다음과 같
은 용지 걸림을 제거하는 방법도 포함되어 있습니다
■
■
■
■
■
걸림
걸림걸림
1 —
정착기에 용지 걸림
2 —
양면 인쇄 유니트에 용지 걸림
3 —
다용도 용지함에 용지 걸림
4 —
정합 롤러에 용지 걸림
5 —
용지함에 용지 걸림
— 5쪽
— 8쪽
— 9쪽
— 11쪽
참조
— 7쪽
참조
참조
.
참조
.
.
.
참조
.
.
컬러 레이저 프린터
2
3
4
5
용지
걸림이 있으면 프린터의 전면 패널 디스플레이
용지 걸림을 제거하는 방법에 대한 자세한 내용을 보려면 i단추
Phaser 6200
1
(1)에 용지
OK
6200-60
걸림 오류 메시지가 표시됩니다
(2)를
누르십시오
.
.
12
주의
토너가 용지에 정착되지 않아 만지면 지워지므로 걸린 용지에 있는 토너를 만지지 마
십시오
저작권
© 2002 Xerox Corporation. All Rights Reserved. 4
걸린 용지를 제거하는 데 비디오를 사용할 수 있습니다.비디오
는 인터렉티브 설명서
www.xerox.com/officeprinting/6200support/ 에
CD-ROM과 Xerox 웹
사이트
있습니다
.
6200-69

용지 걸림 예방
■
용지 및 투명 용지 걸림 횟수를 줄이려면
Xerox Phaser 상표
ROM에
있는 지원 안내서의
용지만 사용하십시오.공급품을 주문하려면 인터렉티브 설명서
공급품 섹션을 참조하거나
http://www.xerox.com/officeprinting/6200supplies
■
용지함이나 다용도 용지함에 용지를 공급하기 전에 서로 붙어 있는 용지를 폅니다
■
지원되는 용지 크기에 대해서는 인터렉티브 설명서
서의
지원되는 용지 섹션을 참조하십시오
■
적절한 용지 공급 지시 사항에 대해서는 인터렉티브 설명서
지 안내서의
■
깨끗하고 손상되지 않은 용지를 사용하십시오.뒤틀린 용지는 사용하지 마십시오
■
새로 개봉한 패키지의 용지를 공급하십시오
■
용지함의 채움선 위로 용지를 추가하지 마십시오
■
용지함 가이드가 용지 크기에 맞게 제대로 설정되어 있는지 확인하십시오
용지함 장착 섹션을 참조하십시오
Phaser® 6200
를 방문하십시오
CD-ROM에
.
.
.
.
프린터용으로 만들어진 용지와
Xerox 웹
사이트
.
있는 용지함 및 용지 안내
CD-ROM에
용지 걸림
CD-
.
있는 용지함 및 용
.
.
용지 걸림의 원인은 무엇입니까
용지 걸림은 다음 상황에서 가장 많이 발생합니다
■
프린터 드라이브에 잘못된 용지 종류가 선택된 경우
■
용지가 사양을 만족하지 않는 경우
■
용지함에 넣은 용지 크기나 무게가 용지함에서 지원되지 않는 경우
■
용지가 손상되거나, 축축하거나, 뒤틀리거나, 구겨지거나, 접힌 경우
■
용지를 제대로 공급하지 않은 경우
■
용지함의 측면 및 후면 가이드를 용지에 맞게 조정하지 않은 경우
■
용지함이 차거나 용지가 용지함의 채움선 위로 공급된 경우
?
.
정착기에 용지 걸림
다음 단계에 따라 용지 걸림을 해결하십시오.용지 걸림을 제거하는 방법에 대해서는 프린터 내
의 레이블을 참조하십시오
1.
프린터의 오른쪽 면에 있는 걸쇠를 사용하여 전면 문 B를 엽니다
.
.
Phaser® 6200 컬러
레이저 프린터
6200-65
5

2.
정착기 유니트의 양쪽 끝에 있는 두 개의 초록색 레버를 위쪽으로 돌립니다
경고
용지 걸림
.
정착기는 뜨겁습니다.화상을 예방하려면 정착기의 검정색 부분을 만지지
마십시오
3.
걸린 용지를 제거합니다.용지 조각이 모두 제거되었는지 확인하십시오
.
6200-61
.
6200-63
4.
정착기의 양쪽 끝에 있는 두 개의 초록색 레버를 아래쪽으로 완전히 밀어 넣습니다
Phaser® 6200 컬러
레이저 프린터
.
6200-62
6

5.
전면 문을 닫습니다
용지 걸림
.
6200-64
추가 정보를 보려면
PhaserSMART에
액세스하십시오
.
양면 인쇄 유니트에 용지 걸림
다음 단계에 따라 용지 걸림을 해결하십시오.용지 걸림을 제거하는 방법에 대해서는 프린터 내
의 레이블을 참조하십시오
1.
전면 문 B를 엽니다
2.
걸린 용지를 제거합니다.용지 조각이 모두 제거되었는지 확인하십시오
.
.
6200-65
.
Phaser® 6200 컬러
레이저 프린터
6200-19
7

3.
전면 문을 닫습니다
용지 걸림
.
6200-64
추가 정보를 보려면
PhaserSMART에
액세스하십시오
다용도 용지함에 용지 걸림
1.
다용도 용지함에서 걸린 용지를 제거합니다
2.
프린터의 전면에 있는 걸쇠를 사용하여 전면 문 A를 엽니다
.
.
6200-13
.
3.
걸린 용지를 제거합니다.용지 조각이 모두 제거되었는지 확인하십시오
Phaser® 6200 컬러
레이저 프린터
6200-66
.
8

4.
전면 문을 닫습니다
5.
다용도 용지함을 열고 용지를 공급합니다.채움선 위로 용지를 공급하지 마십시오.가이
.
6200-64
드가 용지에 평평하게 맞추어졌는지 확인하십시오.용지가 깨끗하고 서로 붙지 않았는지
확인하십시오
.
용지 걸림
6200-09
6200-08
정합 롤러에 용지 걸림
다음 단계에 따라 용지 걸림을 해결하십시오.용지 걸림을 제거하는 방법에 대해서는 프린터 내
의 레이블을 참조하십시오
1.
용지함 1을 완전히 제거합니다
.
.
6200-35
Phaser® 6200 컬러
레이저 프린터
9

2.
프린터 용지함 슬롯 내에서 위로 걸린 용지를 제거합니다.용지 조각이 모두 제거되었는지
확인하십시오
3.
용지함 1을 넣고 프린터에 완전히 밀어 넣습니다
.
6200-15
.
용지 걸림
4.
프린터의 전면에 있는 걸쇠를 사용하여 전면 문 A를 엽니다
6200-67
.
6200-66
Phaser® 6200 컬러
레이저 프린터
10

5.
걸린 용지를 제거합니다
6.
전면 문을 닫습니다
용지 걸림
.
.
6200-64
추가 정보를 보려면
PhaserSMART에
액세스하십시오
.
용지함에 용지 걸림
다음 단계에 따라 용지 걸림을 해결하십시오.용지 걸림을 제거하는 방법에 대해서는 프린터 내
의 레이블을 참조하십시오
1.
전면 패널에 지정된 용지함을 꺼냅니다
.
.
Phaser® 6200 컬러
레이저 프린터
6200-35
11

2.
걸린 용지를 제거합니다
3.
용지함에 용지를 올바로 공급했고 가이드가 용지에 평평하게 맞추어졌는지 확인합니다
.
6200-14
용지 걸림
.
6200-04
4.
프린터 용지함 슬롯 내에서 위로 걸린 용지를 제거합니다.용지 조각이 모두 제거되었는지
확인하십시오
.
6200-15
Phaser® 6200 컬러
레이저 프린터
12

5.
용지함을 넣고 프린터에 완전히 밀어 넣습니다
6.
프린터의 전면에 있는 걸쇠를 사용하여 전면 문 A를 엽니다
.
용지 걸림
6200-67
.
7.
걸린 용지를 제거합니다
8.
전면 문을 닫습니다
Phaser® 6200 컬러
.
.
레이저 프린터
6200-66
6200-64
13

일반
일반 프린터
일반일반
프린터 유지
프린터프린터
유지 보수
유지유지
보수
보수보수
Phaser® 6200
컬러 레이저 프린터
프린터는 농도 센서를 정기적으로 청소하고 다음과 같은 고객 교체 가능 소모품
교체 가능 장치
■
■
■
■
■
소모품이 부족하거나 수명이 다 되었다는 경고가 프린터의 전면 패널에 표시되면 프린터 공급
품을 추가로 주문하십시오.소모품이 비어 있거나 수명이 다 되었다는 오류 메시지가 전면 패널
에 표시되면 소모품을 교체해야 합니다.부품 번호 정보에 대해서는 인터렉티브 설명서
CD-ROM에
하려면
Phaser
설치 지시 사항이 포함되어 있습니다
주의
경고
(CRU)를
토너 카트리지(검정색, 사이안색, 마젠타색 및 노랑색
이미징 유니트
전송 롤러
정착기
급지 롤러
이미징 유니트를 직사 광선에 노출시키지 마십시오.그렇지 않으면 이미지가 희미해
지거나 밝은 영역 또는 진한 선이 생길 수 있습니다.환기구나 먼지를 일으키는 장치
주위에 프린터를 놓지 마십시오
— 20쪽
있는 지원 안내서의
® 6200 Supplies and Accessories 웹
교체하는 것 외에 다른 유지 보수가 거의 필요하지 않습니다
) — 17쪽
— 18쪽
— 23 쪽
참조
— 25쪽
참조
.
참조
.
.
참조
.
공급품 섹션을 참조하십시오.소모품 및 기타 공급품을 주문
사이트를 방문하십시오.각 항목의 패키지에는
.
.
참조
(CRC)과
.
.
고객
오래된 토너 카트리지, 이미징 유니트, 전송 롤러 또는 장착기를 태우지 마십시오
.
프린터 외부 청소
프린터 외부는 물기를 꼭 짠 부드러운 천으로 청소할 수 있습니다.저자극 중성 세제를 적신 천
을 사용하여 얼룩을 제거할 수 있습니다. 프린터에 직접 세제를 뿌리지 마십시오
경고
감전을 방지하려면 프린터를 끄고 전원 코드를 뽑은 다음 프린터를 청소하십시오
주의
프린터 청소에 진공 청소기를 사용하지 마십시오.프린터에 기름을 치지 마십시오
.
.
.
저작권
© 2002 Xerox Corporation. All Rights Reserved. 14

농도 센서 청소
일반 프린터 유지 보수
농도 센서가 더러우면 프린터는 인쇄를 중지합니다.농도 센서를 청소하려면
1.
프린터의 전면에 있는 걸쇠를 사용하여 전면 문 A를 엽니다
2.
전송 롤러를 꺼냅니다.전송 롤러의 양쪽 옆에 있는 오렌지색 탭을 꽉 잡고 부드럽게 들어
올립니다
.
.
6200-66
:
3.
마른 수건이나 면봉을 사용하여 농도 센서를 닦습니다
Phaser® 6200 컬러
레이저 프린터
6200-23
.
6200-12
15

주의
일반 프린터 유지 보수
센서에 에어 스프레이나 소독용 알코올을 사용하지 마십시오
4.
전송 롤러를 다시 설치합니다.전송 롤러의 둥근 끝을 프린터 안쪽에 움푹 패인 검정색 가
.
이드에 끼웁니다.찰깍 소리가 들릴 때까지 오렌지색 탭을 아래로 밀어 넣어 프린터에 전송
롤러를 잠급니다
.
6200-24
5.
전면 문을 닫습니다
6200-25
.
6200-64
Phaser® 6200 컬러
레이저 프린터
16

토너
토너 카트리지
토너토너
카트리지 교체
카트리지카트리지
교체
교체교체
토너 카트리지 교체
1
3
6-8x
6-8x
2
4
2.1
4.2
2.1
4.2
2.2
4.1
4.1
2.2
2.3
2.3
5
Pul l
Tir er
Pull
Tirare
Tirer
Zi eh en
Tirare
Tir ar
Ziehen
Puxe
Tirar
Puxe
Tr ek
Dr a
Trek
Dra
6
Cl ick
Decl ic
Click
Cl ic
Declic
Kl icken
Clic
Cl ic
Klicken
Cl ique
Clic
Clique
Kl ik
Kl ick
Klik
Klick
Phaser® 6200 컬러
레이저 프린터
17

이미징
이미징 유니트
이미징이미징
유니트 교체
유니트유니트
교체
교체교체
이미징 유니트 교체
1
3
2
4.5 kg
10 lbs
4
6
7
5
4x
Pull
Tirer
Tirare
Ziehen
Tirar
Puxe
8
Trek
Dra
Phaser® 6200
컬러 레이저 프린터
18

이미징 유니트 교체
8
10
9
11
4.5 kg
10 lbs
12
Phaser® 6200 컬러
레이저 프린터
13
19

정착기
정착기 교체
정착기정착기
교체
교체교체
정착기 교체
1
3
2
4
5
Phaser® 6200 컬러
레이저 프린터
6
7
20

정착기 교체
Phaser® 6200 컬러 레이저 프린터 21

정착기 교체
Phaser® 6200 컬러
레이저 프린터
22

전송
전송 롤러
전송전송
롤러 교체
롤러롤러
교체
교체교체
전송 롤러 교체
3.13.1
3.3
3.2
Phaser® 6200
컬러 레이저 프린터
23

6.2 6.2
전송 롤러 교체
TRANS
F
E
R
ROL
L
E
R
01
6-201
3-00
6.1
Phaser® 6200 컬러
레이저 프린터
24

급지
급지 롤러
급지급지
롤러 교체
롤러롤러
교체
교체교체
급지 롤러 교체
3
2.1
3.2
3.1
2.2
4.1
4.2
Phaser® 6200 컬러
레이저 프린터
25

6
급지 롤러 교체
6.1
7.2
6.2
7.1
Phaser® 6200 컬러
레이저 프린터
26

재포장
재포장 지시
재포장재포장
지시 사항
지시지시
사항
사항사항
Phaser® 6200
컬러 레이저 프린터
저작권
© 2002 Xerox Corporation. All Rights Reserved. 27

재포장 지시 사항
Phaser® 6200 컬러
레이저 프린터
28

색인
색인
색인색인
Phaser® 6200
컬러 레이저 프린터
ㄱ
고객 교체 가능 소모품
(CRC) 14
교정
3
급지 롤러
교체
25
ㄴ
농도 센서
ㄷ
다용도 용지함
용지 걸림
다용도 용지함에 용지 걸림
도움말 설명서
ㄹ
리소스
ㅅ
색상 교정 자습서
색상 정합 메뉴
15
8
1
1
3
3
8
교정 쪽
도움말 설명서
인쇄 품질 진단
인쇄 품질 진단
ㅈ
재포장 지시 사항
전면 패널
오류 표시
전면 패널의 정보
전송 롤러
교체
정착기
교체
용지 걸림
정착기에 용지 걸림
정합 롤러
용지 걸림
정합 롤러에 용지 걸림
지시 사항 시트
급지 롤러 교체
이미징 유니트 교체
재포장 지시 사항
전송 롤러 교체
정착기 교체
토너 카트리지 교체
3
1
2
2
27
1
1
23
20
5
5
9
25
27
23
20
9
18
17
ㅇ
양면 인쇄 유니트
용지 걸림
양면 인쇄 유니트에 용지 걸림
여백 교정
오류 메시지
용지 걸림
예방
제거
용지 걸림 예방
용지 걸림 제거
용지함
용지 걸림
용지함에 급지 오류
용지함에 용지 걸림
이미징 유니트
교체
인쇄 가능한 쪽
저작권
© 2002 Xerox Corporation. All Rights Reserved. 29
7
7
3
1
5
4
5
4
11
11
11
18
1
ㅊ
청소
농도 센서
프린터 외부
ㅌ
토너 카트리지
교체
17
ㅍ
프린터 청소
14
15
14
 Loading...