

Page 1
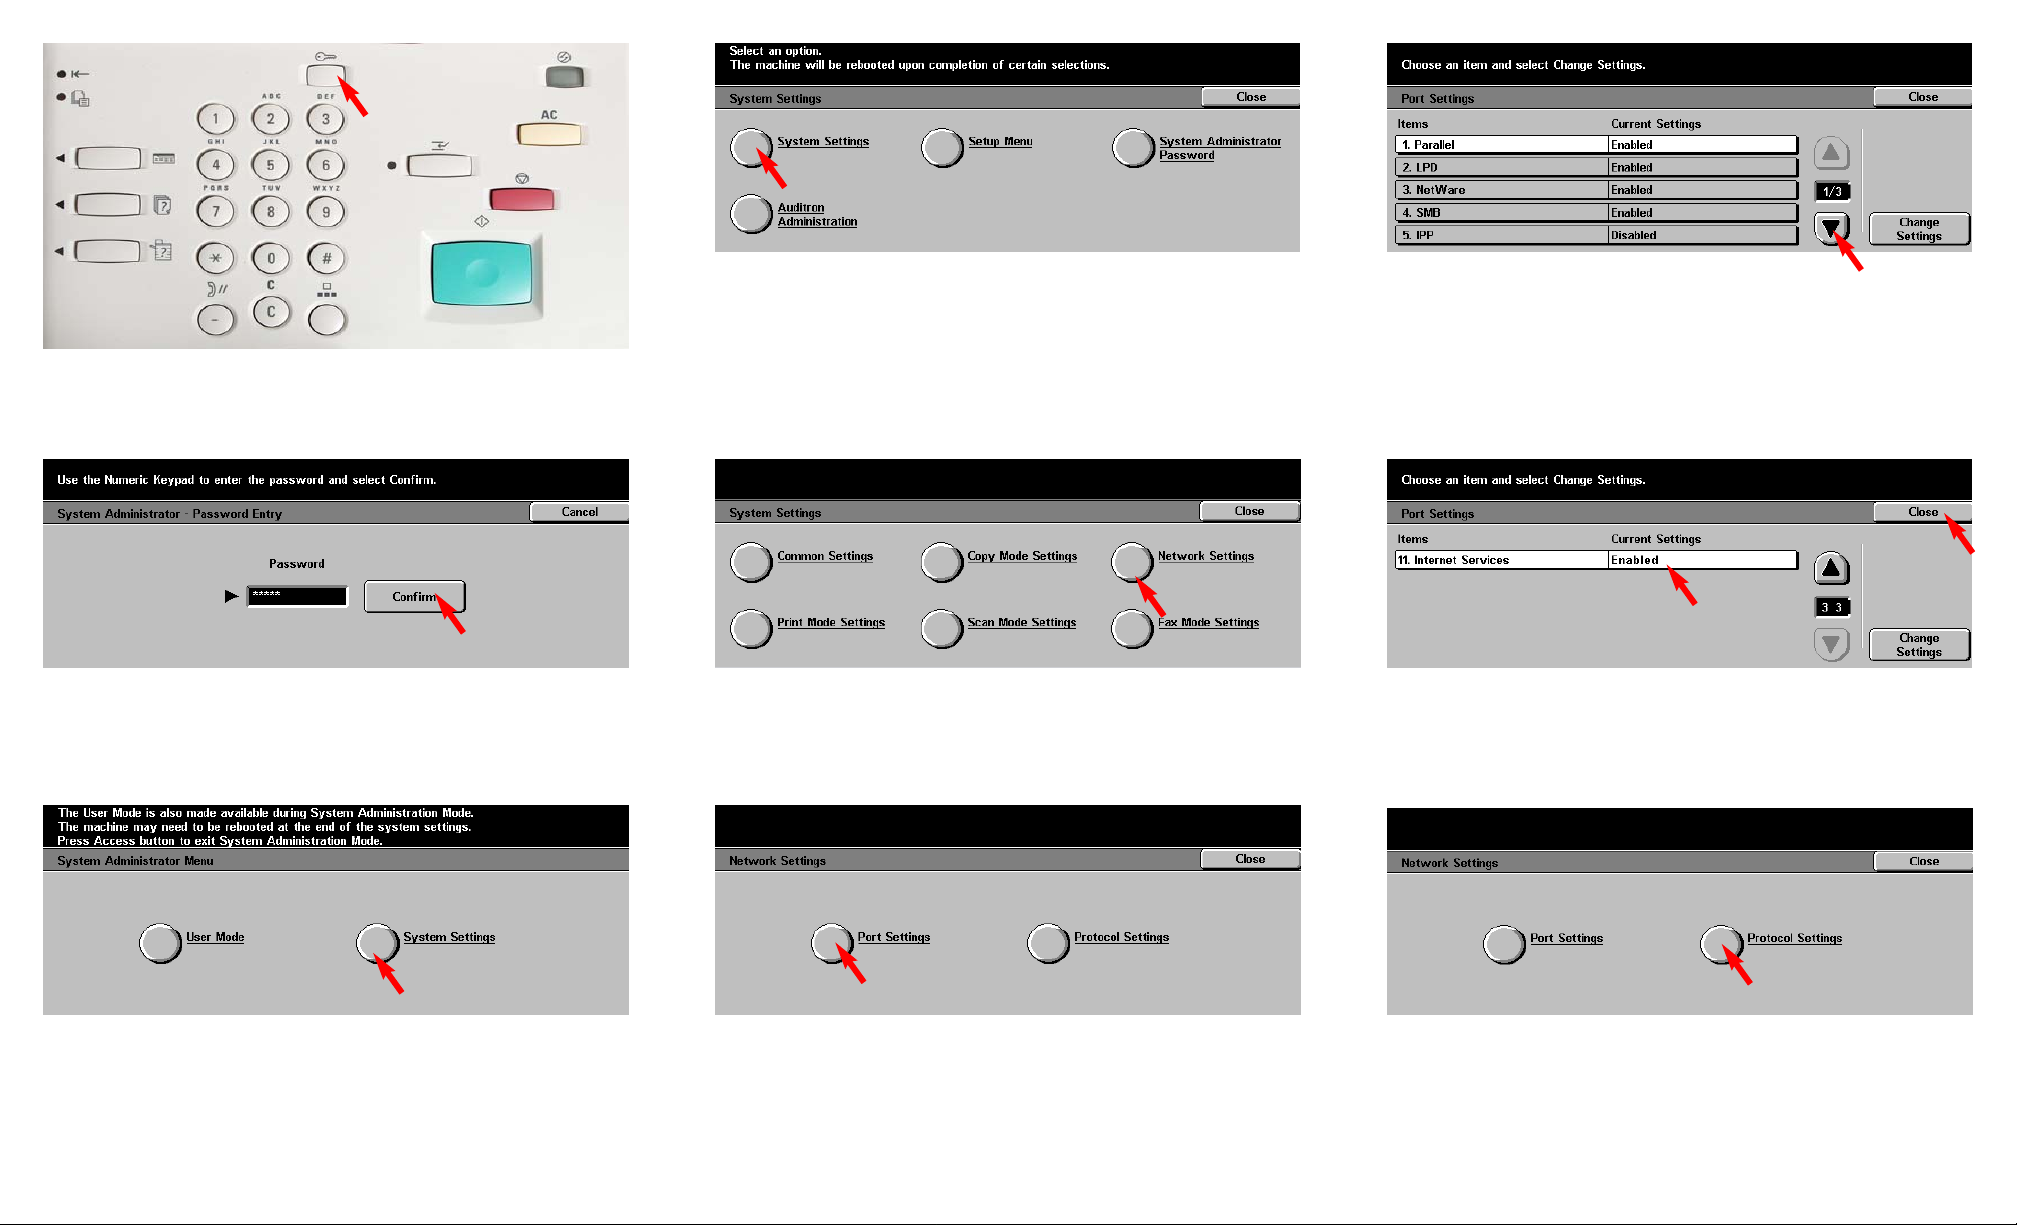
Fig. 1-2
Enter the System Administrator Password from the Numeric Keypad
and then press Confirm. (See Machine Administrator User Guide for
default password.)
Fig. 1-3
Press System Settings.
Fig. 1-4
Press System Settings.
Fig. 1-5
Press Network Settings.
Fig. 1-6
Press Port Settings.
Fig. 1-7
Press the Arrow button to scroll to Internet Services.
Fig. 1-8
Make sure that 11. Internet Services is enabled then press Close.
Note: If Internet Services is disabled press 11. Internet Services then
press Change Settings. Press Enable, press Save.
Fig. 1-9
Press Protocol Settings.
Fig. 1-1
Press Access.
Retrieving Scanned Documents Using Web Browser - 1 of 4
Page 2
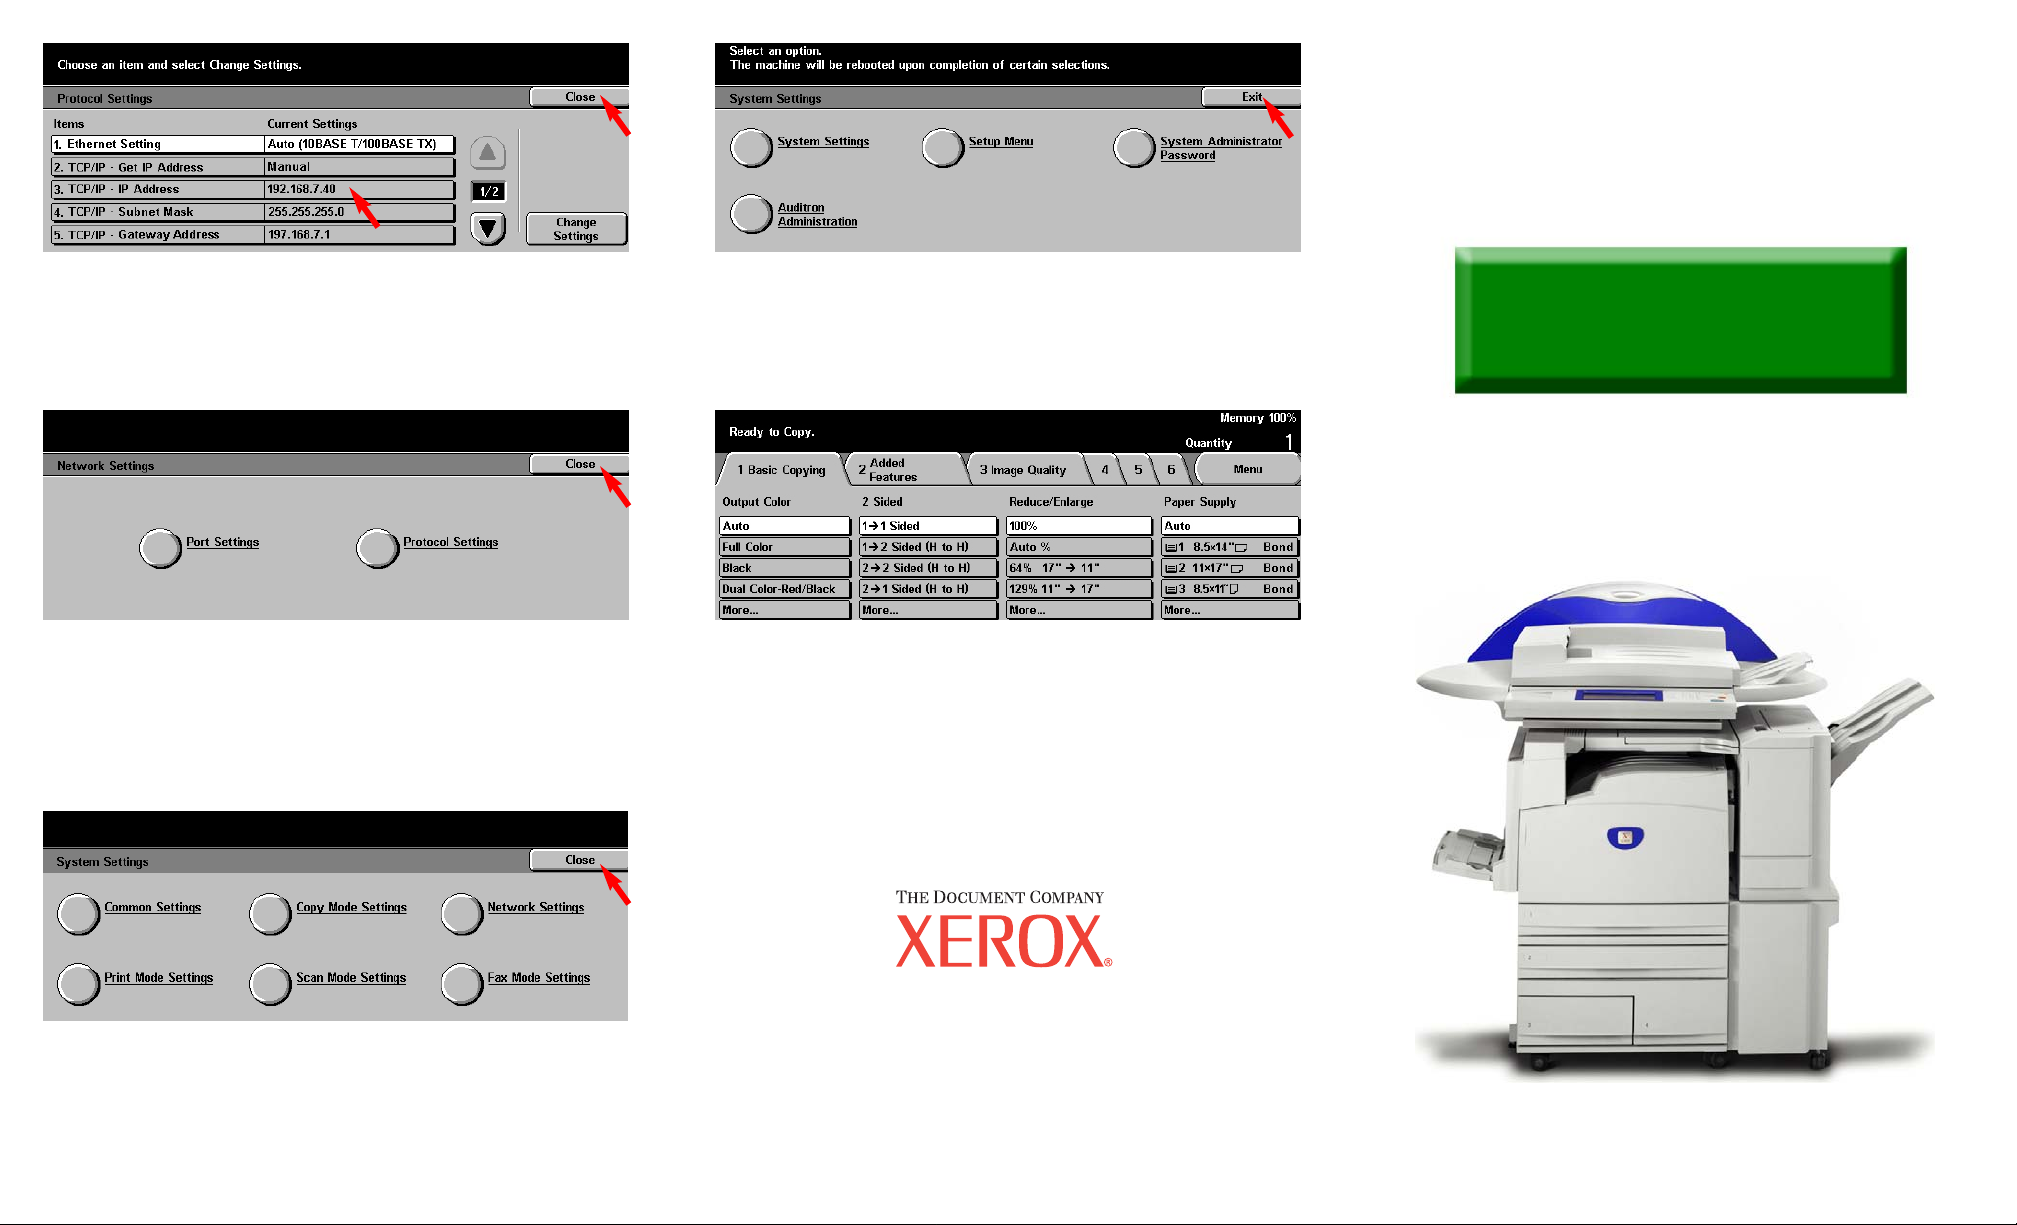
Fig. 1-14
Setup for retrieving scanned documents using web browser is
completed.
Continue with Retrieving Scanned Documents Using Web Browser
Part 2 of 2.
Fig. 1-13
Press Exit.
Fig. 1-11
Press Close.
Fig. 1-12
Press Close.
Retrieving Scanned Documents Using Web Browser - 2 of 4
Quick Start Guide
Retrieving Scanned Documents
Using Web Browser Part 1 of 2
The Telephone Consumer Protection Act of 1991 makes it unlawful for any person to use a
computer or other electronic device, including FAX machines, to send any message unless such
message clearly contains in a margin at the top or bottom of each transmitted page or on the first page
of the transmission, the date and time it is sent and an identification of the business or other entity, or
other individual sending the message and the telephone number of the sending machine or such
business, other entity, or individual.To enter the telephone number identifying the machine and the
header text information (business name) please refer to "Entering Local Terminal Information"
pamphlet Part 2 of 2. To enter date and time please refer to "Entering Local Terminal Information"
pamphlet Part 1 of 2.
Fig. 1-10
Please write down the current setting for TCP/IP - IPAddress then
press Close.
IP Address:_____________________
WorkCentre M24
Page 3

Fig. 2-1
Open an Internet browser, in the Address field enter the IP address of
WorkCentre M24 and press Enter. On the Internet Services screen
click Properties.
Fig. 2-3
Enter the number of the mailbox in which the document was scanned.
Then click Document List.
Fig. 2-5
Click Save this link.
Fig. 2-2
Click Mailbox on the left side of the page.
Fig. 2-4
Place a checkmark in the box next to the document to be retrieved and
in the box next to Enable. Enter Page Number. Click Retrieve.
Fig. 2-6
In the File Download window*, click Save.
* This window may vary depending on the operating system of the
computer.
Retrieving Scanned Documents Using Web Browser - 3 of 4
Page 4

Fig. 2-7
Browse to the folder where the scanned document is to be saved and
click Save.
Fig. 2-8
After download is completed click on Close.
Note: You must have a viewer that will accommodate TIF file format,
if you are retrieving your document as a TIF format.
Retrieving Scanned Documents Using Web Browser - 4 of 4
Quick Start Guide
Retrieving Scanned Documents
Using Web Browser Part 2 of 2
The Telephone Consumer Protection Act of 1991 makes it unlawful for any person to use a
computer or other electronic device, including FAX machines, to send any message unless such
message clearly contains in a margin at the top or bottom of each transmitted page or on the first page
of the transmission, the date and time it is sent and an identification of the business or other entity, or
other individual sending the message and the telephone number of the sending machine or such
business, other entity, or individual.To enter the telephone number identifying the machine and the
header text information (business name) please refer to "Entering Local Terminal Information"
pamphlet Part 2 of 2. To enter date and time please refer to "Entering Local Terminal Information"
pamphlet Part 1 of 2.
WorkCentre M24
 Loading...