

Page 1
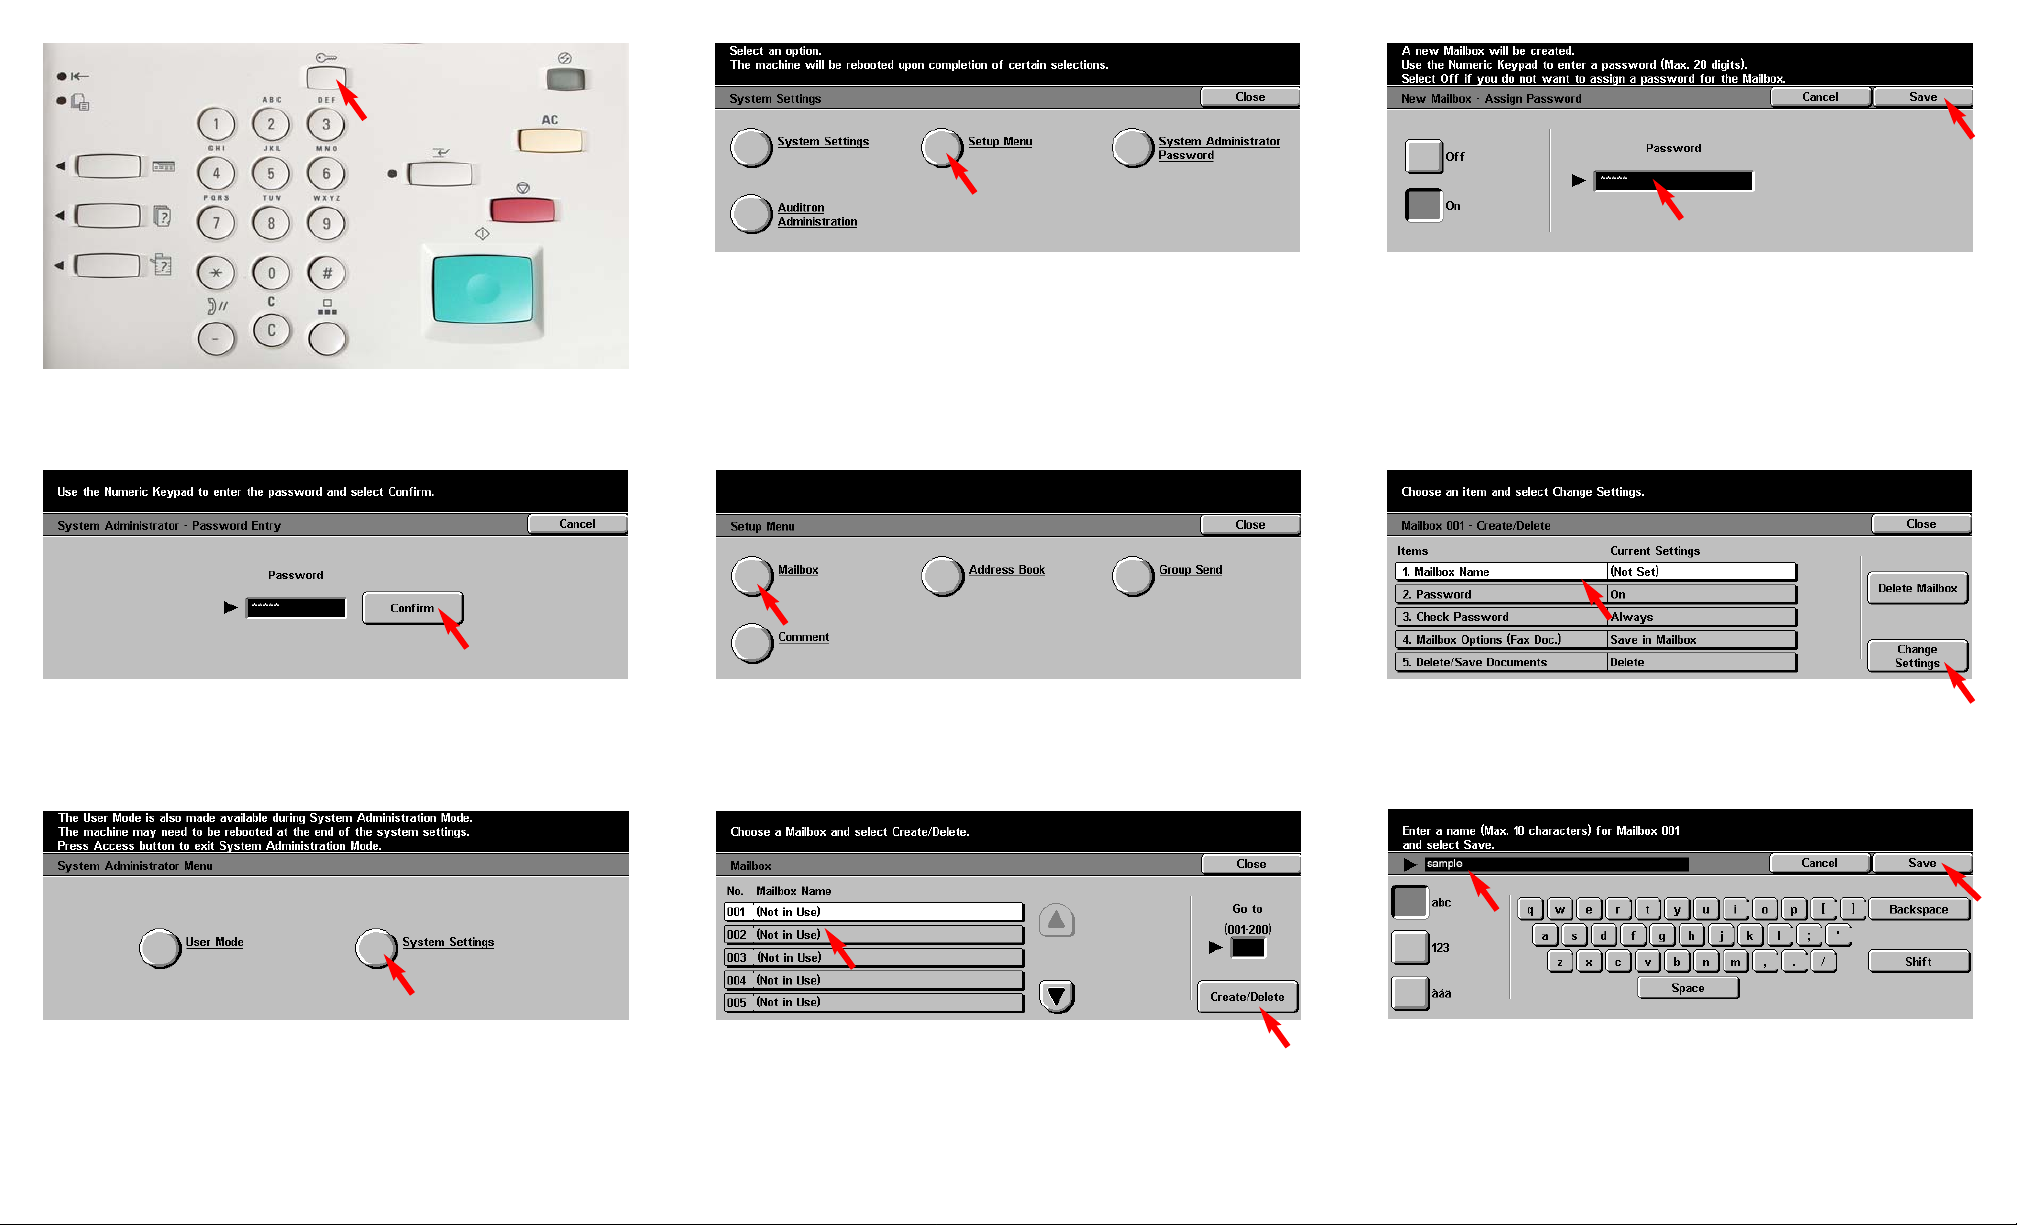
Fig. 1
Press Access.
Fig. 2
Enter the System Administrator Password from the Numeric Keypad
and then press Confirm. (See Machine Administrator User Guide for
default password.)
Fig. 3
Press System Settings.
Fig. 4
Press Setup Menu.
Fig. 5
Press Mailbox.
Fig. 6
Select the Mailbox to be created. Then press Create/Delete.
Fig. 7
Use the Numeric Keypad to enter the password. Then press Save.
Fig. 8
Select 1. Mailbox Name then press Change Settings.
Fig. 9
Enter the name for the Mailbox using the keyboard displayed. The
mailbox name may be up to 10 characters. Press Save after entering
the name.
Creating Mailbox - 1 of 2
Page 2
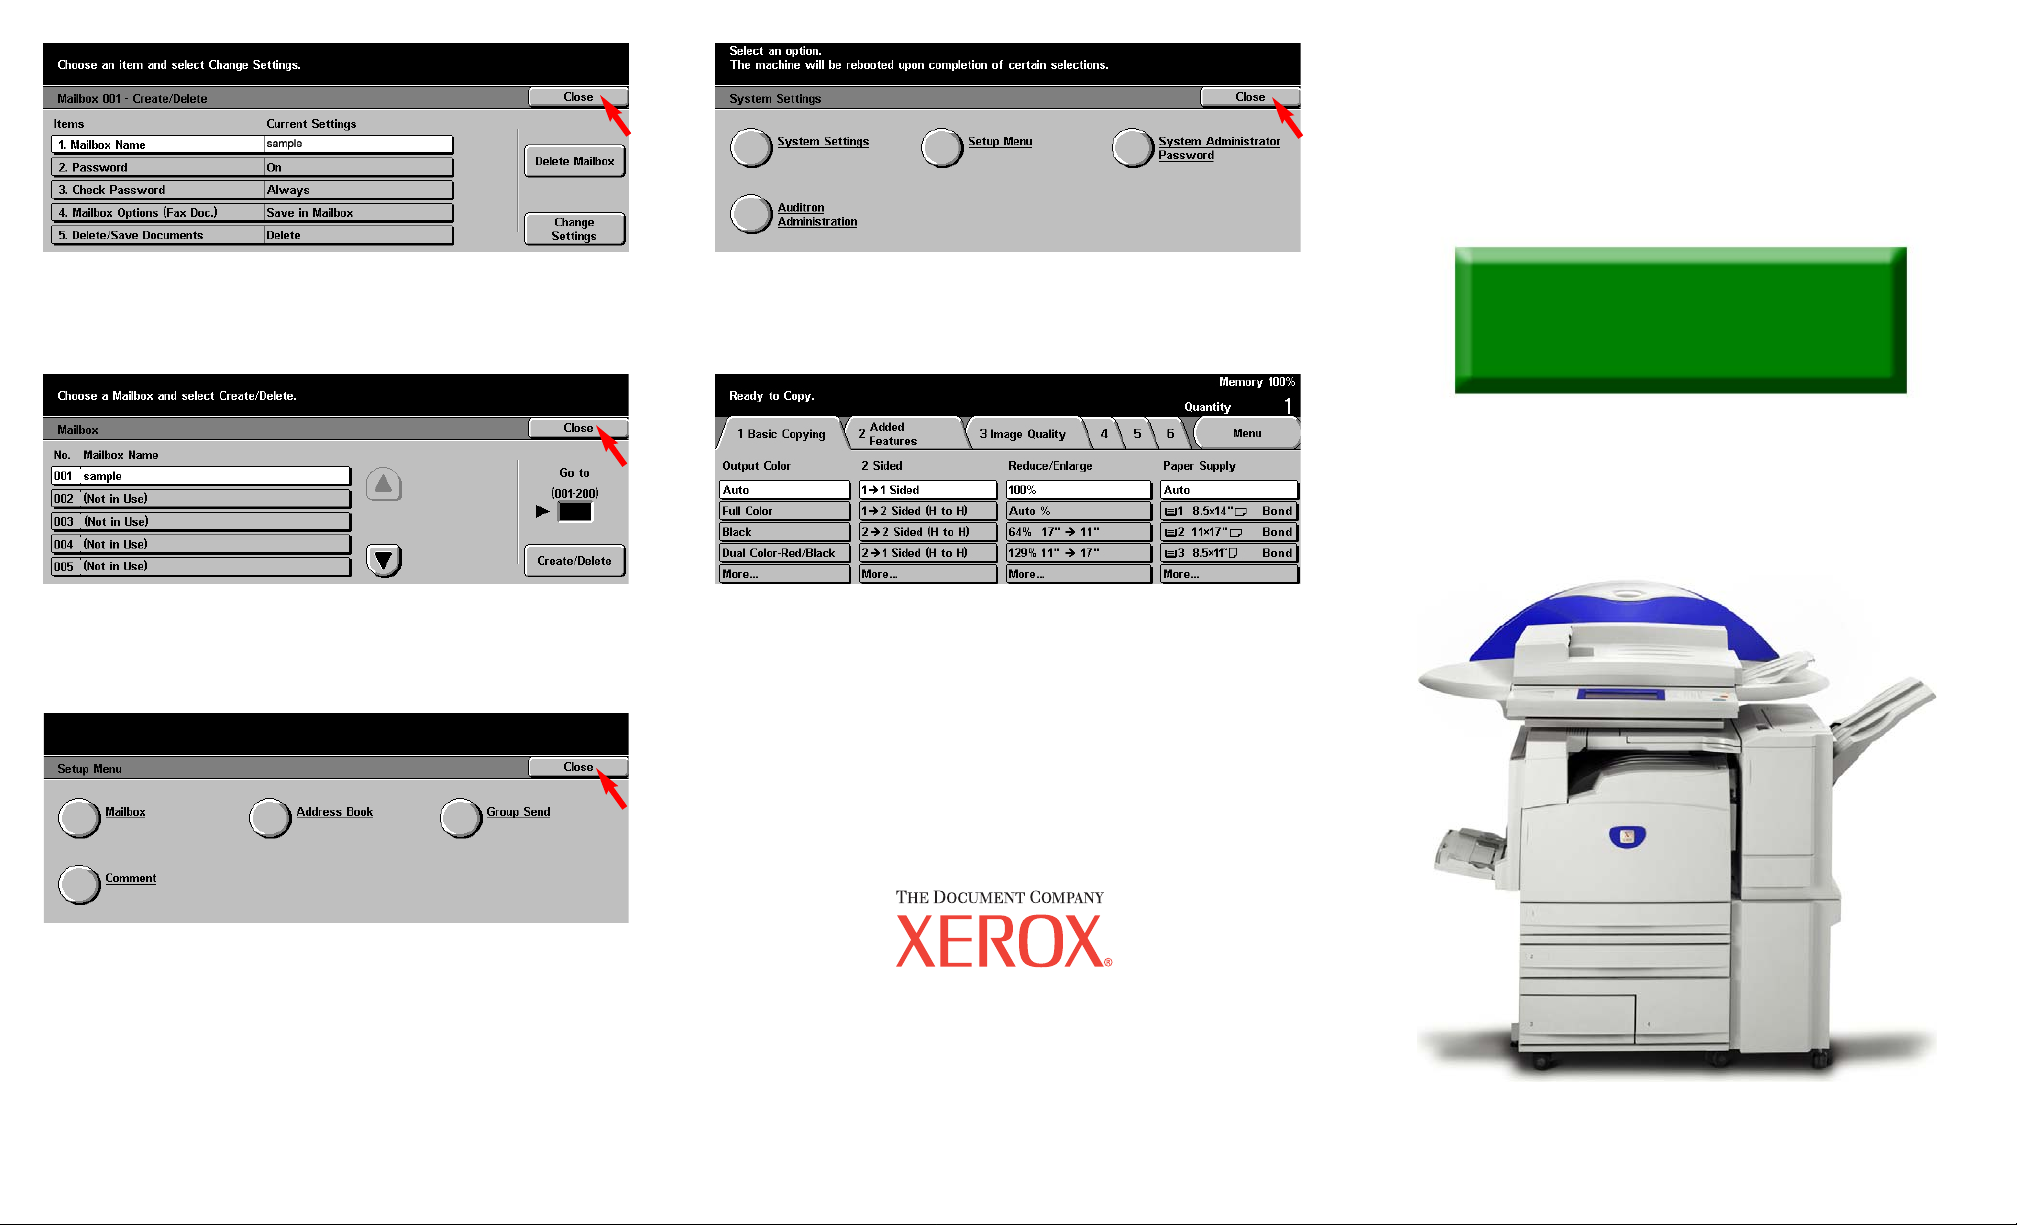
Note: Please remember or write down your Mailbox Number and
Password. This information will be used to scan and retrieve
documents in the mailbox.
Mailbox Number: ________________________________
Mailbox Password: _______________________________
Fig. 10
Select Close.
Note: Password, Check Password, Delete/Save Documents settings
may be set at this time.
Fig. 11
Select Close.
Fig. 12
Select Close.
Fig. 13
Select Close.
Fig. 14
The Menu Screen is displayed and the Mailbox creation is complete.
Creating Mailbox - 2 of 2
Quick Start Guide
Creating Mailbox
The Telephone Consumer Protection Act of 1991 makes it unlawful for any person to use a
computer or other electronic device, including FAX machines, to send any message unless such
message clearly contains in a margin at the top or bottom of each transmitted page or on the first page
of the transmission, the date and time it is sent and an identification of the business or other entity, or
other individual sending the message and the telephone number of the sending machine or such
business, other entity, or individual.To enter the telephone number identifying the machine and the
header text information (business name) please refer to "Entering Local Terminal Information"
pamphlet Part 2 of 2. To enter date and time please refer to "Entering Local Terminal Information"
pamphlet Part 1 of 2.
WorkCentre M24
 Loading...