

Page 1

WorkCentre M24
Fax Reference Guide
This PDF file is best viewed using Acrobat® Reader 5
Page 2

Using the printer to print copies of bank notes or securities is illegal and punishable, regardless of whether they
are being used.
Microsoft, MS-DOS, Windows, Windows NT, Microsoft Network are trademarks or registered trademarks of
Microsoft Corporation in the U.S. and other countrie s.
All product/brand names are trademarks or registered trademarks of the respective holders.
Permission has been obtained from Microsoft Corporation for use of software screen shots.
Saved data may be lost if hard disk of the machine breaks down due to external shocks or if t he power is
accidentally cut off in a manner not following the methods listed in manuals or other documentations. Xerox
is not responsible for such data loss and any consequence caused by such data loss.
Xerox is not responsible for any breakdown of machines due to infection of computer virus.
Important
1
This guide is copyrighted with all rights reserved. Under the copyright laws, this guide may not be copied or
modified in whole or part, without the written consent of the publisher.
2
Parts of this guide are subject to change without prior notice.
3
We welcome any comments on ambiguities, errors, omissions, or missing pages.
4
Never attempt any procedure on the machine that is not specifica lly described i n this guide. Unauthor ized
operation can cause faults or accidents. Xerox is not liable for any problems resulting from unauthorized
operation of the equipment.
Xerox, The Document Company and Ethernet are registered trademarks.
DocuWorks and CentreWare are trademarks.
Page 3

Preface
In this guide, precautions are indicated with the
symbol . Always read and follow these
Thank you for selecting the WorkCentre M24.The WorkCentre M24 is also refered to as the
WorkCentre 24.
This guide aims to provide all the necessary operating information functions for fascimile functions
for new users. Please read this guide carefully before use to obtain the best performance of your
machine. After reading it, please keep this guide handy for quick reference should you encounter
difficulties with the machine.
!
instructions before carrying out the required procedure. Also, thoroughly read the Safety
Notes provided in this guide.
i
Page 4
US Regulatory Information
ii
Fax Send Header Requirements: The Telephone Consumer Protection Act of 1991 makes it
unlawful for any person to use a computer or other electronic device, including a Fax machine, to
send any message unless such message clearly contains in a margin at the top or bottom of each
transmitted page or on the first page of the transmission, the date and time it is sent and an
identification of the business or other entity, or other individual sending the message and the
telephone number of the sending machine or such business, other entity or individual. (The
telephone number provided may not be a 900 number or any other number for which charges
exceed local or long distance transmission charges.)
To enter the telephone number identifying the machine, and the header text information (business
name), please refer to the Section 9.2, “Entering Local Terminal Information" in this reference guide.
To enter the date and time, please refer to the “Changing Settings in System Settings Mode",
“Setting the Common Settings" in the WorkCentre 24 Machine Administrator User Guide.
Data Coupler Information: This equipment complies with Part 68 of the FCC rules and the
requirements adopted by the Administrative Council for the Terminal Attachments (ATCA) A label
is fixed to the rear cover of the product that contains, among other information, a product identifier
in the format US:AAAEQ##TXXXX. If requested, this number must be provided to the Telephone
Company.
A plug and jack used to connect this equipment to the premises wiring and telephone network must
comply with the applicable FCC Part 68 rules and requirements adopted by the ACTA. A FCC
compliant telephone cord and modular plug is provided with this equipment.
You may safely connect the machine to the following standard modular jack: USOC RJ-11C using
the compliant telephone cord (with modular plugs) provided with the installation kit. See installation
instructions for details.
To order the correct service from the Telephone Company please quote the codes listed in the
table: Facility Interface Code (FIC), Service Order Code (SOC), USOC Jack Code and Ringer
Equivalence Number (REN)
FIC SOC USOC Jack REN
02LS2 9.0F RJ-11C 0.2
WARNING: Ask your local telephone company for the modular jack type installed on your
line. Connecting this machine to an unauthorized jack can damage telephone company
equipment. You not Xerox, assume all responsibility and/or liability for any damage caused
by the connection of this machine to an unauthorized jack.
The REN is used to determine the number of devices that may be connected to a telephone line.
Excessive RENs on a telephone line may result in the devices not ringing in response to an
incoming call. In most but not all areas, the sum of the RENs should not exceed five (5.0). To be
certain of the number of devices that may be connected to a line, as determined by the total RENs,
contact the local Telephone Company. The REN for this product is part of the product identifier that
has the format US:AAAEQ##TXXXX. The digits represented by ## are the REN without a decimal
point (e.g., 02 is a REN of 0.2)
Page 5

If this Xerox equipment causes harm to the telephone network, the Telephone Company will notify
you in advance that this temporary discontinuance of service may be required. But if advanced
notice isn’t practical, the Telephone Company will notify the customer as soon as possible. Also,
you will be advised of your right to file a complaint with the FCC if you believe it is necessary.
The Telephone Company may make changes in it facilities, equipment, operations, or procedures
that could affect the operation of the equipment. If this happens, the Telephone Company will
provide advance notice in order for you to make necessary modifications to maintain uninterrupted
service.
If trouble is experienced with this Xerox equipment, for repairs or warranty information, please
contact the Xerox Welcome Center telephone number 800-821-2797. If the equipment is causing
harm to the telephone network, the Telephone Company may request that you disconnect the
equipment until the problem is resolved.
Repairs to the machine should be made only by a Xerox representative or an authorized Xerox
Service agency. This applies at any time during or after the service warranty period. If an
unauthorized repair is performed, the remainder of the warranty period is null and void.
This equipment must not be used on party lines. connection to party line service is subject to state
tariffs. Contact the state public utility commission, public service commission, or corporation
commission for information.
If your office has specially wired alarm equipment connected to the telephone line, ensure the
installation of this Xerox equipment does not disable your alarm equipment. If you have questions
about what will disable alarm equipment, consult your telephone company or a qualified installer.
Canadian Regulatory Information
This product meets the applicable Industry Canada technical specifications. The Ringer
Equivalence Number (REN) is an indication of the maximum number of devices allowed to be
connected to a telephone interface. The termination on an interface may consist of any
combination of devices subject only to the requirement that the sum of the RENs of all the devices
does not exceed 5.
The Canadian REN value of this equipment is 0.2
Repairs to certified equipment should be made by an authorized Canadian maintenance facility
designated by the supplier. Any repairs or alterations made by the user to this equipment, or
equipment malfunctions may give the telecommunications company cause to request the user to
disconnect the equipment.
Users should ensure for their own protection the electrical ground connections of the power utility,
telephone lines and internal metallic water pipe system, if present, are connected together. This
precaution may be particularly important in rural areas.
CAUTION: Users should not attempt to make such connections themselves, but should contact the
appropriate electrical inspection authority or electrician, as appropriate.
iii
Page 6

European Regulatory Information
Radio Equipment & Telecommunications Terminal Equipment Directive
This Xerox product has been self-certified by Xerox for pan-European single terminal connection to
the analogue public switched telephone network (PSTN) in accordance with Directive 1999/5/EC.
The product has been designed to work with the national PSTNs and compatible PBXs of the
following countries:
UK
Ireland
France
Germany
Italy
Spain
In the event of problems you should contact your local Xerox representative in the first instance.
This product has been tested to and is compliant with TBR21, a specification for terminal
European Regulatory Information for the fax kit option
equipment for use on analogue-switched telephone networks in the European Economic Area.
The product may be configured to be compatible with other country networks. Please contact your
Xerox representative if it needs to be reconnected to another country’s network. There are no useradjustable settings in the product.
NOTE: Modification of this product, connection to external control software or to external control
apparatus not authorized by Xerox, will invalidate its certification.
iv
Page 7
S
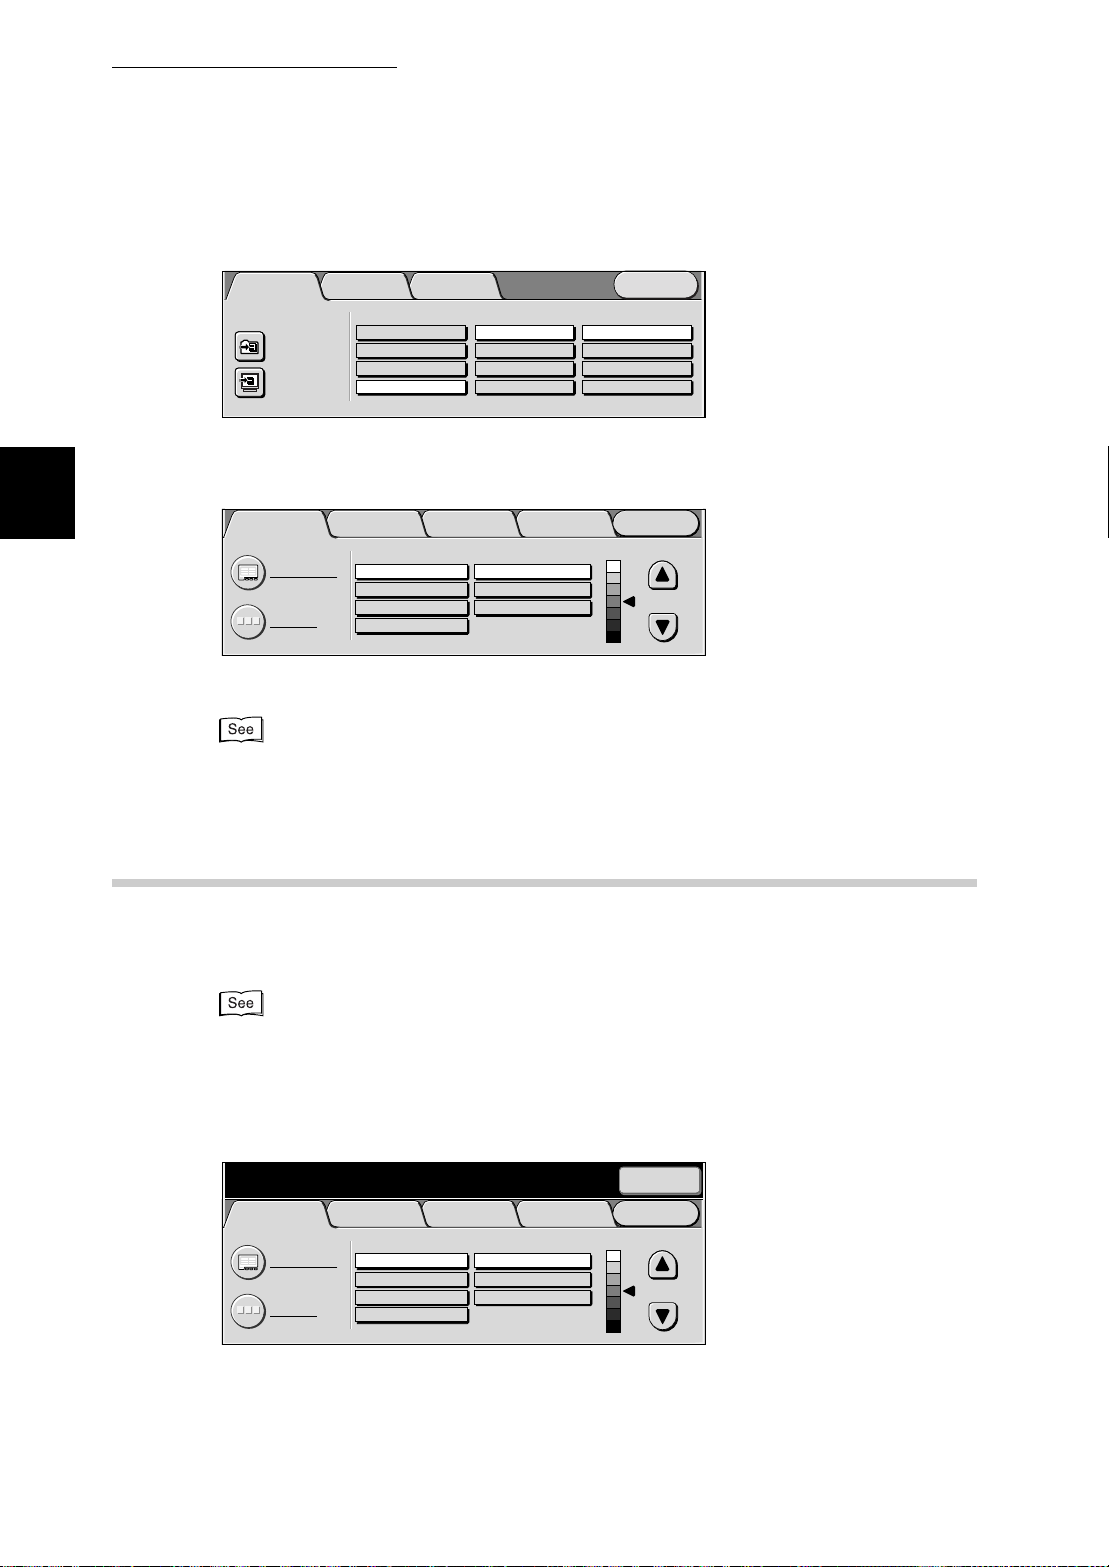
Features in Brief
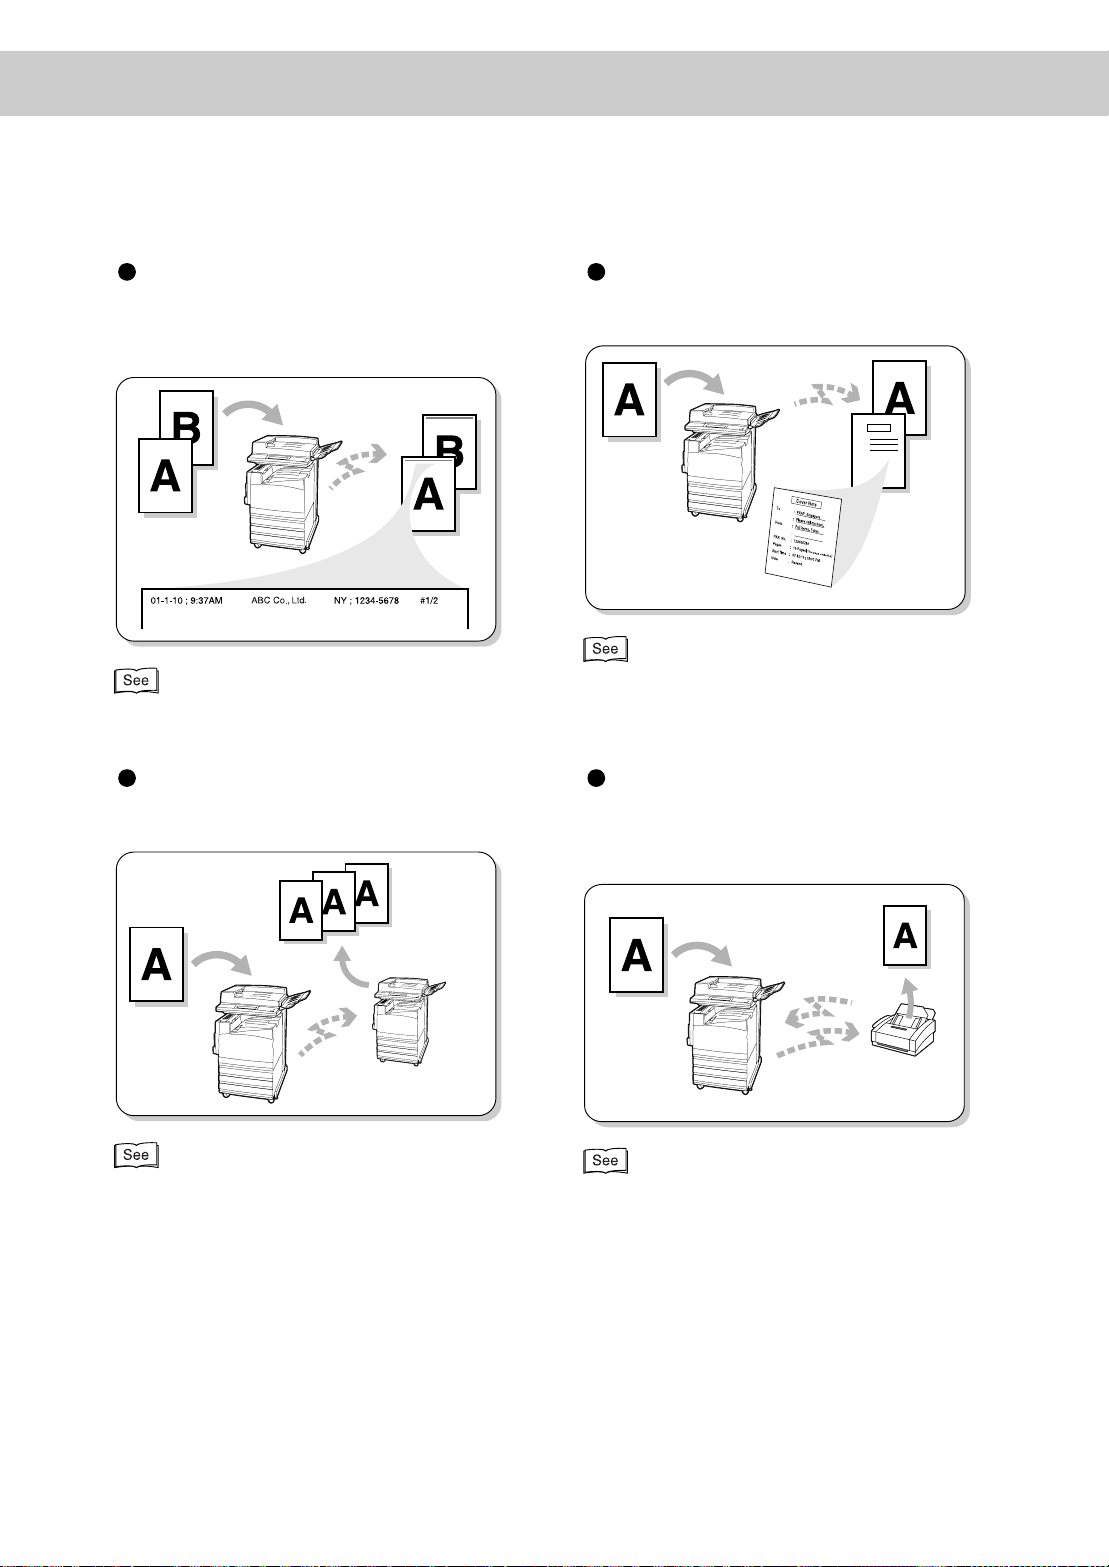
The following shows the basic features of this machine.
Adjusting the image quality
for documents to be transmitted
You can adjust the resolution, density and document quality for document scanning.
mode
electing the G3 communication
“3.1 Simple Send Procedure” (P. 20)
Using the Address Book
Enter recipient’s Fax No. Memory :100%
[ Fax No. ]
Address Book
001
004
007
010
002 003
Xerox Akira Endo
005
008
011 012
ABC
FGHIJ KLMNO PQRST UVWXYZ
DE
006
009
“3.4 Dialing” (P. 27)
Enter Number
0-9
Next
Recipient
Close
Go to
(001-500)
GroupAddress List
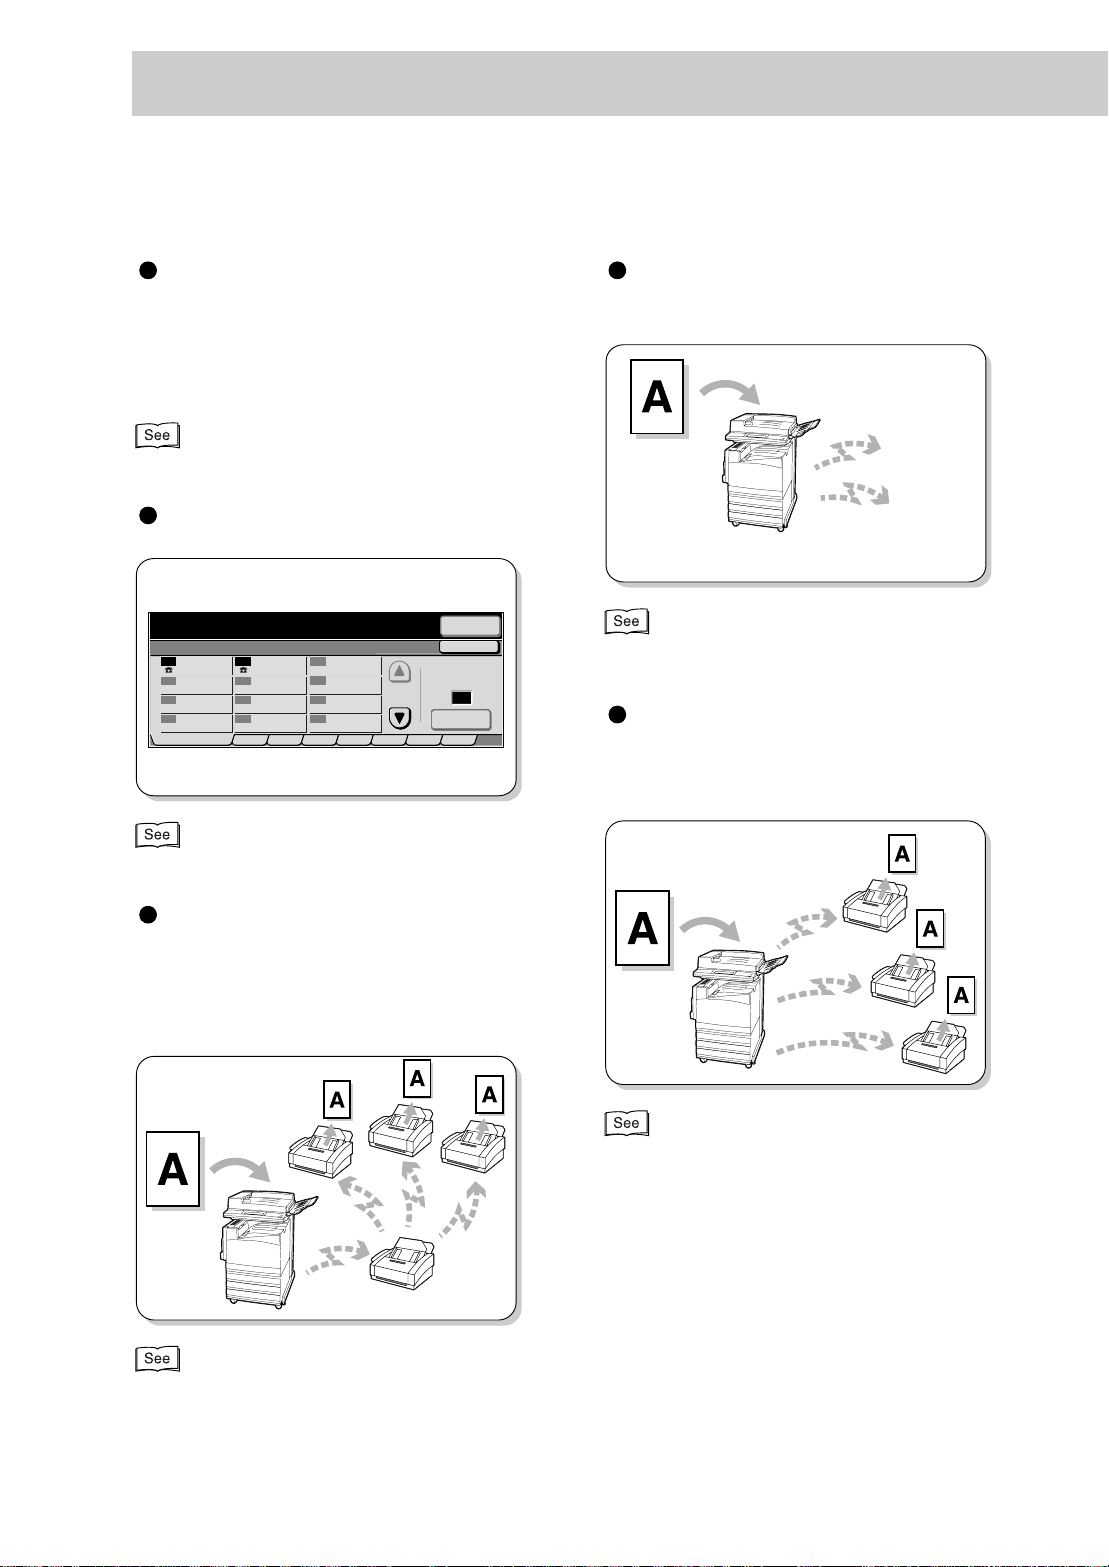
Transmitting documents
through a relay station
When transmitting the same document to
multiple remote terminals over a long distance, this feature saves on cost.
G3
F4800
“3.3 Selecting a Communication Mode (Commu nication Mode)” (P. 25)
Transmitting documents to
multiple locations with a single operation
“4.2 Transmitting Documents Through a Relay Station (Relay Broadcast)” (P. 43)
“4.1 Transmitting to Multiple Destinations (Broadcast Send)” (P. 40)
v
Page 8
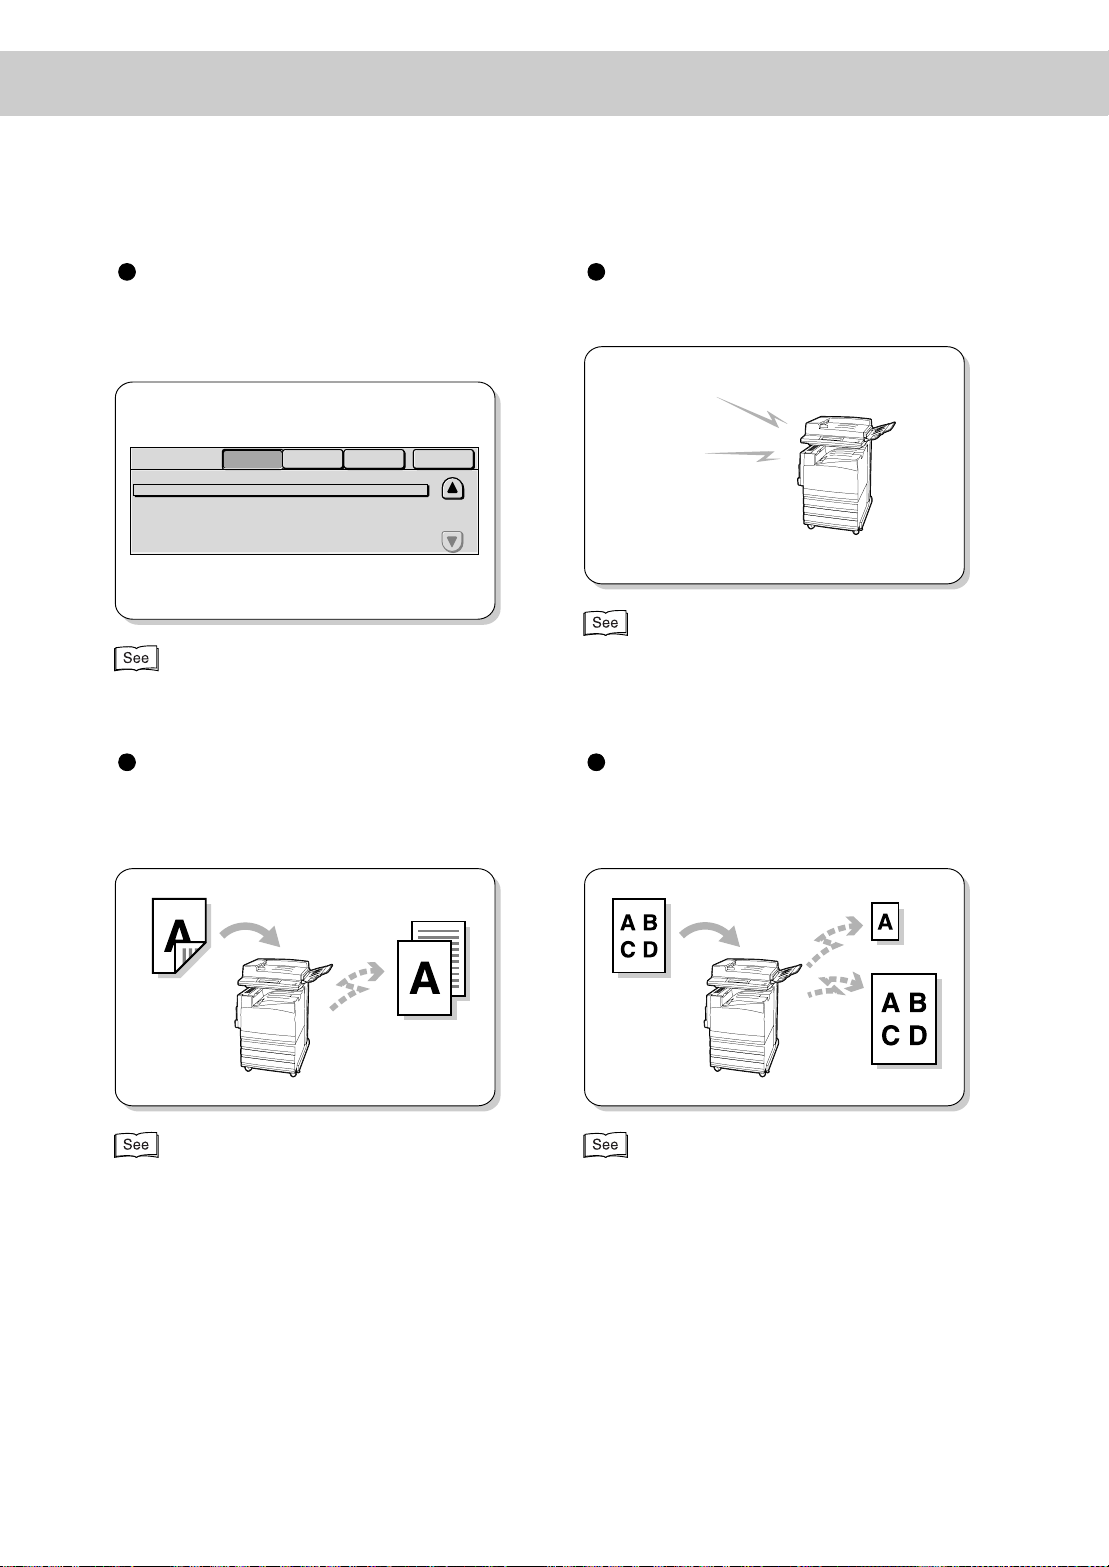
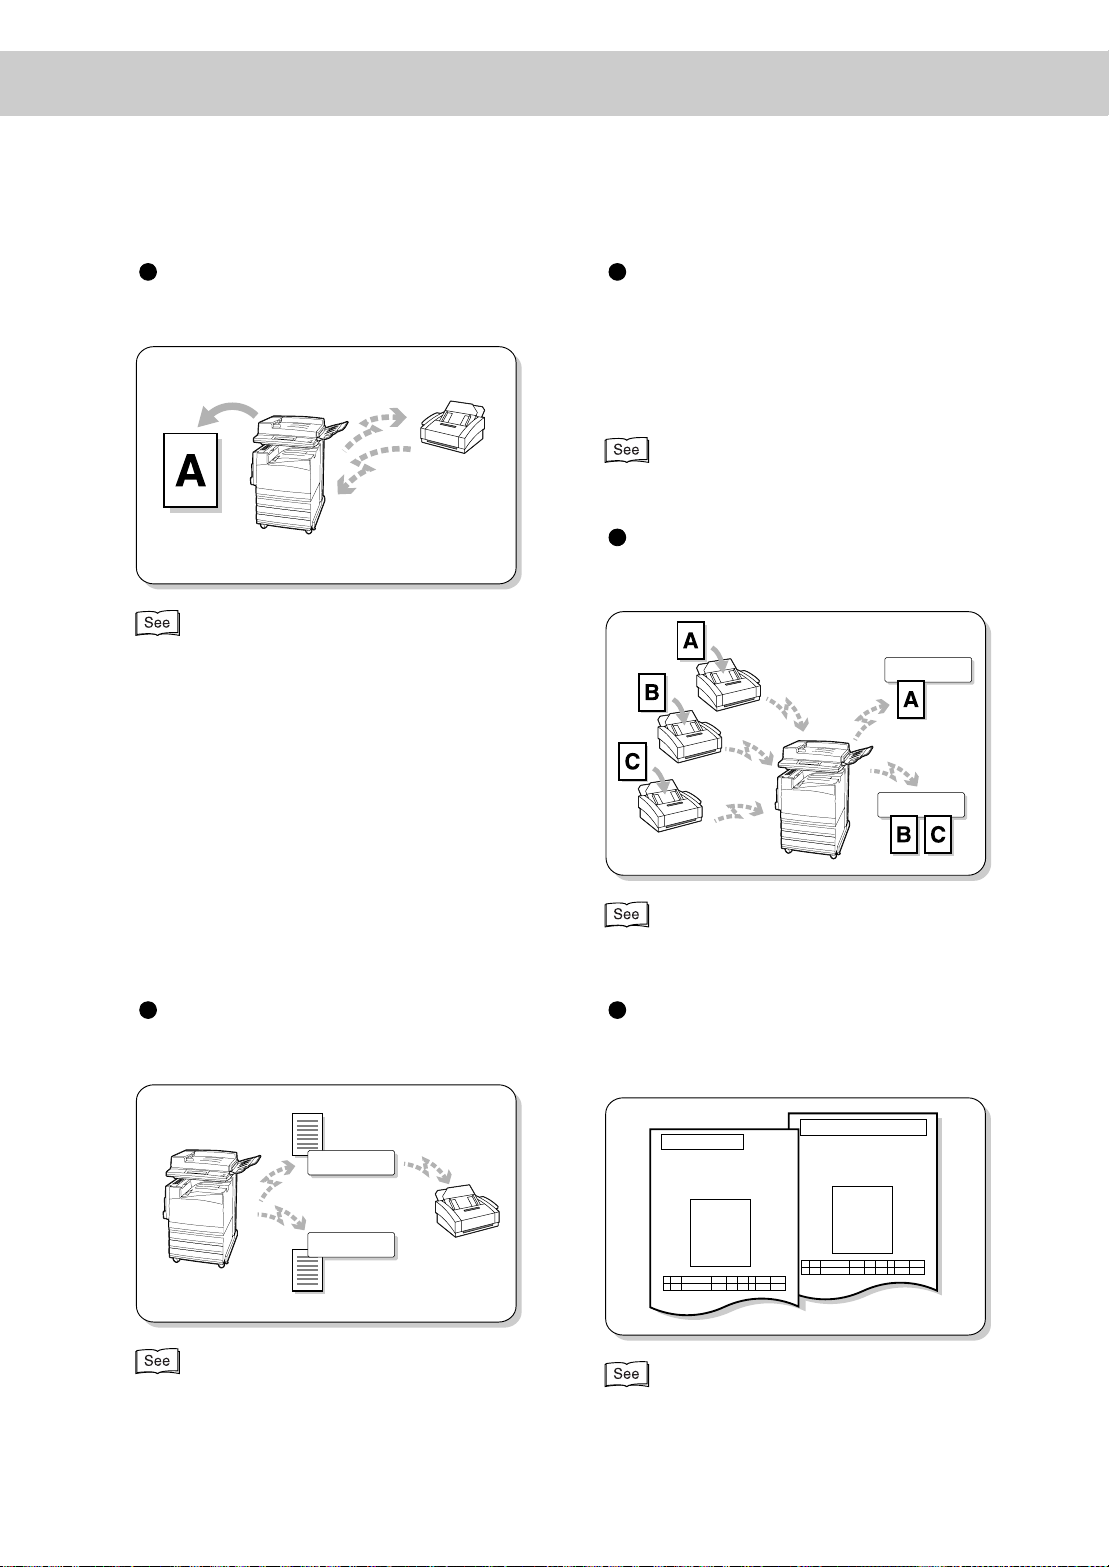
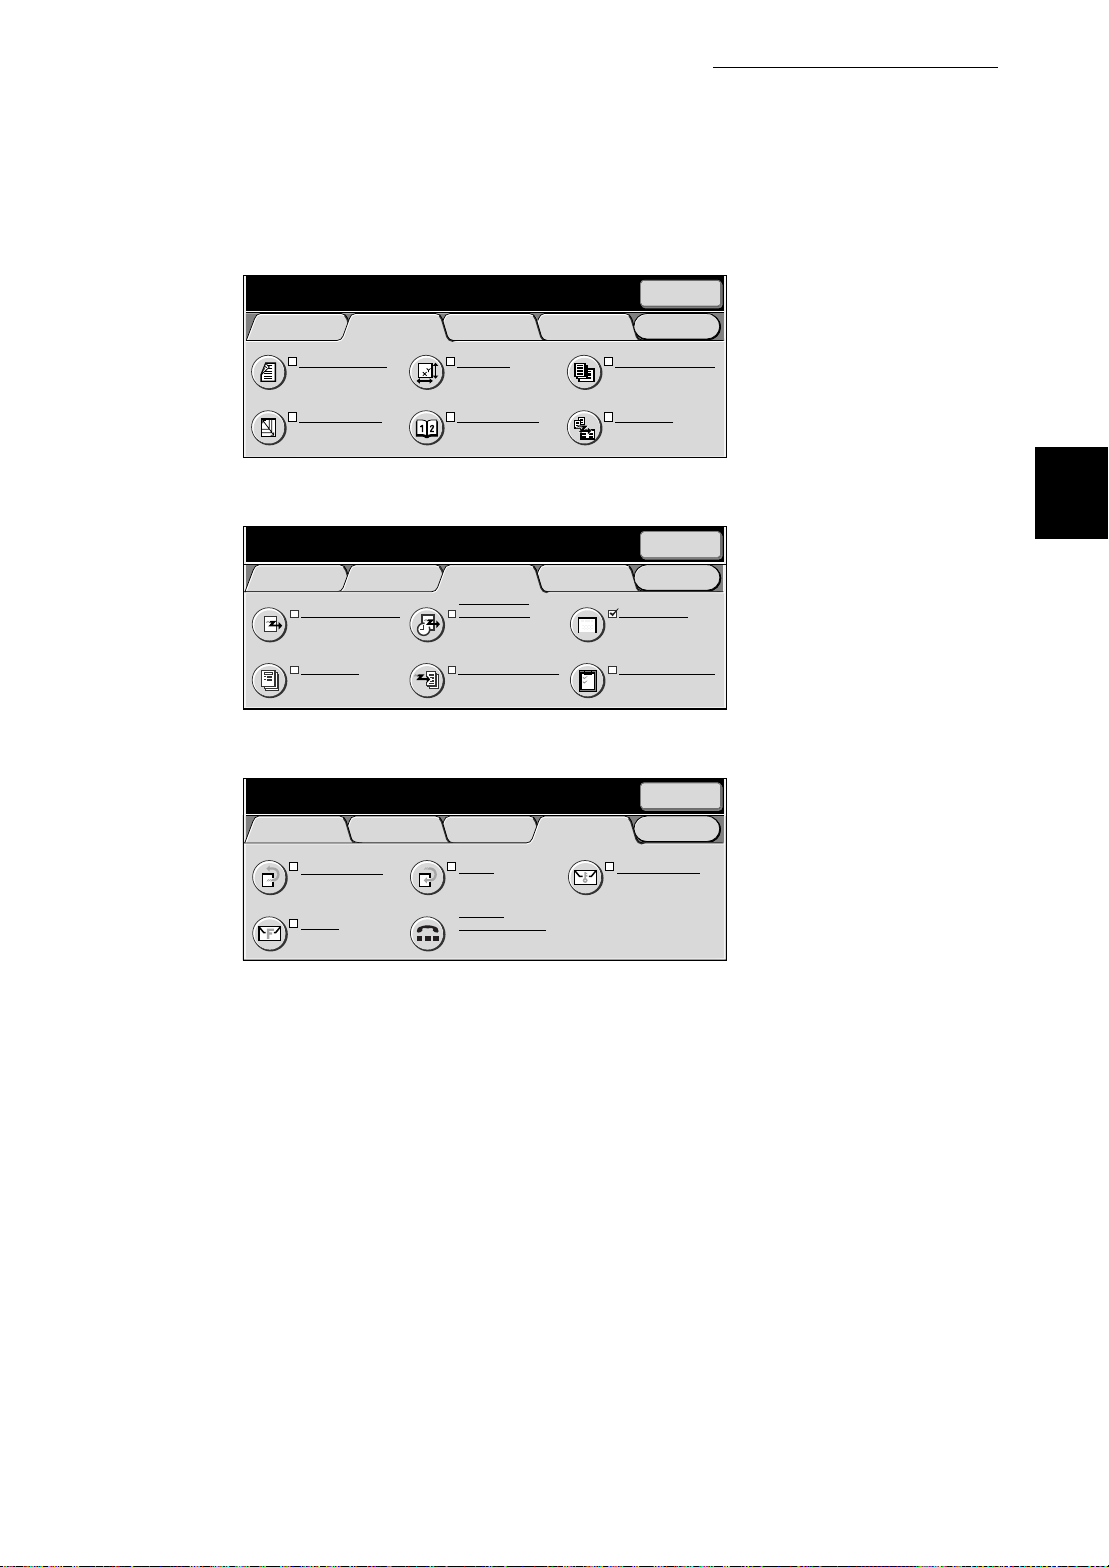
Confirming Job Status
Press the Job Stat us butto n to view information about pending jobs, current jobs and
communication results.
Job Status
Doc. No. - Job Type
00010 - Fax-Send
Current and
Pending Jobs
Status
Waiting
Completed Jobs
Remote Terminal/Contents
0123456789
Stored
Documents
“5.2 Confirming Job Status” (P. 64)
Pages
Waiting Jobs
1/1
Print
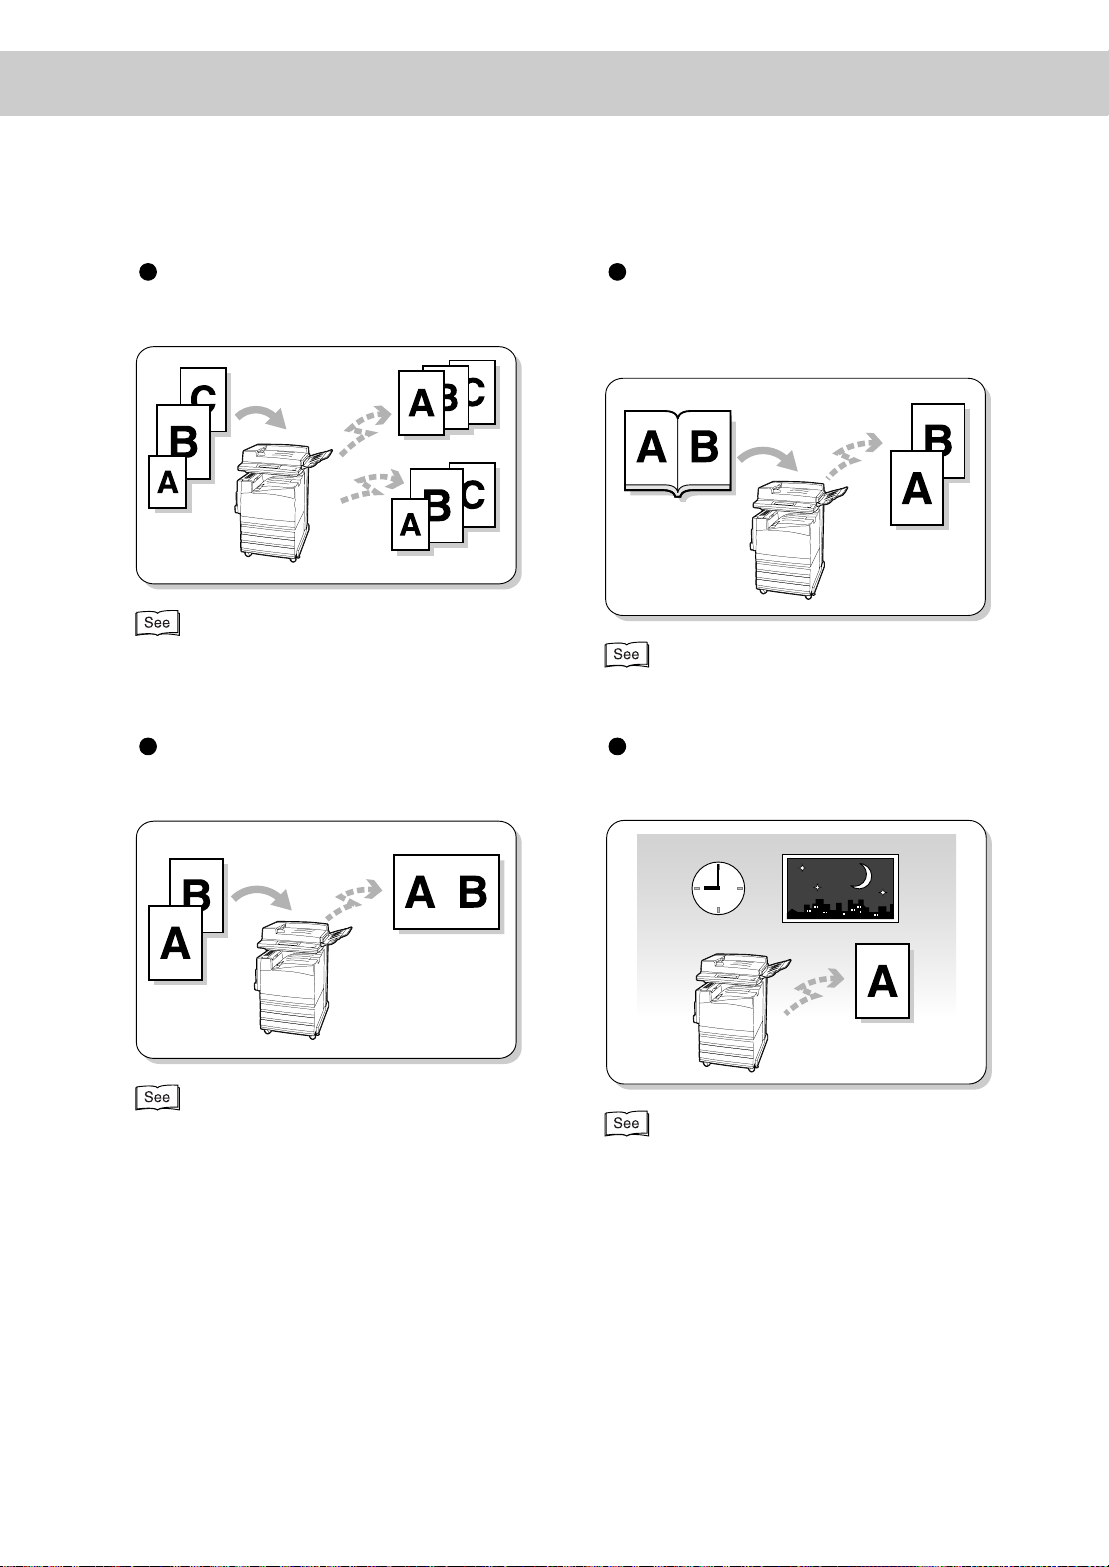
Hearing an incoming call without using the handset
Facsimile
service
“7.1 Making a Telephone Call” (P. 78)
Transmitting two sided documents by dividing them onto
separate pages
“8.1 Transmitting Two sided Originals (2 Sided
Originals)” (P. 84)
Specifying the size and reduction/enlargement ratio for
transmitting documents
“8.2 Specifying Document Size for Transmission
(Scan Size)” (P. 87), “8.4 Scanning Documents at a
Specified Size/Ratio (Reduce/Enlarge)” (P. 93)
vi
Page 9
Scanning documents in vari-
d
p
ous sizes at a time
“8.3 Scanning Documents in Various Sizes (Mixed
Size Originals)” (P. 90)
Transmitting facing pages by
dividing them onto separate
pages
“8.5 Transmitting Facing Pages on Separate Sheets
(Bound Originals)” (P. 95)
Transmitting documents by
merging pages
“8.6 Merging Several Pages Onto One Sheet (Multi-
le Up)” (P. 97)
Transmitting documents at a
specified time
“8.8 Transmitting Documents at a Programme
Time (Delayed Start)” (P. 102)
vii
Page 10
Transmitting doc umen ts w ith
brief information (date, time
and name)
“8.9 Transmitting Documents With Brief Inf ormation
(Send Header)” (P. 105)
Transmitting documents with
a cover page (Cover Note)
“8.10 Transmitting Documents With a Cover Page
(Cover Note)” (P. 107)
Making multiple copies at a
remote machine
Three
Copies
“8.11 Remote Copy (Recipient Print Sets)” (P. 110)
Storing documents being
polled from a remote machine
Retrieve
“8.12 Preparing to Be Polled (Store for Polling)”
(P. 112)
viii
Page 11
/
Receiving documents stored
M
x
at a remote machine
Communicating confidential
documents with a specified
person
You can send/receive documents to/from a
Retrieve
specified person by ente ring a ma ilbox pa ssword.
“8.14 Using the Mailbox Feature (Remote Mailbox
Retrieve from Mailbox)” (P. 118)
Sorting received documents into mailboxes
“8.13 Retrieving a Document From Remote
achine(s) (Polling)” (P.116)
For Support
For Support
For A
For Support
Programming commands
(requests) for mailbox
Forward
For A
For Support
Printed immediately
“9.6 Creating a Mailbox” (P. 173)
“8.15 Sorting Received Documents Into Mailbo
(Box Selector)” (P. 135)
Printing Transmission Report
You can check results of transmissions on
the report.
Transmission Report
Document has been sent.
Document Size A4S
“10.2 Printing Reports and Lists” (P. 206)
Transmission Report-Undelivered
Document has not been sent.
Pass this report to the sender.
Document Size A4S
ix
Page 12

M
anaging use of fax transmis-
sions between departments
“9.6 Creating a Mailbox” (P. 173)
Direct Transmission of Faxes
from a Computer
“Chapter 12 Direct Transmission of Faxes From a
Computer” (P. 237)
Internet Facsimile
“Chapter 13 Using the Internet to Send and Receive
Faxes” (P. 251)
x
Page 13

Contents
◆ Preface ..................................................................................................................................i
◆ Features in Brief ...................................................................................................................v
◆ Contents ...............................................................................................................................xi
◆ Using This Guide .................................................................................................................xvii
Chapter 1 Before Use
1.1 Data to be Registered Before Using the Machine.................................................. 2
1.2 Notes on Fax Communications.............................................................................. 3
1.2.1 Telephone Line Connection..................................................................... 3
1.2.2 Automatic Receive Mode ........................................................................ 3
1.2.3 Making a Telephone Call......................................................................... 3
1.3 Telephone Line Connectors................................................................................... 4
1.4 Using the Touch Panel Display................ ...... ....... ...... ...... ...... ...... ...... ...... ....... ...... 5
1.4.1 Displaying Copy, Scan and Fax Screens................................................. 5
1.4.2 Selecting Fax Function Screen ............................................................... 6
1.5 Entering Text.......................................................................................................... 8
1.5.1 Entry Method........................................................................................... 8
Chapter 2 Loading Documents
2.1 Documents........................................................................................................... 10
2.1.1 Applicable Document Sizes................................................................... 10
2.1.2 Automatically Detected Document Sizes .............................................. 11
2.1.3 Document Handling............................................................................... 12
2.2 Loading Documents............................................................................................. 14
2.2.1 Loading Documents on the Document Glass........................................ 14
2.2.2 Loading Documents in the Document Feeder....................................... 15
2.2.3 Document Orientation ........................................................................... 16
2.2.4 If You Have More Documents to Scan................................................... 17
Chapter 3 Transmitting
3.1 Simple Send Procedure....................................................................................... 20
3.1.1 Resolution ............................................................................................. 20
3.1.2 Original Type ......................................................................................... 21
3.1.3 Lighter/Darker ....................................................................................... 21
3.1.4 Simple Send Procedure ........................................................................ 22
3.2 Transmitting by a Specified Telephone Line......................................................... 23
xi
Page 14

3.2.1 Transmitting by a Specified Telephone Line.......................................... 23
3.7 Sending to a machine that has a Machine Password.....................................................38A
3.2.2 Adding Lines ......................................................................................... 24
3.3 Selecting a Communication Mode (Communication Mode)................................. 25
3.4 Dialing.................................................................................................................. 27
3.4.1 Numeric Keypad Dialing........................................................................ 27
3.4.2 Speed Dialing........................................................................................ 28
3.4.3 One Touch Dialing....... ...... ...... ...... ...... ....... ...... ...... ...... ...... ...... ...... ....... 29
3.4.4 Group Dialing........................................................................................ 29
3.4.5 Using the Address Book........................................................................ 30
3.4.6 Entering Symbols.................................................................................. 33
3.5 Manual Send.......................................... ...... ...... ....... ...... ...... ...... ...... ...... ...... ....... 34
3.6 Transmission Failure............................................................................................ 37
Chapter 4 Broadcast Send
4.1 Transmitting to Multiple Destinations (Broadcast Send) ...................................... 40
4.1.1 Broadcast Send Operation.................................................................... 42
4.2 Transmitting Documents Through a Relay Station (Relay Broadcast)................. 43
4.2.1 Before Using the Relay Broadcast Send Feature.................................. 44
4.2.2 Fax Signal Method ................................................................................ 45
4.2.3 DTMF (Dual Tone Multi Frequency) Method......................................... 46
4.2.4 F Code Method ..................................................................................... 49
4.3 Transmitting Documents Through a Remote Relay Station
(Remote Relay Broadcast)53
4.3.1 Fax Signal Method ................................................................................ 54
4.3.2 DTMF (Dual Tone Multi Frequency) Method......................................... 55
4.3.3 F Code Method ..................................................................................... 59
Chapter 5 Confirming and Canceling a Communication
5.1 Canceling Jobs.................................................................................................... 62
5.2 Confirming Job Status......................................................................................... 64
5.2.1 Checking Jobs in Progress and Pending Jobs...................................... 64
5.2.2 Confirming Completed Jobs.................................................................. 65
Chapter 6 Receiving Jobs
6.1 Reception Mode ............ ...... ...... ...... ...... ...... ...... ....... ...... ...... ...... ...... ...... ...... ....... 68
6.1.1 Switching Between the Modes.............................................................. 68
6.1.2 Automatic Reception............................................................................. 69
xii
Page 15

6.1.3 Manual Reception ................................................................................. 69
6.2 Printing Received Documents ............................................................................. 71
6.2.1 Tray Mode and User Mode.................................................................... 71
6.2.2 Printing the Same Size Images............................................................. 72
6.2.3 Printing the Same Size Images With Margins....................................... 73
6.2.4 Reducing Images at the Sender Side .......... ...... ...... ...... ...... ...... ....... .... 7 4
6.2.5 Reducing Images at the Recipient Side................................................ 75
6.2.6 Using the 2 Up on Receipt Feature....................................................... 76
6.2.7 Using the 2 Sided Printing Feature ....................................................... 76
Chapter 7 Making and Receiving Telephone Calls
7.1 Making a Telephone Call...................................................................................... 78
7.1.1 Off-hook Dialing .................................................................................... 78
7.1.2 On-hook Dialing .................................................................................... 79
7.2 Receiving a Telephone Call ................................................................................. 82
Chapter 8 Using Additional Features
8.1 Transmitting Two sided Originals (2 Sided Originals)........................................... 84
8.2 Specifying Document Size for Transmission (Scan Size) .................................... 87
8.3 Scanning Documents in Various Sizes (Mixed Size Originals)............................ 90
8.4 Scanning Documents at a Specified Size/Ratio (Reduce/Enlarge) ..................... 93
8.5 Transmitting Facing Pages on Separate Sheets (Bound Originals) ..................... 95
8.6 Merging Several Pages Onto One Sheet (Multiple Up) ....................................... 97
8.7 Executing an Urgent Job (Priority Send) ........................................................... 100
8.8 Transmitting Documents at a Programmed Time (Delayed Start)...................... 102
8.9 Transmitting Documents With Brief Information (Send Header)........................ 105
8.10 Transmitting Documents With a Cover Page (Cover Note)................................ 107
8.11 Remote Copy (Recipient Print Sets).................................................................. 110
8.12 Preparing to Be Polled (Store for Polling) .......................................................... 112
8.12.1 Store the Document to Be Polled...................................................... .. 11 2
8.12.2 Checking Documents to Be Polled...................................................... 113
8.13 Retrieving a Document From Remote Machine(s) (Polling)............................... 116
8.14 Using the Mailbox Feature (Remote Mailbox/Retrieve from Mailbox)................ 118
8.14.1 Send to Mailbox (Fax Signal Method) ................................................. 119
8.14.2 Send to Mailbox (DTMF Method)........................................................ 121
8.14.3 Send to Mailbox (F Code Method) ...................................................... 122
8.14.4 Receive in Mailbox.............................................................................. 125
xiii
Page 16

8.14.5 Retrieve From Mailbox (Fax Signal Method) ....................................... 125
8.14.6 Retrieve From Mailbox (DTMF Method).............................................. 128
8.14.7 Retrieve From mailbox (F Code Method)............................................ 130
8.14.8 Private Mailbox.................................................................................... 132
8.15 Sorting Received Documents Into Mailbox (Box Selector)................................ 135
8.15.1 Sorting by Incoming Line .................................................................... 135
8.16 Checking/Printing/Deleting Documents in Mailbox............................................ 136
8.17 Transmitting with F Code (F Code Transmittin g)................................................ 139
8.17.1 About F Code and Passwords............................................................. 139
8.17.2 Functions Used with F Code Transmission ......................................... 139
Chapter 9 Setting up System Administration Mode (Fax Functions)
9.1 Overview of System Administration Mode (Fax Functions) ............................... 142
9.2 Entering Local Terminal Information.................................................................. 145
9.2.1 How to Enter and Change................................................................... 146
9.3 Setting an Address Number .............................................................................. 150
9.3.1 Entry Method....................................... ....... ...... ...... ...... ...... ...... ...... ..... 153
9.3.2 Changing/Deleting Entered Address Numbers................................... 166
9.4 Setting a Group Dial .......................................................................................... 169
9.5 Setting a Comment............................................................................................ 171
9.6 Creating a Mailbox............................................................................................. 173
9.7 Programming Sort to Mailbox (Box Selector Entry)........................................... 178
9.7.1 Documents Sorted by Incoming Line.................................................. 178
9.8 Other Items........................................................................................................ 181
9.8.1 Setup Method...................................................................................... 181
9.8.2 Audio Tones......................................................................................... 182
9.8.3 Printing Priority.................................................................................... 183
9.8.4 Reports ............................................................................................... 184
9.8.5 Screen Defaults................................................................................... 186
9.8.6 Feature Defaults...................... ...... ...... ....... ...... ...... ...... ...... ...... ...... ..... 188
9.8.7 Fax Control.......................................................................................... 192
9.8.8 Output Destination-Line Setup............................................................ 199
9.8.9 Reduce/Enlarge Presets ..................................................................... 200
9.8.10 Setting Scan Size Defaults.................................................................. 201
xiv
Chapter 10 Reports/Lists
10.1 Report/List Types............................................................................................... 204
Page 17

10.2 Printing Reports and Lists ................................................................................. 206
10.2.1 Guide Print Operation ......................................................................... 206
10.2.2 Printing Reports and Lists Automatically............................................. 207
10.2.3 Printing a Transmission Report ........................................................... 208
10.3 Extended Features Settings List........................................................................ 210
10.4 Address Book .................................................................................................... 211
10.5 Comment List ....... ...... ...... ...... ...... ...... ...... ...... ....... ...... ...... ...... ...... ...... ...... ....... .. 212
10.6 Box Selector List................................................................................................ 213
10.7 Activity Report ................................................................................................... 214
10.8 Transmission Report.......................................................................................... 217
10.9 Broadcast/Multi-Poll Report ......... ...... ...... ...... ....... ...... ...... ...... ...... ...... ...... ....... .. 221
10.10 Relay Broadcast Report..................................................................................... 224
10.11 Mailbox Documents Report ............................................................................... 226
10.12 Stored Documents List ...................................................................................... 227
Chapter 11 Troubleshooting
11.1 Troubleshooting.................................................................................................. 230
11.1.1 Problems With Transmission............................................................... 230
11.1.2 Problems With Reception.................................................................... 231
11.1.3 Other Problems................................................................................... 231
11.2 Error Code List.................................................................................................. 234
Chapter 12 Direct Transmission of Faxes From a Computer
12.1 Overview............................................................................................................ 238
12.2 Direct Faxing . ....... ...... ...... ...... ...... ...... ...... ...... ....... ...... ...... ...... ...... ...... ...... ....... .. 239
12.3 Entering Recipient List....................................................................................... 243
12.3.1 Entering Fax Recipient Information Directly........................................ 243
12.3.2 Importing From Fax Recipient Data .................................................... 245
12.3.3 Importing From Fax Phonebook Entries.............................................. 248
12.4 Registering Address Number From a PC .......................................................... 249
Chapter 13 Using the Internet to Send and Receive Faxes
13.1 What is Internet Fax (iFax)?............................................................................... 252
13.1.1 Overview............................................................................................. 252
13.1.2 The Differences Between iFax and Facsimile Features...................... 259
13.2 Setting the Environment .................................................................................... 261
xv
Page 18

13.2.1 Before Use .......................................................................................... 261
13.2.2 Environment Setting............................................................................ 262
13.2.3 Setup the Environment........................................................................ 266
13.2.4 Confirming the Settings....................................................................... 269
13.3 Receiving and Sending E-mails......................................................................... 270
13.3.1 Sending E-mails.................................................................................. 270
13.3.2 Settings That are Configurable During an Outgoing iFax Transmission
............................................................................................................ 273
13.3.3 Receiving E-mails ............................................................................... 279
13.4 Useful Features ................................................................................................. 281
13.4.1 Sending E-mails to Mailboxes Using E-mail Addresses...................... 281
13.4.2 Sending Faxes to Recipients as Relay Centers .................................. 284
13.4.3 Forwarding a Fax as E-mail From Mailbox .......................................... 287
13.5 Report/List ......................................................................................................... 290
13.6 Troubleshooting ................................................................................................. 291
13.6.1 Problems With Transmission ............................................................... 291
13.6.2 Problems With Reception.................................................................... 292
13.7 Precautions and Limitations .............................................................................. 293
Appendix
A Specifications .................................................................................................... 298
B Glossary ............................................................................................................ 299
Index ................................................................................................................................... 303
xvi
Page 19

Using This Guide
This section describes the organization of this guide.
This guide has been produced for people who use the DocuColor 1632/2240 with fax functions on a regular daily basis. When reading this guide, read the chapter that is of particular
relevance to the operation you are performing.
What You Need to Know
This guide assumes that the operator has a basic knowledge of the operating
environment of the personal computer in use, networking environments, and how
to operate a personal computer.
For details about the environment of the personal computer in use, basic knowledge of networking environments, and how to operate a personal computer,
refer to the User Guides provided with the personal computer, operating system,
and network system.
Organization of This Guide
This Guide consists of the following chapters.
Chapter 1 Before Use
This Chapter describes the operating precautions and basic operations such as
text input when using the facsimile features.
Be sure to read this chapter before operating the machine.
Chapter 2 Loading Documents
This Chapter describes the types of original documents that can be used on this
machine; precautions on how to load documents.
Chapter 3 Transmitting
This Chapter describes how the machine receives a document from a remote
facsimile and outputs it. Most routine procedures are described in this chapter.
Chapter 4 Broadcast Send
This Chapter describes how to transmit a document to multiple destinations with
a single operation.
Chapter 5 Confirming and Canceling a Communication
This Chapter describes how to cancel communication and view information
about pending jobs, current jobs and communication results.
xvi
Page 20

Chapter 6 Receiving Jobs
This Chapter describes how the machine receives and prints documents.
Chapter 7 Making and Receiving Telepho ne Cal ls
This Chapter describes how to make and receive telephone calls using an external telephone.
Chapter 8 Using Additional Features
This Chapter describes useful facsimile features and operations.
Chapter 9 Setting up System Administration Mode (Fax Functions)
This Chapter describes how to register data to use the fax functions and the
setup procedures to customize these functions.
Chapter 10 Reports/Lists
This Chapter describes reports and list settings and how to print them.
Chapter 11 Troubleshooting
This Chapter describes what to do when transmission errors occur and when an
error code is displayed in the Activity Report.
Chapter 12 Direct Transmission of Faxes From a Computer
This Chapter describes how to transmit faxes directly from a computer.
Chapter 13 Using the Internet to Send and Receive Faxes
This Chapter describes how to use the Internet Fax (iFAX) function to send and
receive faxes.
Appendix
This appendix describes specifications, brief information on the facsimile service
system, and overseas communication.
xvii
Page 21

Conventions
1
In this guide, host device refers to a personal computer or workstation.
2
The following icons are used in this guide.
Indicates important information and must be read in detail.
Indicates supplementary information.
Indicates references used in this guide. Guide titles are noted without double
quotes while specific sections like “1.9.2 Disabling the Power Saver Mode” or
found within double quotes.
3
Special marks/characters used in this guide.
“ ” : Double quotes indicate the following:
Bold face : Bold face characters refer to selections made like options on the
●
Messages that appear in the touch panel display and computer
screens.
●
Characters to be entered.
●
Feature names or buttons that are difficult to understand.
screen, hard or soft buttons, and keys from the keyboard.
For example: Press
ESC
.
When a checkbox is checked, it indicates ON, otherwise it indicates OFF.
4
The item with the radio button checked is the selected item.
5
xviii
Page 22

xix
Page 23

1
Before Use
1.1 Data to be Registered Before Using the Machine..............................2
1.2 Notes on Fax Communications..........................................................3
1.2.1 Telephone Line Connection................................................3
1.2.2 Automatic Receive Mode....................................................3
1.2.3 Making a Telephone Call ....................... ... ..........................3
1.3 Telephone Line Connectors................................... ............................ .4
1.4 Using the Touch Panel Display............................................................5
1.4.1 Displaying Copy, Scan and Fax Screens ...........................5
1.4.2 Selecting Fax Function Screen...........................................6
1.5 Entering Text................................................................... .... ...............8
1.5.1 Entry Method......................................................................8
Page 24

Data to be Registered
Before Use
1
1.1
The following data has to be registered before using the machine.
Item Contents See
Date and
time
Telephone
line
Local
name
Company
Logo
Address
Number
The current date and time .
A fax number and dial type is registered for
each line the fax is connected to.
The name of the machine displayed by the
receiving machine and re corded in the remote
activity report. The machine identifies itself to
the remote machine when they communicate.
The local name can include alphanumeric
characters and symbols.
This is the Send Header text e.g. name
of business, printed on the Cover Note or the
first line of the transmitted document(s) Send
Header. The Company Logo can include
alphanumeric characters and symbols.
The telephone numbers you frequently use.
The Address Number can include remote
name, telephone number, and specifications
for communication mode, resolution, Broadcast Send and Relay Broadcas t.
Before Using the Machine
“9.2 Entering Local Terminal Information” (P. 145)
“9.2 Entering Local Terminal Information” (P. 145)
“9.2 Entering Local Terminal Information” (P. 145)
“9.3 Setting an Address Number”
(P. 150)
—
For details on settings for the Internet Fax (iFAX), see “13.2 Setting the Environment” (P. 261).
2
Page 25

Notes on Fax
1.2
Follow the instructions described below when using the fax features on the machine.
1.2.1
Telephone Line Connection
You cannot use this machine with a call waiting service.
A facsimile located close to a main unit of a cordless phone can cause distorted
images or interrupted transmission.
This machine should be installed at least five meters away from the main unit of
the cordless phone.
If the digital line leased for your company network is multiplexed, facsimile communication may be restricted as follows:
(1) The features using our unique transmission method, such as Recipient Print
(2) The transmission speed is limited.
(3) Super G3 cannot be used.
The following communication errors may also occur.
These restrictions may occur because the multiplexing device restricts the bandwidth to the minimum required for voice communications. These restrictions vary
according to the network configuration.
For more information, contact your network administrator.
Communications
Sets, Relay Broadcast and Remote Mailbox, are not available.
Before Use
1
1.2.2
1.2.3
Automatic Receive Mode
If the telephone rings while the machine is in standby mode with the automatic
receive mode activated, you cannot speak with the caller.
When you want to answer a telephone call in this mode, connect an external
telephone and use the Auto Switch Time feature to change the time for the
machine to answer the call.
“9.8.7 Fax Control” (P. 192)
Making a Telephone Call
In power saving, you cannot make telephone call with the receiver.To make a
telephone call, press the Power Saver button to cancel power saving.
3
Page 26
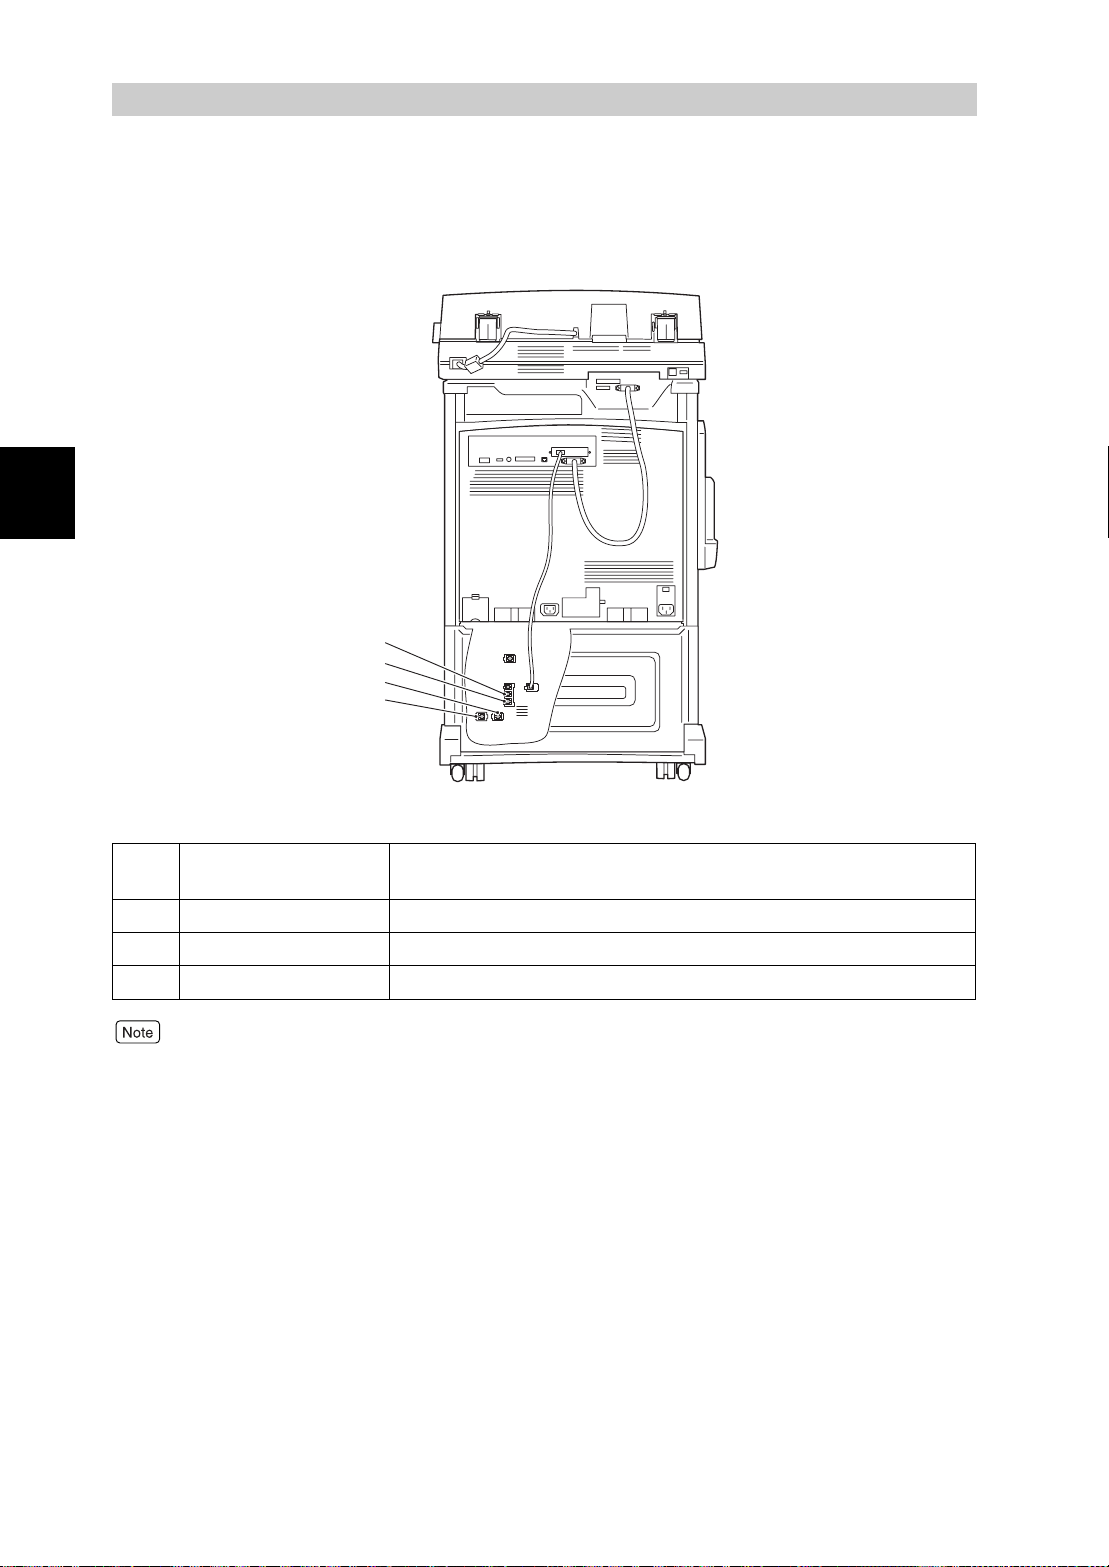
Telephone Line
Before Use
1
1.3
The figure below shows the telephone line connectors at the rear side of the machine.
Connectors
1
2
3
4
1 LINE 1 Connect the fax to a public switched telephone network (PSTN). An
external telephone cannot be connected.
2 TEL An external telephone is connected here.
3 LINE 2 (Line 2) Connect to a public line.
4 LINE 4 (Line 4) Connect to a public line.
US/Canada: Line 2 and 4 can be specified when an option is installed.
Europe: Line 1 only.
4
Page 27
Using the Touch Panel
1.4
Display
By selecting the feature buttons on the touch panel display, you can select various features.
1.4.1
Displaying Copy, Scan and Fax Screens
Use the Menu to access one of the three screens Copy, Scan, and Fax.
Press the Menu at the top right of each screen to display the Menu.
●
If this fails to display the Menu, press the Features button to display the Menu.
●
The machine is factory set to display the Copy screen as the default screen on the touch panel display when the power is turned on. This default screen can be changed in the System Administration
Mode.
Menu screen
■
Menu
Back
Before Use
1
Copy Scan
Use the buttons on the Menu screen to display the screen of the required features.
Copy screen
■
Basic Copying
Output Color Paper Supply
Auto
Full Color
Black
Dual Color-Red/Black
More...
The Copy screen allows you to select the copy features. The Copy screen consists of Basic Copying,
Added Features, Image Quality, and Others.
Added
Features
2 Sided
1->1 Sided
1->2 Sided (H to H)
2->2 Sided (H to H)
2->1 Sided (H to H)
More...
Image Quality
Reduce/Enlarge
100%
Auto%
50% A3->A5
70% A3->A4,B4->B5
More...
Others
Fax
Auto
1 A4
2 A3
3 8.5 11’’
More...
Menu
Plain
Plain
Plain
5
Page 28
Before Use
1
1.4 Using the Touch Panel Display
Scan screen
■
Scan OptionsBasic Scanning
Scan to: Output Color
Mailbox...
Job Template...
Auto 200dpi
Full Color
Grayscale
Black
The Scan screen allows you to select the scanner features.
Fax screen
■
Basic Features Scan Options Send Options
Resolution Original Type Lighter/Darker
A B C
Address Book
Keyboard
Standard
Fine
Super-fine (400dpi)
Super-fine (600dpi)
Image Quality/
File Format
Menu
Scan Resolution 2 Sided Originals
300dpi
400dpi
600dpi
On-Hook/
Others
Text
Text & Photo
Photo
1 Sided
2 Sided (H to H)
2 Sided (H to T)
More...
Menu
1.4.2
The Fax screen allows you to select the fax features.
The Fax screen consists of Basic Features, Scan Options, Send Options and On-Hook/Others. For
details on each screen, see “1.4.2 Selecting Fax Function Screen” (P.6).
Selecting Fax Function Screen
The Fax screen consists of Basic Features, Scan Options, Send Options and
On-Hook/Others.
●
The machine is factory-set to display the Basic Features screen as the default Fax screen. For
details on switching the Fax screens, see “9.8 Other Items” (P. 181).
●
For details on the features displayed on each screen, see “Chapter 3 Transmitting” (P. 1 9) and
“Chapter 8 Using Additional Features” (P. 83).
Basic Features screen
■
Enter recipient’s Fax No. Memory :100%
[ Fax No. ]
Basic Features Scan Options Send Options
Resolution Original Type Lighter/Darker
Standard
Fine
Super-fine (400dpi)
Super-fine (600dpi)
A B C
Address Book
Keyboard
On-Hook/
Others
Text
Text & Photo
Photo
Next
Recipient
Menu
6
Page 29
Scan Options screen
■
1.4 Using the Touc h Pan el Di splay
Enter recipient’s Fax No. Memory :100%
[ Fax No. ]
Basic Features Scan Options Send Options
2 Sided Originals
1 Sided
Reduce/Enlarge
Auto %
Send Options screen
■
Enter recipient’s Fax No. Memory :100%
[ Fax No. ]
Basic Features Scan Options Send Options
Communication Mode
G3 Auto
Cover Note
Off
On-Hook/Others screen
■
Enter recipient's Fax No. Memory :100%
[ Fax No. ]
Basic Features Scan Options Send Options
Store for Polling
Off
F Code
Off
Scan Size
Auto Size Detect
Bound Originals
Off
Priority Send/
Delayed Start
Priority Send : Off
Delayed Start : Off
Recipient Print Sets
1 Set(s)
Polling
Off
On-hook
Manual Send/Receive
On-Hook/
Others
On-Hook/
Others
On-Hook/
Others
Next
Recipient
Menu
Mixed Size Originals
Off
Multiple Up
Off
Next
Recipient
Menu
Send Header
On
Transmission Report
Off
Next
Recipient
Menu
Remote Mailbox
Off
Before Use
1
7
Page 30
Entering Text
1.5
This section describes how to enter characters. Use the keyboard displayed on the touch
panel display to enter text.
This machine allows you to enter numerics, alphabetic characters, and symbols. However,
Before Use
restrictions on the number of characters that can be entered apply to some items.
1
1.5.1
Entry Method
The screen for entering text is sometimes displayed during machine operations. The following describes how to enter text.
Save
Backspace
Space
Shift
Alphanumeric
Symbol
●
Entering alphabet
Cancel
b
a
c
d
h
o
v
j
j
k
q
p
w
r
x
y
f
e
g
l
m
n
t
s
u
z
3
2
1
6
54
9
7
8
0
characters and numbers......... Select the Alphanumeric button. You can
select between upper- and lower-case
characters by selecting the Shift button.
To return to the previous state, select the
Shift button again.
●
Entering symbols................... Select the Symbol button.
●
Entering spaces..................... Select the Space button.
●
1 Deleting characters ............ Select the Backspace button. This deletes one
character at a time.
You can also use the buttons on the control panel.
8
Page 31

2
Loading Documents
2.1 Documents.......................................................................................10
2.1.1 Applicable Document Siz e s............................. .................10
2.1.2 Automatically Detected Document Sizes..........................11
2.1.3 Document Handling..........................................................12
2.2 Loading Documents..................... ....................................................14
2.2.1 Loading Documents on the Document Glass...................14
2.2.2 Loading Documents in the Document Feeder..................15
2.2.3 Document Orientation.......................................................16
2.2.4 If You Have More Documents to Scan..............................17
Page 32

Documents
2.1
You can load documents on the document glass, or place them on the document feeder.
The document feeder allows you to load a stack of documents in it each time.
This section describes the size of documents that can be loaded on the document glass or
Loading Documents
on the document feeder.
2
2.1.1
Applicable Document Sizes
Load only the document sizes listed in the table below on the document glass or
document feeder.
Document glass Document feeder
Document size Smallest size 15 × 15 mm
Largest size 334.5 × 452 mm
Scanning area 297 × 432 mm
Document weight (per
square meter
Number of documents
that can be loaded
*1
)
1 sheet
Smallest size 210 × 148.5 mm
(A5 )
Largest size 297 × 432 mm
(A3, 11 × 17 inch)
297mm
432mm
38 to 128 g/m (one sided document) 50 to 110 g/m (2 sided
documents
50 sheets (38 to 100 g/m
40 sheets (101 to 128g /m
*2
)
2
)
2
)
10
*1 Paper weight is expressed in grams per square meter (gsm).
*2 This value applies when both sides of a two sided document is scanned and tran smitted.
Page 33

2.1 Documents
2.1.2
Automatically Detected Document Sizes
This machine automatically detects document sizes during transmission. The following standard sizes are automatically detected and need not be set.
Specify the closest standard siz e us in g Scan size on the Scan Options scr een whe n loa ding a non-standard document. For details on how to enter the document size, see “8.2 Specifying Document Size for
Transmission (Scan Size)” (P. 87).
Automatically Detected Document Sizes
■
US/Canada Europe
Document Glass
Document
Feeder
The sizes on the left are detected as sizes shown on the right.
A6 , 5.5
× 10"
8.5
5.5
11", 11
, 8.5
" × 14"
" ×
8.5", 8.5
" × 17"
" ×
8.5", 5.5
" × 11"
, 11
, A4, 8.5
" × 17"
" × 11"
, A4, A3
" ×
" × 11"
, A3
, 8.5
8.5", 8
" ×
"
A6 , B6 , A5 , B6, A5, 8
" × 11"
" × 17"
" × 11"
, 8.5
, A3
" × 11"
, A4, B5 ,
,
10", B5, 8.5
A4 , 8.5
B4 , 11
A5, A4 , B5, 8.5
A4, A3
" ×
" × 13"
, B4 ,
Loading Documents
2
,
Document Glass
Document
Feeder
US/Canada Europe
B6
B6
B5
" × 10"
8
" ×
8
8.5
11
A5
5.5
" × 10" →
8
B5
" ×
8
A4
8.5
8.5
8.5
B5
" × 10"
8
" ×
8
B4
11
10.5"
" × 13"
" ×
14.9"
" ×
8.5"
10.5"
" ×
12.4"
" × 13"
" × 14"
10.5"
" × 15"
→
→
→
→
→
→
→
→
→
→
→
→
→
→
→
→
→
→
→
→
" ×
5.5
A5
" × 10"
8
A4
A4
" × 14"
8.5
" × 17"
11
" ×
5.5
" × 11"
8.5
" × 11"
8.5
" × 11"
8.5
" × 11"
8.5
" × 11"
8.5
" × 11"
8.5
" × 11"
8.5
" × 11"
8.5
" × 11"
8.5
" × 11"
8.5
" × 11"
8.5
" × 17"
11
" × 17"
11
8.5
8.5
"
" × 10"
8
" ×
8
10.5"
" × 14"
8.5
" ×
11
14.9"
"
" ×
5.5
" ×
5.5
" × 10"
8
B5
" ×
8.5
" × 11"
8.5
" ×
8.5
" × 13"
8.5
" × 14"
8.5
" × 10"
8
" ×
8
" × 15"
11
" × 17"
11
8.5"
8.5"
10.5"
12.4"
10.5"
→
A4
→
A4
→
→
→
→
→
→
→
→
→
→
→
→
→
→
→
8.5
11
A5
A4
A4
A4
A4
A4
A4
A4
A4
8.5
8.5
B4
B4
" × 13"
" × 17"
" × 11"
" × 11"
11
Page 34

2.1 Documents
Loading Documents
2
2.1.3
Document Handling
Pay attention to the following when placing documents on the document glass or
in the document feeder
Document Glass
Since the following document types are not automatically detected, an error
message may appear or the entire image may not be scanned.
Use the listed procedures to solve this problem.
Non-standard size document
Glossy documents
Thick documents (maga-
zines or the like)
Highly transparent materi-
als such as transparencies
Torn, creased, perforated
or excessively curled documents
Documents
(for facsimile)
Procedure
Specify the closest standard size using Scan Size on the
Scan Options screen.
Place a sheet of white paper the same size as the document
on top of it.
Specify the document size using Scan Size on the Scan
Options screen.
●
Do not load excessively wet documents. Such documents exposes the machine to water and may
damage it.
●
Do not load a document of a weight greater than 5 kg. Such a document could damage the document glass and the machine.
Documents placed in a photograph holder may not be scanned correctly if the film is severely creased.
For details on the scanning size function, see “8.2 Specifying Document Size for Transmission (Scan
Size)” (P. 87).
12
Page 35

Document Feeder
2.1 Documents
The following type of documents cause paper jams or document damage. Such
documents should be placed on the document glass and not in the doc ument
feeder.
●
Folded documents
●
Glossy documents such a s photo graphs
●
Documents to which pieces of
other documents have been
pasted
●
Thick documents
●
Documents that are too light
●
Torn, creased, perforated or excessively curled
documents
●
Documents that are hel d to ge th er by clips, staples
or adhesive.
●
Coated documents or documents with carbon
paper on the rear side
●
Highly transparent materials such as transparencies
●
Thermal paper
Loading Documents
2
13
Page 36

Loading Documents
2
Loading Documents
2.2
This section describes how to load documents.
2.2.1
Procedure
1
Loading Documents on the Document
Glass
This section describes how to load documents on the document glass.
Open the document cover.
Place the document face down, align-
2
ing the corner with the upper left-hand
side corner of the document glass.
Place a sheet of white paper on top of transparencies
and other highly transparent documents.
Close the document cover.
3
When transmitting a thick document, do
not use excessive force to press it against
the document glass. The glass could
break and cause injury.
When scanning with the document cover
open, avoid looking directly at the copy
lamp as this may cause eye fatigue or
strain.
14
Page 37

2.2 Loading Documents
2.2.2
The document feeder can handle up to 50 documents of sizes ranging from
148.5 × 210 mm to 297 × 432 mm. Multiple documents are transmitted in order
from the top and are ejected with the text side face down. This section describes
how to load documents in the document feeder.
Up to 40 thick documents (101 to 128 g/m2) can be loaded.
Procedure
Align the edges of the docume n t.
1
Remove any paper clips or staples.
Extend the document tray extension when loading large documents.
Place the document with the side to
2
be sent facing up (top side for a two
sided document) and slide it into the
document feeder in the directi on of th e
arrow as far as it will go.
The check indicator lights.
Loading Documents in the Document
Feeder
Loading Documents
2
Place documents facing left in the orientation they are
scanned.
Adjust the movable document guide to
3
just touch the edge of the document
stack.
Observe the following to prevent paper jams and damage to documents.
●
Do not hold documents while th ey are being f ed i nto
the scanner.
●
Do not allow sheets to accumulate in the document
tray.
●
Do not place objects on the document tray.
15
Page 38

2.2 Loading Documents
Mixed Size Originals
Loading Documents
2
2.2.3
Documents of different sizes can be loaded together. To do this, slide the documents into the document sending tray as far as they will go, select On in the
Mixed Size Originals screen under the Scan Options. A paper jam will occur
unless this setting is made.
For details, see “8.3 Scanning Documents in Various Sizes (Mixed Size Originals)” (P. 90).
Document Orientation
To transmit a two sided original using the document feeder, the orientation must
be set to indicate the top of the document.
Select Flip on Short-Edge or Flip on Long-Edge under Originals in the 2 Sided
Originals screen of the Scan Options.
The left side orientation is normally specified.
●
Flip on Long-Edge is used for documents where side 1 and side 2 of a document page have the same orientation.
NO.1
NO.1
NO.2
NO.2
The first page The second page
●
Flip on Short-Edge is used for documents where text orientation on side 2 is
inverted from that of side 1.
NO.1
NO.2
For details on the two sided transmission function, see “8.1 Transmitting Two sided Originals (2
Sided Originals)” (P. 84).
NO.1
The first page The second page
NO.2
16
Page 39

2.2 Loading Documents
2.2.4
If you have more than one stack of documents to scan, select the Next Original
button on the touch panel display while the current stack of documents is being
scanned. This allows you to transmit several documents as one set of data.
Procedure
While documents are being scanned, select
1
●
●
If You Have More Documents to Scan
Next Original
Scanning documents...
Fax Store
: 0123456789
Type: Single Terminal
Pages :
1
Standard
When using the document feeder, load the next sets of documents after the machine has finished
scanning the first set.
When no operation is performed in the above screen during a certain period of time, the machine
assumes there are no more documents to scan and an automatic reset is performed. The default
value for the automatic reset time can be changed in the System Administration Mode. The default
factory setting is 1 minute.
:Doc. No. 00010
Last Original
Next Original
Stop
Stop
.
Loading Documents
2
Place the next document.
2
Press
3
When there are still more documents, load the next document and press the Start button.
Start
.
17
Page 40

2.2 Loading Documents
Loading Documents
2
When all documents have been scanned, select
4
Scanning documents...
Fax Store
: 0123456789
Type: Single Terminal
Pages :
Standard
1
:Doc. No. 00010
Stop
Last Original
Next Original
Stop
Last Original
.
18
Page 41

3
3.7 Sending to a Machine that has a Machine Password Set....................38A
Transmitting
3.1 Simple Send Procedure...................................................................20
3.1.1 Resolution.........................................................................20
3.1.2 Original Type.....................................................................21
3.1.3 Lighter/Darker ...................................................................21
3.1.4 Simple Send Procedure....................................................22
3.2 Transmitting by a Specified Telephone Line.....................................23
3.2.1 Transmitting by a Specified Telephone Line......................23
3.2.2 Adding Lines.....................................................................24
3.3 Selecting a Communication Mode (Communication Mode)............. 25
3.4 Dialing..............................................................................................27
3.4.1 Numeric Keypad Dialing...................................................27
3.4.2 Speed Dialing...................................................................28
3.4.3 One Touch Dialing ............................................................29
3.4.4 Group Dialing......................................... ...........................29
3.4.5 Using the Address Book...................................................30
3.4.6 Entering Symbols .............................................................33
3.5 Manual Send.......................................... ..........................................34
3.6 Transmission Failure ........................................................................37
Page 42

Transmitting
3
Simple Send Procedure
3.1
This section describes setup of basic functions and send procedures.
●
The machine is factory-set to inform users of the completion of document scanning and communication with a
sound.
●
The document is scanned and “Documents Sent” appears on the touch panel display. This setting is canceled if a
momentary power outage occurs while is being displayed. If this happens, carry out the settings again.
●
You can send manually after confirming the destination by picking up the optional handset or with the handset
on-hook. For details on sending manually, see “3.5 Manual Send” (P. 34).
Basic Features are set up using the Basic Features screen.
Enter recipient’s Fax No. Memory :100%
[ Fax No. ]
Basic Features Scan Options Send Options
Resolution Original Type Lighter/Darker
Standard
Fine
Super-fine (400dpi)
Super-fine (600dpi)
A B C
Address Book
Keyboard
On-Hook/
Others
Text
Text & Photo
Photo
Next
Recipient
Menu
3.1.1
Resolution
You can set the resolution level for the documents to be scanned.
Standard
■
For documents with easily legible text. (Approx. 200 × 100 dpi/25.4 mm)
Fine (200dpi)
■
For documents with fine text and/or images. (Approx. 200 × 200 dpi/25.4 mm)
Super-fine (400 dpi)
■
For documents with extremely fine text and/or images. (400 × 400 dpi/25.4
mm)
Super-fine (600 dpi)
■
For documents with extremely fine text and/or images.
(600 × 600 dpi/25.4 mm)
●
The Resolution can be individually set for each Address Number. For details on how to register
Address Numbers, see “9.3 Setting an Address Number” (P. 150). The factory-set default is Standard.
●
You can change the default value of the scanning resolution in the System Administration Mode.
For information on how to do the change, see “9.8.6 Feature Defaults” (P. 188). The factory
default value has been set as standard.
●
The machine scans the documents at the specified resolution setting, but if the remote terminal has
no corresponding mode, the machine automatically changes to a resolution supported by the other
machine with the resulting loss of high resolution.
20
Page 43

3.1 Simple Send Procedure
●
The higher the resolution, the lower the transmission speed. Usually, we recommend you even
Super-fine (400dpi).
●
When the Internet Fax (iFAX) function is used for transmission and TIFF-S is selected in the iFAX
Profile in the On-Hook/Others screen, Super-fine (400 dpi) and Super-fine (600 dpi) cannot be
selected. For details on IFAX Profile, see “13.3.2 Settings That a re Configurab le During an Outgoing iFax Transmission” (P. 273).
3.1.2
Original Type
When transmitting photo images or a document that includes photo images, you
can select an appropriate document quality for transmission.
The Original Type can be se lec ted as req uired fo r transm itting t ext docu ments or
documents containing ph otos, etc.
■
Text
For documents with text.
■
Text&Photo
For documents including both text and photo images. This setting automatically
assesses text and photo areas to set the appropriate document quality per
area.
■
Photo
For documents including photo images.
●
The Original Type default value can b e cha nged in the System Administration Mode. For det ail s on
how to change this default value, see “9.8.6 Feature Defaults” (P. 188). The default factory setting
is Text.
●
We recommend selecting same-scale scanning for documents that include photo images. With a
reduction feature, such as the Scan Size Option, stripes may appear on photo images in the reproduced document.
Transmitting
3
3.1.3
Lighter/Darker
Enter the density level.
Seven density levels are available.
The Lighter/Darker default value can be changed in the System Administration Mode. For details on
how to change this default value, see “9.8.6 Feature Defaults” (P. 188). The default factory setting is
Standard.
21
Page 44

3.1 Simple Send Procedure
Transmitting
3
3.1.4
Simple Send Procedure
Loading documents.
Display the Fax screen.
Fax
Back
Next
Recipient
Menu
Menu
Copy Scanner
Select Resolution, Original Type and Lighter/Darker.
Enter recipient's Fax No. Memory :100%
[ Fax No. ]
Text
Text & Photo
Photo
On-Hook/
Others
Basic Features Scan Options Send Options
Resolution Original Type Lighter/Darker
Standard
Fine
Super-fine (400dpi)
Super-fine (600dpi)
A B C
Address Book
Keyboard
“2.2 Loading Documents” (P. 14)
“1.4 Using the Touch Panel Display” (P. 5)
Select Fax.
Select features (if necessary)
Basic Features Scan Options Send Options
2 Sided Originals
1 Sided
Reduce/Enlarge
Auto %
Basic Features Scan Options Send Options
Store for Polling
Off
F Code
Off
Scan Size
Auto Size Detect
Bound Originals
Off
Polling
Off
On-hook
Manual Send/Receive
Dial the telephone number.
Select Start.
On-Hook/
Others
On-Hook/
Others
Next
Recipient
Menu
Mixed Size Originals
Off
Multiple Up
Off
Next
Recipient
Menu
Remote Mailbox
Off
Next
Recipient
Basic Features Scan Options Send Options
Communication Mode
G3 Auto
Cover Note
Off
Priority Send/
Delayed Start
Priority Send : Off
Delayed Start : Off
Recipient Print Sets
1 Set(s)
On-Hook/
Others
Menu
Send Header
On
Transmission Report
Off
For details on fax functions, see the following.
“Chapter 3 Transmitting” (P. 19)
“Chapter 4 Broadcast Send” (P. 39)
“Chapter 8 Using Additional Features” (P. 83)
“3.4 Dialing” (P. 27)
The documents are scanned, and sending starts.
22
Page 45

Transmitting by a Specified
3.2
Special symbols can be used to select lines during transmission.
This section describes procedures for selecting lines for transmission and adding outside
lines with an optional fax (G3/NCU additional).
3.2.1
Transmitting by a Specified Telephone
Telephone Line
Line
When multiple lines are used, you can specify a line (port) for transmission. It is
useful to program local fax information for each line and select a telephone line.
For details on how to register Local Information, see “9.2 Entering Local Terminal Information”
(P. 145).
Procedure
Transmitting
3
Load documents.
1
“2.2 Loading Documents” (P. 14)
Display the Fax screen.
2
Enter recipient’s Fax No. Memory :100%
[ Fax No. ]
Outside Line
Basic Features Scan Options Send Options
iFax/Fax
Address Book
A B C
Keyboard
3
Select
Keyboard
the following format.
Port(line)
number
●
Port numbers are line 1 → “1”, line 2 → “2”and line 4 → “4”
●
Line 2 and 4 can be specified when an option is installed.
Next
Recipient
On-Hook/
Others
Resolution Original Type Lighter/Darker
Standard
Fine
Super-fine (400dpi)
Super-fine (600dpi)
Text
Text & Photo
Photo
Menu
to display the keyboard on the touch panel and enter
Dial number
23
Page 46

3.2 Transmitting by a Specifie d Telephone Line
Transmitting
3
4
3.2.2
Press
Scanning and transmission begins.
For details on how to confirm and cancel the transmission of a document , “Chapter 5 Confirming and
Canceling a Communication” (P. 61).
Start
.
Adding Lines
Lines can be increased by installing an optional FAX (G3/NCU additional). A
FAX additional board kit must be installed to enable the installation of these
options.
The following line and channel configurations are possible depending on how the
options are integrated.
●
FAX (G3/NCU) +FAX (G3/NCU additional) → 2 lines, 2 channels
●
FAX (G3/NCU) +FAX (G3/NCU additional) +FAX (G3/NCU additional) → 3
lines, 3 channels
24
Page 47

Selecting a Communication
3.3
You can select a communication mode based on the capabilities of the remote terminal.
G3 is the international standard for facsimile transmissions established by the ITU-T.
When the Address Number, One Touch Dialing, Group Dialing, or Address Book is used to dial a fax number, the
communications mode currently set to the address number is set and cannot be changed.
●
The Communication Mode can be individually set for each Address Number. For details on how to register
Address Numbers, see “9.3 Setting an Address Number” (P. 150).
●
The Communication Mode default value can be changed in the System Administration Mode. For details on how
to change this default value, see “9.8 Other Items” (P. 181). The default factory setting is G3 Auto.
Mode (Communication Mode)
Communication Modes that can be Selected
G3 Auto
■
Select this mode if the remote terminal is G3 compatible. This mode is the one
normally selected.
The machine automatically switches modes in the following order of priority:
Unique SG3
T G3 depending on the capabilities of the remote terminal.
Unique ECM → Unique G3 → ITU-T SG3 → ITU-T ECM → ITU-
→
Transmitting
3
●
The following indicates the ini tial tran smission spee d, alth ough th e machi ne may switch t o a sl ower
transmission rate depending on the line.
●
G3 Auto: 33.6 kbps (maximum)
●
A communication mode can be specified for transmissions using the Internet Fax (iFAX) function
only when the fax gateway function is used. G3 Auto is used in all other cases. For details on the
fax gateway function, see “13.1.2 The Differences Between iFax and Facsimile Features” (P. 259).
25
Page 48

3.3 Selecting a Communication Mode (Co mmunication Mode)
Procedure
Display the Fax screen.
1
Enter recipient’s Fax No. Memory :100%
[ Fax No. ]
Basic Features Scan Options Send Options
Resolution Original Type Lighter/Darker
Standard
Fine
Super-fine (400dpi)
Super-fine (600dpi)
Text
Text & Photo
Photo
Transmitting
A B C
Address Book
Keyboard
On-Hook/
Others
Next
Recipient
Menu
3
2
Select
Communication Mode
Enter recipient’s Fax No. Memory :100%
[ Fax No. ]
Basic Features Scan Options Send Options
Communication Mode
G3 Auto
Cover Note
Off
Priority Send/
Delayed Start
Priority Send : Off
Delayed Start : Off
Recipient Print Sets
1 Set(s)
On-Hook/
Others
The Communication Mode screen is displayed.
Select the G3 Auto communication mode.
3
Enter recipient’s Fax No. Memory :100%
[ Fax No. ]
Communication Mode
G3 Auto
F4800
4
Select
Save
.
in the Send Options Screen.
Next
Recipient
Menu
Send Header
On
Transmission Report
Off
Next
Recipient
Cancel
Save
26
Page 49

Dialing
3.4
The machine allows the following five dialing methods (fax numbers/mail addresses):
●
Keypad Dialing
●
Speed Dialing
●
One Touch Dialing
●
Group Dialing
●
Using the Address Book
You can dial multiple locations (Broadcast Send) at a time by one or more of the above
methods. These methods can also be used in combination.
Several pending documents can be sent to one destination with a single phone call. This
function is referred to as -batch send.
Note that Batch Send cannot be used together with Broadcast Send, Relay Broadcast Send,
Remote Mailbox, and Delayed Start before the specified time. Nor can transmissions to a
single destination from separate departments be batch processed when there are redialing,
resending or delayed start jobs.
Transmitting
3
●
Mail addresses are used with the Internet Fax (iFAX) function. A mail address can contain up to 128 characters.
●
For details on Broadcast Send, see “4.1 Transmitting to Multiple Destinations (Broadcast Send)” (P. 40).
●
Both iFAX and normal Fax destinations can be used in a Broadcast Send operation. When both type of destinations are entered, mail is sent to iFAX destinations and normal fax transmissions are made to Fax destinations.
3.4.1
Numeric Keypad Dialing
You can use the
numeric keypad to
enter the fax number.
Procedure
Enter the fax number using the
1
numeric keypad.
The Touch Panel Display displays the fax number
entered.
Press the Clear button to correct incorrectly entered
numbers one by o ne.
1 2 3
4 5 6
8 9
7
0
27
Page 50

3.4 Dialing
Transmitting
3
2
3.4.2
Select
Repeat this step to enter multiple fax numbers. You can designate up to 50 destinations at a time.
Next Recipient
Enter recipient’s Fax No. Memory :100%
[ Fax No. ]
Basic Features Scan Options Send Options
A B C
0123456789
Address Book
Keyboard
Resolution Original Type Lighter/Darker
Standard
Fine
Super-fine (400dpi)
Super-fine (600dpi)
to enter multiple locations.
Next
Recipient
On-Hook/
Others
Text
Text & Photo
Photo
Menu
Speed Dialing
You can use Speed Dialing to dial numbers. Program the telephone numbers for
the speed dials beforehand.
A wild card (∗ character on the keypad or ∗ on the keyboard screen) can also be
used to designate multiple locations.
Enter first two digits to select Address Numbers.
■
For example, 10 stations from 100 to 109 can be specified by entering 10∗.
■
You cannot use two wildcard characters, such as 1**, *1*, or **1.
For details on how to register speed dialing numbers, see “9.3 Setting an Address Number” (P.150).
Procedure
Press (speed dialing) and enter a
1
3-digit Address Number.
Repeat this step1 for each additional number.
Select all the Address Numbers.
Enter “
” to select all the Address Numbers.
∗∗∗
1 2 3
4 5 6
8 9
7
0
28
Page 51

3.4 Dialing
3.4.3
You can use the one touch buttons to dial numbers.
Each one touch button corresponds to each Address Number from 001 to 090.
For example, when the number you want to dial is programmed to the Address
Number 001, press the one touch button, 001.
For details on how to register speed dialing numbers, see “9.3 Setting an Address Number” (P. 150).
Procedure
Press the desired one touch button.
1
●
●
●
One Touch Dialing
Each one touch button corresponds to Address Numbers from 001 to 090, respectively.
Repeat this step to designate multiple destinations.
Turn the panel over to press the one t ouch bu tto ns for
Address Numbers 031 and above.
001 006 011
002 007 012
003 008 013
004 009 014
005 010 015
016 021 026
017 022 027
018 023 028
019 024 029
020 025 030
Transmitting
3
3.4.4
Group Dialing
You can use the Group Dialing feature to dial telephone numbers. Prior to use,
program multiple locations to a group dial number.
For details on how to group dial numbers, see “9.4 Setting a Group Dial” (P. 169).
29
Page 52

Transmitting
3.4 Dialing
Procedure
Press (speed dialing) and enter #
1
and a two-digit number usin g the
numeric keypad.
Repeat this step1 for each additional number.
1 2 3
4 5 6
8 9
7
0
3
3.4.5
Using the Address Book
This section describes how to use the Address Book to enter numbers.
The Address Book shows the fax numbers and ma il addres ses sto red in the sp eed dial ing num bers. Fo r
details on how to register Address Numbers, see “9.3 Setting an Address Number” (P. 150).
30
Page 53

Procedure
Display the Fax screen.
1
Enter recipient’s Fax No. Memory :100%
[ Fax No. ]
Basic Features Scan Options Send Options
Resolution Original Type Lighter/Darker
Standard
Fine
Super-fine (400dpi)
Super-fine (600dpi)
A B C
Address Book
Keyboard
On-Hook/
Others
Text
Text & Photo
Photo
Next
Recipient
Menu
3.4 Dialing
Transmitting
2
Select
Address Book
Enter recipient’s Fax No. Memory :100%
[ Fax No. ]
Basic Features Scan Options Send Options
Resolution Original Type Lighter/Darker
Standard
Fine
Super-fine (400dpi)
Super-fine (600dpi)
A B C
Address Book
Keyboard
in the Basic Features screen.
On-Hook/
Others
Text
Text & Photo
Photo
Next
Recipient
Menu
The Address Book screen is displayed.
Select the tab you are looking for to search for a fax number.
3
Enter recipient’s Fax No. Memory :100%
[ Fax No. ]
Address Book
001
Xerox Akira Endo
004
007
010
002 003
005
008
011 012
ABCDE
006
009
FGHIJ KLMNO PQRST UVWXYZ
Enter Number
0-9
Next
Recipient
Close
Go to
(001-500)
GroupAddress List
The fax number is displayed.
3
Repeat this step to designate multiple destinations.
Using the Address Book
Speed dialing numbers, recipients, index and group dialing can be used to
search fax numbers and mail addresses.
The initial Address Number can be changed in the System Adm ini st r ati on Mode. For details on how to
change this number, see “9.8.5 Screen Defaults” (P. 186).
31
Page 54

3.4 Dialing
Address list
■
This shows a list of all registered addresses.
Press the button to display the previous screen and press the button to dis-
play the next screen. Press the Enter Number button and enter an Address Number (001 to 500) in the Go to using the numeric keypad to displa y the entered
number at the top of the list.
Transmitting
3
Enter recipient’s Fax No. Memory :100%
[ Fax No. ]
Address Book
001
Xerox Akira Endo
004
007
010
Index Search
■
002 003
005
008
011 012
ABCDE
006
009
FGHIJ KLMNO PQRST UVWXYZ
Enter Number
0-9
Next
Recipient
Close
Go to
(001-500)
GroupAddress List
This search locates index characters entered when Address Numbers are registered.
Click the ABCDE, FGHIJ, KLMNO, PQRST, UVWXYZ or 0-9 tab to specify index
characters in the screen that appears.
Enter recipient’s Fax No. Memory :100%
[ Fax No. ]
Address Book
6
1
7
2
8
3
9
4
0
5
To access address, select any index button on the left.
ABCDE
FGHIJ KLMNO PQRST UVWXYZ
0-9
Next
Recipient
Close
GroupAddress List
32
Group dial number
■
Group dial number searches for registered groups.
Press the button to display the previous screen and press the button to display the next screen.
Enter recipient’s Fax No. Memory :100%
[ Fax No. ]
Address Book
001
#01
#02
002
001,002,003,004,005,006,007,008,009,010,011,012,013,014,01
#03
5,016,017,018,019,020
#04
ABCDE FGHIJ KLMNO PQRST UVWXYZ
Page
1/13
For details on how to register group dial numbers, see “9.4 Setting a Group Dial” (P. 169).
0-9
Next
Recipient
Close
GroupAddress List
Page 55

3.4 Dialing
3.4.6
Entering Symbols
You can use the following features for dialing by entering the appropriate symbols on the touch panel display.
Feature Symbol Description How to use
Enter pause - or pause
(-)
Transmit
using a password
Transmit
DTMF signal
Transmit PB
(from dial
pulse to tone)
S Use a password to prev ent
! Use to transmit the DTMF
: Switches the dial type from
One pause is three seconds. You can enter
pauses of six seconds, nine
seconds, etc. by additi onal
button presses.
transmission errors.
When a password has been
set, transmission will only
start if the password
matches the ID number on
the remote terminal.
signal.
pulse to tone when the Fax
service is used.
Press the (pause) button.
(Example)
0-123...
0- -123...
1. Select the Keyboard
button in the Basic Features screen to display
the keyboard.
2. Select the PQRST button and the Shift button.
3. Select the S button.
(Example)
0312345678S12345678
1. Select the Keyboard
button in the Basic Features screen to display
the keyboard.
2. Select the Symbol button.
3. Select !.
(Example)
0311123456!123#
1. Select the Tone (:) button on the On-hook or
Off-hook screen.
Transmitting
3
33
Page 56

Manual Send
3.5
This section describes how to send faxes manually.
“Manual Send” is a method of sending faxes after confirming the destination on the handset
or with the handset on-hook.
We recommend that the line monitor volume be set to Loud when selecting this feature.
If an error occurs from the second page onwards when sending multiple pages, transmission of the first page sometimes ends in error.
Transmitting
The line monitor volume c an be ch anged i n the S ystem Admi nistrat ion Mod e. For d etai ls on ho w to cha nge this num ber, see “9.8.2 Audio Tones” (P. 182). The default factory setting is Normal.
Procedure
Load documents.
1
3
“2.2 Loading Documents” (P. 14)
Display the Fax screen.
2
Enter recipient’s Fax No. Memory :100%
[ Fax No. ]
Outside Line
Basic Features Scan Options Send Options
iFax/Fax
Address Book
A B C
Keyboard
Specify the destination by picking up the handset or with the handset
3
Resolution Original Type Lighter/Darker
Standard
Fine
Super-fine (400dpi)
Super-fine (600dpi)
On-Hook/
Others
Text
Text & Photo
Photo
Next
Recipient
Menu
on-hook.
Transmitting documents with the handset picked up
■
1
Pick up the handset.
The Off-hook screen is displayed.
34
Page 57

3.5 Manual Send
2
Select
Press Start to begin Receive operation.
Address:
Manual Send
Off-Hook
Send/Receive
Alphanumeric
Symbol
Manual
Send
Manual
Receive
.
Memory 100
Exit (Line Cut)
The Send/Receive default can be changed in the System Administra tio n Mode. For deta ils on how to
change the settings, see “9.8.7 Fax Control” “ 11. Fax Receiving Mode” (P. 195).
3
Dial the telephone number.
Address:
Off-Hook
Send/Receive
Alphanumeric
Symbol
ABCDEFG
HI JKLMN
OPQR S
VWX
TU
123
456
789
0YZ
Memory 100
Exit (Line Cut)
Shift
Transmitting
3
4
Go to step 5.
Transmitting documents on-hook
■
1
Select
On-hook Manual Send/Receive
Enter recipient's Fax No. Memory :100%
[ Fax No. ]
Basic Features Scan Options Send Options
Store for Polling
Off
F Code
Off
Polling
Off
On-hook
Manual Send/Receive
On-Hook/
Others
The On-hook screen is displayed.
2
Select
Manual Send
Press Start to begin Receive operation.
Address:
On-Hook
Send/Receive
Alphanumeric
Symbol
Manual
Send
Manual
Receive
.
in the On-Hook/Others screen.
Next
Recipient
Menu
Remote Mailbox
Off
Memory 100
Exit (Line Cut)
35
Page 58

3.5 Manual Send
3
Dial the telephone number.
To disconnect the line, select Exit (Line Cut).
Address:
On-Hook
Memory 100
Exit (Line Cut)
Transmitting
3
Send/Receive
Alphanumeric
Symbol
●
For details on how to dial a number, see “3.4 Dialing” (P. 27).
●
For details on how to confirm and cancel the transmission of a d ocum e nt , s ee “Cha pter5 Confirming and Canceling a Communication” (P. 61).
4
Go to step 5.
If you hear the facsimile tone, then
4
press
Scanning and transmission begins.
Start
ABCDEFG
HI JKLMN
OPQR S
VWX
.
TU
123
456
789
0YZ
Shift
36
If you have transmitted documents with the handset picked up, place
5
the handset back on the cradle after end ing the transmission.
Be sure to replace the handset properly. Otherwi se, the line will no t be disconnected an d the telephone
will remain busy.
6
Press
Close
Exit (Line Cut)
or
.
Page 59

3.6
Redial
When the line is busy and the remote machine is engaged for example, the
machine can automatically redial. This function is called redial.
ECM
Error Correction Mode (ECM) is the error correction method defined by ITU-T for
G3 communication. Terminals with ECM mutually check whether the transmission is successful. If not, the transmitted data is returned to the sender.
This enables communication without fax image defects caused by line noise.
ECM on the Activity Report refers to ECM communication.
Transmission Failure
Transmitting
3
37
Page 60

3.6 Transmission Failure
Transmitting
3
38
Page 61

3.7
Sending to a Machine that has a
Machine Password Set
When the other party's machine has a machine password set, you can send from this machine by
sending the necessary password using the F-code screen.
Check the password of the receiving machine in advance.
Note : For details how to set Machine Password on your machine, see section 9.2 Entering Local
Terminal Information
Note : Machine Password is not the same as Mailbox Password. For details how to send to
mailboxes with mailbox passwords see section 8.14 Using the Mailbox Feature (Remote
Mailbox/Retrieve from Mailbox).
38A
Page 62

Leaving F code blank, select Next.
Enter the password on the numeric keypad then select
E
38B
Page 63

4
Broadcast Send
4.1 Transmitting to Multiple Destinations (Broadcast Send)...................40
4.1.1 Broadcast Send Operation...............................................42
4.2 Transmitting Documents Throug h a Relay Station
(Relay Broadcast) ............................................................................43
4.2.1 Before Using the Relay Broadcast Send Feature............. 44
4.2.2 Fax Signal Method............................................................45
4.2.3 DTMF (Dual Tone Multi Frequency) Method.....................46
4.2.4 F Code Method.................................. ............................ ...49
4.3 Transmitting Documents Through a Remote Relay Station (Remote
Relay Broadcast)..... ... ............................ .... ............................ .... ......53
4.3.1 Fax Signal Method............................................................54
4.3.2 DTMF (Dual Tone Multi Frequency) Method.....................55
4.3.3 F Code Method.................................. ............................ ...59
Page 64

Transmitting to Multiple Des-
4.1
Use the Broadcast Send feature to transmit documents to several locations in a single operation. There is no need to scan the same document repeatedly at each transmission.
When the additional G3 kit (option) is installed, you can use the extra lines for simultaneous
broadcast send to make multiple transmissions simultaneously.
The machine prints a Broadcast Report/Multi-Poll Report when a Broadcast Send operation
is completed.
●
The maximum number of remote machines that you can designate at a time is as follows:
●
The numeric keypad dialing : 50 locations
●
Speed dialing : 500 locations
●
Broadcast Send
Using the numeric keypad in combination with speed dialing 549 locations
●
The touch buttons correspond to Address Numbers 001-090.
●
The Cover Note and Remote Mailbox features cannot be selected on the control panel when using Broadcast
Send. To use the Cover Note and Remote Mailbox features, you have to program them in the Address Number.
●
The Transmission Report cannot be specified in this feature.
●
Use the following settings for Broadcast Send with the Internet FAX (iFAX) function when the transmission settings for the destination differ.
●
Communication Mode : G3 Auto
●
iFAX Profile : TIFF-S
tinations (Broadcast Send)
4
40
Page 65

4.1 Transmitting to Multiple Destinations (Broadcast Send)
The Broadcast Send feature enables you to
transmit to all the destinations at one time.
Broadcast Send
4
41
Page 66

4.1 Transmitting to Multiple Destinations (Broadcast Send)
Broadcast Send
4
4.1.1
Procedure
Load documents.
1
“2.2 Loading Documents” (P. 14)
Display the Fax screen.
2
Dial multiple remote parties, then press
3
Select the Yes button on the confirmation screen to start transmission.
Scanning and transmission begins.
Broadcast Send Operation
Enter recipient’s Fax No. Memory :100%
[ Fax No. ]
Basic Features Scan Options Send Options
Resolution Original Type Lighter/Darker
Standard
Fine
Super-fine (400dpi)
Super-fine (600dpi)
A B C
Address Book
Keyboard
On-Hook/
Others
Text
Text & Photo
Photo
Next
Recipient
Menu
Start
.
42
●
For details on how to dial a number, see “3.4 Dialing” (P. 27).
●
For details on how to confirm and cancel the transmission of a d ocum e nt , s ee “Cha pter5 Confirming and Canceling a Communication” (P. 61).
Page 67

Transmitting Documents
4.2
Through a Relay Station
(Relay Broadcast)
Remote Relay Broadcast transmits documents to multiple parties via other fax machines
(relay stations).
A document to be transmitted to multiple remote terminals is first transmitted to one remote
relay station and from there to all other faxes in the same area. This feature is useful to save
on telephone charges when broadcasting a document over a long distance.
Multiple Relay Broadcast operations can be made simultaneously. This is referred to as
Multiple Relay Broadcast.
There are two types of Relay Broadcast Send operations:
Fax signal method
Unique signal method only for machines that have the Relay Broadcast Send
feature. The G3 mode is available.
DTMF method
G3-facsimiles that support Manual Send can make Relay Broadcasts to this
machine.
F Code method
This method can be used among types of machines that have the F Code and
the Relay Broadcast Send functions. The G3 mode is available.
Broadcast Send
For details on which machines can be used as initiating stations and relay stations, see “Appendix C Facsimile Service System” (P. 300).
4
43
Page 68

4.2 Transmitting Documents Through a Relay Station (Rela y B roadcast)
Broadcast Send
4
4.2.1
Before Using the Relay Broadcast Send
Feature
Before using the relay broadcast send feature, program the initiating stations and
relay stations in the Speed Dialing feature.
For details on how to register Address Numbers, see “9.3 Setting an Address Number” (P.150).
Where What is required
●
Fax Signal Method
●
Assign the relay station to an Address Number (001 to 500) to set up the
relay broadcast sen d f eature.
●
Program the Address Number of the initiating station (which is already
programmed at a relay station) as a relay station ID for the relay broad-
Initiating
station
Relay
station
cast send operation.
●
Program the Address Number or group numbers of the destinations
(which are programmed at a relay station) as broadcast receivers. The
wildcard “∗” can be used.
●
DTMF method (G3)/F Code method
●
No programming is required. The dialing format can be programmed in
speed dialing.
●
Fax Signal Method
●
Assign the initiating station to an Address Number from (001 to 099) and
set Relay Station Setup of the Address Number to On.
●
Assign the destinations to Address Numbers fro m 001 to 099. The destinations can be assi gn ed u sin g gr ou p dia l n umb ers from the ass ign ing s tation.
●
DTMF method (G3)/F Code method
●
Assign the initiating s tation either an Address Number from 001 to 500
(when the specification method for the initiating station is 3 digits in F
Code) or 001 to 099 (w hen the spec ification meth od for the initiat ing station is 2 digits in F Code). Then, set Relay Station Setup of the Address
Number to On.
●
Assign the destinatio ns to Address Number. For the de stination, assign
the relay station either an Address Number from 001 to 500 (when the
specification method for the initiating station is 3 digits in F Code) or 001
to 099 (when the specificat ion m etho d for th e ini tiati ng sta tio n is 2 di gits in
F Code).
44
Page 69

4.2 Transmitting Documents Throu gh a Relay Station (Relay Broadcast)
4.2.2
Procedure
Load documents.
1
“2.2 Loading Documents” (P. 14)
Display the Fax screen.
2
Select an Address Number or group number to whi ch a rel ay bro adcast
3
is programmed and press
Repeat this step to designate multiple relay stations.
Scanning and transmission begins.
Fax Signal Method
Enter recipient’s Fax No. Memory :100%
[ Fax No. ]
Basic Features Scan Options Send Options
Resolution Original Type Lighter/Darker
Standard
Fine
Super-fine (400dpi)
Super-fine (600dpi)
A B C
Address Book
Keyboard
On-Hook/
Others
Text
Text & Photo
Photo
Start
.
Next
Recipient
Menu
Broadcast Send
4
●
For details on how to dial a number, see “3.4 Dialing” (P. 27).
●
For details on how to confir m a nd can cel the transmission of a docum e nt, s ee “Chapter 5 Confirm-
ing and Canceling a Communication” (P. 61).
45
Page 70

4.2 Transmitting Documents Through a Relay Station (Rela y B roadcast)
Broadcast Send
4
4.2.3
DTMF (Dual Tone Multi Frequency)
Method
Before using the DTMF method, program the following items.
There are two DTMF methods: automatic transmission and manual transmission.
Password
■
A two-digit number programmed beforehand.
(The factory-set default is none.) For setting Password, contact our Customer Support Center. If a
password has not been programmed, you do not need to use one.
Relay station ID
■
The last two digits of the assigning station Address Number registered at the
relay station.
Address Number
■
An Address Number for the destination station registered at the relay station.
The wildcard “∗”can be used.
46
Page 71

4.2 Transmitting Documents Throu gh a Relay Station (Relay Broadcast)
Sending automatically (without picking up the handset)
The dialing format is as follows.
The above dialing format can be registered in Address Number to enable dialing using an Address
Number. For details on how to register Address Numbers, see “9.3 Setting an Address Number”
(P. 150).
Procedure
Load documents.
1
“2.2 Loading Documents” (P. 14)
Display the Fax screen.
2
Relay station
telephone
number
Enter recipient’s Fax No. Memory :100%
[ Fax No. ]
Basic Features Scan Options Send Options
Resolution Original Type Lighter/Darker
Standard
Fine
Super-fine (400dpi)
Super-fine (600dpi)
A B C
Address Book
Keyboard
Password
Text
Text & Photo
Photo
Relay
station
On-Hook/
Others
ID
Address
Number
Next
Recipient
Menu
Address
Number
Broadcast Send
4
3
Select
Keyboard
to display the keyboard on the touch panel and enter
the following format.
Relay station
telephone
number
Password
Select the Next Recipient button for multiple Relay Broadcast jobs.
●
Use the keyboard on the touch panel display to enter symbols like “!” or “∗”. For details on how to
enter symbols, see “1.5 Entering Text” (P. 8).
●
Destinations for up to 20 stations can be specified.
4
Press
Start
.
Scanning and transmission begins.
Relay
station
ID
Address
Number
Address
Number
47
Page 72

4.2 Transmitting Documents Through a Relay Station (Rela y B roadcast)
Sending manually (picking up the handset or leaving the h andset
on-hook)
The dialing format is as follows.
Relay station
telephone
number
Confirm the
facsimile tone
Confirm the
continuous,
short high-pitched
tone
Procedure
Broadcast Send
Load documents.
1
Password
Relay
station
ID
Address
Number
The continuous,
short high-pitched
tone sounds
4
“2.2 Loading Documents” (P. 14)
2
Select
On-hook Manual Send/Receive
Enter recipient's Fax No. Memory :100%
[ Fax No. ]
Basic Features Scan Options Send Options
Store for Polling
Off
F Code
Off
The On-hook screen is displayed.
3
Select
Manual Send
Press Start to begin Receive operation.
Address:
On-Hook
Send/Receive
Alphanumeric
Symbol
Manual
Send
Manual
Receive
On-Hook/
Others
Polling
Off
On-hook
Manual Send/Receive
.
in the On-Hook/Others screen.
Next
Recipient
Menu
Remote Mailbox
Off
Memory 100
Exit (Line Cut)
48
Page 73

4.2 Transmitting Documents Throu gh a Relay Station (Relay Broadcast)
Enter the following format on the keyboard displayed on the touch
4
panel.
5
4.2.4
Relay station
telephone
number
●
Use the keyboard on the touch panel to enter symbols like “!” or “∗”. For details on how to enter
symbols, see “1.5 Entering Text” (P. 8).
●
Destinations for up to 20 relay stations can be specified.
Press
Scanning and transmission begins.
Start
Confirm the
facsimile tone
.
Confirm the
continuous,
short high-pitched
tone
Password
Relay
station
ID
Address
Number
The continuous,
short high-pitched
tone sounds
F Code Method
In the F Code method, you can do Relay Broadcast Send by doing the following
operations.
When the machine is used as an initiating station, to do Relay Broadcast Send,
check the F Code (sub-address) to the relay station and the necessary passwords.
When the machine is used as a relay station, to do Relay Broadcast Send, transmit the F Code (sub-address) to the initiating station and the necessary passwords.
Broadcast Send
4
When doing Relay Broadcast Send with the F Code method, to use the password set the receive password for the relay station.
●
When doing Relay Broadcast Send among these types of machines, we recommend using the fax
signal method.
●
When using a machine that is different from this machine as a relay station, check the F Code subaddress and password of the targeted destination.
When this machine is a relay station, the F Code that is transmitted to the initiating station is as follows.
Relay Broadcast
Send
Print
directive
Relay
station ID
Up to 20 digits
Address
Number
Address
Number
Address
Number ....
49
Page 74

4.2 Transmitting Documents Through a Relay Station (Rela y B roadcast)
Relay Broadcast Send
■
The number of digits in the relay station ID.
1: For relay station IDs and Address Numbers that are 2 digits.
2: For relay station IDs and Address Numbers that are 3 digits.
Print directive
■
Activate or deactivate printing at the relay station.
1: Activate printing at the relay station.
0: Deactivate printing at the relay station.
Relay station ID
■
Broadcast Send
The Address Number of the initiating station that is assigned to the relay station.
The initiating station is notified of the results of the Relay Broadcast Send when
the relay station ID is set.
The initiating station is not notified of the results of the Relay B roadcast Send
when the relay station ID is “00” or “000”.
4
■
The Address Number assigned to the destination.
An example of the F Code indicating how to print at the relay station, to notify the
initiating station of the results and to Relay Broadcast Send to destinations (200,
201, 202 and 203) is shown below.
F Code example: 21100200201202203
Procedure
Load documents.
1
See “2.2 Loading Documents” (P. 14)
Display the Fax screen.
2
Address Number
Enter recipient’s Fax No. Memory :100%
[ Fax No. ]
Basic Features Scan Options Send Options
Resolution Original Type Lighter/Darker
Standard
Fine
Super-fine (400dpi)
Super-fine (600dpi)
A B C
Address Book
Keyboard
On-Hook/
Others
Text
Text & Photo
Photo
Next
Recipient
Menu
50
Page 75

4.2 Transmitting Documents Throu gh a Relay Station (Relay Broadcast)
Select F Code in the On-Hook/Others screen .
3
Enter recipient’s Fax No. Memory :100%
[ Fax No. ]
Basic Features Scan Options Send Options
Store for Polling
Off
F Code
Off
Polling
Off
On-hook
Manual Send/Receive
On-Hook/
Others
The F Code screen is displayed.
Next
Recipient
Menu
Remote Mailbox
Off
Select On.
4
Enter recipient’s Fax No. Memory :100%
[ Fax No. ]
F Code
Off
On
Enter the F Code with the numeric keypad, and select
5
Use the Numeric Keypad to enter the F Code.
F Code
Off
On
F Code
21100200201202203
Password
9
Memory :100%
Next
Recipient
SaveCancel
Next
Recipient
SaveCancel
Next
Example: F Code: 21100200201202203
On the left side of Password, is displayed.
Next
Broadcast Send
4
.
You can enter up to 20 digits for an F Code.
51
Page 76

4.2 Transmitting Documents Through a Relay Station (Rela y B roadcast)
If necessary, enter the password on the numeric keypad then select
6
Next
.
Use the Numeric Keypad to enter the password.
F Code
Off
F Code
21100200201202203
Memory :100%
Next
Recipient
SaveCancel
Broadcast Send
4
On
You can enter up to 20 digits for a password.
Select
7
Specify the destination and press
8
Scanning and transmission begins.
●
●
Save
For details on how to dial a number, see “3.4 Dialing” (P. 27).
For details on how to confirm and cancel the transmission of a d ocum e nt , s ee “Cha pter 5 Confirm-
ing and Canceling a Communication” (P. 61).
Password
9
.
start
Next
.
52
Page 77

Transmitting Documents
Through a Remote Relay Station
4.3
(Remote Relay Broadcast)
The Remote Relay Broadcast operation is a feature that combines two or more Relay
Broadcast operations.
This function is more economical than Relay Broadcast in transmitting documents to multiple remote machines.
Remote Relay Broadcast
Local
Broadcast Send
The second relay station can send a document simultaneously to multiple remote terminals (Multiple
Relay Broadcast).
For details on which mach ine s can be us ed as first and second relay st ati ons for Remote Relay Broadcast, see “Appendix E Models Providing Relay Broadcast and Recipient Print Set Function” (P. 305),
for details on which models are provided with relay broadcast and recipient print set function.
There are two types of Relay Broadcast Send operations:
Fax signal method
Unique signal method only for machines that have the Relay Broadcast Send
feature. The G3 mode is available.
DTMF method
G3-facsimiles that support Manual Send can make Remote Relay Broadcasts
to this machine.
F Code method
This method can be used among types of machines that have the F Code and
the Relay Broadcast Send functions. The G3 mode is available.
4
53
Page 78

4.3 Transmitting Documents Through a Remote Relay Station (Remote Relay Broadcast)
Broadcast Send
4
4.3.1
Fax Signal Method
Before using the fax signal method, program the initiating station, first relay station and second relay station in Address Number.
For details on how to register Address Numbers, see “9.3 Setting an Address Number” (P.150).
Where What is required
●
Assign the first r elay station to an Ad dress Number (00 1 to 500) to set u p
the relay broadcast send feature.
Initiating
station
First relay
station
Second
relay
station
• Program the last two digits of the Address Number of the initiating station
(which is already program med at a r elay station ) as a rela y station I D for
the relay broadcast sen d operation.
• Program the Address Number of the second relay station (which is
already programmed at the first relay station) as a relay broadcast
receiver.
●
Assign the initiating station to an Address Number from 00 1 to 099, and set
Relay Station Setup of the Address Number to On.
●
Assign the second relay st ation to an Address Numbe r f rom 001 to 099.
• Program the two last digits of the Address Number of the first relay station
(which is already programmed at the s econd relay st atio n) as a rela y sta tion ID for the Relay Broa dcast Send operation.
• Program the Address Numbers of the destinations (which are already
programmed at the second relay station) as broadcast receivers.
●
Assign the first relay station to the same Address Number as that of the initiating station programmed at the first relay station, and set Relay Stat ion
Setup of the Address Number to On.
●
Program the destinations to Address Numbers between 001 and 500.
●
Destinations of Address N umber 100 or above can be progra mmed into a
group.
54
Procedure
Load documents.
1
“2.2 Loading Documents” (P. 14)
Page 79

4.3 Transmitting Documents Through a Remote Relay Station (Remote Relay Broadcast)
Display the Fax screen.
2
Enter recipient’s Fax No. Memory :100%
[ Fax No. ]
Basic Features Scan Options Send Options
Address Book
A B C
Keyboard
Next
Recipient
On-Hook/
Others
Resolution Original Type Lighter/Darker
Standard
Fine
Super-fine (400dpi)
Super-fine (600dpi)
Text
Text & Photo
Photo
Menu
3
4.3.2
Select an Address Number to which a remote relay broadcast is programmed and press
Scanning and transmission begins.
●
For details on how to dial a number, see “3.4 Dialing” (P. 27).
●
For details on how to confir m a nd can cel the transmission of a docum e nt, s ee “Chapter 5 Confirm-
ing and Canceling a Communication” (P. 61).
Start
.
DTMF (Dual Tone Multi Frequency)
Method
Before using the DTMF method, program the following items.
There are two DTMF methods: automatic transmission and manual transmission.
■
Password
A two-digit number programmed beforehand.
(The factory-set default is none.) For setting Password, contact our Customer Support Center. If a
password has not been programmed, you do not need to use one.
Broadcast Send
4
■
Relay station ID
The last two digits of the assigning station Address Number registered at the first
relay station.
■
Address Number
An Address Number for the second relay station registered at the first relay station.
Before using the fax signal method, program the first relay station and the second relay station in Address Number.
55
Page 80

4.3 Transmitting Documents Through a Remote Relay Station (Remote Relay Broadcast)
For details on how to register Address Numbers, see “9.3 Setting an Address Number” (P.150).
Where What is required
●
Assign the initiating station to an Address Number from 00 1 to 500, and set
Relay Station Setup of the Address Number to On.
●
Assign the second relay st ation to an Address Numbe r f rom 001 to 500.
First relay
station
• Program the two last digits of the Address Number of the first relay station
(which is already programmed at the s econd relay st atio n) as a rela y sta tion ID for the Relay Broa dcast Send operation.
• Program the Address Numbers of t he des tin at ion s (w hic h are al read y pr ogramed at the second relay station) as broadcast receivers.
Broadcast Send
Second
relay
station
●
Assign the first relay station to the same Address Number as that of the initiating station programmed at the first relay station, and set Relay Stat ion
Setup of the Address Number to On.
●
Program the destinations to Address Numbers between 001 and 500.
4
Sending automatically (without picking up the handset)
The dialing format is as follows.
The 1st relay station
telephone number
●
This method is available for transmission only between machines of this model.
●
The above dialing format can be registered in Address Number to enable dialing using an Address
Password
Number. For details on how to register Address Numbers, see “9.3 Setting an Address Number”
(P. 150).
Relay
station ID
Procedure
Load documents.
1
“2.2 Loading Documents” (P. 14)
Display the Fax screen.
2
Enter recipient’s Fax No. Memory :100%
[ Fax No. ]
Basic Features Scan Options Send Options
Resolution Original Type Lighter/Darker
Standard
Fine
Super-fine (400dpi)
Super-fine (600dpi)
A B C
Address Book
Keyboard
On-Hook/
Others
Text
Text & Photo
Photo
Next
Recipient
Menu
Address
Number
56
Page 81

4.3 Transmitting Documents Through a Remote Relay Station (Remote Relay Broadcast)
3
Select
Keyboard
to display the keyboard on the touch panel and enter
the following format.
The 1st relay station
telephone number
Select the Next Recipient button for multiple Relay Broadcast jobs.
Use the keyboard on the touch panel display to enter symbols like “!” or “∗”. For details on how to
enter symbols, see “1.5 Entering Text” (P.8).
Press
4
Scanning and transmission begins.
Start
.
Password
Relay
station ID
Address
Number
Sending manually (picking up the handset or leaving the handset
on-hook)
The dialing format is as follows.
The 1st relay station
telephone number
Confirm the
facsimile tone
Confirm the
continuous,
short high-pitched
tone
Password
Relay
station ID
Address
Number
Broadcast Send
4
●
●
Procedure
Load documents.
1
“2.2 Loading Documents” (P. 14)
This method is available for transmission only between machines of this model.
The above dialing format can be registered in Address Number to enable dialing using an Address
Number. For details on how to register Address Numbers, see “9.3 Setting an Address Number”
(P. 150).
57
Page 82

4.3 Transmitting Documents Through a Remote Relay Station (Remote Relay Broadcast)
Broadcast Send
4
2
Select
On-hook Manual Send/Receive
Enter recipient's Fax No. Memory :100%
[ Fax No. ]
Basic Features Scan Options Send Options
Store for Polling
Off
F Code
Off
Polling
Off
On-hook
Manual Send/Receive
On-Hook/
Others
in the On-Hook/Others screen.
Next
Recipient
Menu
Remote Mailbox
Off
The On-hook screen is displayed.
Select
3
Enter the following format on the keyboard displayed on the touch
4
Manual Send
Press Start to begin Receive operation.
Address:
On-Hook
Send/Receive
Alphanumeric
Symbol
Manual
Send
Manual
Receive
.
Memory 100
Exit (Line Cut)
panel.
The 1st relay station
telephone number
●
Use the keyboard on the touch panel to enter symbols like “!” or “∗”. For details on how to enter
symbols, see “1.5 Entering Text” (P. 8).
●
Destinations for up to 20 relay stations can be specified.
5
Press
Start
Scanning and transmission begins.
.
Confirm the
facsimile tone
Confirm the
continuous,
short high-pitched
tone
Password
Relay
station ID
Address
Number
58
Page 83

4.3 Transmitting Documents Through a Remote Relay Station (Remote Relay Broadcast)
4.3.3
F Code Method
In the F Code method, you can do remote Relay Broadcast Send by doing the
following operations.
When doing remote Relay Broadcast Send using this machine as the initiating
station, check the F Code and the necessary passwords for the first relay station.
When doing remote Relay Broadcast Send using this machine as the first relay
station, transmit the F Code (sub-address) and the necessary passwords to the
initiating station, and check the F Code for the second relay station.
When doing remote Relay Broadcast Send using this machine as the second
relay station, transmit the F Code and the necessary passwords to the first relay
station.
It is necessary to assign the first relay station and second relay station Address
Numbers in advance, as shown below.
Where What is required
●
First relay station
Second relay station
Assign the initiating station either an Address Number from
001 to 500 (when the specification method for the initiating
station is 3 digits in F Code) or 001 to 099 (when the specification method for the initiating station is 2 digits in F
Code). Then, set Relay Station Setup of the Address Number to On.
●
Assign the second relay station either an Address Number
from 001 to 500 (when the specification method for the initiating station is 3 di gits in F Code) or 00 1 to 09 9 (wh en the
specification method for th e initiat ing sta tion is 2 dig its in F
Code).
●
Assign the last two digits of the Address Number for th e
first relay station tha t has been assigned to the s econd
station as the relay station ID.
●
Assign the Address Number for the destination station
that has been ass ign ed t o t he s ec ond relay st at ion a s t he
Broadcast Recipient s.
●
Assign the same number for the first relay station as the
Address Number of the initiating station that has been
assigned to the first relay station. Then, set Relay Station
Setup of the Address Number to On.
●
Assign the destination either an Address Number from 00 1
to 500 (when the specification method for the initiating station is 3 digits in F Code) or 00 1 to 099 (when the s pecification method for the initiating station is 2 digits in F Code).
Broadcast Send
4
Station one and station two and equipment on which the Relay Broadcast Send function and the F
Code method are installed are targeted when using the F Code method for remote Relay Broadcast
Send.
59
Page 84

4.3 Transmitting Documents Through a Remote Relay Station (Remote Relay Broadcast)
When doing remote Relay Broadcast Send among these types of machines, we recommend using the
fax signal method.
When this machine is a relay station, the F Code that is transmitted to the initiating station is as follows.
Relay Broadcast
Send
Print
directive
First relay
station ID
Up to 20 digits
Address
Number
Address
Number
Broadcast Send
Relay Broadcast Send
■
The number of digits in the first relay station ID.
1: For first relay station IDs and Address Number that are 2 digits.
2: For first relay station IDs and Address Number that are 3 digits.
Address
Number ....
4
Print directive
■
Activate or deactivate printing at the first relay station.
1: Activate printing at the first relay station.
0: Deactivate printing at the first relay station.
First relay station ID
■
The Address Number of the initiating station that is assigned to the first relay station.
The initiating station is notified of the results of the remote Relay Broadcast Send
when the first relay station ID is set.
The initiating station is not notified of the results of the remote Relay Broadcast
Send when the relay station ID is “00” or “000”.
Address Number
■
The Address Number assigned to the second relay station.
The procedure is the same for Relay Broadcast Send. See “4.2.4 F Code Method” (P. 49).
60
Page 85

5
Confirming and
Canceling a
Communication
5.1 Canceling Jobs ................................................................................62
5.2 Confirming Job Status......................................................................64
5.2.1 Checking Jobs in Progress and Pending Jobs .................64
5.2.2 Confirming Completed Jobs.............................................65
Page 86

Canceling Jobs
5.1
This section describes how to cancel a job in progress and pending job(s).
When you cancel a broadcasti ng job in progress, all pe ndi ng jobs and a job in progr es s des ig nated as broadcast are
Confirming and Canceling a Communication
canceled.
Canceling a job during scanning
Procedure
5
When the following scree n appears, select
1
on the control panel.
Stop
When this screen does not appear, see the instructions in “ Canceling a Pending Jobs”.
Scanning documents...
Stop
Clear
Close
Stop
Start
Stop
on the control panel.
Fax Store
: 0123456789
Type: Single Terminal
Pages :
Standard
The machine pauses and the screen shown below appears.
Select
2
Transmission stops.
Type: Single Terminal
Pages :
A 4
Standard
1
Stop
Ready to scan.
Load the next set of documents and press Start.
Or, select Last Original when the scanning completes.
Fax Store Doc. No. 0010
: 0123456789
1
:Doc. No. 00010
on the screen or press
Last Original
Next Original
Last Original
Next Original
on the screen or press
Stop
62
To continue transmission, select the Start button on the screen or press the Start button on the control
panel.
Page 87

Canceling a pending job
This section describes how to cancel a pending job.
Procedure
Press Job Status.
1
The Job Status screen is displayed.
5.1 Canceling Jobs
Confirming and Canceling a Communication
Select
2
A list of current and pending jobs is displayed.
Select the button to display the previous screen and select the button to display the next screen.
Job Status
Doc. No. - Job Type
00010 - Fax-Send
Job status is shown.
Select
3
Job processing is terminated.
Current and Pending Jobs
Current and
Pending Jobs
Status
Waiting
.
Stop
The document is waiting to be sent.
Touch Promote Job if you want this job to be executed first.
Or, press Stop to cancel.
Fax Store Doc. No.00010
: 0123456789
Type : Fax-Send
Pages:
0/1
Completed Jobs
Remote Terminal/Contents
0123456789
, and select the job to cancel.
Stored
Documents
Promote Job
Pages
Stop
Waiting Jobs
1/1
Print
Close
5
Select
4
To cancel other jobs, select the jobs you want to cancel in the screen at step 2 and select the Stop button.
Close
.
63
Page 88

Confirming Job Status
5.2
You can check transmitted documents, received documents or documents stored to be
polled.
There are three types of job status: Pending Jobs, Current Jobs, and Completed Jobs.
Confirming and Canceling a Communication
Priority Send can be set for a pending job.
Transmission jobs already selected for Priority Send cannot be selected for Priority Send again.
5
5.2.1
Procedure
Press
1
The Job Status screen is displayed.
Select
2
A list of current and pending jobs is displayed.
Select the button to display the previous screen and select the button to display the next screen.
When a job is selected, the screen shown below is displayed to provide detailed job information.
Select the Promote Job button to give priority to a job.
Checking Jobs in Progress and Pending
Jobs
Current and
Pending Jobs
Status
Waiting
Doc. No. 00010
.
Completed Jobs
Remote Terminal/Contents
0123456789
, and check job status.
Stored
Documents
Promote Job
Pages
Stop
Print
Waiting Jobs
1/1
Close
Job Status
Current and Pending Jobs
Job Status
Doc. No. - Job Type
00010 - Fax-Send
The document is waiting to be sent.
Touch Promote Job if you want this job to be executed first.
Or, press Stop to cancel.
Fax Store
: 0123456789
Type : Fax-Send
Pages :
0/1
64
Select
3
To check other jobs, select the jobs you want to check in the screen at step 2.
Close
.
Page 89

5.2 Confirming Job Status
5.2.2
Procedure
Press
1
The Job Status screen is displayed.
Select
2
A list of completed jobs is shown.
Check job status.
3
Select the button to display the previous screen and select the button to display the next screen.
Confirming Completed Jobs
Job Status
Completed Jobs
Job Status
Secure Print Sample Print
Private Mailbox Public Mailbox
Job Status
Doc. No. - Type
00010 - Fax-Send
- - Copy Job
- - Print Job
- - Report/List
00006 - Fax Stored
.
.
Current and
Pending Jobs
Current and
Pending Jobs
Status
OK
Completed
Completed 3/3
Completed 1
Completed 2
Completed Jobs
Completed Jobs
Remote Terminal/Contents
0123456789
A4 : 100%
Endo-Akira: STREAM
Store for Polling
Stored
Documents
Stored
Documents
Delayed Print
Pages
1/1
20
Page
1/10
Confirming and Canceling a Communication
5
When a job is selected, the screen shown below is displayed to provide detailed job information.
Close
4
Fax-Send
Outside Line
Job Type
Status
No.of Pages
Communication Mode
Resolution
Select
Close
Doc No.00010
: 0123456789
: Fax Mailbox - Send
: O K : 2001/10/4 8:10 AMStart Date
: 1/1
: G3 14.4k
: Standard
.
: 2001/10/4 8:11 AMEnd Date
To check other jobs, select the jobs you want to check in the screen at step 2.
65
Page 90

5.2 Confirming Job Status
Confirming and Canceling a Communication
5
66
Page 91

6
Receiving Jobs
6.1 Reception Mode...............................................................................68
6.1.1 Switching Between the Modes..........................................68
6.1.2 Automatic Reception.........................................................69
6.1.3 Manual Reception.............................................................69
6.2 Printing Received Documents..........................................................71
6.2.1 Tray Mode and User Mode................................................71
6.2.2 Printing the Same Size Images........................................72
6.2.3 Printing the Same Size Images With Margins..................73
6.2.4 Reducing Images at the Sender Side...............................74
6.2.5 Reducing Images at the Recipient Side............................75
6.2.6 Using the 2 Up on Receipt Feature..................................76
6.2.7 Using the 2 Sided Printing Feature...................................76
Page 92

Reception Mode
6.1
There are two reception modes: Auto Receive and Manual Receive.
In the Auto Receive mode, the machine automatically responds to transmissions from a
remote terminal.
In the Manual Receive mode, the machine begins reception after the handset has been
lifted and the ready tone of the remote machine sounded. This is useful if you wish to check
the sender or receive documents after speaking with the sender using an external telephone.
The Fax Receiving Mode default value can be changed in the System Administration Mode. For details on how to
change this default value, see “9.8.7 Fax Control” (P. 192). The default factory setting is Auto Receive.
Receiving Jobs
6
6.1.1
Procedure
Press
1
The Machine Status screen is displayed.
Select
2
The Fax Receiving Mode screen is displayed.
Select Manual Receive or Auto Receive.
3
Switching Between the Modes
Machine Status
Fax Receiving Mode
Machine Status
Print Mode
Billing Meter/
Print Report
Machine Information Paper Tray Print Mode
.
in the Machine Status screen.
FaultsConsumables
On-line
Fax Receiving Mode
Auto Receive
SaveCancel
68
4
Manual Receive
Auto Receive
Select
Save
.
Page 93

6.1 Reception Mode
6.1.2
6.1.3
Automatic Reception
When the machine is in the Auto Receive mode, it automatically answers incoming calls and receives documents.
●
You can set the length of ringing time until the call is automatically answered. By picking up the
handset while the telephone is ringing, you can speak with the caller and receive a fax manually if
it has been sent.
●
The number of rings (Auto Switch Time) can be changed in the System Administration Mode. For
details on how to change this default value, see “9.8.7 Fax Control” (P. 192). The default factory
setting is 0 time.
Manual Reception
In the Manual Receive mode, pick up the handset (external telephone) or select
the On-hook button in the screen that appears when the phone rings to
announce an incoming call.
It is recommended that the line monitor volume be set to Loud when using the On-hook feature. The
line monitor volume can be chang ed in th e Syste m Admini strati on Mode. Fo r deta ils on how to c hange
this default value, see “9.8.2 Audio Tones” (P. 182). The default factory setting is Normal.
Receiving Jobs
Procedure
When the telephone rings, the screen shown below is displayed.
1
If a handset is fitted, pick it up. If a handset is not fitted, select the On-hook button.
Receiving
Manual Receive Mode
Please pick up the handset or select On-hook.
On-hook
6
69
Page 94

6.1 Reception Mode
Check whether the call is from a tele-
2
phone or a facsimile.
If the call is from a telephone, answer it.
If the incoming call is from a fax machine, you hear a
facsimile tone.
If On-hook is selected, you will hear the sound from the
machine speaker. However, you cannot speak to the
other party.
Beep!
Receiving Jobs
6
Press
3
The reception starts.
If equipped with a handset, replace it when the online indicator light on
4
the control panel lights.
Start
.
70
Page 95

Printing Received Docu-
6.2
The machine prints the received documents on the same paper size a s the originals from
the remote terminal. However, if the same paper size is not loaded or the Receiving Paper
Size feature is activated, the documents may be printed on a different paper size. The document image may be reduced, partially lost, or split into two pages depending on the programmed settings.
This section describes how to print received documents.
6.2.1
Tray Mode and User Mode
The Receiving Paper Size feature is used to specify the us e of fixed paper s izes
for fax reception.
This feature has two modes: Tray Mode and User Mode.
The Receiving Paper Size feature setting can be changed in the System Administration Mode. For
details on how to change this default value, see “9.8.7 Fax Control” (P. 192). The default factory setting is Tray Mode.
Tray Mode
■
All the paper types (plain paper only) loaded in the trays can be used for printing.
The machine reproduces documents without image loss using the size of paper
closest to that of the original documents. If the receiving machine has only paper
that is smaller than the documents being sent, it informs the sending machine
accordingly. The sending machine will then transmit images that have been
reduced to fit the paper loaded in the receiving machine.
If the receiving machine has only paper that is smaller than the documents being
sent, or the paper supply runs out during printing, how the received documents
are processed may vary according to the settings carried out by the sender.
ments
Receiving Jobs
6
User Mode
■
The paper size on which the received documents is printed is specified. You can
specify one or more paper sizes.
If the same size p aper as the documents is specifie d and loaded in any paper
tray, the machine reprodu ces size-for-s ize images o n the pape r. If the sam e size
of paper as the docu ment is not specified, t he machine reproduces siz e-for-size
images without image loss on any larger size of paper that is specified and
loaded.
We recommend this mode if you always use the same size of paper or reproduce
images of the same size as the received documents.
The printout varies according to the programmed settings and the sizes of paper
loaded in the machine.
71
Page 96

6.2 Printing Received Docu ments
The following pages describe how to print received documents using Tray Mode
or User Mode, when:
●
Printing images on the same size of paper as the documents.
●
Printing the Same Size Images With Margins.
●
Reducing Images at the Sender Side.
●
Reducing the images at the receiver’s printing.
Receiving Jobs
6
6.2.2
Printing the Same Size Images
Tray Mode
■
If the same size of paper as the documents is loaded in any paper tray, the
machine automatically selects the tray and reproduces the same size images on
paper. If the same size of paper is loaded, but in a different orientation (for exam-
ple, the document is A4 while paper orientation is A4 ), the machine automatically rotates the images and reproduces them on paper.
User Mode
■
If the same size of paper as the documents is spe cified and loaded in any paper
tray, the machine automatically selects the tray and reproduces the same size
images on paper. If A4 paper is loaded in a different orientation, the machine
automatically rotates the images and reproduces them on A4 paper.
Sending
Document
Receiving
Reproduced
image
72
Rotating images before reproduction may not be possible with some data.
Page 97

6.2 Printing Received Documents
6.2.3
Printing the Same Size Images With Margins
In the following ca ses, images are printed on paper larger than the documents
with margins.
Tray Mode
■
If the paper size of the documents is not loaded, but a larger paper size is loaded
in one of the paper trays, the machine prints the same size images with margins
on the larger paper size.
Sending
Document (B4)
Receiving
Reproduced
image (A3)
Margin
Receiving Jobs
No paper
User Mode
■
If the same size of paper as the documents is not specified but closer paper
sizes are specified and loaded, the machine prints the same size images with
margins on the larger size paper.
Sending Receiving
Reproduced
image (A3)
Document (B4)
Margin
Specified
6
73
Page 98

6.2 Printing Received Docu ments
Receiving Jobs
6.2.4
Reducing Images at the Sender Side
If the receiving machine only has paper sizes smaller than the documents to be
printed, it informs the sending machine that the documents cannot be received.
The images are reduced by the sending machine.
The images are reduced by a sending machine in the following cases:
Tray Mode
■
When all the loaded paper sizes are smaller than the documents.
The receiving machine automatically selects the paper size closest to the document size.
User Mode
■
When all the specified paper sizes are smaller than the documents.
The receiving machine automat ically selec ts the p aper size c losest to the docu ment si ze.
Sending Receiving
Document
(A3)
Reproduced
image (B4)
6
Reduced
Document (B4)
Specified
74
Page 99

6.2 Printing Received Documents
6.2.5
Reducing Images at the Recipient Side
The receiving document may exceed the actual size due to a scanning slip at the
sending machine. This machine has a feature that automatically reduces the
document to fit available paper sizes.
The machine automatically reduces documents in the following cases:
The length of the received document is longer than regular sizes but within the
value programmed in the Border Limit feature and Auto Reduce on Receipt is set
to On.
Excess Iength
(below border limit)
The way documents are output when Auto Reduce on Receipt and Border Limit
are combined is shown below.
Auto Reduce
on Receipt
Border Limit
When border limits are
not exceeded
When border limits are
exceeded
The document is automatically reduced and output as
one page.
The document is output at the same magnification on separate
pages.
On Off
The portion that exceed s the
set page size is cut off and
the document is output.
Receiving Jobs
6
For details on how to change these default values, see “9.8.7 Fax Control” (P. 192).
75
Page 100

6.2 Printing Received Docu ments
Receiving Jobs
6.2.6
Using the 2 Up on Receipt Feature
Use the 2 Up on Receipt feature to print two consecutive documents on a single
sheet of paper. In some cases, this feature may not be available, depending on
the size of the documents sent.
For details on how to change this default value, see “9.8.7 Fax Control” (P. 192).
The following shows the difference when the 2 Up on Receipt feature is on and
off.
6
76
6.2.7
Using the 2 Sided Printing Feature
Using the 2 Sided Printing feature, multiple page documents that are received
can be printed out on both sides of a sheet.
●
Both sides of a sheet are printed only when the size of the received documents is the same.
●
Duplex printing may not be possible with some data.
For details on how to change this default value, see “9.8.7 Fax Control” (P. 192).
 Loading...