

Page 1

Version 2.0
December 2019
702P08209
Xerox
®
Instant Print Kiosk
Quick Start Guide
Page 2

© 2019 Xerox Corporation. All rights reserved. Unpublished rights reserved under the copyright laws of the United
States. Contents of this publication may not be reproduced in any form without permission of Xerox Corporation.
Copyright protection claimed includes all forms of matters of copyrightable materials and information now allowed by
statutory or judicial law or hereinafter granted, including without limitation, material generated from the software
programs which are displayed on the screen such as styles, templates, icons, screen displays, looks, and so on.
®
Xerox
and Xerox and Design®, CentreWare®, Scan to PC Desktop®, and Xerox Secure Access Unified ID System
are trademarks of Xerox Corporation in the United States and/or other countries.
®
Adobe
Reader®, Adobe®Type Manager®, ATM™, Flash®, Macromedia®, Photoshop®, and PostScript®are trademarks
of Adobe Systems Incorporated in the United States and/or other countries.
®
Apple
, Bonjour®, EtherTalk™, TrueType®, iPad®, iPhone®, iPod®, iPod touch®, Mac®, and Mac OS®are trademarks of
Apple Inc., registered in the U.S. and other countries. AirPrint
Google Cloud Print
™
web printing service, Gmail™webmail service, and Android™mobile technology platform are
®
and the AirPrint Logo®, are trademarks of Apple Inc.
trademarks of Google, Inc.
Microsoft
®
, Windows Vista®, Windows®, OneDrive®, and Windows Server®are trademarks of Microsoft Corporation in
the United States and other countries.
McAfee
®
, ePolicy Orchestrator®, and McAfee ePO™are trademarks or registered trademarks of McAfee, Inc. in the
United States and other countries.
PANTONE
UNIX
Wi-Fi CERTIFIED Wi-Fi Direct
®
and other Pantone, Inc. trademarks are the property of Pantone, Inc.
®
is a trademark in the United States and other countries, licensed exclusively through X/ Open Company Limited.
®
is a trademark of the Wi-Fi Alliance.
®
Page 3

Table of Contents
1 Getting Started.......................................................................................................................... 5
Introduction ...... .... .... .... ..................... .... .... .... ................. .... .... .... ........ ............. ........ .... .... .... ... 6
Kiosk Overview........... .... .... .... ................. .... .... .... .... .... ............. ........ .... .... .... ..................... .... ... 7
Kiosk User Interface Overview .... .... .... ............. ........ .... .... .... ..................... .... .... .... ................. ... 8
2 Making Copies...........................................................................................................................9
Accessing the Copy Features ......... ........ .... .... .... ..................... .... .... .... ................. .... .... .... ....... 10
Making Copies . .... ..................... .... .... .... ........ ................. .... .... .... ..................... .... .... .... ........... 12
Copy Options ................ .... .... .... ..................... .... .... .... ..................... ........ .... .... .... ................. .. 17
3 Scanning a Document...........................................................................................................19
Accessing the Scan Features ....... .... .... .... ..................... .... .... .... ..................... .... .... .... .... .... ..... 20
Scan to Email.... .... .... .... ................. .... .... .... ..................... .... .... .... ..................... .... .... .... .......... 21
Scan to USB......... ........ .... .... .... ................. .... .... .... ..................... .... .... .... ..................... .... .... ... 26
Scan to Google Drive ............. .... .... .... .... ..................... .... .... .... ..................... .... .... .... .............. 32
Scan to Dropbox ......... .... .... .... .... .... ..................... .... .... .... ................. .... .... .... .... ................. .... 37
Scan to OneDrive........ .... .... .... .... .... ................. .... .... .... .... ................. .... .... .... ..................... .... 42
Scan to SharePoint..... ..................... .... .... .... ................. .... .... .... ..................... .... .... .... .... .... ..... 47
Scan Options .. .... .... .... .... ................. .... .... .... ........ ............. ........ .... .... .... ................. .... .... .... .... 52
4 Printing a Document..............................................................................................................55
Accessing the Print Features..... .... .... .... ..................... .... .... .... ........ ............. .... .... .... .... ............ 56
Print from Email.... .... .... .... ..................... .... .... .... ..................... .... .... .... ..................... .... .... .... .. 57
Print from USB ................. .... .... .... ..................... .... .... .... ..................... .... .... .... ........ ............. ... 64
Print from Google Drive........ ..................... .... .... .... ................. .... .... .... .... ................. .... .... .... ... 72
Print from Dropbox ......... .... .... .... .... ..................... .... .... .... ..................... .... .... .... ..................... 79
Print from OneDrive ........ .... .... .... .... ..................... .... .... .... ..................... .... .... .... ................. .... 86
Print from SharePoint. .... .... ................. .... .... .... ..................... .... .... .... .... .... ..................... .... .... . 93
Print from a Personal Computer... ..................... .... .... .... ..................... .... .... .... ..................... .. 100
Print Options.................... .... .... .... ................. .... .... .... ..................... .... .... .... ..................... .... . 107
5 Faxing a Document............................................................................................................. 109
Accessing the Fax Features.................... .... .... .... ..................... .... .... .... ..................... .... .... .... . 110
Faxing a Document. .... .... .... ........ ............. ........ .... .... .... ................. .... .... .... .... ................. .... .. 111
Fax Options... .... .... .... ............. ........ .... .... .... ..................... .... .... .... ................. .... .... .... ............ 116
Xerox®Instant Print Kiosk
Quick Start Guide
3
Page 4

Table of Contents
4
Xerox®Instant Print Kiosk
Quick Start Guide
Page 5

1
Getting Started
This chapter contains:
• Introduction ... .... .... ..................... .... .... .... ..................... .... .... .... ..................... .... .... .... .... .............. 6
• Kiosk Overview.... .... .... .... ..................... .... .... .... ..................... .... .... .... .... ..................... .... .... .... ...... 7
• Kiosk User Interface Overview . ........ ............. .... .... .... .... ..................... .... .... .... ..................... .... .... .. 8
Xerox®Instant Print Kiosk
Quick Start Guide
5
Page 6

Getting Started
Introduction
This document is intended to help you understand how to use the basic functions of the Xerox
Instant Print Kiosk. A separate User Guide provides further information about the safety, operation,
and maintenance of the device. To access the User Guide, go to www.support.xerox.com.
®
6
Xerox®Instant Print Kiosk
Quick Start Guide
Page 7

Getting Started
Kiosk Overview
The Xerox®Instant Print Kiosk consists of:
• A high-speed color multifunction printer
• A customized user interface (UI) module that integrates:
– A high-resolution tablet
– A credit card reader
The total solution allows customers to order, pay for, and execute their jobs. Specifically, the customer
can:
• Copy
• Scan to and Print from:
– Email
– USB
– Google Drive
– Dropbox
– OneDrive
– SharePoint
• Fax (send)
Xerox
®
Instant Print Kiosk
Quick Start Guide
7
Page 8

Getting Started
Kiosk User Interface Overview
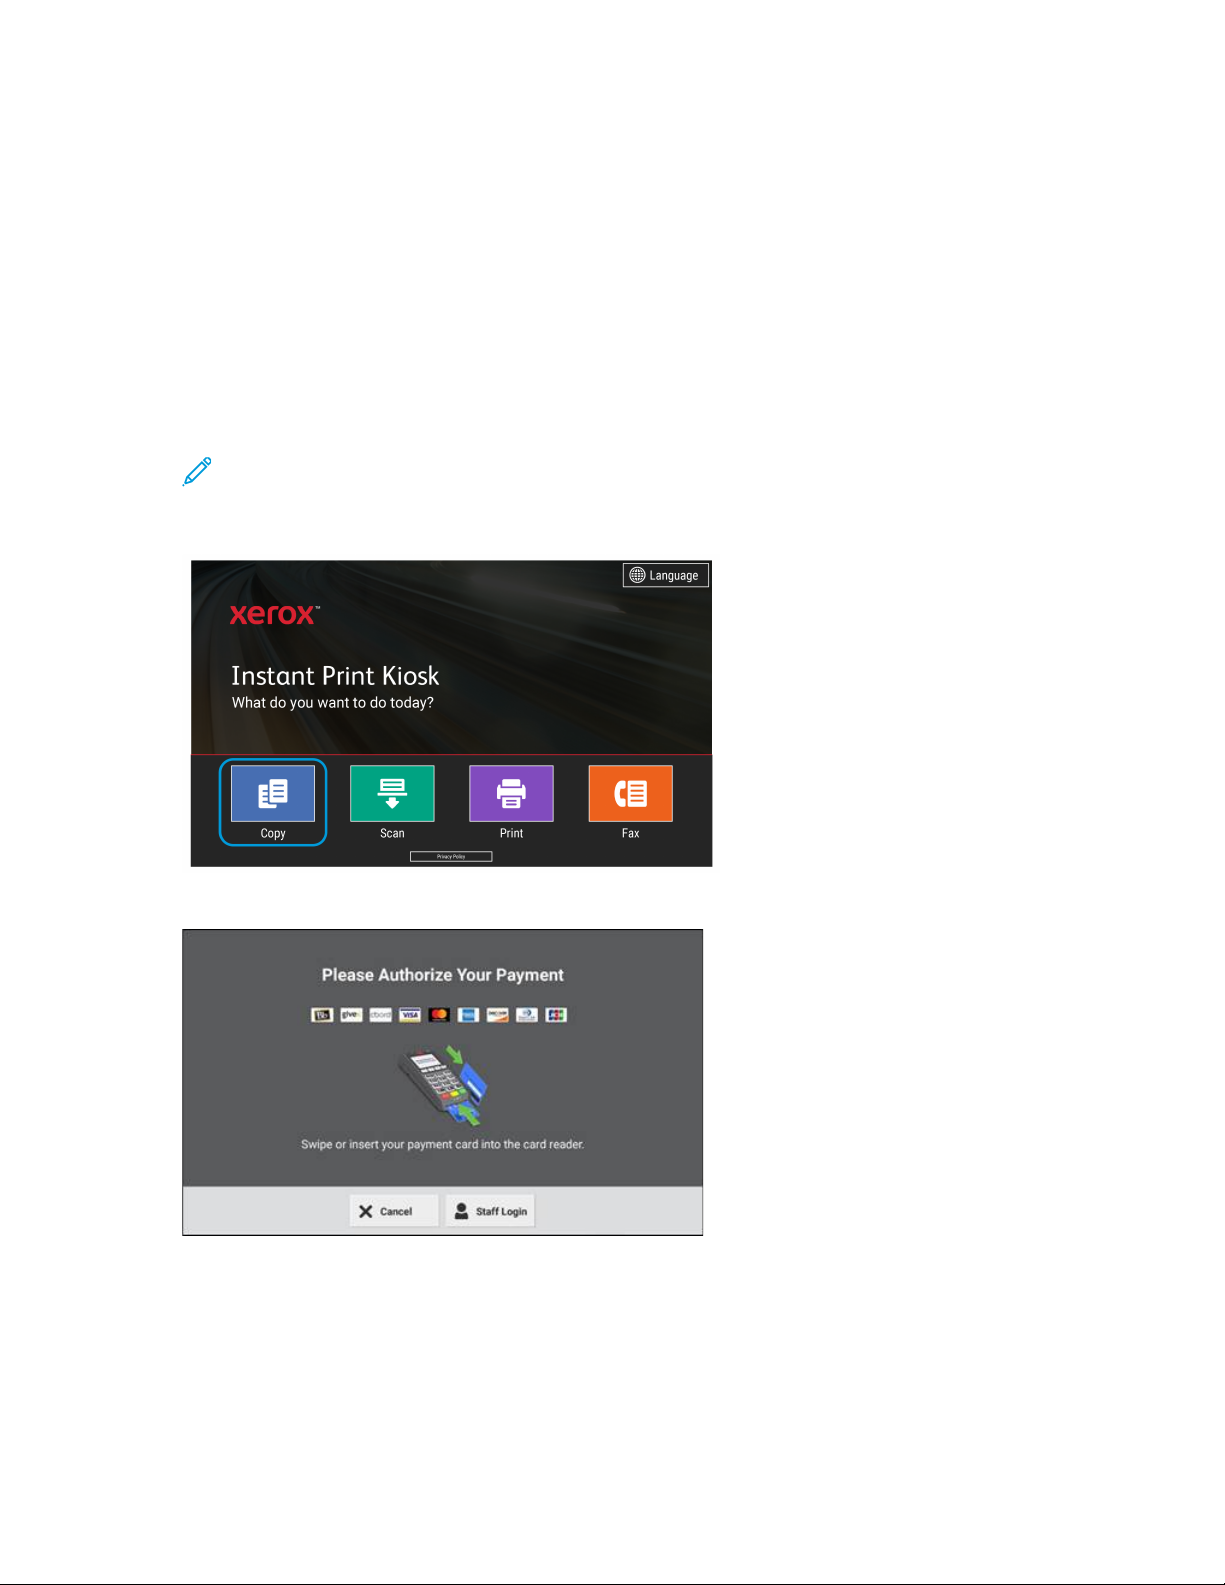
When you walk up to the Xerox Instant Print Kiosk, the following user interface screen appears.
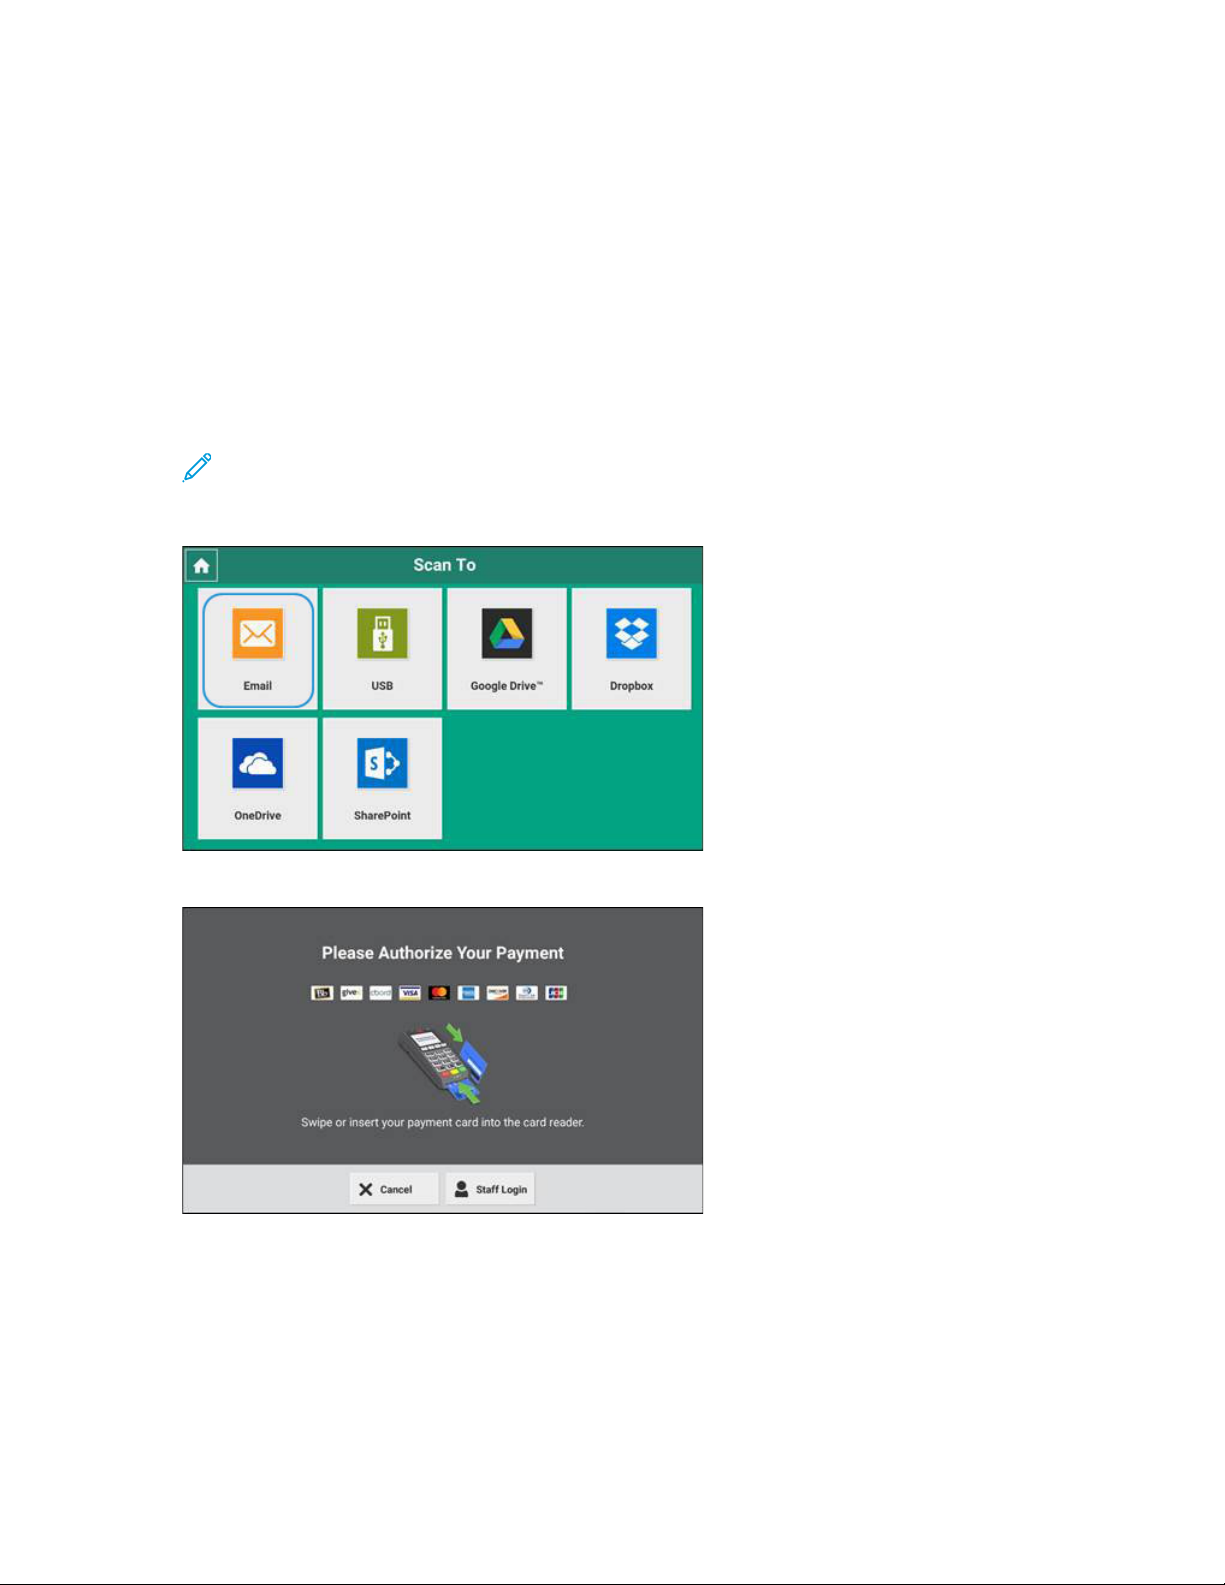
From this screen you can do the following actions:
• Make copies
• Scan to the following locations: email, USB drive, Google Drive, Dropbox, OneDrive, or SharePoint
• Print from the following locations: email, USB drive, Google Drive, Dropbox, OneDrive, or
SharePoint
• Send a fax
8
Xerox®Instant Print Kiosk
Quick Start Guide
Page 9

2
Making Copies
This chapter contains:
• Accessing the Copy Features .. .... .... ........ ............. ........ .... .... .... ..................... .... .... .... ................. . 10
• Making Copies ............... .... .... .... ..................... .... .... .... .... ..................... .... .... .... ..................... .... . 12
• Copy Options ............. .... .... .... ..................... .... .... .... ................. .... .... .... .... .... ..................... .... .... . 17
Xerox®Instant Print Kiosk
Quick Start Guide
9
Page 10

Making Copies
Accessing the Copy Features
1. To access the copy features, touch Copy.
2. Insert or swipe your payment card.
10
Xerox®Instant Print Kiosk
Quick Start Guide
Page 11

3. Select the required Output Color option.
The Copy screen appears.
Making Copies
Xerox®Instant Print Kiosk
Quick Start Guide
11
Page 12
Making Copies
Making Copies
To copy a document, perform the steps that follow:
1. Load your original documents.
• For single pages or paper that cannot be fed using the duplex automatic document feeder,
use the document glass. Lift the duplex automatic document feeder, then place the original
document face down in the upper-left corner of the document glass.
• For multiple, single, or 2-sided pages, use the duplex automatic document feeder. Remove any
staples and paper clips from the pages. Insert the original documents face up in the duplex
automatic document feeder, with the left side entering the feeder first, and the top of the
page away from you. Adjust the paper guides so that they fit against the original documents.
Note: For information about parts of the printer, including the duplex automatic document
feeder and the document glass, refer to the User Guide at www.support.xerox.com.
2. Touch Copy.
3. Insert or swipe your payment card.
12
Xerox®Instant Print Kiosk
Quick Start Guide
Page 13
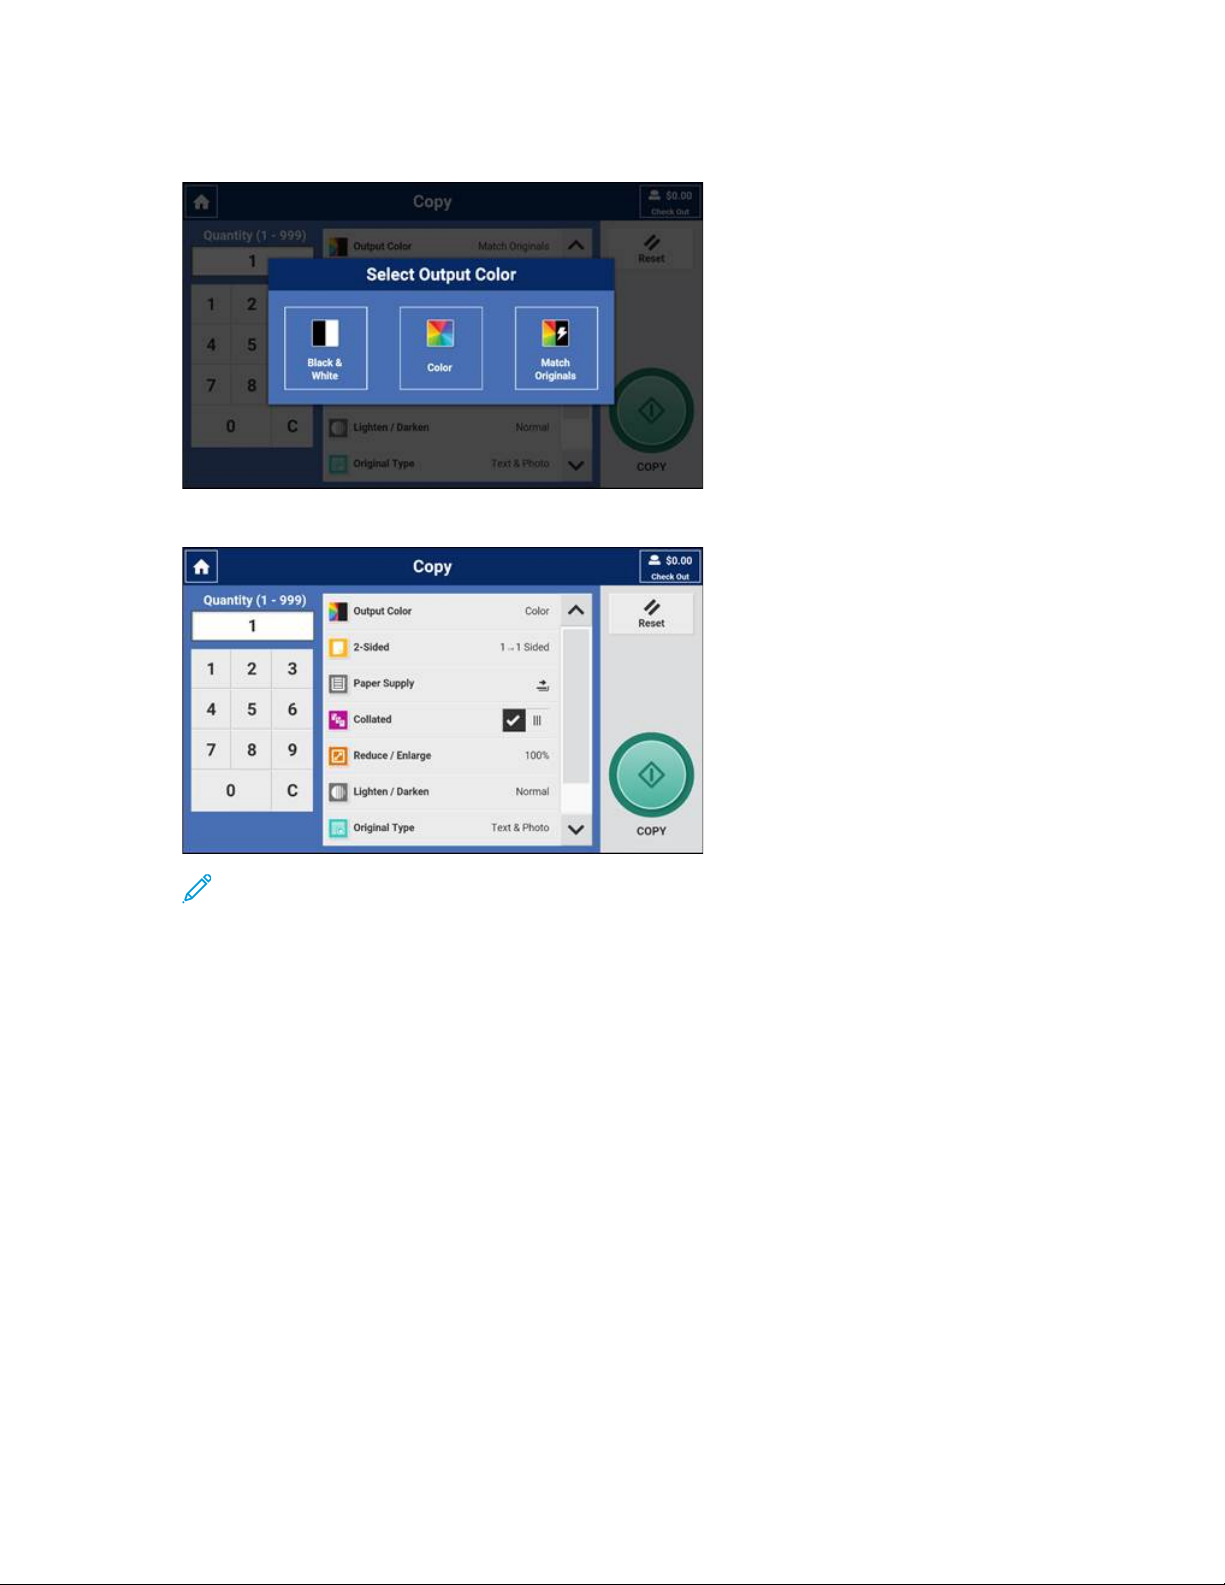
4. Select the required Output Color option.
The Copy screen appears.
Making Copies
Note: At any time, you can touch Reset to return to the default settings.
5. Adjust the settings as required:
• Quantity
• Output Color
• 2-Sided
• Paper Supply
• Collated
• Staple
• Hole Punch
• Reduce/Enlarge
• Lighten/Darken
• Original Type
• Auto Background Suppression
For more information about each of the settings, refer to Copy Options.
Xerox
®
Instant Print Kiosk
Quick Start Guide
13
Page 14
Making Copies
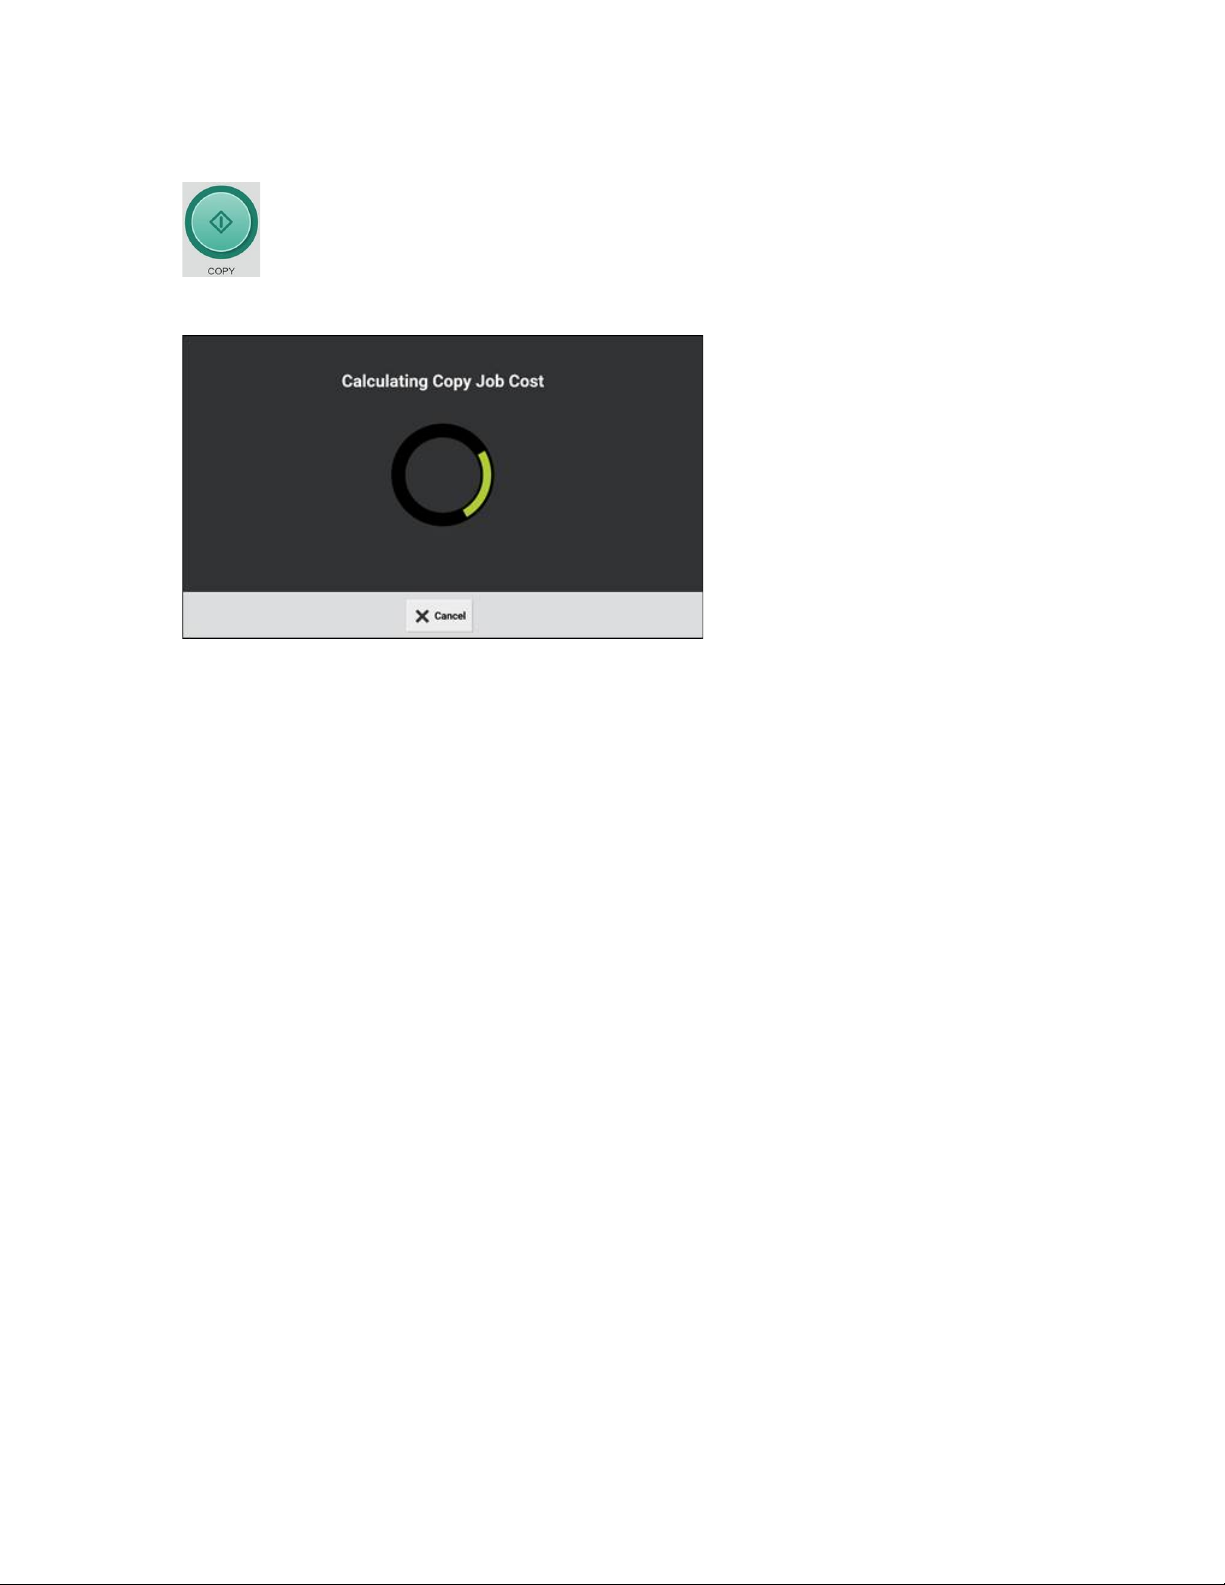
6. Touch Copy.
A screen appears that indicates that the system is calculating your job cost.
When the calculation is complete, the Job Cost screen appears.
14
Xerox®Instant Print Kiosk
Quick Start Guide
Page 15

7. Touch Continue.
Note: If you are making a single copy, the Copy Job Cost screen does not appear, and the
job is processed automatically.
A screen appears that indicates that your job is processing.
Making Copies
A screen appears that indicates that your job is complete.
8. To copy another job, touch Do More.
The Copy screen appears.
9. Repeat Step 5.—Step 8.
Xerox
®
Instant Print Kiosk
Quick Start Guide
15
Page 16
Making Copies
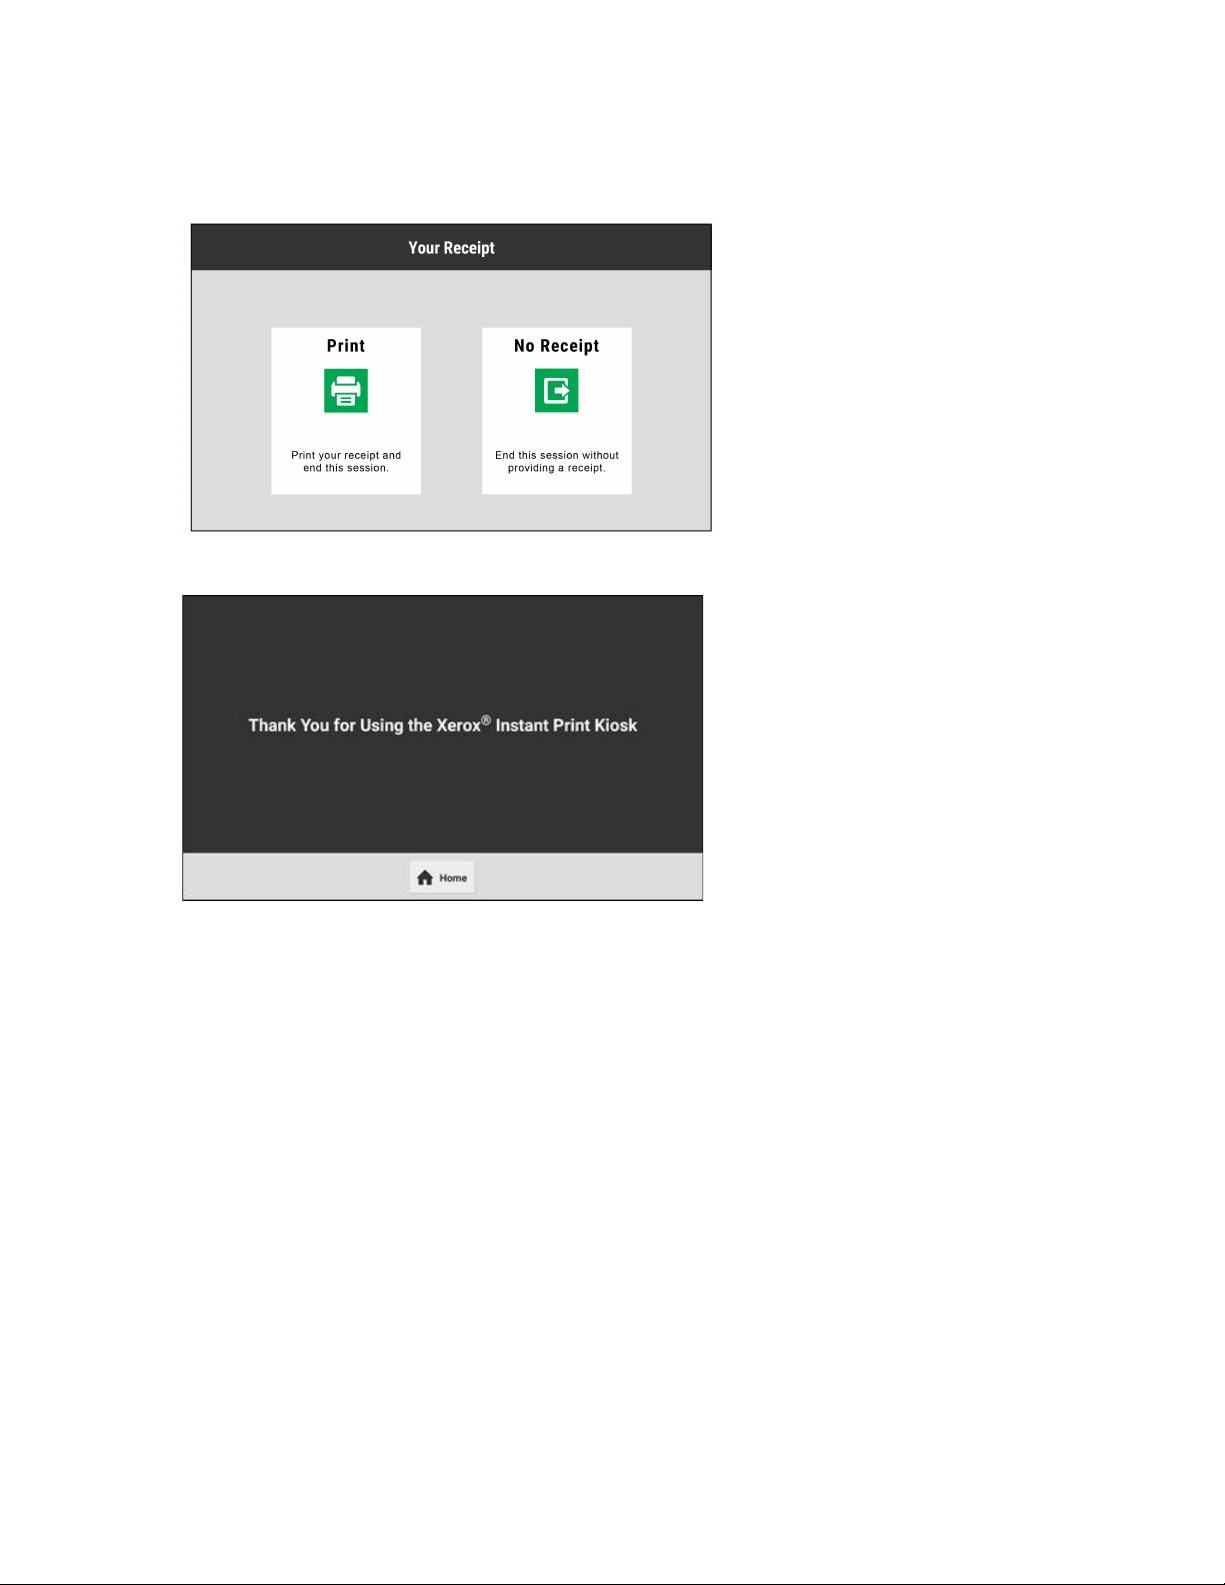
10. To end your session, touch Check Out.
11. Select a Receipt option.
The Thank You screen appears.
16
Xerox®Instant Print Kiosk
Quick Start Guide
Page 17

Copy Options
The following Copy options are available:
Option Description
Quantity Use the Quantity option to enter the number of copies required. Using
the touch pad, enter 1—999 copies. To clear an incorrect entry, use the
C option.
Output Color Use Output Color to control the color rendering of the image. The
following Output Color options are available:
• Black & White
• Color
• Match Originals
2-Sided Use the 2-Sided options to set the device to scan one or both sides of
an original document. For copy jobs, you can specify 1-Sided or 2-Sided
output. If 2-Sided output is selected, use the Rotate Side 2 option to
change the orientation of the image on the second-side pages.
Making Copies
The following 2-Sided options are available:
• 1–1 Sided
• 1–2 Sided
• 2–2 Sided
• 2–1 Sided
Paper Supply Use Paper Supply to select the paper tray to use. If Auto Select is
selected, the printer chooses the paper tray based on the original
document size and the selected settings.
Collated You can collate multiple-page copy jobs automatically. For example,
when making three 1-Sided copies of a six-page document:
• If the Collate feature is activated, the copies are collated and
printed in the order 1, 2, 3, 4, 5, 6; 1, 2, 3, 4, 5, 6; 1, 2, 3, 4, 5, 6.
• If the Collate feature is deactivated, the copies are uncollated and
printed in the order 1, 1,1; 2, 2, 2; 3, 3, 3; 4, 4, 4; 5, 5, 5; 6, 6, 6.
To activate the Collate feature, touch the toggle button.
Staple Use the Staple option to produce stapled sets. The following Staple
options are available:
• No Staple
• Portrait
• Landscape
• Dual Staple
Hole Punch Use the Hole Punch option to produce output with 2, 3, or 4 holes.
Xerox®Instant Print Kiosk
Quick Start Guide
17
Page 18
Making Copies
Option Description
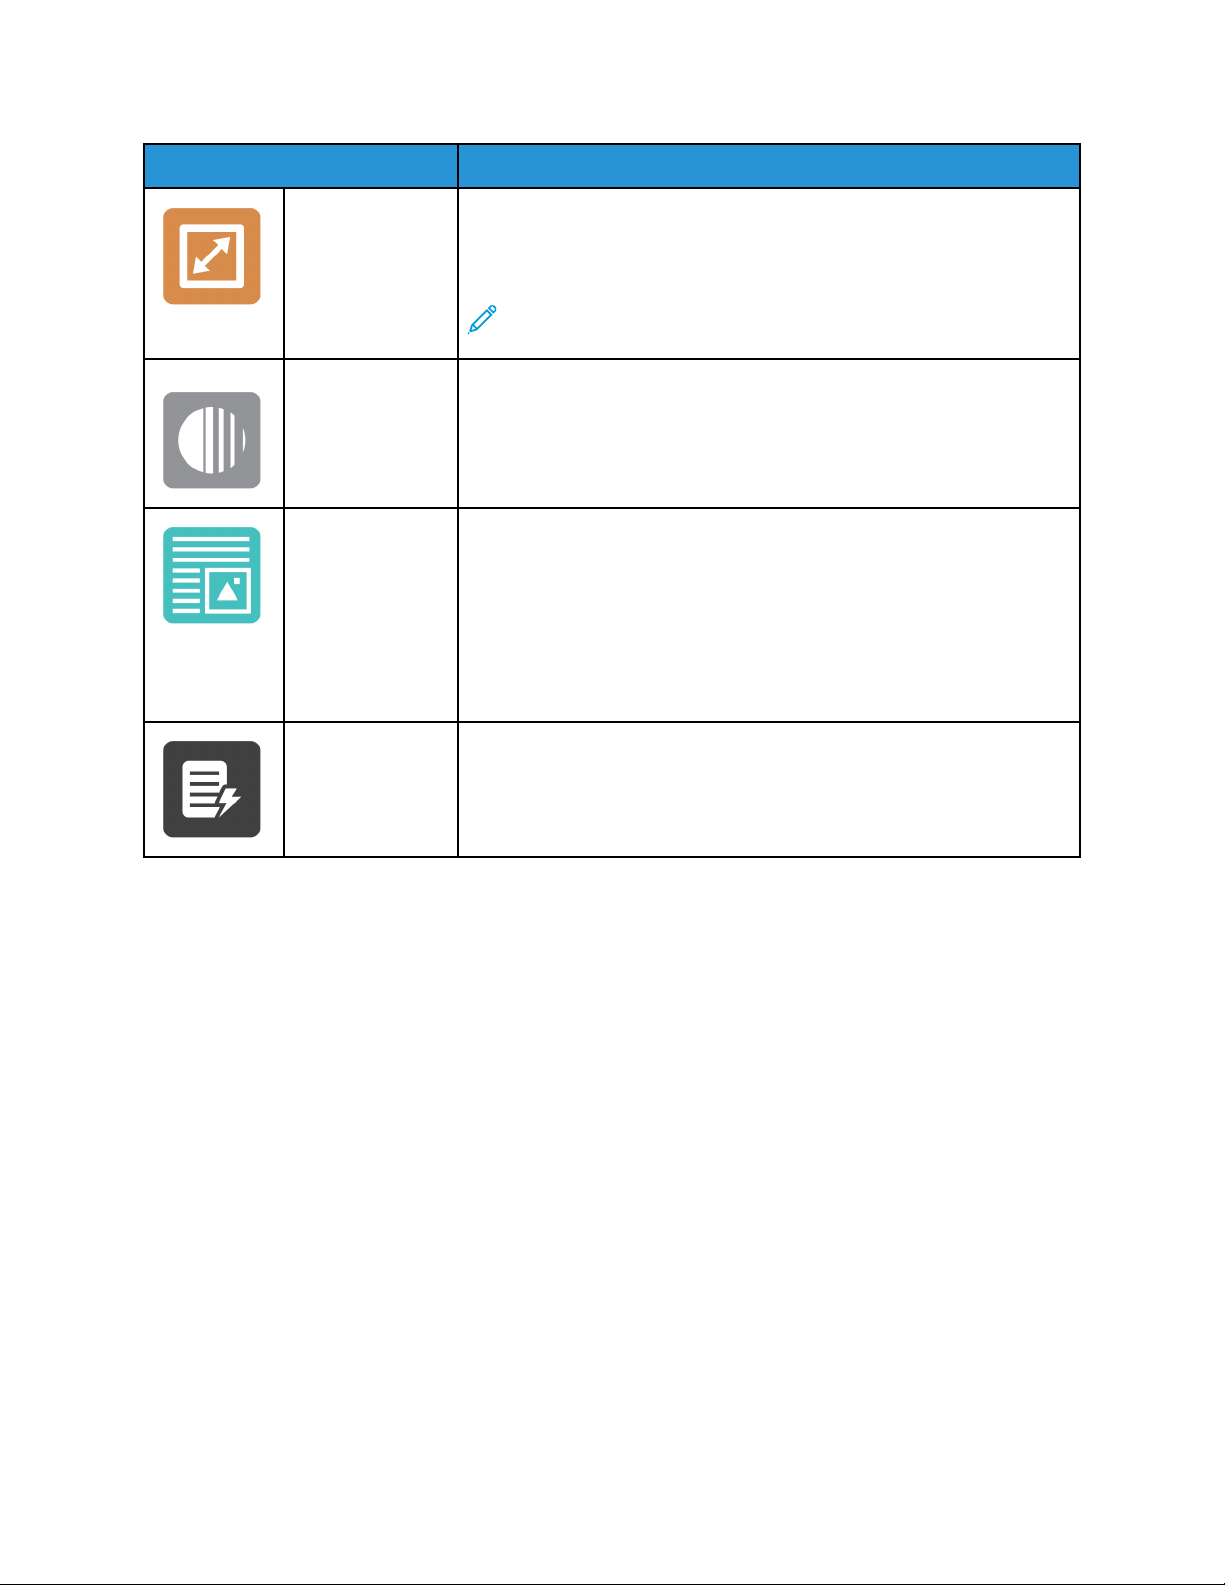
Reduce/Enlarge You can reduce the image to as little as 25% of its original size or
enlarge the image as much as 400%. The Auto % option allows the
device to calculate the reduction or enlargement percentage based on
the size of the original document and the size of the paper selected.
Note: Auto Reduce/Enlarge and Auto Paper Supply cannot be
selected together.
Lighten/Darken Use the Lighten/Darken slider to make the output image or print lighter
or darker.
Original Type The printer optimizes the image quality of the copies based on the type
of images in the original document and how the original document was
created. The following Original Type options are available:
• Text & Photo
• Text
• Photo
• Map
• Newspaper
Auto Background
Suppression
Use the Auto Background Suppression setting to reduce the sensitivity
of the printer to variations in light background colors. To activate the
Auto Background Suppression feature, touch the toggle button.
For information about making copies, refer to Making Copies.
18
Xerox®Instant Print Kiosk
Quick Start Guide
Page 19

3
Scanning a Document
This chapter contains:
• Accessing the Scan Features... ................. .... .... .... ..................... .... .... .... .... .... ................. .... .... .... . 20
• Scan to Email. .... .... ............. ........ .... .... .... ..................... .... .... .... ................. .... .... .... ..................... 21
• Scan to USB.. .... .... .... .... .... ..................... .... .... .... ..................... .... .... .... ................. .... .... .... .......... 26
• Scan to Google Drive. .... .... ..................... .... .... .... ..................... .... .... .... ..................... .... .... .... ...... 32
• Scan to Dropbox .. .... .... ..................... ........ .... .... .... ..................... .... .... .... ................. .... .... .... ....... 37
• Scan to OneDrive . .... .... .... .... .... ..................... .... .... .... ..................... .... .... .... ................. .... .... .... ... 42
• Scan to SharePoint................... .... .... .... ..................... .... .... .... ..................... .... .... .... .... ............. ... 47
• Scan Options............... .... .... .... ........ ............. ........ .... .... .... ..................... .... .... .... ................. .... .... 52
Xerox®Instant Print Kiosk
Quick Start Guide
19
Page 20

Scanning a Document
Accessing the Scan Features
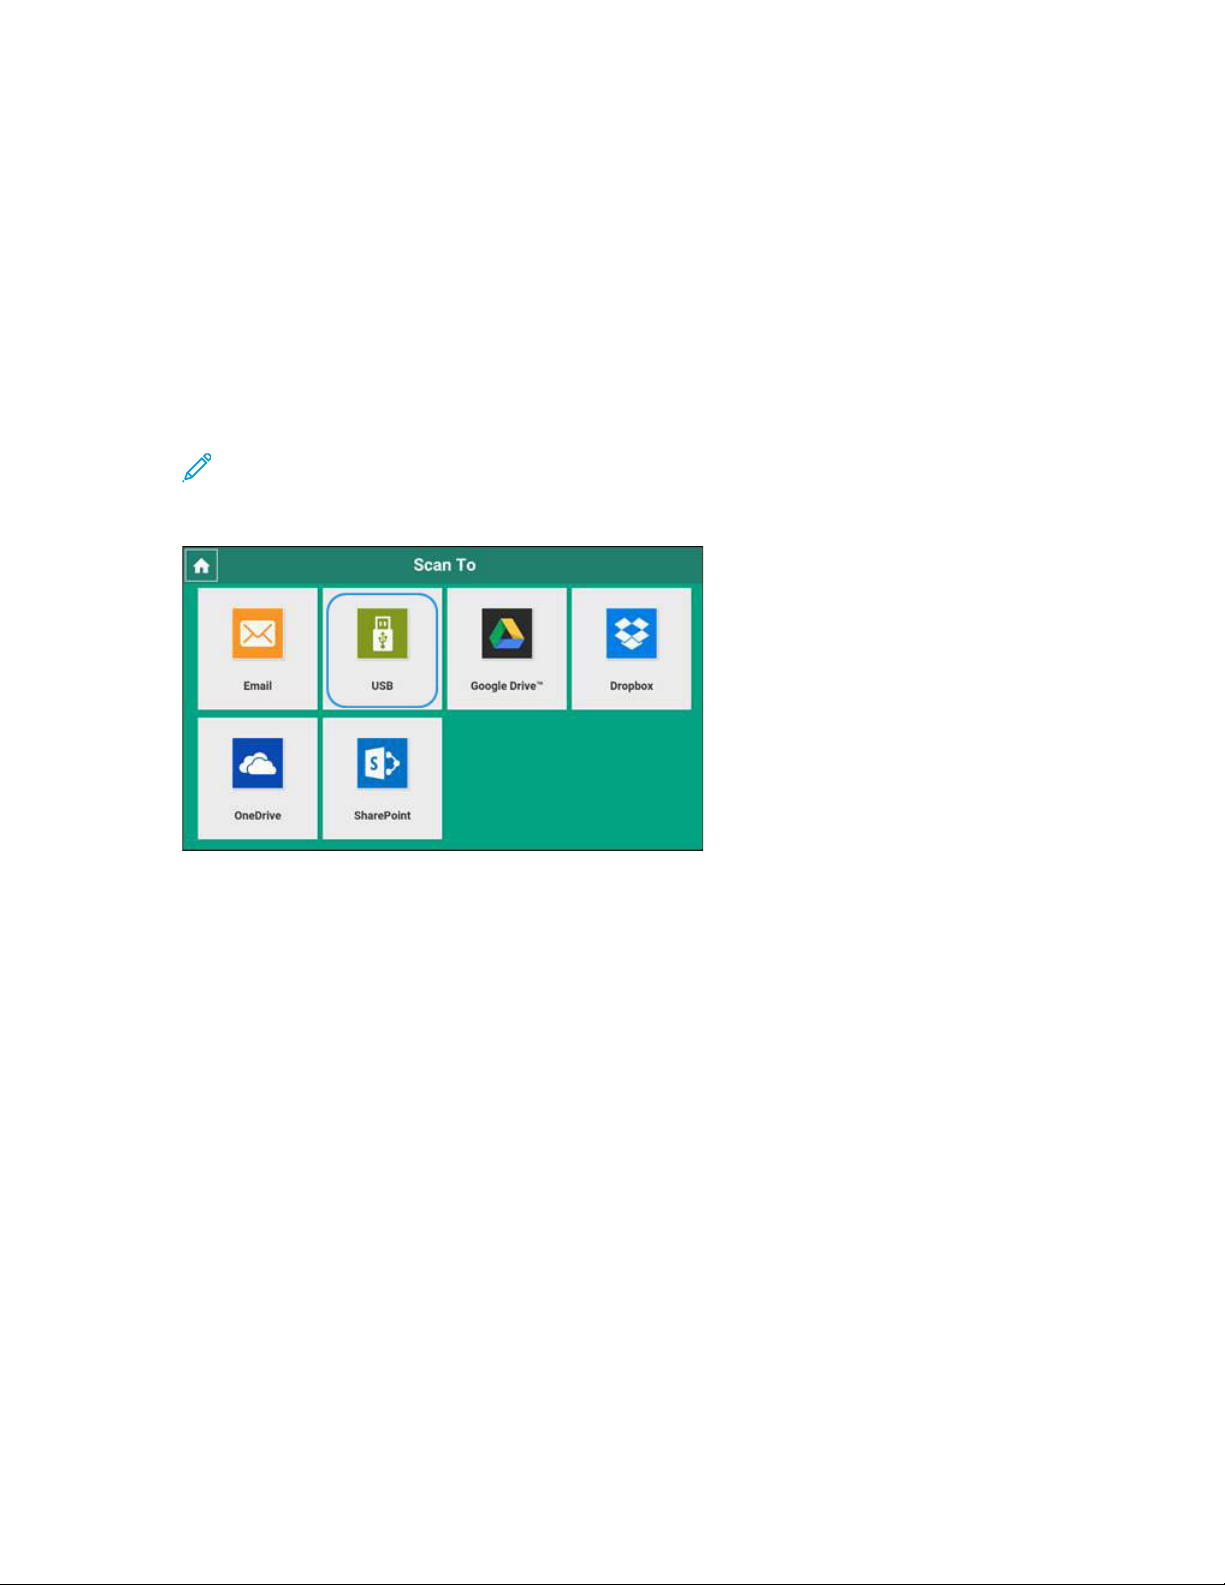
To access the scan features, touch Scan.
The main Scan To screen appears.
20
Xerox®Instant Print Kiosk
Quick Start Guide
Page 21
Scanning a Document
Scan to Email
To scan to email, perform the steps that follow:
1. Load your original documents.
• For single pages or paper that cannot be fed using the duplex automatic document feeder,
use the document glass. Lift the duplex automatic document feeder, then place the original
document face down in the upper-left corner of the document glass.
• For multiple, single, or 2-sided pages, use the duplex automatic document feeder. Remove any
staples and paper clips from the pages. Insert the original documents face up in the duplex
automatic document feeder, with the left side entering the feeder first, and the top of the
page away from you. Adjust the paper guides so that they fit against the original documents.
Note: For information about parts of the printer, including the duplex automatic document
feeder and the document glass, refer to the User Guide at www.support.xerox.com.
2. Touch Email.
3. Insert or swipe your payment card.
The Scan to Email screen appears.
Xerox
®
Instant Print Kiosk
Quick Start Guide
21
Page 22
Scanning a Document
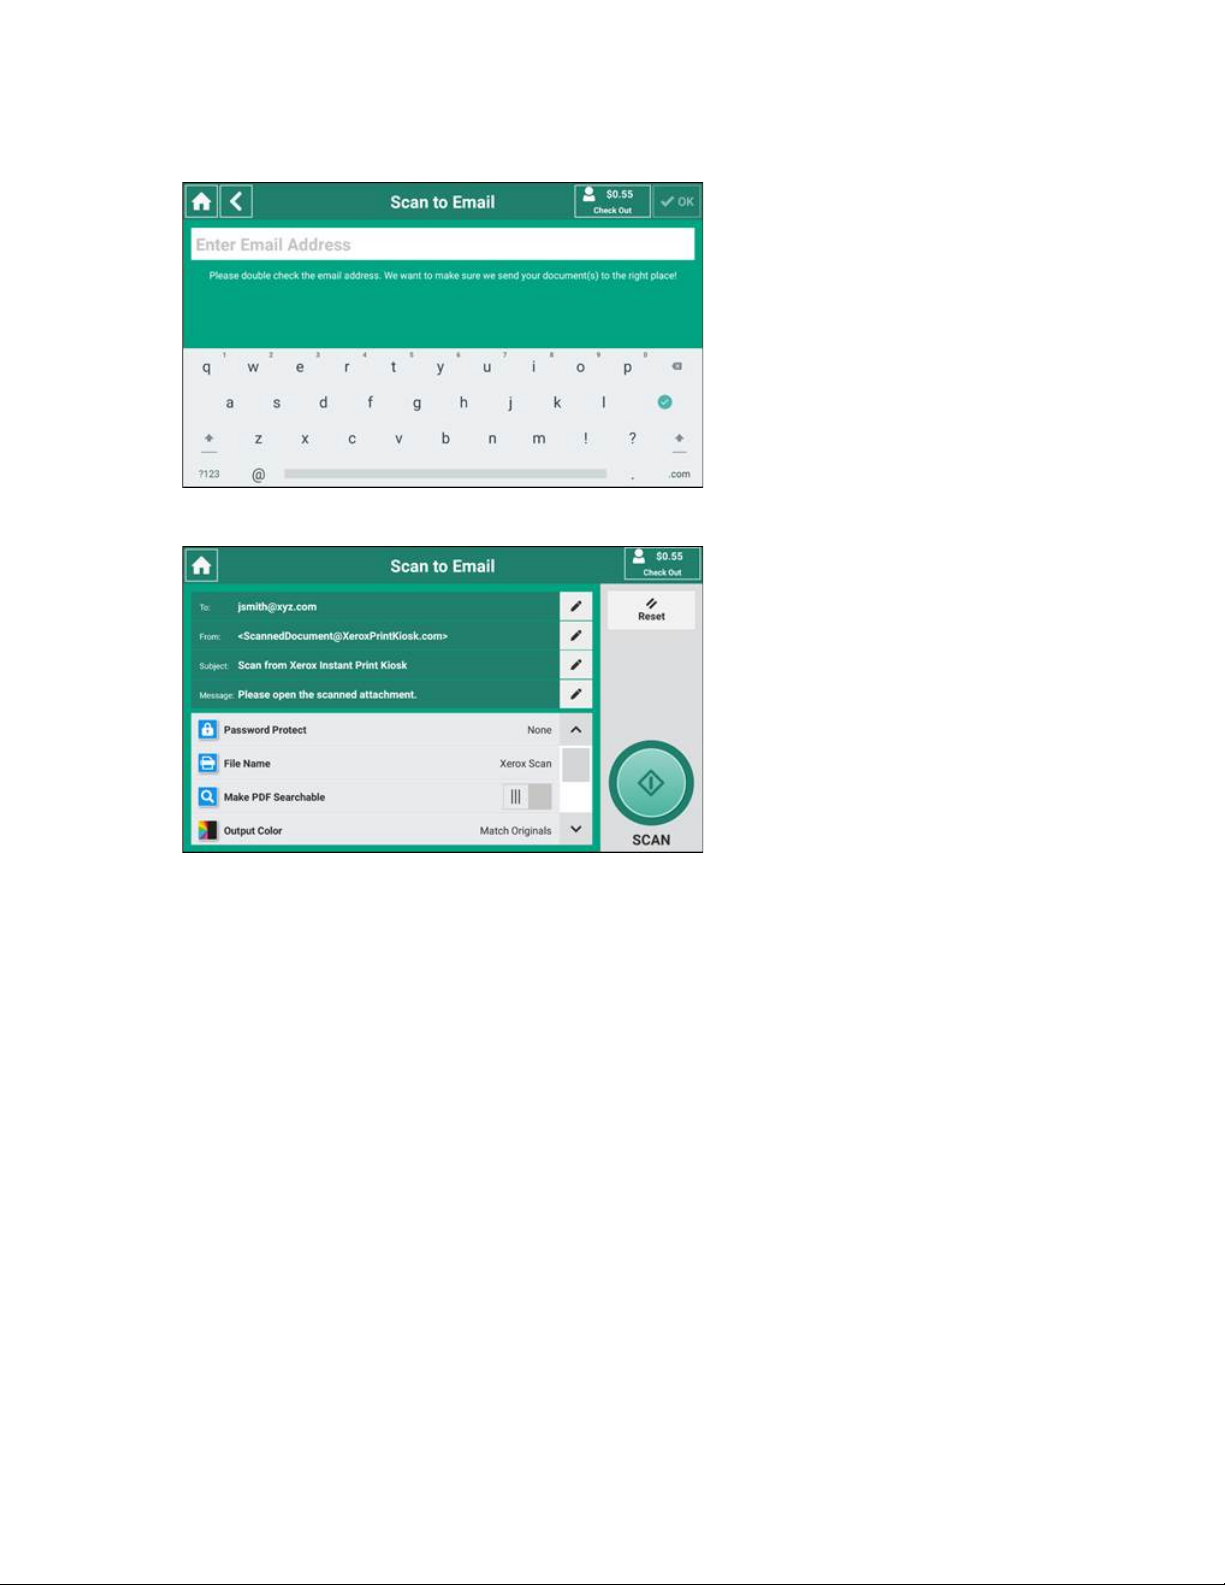
4. Enter the recipient email address, then touch OK.
The Scan to Email screen appears.
5. To enter additional recipients, sender, subject and message details, touch the edit icon for the
field required, then use the touch screen keypad to enter the details. Touch OK to save your
selections and return to the previous screen.
6. Adjust the settings as required:
• Password Protect
• File Name
• Make PDF Searchable
• Output Color
• Original Type
• Original Orientation
• Auto Background Suppression
• 2 Sided
• Resolution
• Original Size
• Lighten/Darken
For more information about each of the settings, refer to Scan Options.
22
Xerox®Instant Print Kiosk
Quick Start Guide
Page 23

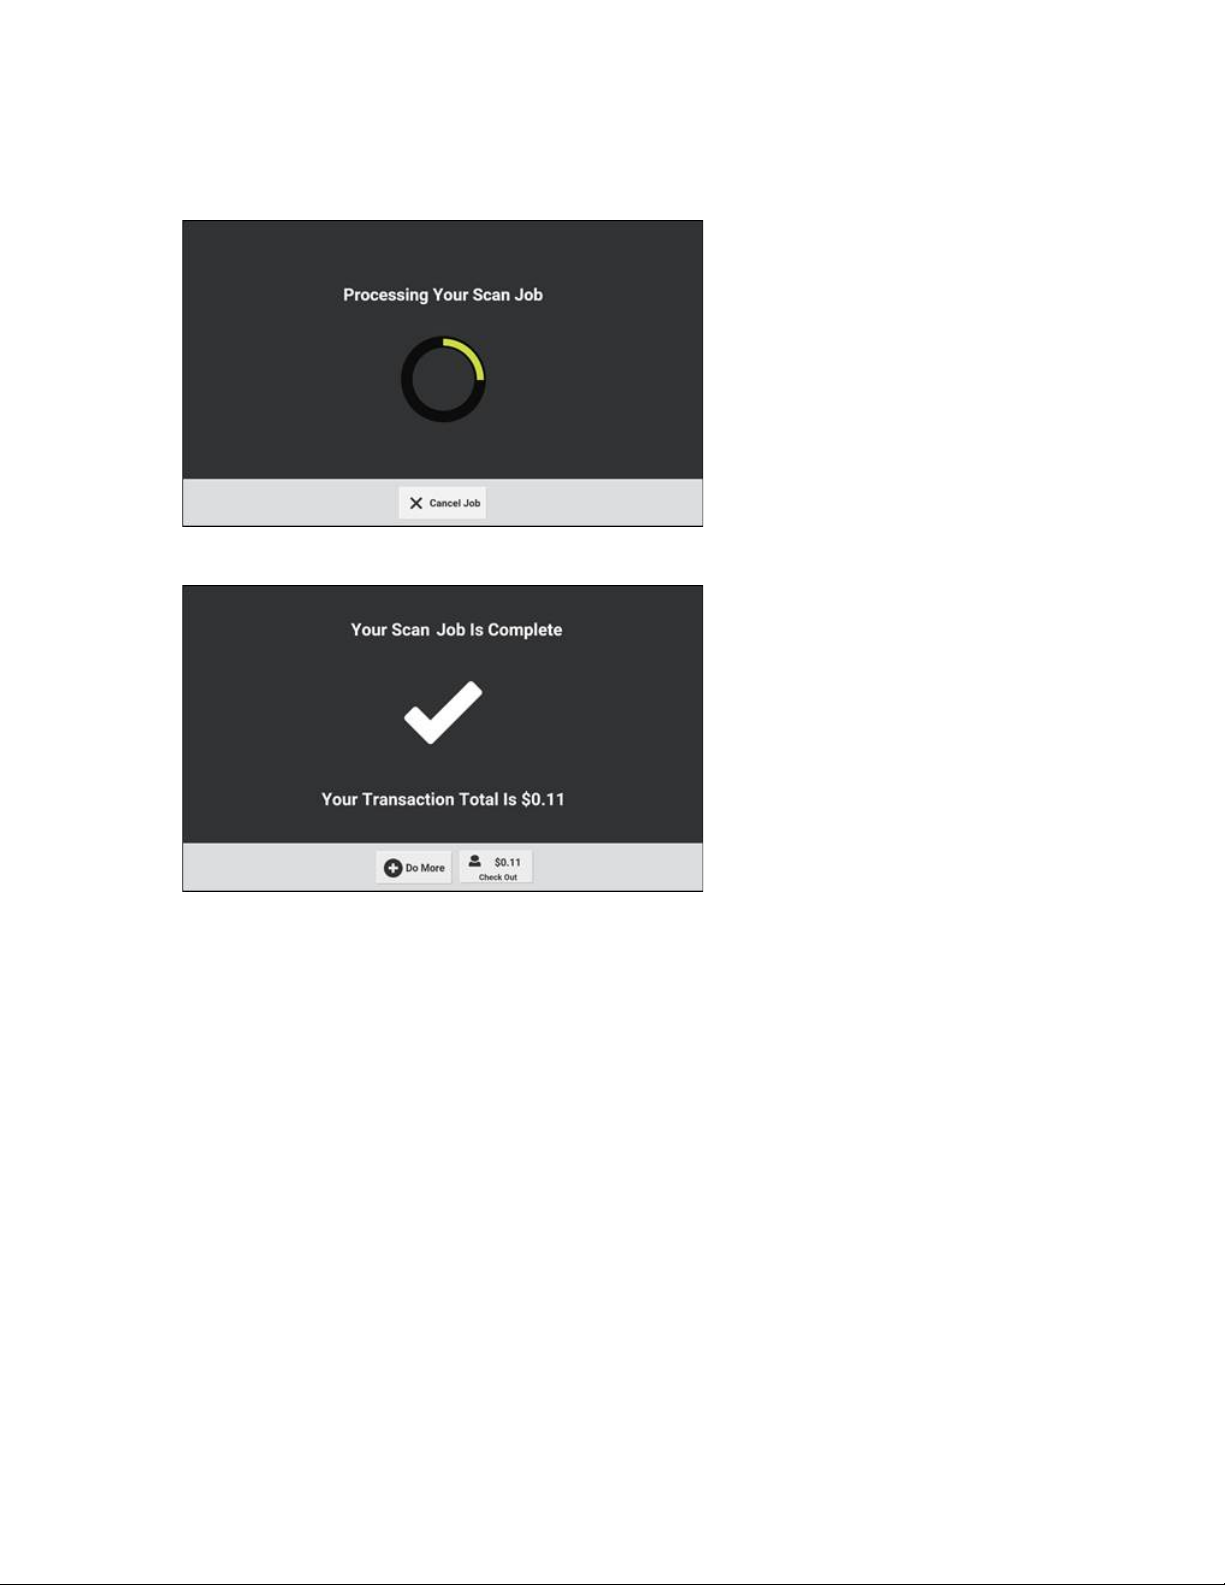
7. Touch Scan.
A screen appears that indicates that the system is calculating your job cost.
When the calculation is complete, the Job Cost screen appears.
Scanning a Document
Xerox®Instant Print Kiosk
Quick Start Guide
23
Page 24
Scanning a Document
8. Touch Continue.
A screen appears that indicates that your job is processing.
A screen appears that indicates that your job is complete.
9. To scan another job, touch Do More.
The first Scan to Email screen appears.
10. Repeat Step 6.—Step 9..
24
Xerox®Instant Print Kiosk
Quick Start Guide
Page 25

11. To end your session, touch Check Out.
12. Select a Receipt option.
The Thank You screen appears.
Scanning a Document
Xerox®Instant Print Kiosk
Quick Start Guide
25
Page 26
Scanning a Document
Scan to USB
To scan to USB, perform the steps that follow:
1. Load your original documents.
• For single pages or paper that cannot be fed using the duplex automatic document feeder,
use the document glass. Lift the duplex automatic document feeder, then place the original
document face down in the upper-left corner of the document glass.
• For multiple, single, or 2-sided pages, use the duplex automatic document feeder. Remove any
staples and paper clips from the pages. Insert the original documents face up in the duplex
automatic document feeder, with the left side entering the feeder first, and the top of the
page away from you. Adjust the paper guides so that they fit against the original documents.
Note: For information about parts of the printer, including the duplex automatic document
feeder and the document glass, refer to the User Guide at www.support.xerox.com.
2. Touch USB.
26
Xerox®Instant Print Kiosk
Quick Start Guide
Page 27
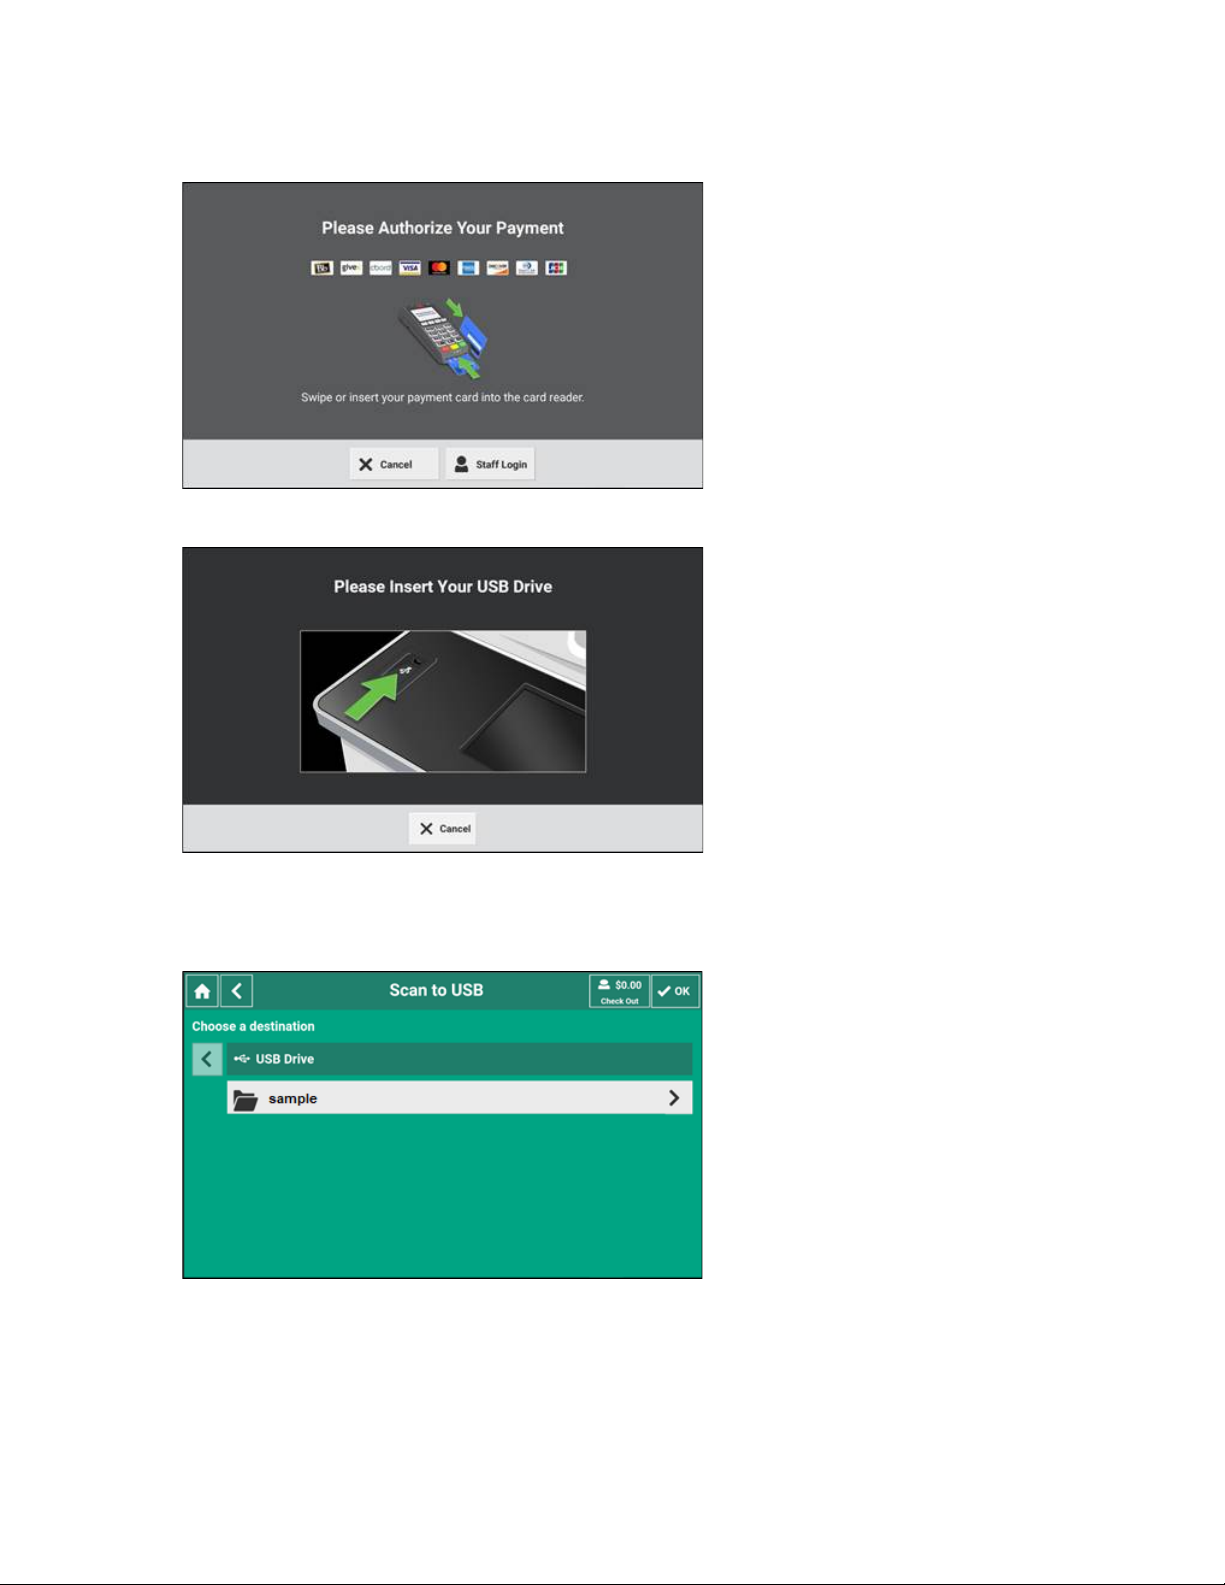
3. Insert or swipe your payment card.
A message appears prompting you to insert your USB Drive.
Scanning a Document
4. Insert your USB drive.
After the retrieval process completes, the message closes. A screen appears that shows the folders
on your USB drive.
Xerox®Instant Print Kiosk
Quick Start Guide
27
Page 28
Scanning a Document
5. Navigate to the required destination folder for your scan, then touch OK.
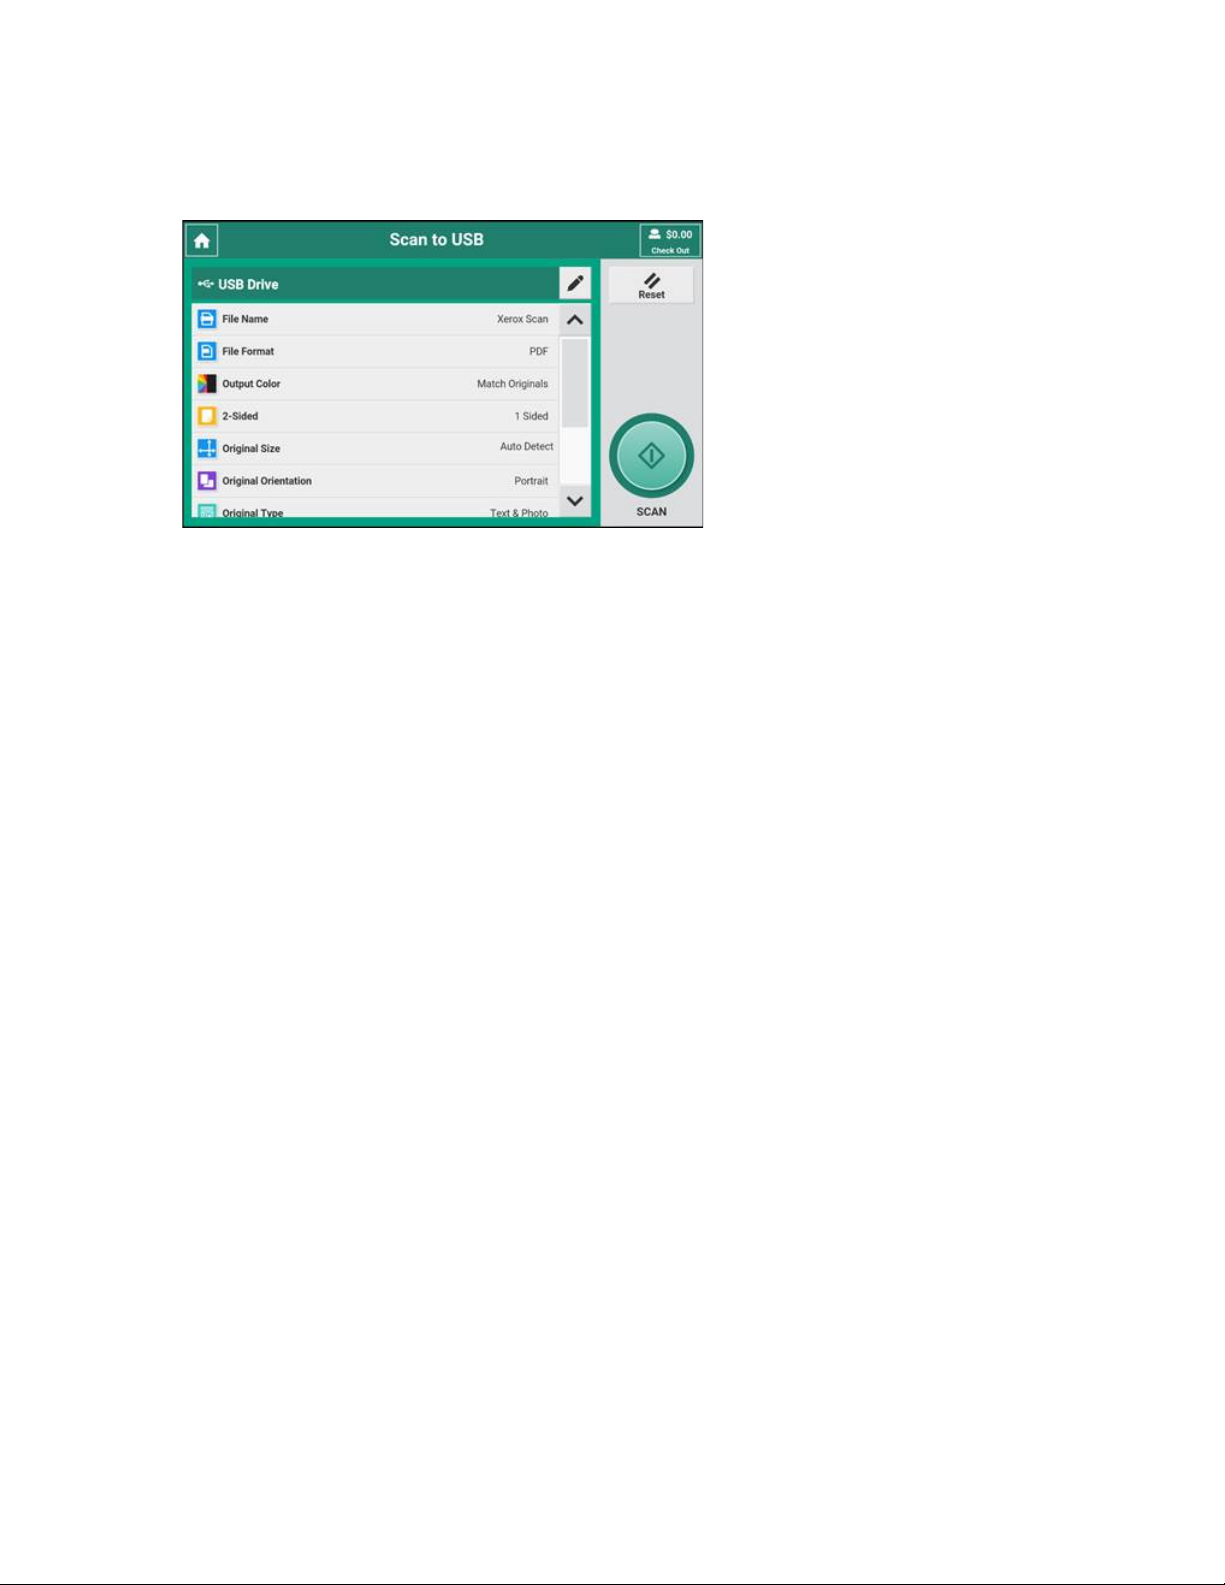
The Scan to USB screen appears.
6. Adjust the settings as required:
• File Name
• File Format
• Output Color
• 2 Sided
• Original Size
• Original Orientation
• Original Type
• Resolution
• Lighten/Darken
• Auto Background Suppression
For more information about each of the settings, refer to Scan Options.
28
Xerox®Instant Print Kiosk
Quick Start Guide
Page 29
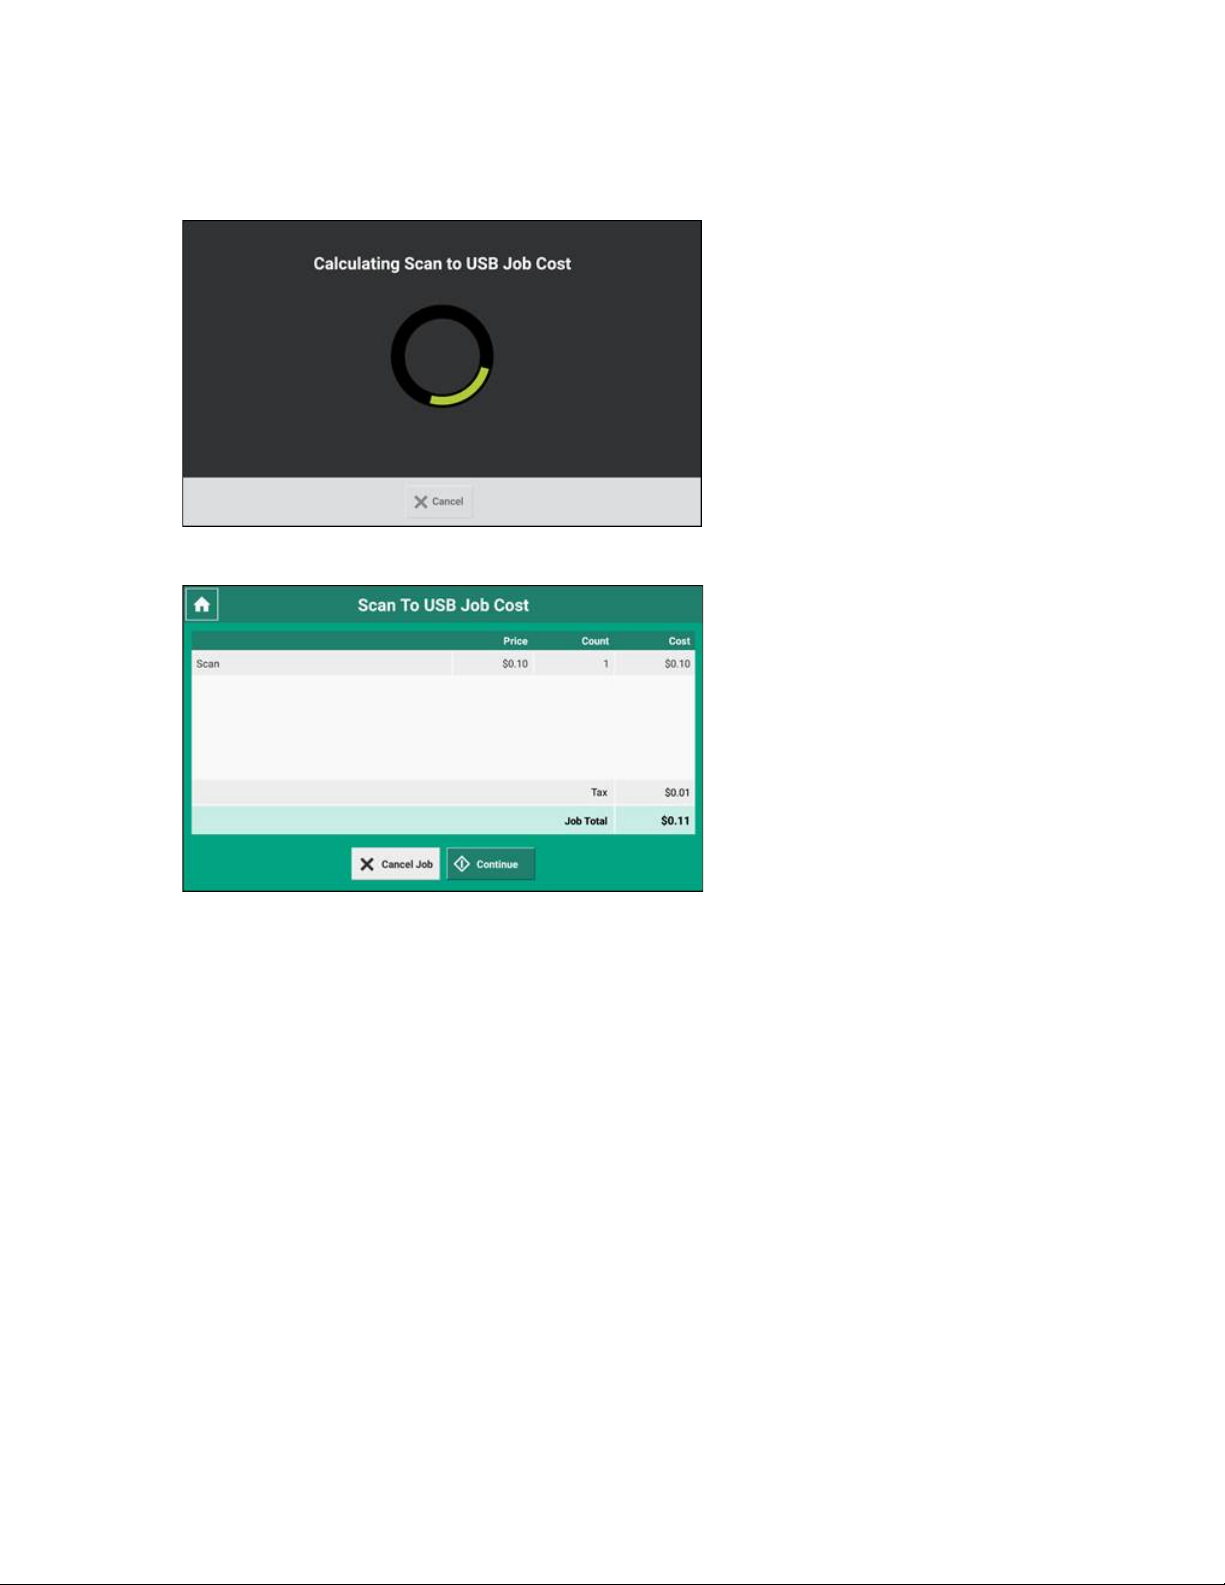
7. Touch Scan.
A screen appears that indicates that the system is calculating your job cost.
When the calculation is complete, the Job Cost screen appears.
Scanning a Document
Xerox®Instant Print Kiosk
Quick Start Guide
29
Page 30

Scanning a Document
8. Touch Continue.
A screen appears that indicates that your job is processing.
A screen appears that indicates that your job is complete.
9. To scan another job, touch Do More.
The first Scan to USB Drive screen appears.
10. Repeat Step 6.—Step 9.
30
Xerox®Instant Print Kiosk
Quick Start Guide
Page 31

11. To end your session, touch Check Out.
12. Select a Receipt option.
The Thank You screen appears.
Scanning a Document
Xerox®Instant Print Kiosk
Quick Start Guide
31
Page 32

Scanning a Document
Scan to Google Drive
To scan to Google Drive, perform the steps that follow:
1. Load your original documents.
• For single pages or paper that cannot be fed using the duplex automatic document feeder,
use the document glass. Lift the duplex automatic document feeder, then place the original
document face down in the upper-left corner of the document glass.
• For multiple, single, or 2-sided pages, use the duplex automatic document feeder. Remove any
staples and paper clips from the pages. Insert the original documents face up in the duplex
automatic document feeder, with the left side entering the feeder first, and the top of the
page away from you. Adjust the paper guides so that they fit against the original documents.
Note: For information about parts of the printer, including the duplex automatic document
feeder and the document glass, refer to the User Guide at www.support.xerox.com.
2. Touch Google Drive.
3. Insert or swipe your payment card.
32
Xerox®Instant Print Kiosk
Quick Start Guide
Page 33

4. Enter your credentials, then touch Next.
5. To allow permissions, touch Allow.
A screen appears that shows the folders in your Google Drive location.
Scanning a Document
6. Navigate to the required destination folder for your scan, then touch OK.
The Scan to Google Drive screen appears.
Xerox®Instant Print Kiosk
33
Quick Start Guide
Page 34

Scanning a Document
7. Adjust the settings as required:
• File Name
• File Format
• Output Color
• 2 Sided
• Original Size
• Original Orientation
• Original Type
• Auto Background Suppression
• Resolution
• Lighten/Darken
For more information about each of the settings, refer to Scan Options.
8. Touch Scan.
A screen appears that indicates that the system is calculating your job cost.
When the calculation is complete, the Job Cost screen appears.
34
Xerox®Instant Print Kiosk
Quick Start Guide
Page 35
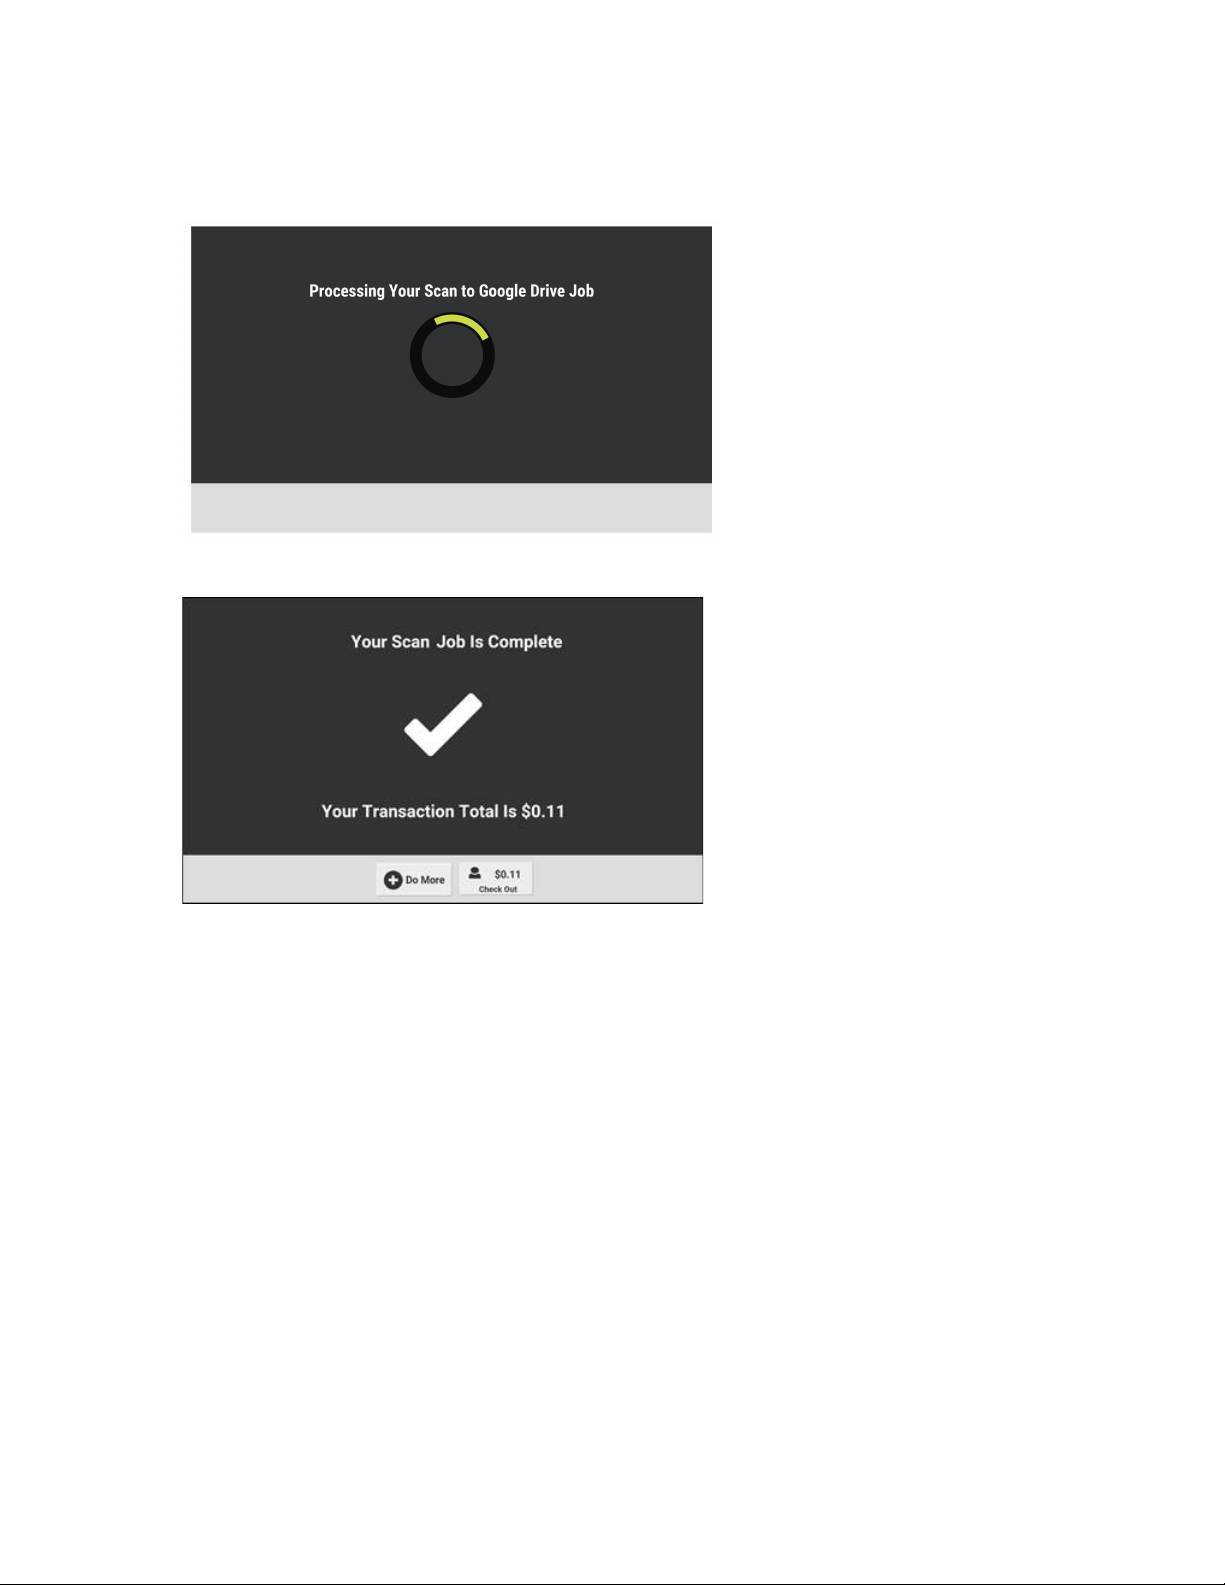
9. Touch Continue.
A screen appears that indicates that your job is processing.
A screen appears that indicates that your job is complete.
Scanning a Document
10. To scan another job, touch Do More.
The first Scan to Google Drive screen appears.
11. Repeat Step 7.—Step 10.
Xerox
®
Instant Print Kiosk
Quick Start Guide
35
Page 36

Scanning a Document
12. To end your session, touch Check Out.
13. Select a Receipt option.
A Thank You screen appears.
36
Xerox®Instant Print Kiosk
Quick Start Guide
Page 37

Scanning a Document
Scan to Dropbox
To scan to Dropbox, perform the steps that follow:
1. Load your original documents.
• For single pages or paper that cannot be fed using the duplex automatic document feeder,
use the document glass. Lift the duplex automatic document feeder, then place the original
document face down in the upper-left corner of the document glass.
• For multiple, single, or 2-sided pages, use the duplex automatic document feeder. Remove any
staples and paper clips from the pages. Insert the original documents face up in the duplex
automatic document feeder, with the left side entering the feeder first, and the top of the
page away from you. Adjust the paper guides so that they fit against the original documents.
Note: For information about parts of the printer, including the duplex automatic document
feeder and the document glass, refer to the User Guide at www.support.xerox.com.
2. Touch Dropbox.
3. Insert or swipe your payment card.
Xerox®Instant Print Kiosk
Quick Start Guide
37
Page 38

Scanning a Document
4. Enter your credentials, then touch Sign In.
5. To allow permissions, touch Allow.
A screen appears that shows the folders in your Dropbox location.
6. Navigate to the required destination folder for your scan, then touch OK.
The Scan to Dropbox screen appears.
38
Xerox®Instant Print Kiosk
Quick Start Guide
Page 39

7. Adjust the settings as required:
• File Name
• File Format
• Output Color
• 2 Sided
• Original Size
• Original Orientation
• Original Type
• Auto Background Suppression
• Resolution
• Lighten/Darken
For more information about each of the settings, refer to Scan Options.
8. Touch Scan.
A screen appears that indicates that the system is calculating your job cost.
Scanning a Document
When the calculation is complete, the Job Cost screen appears.
Xerox®Instant Print Kiosk
Quick Start Guide
39
Page 40

Scanning a Document
9. Touch Continue.
A screen appears that indicates that your job is processing.
A screen appears that indicates that your job is complete.
10. To scan another job, touch Do More.
The first Scan to Dropbox screen appears.
11. Repeat Step 7.—Step 10.
40
Xerox®Instant Print Kiosk
Quick Start Guide
Page 41

12. To end your session, touch Check Out.
13. Select a Receipt option.
A Thank You screen appears.
Scanning a Document
Xerox®Instant Print Kiosk
Quick Start Guide
41
Page 42

Scanning a Document
Scan to OneDrive
To scan to OneDrive, perform the steps that follow:
1. Load your original documents.
• For single pages or paper that cannot be fed using the duplex automatic document feeder,
use the document glass. Lift the duplex automatic document feeder, then place the original
document face down in the upper-left corner of the document glass.
• For multiple, single, or 2-sided pages, use the duplex automatic document feeder. Remove any
staples and paper clips from the pages. Insert the original documents face up in the duplex
automatic document feeder, with the left side entering the feeder first, and the top of the
page away from you. Adjust the paper guides so that they fit against the original documents.
Note: For information about parts of the printer, including the duplex automatic document
feeder and the document glass, refer to the User Guide at www.support.xerox.com.
2. Touch OneDrive.
3. Insert or swipe your payment card.
42
Xerox®Instant Print Kiosk
Quick Start Guide
Page 43

4. Enter your credentials, then touch Next.
A screen appears that shows the folders in your OneDrive location.
Scanning a Document
5. Navigate to the required destination folder for your scan, then touch OK.
The Scan to OneDrive screen appears.
Xerox®Instant Print Kiosk
Quick Start Guide
43
Page 44

Scanning a Document
6. Adjust the settings as required:
• File Name
• File Format
• Output Color
• 2 Sided
• Original Size
• Original Orientation
• Original Type
• Auto Background Suppression
• Resolution
• Lighten/Darken
For more information about each of the settings, refer to Scan Options.
7. Touch Scan.
A screen appears that indicates that the system is calculating your job cost.
When the calculation is complete, the Job Cost screen appears.
44
Xerox®Instant Print Kiosk
Quick Start Guide
Page 45

8. Touch Continue.
A screen appears that indicates that your job is processing.
A screen appears that indicates that your job is complete.
Scanning a Document
9. To scan another job, touch Do More.
The first Scan to OneDrive screen appears.
10. Repeat Step 6.—Step 9.
Xerox
®
Instant Print Kiosk
Quick Start Guide
45
Page 46

Scanning a Document
11. To end your session, touch Check Out.
12. Select a Receipt option.
A Thank You screen appears.
46
Xerox®Instant Print Kiosk
Quick Start Guide
Page 47

Scanning a Document
Scan to SharePoint
To scan to SharePoint, perform the steps that follow:
1. Load your original documents.
• For single pages or paper that cannot be fed using the duplex automatic document feeder,
use the document glass. Lift the duplex automatic document feeder, then place the original
document face down in the upper-left corner of the document glass.
• For multiple, single, or 2-sided pages, use the duplex automatic document feeder. Remove any
staples and paper clips from the pages. Insert the original documents face up in the duplex
automatic document feeder, with the left side entering the feeder first, and the top of the
page away from you. Adjust the paper guides so that they fit against the original documents.
Note: For information about parts of the printer, including the duplex automatic document
feeder and the document glass, refer to the User Guide at www.support.xerox.com.
2. Touch SharePoint.
3. Insert or swipe your payment card.
Xerox®Instant Print Kiosk
Quick Start Guide
47
Page 48

Scanning a Document
4. Enter your credentials, then touch Next.
A screen appears that shows the folders in your SharePoint location.
5. Navigate to the required destination folder for your scan, then touch OK.
The Scan to Sharepoint screen appears.
48
Xerox®Instant Print Kiosk
Quick Start Guide
Page 49

6. Adjust the settings as required:
• File Name
• File Format
• Output Color
• 2 Sided
• Original Size
• Original Orientation
• Original Type
• Auto Background Suppression
• Resolution
• Lighten/Darken
For more information about each of the settings, refer to Scan Options.
7. Touch Scan.
A screen appears that indicates that the system is calculating your job cost.
Scanning a Document
When the calculation is complete, the Job Cost screen appears.
Xerox®Instant Print Kiosk
Quick Start Guide
49
Page 50

Scanning a Document
8. Touch Continue.
A screen appears that indicates that your job is processing.
A screen appears that indicates that your job is complete.
9. To scan another job, touch Do More.
The first Scan to SharePoint screen appears.
10. Repeat Step 6.—Step 9.
50
Xerox®Instant Print Kiosk
Quick Start Guide
Page 51

11. To end your session, touch Check Out.
12. Select a Receipt option.
A Thank You screen appears.
Scanning a Document
Xerox®Instant Print Kiosk
Quick Start Guide
51
Page 52

Scanning a Document
Scan Options
The following Scan options are available:
Note: The options available depend on the Scan destination. Not all options listed are available
for all workflows.
Option Description
Password Protect Use the Password Protect option to add a secure password to the file
that is sent in the email. To open the file, the email recipient is required
to enter the password that you specify with the Password Protect
option.
File Name Use the File Name option to specify a name for the file that contains
the scanned images. Use the touch screen keyboard to enter an
appropriate name for the file.
File Format Use the File Format option to specify the format of the saved image.
The following file format options are available:
• PDF
• PDF/A
• JPG
For PDF and PDF/A, to create a searchable PDF, touch PDF Searchable
(OCR).
Output Color Use Output Color to control the color rendering of the scanned image.
The following Output Color options are available:
• Black & White
• Color
• Grayscale
• Match Originals
2-Sided Use the 2-Sided options to set the device to scan one or both sides of an
original document. To rotate the second-side page images, use the
Rotate Side 2 option.
The following 2-sided options are available:
• 1 Sided
• 2 Sided
• 2 Sided, Rotate Side 2
Original Size To ensure that you are scanning the correct area of the documents,
specify the original document size. Select the size of the original
document, or to allow the device to detect the original document size,
touchAuto Detect.
52
Xerox®Instant Print Kiosk
Quick Start Guide
Page 53

Option Description
Scanning a Document
Original
Orientation
Original Type The printer optimizes the image quality of the scans based on the type
Resolution Resolution determines how fine or grainy graphic images appear. Image
You can use the Original Orientation option to specify the layout of the
original images that you scan. The printer uses the information to
determine if images require rotation to produce the required output.
The following Original Orientation options are available:
• Portrait
• Landscape
of images in the original document and how the original image was
created. The following Original Type options are available:
• Text & Photo
• Text
• Photo
• Map
• Newspaper
resolution is measured in dots per inch (dpi). The following Resolution
options are available:
• 72 dpi
• 100 dpi
• 150 dpi
• 200 dpi
• 300 dpi
• 400 dpi
• 600 dpi
Lighten/Darken Use the Lighten/Darken slider to make the output image lighter or
darker.
Xerox®Instant Print Kiosk
Quick Start Guide
53
Page 54

Scanning a Document
54
Xerox®Instant Print Kiosk
Quick Start Guide
Page 55

4
Printing a Document
This chapter contains:
• Accessing the Print Features.. .... .... .... ................. .... .... .... ..................... ........ .... .... .... ................... 56
• Print from Email . .... .... .... ..................... .... .... .... ................. .... .... .... ..................... .... .... .... .... .... ..... 57
• Print from USB .. .... .... .... .... .... ................. .... .... .... ..................... .... .... .... ..................... .... .... .... ...... 64
• Print from Google Drive. ..................... .... .... .... ..................... .... .... .... ..................... .... .... .... .......... 72
• Print from Dropbox .. .... ................. .... .... .... ........ ..................... .... .... .... ................. .... .... .... ........... 79
• Print from OneDrive . ........ .... .... .... ................. .... .... .... ..................... .... .... .... ..................... .... .... ... 86
• Print from SharePoint.. ..................... .... .... .... ..................... .... .... .... .... ............. ........ .... .... .... ........ 93
• Print from a Personal Computer................. .... .... .... .... ................. .... .... .... ..................... .... .... .... . 100
• Print Options ..... ........ .... .... .... ..................... .... .... .... ..................... .... .... .... ................. .... .... .... .... 107
Xerox®Instant Print Kiosk
Quick Start Guide
55
Page 56

Printing a Document
Accessing the Print Features
To access the Print features, Touch Print.
The main Print From screen appears.
56
Xerox®Instant Print Kiosk
Quick Start Guide
Page 57

Print from Email
To print from email, perform the steps that follow:
1. Touch Email.
2. Insert or swipe your payment card.
Printing a Document
A message appears that prompts you to enter your release code.
Xerox®Instant Print Kiosk
Quick Start Guide
57
Page 58

Printing a Document
3. Enter your release code, then touch OK.
A screen appears that shows the Email items that are available to print.
4. Select the item that you want to print.
5. Select the required Output Color option.
The Print From Email screen appears.
58
Xerox®Instant Print Kiosk
Quick Start Guide
Page 59

6. Adjust the settings as required:
• Quantity
• Page Range
• Output Color
• 2-Sided
• Staple
• Hole Punch
• Paper Supply
For more information about each of the settings, refer to Print Options.
Printing a Document
Xerox
®
Instant Print Kiosk
Quick Start Guide
59
Page 60

Printing a Document
7. To preview the document, touch Preview.
The Preview screen and page images appear.
• To scroll to the left or right, use the arrow buttons or swipe the screen in the direction
required.
• To enlarge the view, tap the page. The single page view is shown.
• To zoom in on a specific area, using two fingers, touch and spread out the area required. The
zoomed in view is shown.
60
Xerox®Instant Print Kiosk
Quick Start Guide
Page 61

Printing a Document
• To view a different area of the page, using your finger, drag the image to pan to the area
required.
• To zoom out, using two spread fingers, pinch the area inward.
• To exit the enlarged page view, touch X.
• To print the job from the Preview screen, touch Print. To adjust further settings, to exit the
Preview option, touch Change Settings. The main print screen is shown.
8. Touch Print.
A screen appears that indicates that the system is calculating your job cost.
When the calculation is complete, the Job Cost screen appears.
Xerox®Instant Print Kiosk
Quick Start Guide
61
Page 62

Printing a Document
9. Touch Continue.
A screen appears that indicates that your job is processing.
A screen appears that indicates that your job is complete.
10. To print another job, touch Do More.
The first Print From Email screen appears.
11. Repeat Step 6.—Step 10.
62
Xerox®Instant Print Kiosk
Quick Start Guide
Page 63

12. To end your session, touch Check Out.
13. Select a Receipt option.
The Thank You screen appears.
Printing a Document
Xerox®Instant Print Kiosk
Quick Start Guide
63
Page 64

Printing a Document
Print from USB
To print from USB, perform the steps that follow:
1. Touch USB.
2. Insert or swipe your payment card.
A message appears that prompts you to insert your USB drive.
64
Xerox®Instant Print Kiosk
Quick Start Guide
Page 65

Printing a Document
3. Insert your USB drive.
A screen appears that shows the folders and items that are available to print on your USB drive.
4. Select the item that you want to print.
Xerox®Instant Print Kiosk
Quick Start Guide
65
Page 66

Printing a Document
5. Select the required Output Color option.
The Print from USB screen appears.
6. Adjust the settings as required:
• Quantity
• Page Range
• Output Color
• 2-Sided
• Staple
• Hole Punch
• Paper Supply
For more information about each of the settings, refer to Print Options.
66
Xerox®Instant Print Kiosk
Quick Start Guide
Page 67

Printing a Document
7. To preview the document, touch Preview.
The Preview screen and page images appear.
• To scroll to the left or right, use the arrow buttons or swipe the screen in the direction
required.
• To enlarge the view, tap the page. The single page view is shown.
• To zoom in on a specific area, using two fingers, touch and spread out the area required. The
zoomed in view is shown.
®
Xerox
Instant Print Kiosk
Quick Start Guide
67
Page 68

Printing a Document
• To view a different area of the page, using your finger, drag the image to pan to the area
required.
• To zoom out, using two spread fingers, pinch the area inward.
• To exit the enlarged page view, touch X.
• To print the job from the Preview screen, touch Print. To adjust further settings, to exit the
Preview option, touch Change Settings. The main print screen is shown.
68
Xerox®Instant Print Kiosk
Quick Start Guide
Page 69

8. Touch Print.
A screen appears that indicates that the system is calculating your job cost.
When the calculation is complete, the Job Cost screen appears.
Printing a Document
Xerox®Instant Print Kiosk
Quick Start Guide
69
Page 70

Printing a Document
9. Touch Continue.
A screen appears that indicates that your job is processing.
A screen appears that indicates that your job is complete.
10. To print another job, touch Do More.
The first Print from USB Drive screen appears.
11. Repeat Step 6.—Step 10.
70
Xerox®Instant Print Kiosk
Quick Start Guide
Page 71

12. To end your session, touch Check Out.
13. Select a Receipt option.
The Thank You screen appears.
Printing a Document
Xerox®Instant Print Kiosk
Quick Start Guide
71
Page 72

Printing a Document
Print from Google Drive
To print from Google Drive, perform the steps that follow:
1. Touch Google Drive.
2. Insert or swipe your payment card.
3. Enter your Google Drive credentials, then touch Next.
72
Xerox®Instant Print Kiosk
Quick Start Guide
Page 73

Printing a Document
4. To allow permissions, touch Allow.
A screen appears that shows the folders and items that are available to print in your Google Drive
location.
5. Select the item that you want to print.
6. Select the required Output Color option.
The Print from Google Drive screen appears.
Xerox®Instant Print Kiosk
Quick Start Guide
73
Page 74

Printing a Document
7. Adjust the settings as required:
• Quantity
• Page Range
• Output Color
• 2-Sided
• Staple
• Hole Punch
• Paper Supply
For more information about each of the settings, refer to Print Options.
74
Xerox®Instant Print Kiosk
Quick Start Guide
Page 75

Printing a Document
8. To preview the document, touch Preview.
The Preview screen and page images appear.
• To scroll to the left or right, use the arrow buttons or swipe the screen in the direction
required.
• To enlarge the view, tap the page. The single page view is shown.
• To zoom in on a specific area, using two fingers, touch and spread out the area required. The
zoomed in view is shown.
®
Xerox
Instant Print Kiosk
Quick Start Guide
75
Page 76

Printing a Document
• To view a different area of the page, using your finger, drag the image to pan to the area
required.
• To zoom out, using two spread fingers, pinch the area inward.
• To exit the enlarged page view, touch X.
• To print the job from the Preview screen, touch Print. To adjust further settings, to exit the
Preview option, touch Change Settings. The main print screen is shown.
9. Touch Print.
A screen appears indicating that the system is calculating your job cost.
When the calculation is complete, the Job Cost screen appears.
76
Xerox®Instant Print Kiosk
Quick Start Guide
Page 77

10. Touch Continue.
A screen appears that indicates that your job is processing.
A screen appears that indicates that your job is complete.
Printing a Document
11. To print another job, touch Do More.
The first Print from Google Drive screen appears.
12. Repeat Step 7.—Step 11.
Xerox
®
Instant Print Kiosk
Quick Start Guide
77
Page 78

Printing a Document
13. To end your session, touch Check Out.
14. Select a Receipt option.
The Thank You screen appears.
78
Xerox®Instant Print Kiosk
Quick Start Guide
Page 79

Print from Dropbox
To print from Dropbox, perform the steps that follow:
1. Touch Dropbox.
2. Insert or swipe your payment card.
Printing a Document
3. Enter your Dropbox credentials, then touch Sign In.
Xerox®Instant Print Kiosk
Quick Start Guide
79
Page 80

Printing a Document
4. To allow permissions, touch Allow.
A screen appears that shows the folders and items that are available to print in your Dropbox
location.
5. Select the item that you want to print.
6. Select the required Output Color option.
The Print from Dropbox screen appears.
80
Xerox®Instant Print Kiosk
Quick Start Guide
Page 81

7. Adjust the settings as required:
• Quantity
• Page Range
• Output Color
• 2-Sided
• Staple
• Hole Punch
• Paper Supply
For more information about each of the settings, refer to Print Options.
Printing a Document
Xerox
®
Instant Print Kiosk
Quick Start Guide
81
Page 82

Printing a Document
8. To preview the document, touch Preview.
The Preview screen and page images appear.
• To scroll to the left or right, use the arrow buttons or swipe the screen in the direction
required.
• To enlarge the view, tap the page. The single page view is shown.
• To zoom in on a specific area, using two fingers, touch and spread out the area required. The
zoomed in view is shown.
82
Xerox®Instant Print Kiosk
Quick Start Guide
Page 83

Printing a Document
• To view a different area of the page, using your finger, drag the image to pan to the area
required.
• To zoom out, using two spread fingers, pinch the area inward.
• To exit the enlarged page view, touch X.
• To print the job from the Preview screen, touch Print. To adjust further settings, to exit the
Preview option, touch Change Settings. The main print screen is shown.
9. Touch Print.
A screen appears that indicates that the system is calculating your job cost.
When the calculation is complete, the Job Cost screen appears.
Xerox®Instant Print Kiosk
Quick Start Guide
83
Page 84

Printing a Document
10. Touch Continue.
A screen appears that indicates that your job is processing.
A screen appears that indicates that your job is complete.
11. To print another job, touch Do More.
The first Print from Dropbox screen appears.
12. Repeat Step 7.—Step 11.
84
Xerox®Instant Print Kiosk
Quick Start Guide
Page 85

13. To end your session, touch Check Out.
14. Select a Receipt option.
The Thank You screen appears.
Printing a Document
Xerox®Instant Print Kiosk
Quick Start Guide
85
Page 86

Printing a Document
Print from OneDrive
To print from OneDrive, perform the steps that follow:
1. Touch OneDrive.
2. Insert or swipe your payment card.
86
Xerox®Instant Print Kiosk
Quick Start Guide
Page 87

Printing a Document
3. Enter your OneDrive credentials, then touch Next.
A screen appears that shows the folders and items that are available to print in your OneDrive
location.
4. Select the item that you want to print.
Xerox
®
Instant Print Kiosk
Quick Start Guide
87
Page 88

Printing a Document
5. Select the required Output Color option.
The Print from OneDrive screen appears.
6. Adjust the settings as required:
• Quantity
• Page Range
• Output Color
• 2-Sided
• Staple
• Hole Punch
• Paper Supply
For more information about each of the settings, refer to Print Options.
88
Xerox®Instant Print Kiosk
Quick Start Guide
Page 89

Printing a Document
7. To preview the document, touch Preview.
The Preview screen and page images appear.
• To scroll to the left or right, use the arrow buttons or swipe the screen in the direction
required.
• To enlarge the view, tap the page. The single page view is shown.
• To zoom in on a specific area, using two fingers, touch and spread out the area required. The
zoomed in view is shown.
®
Xerox
Instant Print Kiosk
Quick Start Guide
89
Page 90

Printing a Document
• To view a different area of the page, using your finger, drag the image to pan to the area
required.
• To zoom out, using two spread fingers, pinch the area inward.
• To exit the enlarged page view, touch X.
• To print the job from the Preview screen, touch Print. To adjust further settings, to exit the
Preview option, touch Change Settings. The main print screen is shown.
8. Touch Print.
A screen appears that indicates that the system is calculating your job cost.
When the calculation is complete, the Job Cost screen appears.
90
Xerox®Instant Print Kiosk
Quick Start Guide
Page 91

9. Touch Continue.
A screen appears that indicates that your job is processing.
A screen appears that indicates that your job is complete.
Printing a Document
10. To print another job, touch Do More.
The first Print from OneDrive screen appears.
11. Repeat Step 6.—Step 10.
Xerox
®
Instant Print Kiosk
Quick Start Guide
91
Page 92

Printing a Document
12. To end your session, touch Check Out.
13. Select a Receipt option.
The Thank You screen appears.
92
Xerox®Instant Print Kiosk
Quick Start Guide
Page 93

Print from SharePoint
To print from SharePoint, perform the steps that follow:
1. Touch SharePoint.
2. Insert or swipe your payment card.
Printing a Document
Xerox®Instant Print Kiosk
Quick Start Guide
93
Page 94

Printing a Document
3. Enter your SharePoint credentials, then touch Next.
A screen appears that shows the folders and items that are available to print in your Sharepoint
location.
4. Select the item that you want to print.
94
Xerox®Instant Print Kiosk
Quick Start Guide
Page 95

5. Select the required Output Color option.
The Print from SharePoint screen appears.
Printing a Document
6. Adjust the settings as required:
• Quantity
• Page Range
• Output Color
• 2-Sided
• Staple
• Hole Punch
• Paper Supply
For more information about each of the settings, refer to Print Options.
Xerox
®
Instant Print Kiosk
Quick Start Guide
95
Page 96

Printing a Document
7. To preview the document, touch Preview.
The Preview screen and page images appear.
• To scroll to the left or right, use the arrow buttons or swipe the screen in the direction
required.
• To enlarge the view, tap the page. The single page view is shown.
• To zoom in on a specific area, using two fingers, touch and spread out the area required. The
zoomed in view is shown.
96
Xerox®Instant Print Kiosk
Quick Start Guide
Page 97

Printing a Document
• To view a different area of the page, using your finger, drag the image to pan to the area
required.
• To zoom out, using two spread fingers, pinch the area inward.
• To exit the enlarged page view, touch X.
• To print the job from the Preview screen, touch Print. To adjust further settings, to exit the
Preview option, touch Change Settings. The main print screen is shown.
8. Touch Print.
A screen appears that indicates that the system is calculating your job cost.
When the calculation is complete, the Job Cost screen appears.
Xerox®Instant Print Kiosk
Quick Start Guide
97
Page 98

Printing a Document
9. Touch Continue.
A screen appears that indicates that your job is processing.
A screen appears that indicates that your job is complete.
10. To print another job, touch Do More.
The first Print from SharePoint screen appears.
11. Repeat Step 6.—Step 10.
98
Xerox®Instant Print Kiosk
Quick Start Guide
Page 99

12. To end your session, touch Check Out.
13. Select a Receipt option.
The Thank You screen appears.
Printing a Document
Xerox®Instant Print Kiosk
Quick Start Guide
99
Page 100

Printing a Document
Print from a Personal Computer
To print from a personal computer to the kiosk, perform the steps that follow:
Note: This procedure requires installation of the PrintMe print driver on the personal computer.
1. At the personal computer, select File→Print.
2. Choose the PrintMe print driver.
3. Click Print.
Your print job is submitted to the print kiosk. The Document ID appears on the personal
computer screen.
4. To view the release code, enter optional Email ID, or touch Skip.
5. Note the Release Code, then go to the kiosk.
6. Select Print, then select Email.
7. Insert or swipe your payment card.
A message appears prompting you to enter your release code.
100
Xerox®Instant Print Kiosk
Quick Start Guide
 Loading...