

Page 1

Version 16.0.3.0
December 2020
702P08483
Xerox
®
FreeFlow
Workshop Guide
®
VI eCompose
Page 2

© 2020 Xerox Corporation. All rights reserved. XEROX®and XEROX and Design®, FreeFlow®, FreeFlow Makeready®,
FreeFlow Output Manager
®
, FreeFlow Process Manager®, VIPP®, and GlossMark®are trademarks of Xerox
Corporation in the United States and/or other countries. Other company trademarks are acknowledged as follows:
Adobe PDFL - Adobe PDF Library Copyright © 1987-2020 Adobe Systems Incorporated.
®
Adobe
PostScript
, the Adobe logo, Acrobat®, the Acrobat logo, Acrobat Reader®, Distiller®, Adobe PDF JobReady™, InDesign®,
®
, and the PostScript logo are either registered trademarks or trademarks of Adobe Systems Incorporated in
the United States and/or other countries. All instances of the name PostScript in the text are references to the
PostScript language as defined by Adobe Systems Incorporated unless otherwise stated. The name PostScript also is
used as a product trademark for Adobe Systems’ implementation of the PostScript language interpreter, and other
Adobe products. Copyright 1987 - 2020 Adobe Systems Incorporated and its licensors. All rights reserved. Includes
®
Adobe
Intel
PDF Libraries and Adobe Normalizer technology.
®
, Pentium®, Centrino®, and Xeon®are registered trademarks of Intel Corporation. Intel Core™Duo is a trademark
of Intel Corporation.
Intelligent Mail
Macintosh
®
is a registered trademark of the United States Postal Service.
®
, Mac®, and Mac OS®are registered trademarks of Apple, Inc., registered in the United States and other
countries. Elements of Apple's Technical User Documentation used by permission from Apple, Inc.
®
Novell
and NetWare®are registered trademarks of Novell, Inc. in the United States and other countries. Oracle®is a
registered trademark of Oracle Corporation Redwood City, California.
PANTONE
™
and other Pantone Inc. trademarks are the property of Pantone Inc. All rights reserved. QR Code™is a
trademark of Denso Wave Incorporated in Japan and/or other countries.
®
TIFF
is a registered trademark of Aldus Corporation.
The Graphics Interchange Format© is the Copyright property of CompuServe Incorporated. GIFSM is a Service Mark
of CompuServe Incorporated.
Windows
Explorer are trademarks of Microsoft Corporation; Microsoft
®
, Windows®10, Windows Server®2012, Windows Server®2016, Windows Server®2019, and Internet
®
and MS-DOS®are registered trademarks of Microsoft
Corporation.
All other product names and services mentioned in this publication are trademarks or registered trademarks of their
respective companies. They are used throughout this publication for the benefit of those companies, and are not
intended to convey endorsement or other affiliation with the publication.
Companies, names, and data used in examples herein are fictitious unless otherwise noted.
While every care has been taken in the preparation of this material, no liability will be accepted by Xerox Corporation
arising out of any inaccuracies or omissions.
Changes are periodically made to this document. Changes, technical inaccuracies, and typographical errors will be
corrected in subsequent editions.
Produced in the United States of America.
Page 3

Table of Contents
1 Getting Started.......................................................................................................................... 7
VI Suite Customer Forum ..... .... ............................. ................................. .................................. 8
Intended Audience ............................. ................................. .................................................... 9
What You Will Learn ..................................... ............................. .... ............................. ........... 10
2 VIeC Workshop Installation..................................................................................................11
Program Download ........ .... ............................. ..................................... .... ............................. . 12
Documentation Download ......................... ................................. ........................................... 13
Client and Server Software........ ...................................................................... ....................... 14
Minimum Server Configuration for the VIeC Server .................. ......................................... ..... 15
Minimum Client Configuration......... ................................. ..................................... ................ 16
Backup and Storage Requirements.. ................................. ................................. ..................... 17
Installation Process.................. ............................. ................................. ................................ 18
Installation Verification .................................... ................................. ............................. .... ... 19
Server Configuration... ............................. ..................................... .... ............................. ........ 20
Load Workshop Files .......... ...................................................................... .............................. 22
3 VIeC and VIeC Workshop Overview....................................................................................25
Third-Party Support for VIeC................ ...................................................................... ............ 27
Job Submission Methods................................ ............................. .... ....................................... 28
What is the VIPP
®
VIPP
What is a VIPP
What is a VIPP
VIeC Features .................................... ............................. ................................. ...................... 33
VIeC .......... .... ...................................................................... ............................. .... ........... 33
VIeC and Print Path ............................. ................................. ........................................... 33
VIeC and Nub File................................... ................................. ............................. .... ....... 33
VIeC Templates .... ............................. ..................................... .... ............................. ........ 33
VIeC Profiles................................ ............................. ................................. ...................... 33
User Name Output Folder ..................................... ............................. .............................. 34
VIeC Dispatch.................... .... ............................. ................................. ............................ 34
VIeC Job Submission Client................ ......................................... ............................. .... .... 34
VIeC Web . ............................. .... ............................. ......................................... ................ 34
®
Language?.................. ..................................... ................................. ........ 29
Resources ..... ................................. ............................. .... ....................................... 29
®
Bookmark?.......... ......................................... ............................. ................... 31
®
PDF Interactive Feature?........................................................... ................... 32
4 Job Parameters and Profiles .................................................................................................35
VIeC Profiles................................................. ................................. ................................. ....... 36
VIeC Parameters............ ................................. ..................................... ................................. . 37
Xerox®FreeFlow®VI eCompose
Workshop Guide
3
Page 4

Table of Contents
Init (Nub) File .......... ................................. ..................................... ................................. . 37
Job Type .......... .... ............................. ................................. ..................................... .... ..... 37
Output Folder Name ........................ ............................. .... ............................. .................. 38
Output Filename Template .... ................................. ............................. ............................ 38
Index File Template ................... ................................. ..................................... ................ 38
Printer Name ............... ...................................................................... .............................. 39
Printer Action.... ................................. ..................................... ................................. ........ 39
Creating an Output Filename Template ........................ ............................. ............................ 40
Advanced Options........... ............................. .... ................................................................ 41
Creating an Index File Template ...... ................................. ..................................... ................ 43
Create a Profile.. ............................. ................................. ................................. ..................... 44
Using an Existing Profile ......................... .... ............................. ......................................... ..... 45
Editing an Existing Profile ................................. ............................. .... ............................. ....... 46
5 VIeC Job Submission .............................................................................................................47
VIeC Job Submission Client.... ..................................... .... ............................. .......................... 48
Open the Job Submission Window ............................ ................................. ...................... 48
Submit a Job............................................... ............................. .... ............................. ....... 48
Close the Job Submission Window ......................... .... ............................. ......................... 48
VIeC Watched Folders Client .............. ................................. ................................. .................. 49
Create and Activate a Watched Folder .................... ......................................... ................ 49
Process a Job Using the Watched Folder........ ................................. ................................. ....... 51
Delete a Watched Folder ...................................................... ............................. .... ........... 52
VIeC LPR Option .................. ................................. ................................. ............................. ... 53
VIeC Dispatch Option ................................... ............................. ................................. ........... 54
6 Hands-On Exercises ................................................................................................................55
What to Expect.. ................................. ................................. ............................. ..................... 57
VI eCompose Workshop Code Descriptions ................. ................................. .......................... 58
vtpworkshop.dbf ....................... .... ............................. ................................. ..................... 59
vtpworkshop.dbm .............. ............................. .... ............................. ................................ 60
7 Exercise 1: VIeC Job Submission Client Overview ............................................................73
Job Creation Area .............. ......................................... ............................. .............................. 75
Data File............. ............................. .... ............................. ................................. .............. 75
Init (Nub) File .......... ................................. ..................................... ................................. . 75
Current Profile.............. .... ..................................... ............................. .... .......................... 75
Job Type .......... .... ............................. ................................. ..................................... .... ..... 75
User Name ......... ................................. ............................. .... ............................. .............. 76
Job Server.................................... .... ............................. ................................. .................. 76
Output Folder........................ .... ............................. ................................. ......................... 76
Printer Action.... ................................. ..................................... ................................. ........ 76
Printer for VIPP
Output Filename Template .... ................................. ............................. ............................ 77
Index File Template ................... ................................. ..................................... ................ 77
4
Xerox®FreeFlow®VI eCompose
Workshop Guide
®
Job Output..................................................................... ....................... 77
Page 5

Table of Contents
VIeC Job Status Area ........ ................................. .................................................................... 78
Function Buttons............................. ............................. .... ............................. ......................... 79
8 Exercise 2: Job Submission ...................................................................................................81
VPC Job Submission.. .... ............................. ................................. ........................................... 82
Data File Job Submission .. ............................. ................................. ....................................... 84
9 Exercise 3: Simple Job Submission ......................................................................................87
10 Exercise 4: Using the Bulk Output Folder.........................................................................91
11 Exercise 5: Using the Output Filename Template .........................................................93
12 Exercise 6: VI Compose Error Condition ..........................................................................95
13 Exercise 7: Watched Folder Job Submission....................................................................97
14 Exercise 8: Output Filename and Index Template Manipulation ........................... 101
15 Exercise 9: Init (Nub) Files............................................................................................... 105
Submit a Data File without VIPP®Commands .. ................................. ................................. . 106
Append the VIPP
Load and Save a Profile................ ................................. ............................. .......................... 109
®
Commands................... ................................. ............................. ............ 107
16 Exercise 10: Using Dispatch............................................................................................ 111
17 Exercise 11: Email ............................................................................................................. 119
Download and Configure Blat ......................... ......................................... ............................ 120
Edit the Data File . ...................................................................... ................................. ......... 122
Edit the DispatchRule.................................... .... ............................. ................................. ..... 123
Xerox®FreeFlow®VI eCompose
Workshop Guide
5
Page 6

Table of Contents
6
Xerox®FreeFlow®VI eCompose
Workshop Guide
Page 7

1
Getting Started
This chapter contains:
• VI Suite Customer Forum ........................... .... ............................. ................................. ................ 8
• Intended Audience ........................................... .... ............................. ................................. ......... 9
• What You Will Learn...... .... ............................. ................................. ........................................... 10
Welcome to the VI eCompose (VIeC) Workshop. This document is designed provide background
information and hands-on lessons in using the program.to walk you through the basic configuration
and operation of VIeC.
By the end of this workshop you will be able to configure the VIeC Server and understand the
operation of lpr, the Watched Folder, and the VIeC Job Submission Client. In the workshop, the
capability of VIeC Dispatch will be demonstrated.
Before using the workshop materials, read the FreeFlow VI eCompose User Guide, and have the user
guide available while you are completing the workshop exercises.
Note: Refer to the following information:
• Case-sensitive entries
When using VIeC, remember that values in all database fields, index fields, and rule values are
case-sensitive.
• Supported distillation job parameters
The built-in PDF authoring engine supports all distillation job parameters except for those that
require post-processing such as DoThumbnails, CompressObjects, EmbedJobOptions, and
Optimize.
The following subjects are not covered in this workshop:
• VIeC Web GUI: For information about this module, refer to the FreeFlow VI eCompose User Guide.
• VIPP
• VIeC as a Windows Service: For information about Windows Service, refer to the FreeFlow VI
®
programming training: For training on VIPP®programming, contact a local Xerox
representative.
eCompose User Guide.
Xerox®FreeFlow®VI eCompose
Workshop Guide
7
Page 8

Getting Started
VI Suite Customer Forum
Xerox hosts a Community Support Forum. The VI Suite Customer forum is now part of the larger
Xerox support forum, allowing you to post and review information about Xerox products and services
all from one location. Take a minute to log in to this customer forum community: http://vippsupport.
xerox.com.
8
Xerox®FreeFlow®VI eCompose
Workshop Guide
Page 9

Getting Started
Intended Audience
This workshop is intended for:
• Application and system programmers who are responsible for creating and running VIPP
applications and want to take advantage of the VIPP®-to-PDF workflow available with VIeC.
• Network administrators and system integrators responsible for the network submission of VIPP
applications and the distribution of the PDF files created using VIeC.
• Print operators who have the responsibility to load, delete, or modify VIPP
®
resources on the VIeC
Server.
®
®
Xerox
®
FreeFlow®VI eCompose
Workshop Guide
9
Page 10

Getting Started
What You Will Learn
The scope of this training is limited to the installation, configuration, and operation of VIeC. This
workshop does not attempt to cover any VIPP
The workshop is divided into the following general areas:
• Getting started, which you are now reading, provides some introductory information and an
overview of the VI eCompose Workshop.
• VIeC Workshop Installation provides an overview of the installation process. You learn about
installation, installation verification, VIeC Server configuration, and how and where to load the
files provided as a part of this workshop.
• VIeC and VIeC Workshop overview provides a summary of VIPP
short overview of VIPP
• Job parameters and profiles provides information about VIeC Job Parameters and Job Profiles,
including information about the Init (Nub) file, job types, andt creating and using profiles.
• VIeC job submission describes the three methods of job submission used by VIeC: lpr, Watched
Folder, and Job Submission Client.
• Hands-on exercises provides exercises that guide you through the configuration and use of VIeC,
including VIeC Dispatch.
®
and VIPP®resources as they relate to VIeC.
®
programming concepts.
®
and VIeC programs, including a
10
Xerox®FreeFlow®VI eCompose
Workshop Guide
Page 11

2
VIeC Workshop Installation
This chapter contains:
• Program Download ..... ................................. ..................................... ................................. ........ 12
• Documentation Download .............. ................................. ................................. ......................... 13
• Client and Server Software . ................................. ..................................... ................................. . 14
• Minimum Server Configuration for the VIeC Server ............... ..................................... ................ 15
• Minimum Client Configuration .. ............................. .... ................................................................ 16
• Backup and Storage Requirements............................ .... ............................. ................................ 17
• Installation Process........... ................................. ............................. .... ....................................... 18
• Installation Verification................ ................................. ................................. ............................ 19
• Server Configuration ......................................... ............................. ................................. ........... 20
• Load Workshop Files ... ................................. ..................................... ................................. ........ 22
This information helps you understand the installed software, and the minimum requirements for the
installation.
Xerox®FreeFlow®VI eCompose
Workshop Guide
11
Page 12

VIeC Workshop Installation
Program Download
To download FreeFlow VI eCompose electronically, go to www.xerox.com/support, select Software &
Platforms, select FreeFlow, select FreeFlow Variable Information Suite, select Driver & Downloads.
If required, set the Operating System type appropriate for your target platform to display the correct
installer file. To download the installer, click the FreeFlow VI eCompose installer file.
Program delivery format
Programs are delivered in .exe format. User can download the application to the target device.
When the device does not have Internet access, copy the EXE file to the target device, then install
the program.
12
Xerox®FreeFlow®VI eCompose
Workshop Guide
Page 13

VIeC Workshop Installation
Documentation Download
English language versions of all of the FreeFlow Variable Information Suite documentation are
available for download. Go to www.xerox.com/support. Select Software & Platforms, select FreeFlow,
select FreeFlow Variable Information Suite, then select Documentation.
Xerox
®
FreeFlow®VI eCompose
Workshop Guide
13
Page 14

VIeC Workshop Installation
Client and Server Software
The VIeC software contains both client and server applications. During the installation, you are
prompted to select the type of installation required. You can install the client on the same PC as the
server or you can install the client on any network-connected PC that has access to the server.
The server requires a Xerox license file to operate. Client software is distributed without any license
requirements. During the installation of the client software, identify a target server. You can change
the target server during normal operation of the system, as required.
14
Xerox®FreeFlow®VI eCompose
Workshop Guide
Page 15

VIeC Workshop Installation
Minimum Server Configuration for the VIeC Server
The following are the minimum requirements for the VIeC Server:
• Windows Server 2012, including R2, 2016, 2019, and Windows 10.
• 2.4–GHz Processor.
• 2 Gbytes of RAM per instance. For more information on running multiple instances of VIeC, refer
to the FreeFlow VI eCompose User Guide.
• 40–Gbyte hard drive.
• Ethernet network interface.
• Microsoft .NET Framework 4.8 (installed).
Xerox
®
FreeFlow®VI eCompose
Workshop Guide
15
Page 16

VIeC Workshop Installation
Minimum Client Configuration
There is no minimum configuration for the client.
16
Xerox®FreeFlow®VI eCompose
Workshop Guide
Page 17

VIeC Workshop Installation
Backup and Storage Requirements
To ensure the normal operation of the VIeC Server, perform the usual backup and housekeeping
practices.
The speed of the processor and the amount of memory available on the VIeC Server is a major factor
in the processing speed you achieve in the creation of PDF files.
Plan your storage requirements. When you plan for your storage needs, consider the following factors
for standard operation, backup, and housekeeping procedures:
• Number of PDF files that you create that require storage
• Size of the PDF files
• Speed at which the PDF files are created
• Where to store the PDF files
• Length of time that the PDF files are stored
Note: For more information on housekeeping, refer to the FreeFlow®VI eCompose User Guide.
Xerox
®
FreeFlow®VI eCompose
Workshop Guide
17
Page 18

VIeC Workshop Installation
Installation Process
For step-by-step installation instructions for VIeC, refer to the FreeFlow VI eCompose User Guide. In
general, the installation process involves the following steps:
• Select the installation type: Client/Server, Server, or Client.
• Answer the installation prompts. This workshop assumes that you have installed the VIeC Server
on the C: drive, and that the VI Compose xgfc directory structure is on the C: drive. If the VIeC
Server is not on the C: drive, and if the VI Compose xgfc directory structure is not on the C: drive,
certain parts of this workshop cannot function as expected.
• Install the VIeC software.
• Install the lpr client, if required. This installation is recommended.
• Install the license.
18
Xerox®FreeFlow®VI eCompose
Workshop Guide
Page 19

VIeC Workshop Installation
Installation Verification
To verify that the installation ran properly, follow the procedures in this section.
• Ensure that the server is running.
• Look for the VI eCompose Local Server (VIeC) icon in the lower-right task bar.
The VIeC Server is configured to start automatically. When the PC is booted, the VIeC icon is present.
When you hover the mouse on the icon, a message appears: VI eCompose Local Server.
If the VIeC icon is not displayed, you can start the server, but this is usually only necessary when the
server module has been stopped manually. To start the server, select the Start menu, then select
Programs→Xerox→VI eCompose→VI eCompose Local Server.
To verify normal operation, run a test job. The steps outlined here are explained further in the
workshop, for now, follow the steps to verify the normal operation of the VIeC Server.
1. In the task bar, right-click the VIeC icon.
2. Select Launch Job Submission Client. The VI eCompose Job Submission Client appears.
3. On the lower right side of the Job Submission Client window, select the Submit Job button. The
default billb.lm VIPP
deposited in the folders indicated in the User Name and Output Folder windows.
Tip: As the job is processed, the job status changes from submitted to complete. Note the
number of pages distilled. Because this job is not using any split options, the value for
pages split and files generated is zero. Split options are explained in more detail later.
4. During the installation of the VIeC software, a shortcut folder called VI eCompose Incoming
Folders was created on the desktop. Locate that folder, or you can scroll to X:\Program Files
(x86)\Xerox\VIPP\xvtp\users\user_name\incoming\bulk, where X is the partition
where the VI eCompose software is installed and user_name is the user name defined during
installation.
5. To display a subfolder that is time-stamped and contains the file name billb_lm, open the default
folder. To find the PDF file, open the time-stamped subfolder, then open and view the PDF file.
6. After you have looked at the PDF file, to end this task, close all the windows. To exit the Job
Submission Client, select X or Alt-X. To confirm, answer Yes.
End of Exercise
This concludes the installation verification process. If you experience any problems, contact a local Xerox
representative.
®
job is submitted to the VIeC Server. The PDF file that is generated is
Xerox®FreeFlow®VI eCompose
Workshop Guide
19
Page 20
VIeC Workshop Installation
Server Configuration
Server configuration options are minimal. Configuration involves specifying the order in which the
VIeC Server processes incoming jobs.
Configuration of the VIeC Web modules is not covered in this document. For information about the
VIeC Web configuration, refer to in the FreeFlow VI eCompose User Guide.
To configure the VIeC Server operation, follow these steps:
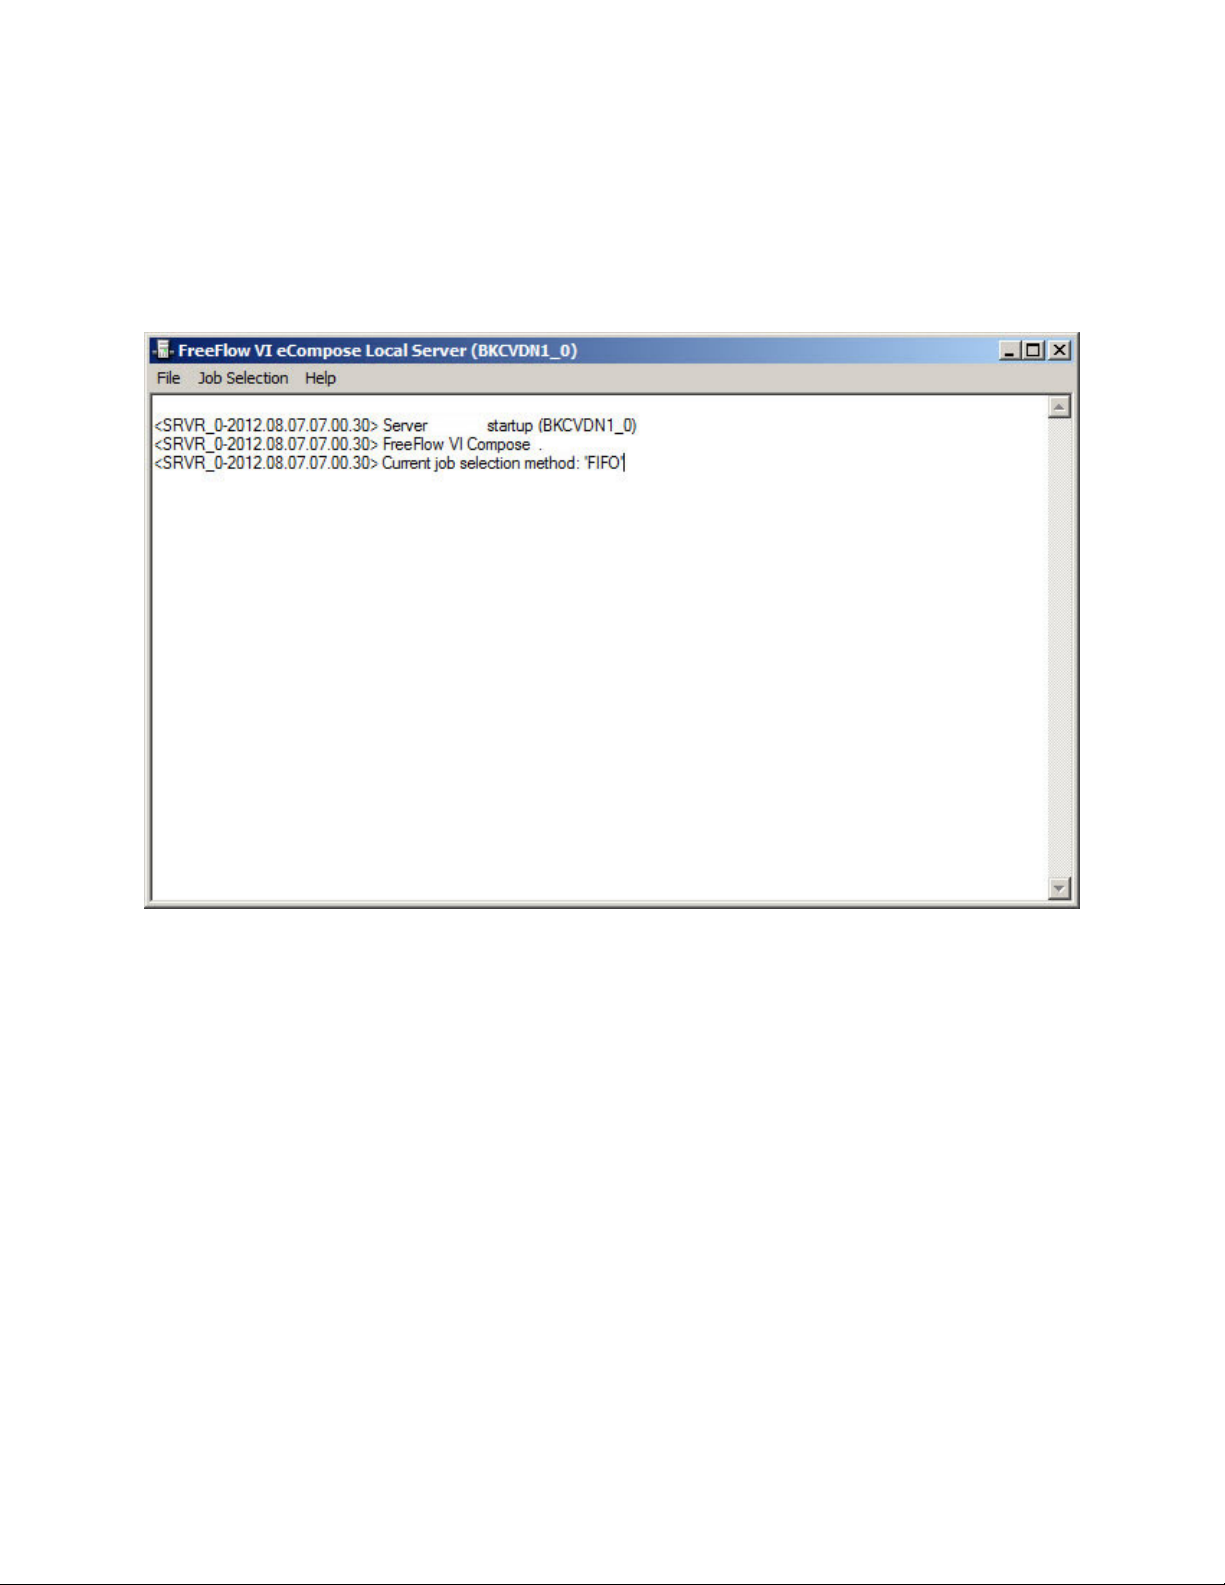
1. On the task bar, double-click the VIeC Server icon located. The VI eCompose Local Server window
appears.
2. To review the available options, select the File menu:
• Save Logfile
• Clear Logfile
• Dump Accounting File
• Show Billing Meters
The Dump Accounting File option creates a comma-delimited file that you can port into Excel or
a database program for query.
3. From the menu bar, select the Job Selection menu. Use the menu to change the operating
parameters that the VIeC Server uses to process VIeC jobs in the server queue. For now, leave the
default to First In, First Out.
4. To review the help that is available, select the Help menu.
5. To close the VI eCompose Local Server window, select the X in the top-right corner.
20
Xerox®FreeFlow®VI eCompose
Workshop Guide
Page 21

VIeC Workshop Installation
Tip:
• Selecting X minimizes the VIeC Server, but does not shut down the server.
• To exit the VIeC Local Server, enter Alt-X.
• To restart the server, access the Windows Start menu, then access the VI eCompose menu.
Xerox
®
FreeFlow®VI eCompose
Workshop Guide
21
Page 22

VIeC Workshop Installation
Load Workshop Files
To find the workshop.zip file containing all the test files and resources used in this workshop, open the
VI eCompose Installation zip file, then scroll to the English\Docs\workshop folder. Extract files
from the workshop.zip file and copy the files to the locations specified in the table.
File Name
vtpworkshop A project folder that contains all
VTPmove.bat DOS batch file, used in the VIeC
vtpworkshop.dbf Data submission file. X:\Program Files (x86)
vtpworkshop.nub Nub/init file used to populate a
Description of File Copy the file here
X:\Program Files (x86)
resources for the project.
Dispatch exercise to show
Dispatch executing a user-defined
process. In this case, the VTPmove.
bat process moves the PDF files to
the C:\MyArchiveFolder on the PC.
In one of the following exercises,
you create the folder.
data file with the required VIPP
start commands.
\Xerox\VIPP\xgfc
\projects, where X is the
partition where the VI eCompose
software is installed.
X:\Program Files (x86)
\Xerox\VIPP\xgfc\mislib,
where X is the partition where the
VI eCompose software is installed.
\Xerox\VIPP\xgfc\mislib,
where X is the partition where the
VI eCompose software is installed.
X:\Program Files (x86)
®
\Xerox\VIPP\xgfc\mislib,
where X is the partition where the
VI eCompose software is installed.
vtpworkshop.pfl VI eCompose Profile file. X:\Program Files (x86)
\Xerox\VIPP\xvtp\users
\xxxx\profiles, where X is
the partition where the VI
eCompose software is installed
and xxxx is the user name.
vtpworkshop.rule VI eCompose DispatchRule file. X:\Program Files (x86)
\Xerox\VIPP\xvtp
\dispatch\rules, where X is
the partition where the VI
eCompose software is installed.
vtpworkshop.vpc VIeC Workshop VI Project
22
Container file. This container holds
all the required VIPP
the vtpworkshop application.
Xerox®FreeFlow®VI eCompose
®
files to run
X:\Program Files (x86)
\Xerox\VIPP\xgfc\mislib,
where X is the partition where the
VI eCompose software is installed.
Workshop Guide
Page 23

VIeC Workshop Installation
File Name
vtpworkshop_error.dbf A data file that generates an error
vtpworkshop_nub.dbf A data file that contains no VIPP
Description of File Copy the file here
X:\Program Files (x86)
message. Used to show where
error messages are displayed.
start commands. This data file
uses the nub/ init feature to
process files properly.
\Xerox\VIPP\xgfc\mislib,
where X is the partition where the
VI eCompose software is installed.
®
X:\Program Files (x86)
\Xerox\VIPP\xgfc\mislib,
where X is the partition where the
VI eCompose software is installed.
Adobe Security options can be applied to the PDF files created. You can add password protection to
the PDF and child PDF files created. The password can be a generic password for all PDF files
produced or a unique password driven by the user data. For more information on PDF security
supported by VI eCompose, refer to the FreeFlow VI eCompose User Guide.
Xerox
®
FreeFlow®VI eCompose
Workshop Guide
23
Page 24

VIeC Workshop Installation
24
Xerox®FreeFlow®VI eCompose
Workshop Guide
Page 25

3
VIeC and VIeC Workshop Overview
This chapter contains:
• Third-Party Support for VIeC ......... ...................................................................... ....................... 27
• Job Submission Methods......................... ................................. .................................................. 28
• What is the VIPP
• What is a VIPP
• What is a VIPP
• VIeC Features ..................... ..................................... .... ............................. ................................. 33
®
Language?........... ......................................... ............................. .... ............... 29
®
Bookmark?... .... ..................................... ................................. .......................... 31
®
PDF Interactive Feature?....................... ............................. .............................. 32
VIeC is a client-server application that allows you to generate Adobe PDF documents from VIPP
based variable data applications. Using the same VIPP
on a print device, the same data file can be sent to the VIeC Server and PDF output created. Use of
the VIeC Dispatch module can integrate the PDF files into the workflow process.
VIeC outputs the PDF files to a local directory structure on the server. The VIeC Dispatch module can
call a user-defined process and pass to that process the PDF file and other information contained in
the VIPP
presentment, archive, viewing, email servers, or other up stream processes as required by customers.
A standard VIPP
the VIeC Server. No changes in the data or VIPP
VIPP
of the VIeC Server by changing the destination TCP/IP address and queue name. Watched Folders
and the VIeC Job Submission Client can be used to submit data files to VIeC. In addition, a VIeC Web
module, not covered in this workshop, can be used to configure and submit jobs to the VIeC Server.
For more information about VIeC Web, refer to the FreeFlow VI eCompose User Guide.
A VIPP
is output to a named directory on the server. A print path can be specified. The data file processed by
VIeC is forwarded to the print device after being processed by the VIeC Server. This action allows for
both electronic and hard copy printing from a single job submission. It is important to note that the
print path passes the data file, not the PDF file, to the target print device. To forward the PDF file,
review the information about the VIeC Dispatch module described later in this workshop and review
the VIeC Dispatch chapter of the FreeFlow VI eCompose User Guide.
Any VIPP
individual sets of PDF files. For example, a statement run containing 10,000 customer records can be
split into 10,000 individual variable-length customer PDF statements. Web presentment applications,
or archive and viewing systems, can take advantage of the individual PDF files, all without making
any changes to the data or the workflow. The VIPP
contain additional data that can be passed to a user-defined process using the VIeC Dispatch
module. For more information about the VIPP
to the VIPP
®
Bookmark. This action provides a rule-based manual or automated API to web
®
application that is submitted to a VIPP®-enabled print device can be submitted to
®
-enabled print device. A job using lpr to submit to a printer can use lpr to submit to the lpr client
®
job processed by the VIeC Server results in the generation of an Adobe PDF file. The PDF file
®
application that uses the VIPP®BOOKMARK command can be further enhanced to create
®
®
Language Reference Manual.
BOOKMARK and extended BOOKMARK features, refer
®
workflow that generates hard copy output
®
resources are required. VIeC operates like any other
®
BOOKMARK and extended BOOKMARK can
®
-
PDF Interactive features such as PDF Bookmarks, PDF notes, or URLs can be included in the output
PDF file using the VIPP
®
SETPIF command. For example, in the statement example, several additional
Xerox®FreeFlow®VI eCompose
Workshop Guide
25
Page 26

VIeC and VIeC Workshop Overview
PDF bookmarks can be created to assist with navigation through the PDF document. URLs can be
inserted into the PDF file that links the customer to a company home page or customer support page.
PDF interactive features are processed only when the job is sent to VIeC. PDF interactive features are
ignored when the data file is processed by a VIPP
®
-enabled printer.
26
Xerox®FreeFlow®VI eCompose
Workshop Guide
Page 27

VIeC and VIeC Workshop Overview
Third-Party Support for VIeC
There are third-party VIPP®GUI design tools that support the creation of VIPP®Bookmarks, PDF
Interactive Features, and VIeC DispatchRules. For information on how these easy-to-use tools can
help you design and create VIPP
vendor web sites.
For information on third-party products that support VIPP
contact your local Xerox representative or log on to the Xerox eStore: http://buy.xerox.com.
®
applications without VIPP®programming knowledge, review the
®
Pro Dynamic Document Construction,
Xerox
®
FreeFlow®VI eCompose
Workshop Guide
27
Page 28

VIeC and VIeC Workshop Overview
Job Submission Methods
VIeC supports four methods of job submission, three are discussed in this workshop:
• lpr
• Watched Folder
• VIeC Job Submission Client
The VIeC Web interface can be used to administer the system and submit jobs for processing. For
more information on the VIeC Web interface, refer to the FreeFlow VI eCompose User Guide.
VIeC provides the capability to append a .nub initialization file to the data file. This action enables
the delimited, XML, or line mode data file to be submitted directly to the VIeC Server. The VIPP
commands required to initiate the VIPP®processing are added to the incoming data file using a VIeC
profile. Each job submission method allows for the use of VIeC profiles. A VIeC profile contains all the
job options, such as output file folder, distill options, and file name templates needed to process the
®
VIPP
option is not available, a default lpr profile can be established or you can include the startup
commands with the data file. For additional information, refer to the FreeFlow VI eCompose User
Guide.
data file on the VIeC Server. The lpr client must be able to process the -T option. If the -T
®
28
Xerox®FreeFlow®VI eCompose
Workshop Guide
Page 29

What is the VIPP®Language?
VIeC and VIeC Workshop Overview
This workshop does not provide training on the VIPP®language. To use VIeC, it is necessary to
understand some of the basics of the VIPP
For training on the VIPP
®
Language, or any of the VI Suite applications, contact your local Xerox
®
language and the FreeFlow Variable Information Suite.
representative, who has information on the available training in your area.
VIeC uses an embedded VI Compose software to process any VIPP
®
application that VIeC receives.
With the introduction of VIeC, this same workflow can be used to create Adobe PDF files. Those files
can contain additional interactive features that can add value to the document produced, such as a
URL link or a link to additional PDF documents.
®
VIPP
VIPP
file is stored at the device. Only the unformatted variable data file with the initial VIPP
is a set of high-level PostScript macros that reside at the VIPP®device. The key advantage of
®
software for the enterprise is that the majority of the information required to format the data
®
start
command or nub file is required to process the data file, producing highly customized and
personalized documents across the enterprise.
®
VIPP
applications can be sent to a variety of printers: desktop, office, production monochrome,
highlight color, or full color printers. The same data file can be sent to VIeC to output PDF files, all
with no changes required to the workflow or the data.
VVIIPPPP®®RReessoouurrcceess
VIPP®jobs consist typically of three types of resources.
• User resources consist of objects used in the job:
– JPEG or TIFF images
– PostScript, EPS, .txt files, decomp files, or RDO files; Tiff only
– Native-mode VIPP
®
forms or segments of VIPP®code
– Fonts
• VIPP
®
Template files consist of the following:
– Job Descriptor Ticket (JDT)
– XML Job Descriptor Ticket (XJT)
– Data Base Master (DBM)
– Font lists and encoding tables
– Distribution lists
• VIPP
®
Data files: VIPP®can be configured to run in these modes:
– Native Mode
– Line Mode
– Data Base Mode
– XML Mode
Xerox
®
FreeFlow®VI eCompose
Workshop Guide
29
Page 30

VIeC and VIeC Workshop Overview
VVIIeeCC aanndd VVIIPPPP®®RReessoouurrcceess
The VIeC Server has the same VI Compose software that can be found on the printer. The VI
Compose software processes the data file and builds the variable data pages on the VIeC Server in
the same way as on a print device. The only difference is that the output consists of PDF files instead
of paper documents.
As on a print device, the VIeC Server needs access to the same VIPP
files. The resource files must be loaded to the standard customer VIPP
Server. VIeC supports both the legacy resource structure and the VI Project resource structure. For
more information on the customer XGFC directory structure, review the FreeFlow VI Compose User
Guide.
The data file is sent to the VIeC Server using one of three standard methods. The lpr command can
be used to submit jobs from clients, including mainframe hosts. The data file can be deposited in a
Watched Folder, typically using FTP software or copied using other networking methods. The PCbased Job Submission Client can be used to submit files for processing. In addition, the VIeC Web
interface is capable of submitting and reviewing jobs submitted for processing.
VIeC can accept a VI Project Container as a job submission file. For more information on VI Project
Containers, review the VI Project section of the FreeFlow VI eCompose User Guide or the FreeFlow VI
Design Pro User Guide.
®
user and template resources
®
directories on the VIeC
30
Xerox®FreeFlow®VI eCompose
Workshop Guide
Page 31

VIeC and VIeC Workshop Overview
What is a VIPP®Bookmark?
The VIPP®BOOKMARK command is a marker. When used in a VIPP®application and processed by
VIeC; the command creates a document boundary, enabling splitting of the output PDF file into
individual PDF sets. Information contained in the bookmark can be accessed in the index file that is
created when the Distill and Split into Pages option is selected in the Job Option Menu of VIeC or set
in a Job Profile.
The BOOKMARK accepts a field name or variable as the input string to the command. Two examples
are shown here:
/VARname 4 10 20 GETFIELD
VARname BOOKMARK
Fieldname BOOKMARK
The input string can consist of one or more variables, fields, and fixed text concatenated using VSUB.
Use this example when you want the bookmark to contain a customer account number and email
address separated by a space:
($$VARaccountNo.$$VARemail.) VSUB BOOKMARK
The BOOKMARK is limited to 256 characters. An extended bookmark of up to 64 K can be created,
and is typically seen when large volumes of text data need to be passed. For example, the extended
bookmark can contain a text string that is used as the body of an email message. The VIPP
application in this workshop contains such an extended bookmark.
®
The BOOKMARK command is ignored when processed by a print device. The BOOKMARK command is
acted upon only when processed by VIeC.
Other commands that can be used in the creation and use of the BOOKMARK command include
GETFIELD, SETVAR, and CS.
For more information about the BOOKMARK command, refer to the VIPP
Manual and the FreeFlow VI eCompose User Guide.
®
Language Reference
Xerox
®
FreeFlow®VI eCompose
Workshop Guide
31
Page 32

VIeC and VIeC Workshop Overview
What is a VIPP®PDF Interactive Feature?
A VIPP®PDF Interactive Feature is a text or image object in a PDF document that can be selected by
Adobe reader and which, when activated, results in some form of interaction, such as a link to a web
page or the opening of a note within the PDF document.
These examples show other uses for bookmarks:
• To help navigate a document.
• A PDF note can flag up-to-date information.
• To insert links to other PDF documents or to a page in a PDF document.
• A URL link can be inserted and associated with a text or graphic element that when selected
transports the user to a web site.
A typical example is an interactive PDF billing statement. The billing statement can contain links to
PDF documents describing the various sections of the statement or billing terms and conditions. The
PDF can contain a URL link to the company home page or a link to another document offering
additional services. This capability adds value to the PDF document that you produce. For more
information, refer to the VIPP
®
SETPIF command in the VIPP®Language Reference Manual.
32
Xerox®FreeFlow®VI eCompose
Workshop Guide
Page 33

VIeC Features
VIeC and VIeC Workshop Overview
This section describes briefly the major features of the VIeC Server. These features, along with the
VIeC unique job-splitting capabilities, make this an industry-unique VIPP
powerful, yet easy to use and configure.
More details about these features are provided later in this workshop. For additional information, and
information about features not covered in this workshop, review the FreeFlow VI eCompose User
Guide.
®
-to-PDF workflow that is
VVIIeeCC
VIeC is designed to process a VIPP®data file and generate a single PDF file or multiple PDF files and
associated index information. VIeC can accept data input from several sources and can pass the PDF
files to a user-defined process using the VIeC Dispatch module. The VIeC Server has a print path so
that the data file submitted to the server can be passed to an identified printer.
VVIIeeCC aanndd PPrriinntt PPaatthh
The VIeC Server provides a print path that can be used to submit the data file to a networked VIPP®enabled print device. The data file can be sent to both the VIeC Server and a hard copy printer
without the need to resubmit the data file.
The print device requires that the VIPP
network file server.
®
user and template files are loaded or available using a
VVIIeeCC aanndd NNuubb FFiillee
On many Xerox DocuPrint devices, the VIeC Server supports a feature called XGFnub. VIeC supports
virtual printer settings on FreeFlow Print Server systems. The nub feature allows an ASCII file to be
appended to the data file before being processed by VIPP
or line mode data file directly to the VIeC Server, without the need to make changes at the host to
add the required VIPP
stored at the VIeC Server using the nub feature, before being processed by VIPP
commands are appended to the incoming data.
®
start commands. When the VIPP®start commands are referenced in a file
®
. End users can submit the database, XML,
®
, the VIPP®start
VVIIeeCC TTeemmppllaatteess
The VIeC Server allows templates to be created that control the parameters used to define the name
of the PDF files created and the index files that are generated. These templates are available only
when the Distill and Split into Pages job option is selected. When the Distill Only job option is
selected, the templates have no effect.
Note: For a VIeC job that does not split but requires Dispatch, to generate the necessary index
file, you can select theDistill Only option using the Output Filename Template with the <GET_
INDEX_WITHOUT_SPLIT> option set.
VVIIeeCC PPrrooffiilleess
The VIeC Server allows VIeC profiles to be created and saved. A VIeC profile is a file that contains a
list of options and template settings that can be applied to a job using options in the various job-
Xerox
®
FreeFlow®VI eCompose
Workshop Guide
33
Page 34

VIeC and VIeC Workshop Overview
submission clients. A profile can be assigned to a data file using the Job Submission Client or lpr -T
options if supported, or assigned to a VIeC Watched Folder.
UUsseerr NNaammee OOuuttppuutt FFoollddeerr
The user name indicates the signed-on user. Each user has a set of default output folders that are
created during installation, and any additional user folders that were created by the system
administrator.
The Default, Alt1, and Alt2 folders can be selected as the output destination for the subfolders
containing the Adobe PDF files created during normal operation of the VIeC Server.
For each file processed by the VIeC Server, a time-dated subfolder is created in the selected output
folder. All PDF files associated with the current job being processed are inside the time-dated
subfolder. This action is necessary to avoid overwriting PDF files created by job runs with the same
name. For example, if you use a web-based application that collects customer data and submits the
data file. There is a special output folder called bulk. Using the bulk folder as the output folder
disables the time-date subfolder. The bulk folder is useful for processes that scan a known directory
location and sweep or process those files. The danger here is that files of the same name overwrite
each other, so be careful when using the bulk directory option.
VVIIeeCC DDiissppaattcchh
VIeC Dispatch is a powerful rule-based Dispatch module. The job of Dispatch is to evaluate the index
file created by the application, using the Distill and Split into Pages job type option. If a
DispatchRule can be applied, VIeC Dispatch passes the rule to a PDF file, along with other
information contained in the index file that is generated by the VIPP
defined process defined in the rule. The DispatchRule can include a process that interfaces with email
servers, a Xerox DocuShare repository, archive repositories, or other user-defined systems. The
Dispatch module does not email or process the PDF file. The module passes the PDF and other
information as required to a process that can interface with additional workflow steps in the customer
environment.
Note: For a VIeC job that does not split but requires Dispatch, to generate the necessary index
file, you can select theDistill Only option using the Output Filename Template with the <GET_
INDEX_WITHOUT_SPLIT> option set.
®
Bookmark command, to a user-
VVIIeeCC JJoobb SSuubbmmiissssiioonn CClliieenntt
VIeC Job Submission Client is supplied on the VIeC installation CD and can be distributed freely. The
VIeC Job Submission Client has two main functions:
• To configure the operation of VIeC to create profiles and do other tasks.
• To select a VIPP
the VIeC Server.
®
data file or a VI Project container and submit those entities for processing by
VVIIeeCC WWeebb
VIeC Web allows VIeC configuration and job submission from a web interface. This module is not
covered in this workshop. For more information on the VIeC Web module and security issues related
to its use, review the FreeFlow VI eCompose User Guide.
34
Xerox®FreeFlow®VI eCompose
Workshop Guide
Page 35

4
Job Parameters and Profiles
This chapter contains:
• VIeC Profiles ..... ......................................... ............................. .... ............................. .................. 36
• VIeC Parameters..... .... ............................. ......................................... ............................. ............ 37
• Creating an Output Filename Template............................. ............................. ............................ 40
• Creating an Index File Template ................................ ......................................... ....................... 43
• Create a Profile............................ ............................. .... ............................. ................................ 44
• Using an Existing Profile......... ............................. ......................................... ............................. . 45
• Editing an Existing Profile............. ................................. ............................. .... ............................ 46
A VIeC Profile contains parameters related to job processing and control. The job parameters include
job type, print options, file name and index template information, and the target VIeC destination
folder.
A VIeC Profile is an ASCII file containing VIeC parameters and values. A VIeC Profile can be created
using a text editor, or using the Save as Profile option in the VIeC Job Submission Client or VIeC Web
interface to save the current settings. The input data file name is not saved.
User-defined VIeC Profiles and default profiles can be created. An example of a default profile is the
lpr_default.pfl file. This file is not present when the system is installed but users can create the file to
set lpr default options. If the lpr client cannot support the -T option, create a file to set the lpr options.
Default settings apply to all submitted lpr jobs. Be aware that this action may not be desirable in your
work environment.
Xerox®FreeFlow®VI eCompose
Workshop Guide
35
Page 36

Job Parameters and Profiles
VIeC Profiles
An example of a profile is shown. A description of the parameters follows. In Exercises 5, 7, and 8 you
work with these job parameters to change the way that the VIeC Server works with input and output
files.
36
Xerox®FreeFlow®VI eCompose
Workshop Guide
Page 37

Job Parameters and Profiles
VIeC Parameters
VIeC parameters specify various paths, actions, locations, file names, field names, and printer
information for VIeC jobs.
IInniitt ((NNuubb)) FFiillee
The InitFile parameter allows the specification of the path to the nub file. The nub file is a set of
®
VIPP
nub file allows raw line, XML, or delimited database data to be submitted directly to the VIeC Server
without the VIPP
path provided.
This is an example of the contents of a nub file:
%!
XGF
(Myjob.dbm) STARTDBM
The nub file contains the required VIPP
VIPP
the nub file.
start commands in an ASCII file that is appended to the raw data file being submitted. The
®
start commands. The start commands are required in the nub file specified in the
®
®
resource files. In the example, the Myjob.dbm file is used to process any file submitted using
start commands to process the job and to call in the needed
JJoobb TTyyppee
The Job Type parameter defines the actions that the VIeC Server performs. The actions are described
here.
Distill Only This option distills the input data stream and
creates a single PDF file. When planning to use
VIeC Dispatch, set the Output Filename
Template to use <GET_INDEX_WITHOUT_
SPLIT>.
Distill and Split into Pages This option requires that the VIPP
the VIPP
the VIPP
VIPP
®
BOOKMARK command. VIeC acts on
®
BOOKMARK command contained in a
®
job. The PDF files produced are split,
based on the information in the bookmark. For
example, a billing statement that uses the
account number as the bookmark can create
individual PDF statements based on the
bookmark value. A single record can be
processed using this option. To create an index
file that can be used in a DispatchRule, use the
Distill and Split into Pages option.
Split into Pages Only This option is used to split PDF files that have
one or more bookmarks present. This option is
used rarely.
®
job contain
Xerox
®
FreeFlow®VI eCompose
Workshop Guide
37
Page 38

Job Parameters and Profiles
OOuuttppuutt FFoollddeerr NNaammee
The Output Folder Name parameter defines the location of the folder that contains the PDF files. The
folder is under the user name that you used to log in.
OOuuttppuutt FFiilleennaammee TTeemmppllaattee
The output file name template affects the way that the VIeC Server names the multiple PDF files
generated when the Job Type parameter is set to Distill and Split into Pages or Split into Pages Only.
if Distill Only is selected, the output file name template has no effect on the output file name. When
a single PDF file is generated using the Distill Only job type, VIeC names the PDF file using the same
name as the input file name.
IInnddeexx FFiillee TTeemmppllaattee
The Index File Template is used to specify the field names that make up the index file generated as
the result of the Distill and Split into Pages or Split into Pages Only Job Type being selected. When the
Job Type is set to Distill Only, no index file is created, unless the Output Filename Template is set to
use <GET_INDEX_WITHOUT_SPLIT>.
The purpose of the index file is to provide an API to an archive, email, CRM, or other customer
process. The index file can be used to build a path to the required PDF file and to provide fields for
additional information contained in the VIPP
a user-defined process using the Dispatch option. In a run of many thousands, it is clear that the
index file is an important component of VIeC output. The index file is output as a comma-delimited .
csv file and an XML file. The index file contains seven standard fields and the bookmark and extended
bookmark, if present. The bookmark field can be split into many separate fields. For example, if the
bookmark was based on the account number, customer name, and email address.
®
BOOKMARK or extended bookmark that are passed to
An index file can be generated that contains separate fields for the account number, customer name,
and email address. These fields can be passed to a user-defined process that uses the information to
submit the PDF file using an email server. The customer PDF statement can be emailed directly to the
customer email account.
EExxaammppllee ooff aa SSttaannddaarrdd IInnddeexx FFiillee
This example shows the standard fields available in a VIeC index file. The example is taken from the
XML format index file. An XML file is easier to read than a .csv file.
Additional fields can be generated from the data available in the VIPP®bookmark, using the Index
File Template options. This is demonstrated in an exercise later in this workshop.
38
Xerox®FreeFlow®VI eCompose
Workshop Guide
Page 39

Job Parameters and Profiles
PPrriinntteerr NNaammee
The Printer Name parameter is used to identify a connected networked VIPP®-enabled print device to
which the data stream is sent after being processed by the VIeC Server. By default, no printer is
identified. To select a printer, the printer must be available to the Windows Printers Dialog box on the
PC. The printer requires access to all the normal VIPP
the VIPP
®
application. The printer processes the VIPP®data in the usual manner.
®
resources, including a production license to run
Note: The printer does not print the PDF files created by the VIeC Server, the printer processes
the VIPP
®
data file.
PPrriinntteerr AAccttiioonn
The Printer Action parameter specifies two conditions for sending the data file to the target print
device:
• Always send the data
• Send the data only if the VIeC Server successfully processes the data file
Xerox
®
FreeFlow®VI eCompose
Workshop Guide
39
Page 40

Job Parameters and Profiles
Creating an Output Filename Template
VIeC allows you to create a template that can be assigned to a profile or selected as an option in the
VIeC Job Submission Client. The template defines how the PDF files are named. The default naming
convention uses the data file name and a six-digit counter.
For example, a file called myjob.dbf submitted to the VIeC Server using the Distill and Split into Pages
option and the default Output Filename template creates PDF files named myjob000000.pdf,
myjob000001.pdf, myjob000002.pdf, and so on.
The Output Filename Template editor allows customizing the naming convention, using fields or
strings contained in the VIPP
In Exercises 5 and 8, the Output Filename Template is used to modify the naming convention of a job
file submitted to the VIeC Server. The available options are reviewed in this section. For a description
of the field names, review the FreeFlow VI eCompose User Guide.
1. To open or launch the VIeC Job Submission Client, in the lower right task bar, right-click the VIeC
icon. When the menu appears, select Launch Job Submission Client.
2. In the Output Filename Template field, notice the default naming convention:
<DFNAME><DIGITS=6>.pdf
Where:
<DFNAME> is the Data File Name.
<DIGITS=6> is the six-digit counter.
.pdf is the pdf file extension.
3. Next to the Output Filename Template field, select Create Template. The Create an Output
Filename Template editor appears.
Note:
®
BOOKMARK or labels entered in the template editor.
• To add a field, insert the cursor at the needed insertion point, then select the
appropriate action button in the template window.
• To delete a field, highlight the field, then press the Delete key.
4. Add a BOOKMARK field. Place the insertion point between the <DFNAME> and the <DIGITS=6>
comments. Select Add Bookmark.
<BKMARK> is added to the template. The VIPP
name and the six-digit counter.
40
Xerox®FreeFlow®VI eCompose
Workshop Guide
®
bookmark contents appear between the file
Page 41

Job Parameters and Profiles
5. Make these changes:
• In the template, select the <DFNAME> comment, then press the Delete key.
• Overwrite the <DIGITS=6> comment with <DIGITS=3>.
The new template appears, and the PDF files use the bookmark value and a three-digit counter.
6. When you are satisfied with the parameters selected, to exit the Output Filename editor window,
select OK. The template contents appear in the Output Filename Template window. The list at
the side contains several previously defined templates that you can select.
When completing normal VIeC operations, after completing the steps outlined here, make
changes to the Index File Template, if required. Save your changes and any other job parameters
to a profile for later use. Saving a profile is discussed later in this chapter.
AAddvvaanncceedd OOppttiioonnss
The VIPP®bookmark that is used to split the VIPP®data file into individual PDF files, can be created
as a simple file name, or can contain several field or variable names concatenated into a single value.
The VIPP
bookmark. The Add Field Separator, Add Field Index, and Add Start/End Index features are used to
break out areas of the bookmark into fields that can be used in the Output Filename.
For example, a bookmark can contain the following:
®
bookmark can include characters that are used later as field separators within the actual
521-99-0684ADavid Kirk^Dave_Kirk@zxyxzx.com
The string example consists of a customer account number, customer name, and an email address
separated by a ^ character that is used as the field separator. To use the customer name as part of a
naming convention, create a template that splits the bookmark into fields using the ^ as a separator.
To do this, follow these steps:
1. To launch the VIeC Job Submission Client, in the lower right task bar, right-click the VIeC icon.
When the menu appears, select Launch Job Submission Client.
2. To the right of the Output Filename Template field, click Create Template.
3. In the top window, place the cursor at the beginning of the template syntax.
4. In the Add Field Separator field, type the ^ character. To add this comment to the output
template, click Add Field Separator.
5. Specify the BOOKMARK. If not already displayed in the template, to insert the BOOKMARK field
<BKMARK>, select ADD Bookmark.
6. Specify which part of the bookmark to use. Place the cursor inside the bookmark comment, just
before the closing >, the insertion point required for the field index that you want to specify.
7. To add the customer email, which is the second field in the bookmark, select a Field Index value
of 1. In the Add Field Index field, type 1. To add the Field Index value to the template, click Add
Field Index. This action works on zero-based indices where 0 = the first field. The new bookmark
comment appears:
<BKMARK[F1]>
This syntax tells VIPP
®
to select the second field, the customer name, from the bookmark. In
addition to separating the bookmark into fields, you can select a number of characters, or a
number of characters based on a selected field.
Xerox
®
FreeFlow®VI eCompose
Workshop Guide
41
Page 42

Job Parameters and Profiles
Note: The Output Filename Template editor is sensitive to the current cursor position. The
editor inserts fields and other comments at the current cursor position, even if the information
does not make sense or is invalid. Before saving the information to a profile, review the Output
Filename Template contents.
42
Xerox®FreeFlow®VI eCompose
Workshop Guide
Page 43

Job Parameters and Profiles
Creating an Index File Template
To create an Index File template, use the same process and concepts described in Creating an Output
Filename template. For more information, review the FreeFlow VI eCompose User Guide.
Xerox
®
FreeFlow®VI eCompose
Workshop Guide
43
Page 44

Job Parameters and Profiles
Create a Profile
After the Output Filename and Index templates have been created, the next step is to save a profile
for use within the VIeC system containing the information created in the next few steps.
Note:
• Remember, the templates are only available using the Distill and Split into Pages job type
option.
• Use a text editor or the Job Submission Client to create a profile. It is recommended that
you start by creating the profiles using the Job Submission Client.
Follow these steps to create the first VIeC Profile.
1. If the Job Submission Client is not open, on the lower right task bar, right-click the VIeC icon.
When the menu appears, select Launch Job Submission Client.
2. Select the following options for each of the Job Parameters:
Data file
The data file is not considered part of the profile. A profile is optionally attached to the data
file when processed.
Init (Nub) File
Select Browse. In the X:\Program Files (x86)\Xerox\VIPP\xgfc\mislib directory,
select the VTPworkshop.nub file. The nub files that you create can be located anywhere on
the network as long as the VIeC Server has access to the files.
User Name
Leave the user name as the default.
Output Folder
Scroll the options, then select something other than the default.
Printer for VIPP Job Output
To view a list of printers, select the menu. If no printers are available, leave the selection at
none. Otherwise, select a printer name. VIeC has no way to know if the printer that you select
is a VIPP
the required VIPP
on the target printer.
Output Filename Template
Select the menu, then select one of the options.
3. After you have completed setting up the job parameters for the profile, click Save Profile.
A dialog box appears that allows you to enter a file name. For the profile name, type My_
first_profile, then select Save.
®
-enabled printer. Ensure that you select a VIPP®-enabled printer, with access to all
®
resources. If you select a printer that is not VIPP®-enabled, the job aborts
44
Xerox®FreeFlow®VI eCompose
Workshop Guide
Page 45

Job Parameters and Profiles
Using an Existing Profile
When you use the Job Submission Client, you can load an existing profile, either to use when
submitting a data file or to edit some key parameter.
Follow these steps to load a VIeC Profile:
1. Open the Job Submission Client, if not already open.
2. To access the Please choose Profile to load dialog box, click Load Profile.
3. Select My_first_profile.pfl. When the profile loads, it populates the Job Submission Client with
the information contained in the profile.
Xerox
®
FreeFlow®VI eCompose
Workshop Guide
45
Page 46

Job Parameters and Profiles
Editing an Existing Profile
Follow these steps to edit an existing VIeC Profile.
1. Load the profile My_first_profile.pfl.
2. Make a change in one or more of the available options.
3. To save the profile, select Save Profile. Use the same profile name to overwrite the existing
profile, or enter a new profile name to create a new profile.
An alternative is to open the profile in a text editor, then make the required changes there.
46
Xerox®FreeFlow®VI eCompose
Workshop Guide
Page 47

5
VIeC Job Submission
This chapter contains:
• VIeC Job Submission Client . ..................................... ................................. ............................. .... 48
• VIeC Watched Folders Client ........... ............................. ................................. ............................. 49
• Process a Job Using the Watched Folder. .... ............................. ................................. .................. 51
• VIeC LPR Option ........... .... ............................. ................................. ........................................... 53
• VIeC Dispatch Option ............................ ............................. .... ............................. ...................... 54
These three methods for job submission to the VIeC Server are described in the workshop:
VIeC Job Submission Client
A stand-alone VIeC Job Submission Client that can be installed on any PC with network access to
the VIeC Server.
Watched Folder Client
A Watched Folder is created on the VIeC Server PC. Data files can be deposited into the Watched
Folder using methods such as FTP, or manual file transfer using the network. Parameters are set for
the Watched Folder that control VIeC Profiles, time intervals that the Watched Folder is checked
for data files, and the disposition of the data file after processing.
LPR
The VIeC Server supports lpr file printing. The VIeC lpr client can be enabled during installation or
loaded at a later time. Jobs submitted to a printer using lpr can be routed to the VIeC Server
without changing the job submission workflow. The VIeC TCP/IP address must be assigned.
The VIeC Web client allows job submission to the VIeC Server. The VIeC Web client is not covered in
this workshop. For more information, refer to the FreeFlow VI eCompose User Guide.
Xerox®FreeFlow®VI eCompose
Workshop Guide
47
Page 48

VIeC Job Submission
VIeC Job Submission Client
You have already become familiar with the VIeC Job Submission Client. The client software can reside
on any PC that is networked to the VIeC Server. The VIeC Job Submission Client can be used to
submit a data file to the VIeC Server.
OOppeenn tthhee JJoobb SSuubbmmiissssiioonn WWiinnddooww
Use one of these methods to open the Job Submission Client:
• Right-click the VIeC icon, if on a local server
• Select Start→Programs→VI eCompose→VI eCompose Job Submission Client
SSuubbmmiitt aa JJoobb
To submit a job for processing:
1. Select the data file or VI Project Container using the browse dialog box.
2. Set the job parameter options you wish to use, or load an existing profile.
3. Press the Submit Job button located at the bottom of the window.
CClloossee tthhee JJoobb SSuubbmmiissssiioonn WWiinnddooww
Closing the Job Submission Client window does not affect the VIeC Server in any way. You can open
and close the Job Submission Client as often as you need.
To close the Job Submission Client, in the top-right corner, select X, or choose File→Exit or Alt-X.
48
Xerox®FreeFlow®VI eCompose
Workshop Guide
Page 49

VIeC Job Submission
VIeC Watched Folders Client
The Watched Folder Client allows you to specify one or more directories where you can place VIPP
jobs for automatic submission to the VIeC Server. Sometimes, this folder is known as a hot folder. If
the network supports shared folders, you can access the VIeC Server Watched Folder on the remote
desktop, using the network.
You can place a data file into the Watched Folder using FTP or other file transfer methods. When you
configure the Watched Folder, you set a time interval and assign a VIeC Profile. At each time interval,
the Watched Folder is searched for data files. If a data file is present, it is submitted to the VIeC
Server, and deleted or stored in a saved job folder, depending on the file disposition parameters.
CCrreeaattee aanndd AAccttiivvaattee aa WWaattcchheedd FFoollddeerr
To create a Watched Folder, create a directory on the VIeC Server that is defined as the watched
folder, and ensure that at least one user profile is available. If a profile you can use already exists, you
can skip this step, otherwise create a dummy generic profile.
After the directory is created, use the VIeC Watched Folders Client to define the Watched Folder as a
VIeC Server resource. Set the options, including the VIeC User name, VIeC Profile, time interval, and
input file disposition. The final step is to activate the watch.
®
1. Create a folder called VTP_Watched_Folder on the C:\ drive. Use the new folder option in
the Windows operating system.
2. Use the VIeC Job Submission Client to create the new profile. To start the VIeC Job Submission
Client, right-click the VIeC icon on the task bar, then select VIeC Job Submission Client.
When the Job Submission Client starts, all the job parameters are set to default. No nub files,
printer names, and so on, are assigned. The Job Typeis set to Distill Only. These parameters are
suitable for our generic profile.
3. Select Save Profile. Enter the name Generic as the profile name, then select Save.
4. To close the VIeC Job Submission Client, select X or Alt-X.
CCoonnffiigguurriinngg aa VVIIeeCC WWaattcchheedd FFoollddeerr
To configure a VIeC Watched Folder, start the VIeC Watched Folder Client as follows:
1. Right-click the VIeC Server icon on the task bar, then select Launch Watched Folders Client.
Alternatively, from the Windows Start menu, select Programs→Xerox→VI eCompose Watched
Folders Client.
The FreeFlow VI eCompose Watched Folders Client window opens. The window displays the
existing Watched Folder configurations. The function buttons are arranged on the right side of
the window. If you click Add Folder, the Watched Folders Client window expands, which contains
the Watched folder details and its profile information. Function buttons that control the
operation of the Watched Folder Client are arranged down the right side.
2. If any existing profiles appear in the top window, delete them. To delete profiles, highlight the
Watched Folder in the top window, then select Delete. This action deletes the selected Watched
Folder configuration. If no Watched Folder configurations are present, ignore this step.
®
Xerox
FreeFlow®VI eCompose
Workshop Guide
49
Page 50

VIeC Job Submission
3. To create a new Watched Folder configuration, select Browse. A Windows directory tree appears.
Scroll through the desktop and select the VTP_Watched_Folder created in step 1 of Create and
Activate a Watched Folder. To confirm the selection, click OK.
The path to the Watched Folder appears in the Watched Folder Details window, under the
Watched Folder label.
Ensure that the VIeC User is set to your user name. Available users appear in the User menu.
4. From the Profile menu, select the generic.pfl profile file you created. The profile contents
appear in the Profile Details window.
5. Select Change Interval. Set the time interval to 5. The time interval is set in seconds. To confirm
the setting, select OK.
Tip: For this training example, 5 seconds is sufficient to quickly demonstrate how this
feature works. In production, you can set this time interval anywhere from 5–10,000
seconds, depending on the frequency of file transmission.
6. Select Add. The defined folder moves into the watched area. When the Watched Folder process is
activated, this folder can be watched for data files.
To avoid data files being resubmitted, to define a file disposition for submitted files, follow the
next steps:
Caution: Failure to assign a file disposition results in the same file being submitted
repeatedly.
7. In the top window, highlight the Watched Folder.
8. From the top menu bar, select File.
9. Select Input File Disposition.
Tip: After the VIeC Server processes the data files, two options are available for the
disposition of the data files. You can either delete the files, or move them to a Saved Job
Folder. The VIeC Server creates the Saved Job Folder in the Watched Folder directory. If you
select Move Input Files to Saved Job Folders, be aware of space constraints and
housekeeping requirements to ensure that you do not exceed the available disk space on
the VIeC Server. Unpredictable results can occur if you exceed the available disk space.
10. Select Move Input File to Saved Jobs Folder.
11. Before you activate the Watched Folder process, save the changes. Click Save Changes, then
answer Yes to the Save Changes prompt.
12. To start the Watched Folder process, select Resume. A Watched Folder status indicator message
and the selected time interval appear at the bottom of the Watched Folder window.
Tip:
• A status of Watching Folders indicates that the system is active.
• A status of Not Watching Folders indicates that the system is paused.
50
• To change from one status to the other, select the Resume and Pause toggle button.
The label of this toggle button appears as either Resume or Pause, depending on the
current status of the Watched Folder process.
Xerox®FreeFlow®VI eCompose
Workshop Guide
Page 51

VIeC Job Submission
Process a Job Using the Watched Folder
To process a VIPP®job using the Watched Folder, move a data file into the Watched Folder directory.
You can move the file using many different methods, from drag and drop, to FTP.
Ensure that the Watched Folder process is active, then follow this process to demonstrate this
capability:
Tip: Steps 1 and 2 are included for demonstration purposes only. In normal operation, none of
the windows opened in these steps needs to be visible.
1. To open the Job Submission Clientwindow, right-click the VIeC icon, then select Launch Job
Submission Client. While the Watched Folder VIPP
window.
2. If it is not already open, open the folder C:\VTP_Watched_Folder,
Reduce the size of this window, then move it to the upper right of the screen. This window is the
watched directory to which you copy the VIPP
file is deleted from this directory and placed into a Saved Input File directory. If the Saved Input
File directory does not already exist, the VIeC Server creates the directory automatically.
®
job processes, activity is displayed in this
®
Data file. As the file is processed, notice that the
Xerox
®
FreeFlow®VI eCompose
Workshop Guide
51
Page 52

VIeC Job Submission
3. Move the Job Submission Client window to the top left of the screen.
4. Use Windows Explorer to locate then drag and drop the file X:\Program Files (x86)
\Xerox\VIPP\xgfc\mislib\vtpworkshop.vpc to the VTP_Watched_Folder
directory.
Wait for approximately 5 seconds. During this time, the Watched Folder time interval passes and
the Watched Folders Client searches the VTP_Watched_Folder for data files. The Watched
Folders Client finds the vtpworkshop.vpc file, and marks the file for processing by the VIeC Server.
The vtpworkshop.vpc file is a VI project container that contains all resources and the data file to
run the job.
The Watched Folders Client forwards the job to the VIeC Server, which processes the file based on
the profile attached to the Watched Folder. In this case, the generic.pfl profile is attached to the
Watched Folder.
During this process, these changes occur:
VI eCompose Local Server Window A log entry is made for the start of the job. As the
job is processed through to completion, other log
entries are made.
VI eCompose Job Submission Client Window The vtpworkshop.vpc job appears in the bottom
window, and a status appears during the process
of that job.
VTP_Watched_Folder The submitted file disappears from this folder. A
new directory called SavedjobFiles is created, if it
does not already exist. The submitted file is moved
to this directory. If the file disposition is set to
delete, the file is not deleted and no backup copy is
saved.
VI eCompose processes the file and generates a PDF file. In this case, because the file is a VI
Project Container, the VIeC Server expands the project container, then processes the data file
contained in the project container. If a data file, such as a VIPP
®
.dbf file, is pointed to, the VIPP
start commands contained in the data file, or in a nub file attached to the data file, specifies the
directory location and the VIPP
®
start commands that VIeC uses to process the data file.
DDeelleettee aa WWaattcchheedd FFoollddeerr
The steps used to delete a Watched Folder from the system are listed here, However, do not perform
this task as a part of this exercise as the folder you created here will be used in the hands-on exercises
later in this document.
1. Open the Watched Folder Client.
2. Select the Pause button to pause the Watched Folder process.
3. Highlight the Watched Folder in the top window.
4. Select the Delete button.
®
5. Restart the Watched Folder process by selecting the Resume button for other Watched Folders
that are present.
52
Xerox®FreeFlow®VI eCompose
Workshop Guide
Page 53

VIeC Job Submission
VIeC LPR Option
The lpr command is probably one of the most common interfaces used to submit VIPP®applications
to printers. Jobs are submitted from mainframe or client-server systems, using TCP/IP, a printer
address, and a queue name. The VIeC Server looks just like any other VIPP
accept lpr jobs as input.
TCP/IP print server services must be started in the Windows operating system running on the VIeC
Server. This action is normally a function of the network system administrator. Without this service
started, lpr is unable to communicate with the VIeC Server. This service is not always loaded, so
confirm that the TCP/IP print server is installed, started, and active. For more information, refer to the
FreeFlow VI eCompose User Guide.
Ensure that the VIeC Server is not be active when installing the LPR option. The LPR Option must be
configured on the VIeC Server.
• To configure the LPR Option during the initial installation, select LPR Option.
• To complete the configuration at a later time, from the Windows Start menu, select
Programs→VI eCompose→Install VI eCompose LPR Option.
After the LPR Option has been installed, a target lpr printer can be defined on the VIeC Server. The
steps to complete this are covered in the FreeFlow VI eCompose User Guide. Multiple printers can be
defined.
®
-enabled printer and can
The syntax of the lpr command and available or supported options changes, based on the type and
system that you are using. If the system that you are using supports the -T or -C options, a profile
name can be included in the lpr command syntax. If the options are not supported, VIeC uses a
default lpr_default.pfl profile or system defaults if lpr_default.pfl is not present, when processing the
lpr input. For more information on lpr job submission, refer to the FreeFlow VI eCompose User Guide.
The scope of this training does not permit an in-depth discussion of lpr and the supported syntax. For
more information about the lpr command and the supported syntax, refer to the FreeFlow VI
eCompose User Guide and the readme_lpr.txt file.
Xerox
®
FreeFlow®VI eCompose
Workshop Guide
53
Page 54

VIeC Job Submission
VIeC Dispatch Option
The VIeC Dispatch option is a powerful rule-based Dispatch system. Its primary function is to watch
output folders for PDF files and index records. VIeC Dispatch validates the index against a set of user
defined rules. If a rule is valid (only one rule can be valid for any one job, else Dispatch will flag the
job as ineligible or conflicted), the instructions in that rule are applied to each PDF file that is
generated.
The instructions in the rule include the execution of a user defined process and the passing of
parameter information to that process. This includes the path to the PDF file and any information
that VIPP
then interacts with whatever customer process or system is required.
Typical uses of this process includes passing:
• PDF file and field information, such as email address, subject field, body text to an email system
• PDF files to an archive system
• PDF files to the next step in the user defined process
This workshop shows a simple example of using the VIeC Dispatch module. Because VIeC Dispatch
calls a user defined process, it is impossible to describe every use for the Dispatch module. One user
may use it to email, another to archive, and another to pass the PDF files to another system or
process, or another user may use it for all of the above.
®
stored in either the standard or extended VIPP®bookmark fields. The user defined process
The Dispatch module is a very powerful module and does require system integration knowledge to
configure effectively. Xerox also offers a set of integration services around the setup and
configuration of VIeC using the Dispatch module, including the creation of the user defined
processes. Contact a local Xerox representative for additional information about how Xerox can
integrate VIeC into the workflow.
54
Xerox®FreeFlow®VI eCompose
Workshop Guide
Page 55

6
Hands-On Exercises
This chapter contains:
• What to Expect............................ ................................. ................................. ............................ 57
• VI eCompose Workshop Code Descriptions. ............................. ................................. .................. 58
Eleven exercises are included in this workshop. The first 10 exercises are designed to familiarize you
with the operation of the VIeC Local Server, the job submission clients, and the Dispatch module.
Exercise 11 is optional and is dependent on the site email and firewall configuration. All the exercises
are summarized here:
• Exercise 1: VIeC Job Submission Client overview: Familiarizes you with the functions of the VIeC
Job Submission Client.
• Exercise 2: Job submission: Demonstrates how to use the Job Submission Client to submit a
• Exercise 3: Simple job submission: Shows you how to change the job options to create 20 unique
• Exercise 4: Using the Bulk Output folder: Demonstrates how to select the Bulk Output Folder as
• Exercise 5: Using the Output Filename template: Shows you how to use the Output Filename
• Exercise 6: VI Compose error condition: Shows you what happens when a data file with a
• Exercise 7: Watched Folder job submission: Allows you to use the Watched Folder Client to set up
• Exercise 8: Output Filename and Index Template manipulation: Shows you how the Job
®
VIPP
the second part of the exercise, you submit a data file to VIeC. Both exercises create the same
PDF file.
PDF files from the same data file. You learn how to view the VIeC Server window that displays
VIeC system-generated messages.
the target output folder. You learn the difference between the Bulk Output Folder and other VIeC
output folders.
template to change the name of the PDF files being generated. You learn how to save the current
Job Submission processing options to a VIeC Profile.
misspelled VIPP
message. This exercise shows what happens when a job aborts and where to locate the error
messages.
a Watched Folder and use the folder to submit the data file. You learn how to assign a VIeC Profile
to the Watched Folder that contains the job options you need to use to process the file. This
exercise demonstrates an automated workflow.
Submission Client can be used to create an Output Filename template and an Index Template
that uses information contained in the Bookmark field.
application to VIeC. In the first part of the exercise, you submit a VI Project Container. In
®
resource is submitted. VI Compose aborts jobs with a VIPP®_unable_to_locate
• Exercise 9: Init (Nub) files: Demonstrates how to set up a VIeC DispatchRule. You learn how the
DispatchRule is used to automate a process to copy the PDF files to another directory. This
process is user-defined, and in a customer environment, could do a lot more than just copying a
file to a new location.
Xerox®FreeFlow®VI eCompose
Workshop Guide
55
Page 56

Hands-On Exercises
• Exercise 10: Using Dispatch: Demonstrates how to configure VIeC Dispatch to move the PDF files
created in this exercise to a new location automatically, which emulates moving the PDF files to
the next step in a customer workflow.
• Exercise 11: Email: Shows you one way to automate the dispatch of VIeC files using email. This is
an optional exercise. Depending on the current network and email server configuration, you may
or may not be able to automate the dispatch of the PDF file to an email server. Some customer
environments may not allow this action, so ask your system administrators if this exercise is
possible. If you cannot complete the exercise, it describes the approximate process used to
configure the Dispatch module in the environment to automate this workflow. You are asked to
edit a job submission data file and change the email address to your own email. For testing
purposes, this test job contains only three records.
Xerox Corporation offers fee-based services to install, configure, and create a VIeC Workflow for
customer environments. For more information, contact your Xerox representative.
Note:
• Before you begin the following exercises, load the VIPP
®
files supplied with this workshop to
the locations described in the table on page 16 of this document. It is assumed that you
have successfully installed and licensed VI eCompose.
• The VIPP
®
resources for this workshop are included with the VI eCompose download. Refer
to Program download. You can download this workshop guide. Refer to Documentation
download.
56
Xerox®FreeFlow®VI eCompose
Workshop Guide
Page 57

What to Expect
Hands-On Exercises
In these exercises, you submit a VIPP®database application created using the VI Design Pro tool.
This tool simplifies the VIPP
requires VIPP
®
programming knowledge.
VTPWorkshop.vpc is a VIPP
®
application design process for VIPP®application programmers, and
®
database mode application that contains 20 delimited records. It prints
20 simplex pages, one page per record. The data file is a comma delimited data file called
vtpworkshop.dbf. This application is a simple mail merge application. At the conclusion of this
workshop, feel free to edit the files or create unique applications.
The first nine exercises take you through the basic settings, configuration, and use of VIeC. In the
10th exercise, you use what you have learned to create an end-to-end workflow. The exercise
implements VIeC Dispatch to call a user process, in this case an XCPOPY command, to move the PDF
files to a new location. The process used in this exercise copies the created PDF files to another folder
on the PC. In a real customer environment, you can use the user-defined process to do a lot more
than only copy the files. You can use the process to start an email server, archive files, or start the
Web presentment processes. There is no limit to what the user-defined process can do.
This workshop can be completed within a day.
Note: VI eCompose Workshop is designed to demonstrate the functionality of VIeC. It is not
intended as an image quality application, but is used to provide a functional demonstration of
VIeC and the VIeC Dispatch module. The images used are low resolution and not suitable for
presentation. If required, to upgrade this application, supply unique image files and logos, or
edit the application to fit individual demonstration purposes. However, make these changes
only after completing the workshop.
Xerox
®
FreeFlow®VI eCompose
Workshop Guide
57
Page 58

Hands-On Exercises
VI eCompose Workshop Code Descriptions
The purpose of this section is to familiarize you with certain sections of the VIPP®code that create
the interactions necessary for VIeC to perform its job.
This workshop assumes you are familiar with the VIPP
teach you VIPP
handy for review of individual commands.
VI eCompose Workshop will produce a single sided mail-merge application.
®
programming. It may be useful to have the VIPP®Language Reference Manual
®
scripting language and does not attempt to
58
Xerox®FreeFlow®VI eCompose
Workshop Guide
Page 59

Hands-On Exercises
vvttppwwoorrkksshhoopp..ddbbff
The data file used in the demonstration is a 20–record comma delimited data file that begins with
the lines of code shown here:
The first five lines in the data file are VIPP®startup information described here. For additional
information, refer to the VIPP
%! Is generic PostScript start syntax
[(projects) (VTPworkshop)] SETPROJECT Points to the location on the device that contains the
QSTRIP_on Strips the first and last quotes from a field. The data
(,) SETDBSEP Sets the delimiter character to a comma.
(vtpworkshop.dbm) STARTDBM Tells VI Compose to use the vtpworkshop.dbm file to
®
Language Reference Manual.
VIPP
entry program used in exercise nine puts quotes
around the data fields it generates. This is not
unusual.
process this data file. The vtpworkshop.dbm file is
located in the path set by SETPPROJECT, in this case
X:\Program Files (x86)\Xerox\VIPP\xgfc
\projects\VTPworkshop.
®
resources used in this application.
Tip:
• You can include the information in the first five lines in a nub file, then use a VIeC Profile to
attach the information to the data file. This method enables you to submit the data file
only to VIeC. This method is demonstrated later in the workshop.
• For better visibility, the line that begins the data portion of the data file is placed in bold
text. This line contains the data file field names, followed by one or more data records that
use the same syntax and field order.
In this example, the names of the six data fields used in this application are listed in line six. They are:
Fname Contains the first name
Lname Contains the last name
Emailfield Contains the email address associated with this user
Combo1 Contains a location identifier
num1 Contains a numeric value. In this example, the
vacation day entitlement.
num2 Contains a numeric value. In this example, vacation
days taken.
Xerox®FreeFlow®VI eCompose
59
Workshop Guide
Page 60

Hands-On Exercises
When applied to the information in the first data entry field, the values for record one, on line seven,
are:
• Fname = david
• Lname = kirk
• Emailfield = david.kirk@zxwgz.com,
• Combo1 = WW"
• num1 = 25
• num2 = 15
vvttppwwoorrkksshhoopp..ddbbmm
The VIPP®Data Base Master file, vtpworkshop.dbm, is processed for each record in the data file. This
file contains all the formatting and data placement commands used to create the application, and is
reproduced in its entirety here:
% &&&&&&&&&&&&&&&&&&&&&&&&&&&&&&&&&&&&&&&&&&&&&&&&&&&&&&&&&&&&&&&&&&&
% SETUP of VIeC BOOKMARK & Extended BOOKMARK &
% &&&&&&&&&&&&&&&&&&&&&&&&&&&&&&&&&&&&&&&&&&&&&&&&&&&&&&&&&&&&&&&&&&&
% Standard BOOKMARK
% F0 F1 F2 Field values used in VTP Index template
($$VARFname.A$$VARLname.A$$VAREmai1.) VSUB BOOKMARK
% Extended BOOKMARK field index F3 in VTP Index Template
% This will be Info2 text and will be used in the body of the e-mail message
% The text is built up as it should be shown in the e-mail text body. For now
% I am just placing this on the stack. I will assign it to the Bookmark later.
($$VARFname.,
thank you for taking part in the FreeFlow VI Suite Demonstration.
You completed the FreeFlow VI Suite demonstration data entry form, providing
name, e-mail, location codes and some information about your vacation
details. These were used to create a delimited data file. The FreeFlow VI
Compose and the VIPP command language was used to process the file and create
the variable data mail merge document.
Behind the scenes the FreeFlow VI eCompose passed your data record to the
FreeFlow VI Compose enabled print device for the hard copy output you
received. It also processed the data record and produced a personalized PDF
file for you. The FreeFlow VI eCompose Dispatch module passed the PDF file to a
mail server along with the subject field and the text you are reading. This
demonstrates how a personalized document can be created from a simple data
record and printed on a FreeFlow VI Compose enabled print device and/or sent
to you via e-mail using the FreeFlow VI eCompose and the dispatch module
included with this software.
All of this was triggered by you filling out the data entry form on the PC and
60
Xerox®FreeFlow®VI eCompose
Workshop Guide
Page 61

Hands-On Exercises
hitting the submit button. Open the PDF file and see what happens when you
click on the photograph. This is an interactive PDF feature embedded into the
document by the FreeFlow VI Compose software.
$$VARFname., for additional information contact your Xerox Sales rep.
Thank you
The FreeFlow VI Digital Collection)
VSUB
% This is Info1 and will be used as the E-mail subject field, field index F4
% Again this is a line of text laid out how you want it to be written
($$VARFname., your personalized e-mail generated from the Teamwork demo.)
VSUB
% Now we add the two text strings to the extended bookmark
% Note because of the way we laid these out, the big text block is the 2nd field.
(A$$.A$$.) VSUB [ /EX 1 1 ] BOOKMARK
Xerox®FreeFlow®VI eCompose
Workshop Guide
61
Page 62

Hands-On Exercises
62
Xerox®FreeFlow®VI eCompose
Workshop Guide
Page 63

Hands-On Exercises
Xerox®FreeFlow®VI eCompose
Workshop Guide
63
Page 64

Hands-On Exercises
BBaassiicc SSeettuupp IInnffoorrmmaattiioonn
The first eight lines of code in the DBM contain basic setup information created by the VI Design Pro
tool.
64
Xerox®FreeFlow®VI eCompose
Workshop Guide
Page 65

Hands-On Exercises
FFoonntt aanndd CCoolloorr IInnddeexxeess
This section of the DBM shows some basic setup of font and color indexes. The section creates three
variable fields that contain title case text values contained in Fname, Lname, and Emailfield. This
ensures that the name fields look correct in the document.
FFoorrmm SSeelleeccttiioonn
The section of the DBM that defines form selection is shown here. The CASE statement uses the
Combol field. This field contains location information to set the background form. For example, if the
field Combol contains the text C1, the Centerl 72bg.jpg file is set as the background form. If the value
in Combol does not match any of the values shown, the default value Sunset72bg.jpg is used as the
background form.
DDeeffiinniinngg aa VVIIPPPP®®BBOOOOKKMMAARRKK
The section of the DBM file, shows the definition of the standard VIPP®BOOKMARK. The VIPP
BOOKMARK (and extended bookmark) command is only activated when processed by VIeC. This
command is ignored if the application is processed on a print device.
The command substitutes the current value in VARFname, VARLname and VAREmail into a string that
is passed to the BOOKMARK command. The ^ character is inserted between the three fields. The ^
character will be used by the VIeC index template as a delimiter character. This will enable us to
break the string into usable fields.
In the comment line (starting with the % character) above the BOOKMARK command the field
number of each variable is indicated as it will be represented in the VIeC index file. This is just a
comment and has no other value other than to help clarify the code to someone who may later need
to troubleshoot the code. (Not that that ever happens!) The index fields will be explained in more
detail later in the exercises.
®
Xerox
FreeFlow®VI eCompose
Workshop Guide
®
65
Page 66

Hands-On Exercises
Defining an extended VIPP®BOOKMARK
The standard VIPP
®
BOOKMARK is limited to 256 characters. This is normally large enough to hold
standard parameter information. Because the job specifies the e-mailing of the PDF files using the
Dispatch module, it is required that additional information be passed to the user defined process. The
additional information includes the body text used in the email note and the email subject
information, which exceeds 256 characters. When the 256 character limitation is exceeded the
information must be placed in an extended bookmark.
Again, there is a comment (indicated by the % character) to mak e it clear that this text will appear
as index field 5 in the bookmark and its assigned name will be info2.
Email text, first string
After the comment, the body of the email text, as it is to appear in the email note, is entered.No
commands have been added to the end of this text. This is just a trick to add two string fields to the
stack (this being the first of the two). The extended bookmark will be created using these two strings
from the stack.
Tip: No commands have been added to the end of this text. This is just a trick to add two string
fields to the stack (this being the first of the two). The extended bookmark will be created using
these two strings from the stack.
66
Xerox®FreeFlow®VI eCompose
Workshop Guide
Page 67

Hands-On Exercises
Email text, second string
The second string to add to the stack also requires the VSUB command because of the variable it
contains. This string will be used for the email subject line. The comments indicate that this will
appear as index field 4 in the VIeC index file that will be generated when running this application to
VIeC using the Distill and Split into Pages option.
% This is Infol and will be used as the Email subject field, field index F4 ($
$VARFname., your personalized email generated from the VI eCompose Workshop
demo.) VSUB
Completing the extended BOOKMARK
To complete this example the BOOKMARK command uses the Extended Bookmark syntax. Review the
BOOKMARK command in the VIPP
the available options.
The important capability used here is the ability to merge the extended bookmark with the
associated regular bookmark for index file processing by VIeC.
Note the ^ character added to the strings. As with the regular bookmark, the ^ character is introduced
into the string to use as a delimiter to separate the fields in the bookmark.
Tip: The $$. $$. is pulling the two strings placed previously on the stack, then passing the
complete string, with separator characters to the BOOKMARK command. Note it will pull the
subject field string first before it pulls the body text. This is because the subject string was
placed on the stack last.
BOOKMARK set up in the Data Base Master file is completed with these lines of code:
% Now we add the two text strings to the extended bookmark
% Note because of the way we laid t hese out, the big text block is the 2nd
field.
(A$$.A$$.) VSUB [ /EX 1 1 ] BOOKMARK
®
Language Reference Manual for information and a description of
MMaaiill MMeerrggee IInnffoorrmmaattiioonn
The next section of code in the DBM positions and prints the string VI Mail Merge Demonstration
using a bold Times Roman font. The code positions the string at the location indicated by the
MOVETO command, using SHP and the center justify option.
PPDDFF IInntteerraaccttiivvee LLiinnkk IInnffoorrmmaattiioonn
This section of code in the DBM sets up a PDF Interactive link, which is set using the SETPIF
command. The action specified in the SETPIF command will attach itself to the next marking
command, be that a text string or an image. The action, a call to a URL link, is attached to a variable
image (based on the value in the Combo1 field, placed with the ICALL command.
In addition, other variables are defined that will be used later. VARCombol will be used to print the
®
Xerox
FreeFlow®VI eCompose
Workshop Guide
67
Page 68

Hands-On Exercises
location, VARCoupon will be used to print a discount amount or percentage on the two coupons
printed at the bottom of the application.
LLaayyoouutt ooff tthhee RReemmaaiinnddeerr ooff tthhee DDooccuummeenntt
The section of the code reproduced below uses standard database VIPP®syntax to lay out the
remainder of the one page application. It is not described, as the key points have already been
discussed. However, after you have completed this workshop, review the code here and compare it to
the printed output. The VIPP
command used in the application does.
®
Language Reference Manual can be used to identify what each
68
Xerox®FreeFlow®VI eCompose
Workshop Guide
Page 69

Hands-On Exercises
DDaattaa DDrriivveenn GGrraapphhiiccss
The part of the DBM shown below is the VIPP®code that generates the data driven business
graphics. The database field num2 contains the number of vacation days allocated, num2 the
number of days taken. VARnum3 is a variable created to contain the number of vacation days
remaining. Num1, num2 and VARnum3 are used in the DRAWBAR command to draw the variable bar
chart on the page.
Xerox
®
FreeFlow®VI eCompose
Workshop Guide
69
Page 70

Hands-On Exercises
70
Xerox®FreeFlow®VI eCompose
Workshop Guide
Page 71

Hands-On Exercises
End of Exercise
Now that you have reviewed the VIPP®code found in the workshop files, begin Exercise 1.
Xerox®FreeFlow®VI eCompose
Workshop Guide
71
Page 72

Hands-On Exercises
72
Xerox®FreeFlow®VI eCompose
Workshop Guide
Page 73

7
Exercise 1: VIeC Job Submission Client Overview
This chapter contains:
• Job Creation Area ....... .... ............................. ......................................... ............................. .... .... 75
• VIeC Job Status Area ..... ............................. .... ............................. ......................................... ..... 78
• Function Buttons...................... ................................. ................................. ............................. ... 79
This exercise provides an overview of the functionality of the VIeC Job Submission Client.
To open or launch the VIeC Job Submission Client, in the lower-right task bar, right-click the VIeC
icon. When the menu appears, select Launch Job Submission Client.
The VIeC Job Submission Client is a manual job submission client for the VIeC Server. The VIeC Job
Submission Client submits to VIeC a VIPP
The two areas that are discussed in detail during the VI eCompose Workshop exercises are the Job
creation area and VIeC job status area. Refer to the illustration in this topic.
In the Job creation area at the top of the screen, you can select the data file and the options to
process the data file. The VIeC job status area in the lower half of the screen displays status
information about each job and updates as each job progresses.
®
data file with options for processing the data file.
The primary function of the VI eCompose Job Submission Client is to submit VIPP®data files for
processing by the VIeC Server. In most customer environments, the submission of data files to VIeC is
handled by the VIeC lpr client or the VIeC Watched Folder Client. Both clients can enable an
automated job submission workflow. The Job Submission Client is typically only used in the following
scenarios:
• During development to test the feature functions of VIeC
• In VIeC application development
Xerox®FreeFlow®VI eCompose
Workshop Guide
73
Page 74

Exercise 1: VIeC Job Submission Client Overview
• In circumstances where users want manual control over job submissions
The Job Submission client provides another important function: the Job submission client can create
VIeC Profiles. A VIeC Profile contains the list of processing options used to process the data file that is
submitted to the VIeC Server. When you select the VIeC Job Submission client window, then select
Save Profile, a VIeC Profile is created. The saved profile is assigned a user-defined name and
contains the current settings displayed in the VIeC Job Submission Client window. The data file path
is not saved in a VIeC Profile. A job submission client uses a VIeC Profile to assign processing options
automatically to the file being processed.
Tip: In Exercises 5 and 8 you create and use a VIeC Profile. For more information, refer to Job
parameters and profiles, found at the beginning of this document.
74
Xerox®FreeFlow®VI eCompose
Workshop Guide
Page 75

Exercise 1: VIeC Job Submission Client Overview
Job Creation Area
DDaattaa FFiillee
This option allows you to browse through the file system to select the VIPP®data file that will be
submitted to the VIeC Server. VIeC can process:
• Raw data files (without any VIPP
• VIPP
• VIeC container files, compressed VIPP
The data file and path in formation selected in this field is not saved in any profile file when the Save
Profile option is selected.
®
files containing the VIPP®start commands and the data to be processed
IInniitt ((NNuubb)) FFiillee
This option allows you to browse and select a previously defined file that contains the VIPP®start
commands necessary to process the data file selected in the Data File option described above. This
option will pre-append the start commands to the data file before submitting the file to the VIeC
processor. This option is only used if the data file does not contain VIPP
®
start commands, which can be added using the nub file option)
®
files containing all the required resources to run a job
®
start commands.
CCuurrrreenntt PPrrooffiillee
This is optional and will allow you to select a previously saved profile or create a new profile based on
the options currently selected in the Job Submission Client window. The Load Profile button will load
the currently selected profile and populate the Job Submission Client with the options in the profile.
The Save Profile option will save the currently displayed options. You will be asked to assign a name
when saving a profile. This field can be left blank. When left blank, the currently displayed options
shown in the Job Submission Client window will be used to process the selected data file.
JJoobb TTyyppee
VIeC can process a file in three ways. Two of which will be described here, and elsewhere in this
workshop.
Xerox
®
FreeFlow®VI eCompose
Workshop Guide
75
Page 76

Exercise 1: VIeC Job Submission Client Overview
Distill Only This will process the currently selected data file and
create a single PDF file containing all the data
records in the data file. When this option is selected,
the Output Filename Template and the Index File
Template options are ignored.
Distill and Split into Pages This option provides a powerful mechanism that can
be used to drive user defined processes upstream of
VIeC in the customer's workflow. This option enables
the data file to be split into individual PDF document
sets, based on the VIPP
℠
VIPP
template file (.dbm, .jdt, or .xjt). This creates a
PDF file at the logical job boundary. Each PDF
document can be variable in length. Which is totally
dependant on the VIPP
the VIPP
application. When this option is selected the Output
Filename Template and Index File Template options
ARE used. The default templates are displayed. These
can be modified and you will do this later in this
workshop.
Split into Pages For information on this option, refer to the FreeFlow
VI eCompose User Guide.
®
code being used to process the
®
BOOKMARK, coded in the
®
data being processed and
UUsseerr NNaammee
This option allows you to specify the User Name that will be used on the VIeC Server to process the
job. This is typically the logged on user.
JJoobb SSeerrvveerr
Allows you to select the tar get VIeC Server (See cluster and server configuration in the FreeFlow VI
eCompose User Guide).
OOuuttppuutt FFoollddeerr
This is where you select the destination folder for VIeC output. This can include VIeC generated
folders, PDF files and VIeC job status files. Default folders are created during install, including a
special bulk folder, which will be discussed later. The administrator can also add additional folders as
required.
PPrriinntteerr AAccttiioonn
This option is only available if the Printer for VIPP®Job Output option is selected. Choose to send the
data file to the printer identified in the option below:
• Only if VIeC reports a successful completion of the job
• Without regard to the reported VIeC status
76
Xerox®FreeFlow®VI eCompose
Workshop Guide
Page 77

PPrriinntteerr ffoorr VVIIPPPP®®JJoobb OOuuttppuutt
Exercise 1: VIeC Job Submission Client Overview
This setting provides a print path to a networked printer that needs to be available to the VIeC
Server. Ensure that the printer is VIPP
print the data file. Next, depending on the printer action selected, VIeC passes the DATA file, and not
the created PDF files, to the target print device. This action enables you to send a data file to VIeC to
create PDF output, and to a print device to print high quality output. Printing to a device includes any
finishing that is available on the print device.
®
-enabled and has access to all the VIPP®resources needed to
OOuuttppuutt FFiilleennaammee TTeemmppllaattee
This option (only available when the Job Type is set to Distill and Split into Pages or Split into Pages
Only defines how the individual PDF files generated by the split option (and the VIPP
command in the template files) will be named. If you are going to create 10,000 PDF files you
probably want some control over the naming conventions used. The Output Filename Template has
several built in templates you can select from or you can define your own template. You will use the
Output Filename Template later in this workshop.
®
BOOKMARK
IInnddeexx FFiillee TTeemmppllaattee
This option (only available when the Job Type is set to Distill and Split into Pages or Split into Pages
Only defines what information will be included in the index files (comma delimited and XML) that are
generated by VIeC. This is the header information and bookmark extraction information that will be
provided in the index files that can be used by the VIeC Dispatch module and other third party
processes to identify and locate a particular PDF file and to pass information from the record that
generated that PDF file. For example, if the VIPP
address information for that record, then the path to that PDF file and the name and email address
information could be passed to some upstream system such as an email server to email the PDF file
to that user. You will use the Index File Template later in this workshop.
®
BOOKMARK command included name and email
Xerox
®
FreeFlow®VI eCompose
Workshop Guide
77
Page 78

Exercise 1: VIeC Job Submission Client Overview
VIeC Job Status Area
The window at the bottom of the screen will display processing information about the jobs submitted
by the current user, including current status, pages distilled, pages split, and files created (if options
are selected).
78
Xerox®FreeFlow®VI eCompose
Workshop Guide
Page 79

Exercise 1: VIeC Job Submission Client Overview
Function Buttons
The buttons at the bottom of the screen provide control over what jobs are displayed in the window.
There is also a button to submit the data file selected in the Data File option, using the processing
options currently shown in the client window. When you click on the submit button the job will start
to process and will be displayed in the status window.
End of Exercise
This completes the overview of the Job Submission Client window. Now you will start to use these options to
process VIPP
®
jobs.
Xerox®FreeFlow®VI eCompose
Workshop Guide
79
Page 80

Exercise 1: VIeC Job Submission Client Overview
80
Xerox®FreeFlow®VI eCompose
Workshop Guide
Page 81

8
Exercise 2: Job Submission
This chapter contains:
• VPC Job Submission................................ ............................. .... ............................. ..................... 82
• Data File Job Submission ........................ .... ............................. ......................................... ......... 84
Exercise 2 is divided into two parts:
• VPC Job Submission
• Data File Job Submission
Both exercises use the Job Type option to create a single PDF file. The PDF file is created in the
default user directory, and contains images for all 20 records in the data file. You can scroll backward
and forward to review each PDF image in the file. The difference between the exercises is how the job
is submitted to the VIe C Server, using a VI Project Container file, or the vtpworkshop.dbf data file.
Xerox®FreeFlow®VI eCompose
Workshop Guide
81
Page 82

Exercise 2: Job Submission
VPC Job Submission
In this exercise, you process the vtpworkshop.vpc VI Project Container file. This exercise uses the
Distill Only job type option to create a single PDF file. The PDF file is created in the default user
directory. The single PDF file contains images for all 20 records. You can scroll backwards and
forwards to review each PDF image in the file.
To complete this exercise, follow these steps:
1. To launch the VIeC Job Submission Client, right-click the VIeC icon in the lower-right task bar.
When the pop-up menu appears, select Launch Job Submission Client.
2. To locate the data file, select Browse next to the Data File window. Scroll to the X:\Program
Files (x86)\Xerox\VIPP\xgfc\mislib directory, then locate the vtpworkshop.vpc file.
To select the file, select Open.
Tip: If you have problems locating the file, you can change the Files of Type setting to *.*.
3. Leave all other job settings unchanged. The default values are listed here. If the values shown on
your Job Submission Client are different than those described here, change the values to these
settings:
Init (Nub) File Empty
Current Profile Empty
User Name Set to the user name you defined during
installation
Output Folder Set to a folder called Default. This is the default
setting.
Job Server Set to local
Printers for VIPP Job Output Set to none
Output Filename Template Set to default. The default is the filename plus 6–
digit counter.
Index File Template Set to default value
Job Type Set to Distill Only. This setting creates a single PDF
file from the data.
4. To submit the data file, select Submit Job located at the bottom of the window.
The job appears in the status window. The job is named as follows:
User_name The logged on user shown in the User Name
window.
Job_Name The data filename
Date & time stamp The date and time the job was submitted.
After a few seconds, the information shown in the status window will indicate that the job
completed. The status information indicates that 20 pages were distilled, 0 pages were split, and
0 files were generated. The pages split and files generated counters are active only when the
Distill and Split into Pages job type is used. If the Distill Only job type is used, the counters
remain at zero.
82
Xerox®FreeFlow®VI eCompose
Workshop Guide
Page 83

Exercise 2: Job Submission
5. Next, locate the shortcut to the default folder on your desktop. This is the folder that contains the
subfolder containing the PDF file.
Alternatively, you can use your browser to scroll to the folder. On an XP system with VIeC
installed using the default settings, the folder is located at X:\Program Files (x86)\Xerox
\VIPP\xvtp\users\user_name\incoming\default, where X is the partition where the
VI eCompose software is installed.
In the default folder, there is a directory with the name based on the following:
user_name This is the current user
job_name This is the filename submitted
date/time stamp This is the time and date the job was processed by
the VIeC Server
6. Open the folder to display the PDF file. The PDF file in this case is named VTPworkshop.pdf. The
data file in the VI Project Container file was named vtpworkshop.dbf. VIeC defaulted to the name
of the data file and the .pdf extension. There is another folder named status and a VTPworkshop.
cfg file. VTPworkshop.cfg contains a list of the job options used to create the PDF file.
Tip: The status folder contains information about the job processing. If your job aborts, the
VI Compose error message is located in this folder.
7. Open the VTPworkshop.pdf file and view the PDF file. Scroll through the records.
8. As you scroll through the records, note that the PDF name does not reflect the Output Filename
Template setting of <DFNAME><DIGITS=6>.pdf.
Tip: When a data file is sent to the VIeC Server using the Distill Only job option, which
generates a single PDF file only, the VIeC Server uses the submitted data filename
VTPworkshop to name the PDF file. The Filename and Index templates are not used in this
mode.
9. Close the PDF file and exit the default folder. Select the Job Submission Client window to make
this the active window.
Xerox
®
FreeFlow®VI eCompose
Workshop Guide
83
Page 84

Exercise 2: Job Submission
Data File Job Submission
In the first part of this exercise you sent a VI Project Container file to the VIeC Server. The project file
was expanded, then the data file was processed. Expanding the resources adds extra overhead. What
if the project folder was installed in the VIPP
®
resource directory already?
In exercise 2-B you will submit only the vtpworkshop.dbf file, which is the data file, to the VIeC Server.
The job locates the VIPP
in the data file.
Only the data file and not all other job resources is sent, because all other resources already exist on
the server. For this reason, the file can process faster, because it does not need to expand the VI
project container file first.
1. First, look at the data file to see what you are about to submit to VIeC. Open the file, X:
\Program Files(x86)\Xerox\VIPP\xgfc\mislib\vtpworkshop.dbf with a text
editor such as Notepad, where X is the partition where the VI eCompose software is installed.
You will see an ASCII file that contains comma delimited data fields. The file contains 20 records
and contains the VIPP
%!
[(projects) (VTPworkshop)] SETPROJECT
QSTRIP_on
(,) SETDBSEP
(vtpworkshop.dbm) STARTDBM
Fname,Lname,Emailfield,Combo1,num1,num2
Data Records ..
®
resources in the directory location specified in the SETPROJECT command
®
start commands shown here:
When you have reviewed the data file, close it without changing anything.
2. To launch the VIeC Job Submission Client, right-click the VIeC icon in the lower-right task bar. If
the client is not already open, when the pop-up menu appears, select Launch Job Submission
Client.
3. To locate the data file, select Browse next to the Data File window.
The data file needed for this exercise is located in X:\Program Files(x86)\Xerox\VIPP
\xgfc\mislib, where X is the partition where the VI eCompose software is installed.The name
of the data file is vtpworkshop.dbf, which is the file you just reviewed. Highlight the file, then
select Open.
4. Leave all other job settings unchanged. To submit the data file, select Submit Job.
The information shown in the status window indicates that the job completed. The status
information shows that 20 pages were distilled, 0 pages were split, and 0 files were generated.
84
Xerox®FreeFlow®VI eCompose
Workshop Guide
Page 85

Exercise 2: Job Submission
5. Next, locate the shortcut to the default folder on your desktop. This is the folder that contains the
subfolder containing the PDF file.
Alternatively, you can use your browser to scroll to the folder. On an XP system with VIeC
installed using the default settings, the folder is located at X:\Program Files(x86)\Xerox
\VIPP\xvtp\users\user_name\incoming\default, where X is the partition where the
VI eCompose software is installed.
In the default directory, you now see two folders. The two folders look the same, but one has a
time stamp that shows a later time. The folder with the later time stamp is the folder you just
created with the submission of this data file.
Tip: Why is the creation of a time-stamped folder important?
• If VIeC did not add the date and time stamp as part of the file name, there would be
no way to tell the jobs apart. The system would overwrite the folder, or stop and wait
for an operator to acknowledge a prompt to overwrite the file. To avoid this result, VIeC
adds a date and time stamp as part of the folder name.
• This feature makes it possible to submit numerous files using the same data file name,
without the risk of overwriting folders or mixing PDF output. For example, a Web-based
interface can be configured to submit a data file called mydata.dbf. Because VI
eCompose creates a date and time-stamped folder name, each job submission can be
clearly identified.
6. Open the most recent folder to display and open VTPworkshop.pdf. As you scroll through the
records, notice that the PDF is the same as the PDF generated in Exercise 2-A. The difference is
that this file was created by the submission of the data file only.
7. Close the PDF file and exit the folder. Select the Job Submission Client window to make it active.
End of Exercise
Exercises 2-A and 2-B are complete. In the next exercise you use the Distill and Split into Pages job type.
Xerox®FreeFlow®VI eCompose
Workshop Guide
85
Page 86

Exercise 2: Job Submission
86
Xerox®FreeFlow®VI eCompose
Workshop Guide
Page 87

9
Exercise 3: Simple Job Submission
In Exercise 3, you use the Distill and Split into Pages Job Type option. You can see how using the
options changes the way VIeC produces the PDF files that are output. For VIeC to distill and split into
pages, a valid VIPP
file and the Distill and Split into Pages Job Type option. To complete this exercise, follow the steps in
this exercise.
1. If not already the active window, launch the VIeC Job Submission Client.
2. To locate the data file: X:\Program Files (x86)\Xerox\VIPP\xgfc\mislib
\vtpworkshop.dbf, where X is the partition where the VI eCompose software is installed.
Select the Browse button next to the Data File window.
3. In the Job Submission Client, change the Job Type setting from Distill Only to Distill and Split
into Pages. Leave all other job settings unchanged.
4. View the VIeC Log file. Viewing the log file is an optional step that would not be done in a
production environment unless there were troubleshooting issues to resolve. To view the log file,
in the task bar, double-click the VIeC icon. The VIeC Server Window opens. This window displays
the VIeC Log file that contains messages generated by the VIeC operation. You can save the log
file as a regular file and print the file as required. The options to save or clear the log file are
located under the File menu.
®
BOOKMARK is required in the VIPP®template file. In this case, select the .dbm
Move this window to one side so that you can view the window when you run a job. As you
submit the job, check this screen to view the log messages that appear.
Xerox®FreeFlow®VI eCompose
Workshop Guide
87
Page 88

Exercise 3: Simple Job Submission
5. To make the VIeC Job Submission window the active window, click VIeC Job Submission. To
submit the data file, select the Submit Job button.
The job appears in the status window. The job name is created from the User_name, job_name,
and a date and time stamp. The filename is the name of a folder created in the default directory
that contains the PDF file. When the job has finished processing, the status changes to complete.
Note the status window displays the amount of pages distilled. Because the Distill and Split into
Pages option was used, notice that a value of 20 is assigned to the Pages Split and 20 to the
files generated. The values show that the data file processed was split into 20 pages and into 20
separate files. Remember, in this application each record generates one page. If the application
created variable page PDF files, the number of pages in the split column would be higher than
the number of files created.
6. After the job has completed, you can review the directory that contains the PDF files. On your
desktop, locate the shortcut to the default folder. The folder contains the subfolder that contains
the PDF file.
You can scroll to that folder using your browser. On an XP system with VIeC installed, using the
default settings, the folder is located at X:\Program Files (x86)\Xerox\VIPP\xvtp
\users\user_name\incoming\default, where X is the partition where the VI eCompose
software is installed.
Note: When reviewing the default folder for the latest subfolder, because the names are
similar, you can sort by the date modified, or review the date and time stamp in the folder
name to identify the latest file.
7. To view the PDF files, open the latest folder. Notice a folder named status, a file called
VTPworkshop.cfg, and two new files called VTPworkshop.csv and VTPworkshop.xml. The two new
files are VIeC index files. The index files are generated when the Distill and Split into Pages Job
Type options are selected. The VIeC Server generates a comma-delimited (CSV) file and an XMLformatted index file. The index files provide a way for VIeC Dispatch and other third-party
processes to locate and use the PDF files generated. The test file contains only 20 records. In a
production run, you can expect a data file to create several thousand PDF files. The index file is a
vital part of VIeC.
Instead of a single PDF file, you have 21 PDF files. A master PDF file called VTPworkshop.pdf is a
20–page PDF file that contains the complete data file of 20 customer records. The other PDF files
use the naming convention specified by the Output Filename Template. The file is named using
the data file name and a six-digit counter as defined in the default template.
8. Open VTPworkshop000001 .pdf, then review the file. Note the PDF file is one page in length.
Open some of the other PDF files and note that they are all single-record PDF files. You have just
taken the original 20–record delimited data file, and by just selecting the Distill and Split into
Pages job type option, you created 20 individual customized PDF files, without making any
changes to the data file. VIeC acted on the VIPP
®
BOOKMARK command and split the PDF at the
logical record boundary.
9. Close the PDF file, then open the VTPworkshop.xml file. The XML index file contains the 20
records processed. This action is described later in more detail. When finished, close the XML
index file.
10. Open the VTPworkshop.csv file. The .csv file is the comma-delimited index file for the 20 records
processed. When finished, close the .csv file.
11. Close the folder, then select the Job Submission Client window to make it the active window.
88
Xerox®FreeFlow®VI eCompose
Workshop Guide
Page 89

Exercise 3: Simple Job Submission
End of Exercise
This completes Exercise 3. Go on to Exercise 4 to see how to use the Bulk Output Folder.
Xerox®FreeFlow®VI eCompose
Workshop Guide
89
Page 90

Exercise 3: Simple Job Submission
90
Xerox®FreeFlow®VI eCompose
Workshop Guide
Page 91

10
Exercise 4: Using the Bulk Output Folder
What if you had a program that every night swept a known folder and moved whatever files were in
that folder to another process such as an archive system? The fact that VIeC uses the date and time
in the name of the subfolder it creates makes it almost impossible to know the name of a folder. This
scenario is where the Bulk Output Folder comes into play.
When the bulk directory is selected as the Output Folder, the VIeC disables the creation of the dateand time-stamped subfolder, and deposits the PDF files directly into the folder named bulk, which is a
known folder location in VIeC. The bulk folder is generated during the default installation of VIeC
software.
The good news is that you know the location of the folder that contains the PDF files. The bad news
is that jobs that use the same data file name overwrite one another. So, if you use the Bulk Output
Folder, you have to understand the feature and use it appropriately. Even when each file name
submitted is unique, a problem can still occur.
Tip: The VIeC Dispatch module can be used as a better-featured alternative to the Bulk Output
Folder. When you use Dispatch, you can use a normal output folder and still start a process to
move the PDF files to a new location or upstream process. The Dispatch module is discussed
later in this workshop.
To see an overview of the Bulk Output Folder, follow these steps:
1. Launch the VIeC Job Submission Client.
2. To locate the data file, select the Browse button next to the Data File window. Select X:
\Program Files (x86)\Xerox\VIPP\xgfc\mislib\vtpworkshop.dbf, where X is
the partition where the VI eCompose software is installed.
3. Change the Job Type setting from Distill Only to Distill and Split into Pages.
4. Scroll the list of Output Folders, then select bulk.
5. To submit the data file, select the Submit Job button.
The job appears in the status window. When the job has finished processing, the status changes
to complete.
You can review the PDF file in two ways:
• You can click the shortcut that points to the incoming folder, then select the bulk folder.
• You can scroll to that folder using your browser. If default installation settings were used, the
folder is located at X:\Program Files (x86)\Xerox\VIPP\xvtp\users\user_
name\incoming\bulk, where X is the partition where the VI eCompose software is
installed.
6. To display the PDF files, open the bulk folder. There is no subfolder with the data file name, user
name, or a date and time stamp. Instead, all PDF files were dumped into the bulk directory. The
advantage of the Bulk Output Folder is that you know the location of the folder containing the
PDF files. The danger is that files of the same name overwrite each other, which is an important
point to remember if you use the Bulk Output Folder.
7. Close any open files and folders, then select the Job Submission Client Window.
Xerox®FreeFlow®VI eCompose
Workshop Guide
91
Page 92

Exercise 4: Using the Bulk Output Folder
End of Exercise
Go on to Exercise 5 to learn about Using the output Filename Template.
92
Xerox®FreeFlow®VI eCompose
Workshop Guide
Page 93

11
Exercise 5: Using the Output Filename Template
In the exercises you have completed so far, you have used VIeC default naming conventions for the
PDF files created. When using the Distill Only Job Type option, you have no control over the file
names. VIeC uses the data file name and a PDF extension. However, if you use the other Job Type
options, such as Distill and Split into Pages, VIeC allows you more control over the naming of the PDF
files created. For more control over PDF file naming, you can use the Output Filename Template.
Several predefined templates are available. Use the menu to select a template, or create your own
template.
In this exercise, you use the Output Filename Template to create a template that uses the first and
second fields from the VIPP
first and last name of the client. The PDF files generated are named using the first and last name
information passed from the BOOKMARK. More typically you would use an account number or other
unique field or combination of fields.
1. Launch the VIeC Job Submission Client.
2. To locate the data file, select the Browse button. The data file needed is X:\Program Files
(x86)\Xerox\VIPP\xgfc\mislib\vtpworkshop.dbf, where X is the partition where
the VI eCompose software is installed.
3. If the Job Type setting is not set, change the Job Type setting to Distill and Split into Pages.
4. Change the Output Folder to the default option.
5. To access the Output Filename template, click the Create Template button. The default naming
convention, <DFNAME><DIGITS=6> appears. The file name includes a six-digit counter, starting
from 000000. This default option has been used previously. In Exercise 2 PDF, files were created
using the data file name VTPWorkshop and an added a six-digit counter starting at 000000.
Beginning with the next step, you change the way VIeC names the PDF file by editing or creating
a new Output Filename Template.
6. To change the Output Filename <DFNAME><DIGITS=6>.pdf, select the Create Template button
to the right of the window. This action opens the Create an Output Filename Template window.
7. <DFNAME><DIGITS=6>.pdf appears in the top section of the window. Highlight the text
<DFNAME><DIGITS=6>, then delete the text. Leave just the .pdf extension.
®
BOOKMARK in the VIPP®job. The first and second fields contain the
8. To add the new Output Filename template, you can type the new syntax or use the built-in
syntax generator. Type the following syntax for the Output Filename Template:
<FS=' ^ '><BKMARK[F0]>_<BKMARK[F1]>.pdf
In the VIPP
to separate the various fields in the bookmark. This file is where those separator characters come
into play. From the BOOKMARK, select field 0 and field 1. Separate the two fields using the
underline character.
®
BOOKMARK command coded in the vtpworkshop.dbm file, the ^ character was used
Xerox®FreeFlow®VI eCompose
Workshop Guide
93
Page 94

Exercise 5: Using the Output Filename Template
9. When the Output Filename Template window displays
<FS=' ^ '><BKMARK[F0]>_<BKMARK[F1]>.pdf, to save the changes, select OK.
10. The current options should be saved as a VIeC Profile. This action enables the reuse of these
settings without having to retype everything. To save the options, select the Save Profile button.
11. For the profile name, type the name Exercise5, then select Save.
12. To submit the data file, select the Submit Job button. Watch the job status window to see the job
appear and the status change to Complete when finished.
13. To review the PDF files, open the shortcut that points to the incoming folder on your desktop, or
browse to X:\Program Files (x86)\Xerox\VIPP\xvtp\users\user_name
\incoming\default, where X is the partition where the VI eCompose software is installed.
In the default directory is a folder with the name User_name, jobname, date/time stamp. Open
this folder to display the PDF files. The folder contains all the same files as were seen in Exercise
3.
Notice that the names of the PDF files have changed because VIeC is using the new File Name
Template that you created. The file name is made up of the first two fields of the VIPP
®
Bookmark. The VIPP®BOOKMARK defined in the vtpworkshop.dbm contains values that are
concatenated by the Output Filename template. The result is a file name that includes the first
name, an underline character, and the last name fields. Using this technique, you can control the
naming conventions that VIeC uses to name the PDF files that it generates. This action allows
VIeC to produce a more meaningful file name.
14. Close the PDF file, then notice the files VTPWorkshop.xml and VTPWorkshop.csv. These are the
two index files that VIeC generates. Open the VTPWorkshop.xml file. The .xml file is easier to view
due in part to the large amount of data contained in the VIPP
®
BOOKMARK and coded in the
vtpworkshop.dbm file. Review the standard set of index fields that are generated automatically
by VIeC during a split operation. The file names, start and end times, and the path to the PDF file
are all included in the index file. Other processes can gain access to the individual PDF file
location. Later, you will see how to expand the number of fields in the index record by adding
additional data fields extracted from the VIPP
®
BOOKMARK.
15. Close all open files.
End of Exercise
This completes Exercise 5. Go to Exercise 6 to learn about VI Compose error conditions.
94
Xerox®FreeFlow®VI eCompose
Workshop Guide
Page 95

12
Exercise 6: VI Compose Error Condition
So far, all the jobs you have run have been created completely and without error. But what happens if
there is an error condition or the job aborts? This exercise generates an error condition and shows you
how to locate information that can help in troubleshooting the problem.
1. Open the Job Submission Client window.
2. Select the Browse option by the Data File Window.
3. Browse to and select the X:\Program Files(x86)\Xerox\VIPP\xgfc\mislib
\VTPWorkshop_error.dbf file, where X is the partition where the VI eCompose software is
installed.
4. Without changing any other options, select the Submit Job button to process the data file.
In this case, the data file contains an error. The job fails and a Failed Distill Error message
appears in the Job Status window.
No PDF file is created in this instance because the job failed. However, you can review error
messages.
5. Click the shortcut that points to the incoming folder created on your desktop during installation,
or browse to X:\Program Files (x86)\Xerox\VIPP\xvtp\users\user_name
\incoming\default, where X is the partition where the VI eCompose software is installed.
6. Open the VTPWorkshop folder that was just created. If you have trouble locating the folder, sort
by date and time. Inside this folder is a subfolder called status. Open the status folder. To view the
VI Compose error message, locate and open the job.failed file. In this case, the job was unable to
locate the file VTPWorkshop_error.dbm because the file does not exist.
7. To review the log file, in the task bar, double-click the VIeC icon. The VI eCompose Local Server
window opens. Scroll to the bottom of the file, then review the last few entries. If needed, select
the File menu, then save the log file to a file that can be emailed or printed for diagnostic
purposes.
8. Close all open windows, including the Job Submission Client window.
End of Exercise
Now that you know how to identify error conditions, go to Exercise 7 to learn about Watched Folder job
submissions.
Xerox®FreeFlow®VI eCompose
Workshop Guide
95
Page 96

Exercise 6: VI Compose Error Condition
96
Xerox®FreeFlow®VI eCompose
Workshop Guide
Page 97

13
Exercise 7: Watched Folder Job Submission
So far, you have used the Job Submission Client to submit jobs manually to VIeC. In this exercise, you
configure the Watched Folder Client. In a demonstration of how workflow can be automated, a data
file is dropped into a Watched Folder and the Watched Folder Client forwards the file automatically to
the VIeC Server to process.
Note: In addition to the Watched Folder Client, there is an lpr client that can receive data sent
to it from an lpr command and process that data file automatically on VIeC. For example, data
submitted from a host system. The lpr client is not discussed in this workshop, but is described
in the VI eCompose User Guide.
1. Start this exercise by creating the folder C:\VTP_Watched_Folder, if you have not already
created it. Use this folder as the VIeC Watched Folder.
2. To open the Watched Folder Client window, right-click the VIeC icon, then select Launch
Watched Folders Client.
If there is already a Watched Folder entry in the top window, highlight it, then select Delete. To
continue, answer OK.
3. To scroll through your file system to find the VTP_Watched_Folder folder that you just created,
select Browse. The path populates in the Watched Folder details area in the middle of the screen.
4. Assign a VIeC Profile to use to process all files processed by this Watched Folder. Use the scroll
bar by the profile option and select the Exercise5.pfl profile. The profile options are displayed in
the window shown.
5. To move this entry into the top window, select Add. This window lists all the Watched Folders
controlled by the Watch Folder Client.
Highlight the Watched Folder in the top window, then select the File menu option on the top bar.
Change the file disposition setting to Delete Input File. This allows the VIeC Client to delete the
data file after the client has passed the file onto the VIeC Server.
Note: If you do not set the disposition setting to Delete Input File, the other option, Move
Input Job to Saved Jobs Folder, saves a copy of the file in a saved folder that it creates in
the VTP_Watched_Folder. If you use the second option, there are housekeeping
considerations that you need to implement to ensure that you do not fill the disk with old
files.
6. Change the default File Ready Check value from the default value to 5.
7. Change the time interval that VIeC Client uses to look at the Watched Folder. For this exercise,
select a time between 5–10 seconds. Select Save Changes.
Note: Adjust both the file ready check and watch timer values for use in a production
system. The times should be based on reasonable intervals for your production system.
Xerox®FreeFlow®VI eCompose
Workshop Guide
97
Page 98

Exercise 7: Watched Folder Job Submission
8. To start the Watched Folder process, select Resume.
The status line at the bottom of the window provides the current status of the Watched Folder,
showing the Watch interval, File Check interval, and the text Watching Folders, which indicates
that the Watched Folder Client is waiting for data files to be dropped into the Watched Folder.
Note: To stop the VIeC Watched Client from watching the folder, select Pause. The status
changes to Not Watching Folders. Do not do this now. If you did, select Resume to
resume watching the folders.
The next few steps show how to open some windows that provide a visual indication that
something is happening. This is an automated process designed to work without operator
intervention. So no bells, whistles, or alarms sound. However, by opening two windows that would
not normally be open during production, you are able to trace the file through VIeC.
9. To trace your file, open the VIeC Local Server window and folder. These steps are not required in
a production environment.
VIeC Local Server window To open the VIeC Local Server window, in the
task bar, double-click the VIeC icon. To
confirm that the file has been processed, view
the VIeC Log file. The VIeC icon flashes red as
it processes a file.
C:\VTP_Watched_Folder
Open the file in Windows Explorer. In the next
step, drop a data file into this folder. By
having the folder open, you can see the VIeC
Client delete the file after the time interval
has passed and the client has passed the data
file to the VIeC Server for processing.
98
Xerox®FreeFlow®VI eCompose
Workshop Guide
Page 99

Exercise 7: Watched Folder Job Submission
10. Now that the Watched Folder is active, copy the X:\Program Files(x86)\Xerox\VIPP
\xgfc\mislib\vtpworkshop.dbf file and paste it into the C:\VTP_Watched_folder
folder, where X is the partition where the VI eCompose software is installed.
Keep watching both the VTP_Watched_Folder and the VIeC Local server window for indications
that something is happening.
When the time interval has expired, the job moves from the VTP_Watched_Folder and passes to
the VIeC Server. You can see the start of a job entry appear in the log file window when the client
passes the data file to the VIeC Server.
11. After the job has completed, change to the default output folder. A new folder has been created.
Check the date and time stamp in the folder name. To review the PDF files created, open the
folder.
The original data file was deleted from C:\VTP_Watched_folder. You set the disposition to
Delete. If you had set the disposition to Save, the data file would have been moved to the saved
folder located in the VTP_Watched_folder directory.
12. Close all open windows and exit the VIeC Job Submission Client.
13. For convenience sake, open the default output folder, delete all the subfolders, then close the
Output folder.
Note: By creating many Watched Folders, each assigned a different profile, you are in effect
creating several virtual printers, each one having different processing options applied.
End of Exercise
You have watched your folders. Now go on to manipulating Output Filenames and Index Templates in
Exercise 8.
Xerox®FreeFlow®VI eCompose
Workshop Guide
99
Page 100

Exercise 7: Watched Folder Job Submission
100
Xerox®FreeFlow®VI eCompose
Workshop Guide
 Loading...