

Page 1

r
o
t
Installation and
Setup Guide
en
raining
WebM
T
Versio n 2.1
Page 2

Copyright © 1999-2000 Xerox Corporation. All Right s Reserved.
Publication number: 613P08611
Copyright protection claimed includes all forms of matters of
copyrightable m aterials and information now allowed by statutory or
judicial la w or here inafter gr ant ed, inc luding wi thout l imitat ion, mat erial
generated from the sof tware pr ogr ams which are disp layed o n t he scre en
such as styles, templates, icons, screen displays, looks, etc.
XEROX®, The Document Company®, the stylized X, DataGlyph,
Document Centr e, CentreWare, DocuShare, PaperWare, are registered
trademarks and FlowPor t, Document Token, and DocuStamp are
trademarks of Xerox Corporation or its subsidiaries.
Adobe and Acrobat are registered trademarks of Adobe Systems,
Incorpora ted. Lotus, Lotusphere, and Lotus Not es are registered
trademarks and Notes and Domino are trademarks of Lotus C orporation.
Pagis and TextBridge are registered trademarks of ScanSoft, Inc.
Microsoft, Microsoft Windows, Microsoft Word, Microsoft Exchange,
Microsof t Internet Expl orer, Microsoft Offi ce, Imaging for Windows, MS,
MS-DOS, and Win d ow s are registered trademarks of Microsoft
Corporation. Netscape Navigator and Netscape Enterprise Server are
registered trademarks of Netscape Communications Corporation. HP,
PCL, and HP Deskjet are registered trademarks of Hewlett-Packard
Company. IBM is a registered trademark of International Business
Machines Corpor ati on. Java, Java Runtime Environm ent, JRE, Java
Archive, JAR, and Sun Solaris are trademarks or registered trademarks
of Sun Microsystem s, Inc. All other product names are trademarks/
tradenames of t h ei r respective owners.
Notice
WebM
WebM
Specificati ons des cribe d in t his pu bli cation ar e sub ject to change wi thout
notice. Use of some features may be limite d by your hardware or
software conf iguration. Contact your dealer or Xerox for detai ls.
T
T
ento
ento
ain
ain
r
r
r
r
g
g
in
in
November 2000
Page 3

Contents i
Chapter 1 Installing the FlowPort Server ................................. 1–1
FlowPort CD - ROM Contents......... ................ .......... ......... .... 1–2
FlowPort Sy s t em Requ irements............ ................. ......... ...... 1–3
Windows NT or Windows 2000 Server.......................... 1–4
Network Environment . .......... ................ .......... ......... .... 1–5
FlowPort Client Requirem ent s....... ................ .......... ......... .... 1–6
Optiona l Co mpon e n t s ... ......... .......... ................ .......... ........1–7
Microsoft Office ............................................................... 1–7
Repositories ..................................................................... 1–7
Performance Considerations....... ......... ................. ......... ...... 1–8
Server Port s......... ................ .......... ................................. .1–8
Web Browser...................................................................1–8
Installing FlowPort.............................................................. 1–9
Configuring FlowPort........................................................ 1–25
Xerox Document Centre Setup.......................................... 1–30
Internet Fax Machine Setup (Optional) ............................. 1–31
SMTP Server...... ................. ......... ......... ................. .... 1–31
POP3 Polling Server.................................................... 1–32
Repository Setup......... .......... ................ .......... ................ ..1–33
Domino............... ................ .......... ................ .......... ......1–33
Domino.Doc............... ................ .......... ................ .........1–34
Contents ❖ ii i
Page 4

iManage....................................................................... 1–35
To Set the iManage Environment Path........................1–35
Documentum................................................................1–36
PaperWare forms and Documentum ...........................1–37
Creating User Accounts..................................................... 1–38
Getting More Information.................................................1–39
Customer Support......................................................... 1–39
Uninstalling FlowPort........................................................ 1–40
To Stop the FlowPort Server:....................................... 1–40
To Uninstall the FlowPort Server:................................ 1–40
Appendix A Troubleshooting ...................................................... A–1
System Requi rements......... ................. ......... ................. ...... A–2
Installing FlowPort.............................................................. A–4
Configuring FlowPort..........................................................A–7
iv ❖ Xerox FlowPort Installation and Setup Guide
Page 5

Installing the FlowPort Server Chapter1
The purpose of this document is to provide an
experienced System Administrator with th e FlowPort
system requirements and instructions f or in stalling
FlowPort and its suite of server-based applications.
This chapter includes the following sections:
FlowPort CD - ROM Contents .......... ................. ......... .......... 1–2
FlowPort Sy s t em Requ irements ........... ................. ......... ..... 1–3
FlowPort Client Requirem ent s ......................... ......... .......... 1–6
Optiona l Co mpon e n t s ......... ......... ................. ......... .......... 1–7
Performance Considerations ........ ......... ................. ......... ... 1–8
Installing FlowPort ............................................................ 1–9
Configuring FlowPort ...................................................... 1–25
Xerox Document Centre Setup ........................................ 1–30
Internet Fax Machine Setup (Optional) ........................... 1–31
Repository Setup ........... ......... ................. ......... ............... 1–33
Creating User Accounts ................................................... 1–38
Getting More Information ............................................... 1–39
Uninstalling FlowPort ...................................................... 1–40
Chapte r 1: Installi ng the F lowP ort Ser ver ❖ 1–1
Page 6

FlowPort CD-R OM C onten ts
FlowPort CD-ROM Contents
The Flowport CD-RO M contains the following software
and documentation:
• FlowPort server software
• FlowPort documentation
— FlowPort Installation and Setup Guide (PDF)
— FlowPort User Guide (PDF)
— FlowPort Administrator Guide (PDF)
• JRE 1.2.2 (Java Runtime Environment)
• TextBridge Optica l Character Recognition software
• Adobe Acrobat Reader 4.05
Note: Textbridge OCR software is not available on the
FlowPort Trial CD.
1–2 ❖ Xero x F lowP ort I nst allat ion an d S etu p Guide
Page 7

FlowPort System Requirements
Before installing the FlowPort software, complete the
installation checklist below to determine that your Xerox
Document Cent re ST or Internet Fa x machine and
Windows (NT or 2000) server meet these requirements:
FlowPort Sys tem Re quirem ents
Xerox Document
Centre ST
Scan To File option
installed
Domain Naming
Syst em (DNS) host
name or static IP
address assigned:
_________________
TCP/IP-enabled
lpr-enabled
Note: For a list of Xerox Document Centre models
currently supported, go to the Xerox web site at:
h
ttp://www.xerox.com/flowport
or
Internet Fax
machine
TCP/IP-enabled
Domain Naming
System (DNS) host
name or static IP
address assigned:
_______________
Chapte r 1: Installi ng the F lowP ort Ser ver ❖ 1–3
Page 8

FlowPort Sy stem Req uireme nts
Windows NT or Windows 2000 Server
Microsoft Windows NT 4.0 Server with Service Pack 4,
5, or 6 (SP 6 is recommended for optimum
performance)
Microsoft Windows 2000 Server
Pentium II, III or Pentium Pro, 200 MHz or faster
128 MB RAM
420 MB free disk space
200-400 MB virtual memory
TCP/IP-enabled
Three IP ports: 21 and 25 required, 80 reco mmended
Domain Naming System (DNS) host name and static
IP address assigned:
host name: _____________________________________
IP address:______________________________________
To verify that the DNS hostname is correct, access th e
FlowPort server in a Web browser. You can use either the
IP address or the DNS hostname of the machine on
which t he FlowPort server is installed.
If using the hostname, verify that it is the DNS
hostname rather than a Windows NT networking name.
(The machine may be displayed in the Windows
Network Neighborhood under a n NT networking name,
which cannot be used to communicate with the
FlowPort server.) Perform the following steps to confirm
that the name is registered under DNS on the server.
Note: To look up the IP address in a DOS
window—enter the command : ipconfig /all
Caution: Be sure to use the DNS hostname rather
than Windows NT networking name.
1–4 ❖ Xero x F lowP ort I nst allat ion an d S etu p Guide
Page 9

FlowPort Sys tem Re quirem ents
Use the nslookup comma nd in Windows as follows:
A Open a DOS window
B At the DOS prompt, enter: nslookup DNS-hostname
If the hostname that you entered is registered , you will
receive a response with a Name (DNS name) plus an IP
Address. This means that you can use the fully qualified
hostname to access the FlowPort server in a Web
browser.
If the hostname is not registered, you will get a message
that the server cannot find it. Get the correct DNS name
(if there is one), or use the FlowPort server’s IP address
to access it.
Network access to a Xerox Document Centre S T, or
Internet Fax machine
No FTP or Email (such as Microsoft Exchange) service
running on the same server as FlowPor t
Network Environment
The following services can be provided anywhere on the
network:
SMTP mail host; for example, a Microsoft Exchan ge
server may be used as the ma il host
SMTP mail DNS host name or IP address:
______________________________________________
SMTP ema il func tions
Domain Naming System (DNS)
Optional (if not printing to a Xerox Do cument
Centre): PostScript Level 2 (or higher) or HP-PCL Level
3 (or high er) networked printer (must be T CP/IP- a nd
lpr-enabled)
Chapte r 1: Installi ng the F lowP ort Ser ver ❖ 1–5
Page 10

FlowPort Cl ient Require ment s
FlowPort Client Requirements
The FlowPort server is accessed through a Web browser. It
can be accessed on a ny platform that supports the
following:
Microsoft Internet Explorer 4.0, version 4.72 or later
or Netscape N avigator, version 4.5.1 or later
Viewer that supports multi-page TIFF email
attachments, such as Imaging for Windows or Pagis
2.06 Viewer
Note: A free Pagis 2.06 Viewer can be downloaded
from the Scansoft web site at:
h
ttp://www.scansoft.com/products.
1–6 ❖ Xero x F lowP ort I nst allat ion an d S etu p Guide
Page 11

Optional Components
Optiona l Comp onents
Microsoft Office
Repositories
If you plan to print Microsoft Office documents, you need
to install Microsoft Office on the FlowPort system.
FlowPort supports Office 97 or greater. FlowPort
Document Token and Documen t Catalog forms can be
used to print Microsoft Word, Excel, and PowerPoint
documents.
Note: Installing Microsoft Office before installing FlowPort is
recommended.
The FlowPort applicat ions, Document Ca talo g and
Document Token, require a repository to be installed on a
server. Repositories that are supported by FlowPort:
• Xerox DocuShare 2.2 (sto re and access)
• Microsoft Exchange Web Folder (store and access)
• Lotus Domino .Doc (store and access)
• Lotus Domino (store and access)
• FTP Directory (store and access)
• iManage (store and access)
• Documentum (store and access)
• Email to Microsoft Exch ange (store only)
• Email to Lotus Notes/Domino (store only)
Note: Refer to your repository documentation for server
requirements.
Chapte r 1: Installi ng the F lowP ort Ser ver ❖ 1–7
Page 12

Performan ce C ons idera tions
Performance Considerations
FlowPort server performance can be affected by software
running on the same host system. This section provides
information that maximi zes FlowPort server performance.
Server Ports
Web Browser
You can install FlowPort and repository software on the
same system; however, this will increase contention for
the
CPU. FlowPort operates its own Web server and
therefore requires a dedicated
(recommended). The repository HTTP port should be
configured with a differ en t valu e, such as port 90.
To improve performance when using N etscape Navigato r
on the same machine as the FlowPort server, you must set
Navigator's priority to Low:
Right-click the Windows NT taskbar and click Task
1
Manager.
Right-click netscape.exe.
2
Point to Set Priority and then click Low.
3
HTTP port such as port 80
1–8 ❖ Xero x F lowP ort I nst allat ion an d S etu p Guide
Page 13

Installing FlowPort
Installin g Flo wPort
Before you start, make sure you have Administrator
privileges for the server on which you are installing
FlowPort.
If you currently have FlowPort Release 1.0.x installed,
backup your FlowPort directory (which includes the user
data files and system files) before upgrading to the new
version of FlowPort.
To backup your existing FlowPort files, perform t he
following:
Stop the FlowPort service.
1
Note: Refer to the “Uninstalling FlowPort” section
to stop the FlowPort server.
Make a copy of the entire \FlowPort directory—by
2
default C:\Xerox\FlowPort.
Rename this directory and save it elsewhere on your
syste m . It contains a ll data an d s ystem f iles used by
FlowPort.
After your data files are backed up, install FlowPort
3
Release 2.x. Your old user data files will be upgraded so
that user a c c ounts and fo rm s do no t ne ed to be re-c reated.
Chapte r 1: Installi ng the F lowP ort Ser ver ❖ 1–9
Page 14

Installin g Flo wPor t
To install FlowPort:
Insert the FlowPort CD into the CD-ROM drive.
1
If the FlowPort installation program does not run
2
automatically:
A Double-click to open My Computer.
B Click the CD-ROM drive.
C Click setup.exe.
The FlowPort Installation welcome scree n displays.
1–10 ❖ Xerox FlowPort Ins tallation and Setup Guide
Page 15

Installin g Flo wPort
In the FlowPort Installation welcome screen, click In stall
3
FlowPort. The FlowPort Installation application screen
displays.
In the FlowPo r t I ns ta llation appli c at io n s c re en , install the
4
following applications:
A JRE 1.2.2 (Java Runtim e Environment). Follow the
onscreen instructions to complete the JRE installation.
B TextBridge Optical Character Recognition software.
Follow the onscreen instructions (for typical install) to
complete the TextBridge installation.
Note: Textbridge OCR software is not available on
the FlowPort Trial CD. The Install Textbridge
button is disabled.
C Adobe Acrobat Reader 4.05. Follow the onscreen
instructions to complete the Acrobat Reader
installation.
Chapter 1: I nstal ling t he FlowPo rt Se r ver ❖ 1– 11
Page 16

Installin g Flo wPor t
At the completion of the Acrobat Reader installation, click
5
Next to proceed to the FlowPort Configuration test
screen. Ru n ning the configuration teste r i s r ec o mm en ded.
Note: If you are upgrading the FlowPort server,
ensure that the server is stopped before running
the Configuration Tester. Refer to the
“Uninstalling FlowPort” section to stop the
FlowPort server.
In the FlowPort Conf igura tion te st screen , click Run
6
Configuration Tester.
Note: If you are installi ng FlowPort on a Windows
2000 Server, ensure that the Windows 2000
Virtual Server is stopped before running the
Configuration Tester. Refer to the Windows 2000
Server documentation to stop the server.
1–12 ❖ Xerox FlowPort Ins tallation and Setup Guide
Page 17
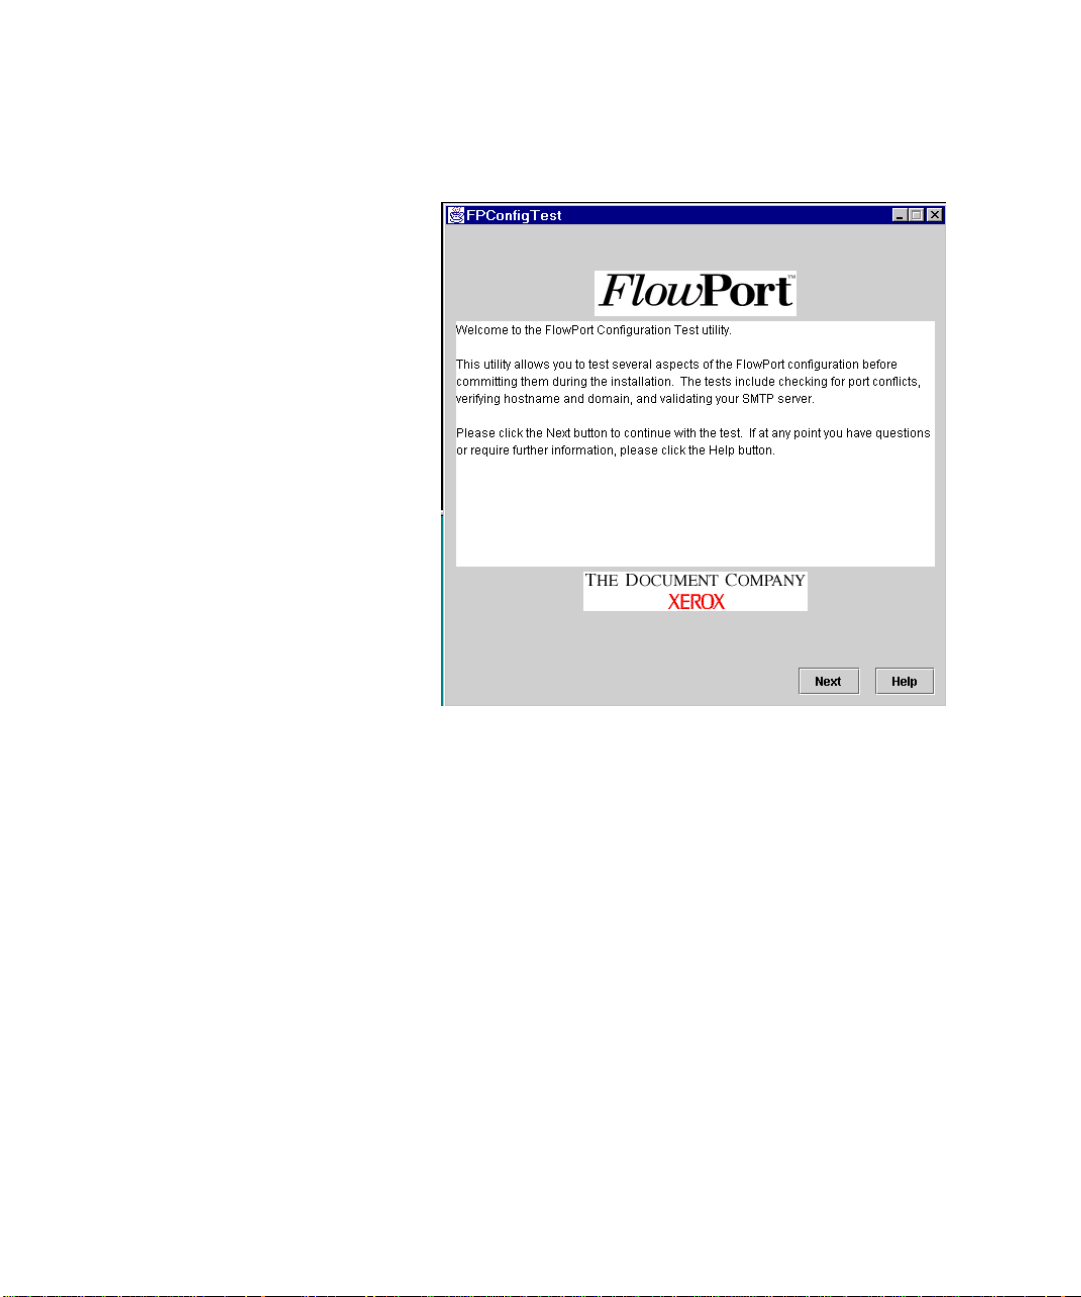
Installin g Flo wPort
The FlowPort Configuration Utility Welcome page
displays.
Chapter 1: I nstal ling t he FlowPo rt Se r ver ❖ 1– 13
Page 18

Installin g Flo wPor t
Click Next to c o ntinue wit h the test. The T est Prep a ra tion
7
page displays .
1–14 ❖ Xerox FlowPort Ins tallation and Setup Guide
Page 19

Installin g Flo wPort
Click Next to continue with the test. The Port Conflicts
8
Test page displa ys.
The FPConfig Test checks for port c o nflicts on Ports 21,
25, and 80.
Note: If port 80 is being used by the server, enter
an alternate port number for the FlowPort HTTP
port.
Enter the HT TP port nu mber or click Next to accept the
9
defa ult. The H ost and Domai n s creen displays .
Chapter 1: I nstal ling t he FlowPo rt Se r ver ❖ 1– 15
Page 20

Installin g Flo wPor t
adoc.xerox.com
Enter the hos tname and doma in.
10
1–16 ❖ Xerox FlowPort Ins tallation and Setup Guide
Page 21

Installin g Flo wPort
Click Next to continue to the SMTP server test screen.
11
Enter fully qualified name for the SMTP server.
12
Chapter 1: I nstal ling t he FlowPo rt Se r ver ❖ 1– 17
Page 22

Installin g Flo wPor t
Click Next to p roceed to the FPConfig Test Summary
13
screen.
1–18 ❖ Xerox FlowPort Ins tallation and Setup Guide
Page 23

Installin g Flo wPort
Click Test to start the port configuration test. At the
14
comp let ion of the configur at ion t ests, a status screen
displays.
Note: If a failure flag appears indicating a port
conflict, click the He lp button for information to
resolve the port conflict.
Click Finish to install Flow Port. The FlowPo rt Run
15
Conf iguration Test screen re-displa ys.
Chapter 1: I nstal ling t he FlowPo rt Se r ver ❖ 1– 19
Page 24

Installin g Flo wPor t
Click Next to p roceed to the Install FlowPort Server
16
screen.
1–20 ❖ Xerox FlowPort Ins tallation and Setup Guide
Page 25

Installin g Flo wPort
In the Install FlowPort Server screen, click Install
17
FlowPort Server. Follow the onscreen instructions to
complete the Flo wPort insta llati on.
Caution: Quit all Windows applications before
continuing with the FlowPort installa tion. F ailure
to quit applications can delet e th e data files.
If you are upgrading or re-installing FlowPort, you are
asked whether to pack and unpack your user data files so
that they can be used with the new version.
Note: If you intend to use your previous data files
with this new release, it is recommen ded that you
select the option to pack them now. Y o u will not be
able to pack your previous data files after the new
FlowPort server has been installed. Depending on
the size of your existing data files, this process can
take a long time.
The old user data files will be upgraded and unp acked.
Click OK to continue.
Chapter 1: I nstal ling t he FlowPo rt Se r ver ❖ 1– 21
Page 26

Installin g Flo wPor t
In the FlowPort Setup screen, follow the onscreen
18
instructions to verify the HTTP port number or accept the
default.
Note: When specifying the port number for the
HTTP server, be sure the port number is not in
use. The HTTP server is part of the FlowPort
server; you do not need a separate Web server to
run FlowPort.
Click Next to p roceed to the License Key Information
19
screen.
1–22 ❖ Xerox FlowPort Ins tallation and Setup Guide
Page 27

Installin g Flo wPort
The L icense Key Information screen provides Flo wPort
20
License K ey inf o r mat ion.
Click Yes to p roceed to the Enter License Key screen.
21
Chapter 1: I nstal ling t he FlowPo rt Se r ver ❖ 1– 23
Page 28

Installin g Flo wPor t
If available, enter the 16-character license key. If you click
22
Next without entering the license key, FlowPort will
install and operate as a trial version and expire after 60
days.
Note: To obtain a license key, contact your local
Xerox FlowPort repr esentative or go to the Xerox
web site at http://www.xerox.com/flowport for
additional information.
To upgrade from a FlowPort trial or to switch off
the 60-day tri al time limit on FlowPort , you must
run the FlowPort installation program from the
FlowPort CD-ROM to enter the license key,
reinstall FlowPort, and restart the server to set the
license key and the Textbridge OCR software.
Click Next to con tinue the Fl o wPort inst a llation. When
23
the F lowPo rt installa tion is complete, restart the
computer.
1–24 ❖ Xerox FlowPort Ins tallation and Setup Guide
Page 29

Configuring FlowPort
To configure the FlowPort ser ver on ce it is installed:
1
2
Configuring FlowPort
Open a Web browser, either on the same machine or on a
client work sta tion (refer to the Performanc e Conside r ations
section to set the browser priority).
In the Address (or Location) box, enter the server’s name.
For example, for a server named “astro,” and assuming
that th e FlowPort s erver is running on port 80, y o u wo uld
enter:
http://astro
The FlowPort Welcome page displays.
In the username box, type admin (the default for
3
FlowPort adm inistr a tor user na me).
Chapter 1: I nstal ling t he FlowPo rt Se r ver ❖ 1– 25
Page 30

Configuring FlowPort
In the password box, type 22222 (the default f or
4
FlowPort a dministra to r password).
Note: Refer to the Administrator online help or
Administrator Guide to change the administrator
account information.
Click Login. The Language Pack Installation screen
5
displays.
Note: This screen displays only if this is an initial
FlowPort installation.
Select and insta ll you r language option s . Continue to the
6
System Configuration page.
1–26 ❖ Xerox FlowPort Ins tallation and Setup Guide
Page 31

Configuring FlowPort
On the System Configuration page, enter the
7
information required for your site.
Note: For more information about an option, click
on the option’s hyperlink to open a Help window.
Click the option’s
hyperlink to open a Help
window.
Click the Apply button.
8
Click th e Continue button. The Install Application Suite
9
page lists all the available applications and services. All
applications and services are checked (default) to be
installed.
Chapter 1: I nstal ling t he FlowPo rt Se r ver ❖ 1– 27
Page 32

Configuring FlowPort
Click the Install Applications and Services Now button.
10
Note: Refer to the Administrator online help or
Administrator Guide to configure applications,
services, o r both.
1–28 ❖ Xerox FlowPort Ins tallation and Setup Guide
Page 33

Configuring FlowPort
On the Loading Applications and Services page, click
11
the Continue button.
Note: Depending on the size of the application and
service files, this process can take several minutes.
On the Administrator Email Confirmation page, click
12
the Continue button to send a confirmation of the
installation to the FlowPort administrator.
Click Continue.
13
Click the logout link.
14
Chapter 1: I nstal ling t he FlowPo rt Se r ver ❖ 1– 29
Page 34

Xerox D ocu ment Cen tre Setu p
Xerox Document Centre Setup
If you have a Xerox Document Centre, go to the Xerox
web site at
setup documentatio n for your Document Centre.
Note: If you do not have a Xerox Document Centre, continue
to the Internet Fax Machine Setup.
Two sets of instructions are provided in each D ocument
Centre setup docume ntation:
• FlowPor t without CentreWare Scanning
Services—Refer to this section if the FlowPort server is
your only Document C en tre scanning solution.
• FlowPort with CentreWare Scanning Services—Refer
to this section if you have already installed Xerox
CentreWare
http://www.xerox.com/flowport to download the
Scanning Services f or use at your site.
1–30 ❖ Xerox FlowPort Ins tallation and Setup Guide
Page 35

Intern et Fax Mach ine Setu p (Optio nal)
Internet Fax Machine Setup (Optional)
FlowPort is an SMTP (Simple Mail T ransfer Protocol) direct
mail system but can be configured to work with the POP3
(Post Office Protocol) polling mail system. To use an
Internet Fax machine as an input and output device for
FlowPort, you must make configuration settings if using
either an SMTP server or a POP3 polling server.
SMTP Server
The FlowPor t SMT P option directly manages the Internet
FAX mailboxes through the hostname an d user name
mailboxes that are configured for FlowPort.
To complete the F lowPort SMTP conf iguration, you need
the fol lowing i nformati on fr om your Inf ormati on Syste ms
(IS) administrator:
•DNS hostname
• DNS domain name
• Static IP address
In addition to the FlowPort conf iguration, you need to
configure the Internet Fax machine.
• Assign a speed dial number or use an alternate method
to specify the FlowPort server’s Internet Fax address.
For example:
FlowPort@FlowPortserver-hostname.domain
The FlowPortserver-hostname is a name assigned to the
FlowPort s e rver t h at r e ce iv es Internet f axes . By d ef a ult ,
it is the DNS name of the machine running the
FlowPort server. Depending on your mail server, your
Information Systems administra tor may need to
customize the server in o rder to h ave incomin g
Internet faxes forwarded to the Flo wPort server. See
your IS administrator.
Chapter 1: I nstal ling t he FlowPo rt Se r ver ❖ 1– 31
Page 36

Internet Fax M ac hine Setu p (O ptio nal)
Note: If incoming faxes are sent to an address other than
FlowPort@FlowPortserver-hostname.domain, you must enter
this address in the Interne t Fax Receive Serv ice conf iguratio n
page in order for outgoing Internet faxes to show this address.
For more information about addressing for incoming Internet
faxes, login to the FlowPort Web Centre as admin; click the
Applications button; under Configure Applications and
Services, click the Internet Fax Receive Service link; and
click th e help link.
• Set the “from” address to an Internet Fax mailbox that
prints incoming Internet Faxes on the Internet Fax
machine.
• Set the resolution to the “Super Fine ” setting for yo ur
Internet Fax machine (Super Fine is 200 x 200 dots per
inch or greater).
POP3 Polling Server
The FlowPort POP3 option continually polls the re mote
mailbox server that mana ges user m ailbox es. T his o ption
requires a Type MX re cord listed in the D NS services table,
which can be verified by yo ur I nf ormation Systems
administrator.
To complete the FlowPort con fig urat ion for a PO P3 mail
server, have your Information System s administrator
create a FlowPort mail account and enter the f ollo w ing
FlowPort information to the mail server for each new
user:
• Hostname of the POP3 mailbox server
• User name for the PO P 3 mailbox account
• User password for the mailbox
1–32 ❖ Xerox FlowPort Ins tallation and Setup Guide
Page 37

Repository Setup
Repository Setup
During installation, the FlowPort server is c onfig ured to
support multiple repositories (refer to Optional
Components). This section provides additional
configuration instructions for the following repositories.
•Domino
•Domino.Doc
•iManage
•Documentum
Note: FlowPort, functioning as a cl ient to a r epository , may use
a client license token allocated for clients of the repository.
Domino
This repository allows users to store documents in a Lotus
Domino repository on the network. Domino supports
both writing and readin g by FlowPort. Users can store
documents and also a ccess (retrieve) stored documents
from a Domino repository via Document Tokens and
Document Catalogs. Document properties, selected by the
user via a checkbox on a P aperWare form, are stored with
the doc ument.
To use FlowPort with Domino , you must perform the
following procedure.
Install the Lotus Notes 5.0 client software onto the
1
FlowPort server.
Note: For details installing Lotus Notes client
software, refer to the Lotus Notes documentation.
Chapter 1: I nstal ling t he FlowPo rt Se r ver ❖ 1– 33
Page 38

Reposito ry Se tup
From the Lotus Notes directory, copy the NCSO.jar to the
2
FlowPort directory C:\Xerox\Flo wPort\ Imp ortJars.
Note: Lotus Notes directory—
C:\Lotus\Notes\data\domino\java\NSCO.jar.
If you installed Lotus Notes to a different
directory, replace C:\Lotus\Notes with your Lotus
directory nam e.
Domino.Doc
This repository allows users to store documents in a Lotus
Domino.Doc repository on the network. Domino.Doc
supports both writing and reading by FlowPort. Users can
store documents and also access (retrieve) stored
documents from a Domino.Doc repository via Document
Tokens and Do cument Catalogs. Document properties,
selected by the user via a check bo x on a P aperWare form,
are stored with the document.
T o use FlowPort with Domino.Doc, you must perform the
following procedure.
Login to your Domino.Doc server, using the URL for a
1
Domino.Doc librar y provided by your Domino.Doc
system administrator. An example URL:
http://somewhere.com/domdoc/
DominoDoc1Lib.nsf?Opendatabase
Enter your Domino .Doc user name a nd password when
2
requested.
Click Library administration.
3
Click Download Client Software.
4
Click to accept the "Lotus software agreement," and select
5
the ddsetup.exe ico n.
Save the file to the FlowPort server m achine.
6
Once the d o wnlo ad is com pleted, inst all ddesetup.exe on
7
the FlowPort server machine.
When prompted, se le c t Custo m installa tion.
8
1–34 ❖ Xerox FlowPort Ins tallation and Setup Guide
Page 39

For Type of installation, select API Install.
9
Follow the onscreen instructions to complete the
10
installation.
Repository Setup
iManage
This repository allows users to store FlowPort docu ments
in an iManage reposito ry on the network. iM anage
supports both writing and reading by FlowPort. Users can
store documents and also access (retrieve) stored
documents from an iManage repository via Document
Tokens and Do cument Catalogs. Document properties,
selected by the user via a check bo x on a P aperWare form,
are stored with the document.
After installing FlowPort, you must perform the following
steps in order to use iManage with FlowPort.
Inse rt the iMa nage CD into the server’s CD-ROM driv e.
1
If the iManage CD installation program does not run
2
automatically:
A Double-click to open My Computer.
B Click the CD-R OM drive.
C Click setup.exe.
Follow the onscr een in s tructions to inst all on ly the
3
minimum configuration from the iManage CD-ROM.
When prompted, deselect any iManage options that are
listed.
Note: For installation details, refer to the iManage
Administration Manual for details.
Note: Selecting and installing iManage options
can cause conflict or errors with the FlowPort
server.
To Set the iManage Environment Path
On the FlowPort Wind ow s NT work station, click the Start
1
button, select Settings, a nd c lic k Control Panel.
Double-click System and click the Environment tab.
2
Chapter 1: I nstal ling t he FlowPo rt Se r ver ❖ 1– 35
Page 40

Reposito ry Se tup
From the System Variables list, select th e v ariable Path.
3
Add C:\Program Files\iManage to the end of the Path
4
value.
Note: If you installed iManage to a different directory,
replace C:\Program Files\iManage with your
iManage directory name.
Documentum
This repository allows users to store docum en ts in a
Documentum repository on the network. Documentum
supports both writing and reading by FlowPort. Users can
store documents and also access (retrieve) stored
documents from a Documentum repository via
Document Tokens and Documen t C atalogs. Document
properties, selected by the user via a checkbox on a
PaperWare form, are stored with the document.
After installing FlowPort, you must perform the steps
below in order to use Documentum with FlowPort.
Insert the Documentum CD into the server’s CD-ROM
1
drive.
If the Documentum CD installation program does not run
2
automatically:
A Double-click to open My Computer.
B Click the CD-R OM drive.
C Click setup.exe.
Follow the onscr een in s tructions to inst all on ly the
3
minimum configuration from the Documentum
CD-ROM. When prompted, deselect any Documentum
options that are listed.
Note: For i n stallation details, refer to the
Documentum Administration Manual for details.
Note: Selecting and installing Documentum
options can cause conflict or errors with the
FlowPort server.
1–36 ❖ Xerox FlowPort Ins tallation and Setup Guide
Page 41

Repository Setup
When prompted for the D o c Brok er config uration, enter
4
the m a c hine ho s t name (D NS) for the server running th e
Documentu m Do c Broker.
Follow the onscreen instructions to complete the
5
installation.
PaperWare forms and Documentum
To create avFlow P ort P aperWare form, Documentum
requires an Object ID. To allow your FlowPort users to
identify the Documen tum O bje ct ID, you need to install
the FlowPort resource file, flowpor t.vrf, to the
Documentum ser ver or to e ach FlowPort user’s system.
The virtual re s ource file, flowport.vrf, can be
downloaded from the Xerox FlowPort web site at:
http://www.xerox.com/flowport
Chapter 1: I nstal ling t he FlowPo rt Se r ver ❖ 1– 37
Page 42

Creating User Accounts
Creating User Accounts
To enable a user to ac cess the FlowPort server through a
Web browser, you must create a FlowPort user account.
To create a user account:
In your Web browser’s Address (or Location) box, enter
1
the server’s name. For example, for a serv er named
“astro,” and assuming that the FlowPort server is running
on port 80, you would type:
http://astro
The FlowPort Welcome page displays.
In the username box, type admin.
2
In the password box, type 22222.
3
Click LOGIN.
4
Click the Users button.
5
Click the Add New User link.
6
On the Add New User page, enter the following required
7
information:
User Name: Name used to login to the FlowPort server.
Email Address: User’s email address.
Default Printer: The printer or Internet Fax device on
which the user prints PaperWare forms, or the email
address to use when emailing PaperWare forms.
Printer Type: Type of device selected as the default
printer.
Click the Submit button.
8
Note: You can enter any non-required i nformation
at this time. If you need more information about
an option, click the option’s link.
Click Continue to set up the user's applications.
9
1–38 ❖ Xerox FlowPort Ins tallation and Setup Guide
Page 43

On the User Profile page, select the appropriate
10
application option for the user.
A If the user is to receive Internet Faxes, select Inte rnet
Fax Mailbox to specify the Internet Fax options.
B If the user will be tracking FlowPort usage, select
Network Accounting to set DocuCentre accounting.
For more information, click the help link.
Click OK. FlowPort sends an email messag e to the new
11
user that explains how to get started using FlowPort and
provides your email a ddr es s .
Getting More Information
When you login as “admin,” click the help link located in
the up p er right corner to open on line help for the
FlowPort administrator.
• For an introduction, refer to the following two sections
“Introducing FlowPort” and “Getting Started.”
Getting M ore Informa tion
Customer Support
See “Opening the online Administrator Guide” to
open the FlowPort Administrator Guide in PDF format.
• In the FlowPort administrator’s Web interface, many
text boxes have hyperlink ti tles. Click a link to get
more information.
When a user logs in to the FlowPort Web Centre, the
FlowPort user interface displays. Users can click the help
link in this interface to open online help about FlowPort
user tasks.
If you have questions or problems installing and setting
up FlowPort, you can contact FlowPort customer support
at the telephone number listed in the FlowPort web site.
http://www.xerox.com/flowport
Chapter 1: I nstal ling t he FlowPo rt Se r ver ❖ 1– 39
Page 44

Uninstalling FlowPort
Uninstalling FlowPort
Note: Before uninstalling, decide whether you want to
transport and use your database with any new version of
FlowPort that you install.
If you intend to transport your database, it is recommended
that you do not perform the uni nstal l steps, but install ove r th e
previous version of FlowPort. When the installation program
prompts for the option to pack and transport your old
database, s elect Yes. To install over a previous version of
FlowPort, see the “Installing FlowPort” section.
To Stop the FlowPort Server:
On the FlowPort Wind ow s NT work station, click the Start
1
button, point to Settings, and click Control Panel.
Double-click Services.
2
Select FlowPort Server and click Stop to stop the
3
FlowPort Server.
Close the Services window.
4
To Uninstall the FlowPort Server:
On the FlowPort Wind ow s NT work station, click the Start
1
button, select Settings, a nd c lic k Control Panel.
Double-click Services.
2
Select FlowPort Server and click on Stop to stop the
3
FlowPort Server.
Close the Services window.
4
Double-click Add/Remove Programs.
5
Select FlowPort Server and click Add/Remove.
6
Click OK to confirm.
7
1–40 ❖ Xerox FlowPort Ins tallation and Setup Guide
Page 45

Uninstal ling F low Port
On the FlowPort Wind ow s NT work station, click the Start
8
button, select Settings, a nd c lic k Pri nters.
Select and delete the FlowPort TIFF printer.
9
Reboot the system.
10
Chapter 1: I nstal ling t he FlowPo rt Se r ver ❖ 1– 41
Page 46

Uninstalling FlowPort
1–42 ❖ Xerox FlowPort Ins tallation and Setup Guide
Page 47

Troubleshooting Appendix A
This appendix provides information f or trouble shooting
problems you may encoun ter whe n inst alling and
configuring FlowPort.
This appendix includes the following:
System Requi rements......... ................. ......... ................. ..... A–2
Installing FlowPort............................................................. A–4
Configuring FlowPort......................................................... A–7
Appendix A: Troubleshooting ❖ A–1
Page 48

System R equire ment s
System Requirements
The following section provides system requirements that
may affect properly installing and co nfiguring FlowPort.
System Requirement Resolution
About the NT Server To view server informat io n, such as hostnam e or net work s etup, pe rform
the followi ng:
1. Open a DOS co m ma nd wi ndow.
2. Enter ipconfig/all.
If you know the I P addre ss , you can fi nd the serv er’s name by enter the IP
address from the ipconfig/all window.
If you know the NT server name, you can find the server’s IP address by
entering the name from the ipconfig/all window.
DNS Hostname FlowPort c an r un wit hout a DNS hos tna me, but th e Flow Port Inte rnet Fax
Print and Store application cannot. Also, if the IP address of the FlowPort
server machine were to ch ange, all FlowPort PaperWare forms would be
invalid if there is no DNS name.
To verify that the DNS hostname is correct, access the FlowPort server in
a Web browser. You can use either the IP address or the DNS hostname
of the machine on which the FlowPort server is installed.
If using the hostname, verify th at it is the DNS h ostname rather than a
Windows NT networki ng nam e. (The machine may be displayed in the
Windows Network Neighbor hoo d under an NT net working na me, whi ch
cannot be used to com m unicate with the Flo wP ort server.) Follow the
steps below to confirm that the name is registered under DNS on the
server.
Use the nslookup command in Windows as follows :
1. Open a DOS window.
2. At the DOS prompt, type: nslookup DNS-hostname.
3. Press RETURN.
If the host nam e that you entered is registered, you wi ll receive a
respo nse with a Name (DNS name) plus IP Address. This means that you
can use the fu ll y qualified hostname to access the FlowPort server in a
Web browser.
If the hostname is not registered, you will get a message that the server
cannot find it. Get the correct DNS name (if there is one), or use the
FlowPort server machin e’s IP address to access it.
A–2 ❖ Xerox FlowPort Installation and Setup Guide
Page 49

System Requirements
System Requirement Resolution
Static IP Addressing You should not use Dynamic Host Configuration Protocol (DHCP) to
assign an IP addres s to your NT ser ver. DHCP may reassign a ma chi ne’s IP
addres s aft er rebo oti ng. Thi s in val idat es a ny P aperW ar e for ms c reat ed on
FlowPort . Therefore, a static IP address is required in ord er to run
FlowPort.
Checking Ports In the DOS command window, enter NETST AT -a | more to check which
ports are i n use by the server.
Machine Ports Befor e inst al ling Flow Port, you should d is able or rem ove an y SM TP ser ver
(or service) you are running on the machine. FlowPort requires that port
25 be available since it cannot run on the same machine as a separate
mail serv e r.
You should also disable or remove any FTP server (or service) you are
running on the machine. FlowPort includes an FTP server which runs by
default on port 21.
If you receive an error regarding an HTTP port in use, you mus t change
the port that t he Microsoft Internet Informati on Server (IIS) runs on, or
re-install FlowPort to another port. If you must keep II S on the NT serve r,
the IIS FTP server and mail server components must be disabled. The IIS
HTTP Web server must be assigned to a port other than the HTTP port
used by FlowPort (default, port 80).
Scan-to-Fi l e Option Check the Docu me nt Centre Touch Screen display. If there is a Scan Tab,
then Scan-to-File is enabled.
Appendix A: Troubleshooting ❖ A–3
Page 50

Installin g Flo wPor t
Installing FlowPort
The following section describes solutions to some
common problems you may encounter when insta lling
FlowPort.
FlowPort In stall ati on Resolution
FlowPort Installation Order Install ing FlowPort on a new system should be done in the follow ing
order:
1. Document Centre
2. DocuShare
3. FlowPort
FlowPort Fails to Run If the FlowPort Welcome/Login page in your browser does not display,
the FlowPort server is not running.
There is a possibility that a po rt problem i s preventing the server to start.
Perfo rm th e follo w i ng to chec k the serv er stat u s:
1. Go to C:\Xerox\FlowPort\Logs\AdminN.log.
2. Inspect the log for lines that indicate a port conflict or another
reason for failure.
Example:
“System shutting down: UNABLE TO START HTTP SERVER ON PORT
80. Perhaps some other Web server is using port 80.”
3. Change the services to another port or re-install FlowPort to
another port.
A–4 ❖ Xerox FlowPort Installation and Setup Guide
Page 51

FlowPort In stall ati on Resolution
Installin g Flo wPort
FlowPort Fails to Run: HTTP
Port Conflict
FlowPort Fails to Run: SMTP
Service Conflict
The Flow P o rt server is not able to st ar t—the log file indic at e s th a t i t is
unable to st art the HTTP server on port 80.
The most common reason is that Microsoft Internet Information Server
(IIS) is already running on port 80 (or FlowPort is installed on the same
serve r as Do cuSha re).
Perfo rm th e follo w i ng to chec k the serv er stat u s:
1. Go to C:\Xerox\FlowPort\Logs\AdminN.log.
2. Inspect the log for lines that indicate a port conflict or another
reason for failure.
Example:
“System shutting down: UNABLE TO START HTTP SERVER ON PORT
80. Perhaps some other Web Server is using port 80.”
3. Change the services to another port or re-install FlowPort to
another port.
Note: The IIS server includes three possible components. If the IIS
must be kept on the NT server, the IIS FTP server and mail server
components must be disabled. The IIS HTTP Web server must be
assigned to a port other than the HTTP port used by FlowPort
(default is port 80).
The FlowPort server is not able to start—t he log file displays a message
that TCP port 25 is be ing used. FlowPort r equires that port 25 be
availabl e. It ca nnot run on the same machine as a sepa ra te mai l serve r as
port conf licts may res ult.
Perfo rm th e follo w i ng to chec k the serv er stat u s:
1. Go to C:\Xerox\FlowPort\Logs\AdminN.log.
2. Inspect the log for lines that indicate a port conflict or another
reason for failure.
Example:
“The Internet Fax service was unable to start up because some other
SMTP mail server is running on this machine and using TCP port 25.”
3. Disable or remove any SMTP server (or service) that is running on
the machine.
Appendix A: Troubleshooting ❖ A–5
Page 52

Installin g Flo wPor t
FlowPort In stall ati on Resolution
FlowPort Fails to Run: NSA
Server Fails
The FlowPort server is not able to start—t he log file displays a message
that the NSA se rver has failed. FlowPort inc ludes an FTP server which
runs by default on port 21. It cannot run on a machi ne w here another
FTP server is running as port confl icts may result .
Perfo rm th e follo w i ng to chec k the serv er stat u s:
1. Go to C:\Xerox\FlowPort\Logs\AdminN.log.
2. Inspect the log for lines that indicate a port conflict or another
reason for failure.
Example:
“System shutting down: NSA Server failed.”
3. Disable or remove any FTP server (or service) that is running on
the machine
A–6 ❖ Xerox FlowPort Installation and Setup Guide
Page 53

Configuring FlowPort
Configuring FlowPort
The following section describes solutions to some
common problems you may encounter when configuring
FlowPort.
FlowPort Configuratio n Resolution
Mail Host Errors I f you receive an error when specifying the name of your mail server,
then you need to use the fully qualified hos tname of the server. The fully
qualified hostname includes the main serve r nam e, as well as the
hostname. For example:
mailserve r-1.goodcompany.com
See your system administrator if you do not know the fully qualified
hostname of your mail server.
LPR-enabled Document Centre You need to enable LPR on the Document Centre. An IP address or
preferably, a DNS address is necessary to enable LPR printing.
To check if LPR is enabled, perform the following st eps:
1. On the Document Centre, press the Machine Status button.
2. On the LCD Touch Screen, press the Reports and Counters tab.
3. Press Reports, then press Printer Configuration.
4. Press Start.
A configuration report is pri nted. Look under “Line Printer Daemon” to
see if the sta tus is “Enabled”.
To enable LPR, see the Reference Guide, Setup Gui de, or online System
Administration Manual for your spec ific Document Centre m odel.
Appendix A: Troubleshooting ❖ A–7
Page 54

Configuring FlowPort
FlowPort Configuratio n Resolution
Microsoft Office Document
Printing
If there is a problem printing Microsoft documents, it is possi ble that on
Windows NT 4.0 servers, long dir ectory paths (t hose that contain spaces
and directory names longer than 8 characters) may conflict with other
directories on the same or a different drive.
Note: If Microsoft Office is already installed on the server on which
FlowPort is installed, uninstall and reins tall Offi c e to the dir ec tory
path names using the following install procedure.
Install Microsoft Office on the FlowPort server machine, using the
following conventions:
• The directory path to which you install Office cannot contain any
spaces.
• Each directory name in the path must contain eight characters or
less.
For example, the following installation paths are invalid:
C:\Program Files\Microsoft Office\Office
incorrect: contains spaces and directory names are too long
C:\Program Files\MicrosoftOffice\Office)
incorrect: directory names are too long
C:\Program\MS Stuff\Office
incorrect: contains a space in the directory name
These installation paths are valid:
C:\Program\MSO ffice\Office
C:\MSOffice
C:\Office
Note: For more information, see the Microsoft Knowledge Base
article, Q185 126 Bug: Error 429 “ActiveX Component Can ’t
Create Object” on NT. Article available on Microsoft Web site,
http://www.microsoft.com.
Locked Scanning Administrators: The Document Centre scan template may not work or
may stop working if a template pool was not pr operly set up prio r to
creating the FlowPort scan template. This step must be performed in
order to create scan templates successfully.
For more information about setti ng a template pool, see the Document
Centre (CentreWare) online documentation, or the “FlowPort Without
CentreWare Scanning Services” sections in the FlowPort Installation and
Setup G uide appendices.
Users: See your FlowPort administrator.
A–8 ❖ Xerox FlowPort Installation and Setup Guide
Page 55

Configuring FlowPort
FlowPort Configuratio n Resolution
Proxy Host for FlowPort It is not necessary to specif y a Proxy Host (on the System page of the
adminis trato r’s web interface ) unl ess you expec t Flow Port user s to acces s
DocuSha re co lle ct io n s lo c at e d out s id e yo u r company int ra n et . If a ll
DocuShar e collections are w ithin your company fir ewall, do not specify a
Proxy Host.
Specifying a proxy can impact FlowPort perform ance and can hinder
proper au t he ntication of Pa p e rWa re fo rms that are en tered at a remote
FlowPort server .
Appendix A: Troubleshooting ❖ A–9
Page 56

Configuring FlowPort
A–10 ❖ Xerox F lowP ort I nstal lati on an d Setu p Guide
 Loading...