

Page 1

Fiery
SERVER & CONTROLLER SOLUTIONS
®
EXP6000/EXP5000 Color Server
Printing from Windows
Page 2

© 2005 Electronics for Imaging, Inc. The information in this publication is covered
under Legal Notices for this product.
45049025
15 March 2005
Page 3

7
8
8
9
10
11
12
24
24
25
ONTENTS
ONTENTS
C
C
CONTENTS
NTRODUCTION
I
Terminology and conventions
About this manual
Setting up printing
User software
System requirements
3
10
I
NSTALLING
Installing printer drivers by Point and Print
Installing printer drivers from the User Software CD
Downloading printer drivers using Fiery WebTools
S
ETTING
Printing connections
Completing the SMB printing connection
Completing TCP/IP and LPR printing connections
P
RINTER
Installing Windows 98/Me printer drivers 14
Installing the Windows NT 4.0 printer driver 15
Installing Windows 2000/XP/Server 2003 printer drivers 17
Using the WebTools Installer 21
U
P
P
RINTING
Completing the Windows NT 4.0 TCP/IP and LPR connection 26
Completing the Windows 2000/XP/Server 2003 TCP/IP
and Port 9100 or LPR connection 28
D
RIVERS
C
ONNECTIONS
14
20
26
Page 4

41
42
45
46
47
48
49
52
57
CONTENTS
Completing IPX/SPX or IPX (Novell) connections
Completing the Windows 98/Me IPX/SPX or IPX (Novell) connection 32
Completing the Windows NT 4.0 IPX (Novell) connection 34
Completing the Windows 2000/XP/Server 2003 IPX (Novell) connection 36
Completing IPP connections
Setting up IPP printing with Windows 98/Me 38
Setting up IPP printing with Windows 2000/XP/Server 2003 39
ONFIGURING
C
Configuring installable options manually
Configuring installed options and updating print options
settings automatically
NSTALLABLE
I
PTIONS
O
4
32
38
43
IERY
F
P
RINTING
P
Configuring the connection for EFI Job Monitor
Installing Fiery printing utilities
Using Fiery Printer Delete Utility
Configuring the connection for EFI Fiery Mail Port
Using Fiery E-mail Service
How Fiery E-mail Service works
Printing using an e-mail client 53
Job Control 54
Printing using the E-mail Port Monitor 56
TILITIES
U
RINTING
Printing from applications
Setting options and printing 58
Using job templates
53
58
65
Page 5

79
CONTENTS
Using Shortcuts
Customizing Print Option Shortcuts 70
Defining and printing custom page sizes
Working with custom page sizes in Windows 98/Me PostScript printer driver 71
Working with custom page sizes in Windows NT 4.0 PostScript printer driver 73
Working with custom page sizes in Windows 2000/XP/Server 2003
PostScript printer driver 76
Viewing the digital press status
Saving files to print at a remote location
NDEX
I
5
69
71
80
81
Page 6

Page 7

NTRODUCTION
I
INTRODUCTION
This manual describes how to install the printer drivers and printer description files for the
Fiery EXP6000/EXP5000 Color Server and how to set up printing from Microsoft Windows
computers. It also describes several printing utilities and how to print to the Fiery EXP6000/
EXP5000 Color Server. For information about setting up network servers and clients to
use the Fiery EXP6000/EXP5000 Color Server, see Configuration and Setup . For general
information about using the digital press, your computer, application software, or your
network, see the documentation that accompanies those products.
The Fiery EXP6000 supports the DocuColor 6060. The Fiery EXP5000 supports the
DocuColor 5252/2060/2045.
7
Page 8
INTRODUCTION
Terminology and conventions
This manual uses the following terminology and conventions.
Term or convention Refers to
Aero Fiery EXP6000/EXP5000 (in illustrations and examples)
Digital press DocuColor 6060/5252/2060/2045
Fiery EXP6000/EXP5000 Fiery EXP6000/EXP5000 Color Server
Titles in italics
Windows Windows 98, Windows Me, Windows NT 4.0,
8
Other books in this documentation set
Windows 2000, Windows XP, Windows Server 2003
Topics for which additional information is available
by starting Help in the software
Tips and information
The Fiery EXP6000/EXP5000 includes support for Fiery WebTools, which allow you to
download printer drivers and printer description files to your desktop for installation on
your Windows computer.
About this manual
This manual covers the following topics:
•Installing printer files on Windows computers
•Setting up printing connections on Windows computers
•Installing Fiery EXP6000/EXP5000 printing utilities
•Printing from Windows computers
Important information
Important information about issues that can result in
physical harm to you or others
Page 9

INTRODUCTION
Setting up printing
The following table lists the procedures for installing printer drivers and setting up the
printing connections for each Windows platform supported by the Fiery EXP6000/
EXP5000.
Action Windows 98/Me Windows NT 4.0 Windows 2000/XP/
Server 2003
Installing printer drivers “Installing printer drivers by Point and Print” on page 12
“Installing printer drivers from the User Software CD” on page 14
“Downloading printer drivers using WebTools” on page 20
Setting up SMB printing “Completing the SMB printing connection” on page 25
Setting up TCP/IP printing Not supported “Completing the
Windows NT 4.0 TCP/IP and
LPR connection” on page 26
“Completing the
Windows 2000/XP/Server 2003
TCP/IP and Port 9100 or
LPR connection” on page 28
9
Setting up IPX/SPX or IPX
(Novell) printing
Setting up IPP printing “Setting up IPP printing with
“Completing the Windows 98/
Me IPX/SPX or IPX (Novell)
connection” on page 32
Windows 98/Me” on page 38
“Completing the
Windows NT 4.0 IPX (Novell)
connection” on page 34
Not available “Setting up IPP printing with
“Completing the
Windows 2000/XP/Server 2003
IPX (Novell) connection” on
page 36
Windows 2000/XP/Server 2003”
on page 39
Page 10

:
INTRODUCTION
User software
Fiery EXP6000/EXP5000 user software for setting up printing is provided on the
User Software CD.
Adobe PostScript
Printer Driver
PageMaker PPD files Allows you to print to the Fiery EXP6000/EXP5000 from
Job Monitor Allows you to monitor the status of connected
10
Allows you to print to the Fiery EXP6000/EXP5000 from
Windows 98/Me and Windows NT 4.0 computers, and
supports Fiery EXP6000/EXP5000 and PostScript 3
features.
Windows 2000/XP/Server 2003 users use the PostScript
Printer Driver provided with those operating systems.
Adobe PageMaker. You must install the appropriate PPD
in PageMaker. See the PageMaker documentation for
instructions.
Fiery EXP6000/EXP5000 servers and print jobs
sent to them.
EFI Fiery Mail Port Allows you to send jobs to the Fiery EXP6000/EXP5000
N
OTE
Install PostScript printer drivers and printer description files from the User Software
CD or from the Fiery EXP6000/EXP5000 using the Installer selection in WebTools.
For instructions, see “Using the WebTools Installer” on page 21.
System requirements
For detailed system requirements, see Welcome , in your media pack.
Automatically installed when the printer driver is
installed on a Windows computer.
in the form of e-mail attachments by adding the EFI Fiery
Mail Port software as a printer port.
Page 11

:
NSTALLING
I
RINTER
P
INSTALLING PRINTER DRIVERS
RIVERS
D
This chapter describes the procedures for installing printer drivers on a computer using a
supported version of Windows. For the Windows versions supported, see “Terminology and
conventions” on page 8. Installing printer drivers and printer description files is the first step
in setting up the Fiery EXP6000/EXP5000 as a PostScript printer.
Install printer drivers as follows:
•From the Fiery EXP6000/EXP5000 through Point and Print using SMB printing.
•From User Software CD 1 (of 2).
•From WebTools using the Installer to download and install. For instructions,
see “Downloading printer drivers using WebTools” on page 20.
11
N
OTE
WebTools is available if the administrator has enabled Internet access to the
Fiery EXP6000/EXP5000. Once you download the printer files, the installation process
is identical to installing from the User Software CD.
If a Fiery EXP6000/EXP5000 printer driver installed is already installed, you must uninstall it
before you install a new one. See “Using Fiery Printer Delete Utility” on page 48.
Page 12

INSTALLING PRINTER DRIVERS
Installing printer drivers by Point and Print
SMB printing (also known as Windows or WINS printing) allows you to install PostScript
printer drivers and printer description files on your computer from the Fiery EXP6000/
EXP5000 using Point and Print, and print to a particular connection (Hold, Print, or Direct).
To set up SMB printing, you must install the TCP/IP protocol and Client for Microsoft
Networks.
Each connection (Hold, Print, or Direct) requires a new printer driver and printer description
file. Repeat the procedure for each connection. If you install more than one printer, assign
each a descriptive name during printer driver installation, such as
that you can easily identify printers.
When you install the printer driver using Point and Print, you cannot configure installable
options manually. Installable options must be configured by the Fiery EXP6000/EXP5000
administrator.
Once the administrator has configured the installable options, the installed options are
displayed in the printer driver when you enable Two-Way Communication. For more
information about configuring installable options, see “Configuring Installable Options” on
page 41.
Aero-Print
or
Aero-Hold
12
, so
B
EFORE
YOU
BEGIN
•Ask your network administrator for the IP address or name of the Fiery EXP6000/EXP5000 on
the network.
• Configure the Fiery EXP6000/EXP5000 for SMB printing.
SMB printing is referred to as Windows Printing in Setup and on the Configuration page (see
Configuration and Setup ).
T
UP SMB
O
SET
1 Right-click Network Neighborhood or My Network Places, and select Find Computer or Search
2Type the name or IP address of the Fiery EXP6000/EXP5000 and click Search Now.
PRINTING
for Computers.
ON WINDOWS COMPUTERS
If you cannot locate the Fiery EXP6000/EXP5000, contact your network administrator.
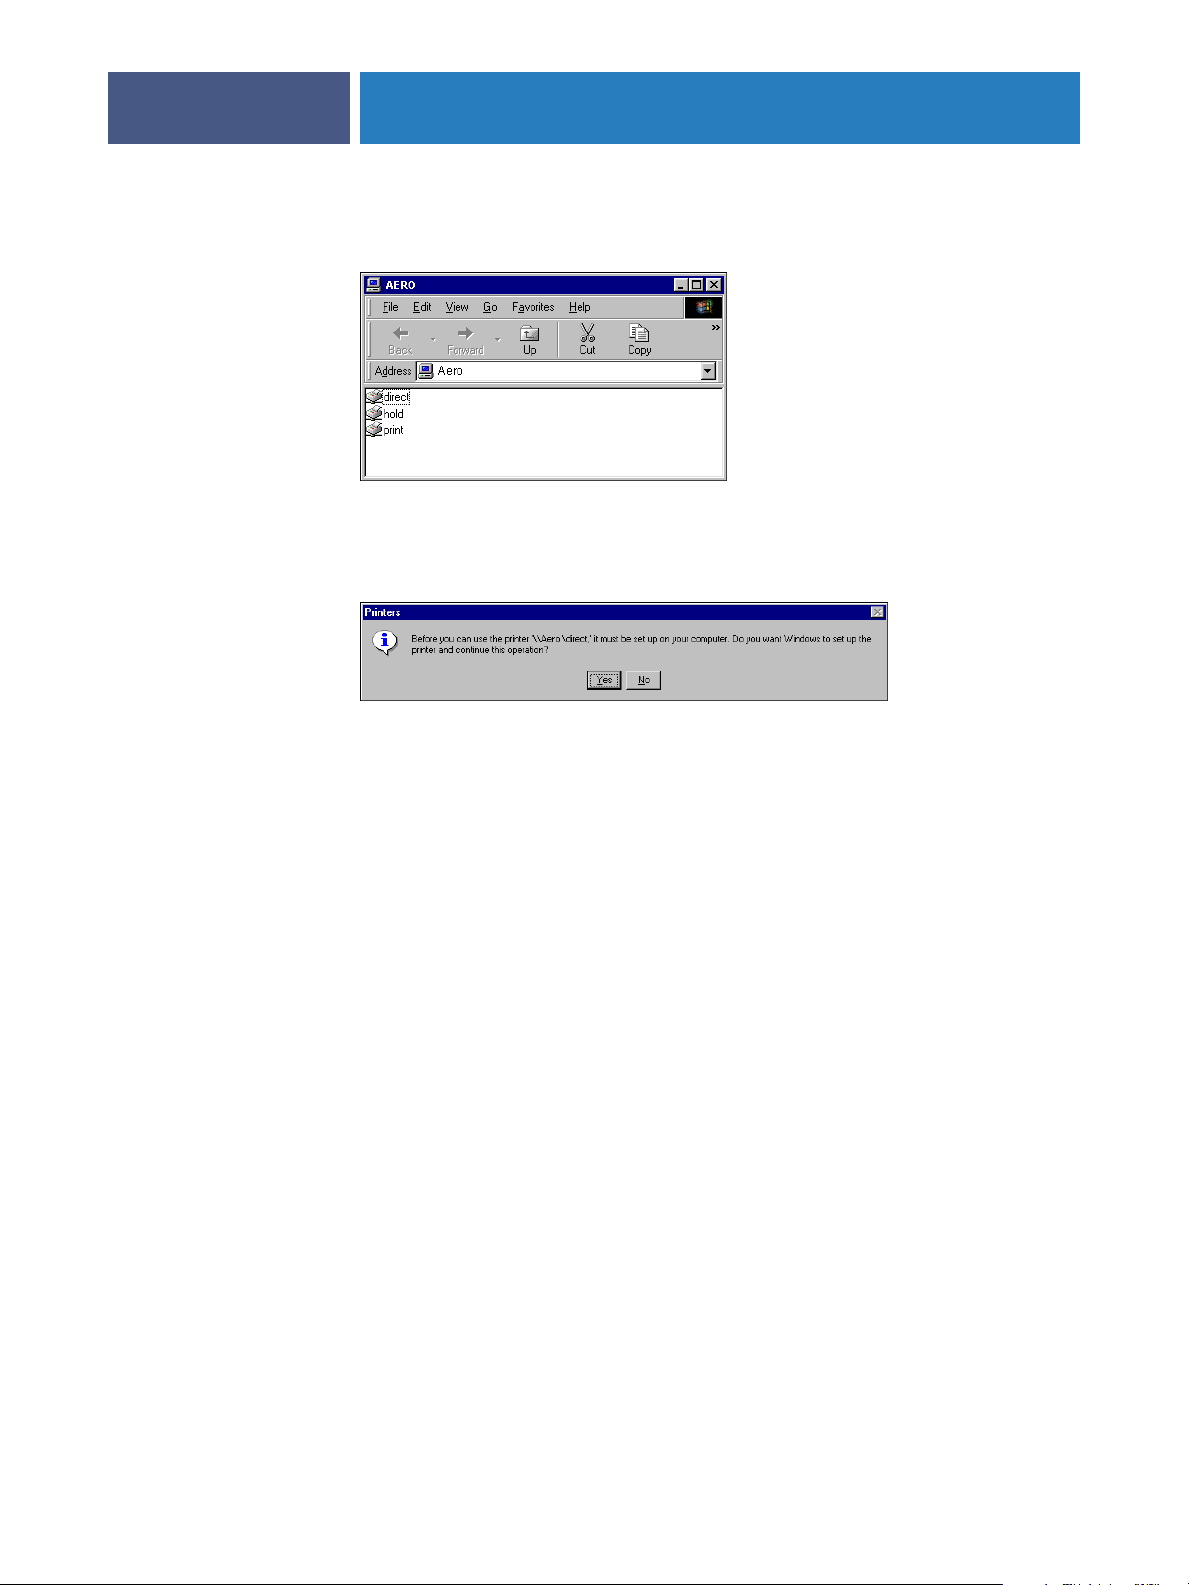
3 Double-click the name of the Fiery EXP6000/EXP5000 to display enabled print connections.
Page 13
INSTALLING PRINTER DRIVERS
NOTE: For a description of each print connection, see Configuration and Setup.
4 Double-click the connection that you want to set up (Hold, Print, or Direct).
Windows 98/Me and Windows NT 4.0: The Printers dialog box appears, asking whether you
want to set up the printer. Proceed to step 5.
13
Windows 2000/XP/Server 2003: The files are installed on your computer and the printer is
displayed in the Printers and Faxes window. Proceed to step 6.
5 Windows 98/Me and Windows NT 4.0: Select Yes to install the PostScript printer driver and
printer description file for the selected connection.
Windows downloads the printer driver and printer description files from the Fiery EXP6000/
EXP5000 to your computer and installation is complete.
6 Windows 98/Me/NT 4.0/2000: Click Start, choose Settings, and then choose Printers.
Windows XP: Click Start and choose Printer and Faxes.
Windows Server 2003: Click Start, choose Control Panel, and then choose Printers and Faxes.
7 Right-click the Fiery EXP6000/EXP5000 icon and choose Properties.
8 Click Print Test Page on the General tab.
If the Test page prints successfully, you are ready to print from the computer.
9 Repeat the previous steps for the other connections that you want to set up.
Page 14
INSTALLING PRINTER DRIVERS
Installing printer drivers from the User Software CD
The following procedures describe installing the printer driver from User Software CD 1
(of 2).
Installing Windows 98/Me printer drivers
The following procedures display Windows 98 illustrations. Windows Me differences
are noted.
TO INSTALL THE POSTSCRIPT PRINTER DRIVER FOR WINDOWS 98/ME
1 Click Start, choose Settings, and then choose Printers.
2 Double-click the Add Printer icon and click Next.
3 Specify printing using a local printer and click Next.
This procedure describes the installation of a local printer. You can modify the connection
later, according to your network type.
14
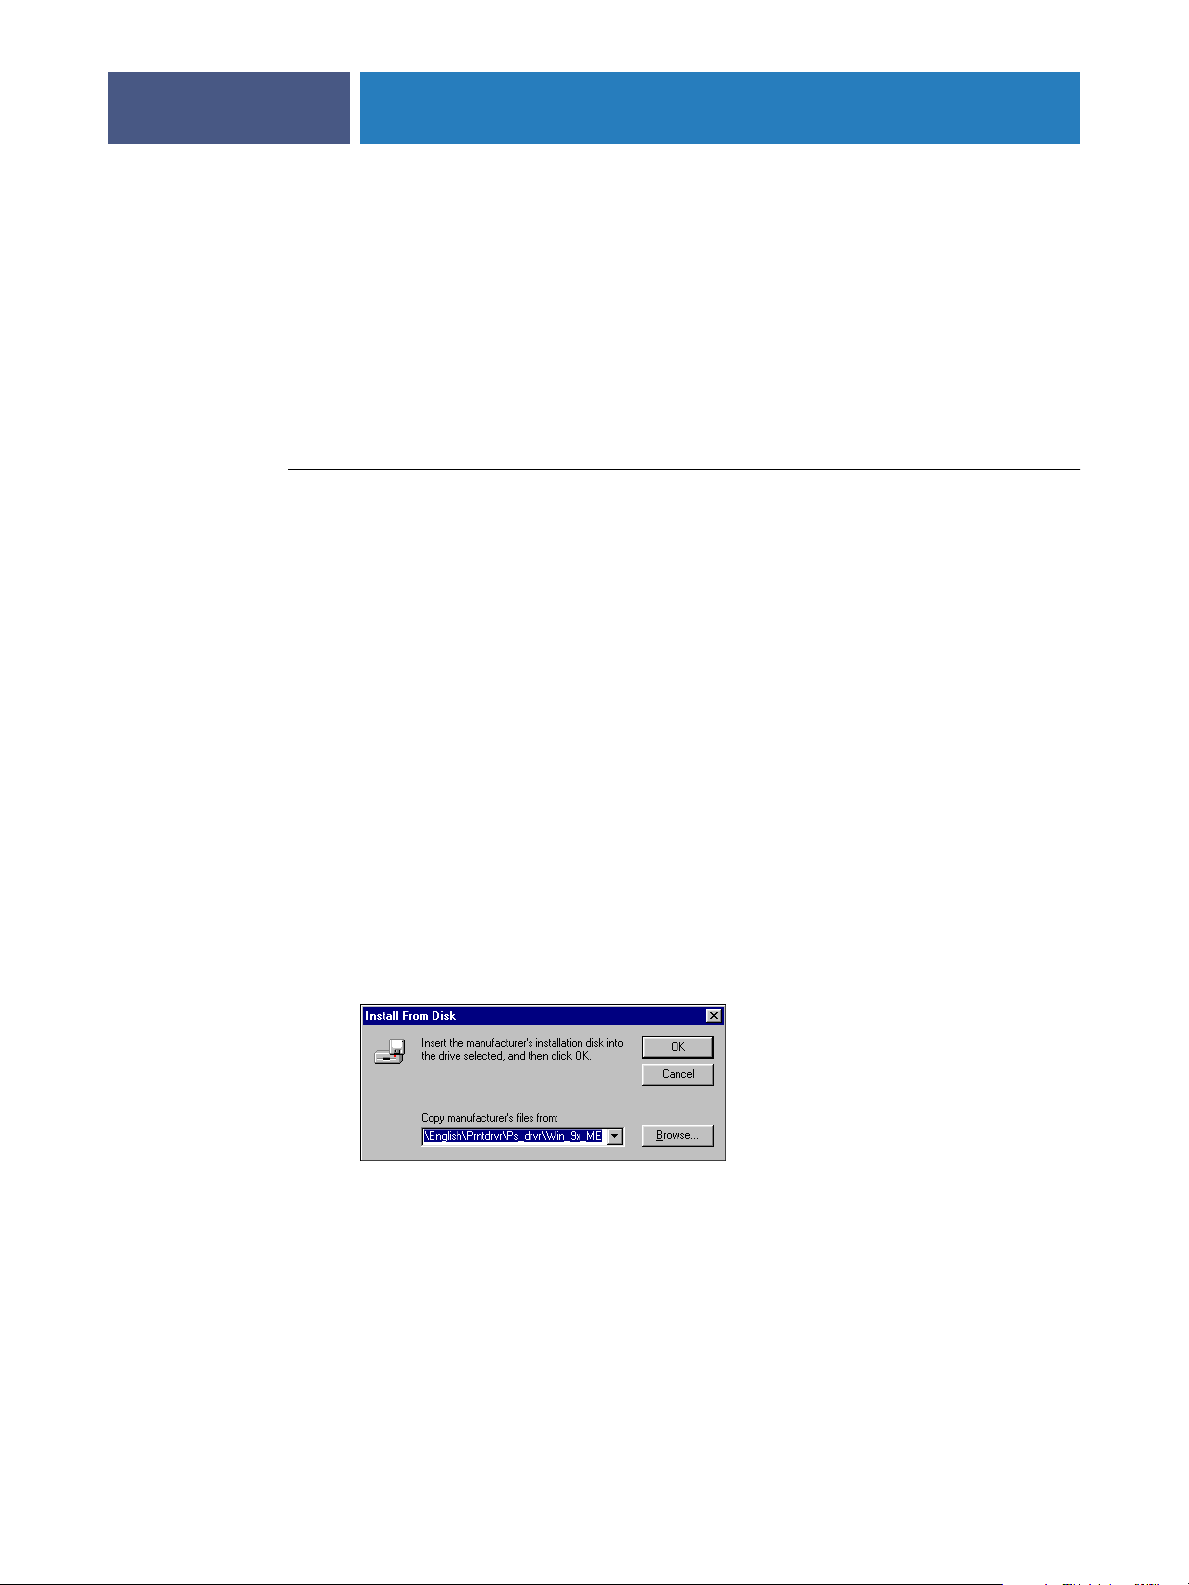
4 Click Have Disk in the dialog box displaying lists of manufacturers and printers.
The Install From Disk dialog box prompts you for the disk.
5Type the name of the CD-ROM drive (for example, D:\) and click Browse.
Browse to English\Prntdrvr\Ps_drvr\Win_9x_ME.
If you are installing from the files you downloaded using the Installer in Fiery WebTools,
browse to prntdrvr\Prntdrvr\Ps_drvr\Win_9x_ME.
6 Make sure that Oemsetup.inf is selected and click OK.
The path is copied to the Install From Disk dialog box.
7Verify that the path is correct and click OK.
Page 15
INSTALLING PRINTER DRIVERS
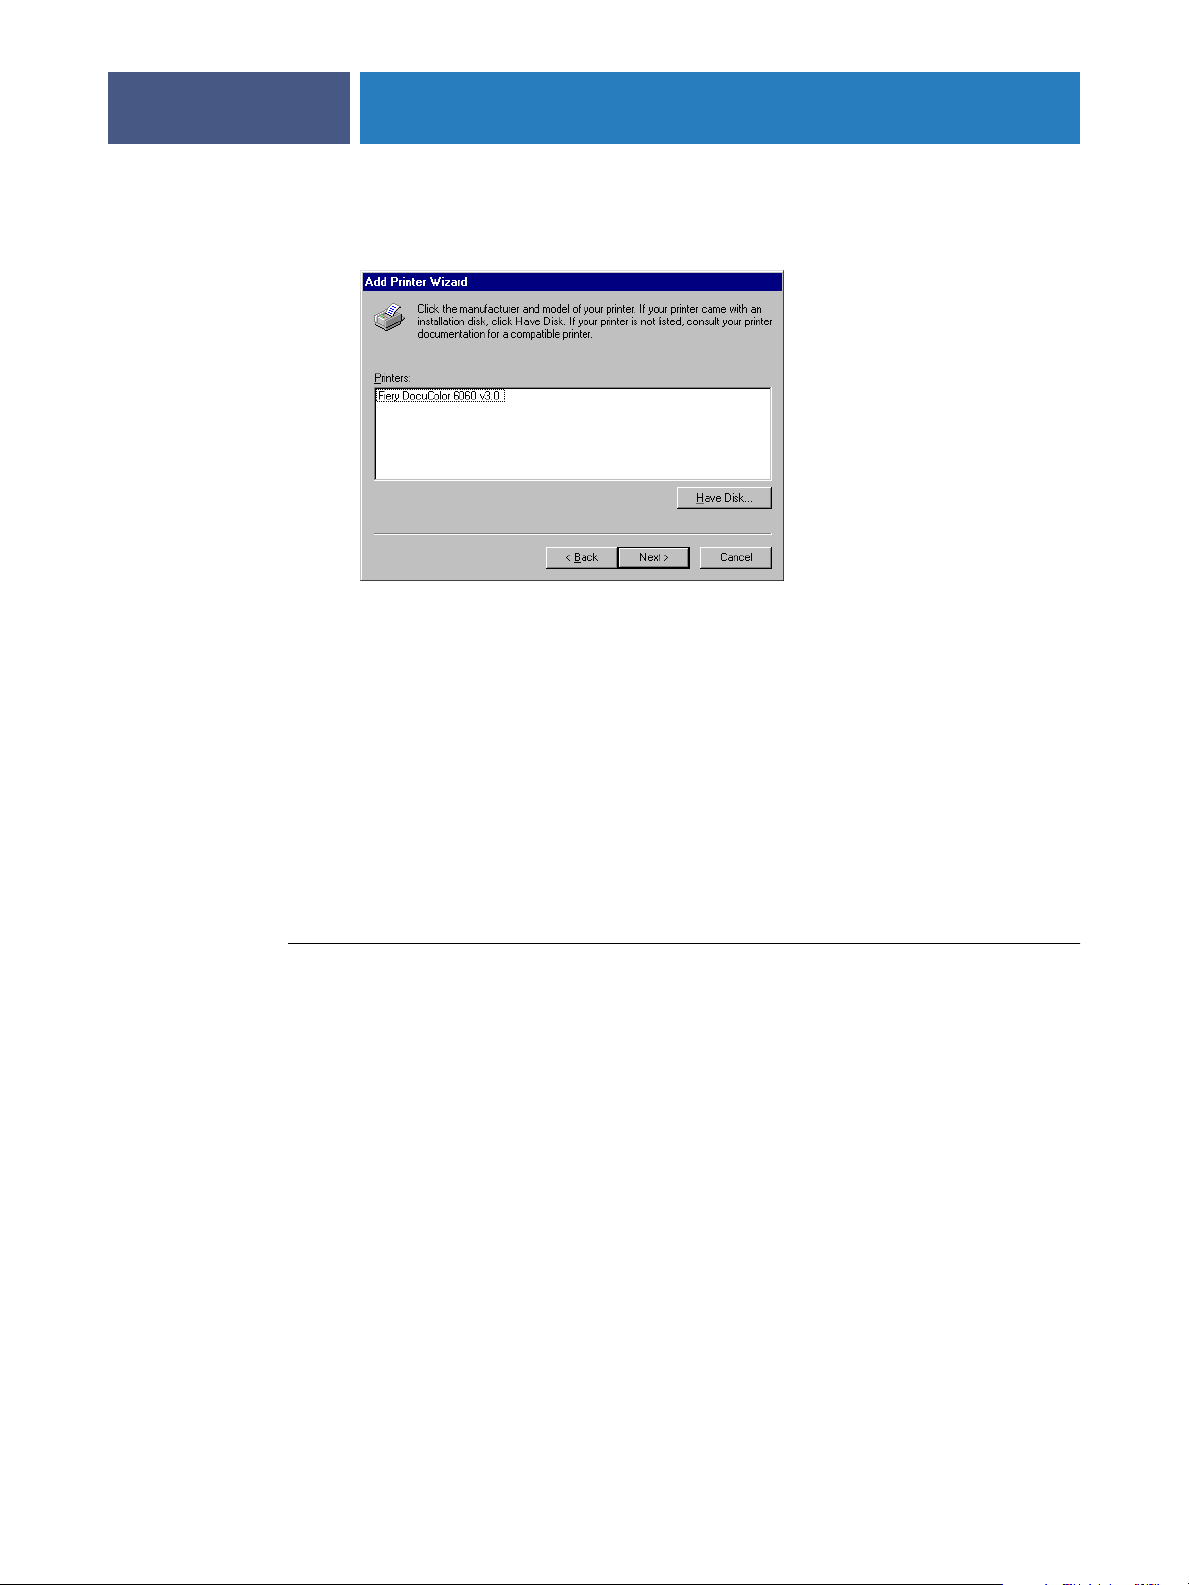
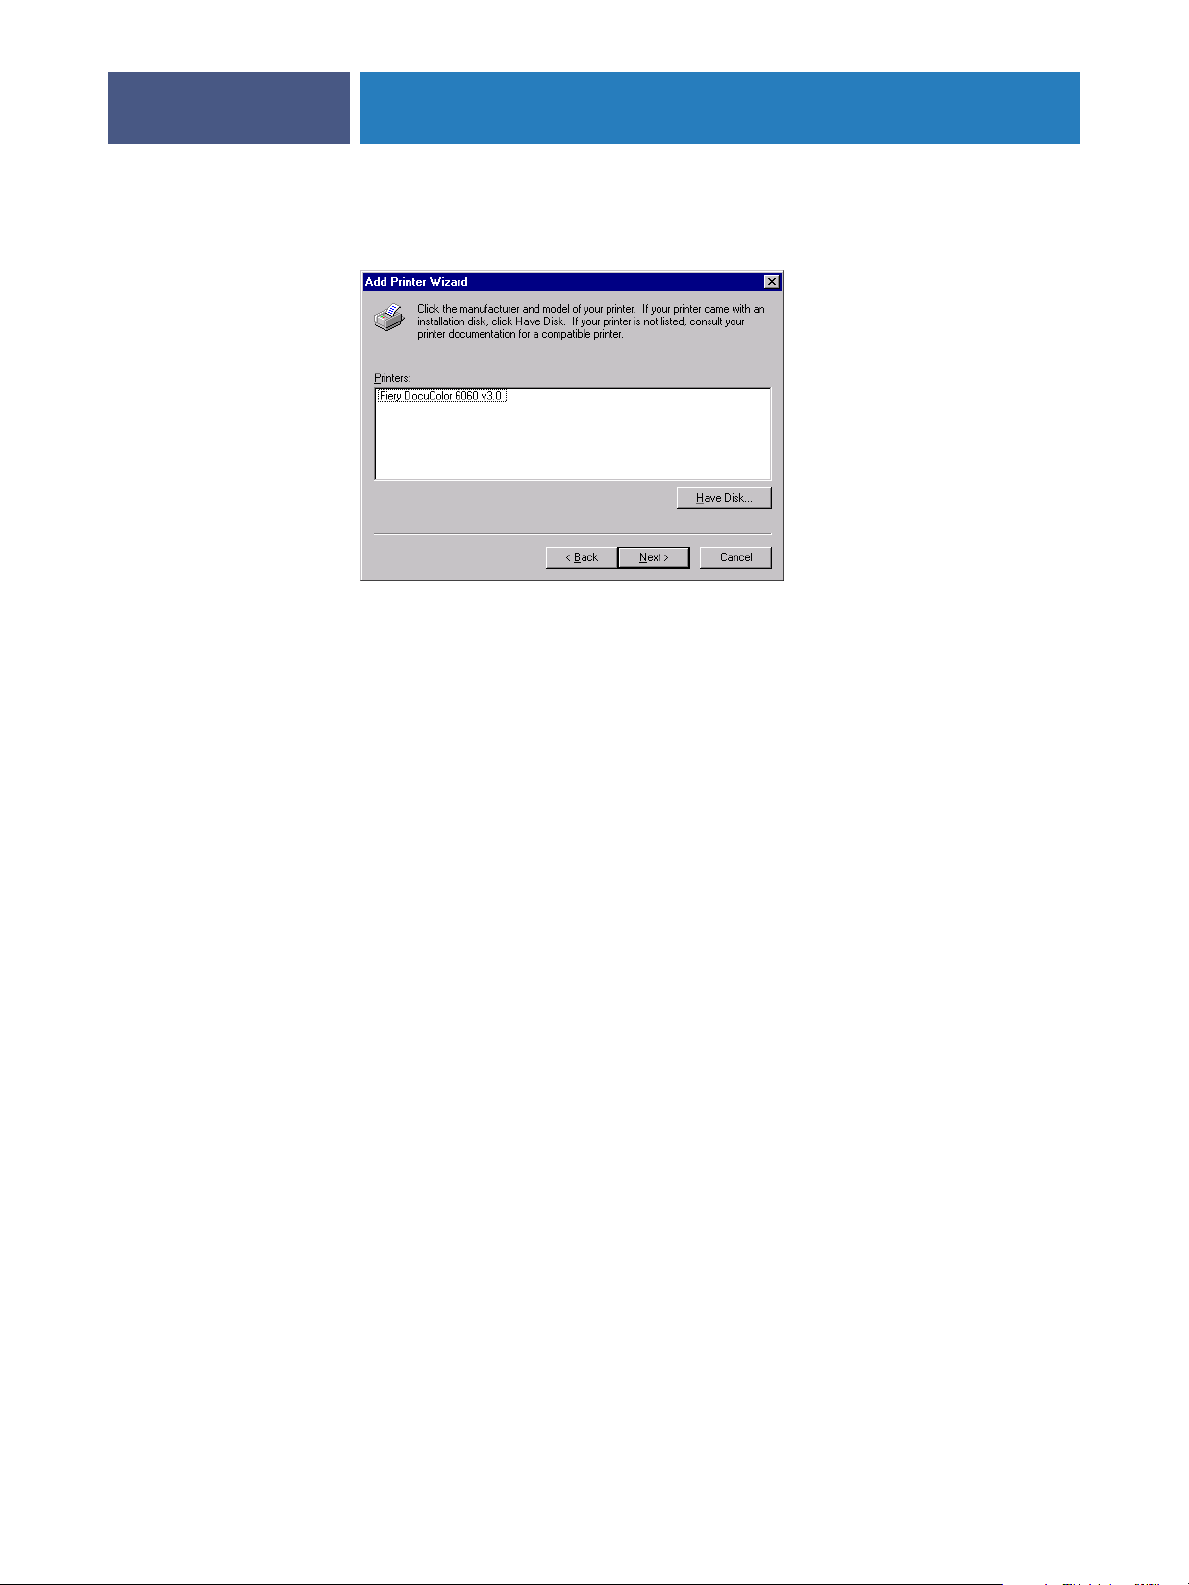
8 Select the Fiery EXP6000/EXP5000 as your printer and click Next.
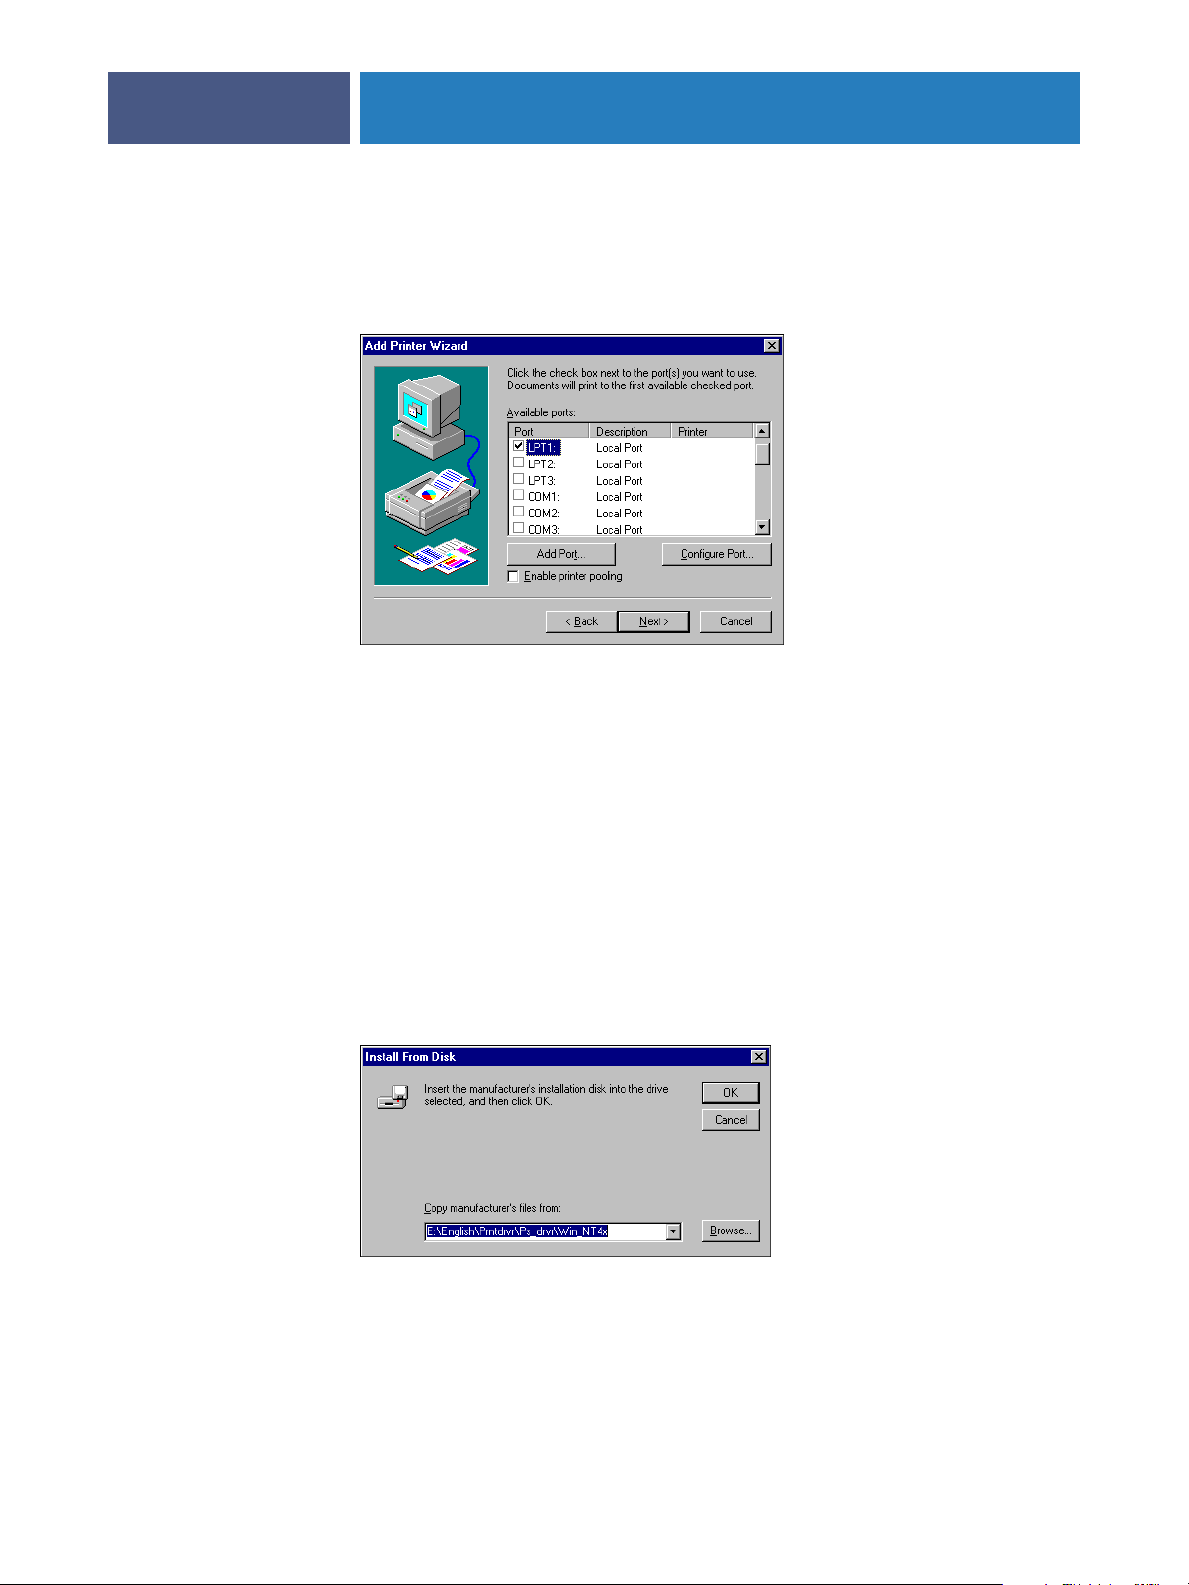
9 Select the LPT1 port and click Next.
Configure the port later, according to your network type.
15
10 Type a name for the Fiery EXP6000/EXP5000 in the Printer name field, indicate whether
you want to make it the default printer, and click Next.
11 Select No to printing the test page and click Finish.
The necessary PostScript files are installed on your computer.
Installing the Windows NT 4.0 printer driver
The following procedure describes installing the Windows NT 4.0 printer driver from
the User Software CD.
TO INSTALL THE POSTSCRIPT PRINTER DRIVER FOR WINDOWS NT 4.0
1 Insert the User Software CD into the CD-ROM drive.
2 Click Start, choose Settings, and then choose Printers.
3 Double-click Add Printer.
4To install a printer locally, select My Computer and click Next.
My Computer is available if you logged in to a computer on which you have Administrator
privileges. If it is not available, you can add a network printer. The procedure is similar to
adding a port (see “Completing the Windows NT 4.0 TCP/IP and LPR connection” on
page 26).
Page 16
INSTALLING PRINTER DRIVERS
5 Select LPT1 and click Next.
This general installation works for the parallel port connection. You can add a network port
later, according to your network type.
6 Click Have Disk in the dialog box displaying lists of manufacturers and printers.
16
The Install From Disk dialog box prompts you for the disk.
7Type the name of the CD-ROM drive (for example, D:\) and click Browse.
If you are installing from files you downloaded using the Installer in WebTools, type
the name of your hard disk (for example, C:\) and click Browse.
8Browse to the English\Prntdrvr\Ps_drvr\Win_NT4x folder and click Open.
If you are installing from files you downloaded using the Installer in WebTools, browse to the
prntdrvr\Prntdrvr\Ps_drvr\Win_NT4x folder and click Open.
Make sure that Oemsetup.inf or Oemsetup is selected.
The path is copied to the Install From Disk dialog box.
9Verify that the path is correct and click OK.
Page 17
INSTALLING PRINTER DRIVERS
10 Select the Fiery EXP6000/EXP5000 printer driver in the Printers list and click Next.
11 Type a name for the Fiery EXP6000/EXP5000 in the Printer name field, indicate whether you
want to make it the default printer, and click Next.
12 Indicate whether you want the printer installed as a shared printer and click Next.
17
If you select Shared, type a Share Name for the printer and select the operating systems used
by client computers. For information about shared printers, see Configuration and Setup.
13 Click No to postpone printing a test page and click Finish.
When installation is complete, the Printers window is displayed with an icon for the newly
installed printer.
Installing Windows 2000/XP/Server 2003 printer drivers
To install the printer driver on a Windows Server 2003 computer, use the Windows XP
PPD files.
To use the printer driver on Windows 2000/XP/Server 2003, you must select the following
options in the Advanced tab of the printer driver after installation is complete:
•Spool print documents
•Start printing immediately
•Print spooled documents first
Deselect the following option:
•Enable advanced printing features
NOTE: The following procedures use Windows 2000 illustrations. Windows XP/Server 2003
differences are noted.
Page 18
INSTALLING PRINTER DRIVERS
TO INSTALL THE PRINTER DRIVER FOR WINDOWS 2000/XP/SERVER 2003
1 Windows 2000: Click Start, choose Settings, and then choose Printers.
Windows XP: Click Start and choose Printer and Faxes.
Windows Server 2003: Click Start, choose Control Panel, and then choose Printers and Faxes.
2 Windows 2000: Double-click the Add Printer icon and click Next.
Windows XP: Click Add a printer.
Windows Server 2003: Choose Add a printer.
3 Specify printing using a Local printer, uncheck the “Automatically display and install my Plug
and Play printer” box, and click Next.
This procedure describes the installation of a local printer. You can modify the connection
later, according to your network type.
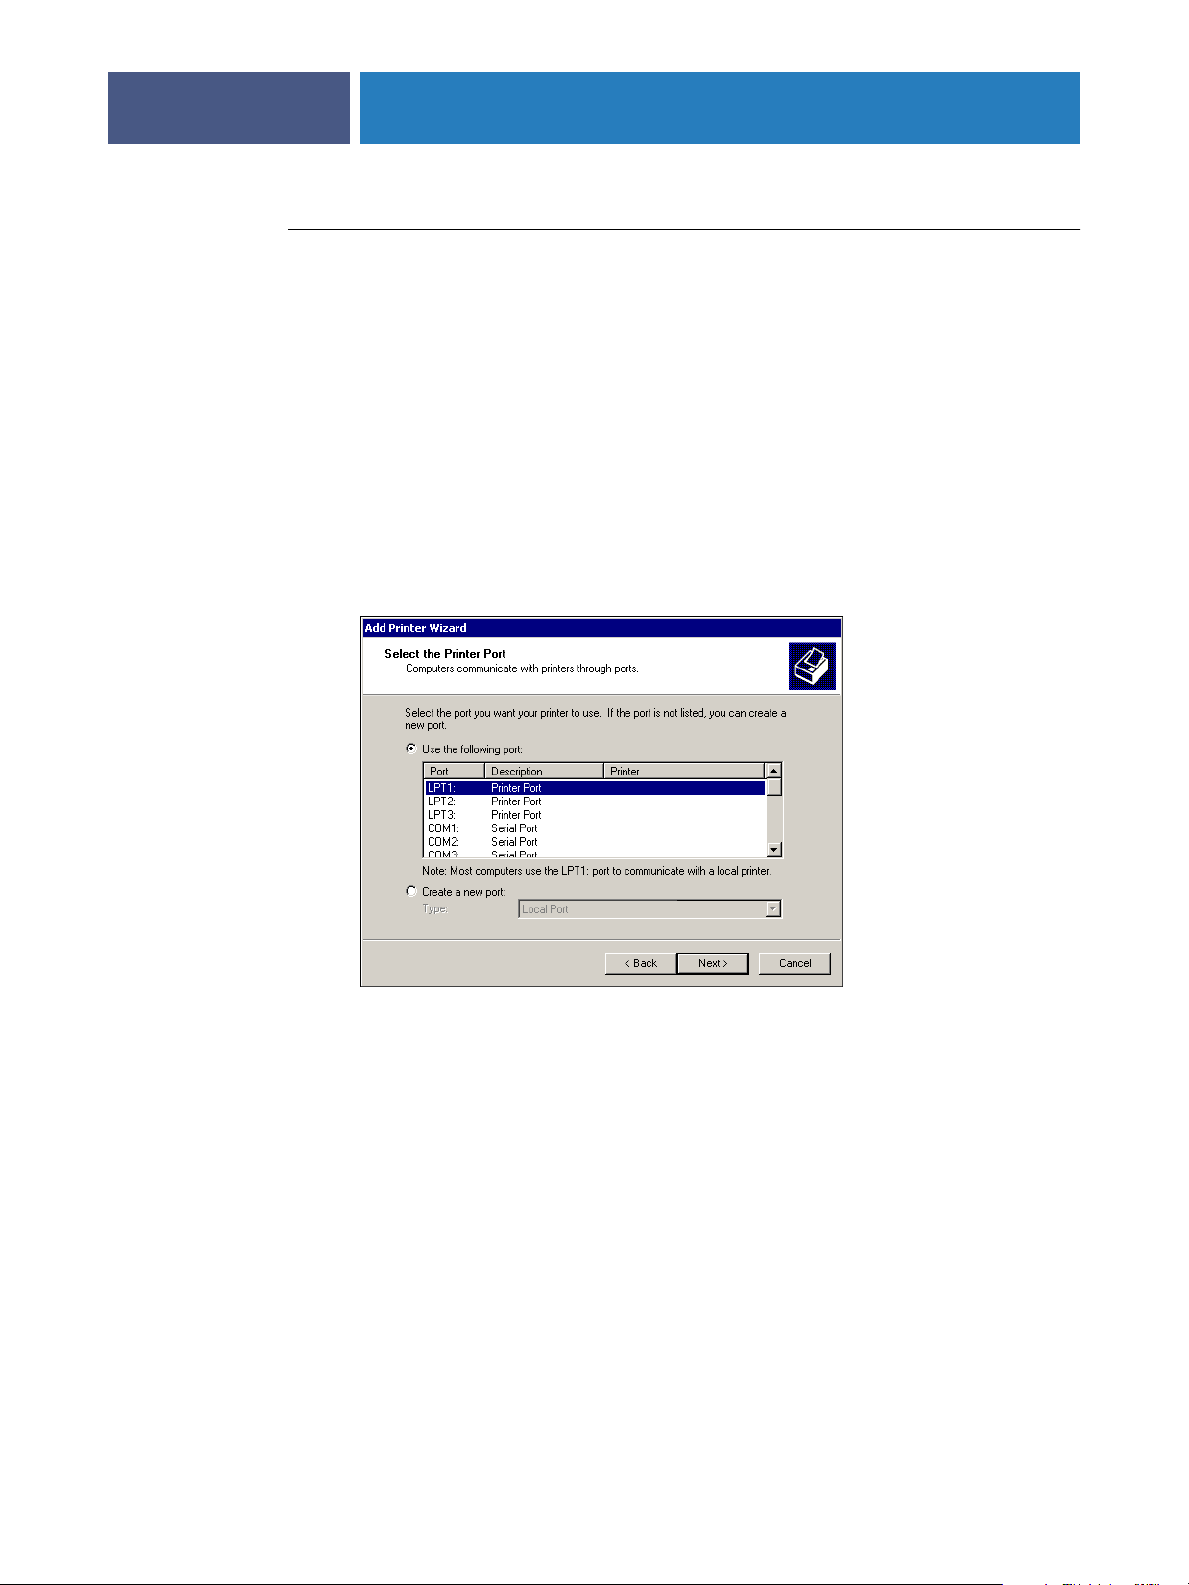
4 Select LPT1 and click Next.
18
5 Click Have Disk in the dialog box displaying lists of manufacturers and printers.
The Install From Disk dialog box prompts you for the disk.
6 Insert the User Software CD into the CD-ROM drive, type the name of the CD-ROM drive (for
example, D:\), and click Browse. Browse to the English \Prntdrvr\Ps_drvr\Win_2K_XP folder.
If you are installing from the files you downloaded using the Installer in Fiery WebTools,
browse to prntdrvr\Prntdrvr\Ps_drvr\Win_2K_XP and click
Open.
Make sure that Oemsetup.inf or Oemsetup is selected and click Open.
7Verify that the path is correct and click OK.
The path is copied to the Install From Disk dialog box.
Page 19
INSTALLING PRINTER DRIVERS
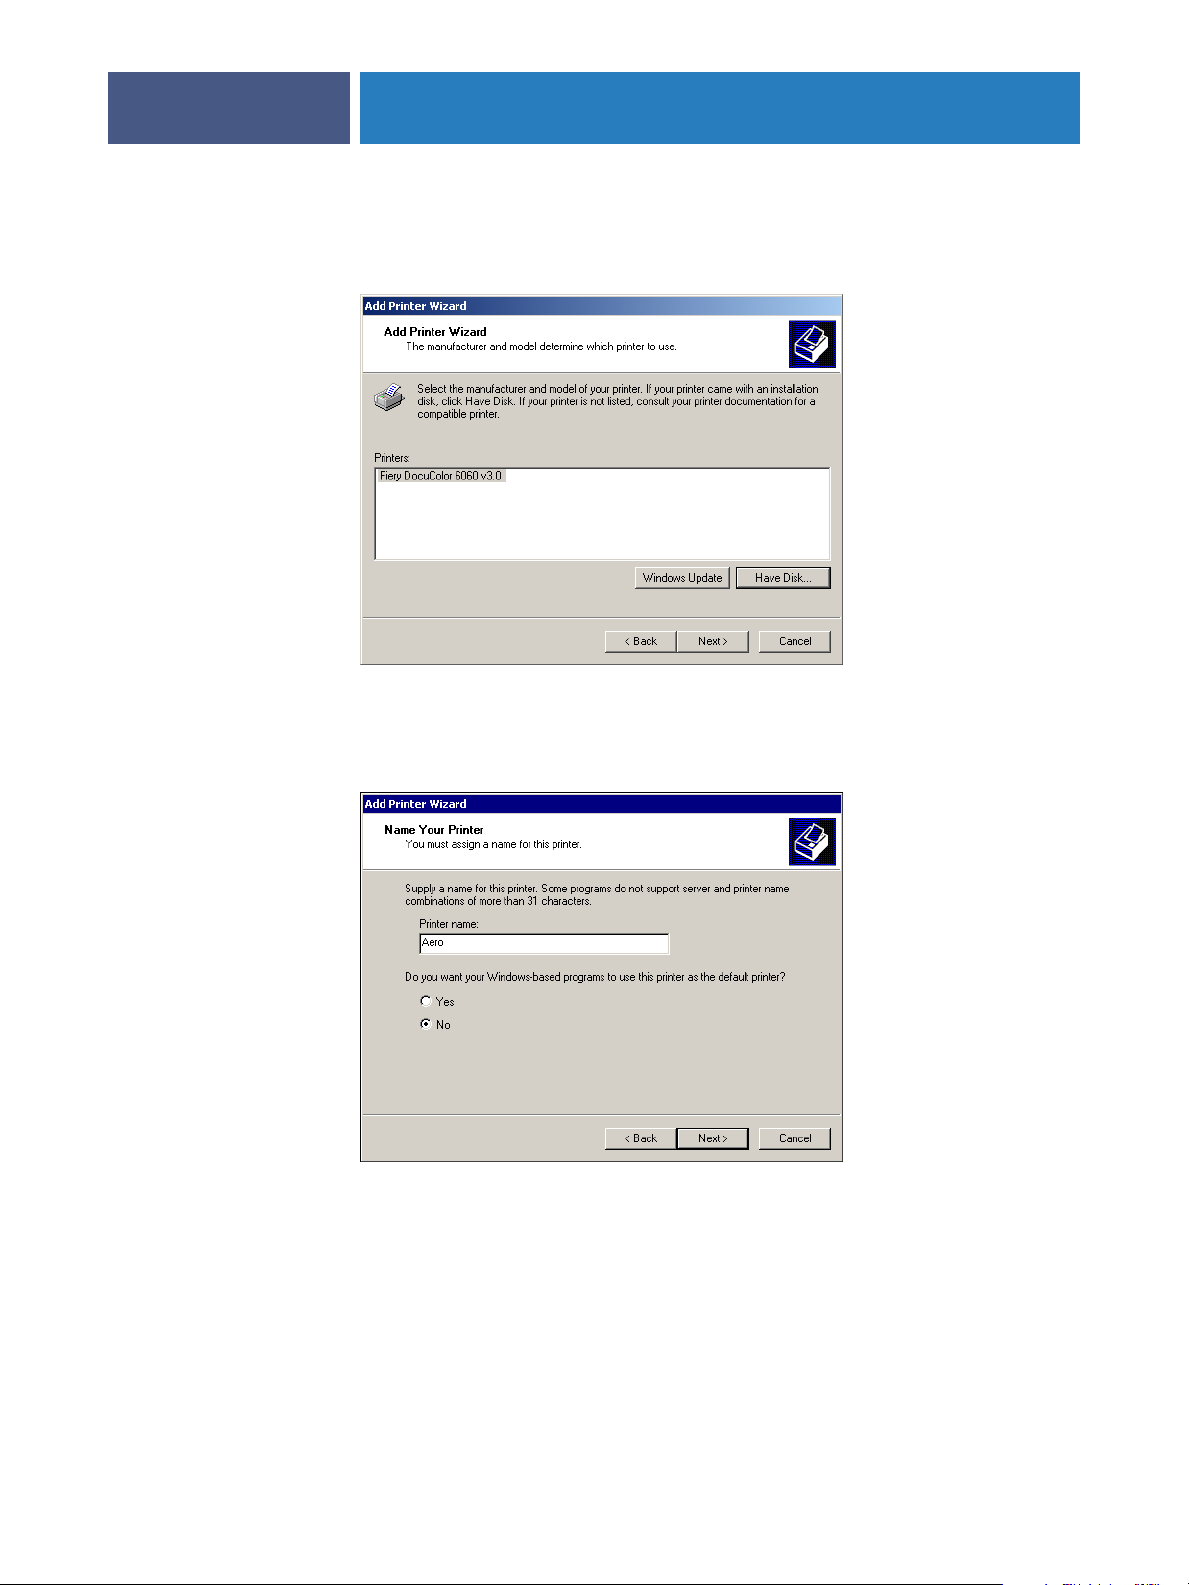
8 In the Printers box, select the Fiery EXP6000/EXP5000 printer driver as your printer
and click
Next.
19
9Type a name for the Fiery EXP6000/EXP5000 in the Printer name field, indicate whether you
want to make it the default printer, and click Next.
This name is used in the Printers window and the queues window.
10 Follow the on-screen instructions.
When asked whether to print a Test Page, select No.
The necessary files are installed on your hard disk. When installation is complete, the Printers
window appears with an icon for the newly installed printer.
Page 20

INSTALLING PRINTER DRIVERS
Downloading printer drivers using WebTools
Download the printer driver files from the Fiery EXP6000/EXP5000 using WebTools, and
then follow the procedures for installing the printer drivers from the User Software CD.
Before you download the printer driver files, you must set specific Fiery EXP6000/EXP5000
options in Network Setup and Printer Setup. You also must prepare each client computer
to communicate with the Fiery EXP6000/EXP5000 over the Internet or intranet.
For more information about Network Setup and Printer Setup, see Configuration and Setup.
TO SET UP A CLIENT COMPUTER TO USE WEBTOOLS
1 Enable TCP/IP networking.
2 Make sure the computer has a valid, unique IP address.
3 Make sure a supported Internet browser is installed on the computer.
For more information about supported browsers, see Welcome.
4 Make sure Java is enabled in your Internet browser.
20
For more information about setting up the Fiery EXP6000/EXP5000 and the network,
see Configuration and Setup.
NOTE: If the client computer is running Windows XP with Service Pack 2 (SP2) installed,
Pop-up Blocker is turned on by default. With this function turned on, a warning message
appears when you access Fiery WebTools, and your access to WebTools is denied. To gain
access, do one of the following:
• Change the Pop-up Blocker setting.
•Turn off Pop-up Blocker.
Page 21

INSTALLING PRINTER DRIVERS
TO CHANGE THE POP-UP BLOCKER SETTING FOR WEBTOOLS
If Pop-up Blocker is turned on, a warning message appears when you access WebTools.
• Click the message and choose one of the following:
•Temporarily Allow Pop-ups: Allows one-time access to the pop-up window.
• Always Allow Pop-ups for This Site: Always allows access to the pop-up window.
NOTE: The warning message appears for each pop-up window. You must change the Pop-up
Blocker setting for each pop-up window you want to allow.
Turn off Pop-up Blocker in Internet Explorer from the Tools menu or in Internet Options.
TO TURN OFF POP-UP BLOCKER FROM THE TOOLS MENU
1 Choose Pop-up Blocker from the Tools menu.
2 Click Turn Off Pop-up Blocker.
21
TO TURN OFF POP-UP BLOCKER IN INTERNET OPTIONS
1 Choose Internet Options from the Tools menu.
2 Click the Privacy tab.
3 Clear the Block Pop-ups option.
4 Click Apply, and then click OK.
Using the WebTools Installer
The WebTools Installer allows you to download installers for printer drivers to your computer
directly from the Fiery EXP6000/EXP5000.
TO DOWNLOAD PRINTER DRIVER FILES WITH THE WEBTOOLS INSTALLER
1 Start your Internet or intranet browser and type the DNS name or IP address of
the Fiery EXP6000/EXP5000.
2 Select a login level, type a password, if required, and then click OK.
No password is required to log in as a guest. If the administrator has configured guest access,
any user has full access to the Installer in WebTools while logged in as a guest.
Page 22
INSTALLING PRINTER DRIVERS
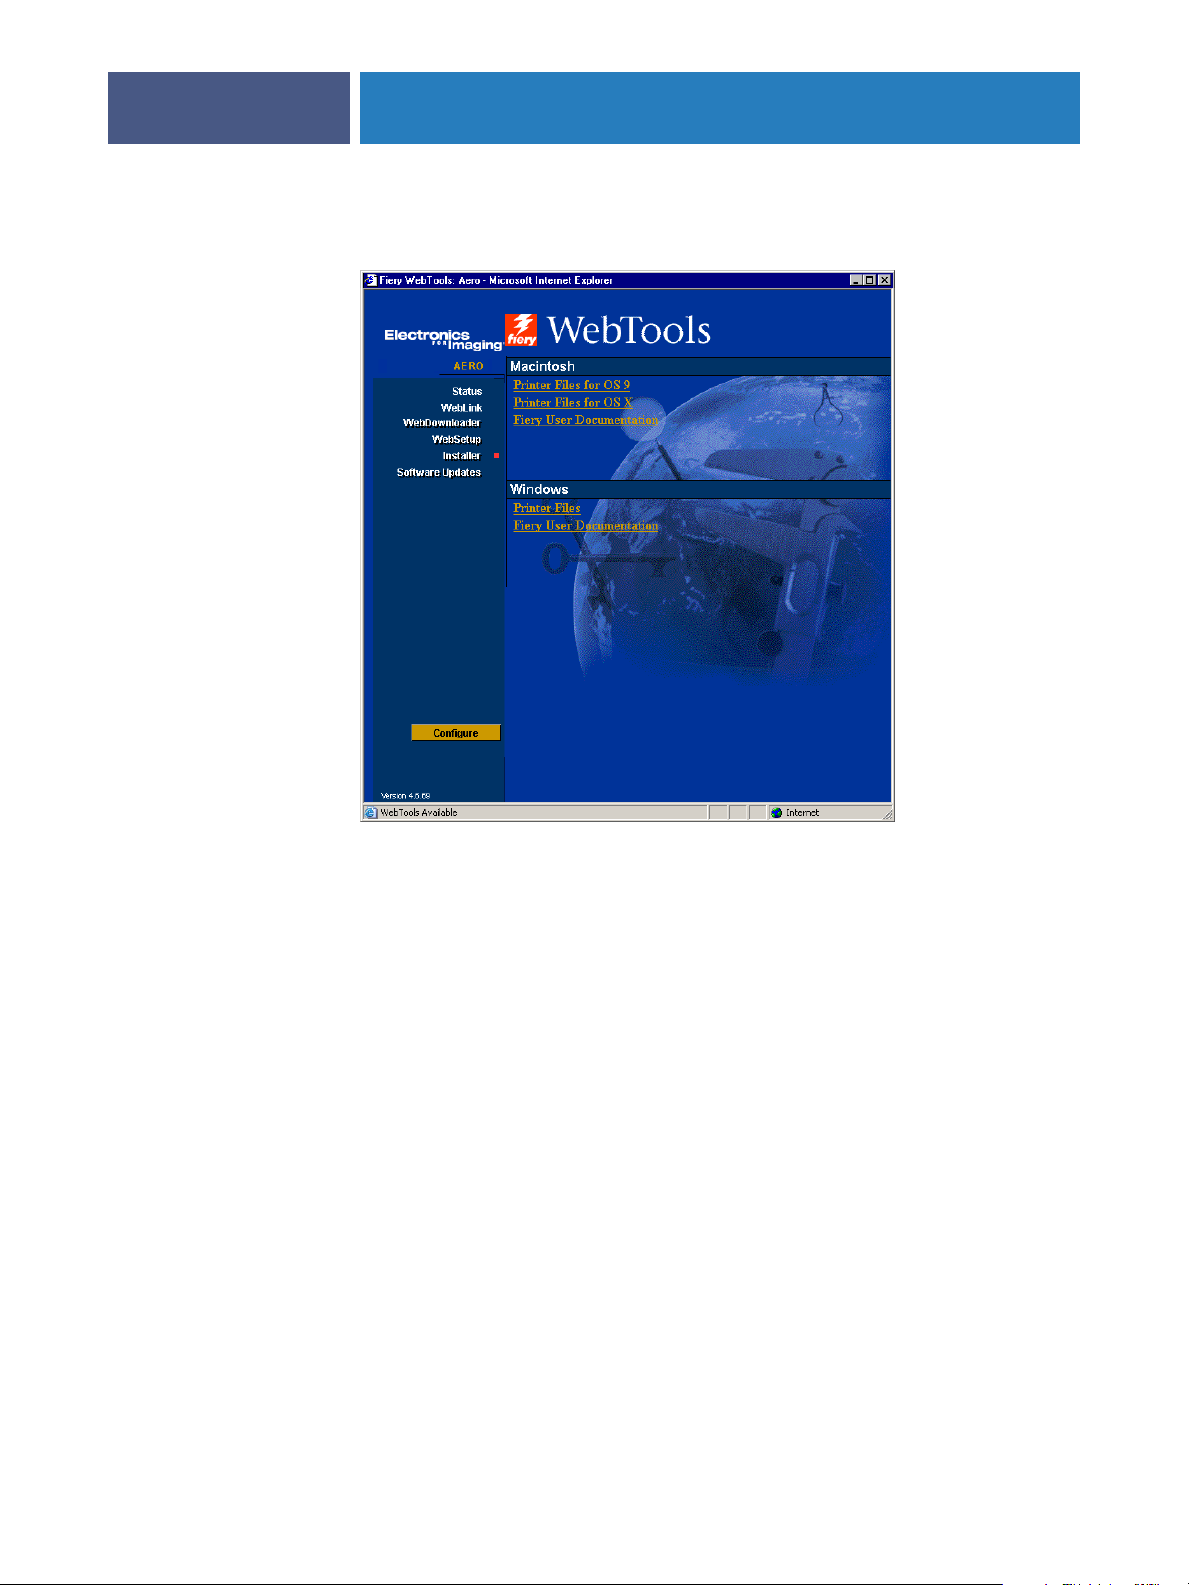
3 Click Installer.
22
4 Click the name of the item that you want to install.
For Windows printer drivers, click Printer Files under the Windows heading.
5 If a dialog box prompts you to either open the file or save it to disk, choose to save it
to disk.
6Browse to the location where you want to save the PRNTDRVE.EXE file and click Save.
The file is downloaded from the Fiery EXP6000/EXP5000. This compressed file is an archive
that contains multiple files.
7 Double-click the PRNTDRVE.EXE file to extract the files.
Depending on your operating system, you may be prompted to select a location to extract the
files to.
Page 23

INSTALLING PRINTER DRIVERS
23
Follow the instructions for your operating system to install the printer driver. The procedures
are the same as for installing from the CD, except that after you click Have Disk, you browse
to the location where you extracted the files rather than to the CD.
For instructions on installing
the printer driver for
Windows 98/Me “To install the PostScript printer driver for Windows 98/Me”
Windows NT 4.0 “To install the PostScript printer driver for Windows NT 4.0”
Windows 2000/XP/Server 2003 “To install the printer driver for Windows 2000/XP/
See
on page 14
on page 15
Server 2003” on page 18
Page 24

SETTING UP PRINTING CONNECTIONS
SETTING UP PRINTING CONNECTIONS
To print from Windows computers, you or the administrator must perform the
following tasks:
•Set up network servers, if any.
•Set up the Fiery EXP6000/EXP5000 to accept print jobs from your computer.
• Configure a port on each Windows computer for the network type.
Printing connections
The Fiery EXP6000/EXP5000 supports the following printing connections:
24
• SMB
•TCP/IP and LPR
• IPX/SPX or IPX (Novell)
• IPP
Page 25

SETTING UP PRINTING CONNECTIONS
Completing the SMB printing connection
If your network does not have a Windows server, Windows computers can still print to the
Fiery EXP6000/EXP5000. This method of printing is SMB printing (also known as
Windows or WINS printing). When users send print jobs, computers running Windows
operate in a peer-to-peer environment and communicate directly with the Fiery EXP6000/
EXP5000.
Enabling SMB printing allows the Fiery EXP6000/EXP5000 to be listed on the network, so
that Windows clients can print to a particular print connection (Hold, Print, or Direct) on
the Fiery EXP6000/EXP5000 without using other networking software. Windows printing
runs via TCP/IP. You must configure TCP/IP on the Fiery EXP6000/EXP5000 and on all
computers that use SMB printing.
Once you enable SMB printing on the Fiery EXP6000/EXP5000, you can set up the
Windows or SMB connection and install the printer driver in one procedure. For more
information, see “Installing printer drivers by Point and Print” on page 12.
25
Page 26

SETTING UP PRINTING CONNECTIONS
Completing TCP/IP and LPR printing connections
TCP/IP and LPR printing are supported for Windows NT 4.0 and Windows 2000/XP/
Server 2003 only. Procedures for setting up the printing connections on these platforms are
described in the following sections.
NOTE: TCP/IP printing is different from a TCP/IP connection. Setting up TCP/IP printing
and configuring your computer for TCP/IP connection are two separate steps.
Completing the Windows NT 4.0 TCP/IP and LPR connection
After you install the PostScript printer driver and printer description files, complete the setup
for the TCP/IP and LPR connection by performing the following steps:
•Prepare the Fiery EXP6000/EXP5000 to accept print jobs using TCP/IP and LPR
protocols. For details, see Configuration and Setup.
•Enable LPD on the Fiery EXP6000/EXP5000. For details, see Configuration and Setup.
• Configure the computer for the TCP/IP connection.
26
Before you complete the following procedure, contact your system administrator for the IP
address assigned to the Fiery EXP6000/EXP5000, the subnet mask, and the gateway address,
if required.
The TCP/IP protocol should already be installed on your Windows NT 4.0 computer.
TO SET UP TCP/IP AND LPR PRINTING FOR WINDOWS NT 4.0
1 Click Start, choose Settings, and then choose Printers.
2 Right-click the Fiery EXP6000/EXP5000 icon and choose Properties.
3 Click the Ports tab.
Page 27

SETTING UP PRINTING CONNECTIONS
4 Click Add Port.
The available port types are displayed.
5 Select LPR Port and click New Port.
If the LPR port is not listed, install the TCP/IP network protocol and Microsoft TCP/IP
printing software. For more information, see your Windows documentation.
6Type the IP address of the Fiery EXP6000/EXP5000.
27
If your network uses Domain Name Services (DNS), type the DNS name assigned to the
Fiery EXP6000/EXP5000 instead of the IP address.
7Type one of the following printer names, depending on the connection that you want to print
to.
print
hold
direct
N
OTE: This name is case-sensitive. Type it exactly as shown.
8 Click OK.
The computer verifies the address or DNS name you type and notifies you if it cannot resolve
the address.
9 Click Close in the Printer Ports dialog box.
The new port configuration is reflected on the Ports tab. To verify the connection, you must
close the Printer Properties dialog box.
10 Click OK to close the Printer Properties dialog box.
11 Reopen the Printer Properties dialog box.
Page 28

SETTING UP PRINTING CONNECTIONS
12 Click the General tab and click Print Test Page.
13 Click OK to close the Printer Properties dialog box.
When you print, your PostScript files are transmitted over the LPR Port connection to the
Fiery EXP6000/EXP5000.
Completing the Windows 2000/XP/Server 2003 TCP/IP and Port 9100
or LPR connection
Once you have installed the PostScript printer driver files, complete the setup for the TCP/IP
and LPR connection as follows:
•Prepare the Fiery EXP6000/EXP5000 to accept print jobs using TCP/IP and LPR
protocols. For details, see Configuration and Setup.
•Enable LPD or Port 9100 on the Fiery EXP6000/EXP5000. For details, see Configuration
and Setup.
• Configure the computer for the TCP/IP connection.
28
Before you complete the following procedure, contact your system administrator for the IP
address assigned to the Fiery EXP6000/EXP5000, the subnet mask, and the gateway address,
if required.
The TCP/IP protocol should already be installed on the Windows 2000/XP/Server 2003
computer.
NOTE: You can also set up the LPR connection by installing Print Services for UNIX, which is
supplied as an add-on Windows component with Windows 2000/XP/Server 2003. For more
information, see your Windows documentation.
Page 29

SETTING UP PRINTING CONNECTIONS
TO SET UP TCP/IP AND PORT 9100 OR LPR CONNECTION FOR WINDOWS 2000/XP/SERVER 2003
NOTE: The following procedures use Windows 2000 illustrations. Windows XP/Server 2003
differences are noted.
1 Click Start, choose Settings, and then choose Printers.
2 Right-click the Fiery EXP6000/EXP5000 icon and choose Properties.
3 Click the Ports tab.
29
4 Click Add Port.
5 Select Standard TCP/IP Port from the list of Available port types and click New Port Type.
6 Click Next.
The Add Standard TCP/IP Printer Port Wizard dialog box appears.
Page 30

SETTING UP PRINTING CONNECTIONS
7Type the Fiery EXP6000/EXP5000 IP address.
8 Click Next.
30
9 Make sure that Generic Network Card is selected as Standard for Device Type and click
10 Click Finish to close the Add Standard TCP/IP Printer Port Wizard dialog box, and then click
Close in the Printer Ports dialog box.
11 Click Configure Port in the Ports tab of the Properties dialog box.
Next.
The Configure Standard TCP/IP Port Monitor dialog box appears.
12 If LPD printing is enabled on the Fiery EXP6000/EXP5000, select LPR in the Protocol area
and LPR Byte Counting Enabled in the LPR Settings area.
NOTE: You can also proceed without selecting LPR Byte Counting Enabled.
Page 31

SETTING UP PRINTING CONNECTIONS
If Port 9100 printing is enabled on the Fiery EXP6000/EXP5000, select Raw in the
Protocol area.
The port number 9100 automatically appears in the Raw Settings area. This is the default
port number. You can print to the printer connection selected for Port 9100 printing on
the Fiery EXP6000/EXP5000.
To specify a specific port number, see the following step.
13 Type the name of the print connection.
For LPR, type direct, print, or hold for Queue Name. “z” is displayed as the default for print.
You can leave “z” as is or type print. For the Hold queue, you must type hold. For the Direct
connection, you must type direct.
For Port 9100, manually type the following port numbers for each print connection in the
Raw Settings area:
Fiery EXP6000/EXP5000 default: 9100
direct: 9101
31
print: 9102
hold: 9103
N
OTE: Type the number exactly as shown.
14 Click OK to close the Configure Standard TCP/IP Port Monitor dialog box.
Page 32

SETTING UP PRINTING CONNECTIONS
Completing IPX/SPX or IPX (Novell) connections
IPX/SPX or IPX (Novell) printing connections are supported for Windows 98/Me,
Windows NT 4.0, and Windows 2000/XP/Server 2003. The procedures for each platform
are described in the following sections.
Completing the Windows 98/Me IPX/SPX or IPX (Novell) connection
If you are printing through a Novell server, set up the Novell network and file server before
you begin. Configure the file server with a print server and print connection for the
Fiery EXP6000/EXP5000. For details, see the documentation that accompanies NetWare
and Configuration and Setup.
To print from Windows 98/Me computers over IPX (Novell), set up IPX/SPX protocols, and
then configure the Fiery EXP6000/EXP5000 by choosing the IPX frame type and typing the
settings for the port that you use.
TO SELECT A FRAME TYPE FOR IPX/SPX PRINTING FOR WINDOWS 98/ME
1 Click Start, choose Settings, and then choose Control Panel.
32
2 Double-click the Network icon.
NOTE: Make sure that IPX/SPX-compatible Protocol is in the list of installed network
components.
For further instructions, see the documentation that accompanies Windows 98/Me or contact
Microsoft Technical Support.
3 Double-click the IPX/SPX-compatible Protocol icon.
Page 33

SETTING UP PRINTING CONNECTIONS
4 Click the Advanced tab.
5 Select Frame Type in the Property list.
6From the Value menu, choose the Frame Type that corresponds to the one set in
Fiery EXP6000/EXP5000 Network Setup.
To determine which frame type(s) are configured, print the Configuration page from
the Fiery EXP6000/EXP5000.
NOTE: Do not select Auto. Doing so may not select the frame type specified on
the Fiery EXP6000/EXP5000.
33
7 Click OK and close the Network Control Panel.
8 When prompted to restart your computer, click Yes.
TO SET UP A PORT FOR IPX (NOVELL) PRINTING WITH WINDOWS 98/ME
1 Click Start, choose Settings, and then choose Printers.
2 Click the Fiery EXP6000/EXP5000 printer icon and choose Properties from the File menu.
3 Click the Details tab and click Add Port.
A list of connection options appears.
4 In the Add Port dialog box, specify the network path or click Browse to browse the network.
5 If you are using a NetWare file server, double-click the icon for the NetWare file server to use
for printing to the Fiery EXP6000/EXP5000.
6 Click the printer icon for the NetWare print queue that you want to use, and then click OK.
Page 34

SETTING UP PRINTING CONNECTIONS
7Verify that the network path is updated in the Add Port dialog box and click OK.
34
Your print jobs are transmitted to the specified Print queue on the Novell file server.
The Fiery EXP6000/EXP5000 polls the file server, and if jobs are present, they are
transmitted to the Fiery EXP6000/EXP5000.
8To confirm the connection, click the General tab, click Apply, and then click Print Test Page.
When the Test Page prints successfully, you are ready to print from the computer.
Completing the Windows NT 4.0 IPX (Novell) connection
Complete the setup for the IPX (Novell) connection as follows:
• Configure the Novell network and file server for handling Fiery EXP6000/EXP5000
print jobs. Configure the file server with a print server and print connection for the
Fiery EXP6000/EXP5000. For details, see the documentation that accompanies NetWare.
•Prepare the Fiery EXP6000/EXP5000 for IPX printing.
•Set up the IPX connection on the computer.
Before you begin IPX Setup, install NetWare protocols (NWLink IPX/SPX Compatible
Transport) and NetWare client services on the Windows NT 4.0 computer.
TO SET UP IPX (NOVELL) PRINTING FOR WINDOWS NT 4.0
1 Double-click Network Neighborhood.
2 Double-click NetWare or Compatible Network.
A list of NetWare servers appears.
3 Double-click the NetWare tree or file server for which the network administrator defined a
print connection for the Fiery EXP6000/EXP5000.
You may have to log on to the file server to see the print connections.
4 Double-click the print connection defined for the Fiery EXP6000/EXP5000.
Page 35

SETTING UP PRINTING CONNECTIONS
5 If the NetWare server does not have a suitable driver for the Fiery EXP6000/EXP5000, you are
asked if you want to set up the printer on your computer. Click Yes.
6 Click OK to install the Fiery EXP6000/EXP5000 PostScript printer driver.
7Follow step 6 through step 13 of the procedure “To install the PostScript printer driver for
Windows NT 4.0” on page 15.
35
When installation is complete, a new printer window appears, with the name of the print
queue on the NetWare server.
8 Choose Properties from the File menu and click the Ports tab.
Verify that the connection to the NetWare queue is listed and selected as a port for
the Fiery EXP6000/EXP5000.
9 Click the General tab and click Print Test Page.
10 In the printer Job Notes window, type user and job identification information, and then
click OK.
The Test Page remains listed in the queue window until it is printed.
The Fiery EXP6000/EXP5000 polls the NetWare server for print jobs in the print connection
defined for the Fiery EXP6000/EXP5000. When you print, your PostScript files are spooled
to that connection and transmitted over the queue “port” to the Fiery EXP6000/EXP5000.
Page 36

SETTING UP PRINTING CONNECTIONS
Completing the Windows 2000/XP/Server 2003 IPX (Novell)
connection
Complete the setup for the IPX (Novell) connection as follows:
• Configure the Novell network and file server for handling Fiery EXP6000/EXP5000 print
jobs. Configure the file server with a print server and print connection for the
Fiery EXP6000/EXP5000. For details, see the documentation that accompanies NetWare.
•Prepare the Fiery EXP6000/EXP5000 for IPX printing.
•Set up the IPX connection on the computer.
Before you begin, install NetWare protocols (NWLink IPX/SPX Compatible Transport) and
NetWare client services on the Windows 2000/XP/Server 2003 computer.
TO SET UP IPX (NOVELL) PRINTING FOR WINDOWS 2000/XP/SERVER 2003
1 Windows 2000: Double-click My Network Places.
Windows XP: Click Start and click My Network Places.
Windows Server 2003: Click Start, choose Explorer, and then click My Network Places.
36
2 Double-click NetWare or Compatible Network.
A list of NetWare servers appears.
3 Double-click the NetWare tree or file server for which the network administrator defined a
print connection for the Fiery EXP6000/EXP5000.
You may have to log on to the file server to see the print connections.
4 Double-click the print connection defined for the Fiery EXP6000/EXP5000.
5 If the NetWare server does not have a suitable driver for the Fiery EXP6000/EXP5000, you are
asked if you want to set up the printer on your computer. Click Yes.
6 Click OK to install the Fiery EXP6000/EXP5000 PostScript printer driver.
Page 37

SETTING UP PRINTING CONNECTIONS
7Follow step 6 through step 10 of the procedure “To install the printer driver for
Windows 2000/XP/Server 2003” on page 18.
When installation is complete, a new printer window appears, with the name of the print
queue on the NetWare server.
8 Choose Properties from the File menu and click the Ports tab.
Verify that the connection to the NetWare queue is listed and selected as a port for
the Fiery EXP6000/EXP5000.
37
9 Click the General tab and click Print Test Page.
10 In the printer Job Notes field, type user and job identification information, and then
click OK.
The Test Page remains listed in the queue window until it is printed.
The Fiery EXP6000/EXP5000 polls the NetWare server for print jobs in the print connection
defined for the Fiery EXP6000/EXP5000. When you print, your PostScript files are spooled
to that connection and transmitted over the queue “port” to the Fiery EXP6000/EXP5000.
Page 38

SETTING UP PRINTING CONNECTIONS
Completing IPP connections
With Internet Printing Protocol (IPP), print jobs are sent to the Fiery EXP6000/EXP5000
over the Internet.
IPP printing is supported on Windows 2000/XP/Server 2003 and can be enabled on
Windows 98/Me computers by installing the “wpnpins.exe” client file (available on the
Windows Me CD or the Windows 2000 Server CD). For more information about obtaining
and installing this file, contact Microsoft Corporation or Microsoft Technical Support.
IPP printing is not supported on Windows NT 4.0.
NOTE: The IPP setup procedures are performed after installing the appropriate printer drivers
(see Installing Printer Drivers).
Setting up IPP printing with Windows 98/Me
Before you begin, perform the following tasks:
•Make sure the Fiery EXP6000/EXP5000 is configured for TCP/IP printing and
IPP printing.
38
For more information, see Configuration and Setup.
•Specify the printing destination on your computer.
TO SET UP IPP PRINTING WITH WINDOWS 98/ME
1 Click Start, choose Settings, and then choose Printers.
2 In the Printers window, right-click the Fiery EXP6000/EXP5000 PostScript printer driver icon
and choose Properties.
3 Click the Details tab and click Add Port.
The Add Port dialog box appears.
Page 39

SETTING UP PRINTING CONNECTIONS
4Type the network path for the printer.
The path for the printer is the IP address or DNS name followed by ipp/print. Insert slashes
between the elements, for example, http://10.10.10.150/ipp/print.
NOTE: The network path is not case-sensitive.
39
5 Click OK.
Setting up IPP printing with Windows 2000/XP/Server 2003
Before you begin, perform the following tasks:
•Make sure the Fiery EXP6000/EXP5000 is configured for TCP/IP printing and
IPP printing.
For more information, see Configuration and Setup.
•Specify the printing destination on your computer.
TO SET UP IPP PRINTING WITH WINDOWS 2000/XP/SERVER 2003
1 Windows 2000: Click Start, choose Settings, and then choose Printers.
Windows XP: Click Start and choose Printers and Faxes.
Windows Server 2003: Click Start, choose Control Panel, and then choose Printers and Faxes.
2 Windows 2000: Double-click the Add Printer icon and click Next.
Windows XP: Click Add a printer under Printer Tasks.
Windows Server 2003: Choose Add a printer.
3 Select Network printer and click Next.
4 Select Connect to a printer on the Internet or on your intranet. Type an IP address or
computer name in the URL field.
The URL for the printer is the IP address, or DNS name, followed by ipp/print. Insert slashes
between the elements.
Page 40

SETTING UP PRINTING CONNECTIONS
NOTE: The URL for the printer is not case-sensitive.
5 Click Next.
40
The Connect to Printer dialog box appears.
6 Click OK.
The Add Printer Wizard dialog box appears.
7 If you are installing the PostScript printer for the first time, follow the procedure
“To install the printer driver for Windows 2000/XP/Server 2003” on page 18.
If you already installed the printer driver on your computer, choose the appropriate names
from the Manufacturers and Printers lists and click OK.
8 Indicate whether you want to make the Fiery EXP6000/EXP5000 the default printer and
click Next.
9 Click Finish.
Page 41

CONFIGURING INSTALLABLE OPTIONS
CONFIGURING INSTALLABLE OPTIONS
After you complete the printer driver installation, you must configure the Fiery EXP6000/
EXP5000 for the options installed on the digital press to allow the Fiery EXP6000/EXP5000
to take advantage of the digital press options. Configure the options manually, or for TCP/IP
network connections, use the Two-Way Communication feature to configure the options
automatically.
41
Page 42

CONFIGURING INSTALLABLE OPTIONS
Configuring installable options manually
The following procedures describe how to manually configure the Fiery EXP6000/EXP5000
for the options installed on the digital press. The procedures for all Windows platforms are
similar. Any differences are noted in the text. The installable options are listed in the following
table.
Installable option Selections
GA Package Not Installed, Fiery Graphic Arts Package, Fiery Graphic Arts
Package, Premium Edition
Feeder Not Installed, SFM (Fiery EXP6000), HCF (Fiery EXP5000)
Finishing Device Setup Not Installed, HCS, HCSS, HCS Bypass, HCS - HCS,
HCS -HCSS, HCS - HCS Bypass
TO CONFIGURE OPTIONS MANUALLY
1 Windows 98/Me/NT 4.0/2000: Click Start, choose Settings, and then choose Printers.
Windows XP: Click Start, and choose Printers and Faxes.
Windows Server 2003: Click Start, choose Control Panel, and then choose Printers and Faxes.
42
2 Click the Fiery EXP6000/EXP5000 icon and choose Properties from the File menu.
3 Click the Installable Options tab.
4 Select an installable option from the Available Options list.
5 Click Add to move the option to the Installed Options list.
6 Click Apply, and then click OK.
Page 43

CONFIGURING INSTALLABLE OPTIONS
Configuring installed options and updating print options
settings automatically
If you enabled a TCP/IP network, you can automatically update your printer driver to reflect
the options currently installed on the digital press. When the printer driver is first installed,
the options reflect the default settings that were set up in Fiery EXP6000/EXP5000 Setup or
ColorWise Pro Tools. When you update the printer driver using the Two-Way
Communication feature, you allow the printer driver to retrieve the settings from the
Fiery EXP6000/EXP5000.
The Two-Way Communication feature also updates the ColorWise print options in Expert
Color Settings to reflect the current color settings on the Fiery EXP6000/EXP5000. For more
information about ColorWise print options, see Color Printing.
TO ENABLE TWO-WAY COMMUNICATION
1 Windows 98/Me/NT 4.0/2000: Click Start, choose Settings, and then choose Printers.
Windows XP: Click Start and choose Printers and Faxes.
Windows Server 2003: Click Start, choose Control Panel, and then choose Printers and Faxes.
43
2 In the Printers window, select the Fiery EXP6000/EXP5000 printer driver icon.
3 Choose Properties from the File menu.
4 Click the Installable Options tab.
5 Select Two-Way Communication.
6Type the Fiery EXP6000/EXP5000 IP address or DNS name.
Page 44

CONFIGURING INSTALLABLE OPTIONS
7 Select Update Fiery Driver When Opened to display the printer’s current default settings
when the printer driver is opened.
NOTE: To confirm that Two-Way Communication is enabled, click the About tab.
8 Click Update.
9 Select Enable E-mail Notification to receive e-mail notification after your job has been
printed, and type the e-mail address to which an e-mail notification is sent.
You will receive e-mail notification of any errors that occur during printing.
NOTE: Enable E-mail Notification is displayed only if E-mail Service is enabled at Setup.
For more information, see Configuration and Setup.
10 Windows 2000/XP/Server 2003: Click the Advanced tab and deselect Enable Advanced
Printing Features.
11 Click OK.
44
Page 45

FIERY PRINTING UTILITIES
FIERY PRINTING UTILITIES
You can install the following Fiery utilities from the User Software CD:
• EFI Job Monitor
•Fiery Printer Delete Utility
• EFI Fiery Mail Port
NOTE: Job Monitor is automatically installed when you install the printer driver on
your computer. To use Job Monitor, you must enable it in the printer driver. (For more
information, see page 46.)
45
Page 46

FIERY PRINTING UTILITIES
Configuring the connection for Job Monitor
Use Job Monitor to monitor the status of Fiery EXP6000/EXP5000 servers and view
information about the print jobs sent to them.
For information about using Job Monitor, see Job Monitor Help.
TO CONFIGURE THE CONNECTION TO FIERY EXP6000/EXP5000 SERVERS
1 Windows 98/Me/NT 4.0/2000: Click Start, choose Settings, and then choose Printers.
Windows XP: Click Start and choose Printer and Faxes.
Windows Server 2003: Click Start, choose Control Panel, and then choose Printer and Faxes.
2 In the Printers window, select the Fiery EXP6000/EXP5000 PostScript printer driver icon.
3 Choose Properties from the File menu.
4 Click the Printer Status tab.
5 Click Launch Job Monitor.
Job Monitor opens a utility window and establishes a connection to the Fiery EXP6000/
EXP5000. If you have installed and configured printer drivers for more than one digital press,
Job Monitor automatically establishes connections to all the Fiery EXP6000/EXP5000
servers.
46
1 Server
1
6 Click Update in the Printer Status window.
7 Click OK in the Printer Status window.
The Job Monitor icon ( ) appears on the desktop and in the Windows taskbar of
your computer.
NOTE: To use Job Monitor on Windows 2000/XP/Server 2003, deselect the Enable advanced
printing features option on the Advanced tab of the printer driver.
Page 47

FIERY PRINTING UTILITIES
Installing Fiery printing utilities
You must install the Fiery utilities on each client computer. The installation of each utility is
similar. Before you begin each installation, determine where you want to install each item
on your computer. Otherwise, the software is placed by default in the Fiery folder inside the
Programs folder.
TO INSTALL FIERY UTILITIES
1 Open the appropriate folder for the software that you want to install.
2 Double-click the Setup.exe icon.
3Follow the on-screen instructions to complete installation.
47
Page 48

FIERY PRINTING UTILITIES
Using Fiery Printer Delete Utility
Fiery Printer Delete Utility is installed and used locally, so you do not need to connect to the
Fiery EXP6000/EXP5000 before you use the software.
TO USE FIERY PRINTER DELETE UTILITY
1 Click Start, choose Programs, and then choose Fiery.
2 Click FieryPrinterDeleteUtility.
The Fiery Driver Uninstall Tool dialog box appears. Any Fiery EXP6000/EXP5000 printer
drivers found on your computer are listed.
48
3To delete a printer, select the printer name and click Delete.
4 Click OK to delete the selected printer driver.
5 Click OK to restart, or, to delete another printer driver, click Cancel to return to the
Fiery Driver Uninstall Tool dialog box. When you finish deleting printer drivers, restart
your computer.
Page 49

FIERY PRINTING UTILITIES
Configuring the connection for Mail Port
The E-mail Service allows you to print to and control the Fiery EXP6000/EXP5000 remotely.
Jobs are sent to the Fiery EXP6000/EXP5000 in the form of e-mail attachments. Set up
e-mail printing on Windows computers by adding the Mail Port software as a printer port.
To set up the Fiery EXP6000/EXP5000 for e-mail printing, see Configuration and Setup. After
you perform Setup, install the software from the User Software CD onto your Windows
computer, and add a port.
NOTE: The following procedures are similar for all Windows platforms.
TO CONFIGURE THE CONNECTION FOR THE MAIL PORT
1 Windows 98/Me/NT 4.0/2000: Click Start, choose Settings, and then choose Printers.
Windows XP: Click Start and choose Printers and Faxes.
Windows Server 2003: Click Start, choose Control panel, and then choose Printers and Faxes.
2 Windows 98/Me: Click the Fiery EXP6000/EXP5000 printer driver icon, choose Properties
from the File menu, and then click the Details tab.
Windows NT 4.0/2000: In the Printers window, double-click the Add Printer icon and click
Next.
Windows XP: In the Printers and Faxes window, click Add a printer and then click Next.
Windows Server 2003: Click Start, choose Add a Printer, and then click Next.
49
3 Windows 98/Me: Proceed to step 4.
Windows NT 4.0/2000/XP/Server 2003: Specify printing using a Local printer and click Next.
4 Windows 98/Me and Windows NT 4.0: Click Add Port in the window displaying a list of ports.
The Printer Ports dialog box displays EFI Fiery Mail in the Available Printer Ports list.
Page 50

FIERY PRINTING UTILITIES
5 Windows 2000/XP/Server 2003: Select Create a New Port and choose EFI Fiery Mail from the
Type menu.
6 Windows 98/Me and Windows NT 4.0: Select EFI Fiery Mail and click New Port.
Windows 2000/XP/Server 2003: Click Next.
50
The Add Port dialog box appears.
7Type the basic information required to set up the e-mail port.
Fiery’s E-mail Address: Type the e-mail address of the Fiery EXP6000/EXP5000.
Outgoing Mail Server: Type the name or IP address of the SMTP server for the port monitor
to use.
Page 51

FIERY PRINTING UTILITIES
8 Click Advanced.
The E-Mail Port Configuration dialog box appears.
51
9Type the following information.
For Fiery Server:
• E-mail Address: The e-mail address of the Fiery EXP6000/EXP5000.
• Queue: The print connection on the Fiery EXP6000/EXP5000 that you want.
For Outgoing Mail Server (SMTP):
• Server Name: The SMTP server to use.
• From Address: The “from” address to insert in the e-mail.
For Options:
• Break apart messages larger than: The maximum size of a single e-mail message
is displayed. If a job exceeds this size, it is split into multiple messages, each not to exceed
this size, and then is sent to the Fiery EXP6000/EXP5000. The Fiery EXP6000/EXP5000
automatically combines all split messages into the original single print job for printing.
• Status messages from Fiery: When enabled, the Status option prompts the
Fiery EXP6000/EXP5000 to send status reports of the job printed to the print queue
via e-mail.
10 Click OK.
The Add Printer Wizard dialog box appears.
11 Click Next and follow the on-screen instructions for installing the printer driver for your
Windows computer.
Page 52

FIERY PRINTING UTILITIES
Using Fiery E-mail Service
Fiery E-mail Service allows you to control the Fiery EXP6000/EXP5000 using your current
e-mail infrastructure and print to remote locations and bypass firewalls. Fiery E-mail Service
is not application-specific. You can use any e-mail infrastructure.
With E-mail Service, you can submit jobs to the Fiery EXP6000/EXP5000 as e-mail
attachments.
Use E-mail Service to do the following:
•Print using an e-mail client.
•Print using the Fiery E-mail Port Monitor.
• Scan using Scan to E-mail.
52
Page 53

FIERY PRINTING UTILITIES
How Fiery E-mail Service works
To use the e-mail services, you must set up E-mail Service as described in
Configuration and Setup.
To print with an e-mail client, you send a file as an e-mail attachment. E-mail Service
extracts the file and sends it to the Fiery EXP6000/EXP5000. The attachment can be
in any format the Fiery EXP6000/EXP5000 recognizes (PostScript, PDF, or TIFF).
NOTE: Fiery E-mail Service does not process files with .vbs, .exe, or .bat extensions.
To print using the Fiery E-mail Port Monitor, you must print to a printer connected to the
Fiery E-mail Port Monitor. If you install E-mail Port Monitor, your print job is e-mailed
to the Fiery EXP6000/EXP5000 when you choose Print from an application. For more
information about setting up the E-mail Port Monitor, see page 49.
E-mail Service supports Scan to E-mail, a feature that allows you to scan a document
and send it to an e-mail address as an attachment or URL. For more information about
Scan to E-mail, see Utilities.
53
The Fiery EXP6000/EXP5000 supports internal address books. Administrators can retrieve,
add, delete, and clear addresses from the address books by sending requests via e-mail.
For more information about address books, see Configuration and Setup.
Printing using an e-mail client
You can submit print jobs to the Fiery EXP6000/EXP5000 in the form of an e-mail
attachment using your e-mail application. When you send an e-mail with an attachment,
E-mail Service extracts the file and sends it to the Fiery EXP6000/EXP5000 Print queue.
The file format must be one supported by the Fiery EXP6000/EXP5000.
By default, anyone can print with an e-mail client, unless the Print address book has been
set up by the administrator. If the Print address book has been set up and your e-mail address
is not in it, you cannot send files to the Fiery EXP6000/EXP5000 via e-mail. For more
information about address books, see Configuration and Setup.
NOTE: The Direct connection and Hold queue are not supported by the e-mail client feature.
NOTE: The following illustrations depict the Microsoft Outlook e-mail application.
NOTE: HTML-formatted e-mail messages are printed in HTML source codes, not as they
appear on the remote workstation.
Page 54

FIERY PRINTING UTILITIES
TO PRINT USING AN E-MAIL CLIENT
1 Open your e-mail application.
2Type the Fiery EXP6000/EXP5000 e-mail address in the To: line.
3Type text in the Subject line or leave the Subject line blank.
4Attach the file that you want to print.
You can also type text in the body of the message. That text is printed with the file.
NOTE: If your attachment exceeds the file size limitation set by your e-mail system
administrator, the e-mail is not sent.
54
5 Send the e-mail.
The file is sent to the Fiery EXP6000/EXP5000 and the job is printed. After the
Fiery EXP6000/EXP5000 receives the job, you are sent an e-mail notification that the print
job was accepted. The e-mail provides a job identification (ID). Use the job IDs to manage
jobs with Job Control (see the following section). The e-mail notification indicates any
current error at the digital press.
Once the job has been printed, you are sent a second e-mail notification that indicates the job
printed successfully.
Use Job Control to see if your job printed successfully.
Job Control
You can manage your print jobs by submitting commands to the Fiery EXP6000/EXP5000
via e-mail. You can cancel a job, check job status, and get help on a job. Once you send a
command, the Fiery EXP6000/EXP5000 returns an e-mail response.
Page 55

FIERY PRINTING UTILITIES
TO MANAGE PRINT JOBS WITH JOB CONTROL
1 In your e-mail application, type the Fiery EXP6000/EXP5000 e-mail address in the To: line.
2Type one of the following Job Control commands in the Subject line:
To check the status of a job, type #JobStatus<job id> in the Subject line.
You receive a reply to your job status query. You can only get the status of the job if you sent
the job or are an administrator.
To cancel a job, type #CancelJob<job id> in the Subject line.
You receive a notification indicating that the job has been cancelled and did not print to the
Fiery EXP6000/EXP5000. You can only cancel a job if you sent the job or are an
administrator.
To get help, type #Help in the Subject line.
You receive an e-mail response that contains links that allow you to cancel jobs, check job
status, and search and manage address books. Click any of the links to perform a Job Control
command.
55
Page 56

FIERY PRINTING UTILITIES
Printing using the E-mail Port Monitor
Once you set up the E-mail Port Monitor, print using E-mail Service in the same manner as
any other printing method. No additional steps are necessary.
NOTE: The Direct connection is not supported when you print with E-mail Port Monitor.
TO PRINT USING THE FIERY E-MAIL PORT MONITOR
1 Choose Print in your application.
2 Make sure the Fiery EXP6000/EXP5000 is selected as your printer and you have installed the
E-mail Port Monitor for the Fiery EXP6000/EXP5000.
3 Click Properties.
4 Click the Fiery Printing tab.
56
5 Set the print options and click OK.
To set options using the printer driver, see “Setting options and printing” on page 58.
6 Click OK again to send your job to the Fiery EXP6000/EXP5000.
If the attachment exceeds the file size limitation set in your application, the attachment is
broken into several messages.
Page 57

PRINTING
PRINTING
This chapter describes printing to the Fiery EXP6000/EXP5000. You can print from a
networked Windows computer or a computer using Windows (WINS) printing. You can also
print to a file so that it can be printed at a remote location (see “Saving files to print at a
remote location” on page 80). In addition to these methods, you can download certain types
of files to the Fiery EXP6000/EXP5000 using Fiery Downloader (see Utilities), and print
documents using EFI Hot Folders (an option) (see Utilities) and Fiery E-mail Services
(see “Using Fiery E-mail Service” on page 52).
For information about setting up the Windows environment for printing with Windows
servers connected to the Fiery EXP6000/EXP5000, see Configuration and Setup. For
information about connecting to the Fiery EXP6000/EXP5000 over the network, see “Setting
Up Printing Connections” on page 24. For information about installing printer drivers, see
“Installing Printer Drivers” on page 11.
57
Page 58

PRINTING
Printing from applications
After you install the Fiery EXP6000/EXP5000 printer driver and configure the proper port,
you can print directly from most Windows applications. Set the print options for the job and
choose Print from your application.
To achieve optimal printing results from specific applications, see Color Printing and Fiery
Color Reference.
Setting options and printing
To print from all Windows platforms, install the corresponding PostScript printer driver. The
drivers are included on the Fiery EXP6000/EXP5000 User Software CD.
Once you install the printer driver and printer description files, you can specify print settings
for a particular job and print it to the Fiery EXP6000/EXP5000. You can also set default print
settings using the driver.
To print from Windows applications on a computer connected to a print server, the print
server must be a Novell NetWare, Windows NT 4.0/2000/Server 2003, or UNIX server.
For more information, see Configuration and Setup.
58
To print from Windows applications without connecting to a print server, use Server Message
Block (SMB) printing. For more information, see “Completing the SMB printing
connection” on page 25.
NOTE: Not all Fiery EXP6000/EXP5000 print options are supported in the Windows 98/Me/
NT 4.0 printer drivers. To use these features when printing from Windows 98/Me/NT 4.0,
you must send your job to the Hold queue and then override the job properties from
Command WorkStation. For more information, see Utilities.
The following procedures explain how to use the printer driver to specify print options.
For information about specific print options, see Print Options.
NOTE: The following procedures use Windows 2000 illustrations.
TO SET PRINT OPTIONS FOR A SPECIFIC WINDOWS PRINT JOB USING THE PRINTER DRIVER
1 Choose Print in your application.
2 Select the Fiery EXP6000/EXP5000 as your printer and click Properties.
Page 59

PRINTING
3 Click the Fiery Printing tab.
59
1 Job Templates, see page 65
2 Print option bars
3 Shortcuts, see page 69
4 Click to display all
print options
5 Click to hide all
print options
1
2
4
5
3
The Fiery Printing tab serves as the control center for all frequently used printing functions.
NOTE: For a complete list of print options, see Print Options.
4 Click the ColorWise print option bar and specify the color profile options for the job.
In the Print Mode area, select a color mode for the job. To use advanced color management
features, such as Rendering Style, click Expert Settings and proceed to step 5. Otherwise,
proceed to step 7.
Page 60

PRINTING
5 In the Expert Color Settings dialog box, click Update to display the current Fiery EXP6000/
EXP5000 settings.
If the Update button does not appear, make sure that the Two-Way Communication option
is selected, as described in “Configuring installed options and updating print options
settings automatically” on page 43.
60
6 Specify the color settings for the print job and click OK.
7 Click the Owner Information print option bar.
8Type an account name in the Group Name field.
The Group Name appears in the Job Log. The account name is defined by your administrator
for managing purposes. For the account name, consult the administrator.
Page 61

PRINTING
9Type a password in the Group Password field.
The Group Password appears in the Job Log, but it is encrypted. The password is defined by
your administrator for managing purposes. For the password, consult the administrator.
When the account name and password you typed match those defined by the administrator,
your job is printed. Otherwise, an error is generated, and your job is placed in the Printed
queue.
The administrator or operator can edit the Group Name and Group Password from the
Command WorkStation Job Properties dialog box. The Group Name appears in the job’s
Notes 2 field in the Job Log.
NOTE: Group Name and Group Password options are not available when you print to the
Direct connection.
10 Type information in the Notes field.
The information you type in the this field can be viewed by the operator in Command
WorkStation and also appears in the Job Log. It cannot be edited or erased by the operator.
61
For more information about Command WorkStation, see Utilities.
11 In the Instructions field, type instructions to the operator about the job.
These instructions are displayed in Command WorkStation, but do not appear in the
Job Log. These instructions can be edited by the operator.
12 Click the remaining print option bars to specify the appropriate settings for the print job
and click OK.
To quickly find a print option you are looking for, move the cursor slowly over the print
option bars. A menu appears for each print option bar, which displays print options available
under the print option bar.
Page 62

PRINTING
These print options are specific to the Fiery EXP6000/EXP5000 and the digital press. They
override settings specified in Fiery EXP6000/EXP5000 Printer Setup, but can be overridden
from Command WorkStation.
For information about these options and overrides, see Print Options.
For information about configuring installable options, see Configuring Installable Options.
For more information about Command WorkStation, see Utilities.
If you choose Printer’s default, the job prints according to the settings specified in Setup.
For more information, see Print Options.
NOTE: If you specify incompatible print settings, the Conflict dialog box provides instructions
to resolve the conflict.
13 From your application, click OK to send your print job.
Make sure that the Fiery EXP6000/EXP5000 is selected as your current printer.
NOTE: Some options listed in the printer driver could also be set from an application (for
example, Collation or Reverse Order). In these cases, use the driver option to perform the
function, rather than setting it from the application. The application might not set up the
file properly for printing on the Fiery EXP6000/EXP5000, which can cause unexpected
printing errors and longer processing time.
62
NOTE: With the E-mail Notification feature enabled in the printer driver as described in
“To enable Two-Way Communication” on page 43, you receive an e-mail notification after
your job is printed or when a printing error occurs. The feature also requires that Mail Port
is installed and the Status messages from Fiery option is selected in the E-Mail Port
Configuration dialog box. For more information about installing and configuring Mail Port,
see “Configuring the connection for Mail Port” on page 49.
TO SET DEFAULT PRINT OPTIONS FOR WINDOWS PRINT JOBS USING THE ADOBE
OR MICROSOFT POSTSCRIPT PRINTER DRIVER
1 Windows 98/Me/NT 4.0/2000: Click Start, choose Settings, and then choose Printers.
Windows XP: Click Start and choose Printer and Faxes.
Windows Server 2003: Click Start, choose Control Panel, and then choose Printers and Faxes.
2 Windows 98/Me: Right-click the Fiery EXP6000/EXP5000 icon and choose Properties.
Windows NT 4.0: Right-click the Fiery EXP6000/EXP5000 icon and choose Document defaults.
Windows 2000/XP/Server 2003: Right-click the Fiery EXP6000/EXP5000 icon and choose
Printing Preferences.
Page 63

PRINTING
3 If the Fiery Printing tab is not displayed, click it.
4 Specify the default settings for your print job, as described on page 58.
63
5 Click OK to close the dialog box.
Accessing print options without opening print option bars
You can also access and change the print option settings by right-clicking the print option
bars. When you right-click a print option bar, a list of print options appears, and you can
change settings in the list for your print job.
TO ACCESS PRINT OPTIONS WITHOUT OPENING PRINT OPTION BARS
1 Open the Fiery Printing tab.
2 Right-click a print option bar.
A list of the print options for that print option bar appears.
Page 64

PRINTING
3 Click or move and hold the cursor over an option to which you want to make a change.
Available settings appear.
4 Click a setting.
64
NOTE: For the text-field options such as Group Name and Notes, you must click and open the
print option bars to access them.
Page 65

PRINTING
Using job templates
Saving print option settings to your hard disk enables you to load specifically configured
settings for a particular job as a template. You can also share templates over a network,
using the Import and Export features.
TO CREATE A JOB TEMPLATE
1 Make sure that Default Job Template appears in the Job Templates menu, and then configure
options from the print option bars.
As soon as you change any settings, the Job Templates menu displays Untitled instead of
Default Job Template.
65
1 Save Current Job Template
2 Job Templates
1 2
2 Click the Save Current Job Template button.
3Type a Job Template name and click OK.
The name appears in the Job Templates menu.
TO LOAD JOB TEMPLATES
1From the Fiery Printing tab, click the Job Templates menu.
2 Choose the settings you want to use for your template.
The options are automatically configured.
Page 66

PRINTING
TO DELETE JOB TEMPLATES
1From the Fiery Printing tab, click the Job Templates button.
2 Choose the templates that you want to delete and click Delete.
3 Click Yes to confirm the deletion and click OK.
TO MODIFY JOB TEMPLATES
1 On the Fiery Printing tab, click the Job Templates menu.
66
2 Choose the template that you want to modify and click OK.
The options are automatically configured with the currently saved settings.
3 Configure your new settings from the print option bars, and then click the Save Current Job
Template button.
4 Click OK to save the modified template.
TO EXPORT SAVED TEMPLATES
1 On the Fiery Printing tab, click the Job Templates button.
2 Choose the job template that you want to export and click Export.
Page 67

PRINTING
3Browse to the location in which to save the file, type a file name, and then click Save.
NOTE: The file name must include the .sav extension and cannot exceed eight characters
(not including the extension). The file name does not have to match the job template name.
4 Click OK.
67
TO IMPORT SAVED TEMPLATES
1 On the Fiery Printing tab, click the Job Templates button.
2 Click Import.
3Browse to the location of the saved template file that you want to import.
4 Select the file and click Open.
Page 68

PRINTING
5 Click OK in the Job Templates dialog box.
NOTE: When you import job templates, they appear in the Job Templates menu under the job
template name, not the file name. In the preceding examples, the file present.sav (file name)
was imported, but it appears in the Job Templates menu as Presentation (template name).
68
Page 69

Using Shortcuts
1 Print Option Shortcuts
2Page Shortcuts
PRINTING
The Print Option Shortcuts area of the Fiery Printing tab displays the current settings for
some of the most commonly used print options. You can access and change these settings
quickly and easily using the Shortcuts. You can also access some page layout and finishing
options by right-clicking the image of the page in the Page Shortcuts area.
1
2
69
TO SET PRINT OPTIONS USING PRINT OPTION SHORTCUTS
1 On the Fiery Printing tab, position your cursor over the print option that you want to set.
The cursor changes into a hand.
2 Click the selected print option and specify the appropriate settings.
You can also right-click the print option and specify the settings.
3 Click Apply to make the new settings the default.
4 Click OK to close the Properties dialog box.
TO SET PRINT OPTIONS USING THE PAGE SHORTCUTS
1 On the Fiery Printing tab, click the Finishing tab, position your cursor over the page image,
and then right-click.
2 Specify the appropriate settings for the print options.
3 Click Apply to make the new settings the default.
4 Click OK to close the Properties dialog box.
Page 70

PRINTING
Customizing Print Option Shortcuts
Customizing the Print Option Shortcuts area allows you easy access to the most frequently
used print options.
TO CUSTOMIZE THE PRINT OPTION SHORTCUTS AREA
1 Click Shortcuts in the Print Option Shortcuts area.
The Modify Shortcuts dialog box appears.
70
2 Select an option to remove from the Current Shortcuts list and click Remove or double-click
an option to remove in the Current Shortcuts list.
The maximum number of the print options displayed in the Print Options Shortcuts area
is six.
3 Select an option you want to add from the Available Shortcuts list and click Add or
double-click an option you want to add in the Current Shortcuts list.
The new option item appears at the bottom of the Current Shortcuts list.
4To change the order of the Current Shortcuts, select an option in the Current Shortcuts list
and click Move Up or Move Down.
5 Click OK to close the Modify Shortcuts dialog box.
Page 71

PRINTING
P
Land
Defining and printing custom page sizes
With custom page sizes, you define the dimensions of a printed page. After you define a
custom page size, you can use it from within an application without redefining it each time
you print. When you create custom page sizes, specify Width dimensions to correspond with
the shorter side of your job and specify Height dimensions to correspond with the longer side
of your job. Set custom page sizes in this way, regardless of the orientation settings in the
application.
71
ortrait
Height
Width
NOTE: Custom page sizes are not supported with Imposition jobs.
NOTE: Custom page sizes for Windows NT 4.0 and Windows 2000/XP/Server 2003 cannot
Width
scape
Height
be set using the Fiery Printing tab. For more information, see “Working with custom page
sizes in Windows NT 4.0 PostScript printer driver” on page 73 and “Working with custom
page sizes in Windows 2000/XP/Server 2003 PostScript printer driver” on page 76.
Working with custom page sizes in Windows 98/Me PostScript
printer driver
When you define or edit a custom page size, or print your job on a custom page size in the
Windows 98/Me PostScript printer driver, use the following procedures.
TO DEFINE A CUSTOM PAGE SIZE WITH THE WINDOWS 98/ME POSTSCRIPT PRINTER DRIVER
1 Click Start, choose Settings, and then choose Printers.
2 Right-click the Fiery EXP6000/EXP5000 PS icon and choose Properties.
3 Click the Fiery Printing tab and then click the Paper Source print option bar.
Page 72

1 Click Custom
PRINTING
4 Click Custom.
1
The Enter Custom Paper Size dialog box appears.
72
5 Specify options to define the custom page size.
Paper name: Type a name for your custom page size. The new custom paper name appears in
the Document Size menu.
Width: Type the width of the print job.
Length: Type the length of the print job.
Units: Select a unit of measurement for the print job.
Transverse: Select this option to swap Width and Length dimensions to correspond to the
paper feed direction of the print job.
6 Click OK.
7To define the unprintable area of the custom page, click Unprintable Area, type the desired
information, and then click OK.
8 Click OK to close the dialog box.
Page 73

PRINTING
TO EDIT A CUSTOM PAGE SIZE WITH THE WINDOWS 98/ME POSTSCRIPT PRINTER DRIVER
1 Click Start, choose Settings, and then choose Printers.
2 Right-click the Fiery EXP6000/EXP5000 PS icon and choose Properties.
3 Click the Fiery Printing tab and then click the Paper Source print option bar.
4 Choose the name of the custom page you want to edit from the Page Size menu.
5 Click Custom.
The Enter Custom Paper Size dialog box appears.
6 Edit the settings, as described on page 72, and click OK.
TO PRINT A CUSTOM PAGE SIZE WITH THE WINDOWS 98/ME PRINTER DRIVER
1 Choose Print from your application.
2 Select the Fiery EXP6000/EXP5000 icon as the printer and click Properties.
3 Click the Fiery Printing tab and then click the Paper Source print option bar.
73
4 Select a tray from the Paper Source menu.
The custom page size must be defined and assigned to a tray at the digital press control panel.
For more information, see the documentation that accompanies your digital press.
5 Select the custom page size from the Page Size menu.
6 Click the Layout print option bar and select a setting from Orientation according to the way
the custom size paper is loaded in the tray.
7 Click OK, and then click OK again to print the job.
Working with custom page sizes in Windows NT 4.0 PostScript
printer driver
When you define or edit a custom page size, or print your job on a custom page size in the
Windows NT 4.0 PostScript printer driver, use the following procedures.
TO DEFINE A CUSTOM PAGE SIZE WITH THE WINDOWS NT 4.0 POSTSCRIPT
PRINTER DRIVER
1 Click Start, choose Settings, and then choose Printers.
2 Right-click the Fiery EXP6000/EXP5000 PS icon and choose Document defaults.
3 Click the Page Setup tab.
Page 74

PRINTING
4 Choose PostScript Custom Page Size from the Paper Size menu.
The PostScript Custom Page Size Definition dialog box appears.
74
5 Specify options to define the custom page size.
Custom Page Size Dimensions: Type the width and height of the print job.
Unit: Select a unit of measurement for the print job.
Paper Feed Direction: Choose the paper feed direction of the print job.
Paper Type: Only the Cut Sheet option is available.
Offsets Relative to Paper Feed Direction: Type the offsets (margins) of the print job
relative to the paper feed direction.
6 Click OK.
7 Click OK to close the dialog box.
Page 75

PRINTING
TO EDIT A CUSTOM PAGE SIZE WITH THE WINDOWS NT 4.0 PRINTER DRIVER
1 Click Start, choose Settings, and then choose Printers.
2 Right-click the Fiery EXP6000/EXP5000 icon and choose Document defaults.
3 Click the Advanced tab.
75
4 If PostScript Custom Page Size is selected as Paper Size, click Edit Custom Page Size.
Otherwise, choose PostScript Custom Page Size from the Paper Size menu.
The PostScript Custom Page Size Definition dialog box appears. If it does not appear, click
Edit Custom Page Size.
5 Edit the settings as described on page 74 and click OK.
TO PRINT A CUSTOM PAGE SIZE WITH THE WINDOWS NT 4.0 POSTSCRIPT
PRINTER DRIVER
1 Choose Print from your application.
2 Select the Fiery EXP6000/EXP5000 PS as the printer and click Properties.
3 Click the Fiery Printing tab and then click the Paper Source print option bar.
4 Select a tray from the Paper Source menu.
The custom page size must be defined and assigned to a tray at the digital press control panel.
For more information, see the documentation that accompanies your digital press.
5 Choose PostScript Custom Page Size from the Paper Size menu.
6 Click the Layout print option bar and select a setting from Orientation, according to the way
the custom size paper is loaded in the tray.
7 Click OK, and then click OK again to print the job.
Page 76

PRINTING
Working with custom page sizes in Windows 2000/XP/Server 2003
PostScript printer driver
When you define or edit a custom page size, or print your job on a custom page size in the
Windows 2000/XP/Server 2003 PostScript printer driver, use the following procedures.
NOTE: Windows 2000/XP/Server 2003 have a similar interface when setting options and
printing. The following procedures use Windows 2000 illustrations with Windows XP/
Server 2003 differences noted.
TO DEFINE A CUSTOM PAGE SIZE WITH THE WINDOWS 2000/XP/SERVER 2003 POSTSCRIPT PRINTER DRIVER
1 Windows 2000: Click Start, choose Settings, and then choose Printers.
Windows XP: Click Start and choose Printer and Faxes.
Windows Server 2003: Click Start, choose Control Panel, and then choose Printers and Faxes.
2 Right-click the Fiery EXP6000/EXP5000 PS icon and choose Printing Preferences.
3 Click the Paper/Quality tab.
4 Click Advanced.
76
Page 77

PRINTING
5 Choose PostScript Custom Page Size from the Paper Size menu.
The PostScript Custom Page Size Definition dialog box appears.
6 Specify options to define the custom page size.
Custom Page Size Dimensions: Type the width and height of the print job.
77
Unit: Select a unit of measurement for the print job.
Paper Feed Direction: Choose the paper feed direction of the print job.
Paper Type: Only the Cut Sheet option is available.
Offsets Relative to Paper Feed Direction: Type the offsets (margins) of the print job relative
to the paper feed direction.
7 Click OK to close the PostScript Custom Page Size Definition dialog box.
8 Click OK to close the Advanced Options dialog box.
9 Click OK to close the Printing Preferences dialog box.
You can now specify the custom page size from an application.
NOTE: Access the Paper/Quality tab only for defining or editing custom page sizes. Set up the
rest of the print options in the Fiery Printing tab.
Page 78

PRINTING
TO EDIT A CUSTOM PAGE SIZE WITH THE WINDOWS 2000/XP/SERVER 2003 POSTSCRIPT PRINTER DRIVER
1 Windows 2000: Click Start, choose Settings, and then choose Printers.
Windows XP: Click Start and choose Printer and Faxes.
Windows Server 2003: Click Start, choose Control Panel, and then choose Printers and Faxes.
2 Right-click the Fiery EXP6000/EXP5000 icon and choose Printing Preferences.
3 Click the Paper/Quality tab.
4 Click Advanced.
5 Choose PostScript Custom Page Size from the Paper Size menu.
The PostScript Custom Page Size Definition dialog box appears. If it does not appear, click
Edit Custom Page Size.
6 Edit the settings, as described on page 77, and click OK.
TO PRINT A CUSTOM PAGE SIZE WITH THE WINDOWS 2000/XP/SERVER 2003 POSTSCRIPT PRINTER DRIVER
1 Choose Print from your application.
78
2 Select the Fiery EXP6000/EXP5000 as the printer and click Properties.
3 Click the Fiery Printing tab and then click the Paper Source print option bar.
4 Choose PostScript Custom Page Size from the Paper Size menu.
5 Click the Layout print option bar and select a setting from Orientation, according to the way
the custom size paper is loaded.
6 Click OK, and then click OK again to print the job.
Page 79

PRINTING
Viewing the digital press status
You can view the status of the digital press consumables from the printer driver. You can
also monitor the paper level in each tray from Job Monitor. For more information about
Job Monitor, see Job Monitor Help.
TO VIEW THE STATUS OF THE FIERY EXP6000/EXP5000 CONSUMABLES
1 Windows 98/Me/NT 4.0/2000: Click Start, choose Settings, and then choose Printers.
Windows XP: Click Start and choose Printer and Faxes.
Windows Server 2003: Click Start, choose Control Panel, and then choose Printers and Faxes.
2 Right-click the Fiery EXP6000/EXP5000 icon and choose Properties.
3 Click the Printer Status tab and click Update.
79
Paper
• Tray: Displays the tray name.
• Level: Displays the amount of paper remaining in the specified tray: Not Empty or Empty.
• Size: Displays the size of paper in the specified tray.
•
Dimensions: Displays the dimensions of the paper in the specified tray in inches or
millimeters.
Media Type: Displays the type of media loaded in the specified tray.
•
Toner
• Color: Displays the color of toners.
Level: Displays the amount of remaining toner.
•
Engine Status
This area displays the current status of the digital press.
Page 80

PRINTING
Saving files to print at a remote location
If you do not have a Fiery EXP6000/EXP5000 onsite and are preparing files to take to a
service bureau or other location, print the final files to the File port (as opposed to one of the
local ports). You can also print to the File port to create a file to download using Downloader.
For instructions on printing to the File port, see the documentation that accompanies
Windows.
80
Page 81

INDEX
81
INDEX
C
ColorWise print options 43
custom page size, see defining a custom
page size, printing a custom page size
D
default print options 62
defining a custom page size
Windows 2000/XP 76
Windows 98/Me 71
Windows NT 4.0 73
DNS name 27
E
E-mail Notification 44
E-mail Port Monitor 56
F
Fiery Mail Port
configuring 49
on User Software CD 10
Fiery Printer Delete Utility 48
Fiery utilities, installing 45
Fiery WebTools
Installer 21
setting up 20
Fiery E-mail Service
about 53
Job Control 54
File port, saving files to 80
G
Group Name field 60
Group Password field 61
I
installable options
configuring from printer driver 42
updating automatically 43
installing
Adobe PostScript printer,
Windows 98/Me 14
Adobe PostScript printer,
Windows NT 4.0 15
Fiery utilities 45
Job Monitor 45
printer drivers using Point and Print 12
Windows 2000/XP/Server 2003 printer
driver from User Software CD 18
Windows 98/Me printer driver
from User Software CD 14
Windows NT 4.0 printer driver
from User Software CD 15
Instructions field 61
IPP connection
Windows 2000/XP/Server 2003 39
Windows 98/Me 38
IPX connection
Windows 2000/XP/Server 2003 36
Windows 98/Me 32
Windows NT 4.0 34
IPX frame type selection 32
IPX/SPX printing, port setup 33
J
Java, enable in browser 20
Job Control 54
Job Monitor
configuring server connection 46
installing 45
on User Software CD 10
job template
creating 65
deleting 66
exporting 66
importing 67
loading 65
modifying 66
Page 82

INDEX
82
L
LPD printing
Windows NT 4.0 26
LPR connection
Windows 2000/XP/Server 2003 29
Windows NT 4.0 26
M
managing print jobs 55
N
Notes field 61
Novell NetWare client setup
Windows 2000/XP/Server 2003 36
Windows 98/Me 32
Windows NT 4.0 34
O
Oemsetup.inf file 14, 16, 18
overriding Printer Setup settings 62
Owner Information 60
P
Point and Print 12
port setup for IPX/SPX printing 33
PostScript printer driver
deleting 48
download using Fiery WebTools 21
installing from User Software CD 14
installing using Point and Print 12
Windows 98/Me 14
Windows NT 4.0 15
PPD
Windows 2000/XP/Server 2003 19
Windows 98/Me 15
Windows NT 4.0 17
print options 58
printer driver, see PostScript printer
driver
Printer’s default 62
printing
from an application 58
to File port 80
using an E-mail client 53
printing a custom page size
Windows 2000/XP 78
Windows 98/Me 73
Windows NT 4.0 75
printing connections, supported types 24
Prntdrve.exe file 22
S
shortcuts
customizing 70
setting print options 69
SMB printing
completing connection 25
setup 12
T
TCP/IP connection
Windows 2000/XP/Server 2003 29
Windows NT 4.0 26
Two-Way Communication 43, 60
U
User Software CD 10, 45
W
Windows 2000/XP/Server 2003
IPP connection 39
IPX connection 36
LPR or Port 9100 connection 29
printer driver, installing
from User Software CD 18
TCP/IP connection 29
Windows 98/Me
IPP connection 38
IPX frame type selection 32
IPX/SPX or IPX (Novell) connection 32
PostScript printer driver 14
printer driver, installing
from User Software CD 14
Windows NT 4.0
IPX connection 34
LPR connection 26
PostScript printer driver 15
printer driver, installing
from User Software CD 15
TCP/IP connection 26
 Loading...