

Page 1

Fiery® EX4112/4127
Utilities
Page 2

© 2007 Electronics for Imaging, Inc. The information in this publication is covered
under Legal Notices for this product.
45064003
17 August 2007
Page 3

CONTENTS
CONTENTS
CONTENTS 3
INTRODUCTION 7
Terminology and conventions 8
About this document 9
About Help 9
Preparing for installation on Windows computers 10
Preparing for installation on Mac OS computers 11
Fonts 11
Installing user software 12
Installing user software on a Windows computer 12
Installing user software on a Mac OS computer 14
COMMAND WORKSTATION, WINDOWS EDITION 16
Installing Command WorkStation, Windows Edition 17
Configuring the connection to the Fiery EX4112/4127 18
Using Command WorkStation, Windows Edition 21
Additional features 22
User Authentication 22
Mixed Media 22
Insert Tabs 27
Virtual Printers 30
Troubleshooting 33
Command WorkStation cannot connect to the Fiery EX4112/4127 33
Command WorkStation does not respond 33
Page 4

CONTENTS 4
PAPER CATALOG 34
Installing Paper Catalog 34
Specifying Paper Catalog media for jobs 34
Setting up Paper Catalog 36
Managing Paper Catalog entries 36
Managing catalogs 38
Setting display options 40
Specifying media attributes for Paper Catalog 41
Specifying custom paper sizes 41
Description of media attributes 42
Using Paper/Tray Association 47
Associating catalog entries with trays 47
Monitoring media status in trays 47
COMMAND WORKSTATION, MACINTOSH EDITION 48
Installing Command WorkStation, Macintosh Edition 49
Configuring the connection to the Fiery EX4112/4127 49
Using Command WorkStation, Macintosh Edition 52
Additional Features 53
User Authentication 53
Mixed Media 53
Schedule Printing 56
Troubleshooting 57
Command WorkStation cannot connect to the Fiery EX4112/4127 57
Command WorkStation does not respond 57
IMPOSE 58
Installing and enabling Impose 58
Installing Impose 58
Installing Adobe Acrobat and Enfocus PitStop 59
Using Impose 61
Page 5

CONTENTS 5
PRODUCTION FEATURES 62
Installing the production features 63
Using the production features 64
Compose 64
Preflight 65
Reorder Jobs 67
Job Mismatch 68
Rush Printing 68
Schedule Printing 68
Quick Doc Merge 70
SCAN 73
Installing and configuring Remote Scan 74
Installing Remote Scan 74
Configuring Remote Scan 74
Using Remote Scan 76
Scanning from the copier Control Panel 76
Retrieving scans using WebTools 76
HOT FOLDERS 77
Installing Hot Folders 77
Using Hot Folders 77
Additional features 78
Preserve Document Setting 78
About Hot Folders filters 78
Using the PDF to PS filter 78
VDP RESOURCE MANAGER 79
Installing VDP Resource Manager 79
Configuring the connection to the Fiery EX4112/4127 80
Using VDP Resource Manager 82
Page 6

CONTENTS 6
WEBTOOLS 83
Setting up WebTools 84
Accessing the WebTools home page 85
Using WebTools 85
Home 85
Downloads 85
Docs 85
Scan Settings 86
Configure 86
INDEX 87
Page 7

INTRODUCTION
INTRODUCTION 7
The Fiery EX4112/4127 media pack includes a set of software utilities that allow you to
manage the Fiery EX4112/4127, as well as the print workflow and content of jobs on the
Fiery EX4112/4127.
This document provides an overview of how to install, configure, and use the following
Fiery EX4112/4127 utilities:
• Command WorkStation, Windows Edition
•Impose
• Command WorkStation, Macintosh Edition
• Remote Scan
•Hot Folders
• VDP Resource Manager
• WebTools
Page 8
INTRODUCTION 8
Terminology and conventions
This document uses the following terminology and conventions.
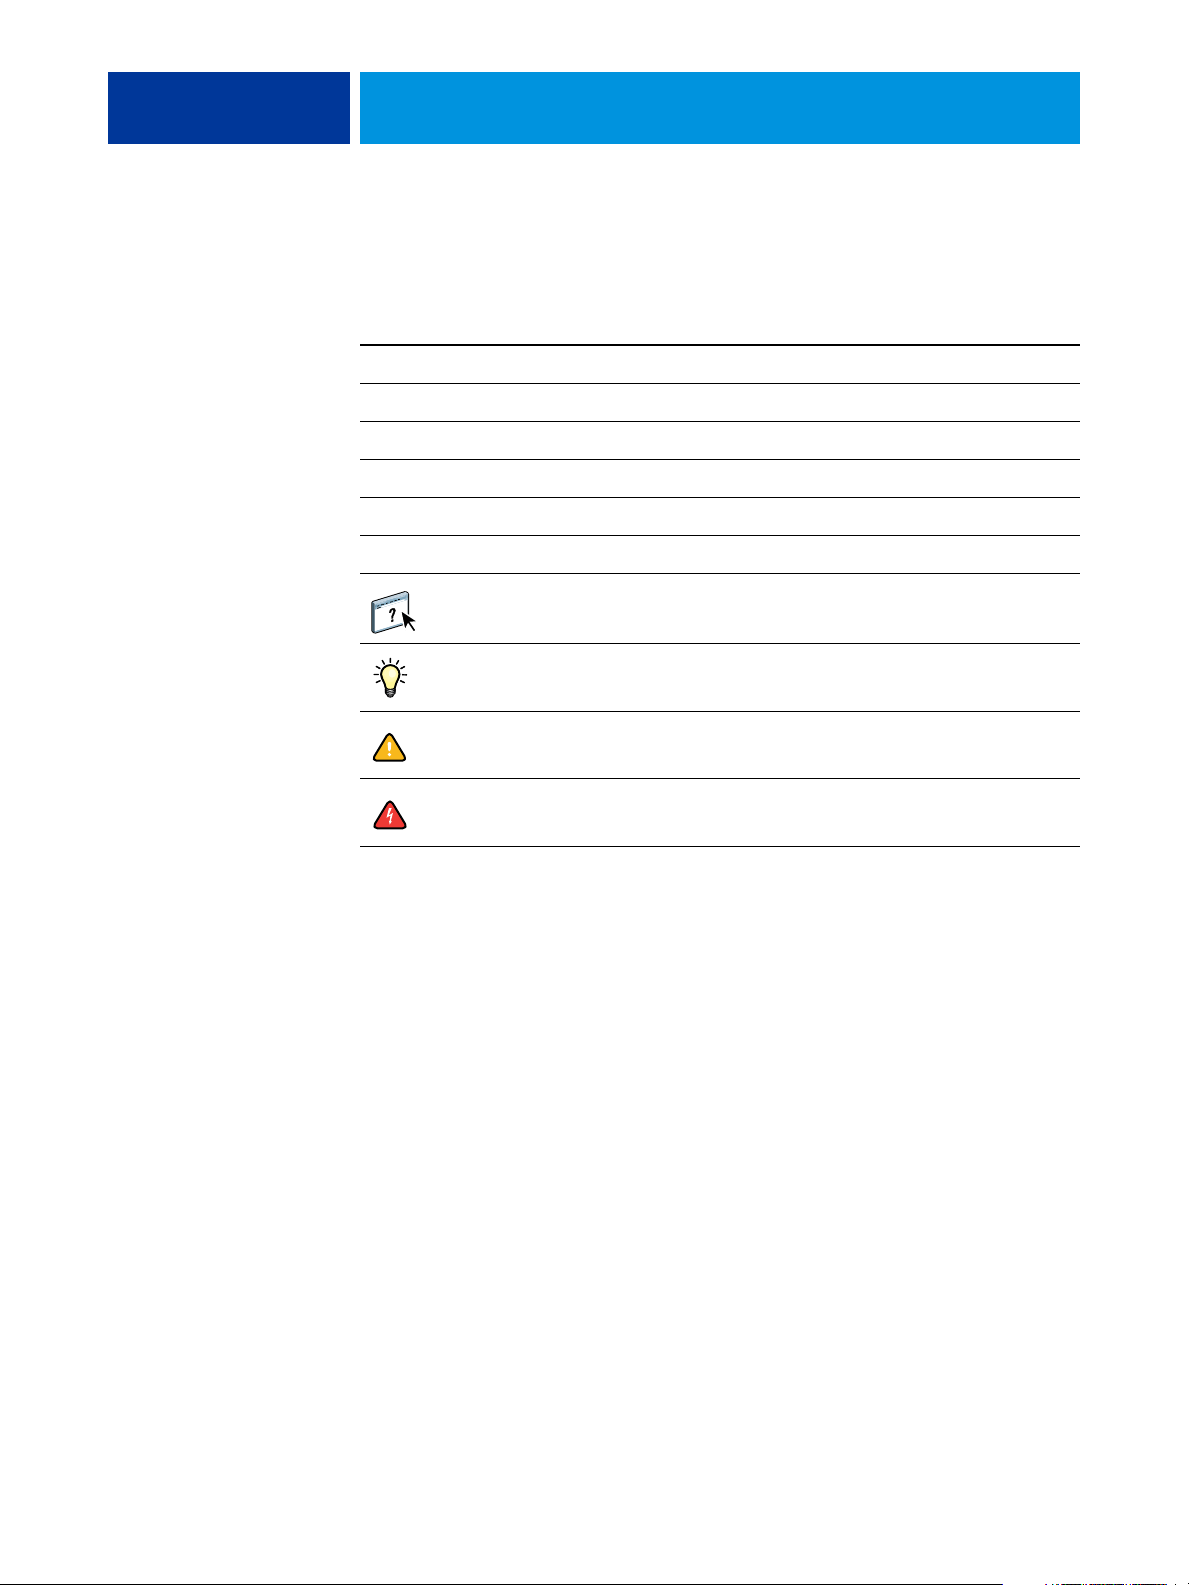
Term or convention Refers to
Aero Fiery EX4112/4127 (in illustrations and examples)
Copier Xerox 4112 and Xerox 4127
Fiery EX4112/4127 Fiery EX4112/4127
Mac OS Apple Mac OS X
Titles in italics Other documents in this set
Windows Microsoft Windows 2000, Windows XP, Windows Server 2003
Topics for which additional information is available by starting Help
in the software
Tips and information
Important information
Important information about issues that can result in physical harm to
you or others
Page 9

INTRODUCTION 9
About this document
This document covers the following topics:
•
Command WorkStation, Windows Edition: Monitoring and managing the print workflow
of jobs on the Fiery EX4112/4127.
•
Impose: Applying imposition layouts to jobs for custom printing, binding, and cutting
purposes (Windows only).
•
Command WorkStation, Macintosh Edition: Monitoring and managing the print workflow
of jobs on the Fiery EX4112/4127.
•
Remote Scan: Initiating and retrieving a scan on the copier from a remote computer on the
network. Includes the Scan TWAIN plug-in module.
•
Hot Folders: Storing and reusing frequently used print options when printing PostScript
and PDF files on the Fiery EX4112/4127.
•
VDP Resource Manager: Finding and deleting global objects used in variable data printing.
•
WebTools: Managing your Fiery EX4112/4127 remotely from the Internet or your
company’s intranet.
About Help
Detailed instructions on using most Fiery EX4112/4127 utilities are provided in Help.
Wherever appropriate, this document refers you to Help for additional information and
explains how to access Help for each utility.
Page 10

INTRODUCTION 10
Preparing for installation on Windows computers
Before installing Fiery EX4112/4127 software on a Windows computer, complete
the following:
• To use Fiery EX4112/4127 user software on a Windows computer, the Sun Java file,
Java Runtime Environment (JRE), provided in the Common Utilities folder on the
User Software DVD, must be installed on your computer. If the correct Sun Java file is not
installed, the Fiery User Software Installer installs it automatically before installing the
Fiery EX4112/4127 software.
NOTE: JRE, SE v1.5.0_01 (the recommended version) is provided on the User
Software DVD.
• To install the Fiery EX4112/4127 software, you must have Service Pack 4 installed
on a Windows 2000 computer, and Service Pack 2 installed on a Windows XP computer.
If you do not, a warning message alerts you to install the Service Pack.
Different versions of Sun Java JRE can be installed on your computer. The Fiery EX4112/
4127 software automatically finds the correct version, so you do not need to uninstall other
versions of Sun Java JRE required for third-party applications.
Page 11

INTRODUCTION 11
Preparing for installation on Mac OS computers
Before installing Fiery EX4112/4127 software on a Mac OS X computer, you can install
printer fonts.
Fonts
The Fonts on the User Software DVD include screen and printer fonts that correspond
to the 136 built-in PostScript and True Type printer fonts on the Fiery EX4112/4127.
To be available to applications, the screen fonts must be installed on Mac OS X.
TO INSTALL SCREEN AND PRINTER FONTS ON MAC OS X V10.4
1 Insert the User Software DVD into the DVD drive of the Mac OS X computer.
2 Start the Font Book application in Applications/Font Book.
3 Choose Add Fonts from the File menu.
4 Choose User Software/OSX/Fonts/Albertus MT.
5 Choose Select All from the Edit menu.
6 Choose one of the following from Install fonts:
• For your personal use: for your use only
• For shared use: for all users of this computer
• For Classic: for Mac OS X Classic
NOTE: For Mac OS X v10.4, you must select User, Computer, or Classic Mac OS in
Preferences/Default Install Location of Font Book beforehand.
7 Click Open.
8 Exit the Font Book application.
Page 12
INTRODUCTION 12
Installing user software
You can install Fiery EX4112/4127 user software in the following ways:
• From the User Software DVD
• Over the network
• From the Fiery EX4112/4127, using the Internet or intranet
If you have installed any Fiery EX4112/4127 user software previously on your computer,
the installer will allow you to uninstall those applications during the process.
Installing user software on a Windows computer
All installation of user software on a Windows computer is done through the Fiery User
Software Installer. The procedures below describe installing from the DVD, over the network,
or over the Internet, and also modifying the user software.
The only applications that are not installed by the Fiery User Software Installer are Adobe
Acrobat and Enfocus PitStop, for use with Impose. For more information, see “Installing
Adobe Acrobat and Enfocus PitStop” on page 59.
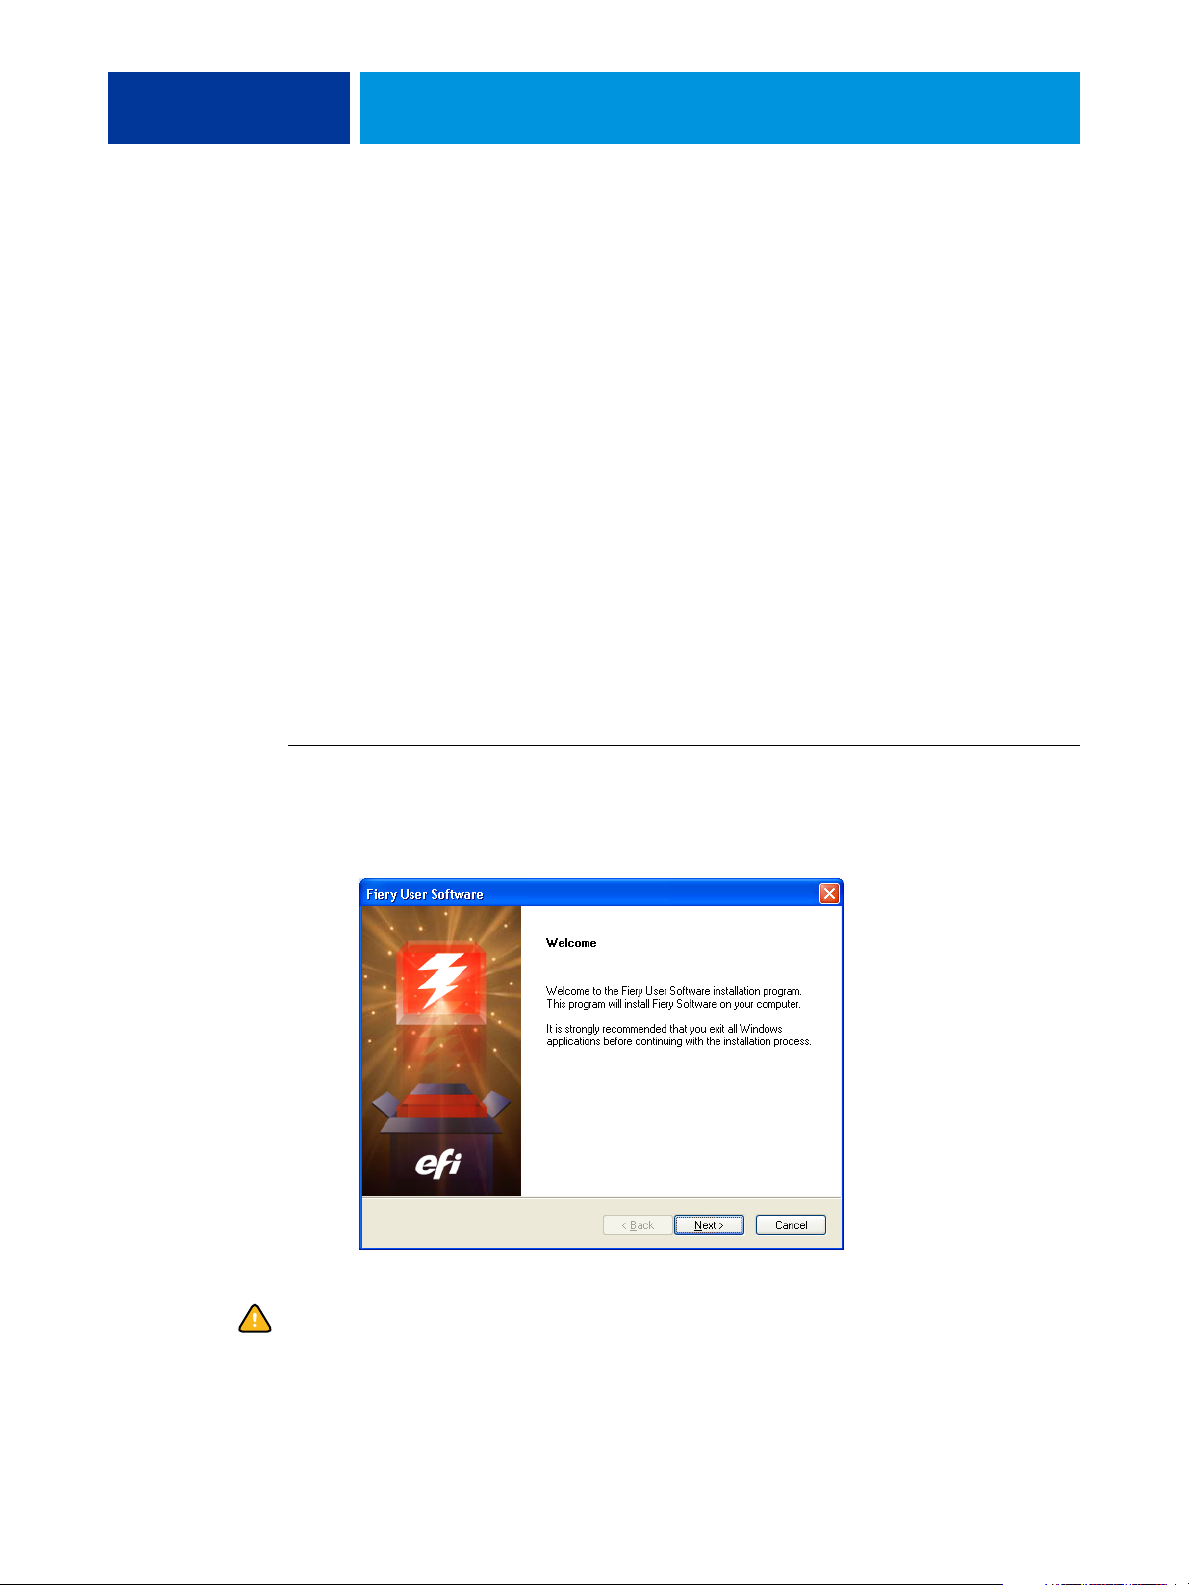
TO INSTALL USER SOFTWARE ON A WINDOWS COMPUTER FROM THE USER SOFTWARE DVD
1 Insert the User Software DVD into the DVD drive of your computer.
The Welcome screen of the installer appears.
2 Follow the on-screen instructions.
Do not attempt to install user software by opening the individual folders for the applications.
Always use the Fiery User Software Installer.
Page 13

INTRODUCTION 13
If you want to modify or remove any user software after you have installed it on your
computer, you can do so using the User Software DVD. See the following procedure.
TO MODIFY USER SOFTWARE USING THE USER SOFTWARE DVD INSTALLER
1 Insert the User Software DVD into the DVD drive of your computer.
2 On the window that appears, select Modify, Repair, or Remove.
3 Follow the on-screen instructions.
If your computer does not have a DVD drive, you can install the user software from the
Fiery EX4112/4127 over the network. Ask your network administrator for the IP address
or the DNS server name of the Fiery EX4112/4127.
You can also install the user software from the Fiery EX4112/4127 over the Internet. Ask your
network administrator for the IP address of the Fiery EX4112/4127.
Use your Internet browser to access WebTools. For complete information about browser and
system requirements, see Wel co me .
TO INSTALL USER SOFTWARE ON A WINDOWS COMPUTER OVER THE NETWORK
1 Click Start, choose Run, and type either “\\IP address” or “\\DNS server name” of the
Fiery EX4112/4127.
2 Type the user name and password, if required.
Check with your network administrator to see if a password is required.
3 Double-click the PC_User_SW directory.
4 Double-click the Master Installer icon.
5 Follow the on-screen instructions.
TO INSTALL USER SOFTWARE ON A WINDOWS COMPUTER OVER THE INTERNET
1 Start your Internet browser.
2 Type the IP address or DNS name of the Fiery EX4112/4127.
The Fiery EX4112/4127 home page appears.
3 Click the tab for Downloads.
4 Click the link for the software that you want to install.
5 Choose Run to open the file or Save to save it to your computer.
6 If you choose Run, proceed to step 9.
7 If you choose Save, browse to the location where you want to save the USERSWMI.exe file and
click Save.
The file is downloaded from the Fiery EX4112/4127.
Page 14

INTRODUCTION 14
8 Double click the USERSWMI.exe file.
9 Choose to open the file or save it to your computer.
10 Enter the Fiery EX4112/4127 URL, http://<IP address>, when asked.
11 Follow the on-screen instructions.
For complete instructions on how to use Downloads, see Downloads Help.
For more information about WebTools and Downloads, see WebTools.
Do not attempt to install user software by opening the individual folders for the applications.
Always use the Fiery User Software Installer.
Installing user software on a Mac OS computer
Installation of user software on a Mac OS computer is done separately for each application.
TO INSTALL USER SOFTWARE ON A MAC OS COMPUTER FROM THE USER SOFTWARE DVD
1 Insert the User Software DVD into the DVD drive of your computer.
2 Browse to the OSX folder.
3 Double-click the installer icon for the application that you want to install.
4 Follow the on-screen instructions.
TO INSTALL USER SOFTWARE ON A MAC OS COMPUTER OVER THE NETWORK
1 Choose Connect to Server from the Go menu.
2 Type smb:// followed by the IP address of the Fiery EX4112/4127, and click Connect.
If you cannot locate the Fiery EX4112/4127, contact your network administrator.
3 Type the user name and password, if required.
Check with your network administrator to see if a password is required.
4 Select the smb shared volume that you want to connect to.
5 Select Mac_User_SW and click OK.
6 Open the OSX folder.
7 Double-click the installer icon for the application that you want to install.
8 Follow the on-screen instructions.
You can also install the user software from the Fiery EX4112/4127 over the Internet. Ask your
network administrator for the IP address of the Fiery EX4112/4127.
Use your Internet browser to access WebTools. For complete information about browser and
system requirements, see Wel co me .
Page 15

INTRODUCTION 15
TO INSTALL USER SOFTWARE ON A MAC OS COMPUTER OVER THE INTERNET
1 Start your Internet browser.
2 Type the IP address or DNS name of the Fiery EX4112/4127.
The Fiery EX4112/4127 home page appears.
3 Click the tab for Downloads.
4 Click the link for Mac OSX Client Software Installer.
The osxutils.dmg file is downloaded to your computer and a virtual disk appears on your
desktop.
5 Follow the on-screen instructions.
For complete instructions on how to use Downloads, see Downloads Help.
For more information about WebTools and Downloads, see WebTools.
Page 16

COMMAND WORKSTATION, WINDOWS EDITION 16
COMMAND WORKSTATION, WINDOWS EDITION
Command WorkStation, Windows Edition allows Fiery EX4112/4127 operators (or users
with Operator or Administrator privileges) to monitor and manage the print workflow of jobs
on the Fiery EX4112/4127. Command WorkStation, Windows Edition allows you to do the
following:
• View the print status of jobs on the Fiery EX4112/4127
• Hold, process, and print jobs
• Override user-assigned print option settings
• Preview the page content of a job
• Reorder pages in a job and combine pages from different jobs
• Create and use FreeForm master files for variable data printing
• Archive job files
• View job logs of recent print activity
Page 17

COMMAND WORKSTATION, WINDOWS EDITION 17
Installing Command WorkStation, Windows Edition
Install Command WorkStation, Windows Edition on a Microsoft Windows computer that
has a network connection to the Fiery EX4112/4127. For a complete list of system
requirements, see Wel c o me.
The installer for Command WorkStation, Windows Edition is provided on the User Software
DVD. In addition to the Command WorkStation software, the installer installs the Java files
required to use Setup from Command WorkStation. For information about using Fiery
Setup, see Configuration and Setup.
Before you install the utility, read the guidelines described in “Preparing for installation on
Windows computers” on page 10.
To install Command WorkStation, see “Installing user software on a Windows computer” on
page 12.
Page 18
COMMAND WORKSTATION, WINDOWS EDITION 18
Configuring the connection to the Fiery EX4112/4127
The first time you start Command WorkStation, you are prompted to configure the
connection to the Fiery EX4112/4127.
You can also edit the configuration whenever there is any change to your Fiery EX4112/
4127 server or network, such as a changed server name or IP address. If you change
Fiery EX4112/4127 Setup information, do so before you reconfigure the connection.
For information about reconfiguring the connection, see “To modify the configuration for
Command WorkStation, Windows Edition” on page 20.
BEFORE YOU BEGIN
• Print the Fiery EX4112/4127 Configuration page.
For instructions on printing the Configuration page, see Configuration and Setup.
This page contains information you need when configuring the connection, such as the
IP address of the Fiery EX4112/4127. For TCP/IP installations, you can use the DNS name
instead of the IP address. Make sure the Fiery EX4112/4127 is already registered in a Domain
Name Server (DNS) on your network. For more information, contact your network
administrator.
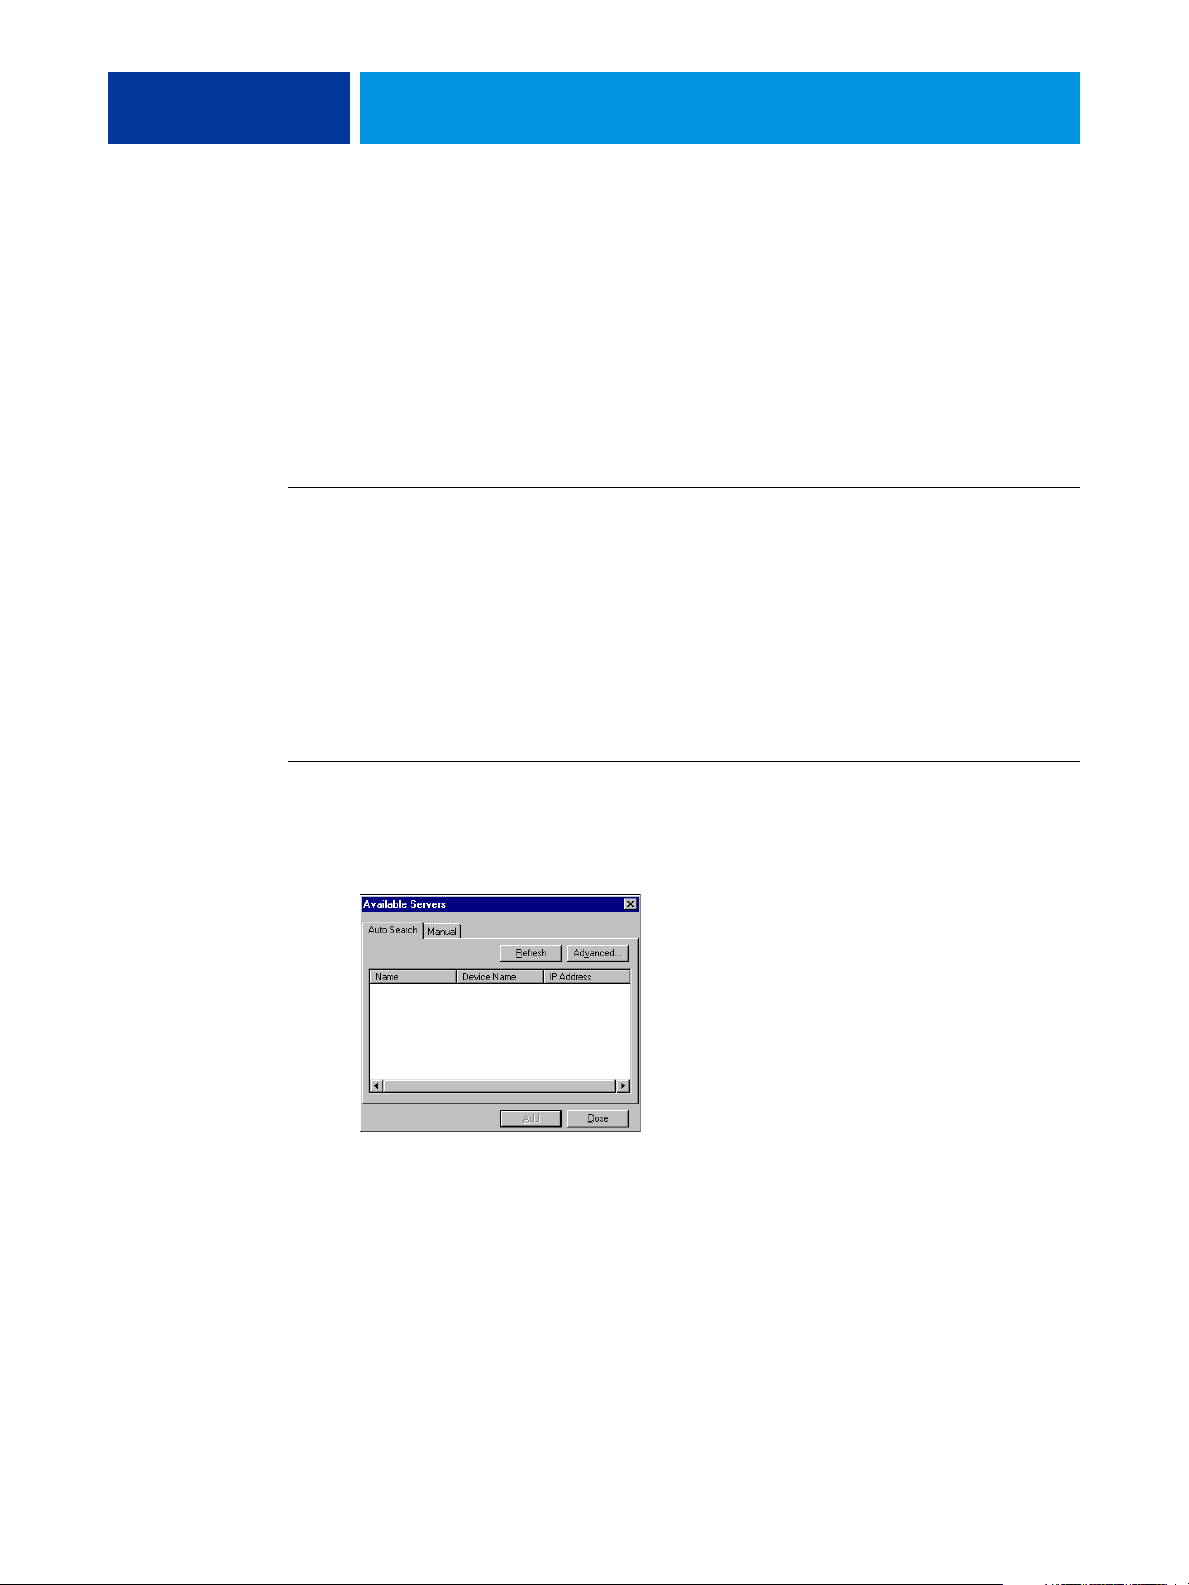
TO CONFIGURE THE CONNECTION FOR COMMAND WORKSTATION, WINDOWS EDITION
1 Choose Start > Programs > Fiery > Command WorkStation to start the utility.
The Available Servers dialog box appears and displays all servers found in the local subnet.
Page 19
COMMAND WORKSTATION, WINDOWS EDITION 19
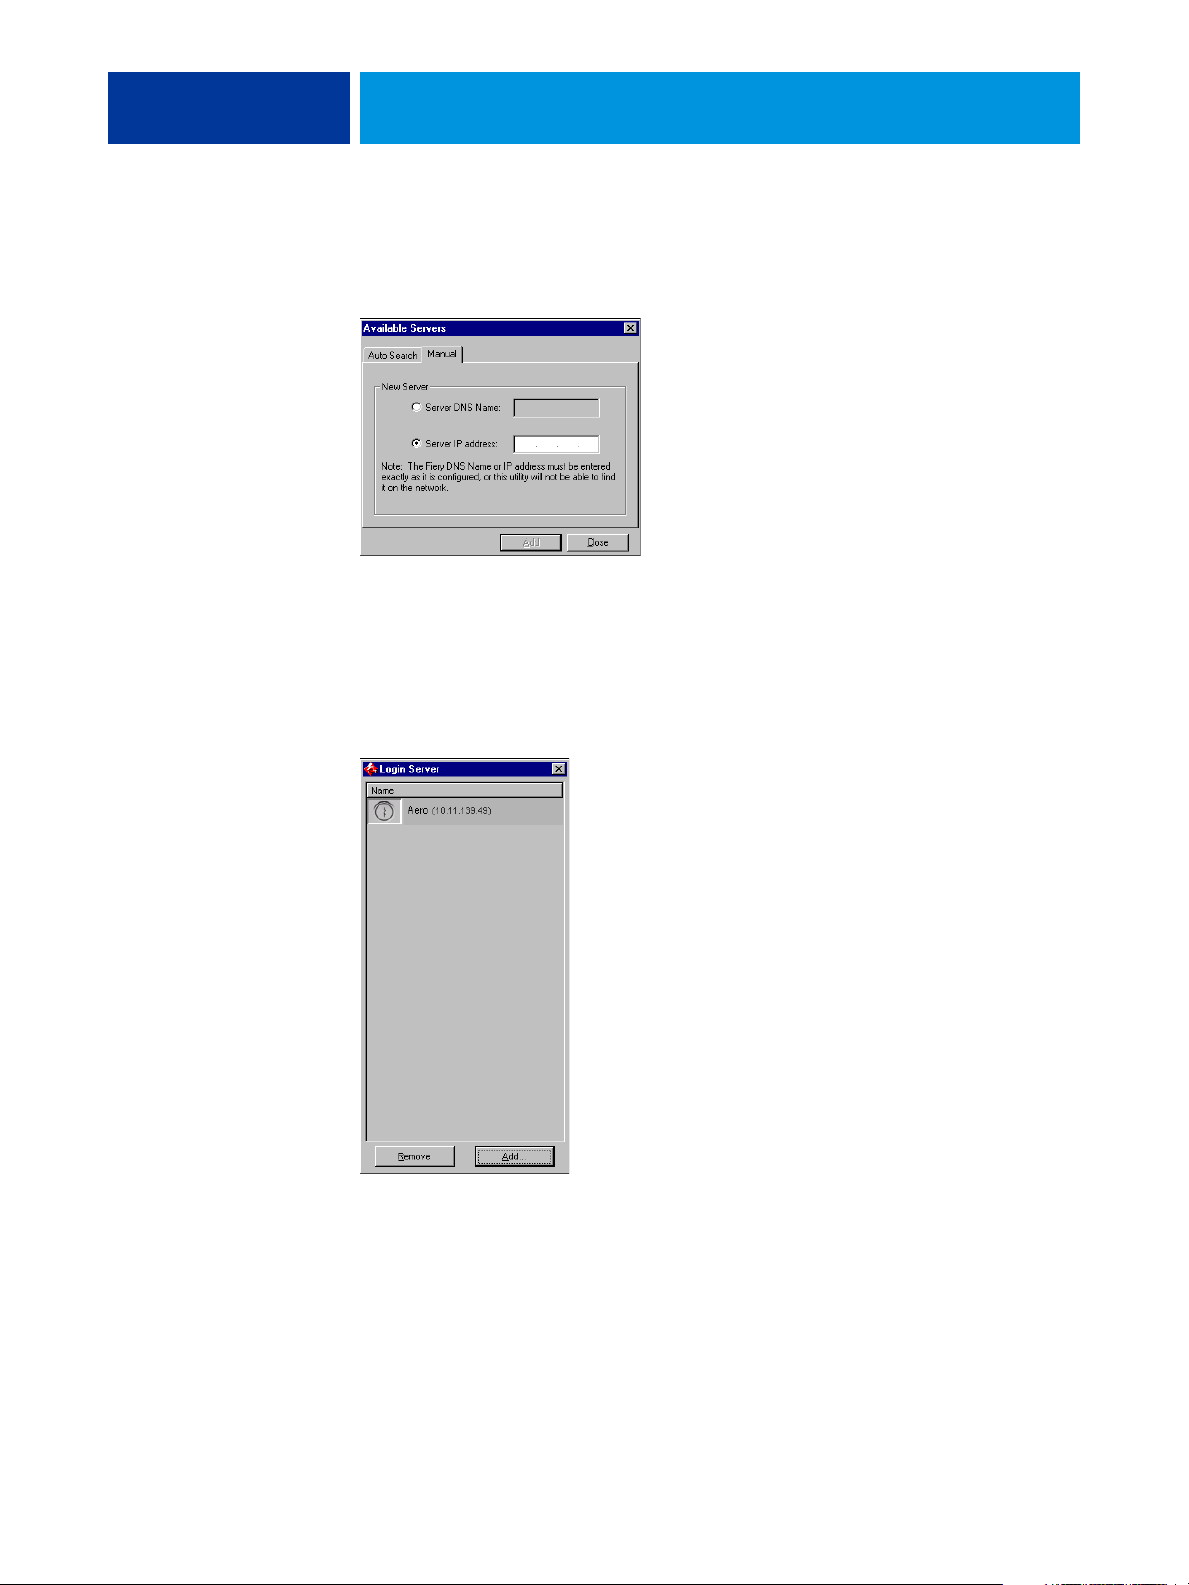
2 If no Fiery EX4112/4127s were found, click the Manual tab to search by DNS name or
IP address. Type the DNS name or IP address and click Add to add the server to the
Available Servers list.
If no Fiery EX4112/4127s were found by Manual search, click the Auto Search tab, and then
click Advanced to search by a range of IP addresses or by the IP address and subnet mask.
All available servers appear in the Available Servers list.
3 Select the Fiery EX4112/4127 that you want to use and click Add.
The selected Fiery EX4112/4127 is added to the Login Server window.
Page 20
COMMAND WORKSTATION, WINDOWS EDITION 20
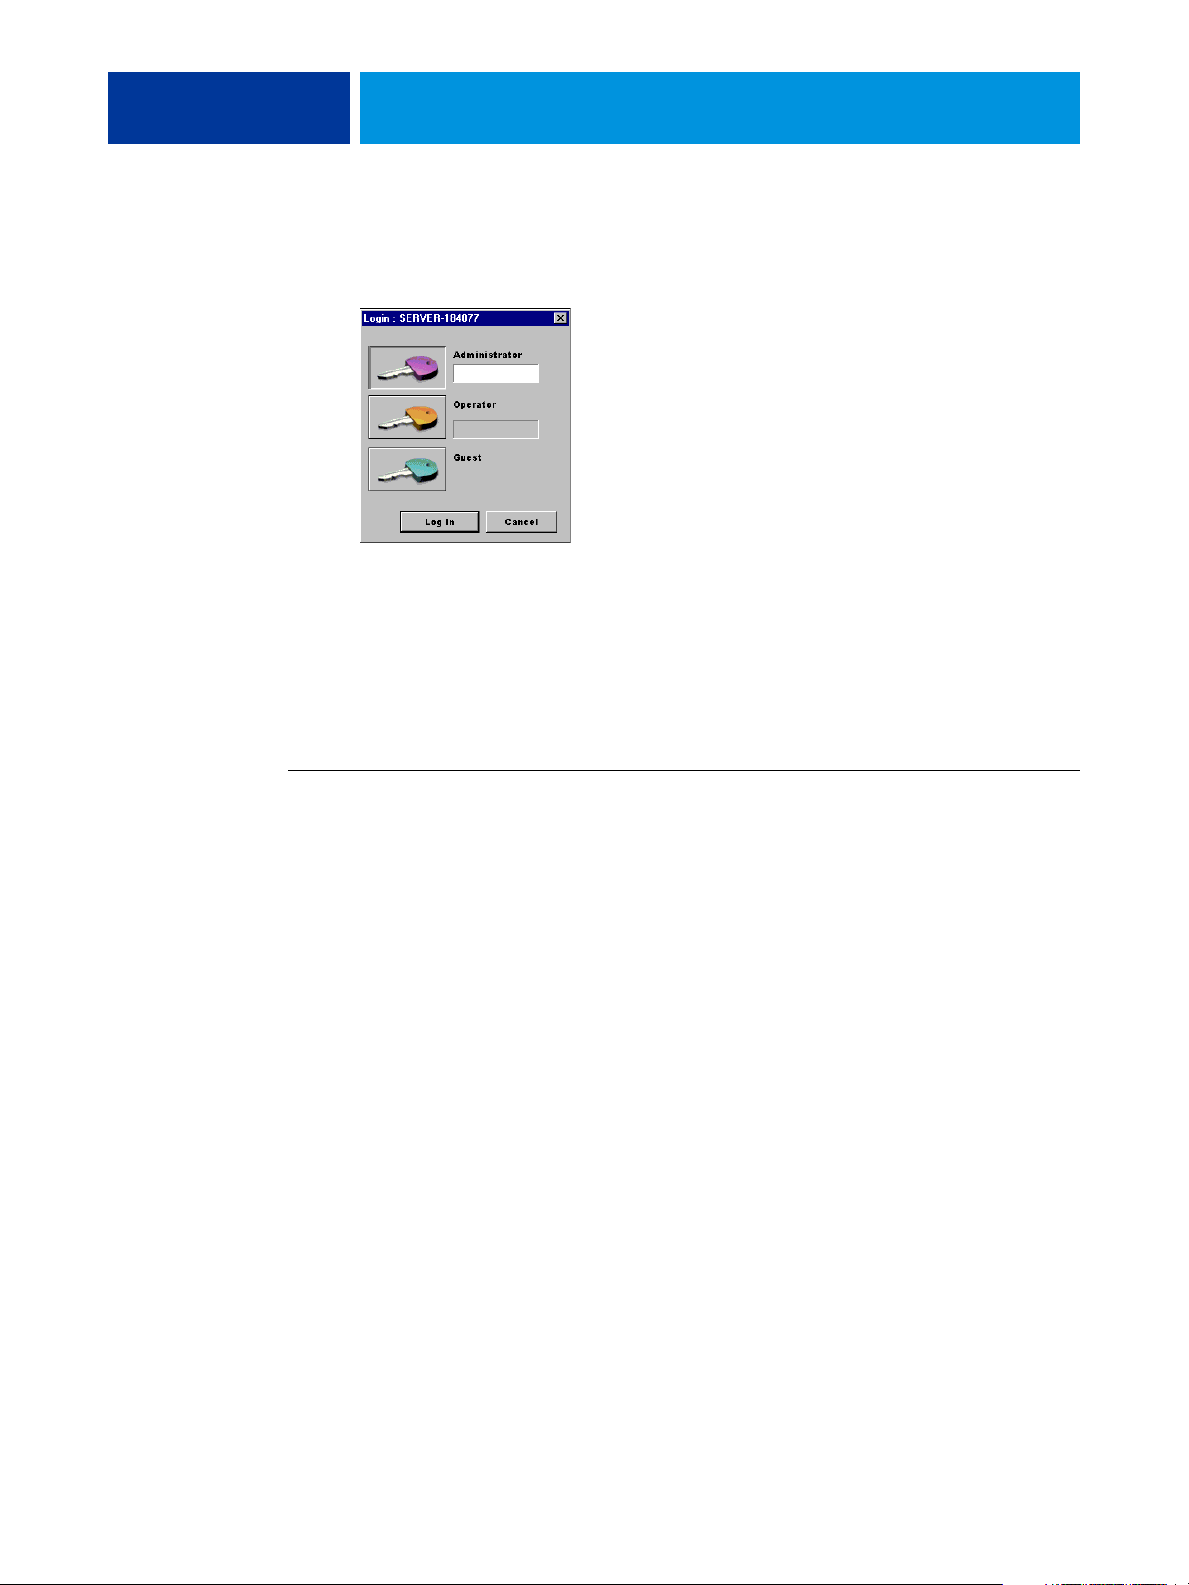
4 Click the button to the left of the server name.
The Login dialog box appears.
5 Click the key to the left of Administrator, Operator, or Guest and type the appropriate
password, if required.
6 Click Log In.
For information about setting passwords and the default Administrator password for the
Fiery EX4112/4127, see Configuration and Setup.
Command WorkStation is now connected to the Fiery EX4112/4127.
TO MODIFY THE CONFIGURATION FOR COMMAND WORKSTATION, WINDOWS EDITION
1 Start Command WorkStation.
The Login Server window appears.
2 Select the Fiery EX4112/4127 for which you want to modify the configuration and
click Remove.
3 Repeat “To configure the connection for Command WorkStation, Windows Edition” on
page 18.
Page 21
COMMAND WORKSTATION, WINDOWS EDITION 21
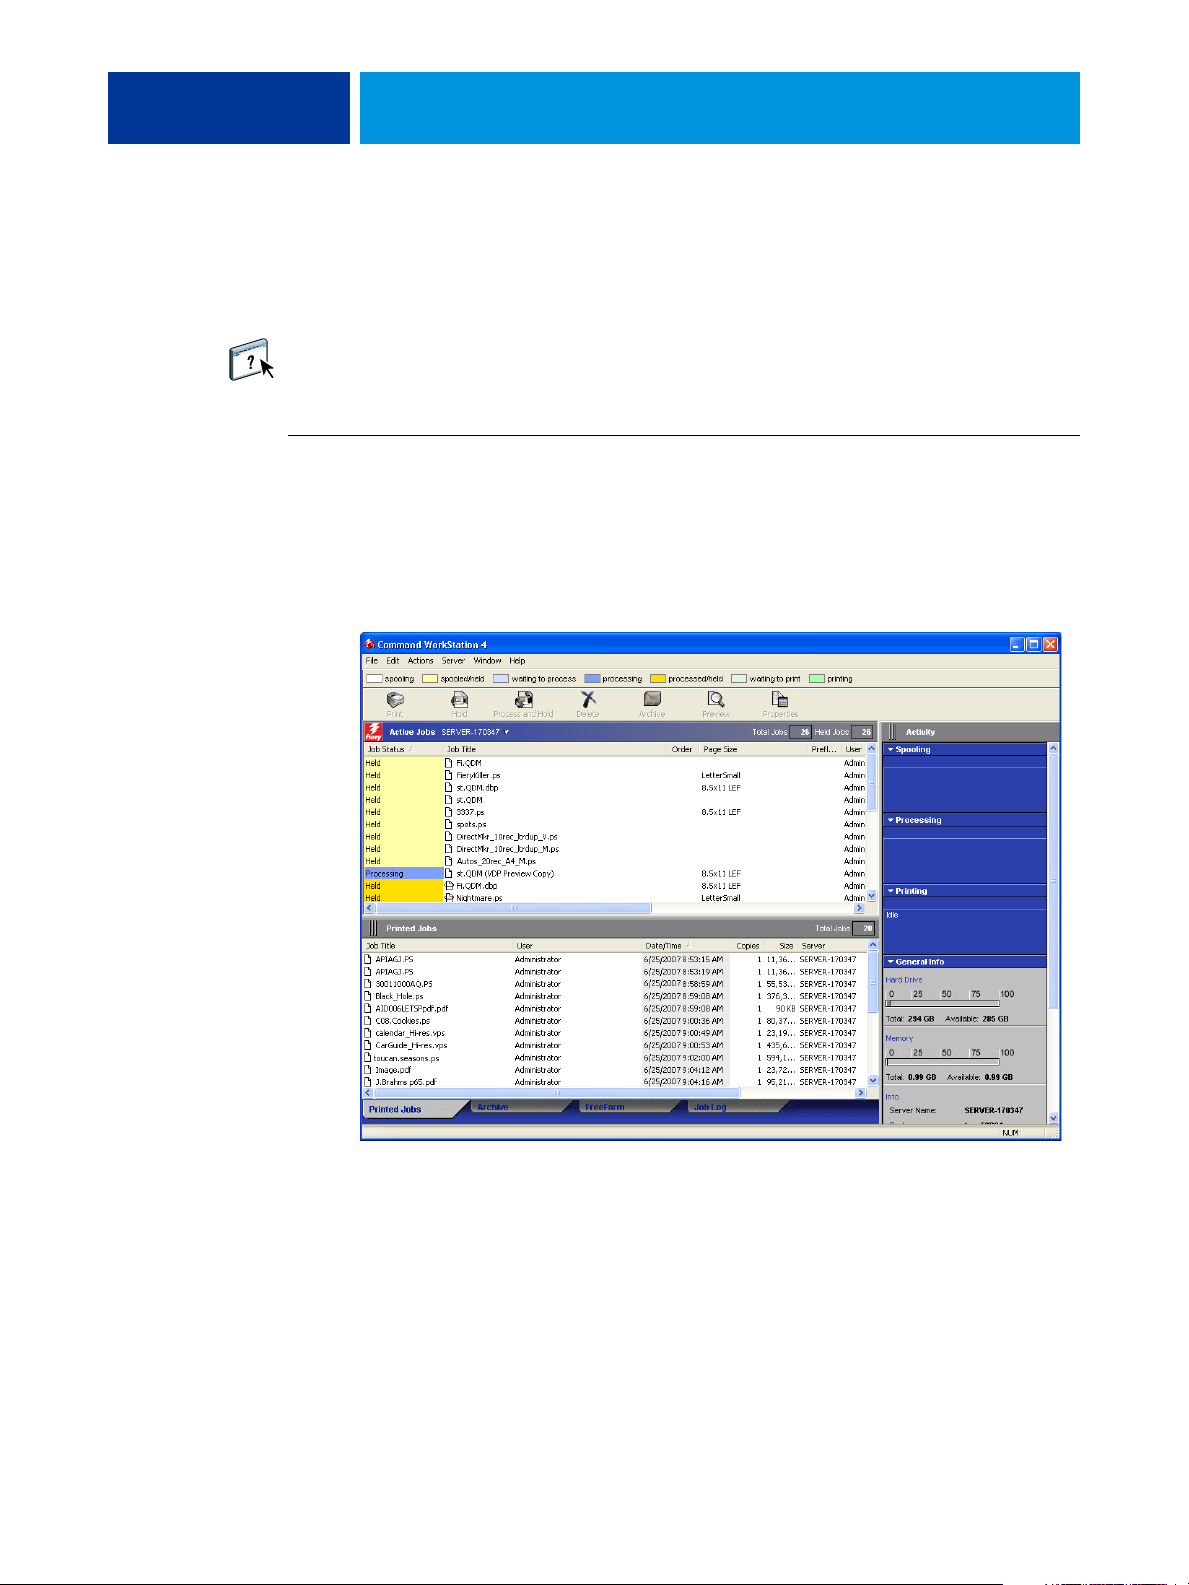
Using Command WorkStation, Windows Edition
After you install and configure Command WorkStation, you can begin using it to monitor
and manage jobs on the Fiery EX4112/4127.
For complete instructions on using the standard Command WorkStation features, see
Command WorkStation Help. Additional features are described in the sections starting on
page 22. Additional production features are described in Production Features.
TO ACCESS COMMAND WORKSTATION HELP
1 Start Command WorkStation.
Select the Fiery EX4112/4127 from the Server List dialog box and log in to the server.
For information about setting passwords and the default Administrator password for the
Fiery EX4112/4127, see Configuration and Setup.
2 Choose Help from the Help menu.
Page 22

COMMAND WORKSTATION, WINDOWS EDITION 22
Additional features
The following sections describe how to use additional features of Command WorkStation that
are not discussed in Command WorkStation Help.
User Authentication
If user authentication has been enabled in Fiery EX4112/4127 Setup, users may have to enter
a user name and password in the printer driver to send a job to the Fiery EX4112/4127.
Management of the job in Command WorkStation is determined by how you have logged on
to the Fiery EX4112/4127, as Administrator, Operator, or Guest.
For information about setting up Users and Groups and enabling user authentication in the
Configure WebTool, see Configuration and Setup. For information about User Authentication
in the printer driver, see Print Options.
Mixed Media
The Mixed Media feature allows you to define the chapter divisions of a job, print ranges of
pages on varying types of media, insert blank media between pages, and insert tab media
containing text labels.
The following guidelines and restrictions apply to Mixed Media settings:
• The Mixed Media dialog box restricts you from specifying settings that conflict with
any media, page size, or finishing settings that have been specified for the job in the
Job Properties dialog box or printer driver.
• When two or more Mixed Media settings are in conflict with each other, the Mixed Media
dialog box highlights the setting names in red, signaling you to resolve the conflict.
• When you specify print options (in the Job Properties dialog box or printer driver) after
specifying Mixed Media settings, certain print options may conflict with the page-specific
Mixed Media settings. You must resolve the conflict by choosing different print options or
removing certain Mixed Media specifications.
• If counters are configured for the copier, blank media inserted between pages count as
printed pages.
Basic instructions for accessing and using Mixed Media are provided in Command
WorkStation Help. Features specific to the Fiery EX4112/4127 are described in the following
procedures.
Page 23
COMMAND WORKSTATION, WINDOWS EDITION 23
TO DEFINE MIXED MEDIA SPECIFICATIONS
1 Select or right-click a spooled/held job in the Active Jobs window and choose Properties from
the Actions menu or double-click a job.
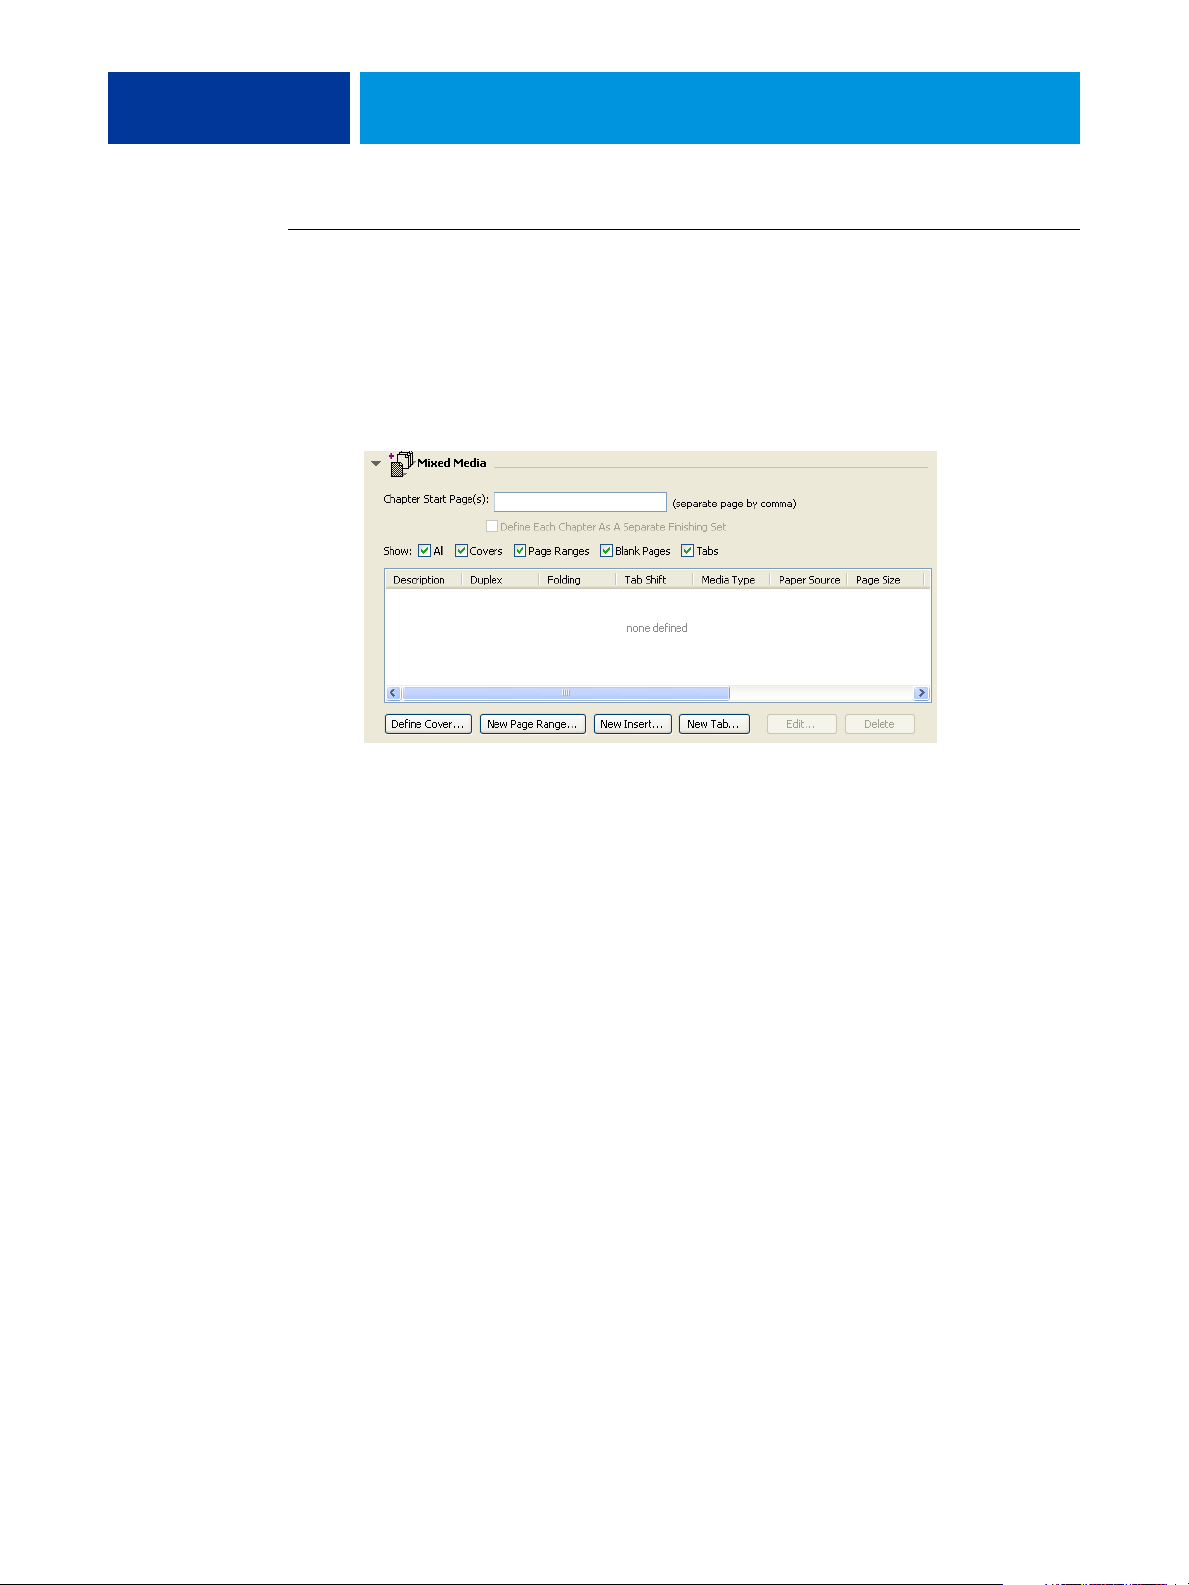
2 Click the Media icon and scroll down to Mixed Media.
The Mixed Media dialog box lists any previously defined media settings and includes buttons
for defining, modifying, and removing settings.
3 For Chapter Start Page(s), type the page numbers on which you want to start new chapter
sections.
Type page numbers as comma-separated values (for example: 4,9,17) to designate the start of
each new chapter. This feature forces each starting page to use a right-side page, adding a
preceding left-sided blank, if required.
NOTE: It is not necessary to type the first page. Page numbers refer to the numbering of the
original document. If you use the Chapter Start Page(s) feature, all media specified in the
Paper menu per chapter must share the same dimensions (for example, all Letter, all Tabloid,
or all A4).
4 To apply finishing options (for example, stapling or sorting) to each chapter created using
the Chapter Start feature, select the “Define Each Chapter As A Separate Finishing Set”
option.
NOTE: You can use the Define Each Chapter As A Separate Finishing Set function to define
subset finishing styles when the finishing style is the same for the entire set. For example, if
you specify stapling with a 10-page document with Chapter Start Page(s) as 3,6, the pages are
divided into 1–2, 3–5 and 6–10 groups and each group is stapled. You can also use Chapter
subsets to specify Multi-Center Fold and Fold and Staple finishing options.
NOTE: Not all finishing options can be applied to chapters that contain mixed sizes of media
(for example, Letter and A4).
5 To define properties for front and back covers, click Define Cover.
For more information, see “To define cover media settings” on page 24.
Page 24
COMMAND WORKSTATION, WINDOWS EDITION 24
6 To define properties for individual pages or page ranges, click New Page Range.
For more information, see “To define media for specific pages” on page 25.
7 To insert tab media, click New Tab.
The Insert Tab dialog box appears. For information about defining tab settings, see page 27.
NOTE: The Insert Tab feature is not available for imposed jobs.
8 To insert blank pages, click New Insert.
For more information, see “To insert blank pages” on page 26.
9 To modify or delete a current definition, select it in the Mixed Media Definition list, and click
Edit or Remove.
If you click Edit, enter new settings for the definition and click Modify.
10 After you finish defining Mixed Media settings, click OK to close the Mixed Media dialog box
and Job Properties.
The Mixed Media settings are applied to the job.
NOTE: You can save up to 100 different settings for the Selection list in the Mixed Media
dialog box.
TO DEFINE COVER MEDIA SETTINGS
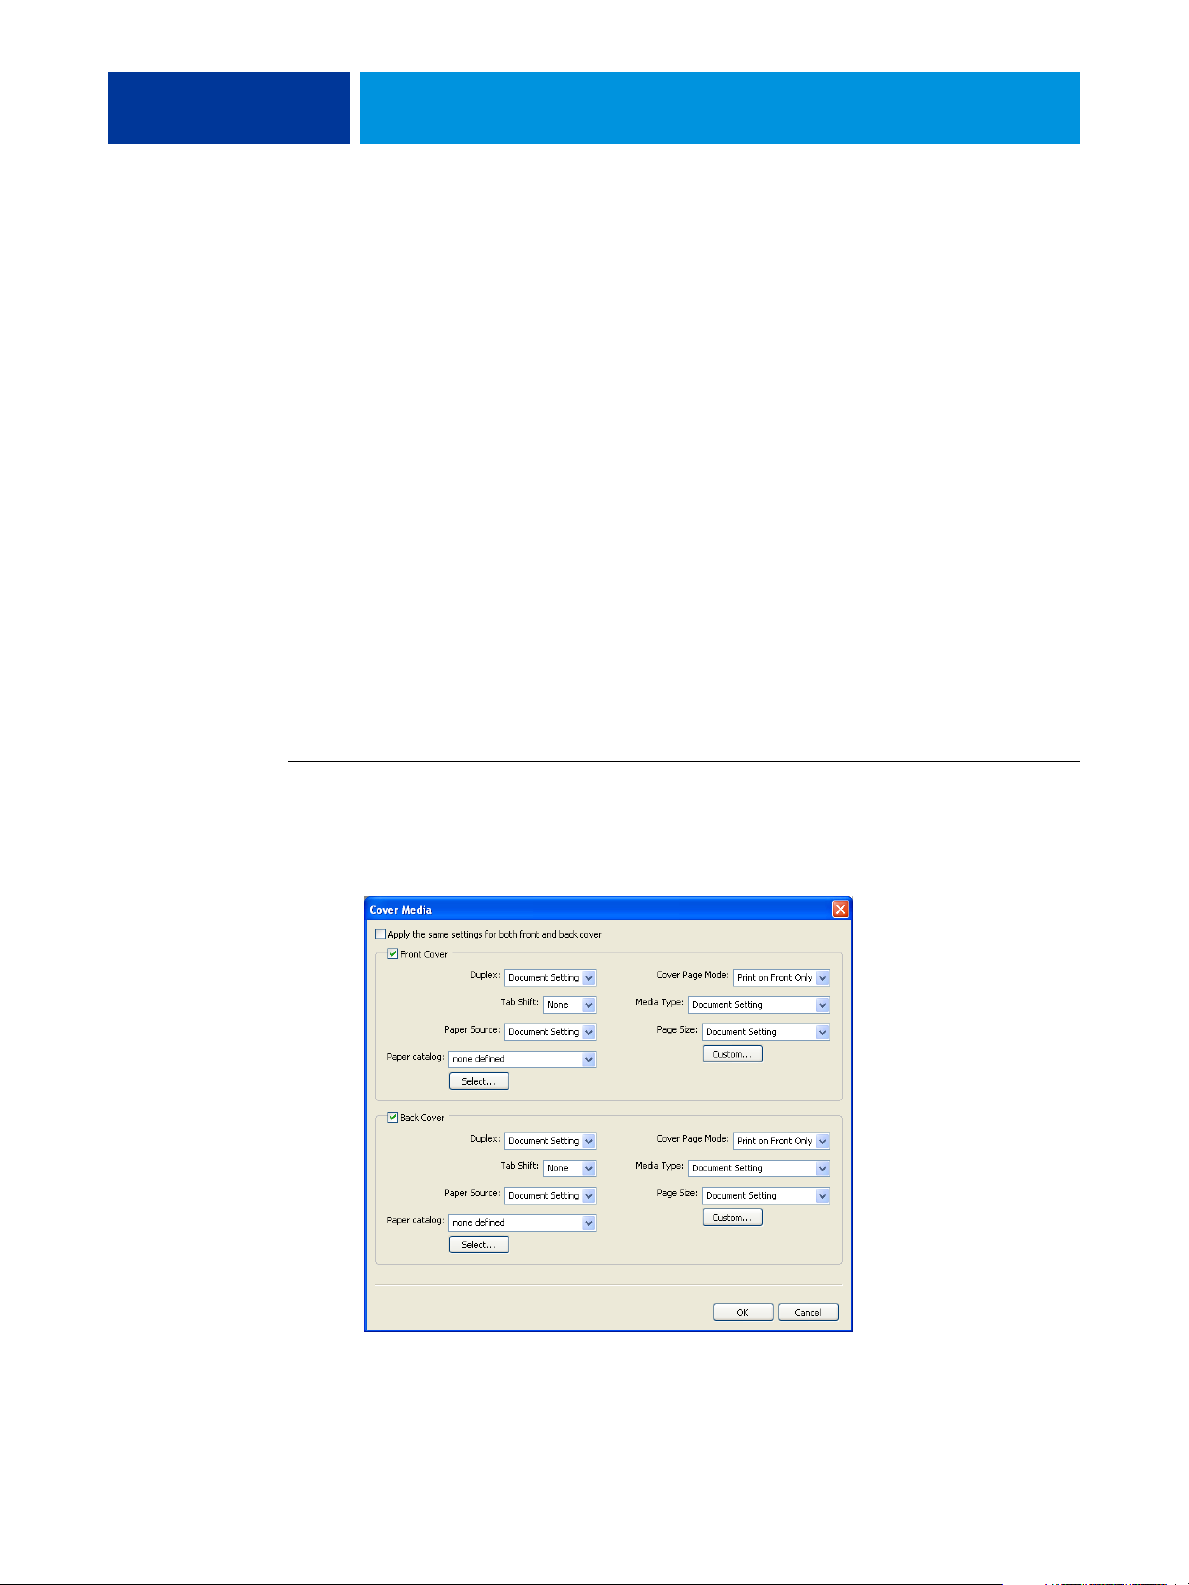
1 In the Mixed Media dialog box, click Define Cover.
The Cover Media dialog box appears.
Page 25
COMMAND WORKSTATION, WINDOWS EDITION 25
2 To define identical front cover and back cover media, select the “Apply the same settings for
both front and back cover” option. To define media settings for the front or back cover
individually, select the Front Cover or Back Cover option.
3 Select your desired media from the Paper Catalog drop-down menu.
4 You can also click Select to open the Paper Catalog window, select your desired media, and
click OK.
For more information about Paper Catalog, see page 34.
5 Click OK to return to the Mixed Media dialog box.
Cover Media settings take precedence over settings defined in the Page/Page Range Media
dialog box.
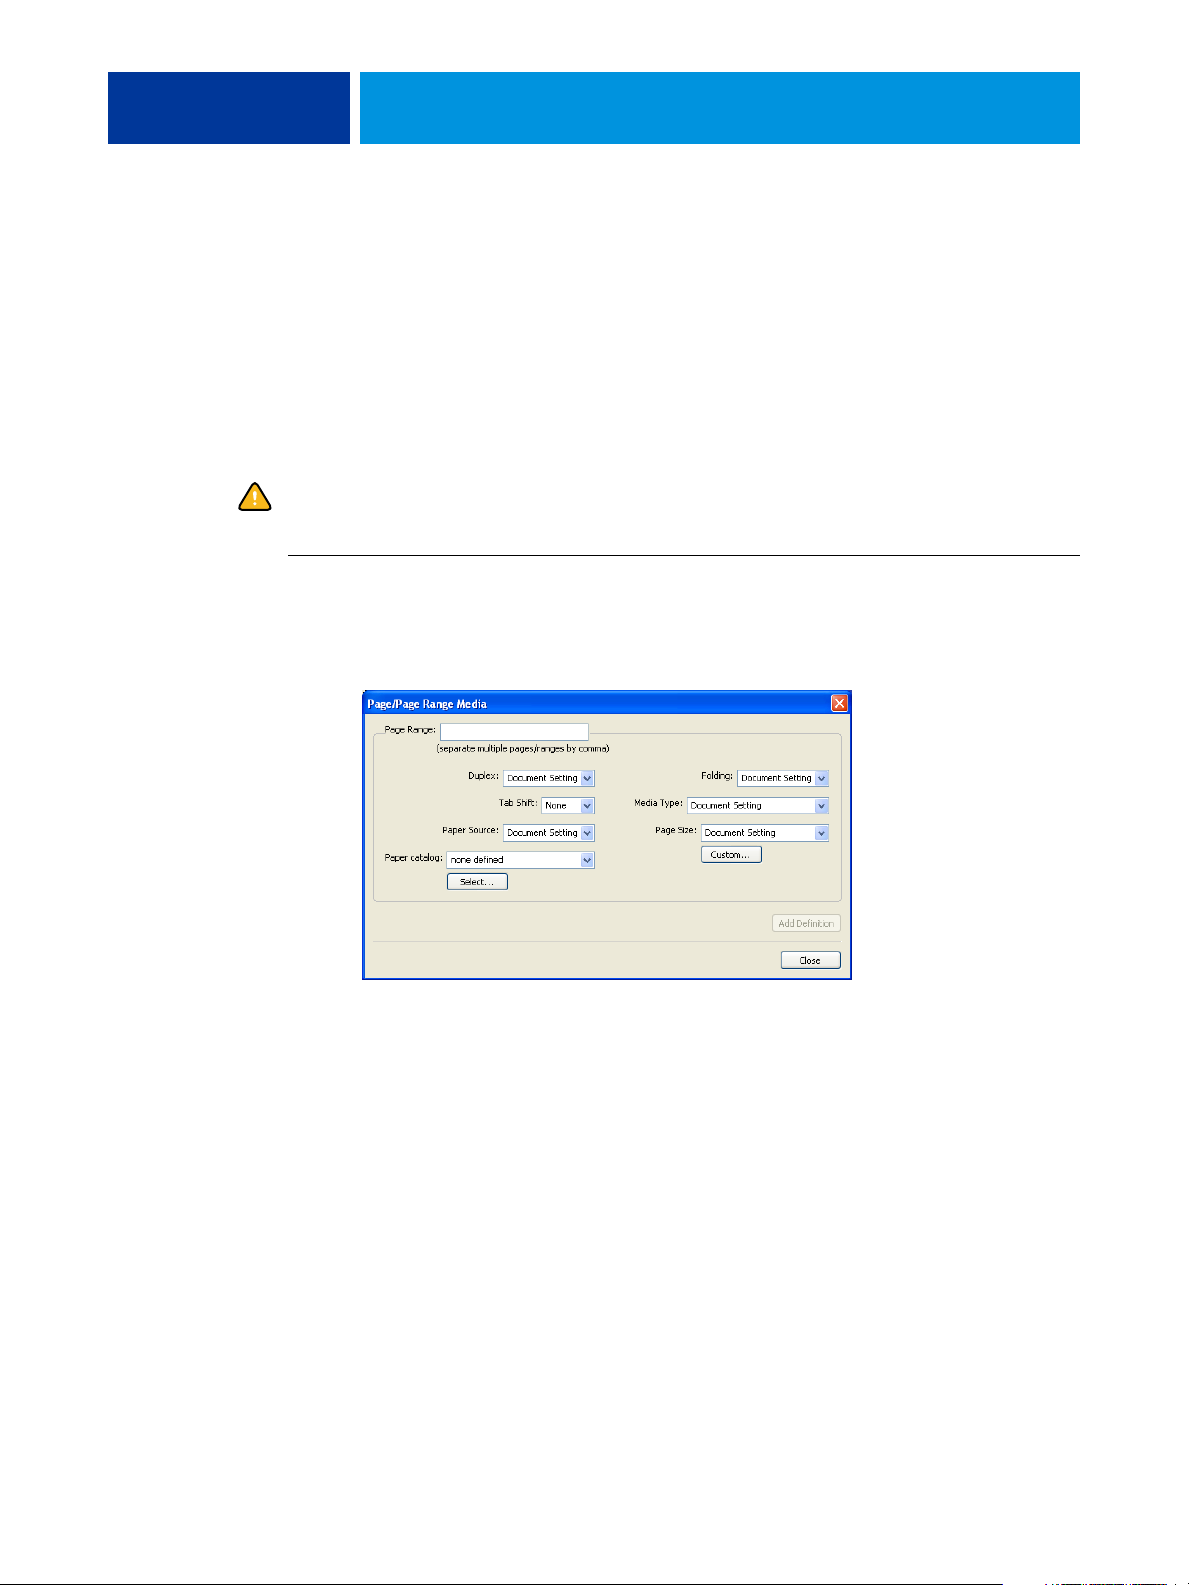
TO DEFINE MEDIA FOR SPECIFIC PAGES
1 In the Mixed Media dialog box, click New Page Range.
The Page/Page Range Media dialog box appears.
2 Type pages and page ranges as comma-separated values (for example: 3,9–14,18).
3 Specify other settings, as required.
If you assign a new media type to the back side of a duplexed sheet, a blank page is inserted to
force the assigned page content to the front side of the next sheet.
4 Select your desired media from the Paper Catalog drop-down menu.
5 You can also click Select to open the Paper Catalog window, select your desired media, and
click OK.
For more information about Paper Catalog, see page 34.
6 Click Add Definition after each media setting you define.
7 Click Close to return to the Mixed Media dialog box.
Page 26
COMMAND WORKSTATION, WINDOWS EDITION 26
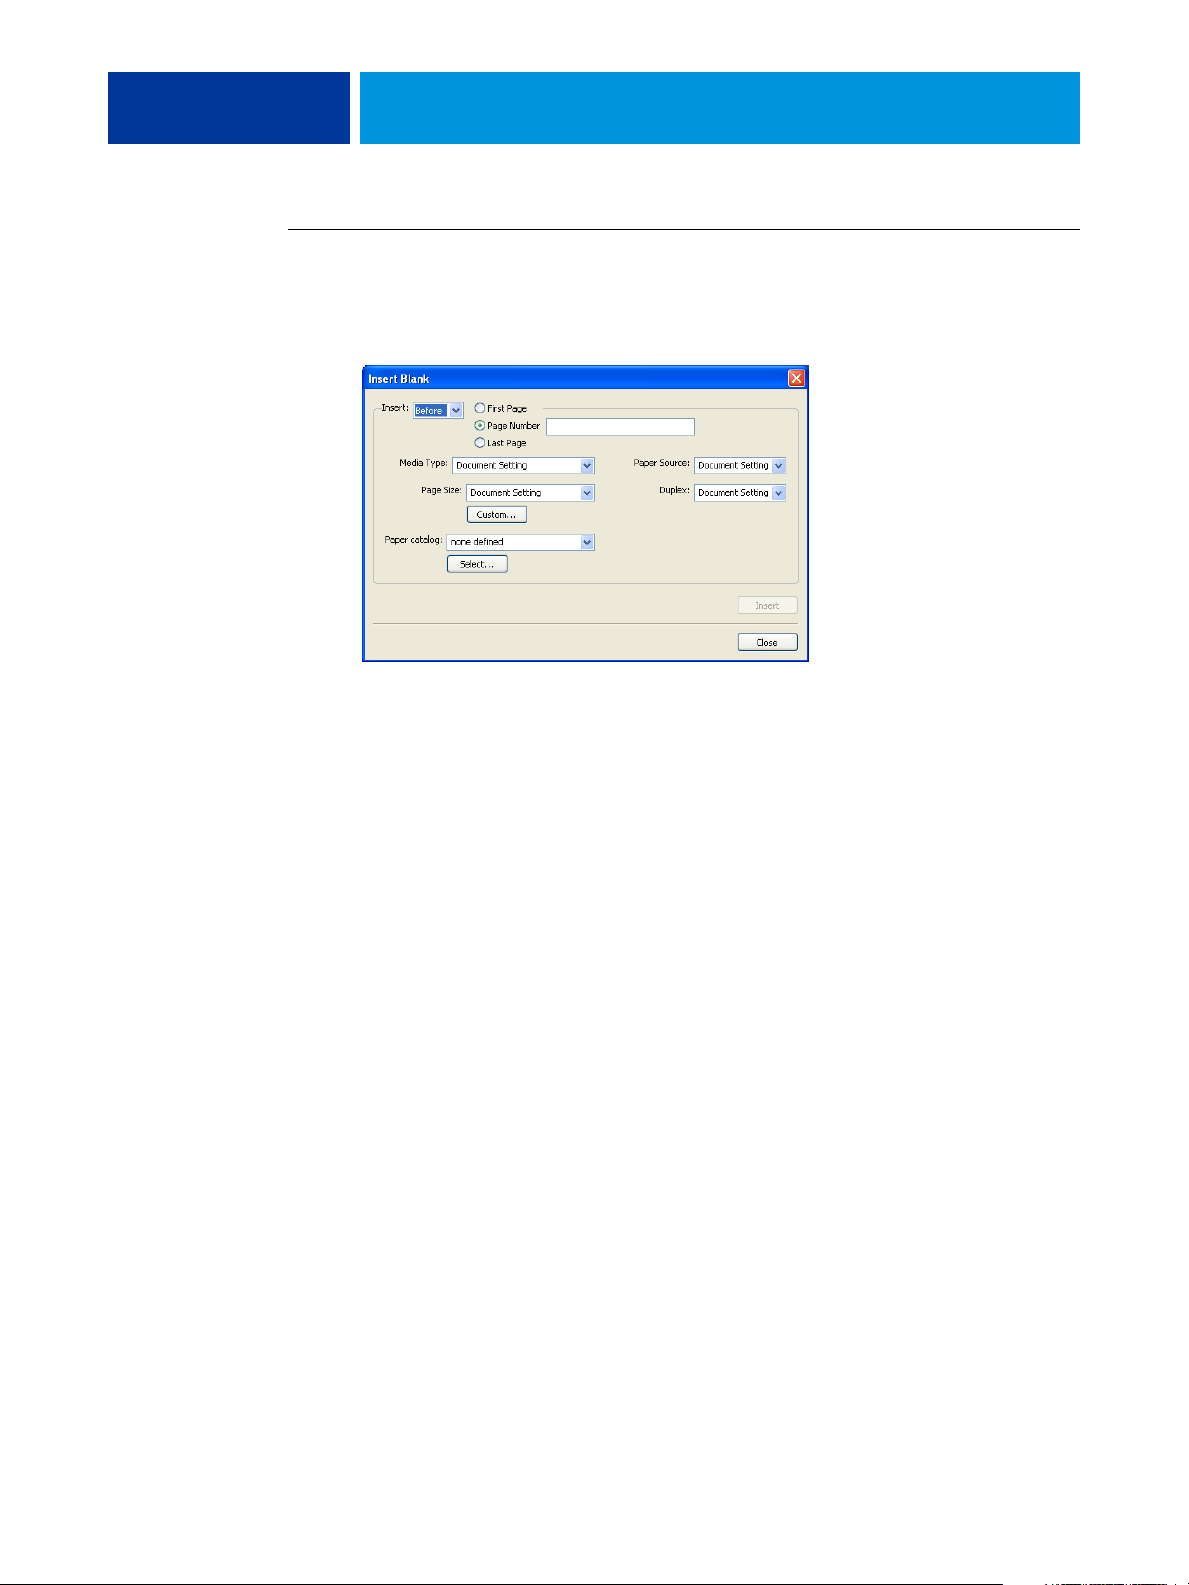
TO INSERT BLANK PAGES
1 In the Mixed Media dialog box, click New Insert.
The Insert Blank dialog box appears.
2 Indicate whether to insert the blank before or after the target page. Define the target page as
either the first or last page in the document, or as a specific numbered page.
3 Specify other settings as required for the blank page.
4 Select your desired media from the Paper Catalog drop-down menu.
5 You can also click Select to open the Paper Catalog window, select your desired media, and
click OK.
For more information about Paper Catalog, see page 34.
6 Click Insert after each blank page you define.
7 Click Close to return to the Mixed Media dialog box.
Page 27
COMMAND WORKSTATION, WINDOWS EDITION 27
Insert Tabs
The Insert Tabs feature allows you to automatically insert tab pages throughout a job.
This feature accommodates various sizes and types of tab media stock. Users can insert the
tab text and override text attributes on a per-job basis.
NOTE: The Insert Tabs feature is not available for imposed jobs.
NOTE: When you configure counters for the copier, printed tab pages count as black-and-
white pages, provided colors are calibrated to use pure black toner. Expelled tabs are not
counted as printed pages.
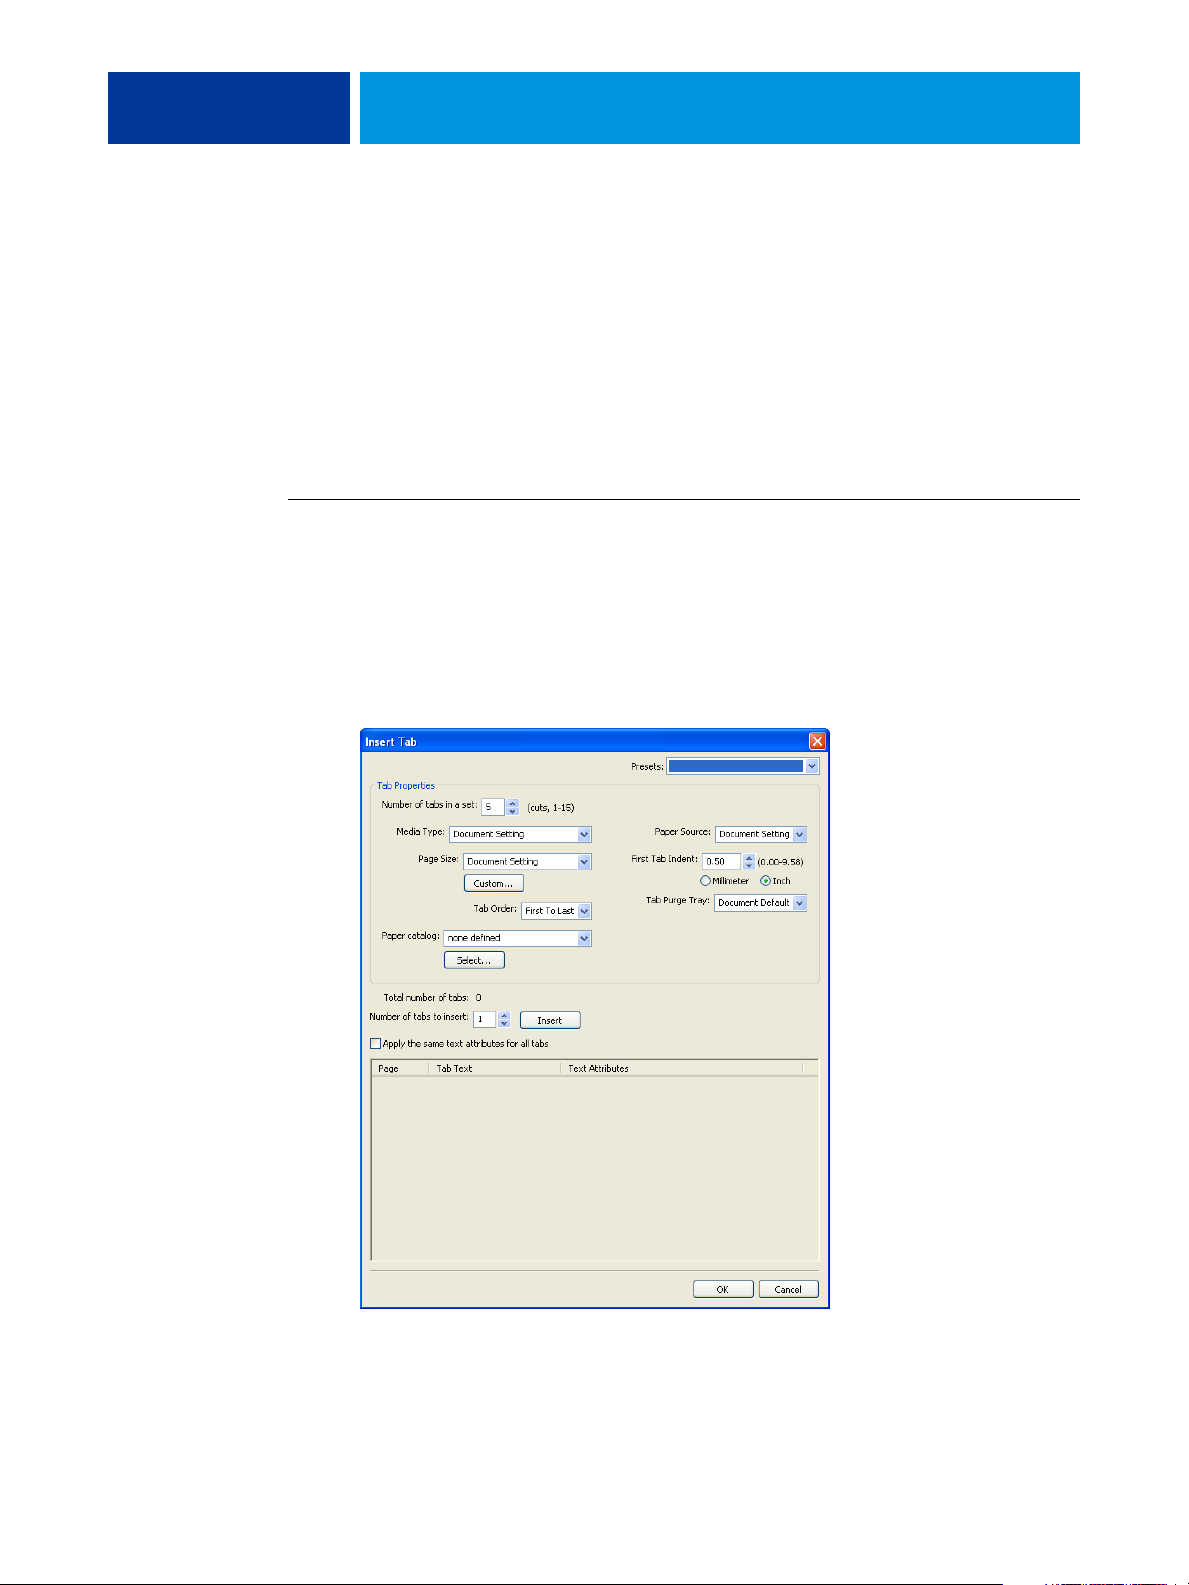
TO INSERT TAB PAGES
1 Select or right-click a spooled/held job in the Active Jobs window and choose Properties from
the Actions menu or double-click a job.
2 Click the Media icon and scroll down to Mixed Media.
3 In the Mixed Media dialog box, click New Tab.
The Insert Tab dialog box appears.
Page 28

COMMAND WORKSTATION, WINDOWS EDITION 28
4 Enter the number of tab positions included in a complete tab set in the “Number of tabs in a
set” field.
This specification ensures that tab text is printed in the correct tab positions. For example,
tab positions in a set consisting of ten tabs are distinct from tab positions in a set consisting of
five tabs.
5 Specify settings for the tab stock, as required.
Paper Size values refer to the dimensions of the stock, including the tabbed portion.
NOTE: Neither the Fiery EX4112/4127 nor the copier can recognize the tab positions.
You must create documents and select items so that the print image is not positioned outside
the tab area.
6 Select your desired media from the Paper Catalog drop-down menu.
7 You can also click Select to open the Paper Catalog window, select your desired media, and
click OK.
For more information about Paper Catalog, see page 34.
8 To specify attributes for the tab text, enter the number of tabs in the “Number of tabs to
insert” field and click Insert.
9 If you want all tabs to use the same text attributes, select “Apply the same text attributes
for all tabs”.
10 In the Text Attributes area, click the arrows to display the menus for font, size, text rotation,
and text alignment, and select the attributes you want from each menu.
Page 29

COMMAND WORKSTATION, WINDOWS EDITION 29
11 Indicate where you want each tab inserted in the document.
• In the Page field, type the page number where you want the tab inserted.
• Select Before to insert the tab before the page number or click to clear the checkbox.
NOTE: If you define a tab to be inserted between an odd-numbered page and an
even-numbered page in a duplex job, the tab is inserted after the odd-numbered page
on the first sheet, and the even-numbered page is printed on the next sheet.
12 Enter the desired tab text for each tab in the Tab Text field.
If desired, specify individual text attributes for each tab individually.
13 After you finish specifying tab text, click OK to close the Insert Tab dialog box.
The Mixed Media dialog box displays the current tab settings in the Mixed Media
definition list.
14 To modify media settings for the tabs, select the tab description in the Mixed Media
definition list, and click Edit.
15 To apply your Insert Tab settings to the document, click OK to close the Mixed Media dialog
box and Job Properties.
Page 30

COMMAND WORKSTATION, WINDOWS EDITION 30
Virtual Printers
Virtual printers give users a method of printing to the Fiery EX4112/4127 using predefined
settings to configure the print job. The Fiery EX4112/4127 administrator can create virtual
printers and publish them so that users can access them on the network. The SMB, LPR and
FTP services are supported.
NOTE: By default, three virtual printers are already set up to correspond to the print, hold, and
direct queues. These virtual printers cannot be modified.
The administrator specifies job settings for the virtual printer. The administrator can apply an
imposition template to a virtual printer. Imposition settings override job property settings.
The Fiery EX4112/4127 administrator can view the available virtual printers and published
queues, publish a virtual printer, and delete, duplicate, or edit a virtual printer.
To configure virtual printers, you must be logged on with Administrator privileges.
TO CONFIGURE A VIRTUAL PRINTER
1 In the Command WorkStation Server menu, choose Virtual Printers.
2 Click New.
3 Specify the following:
• Virtual Printer Name: Type an alphanumeric name.
•
Comments: Add comments to help define the virtual printer for the user, for example,
“duplex company brochure.”
•
Printing: Select one of the standard Fiery EX4112/4127 actions available from Command
WorkStation, including Hold, Process and Hold, Print, and Print and Hold.
•
Use Custom Job Properties: Access and choose Job Properties.
•
Apply Imposition Settings: Access and choose Impose settings.
4 Click OK.
Page 31

COMMAND WORKSTATION, WINDOWS EDITION 31
TO MANAGE VIRTUAL PRINTERS
1 Choose Server > Virtual Printers.
2 Select a virtual printer in the list and click Edit, Duplicate, or Delete.
NOTE: Once a virtual printer has been created, its name cannot be changed, although the
print settings can be changed.
Printing to a virtual printer using SMB
Virtual printers are published on the network. To print to a published virtual printer from a
client computer over SMB, do the following:
TO PRINT TO A VIRTUAL PRINTER USING SMB
1 Right-click Network Neighborhood or My Network Places, and select Find Computer or Search
for Computers.
2 Type the name of the Fiery EX4112/4127 that you are looking for and click Search Now.
If you cannot locate the Fiery EX4112/4127, contact your network administrator.
3 Double-click the name of the Fiery EX4112/4127 to display published virtual printers.
4 Double-click the virtual printer that you want to connect to.
You must install the printer driver from the User Software DVD as described in Printing from
Windows.
The virtual printer appears in Settings > Printers and Faxes.
Printing to a virtual printer using LPR on Windows
To print to a virtual printer from a client computer using an LPR connection on Windows,
you must configure a standard TCP/IP port for LPR printing and install the Fiery EX4112/
4127 printer drivers. When you configure the port, select LPR for the protocol and type the
name of the virtual printer for the queue name.
For information, see Printing from Windows.
Printing to a virtual printer using LPR on Mac OS
To print to a virtual printer from a client computer using an LPR connection on Mac OS,
follow the instructions for setting up the Fiery EX4112/4127 on Mac OS X using IP printing.
For Queue Name, enter the name of the virtual printer.
For information, see Printing from Mac OS.
Page 32

COMMAND WORKSTATION, WINDOWS EDITION 32
PRINTING TO A VIRTUAL PRINTER USING FTP
If the administrator has enabled FTP services, the Fiery EX4112/4127 can function as an
FTP server. For information about Setup, see WebTools Configure Help.
To print to a virtual printer using FTP, use your FTP client software and connect to the
Fiery EX4112/4127 as to any FTP server. Ask your network administrator for the following
information:
• IP address or DNS name of the Fiery EX4112/4127
• User name and password, if required
• The name of the virtual printer
For more information about FTP printing, see Printing from Windows and
Printing from Mac OS.
Page 33

COMMAND WORKSTATION, WINDOWS EDITION 33
Troubleshooting
When troubleshooting basic connection and software problems with Command
WorkStation, see the following sections. For additional troubleshooting information,
see Command WorkStation Help.
Command WorkStation cannot connect to the Fiery EX4112/4127
If you cannot connect to the Fiery EX4112/4127 or locate the Fiery EX4112/4127 from your
computer, contact the network administrator. The administrator may need to troubleshoot
your network connections and check settings on the servers that you print to. If settings have
changed, it may be necessary to reconfigure the Fiery EX4112/4127 (see Configuration and
Setup).
If you can connect to the Fiery EX4112/4127 with another utility, you may need to
reconfigure the Command WorkStation connection to the Fiery EX4112/4127 (see page 18).
If you configured the Fiery EX4112/4127 and set up client computers and network servers
according to the instructions in Configuration and Setup, print a Test Page. If you can print
the Test Page but still cannot print a document from a remote computer, contact your
network administrator to troubleshoot the network connection.
Command WorkStation does not respond
If Command WorkStation is unresponsive, use the following troubleshooting guidelines.
IF THE COMMAND WORKSTATION WINDOWS DO NOT UPDATE
1 Log off and then quit Command WorkStation.
2 Restart Command WorkStation or restart the computer.
If the Command WorkStation windows do not update or no jobs are displayed, and the
mouse has no effect (you cannot select a job or a window, use a right mouse command, or
select a menu item), the Fiery EX4112/4127 is offline or network communication has failed.
TO FORCE AN EXIT FROM COMMAND WORKSTATION
1 Press Ctrl-Alt-Delete and use the Task Manager to close Command WorkStation.
2 At the Fiery EX4112/4127, disconnect and reconnect the network cable, and then try printing
a Test Page or Configuration page.
3 If printing fails, restart the Fiery EX4112/4127.
Page 34

PAPER CATALOG
Installing Paper Catalog
PAPER CATALOG 34
Paper Catalog is a system-based paper warehouse database, which stores attributes of any
media available for printing from the Fiery EX4112/4127. Paper Catalog allows you to define
custom catalog entries based on any combination of attributes you desire. You can customize
any of the media attributes that are available for a catalog entry. You can then select media for
your job from those listed.
Paper Catalog is installed by default with Command WorkStation.
For information about installing Command WorkStation, Windows Edition, see page 17. For
information about configuring Command Workstation, see “Configuring the connection to
the Fiery EX4112/4127” on page 18.
For complete instructions on how to use the standard Command WorkStation features, see
Command WorkStation Help. For instructions on how to access Command WorkStation
Help, see page 21.
Specifying Paper Catalog media for jobs
This section describes how to specify Paper Catalog media for use with a print job. You can
specify Paper Catalog media from the following interfaces:
• Command WorkStation
• Job Properties in Command WorkStation
• Mixed Media Setup in Command WorkStation
•Hot Folders
•Compose
• Printer driver (for instructions, see Print Options)
NOTE: The following procedures assume that one or more Paper Catalog entries have already
been defined by an administrator. For information about how to define Paper Catalog entries,
see “Setting up Paper Catalog” on page 36.
Page 35

PAPER CATALOG 35
TO ACCESS PAPER CATALOG FROM COMMAND WORKSTATION
• To open Paper Catalog from Command WorkStation, select a spooled/held job in the Active
Jobs window and choose Paper Catalog from the Server menu.
TO SPECIFY PAPER CATALOG MEDIA FROM JOB PROPERTIES
1 Select a spooled/held job in the Active Jobs window and choose Properties from the
Command WorkStation Actions menu.
2 In the Job Properties dialog box, click the Media icon.
3 Choose the desired catalog entry from the Paper Catalog menu.
NOTE: If you specify a paper catalog entry and then use Job Properties to change the page size
(or another attribute associated with the paper catalog entry), the paper catalog assignment is
canceled. Job Properties subsequently displays “none defined” for Paper Catalog.
TO SPECIFY PAPER CATALOG MEDIA FROM MIXED MEDIA SETUP
1 Select or right-click a spooled/held job in the Active Jobs window and choose Properties from
the Actions menu, or double-click a job.
2 Click the Media icon in Job Properties and scroll down to Mixed Media.
3 Choose the desired Paper Catalog entry in the New Page Range, or New Insert windows.
For more information about Mixed Media Setup, see “Mixed Media” on page 22.
TO SPECIFY PAPER CATALOG MEDIA FROM COMPOSE
• Select a spooled/held job in the Active Jobs window and choose Compose from the Actions
menu. Then choose Paper Catalog from the Compose File menu.
For information about using Compose, see Compose Help. Compose Help also includes
information about how to apply Paper Catalog entries to your job.
TO SPECIFY PAPER CATALOG FROM HOT FOLDERS
1 In the Folder Properties dialog box, select Job Settings and click Define.
2 In the Job Properties dialog box, click the Media icon, and then select your desired media
from the Paper Catalog drop-down menu.
3 You can also click Details to open the Paper Catalog window, select your desired media, and
click OK.
4 Click OK to return to the Hot Folders Properties window.
Page 36

PAPER CATALOG 36
Setting up Paper Catalog
The following sections describe how to use the features of Paper Catalog.
NOTE: Only administrators can configure and edit Paper Catalog entries and settings.
Managing Paper Catalog entries
The following procedure describe how to create, duplicate, edit, and delete catalog entries.
TO CREATE A NEW CATALOG ENTRY
1 In Command WorkStation, choose Paper Catalog from the Server menu.
The main Paper Catalog window is displayed.
2 Choose File > New Paper or click the New icon .
3 In the New Media window, specify the attributes for the new catalog entry.
Highlight the desired attribute line in the window, and then click the right-hand column of
that attribute line to access the drop-down menu or text field.
For information about setting a specific attribute, see “Specifying media attributes for Paper
Catalog” on page 41.
4 Click OK.
The new entry appears with a white background in the Paper Catalog window.
TO DUPLICATE A CATALOG ENTRY
1 In Command WorkStation, choose Paper Catalog from the Server menu.
2 Select the catalog entry that you want to duplicate.
3 Choose File > New Paper or click the New icon .
The duplicated entry appears at the bottom of the list.
To customize your catalog entry, see the following procedure.
TO EDIT A CATALOG ENTRY WITHIN THE MAIN PAPER CATALOG WINDOW
1 In Command WorkStation, choose Paper Catalog from the Server menu.
2 Highlight the entry that you want to edit.
Editable entries appear with a white background.
Page 37
PAPER CATALOG 37
3 Click on an attribute in the entry line to display the drop-down menu or text field for that
attribute. Then choose the new attribute setting or enter the new attribute value as desired.
All changes are automatically saved.
For information about setting a specific attribute, see “Specifying media attributes for Paper
Catalog” on page 41.
TO EDIT A CATALOG ENTRY WITHIN THE EDIT MEDIA WINDOW
1 In Command WorkStation, choose Paper Catalog from the Server menu.
2 Highlight the entry that you want to edit.
Editable entries appear with a white background.
3 Choose Edit > Paper Properties, or click the Properties icon .
The Edit Media window appears.
4 In the Edit Media window, highlight the attribute line that you want to edit. Then click the
right-hand column of that attribute line to access the drop-down menu or text field.
Choose the new attribute setting or enter the new attribute value as desired.
For information about setting a specific attribute, see “Specifying media attributes for Paper
Catalog” on page 41.
Repeat steps 2 and 3 for any other attribute that you wish to edit.
5 Click OK.
TO DELETE A CATALOG ENTRY
1 In Command WorkStation, choose Paper Catalog from the Server menu.
2 Highlight the catalog entry that you want to delete.
3 Choose Edit > Delete or click the Delete icon .
An alert message asks if you want to delete the entry.
4 Click Yes.
Page 38

PAPER CATALOG 38
Managing catalogs
You can manage catalogs of media entries by doing the following:
• Replace the current catalog of entries with another catalog of entries.
• Merge the current catalog of entries with another catalog of entries imported from a
different location.
• Export the current catalog of entries to another location.
• Reset the current catalog to the factory default entries and attributes.
TO REPLACE THE CATALOG WITH ANOTHER CATALOG
NOTE: Before you replace the catalog, be sure to archive the current catalog entries by using
the Export command.
1 In Command WorkStation, choose Paper Catalog from the Server menu.
2 Choose File > Replace Catalog.
3 Navigate to the replacement catalog file (.xml file format) on your computer or network, and
click Open.
An alert message asks if you want to replace your current catalog.
4 Click Yes.
TO MERGE THE CATALOG WITH AN IMPORTED CATALOG
1 In Command WorkStation, choose Paper Catalog from the Server menu.
2 Choose File > Merge Catalog.
3 Navigate to the catalog file (.xml file format) on your computer or network that you want to
import, and click Open.
The current catalog is now merged with the one you just imported.
NOTE: When you merge catalogs, all color profile associations in the imported catalog are
discarded. If the imported catalog contains an entry that has the identical attributes as an
entry in the original database, the new entry is not imported and the original entry remains
intact in the merged catalog.
Repeat the procedure for additional catalogs of entries that you want to merge into the
current catalog.
Page 39

PAPER CATALOG 39
TO EXPORT THE CATALOG
1 In Command WorkStation, choose Paper Catalog from the Server menu.
2 Choose File > Export.
3 Navigate to the location on your computer or network where you want to save the exported
catalog file.
4 Enter a name for the catalog file, and click Save.
The exported catalog is saved as an .xml file. The exported catalog can be imported back into
the main Paper Catalog window by using the Merge Catalog command.
TO RESTORE THE CATALOG TO FACTORY DEFAULTS
NOTE: Any added or edited catalog entries are lost when you reset the catalog to factory
defaults. To save your customized entries, use the Export command to archive the catalog
before resetting it to factory defaults.
1 In Command WorkStation, choose Paper Catalog from the Server menu.
2 Choose File > Reset to Factory Defaults.
An alert message asks if you want to reset the catalog to its factory defaults.
3 Click Yes.
Page 40

PAPER CATALOG 40
Setting display options
The preferences dialog box specifies the units of measurements used to display attributes such
as custom page sizes. This preference setting does not affect predefined page size values. The
setting applies to Paper Catalog only and overrides the units setting specified in Command
WorkStation preferences.
You can also customize the display of attribute columns in the main Paper Catalog window.
TO SET THE UNIT OF MEASUREMENT FOR PAPER CATALOG
1 In Command WorkStation, choose Paper Catalog from the Server menu.
2 Choose Edit > Preferences.
3 Specify the desired Size Units.
4 Click OK.
TO CUSTOMIZE THE DISPLAY OF ATTRIBUTE COLUMNS
1 In Command WorkStation, choose Paper Catalog from the Server menu.
2 Do any of the following:
• To sort the catalog entries according to a particular attribute, click the column title bar for
that attribute.
• To add an attribute column to the display, right-click the title bar of a column, click Add
and choose the attribute that you want to add as a column.
The new column is added immediately to the right of the column that you right-clicked.
• To change the display order of a column, click and drag the title bar of the column.
• To remove a column from the display, right-click the title bar of the column and click
Delete. Alternatively, you can drag the title bar of the column off the Paper Catalog
window to remove it.
NOTE: Attribute columns removed by an administrator will not display in Paper Catalog or
Paper/Tray Association for any users connected to the Fiery EX4112/4127. These columns
can only be restored by an administrator.
Page 41

PAPER CATALOG 41
Specifying media attributes for Paper Catalog
The following sections describe how to specify media attributes for entries in Paper Catalog.
Specifying custom paper sizes
You can define a custom paper size when creating or editing a catalog entry.
TO SPECIFY A CUSTOM PAPER SIZE FOR A CATALOG ENTRY
1 In Command WorkStation, choose Paper Catalog from the Server menu.
2 Choose File > New Paper or click the New icon .
Or, to edit an existing catalog entry, highlight the entry and click the Properties icon .
3 In the New Media window, click the Paper Size field and enter the custom page values for that
catalog entry.
Enter custom page values using the format “m x n”, for example “8 x 10”.
If you do not specify a unit of measurement (such as in, mm, or pt), Paper Catalog uses the
default unit specified in Preferences.
If a unit measurement other then the default is specified, the value is converted and displayed
in default measurement units.
Page 42

PAPER CATALOG 42
Description of media attributes
The following table describes the media attributes that you can specify for catalog entries.
Attribute names appear in the column titles of the main Paper Catalog window. Mandatory
attributes appear with populated fields. You cannot leave the field for a mandatory attribute
empty.
Media attribute Description
Back Coating
Back Gloss Value
Brightness
CIE Lab Color
CIE Tint
CIE Whiteness
Color Name
Custom Color Name
Description
Feed Direction
Front Coating
Front Gloss Value
Indicates the type of pre-process coating applied to the back side of the media sheet.
The percentage of light reflected by the back side of the media when it is viewed under illumination with a
75-degree angle of incidence. A higher percentage of reflection indicates a higher gloss value.
Light reflectance of the media used. Enter a value from 0% (low reflectance) to 100% (high reflectance).
The device-independent color of the media. Specify the color using CIE L*a*b* values.
Describes how neutral, unsaturated, or non-chromatic the media is. Specify the media tint using values in
the CIE xyz coordinate system. A coordinate of (0, 0, 0) indicates a perfectly neutral tint.
Describes the amount of overall light reflected by the media, as measured across the entire visible spectrum.
Specify the reflection amount using values in the CIE xyz coordinate system. A coordinate of (100, 100,
100) indicates perfect whiteness.
Color of the media used. To indicate translucent media, choose a “Clear” color option.
Custom color of the media used. Use this attribute if your desired color does not appear in the Color Name
menu. Type the name of your custom color into this field.
Additional descriptive information for the catalog entry, such as the manufacturer, model, part number, and
type of media used. Type the desired description into this field.
Specifies how the media sheet is fed into the printer. Choose between Long Edge Feed and Short Edge Feed.
Indicates the type of pre-process coating applied to the front side of the media sheet.
The percentage of light reflected by the front side of the media when it is viewed under illumination with a
75-degree angle of incidence. A higher percentage of reflection indicates a higher gloss value.
Grade
The surface quality of the media, expressed as a grade level from 1 and 5. Use the following guidelines:
1 Gloss-coated paper
2 Matte-coated paper
3 Gloss-coated web paper
4 Uncoated white paper
5 Uncoated yellowish paper
Page 43

PAPER CATALOG 43
Media attribute Description
Grain Direction
Hole Type
Imageable Sides
Media Unit
Name
Opacity
Opacity Level
Paper Size
Direction of paper grain on the media used. Choose from the following options:
Short Grain runs parallel to the short edge of the media, as defined by Paper Size.
Long Grain runs parallel to the long edge of the media, as defined by Paper Size.
Pattern of punched holes (if any) on the media used.
Specifies which side(s) of the media support print imaging.
The physical format of the media that is fed into the print device. Choose from the following options:
Sheet Individually cut sheets.
Roll Media that is continuously connected and wrapped around a spindle.
Continuous Media that is continuously connected and folded, as in a fan-folded format.
Descriptive name for the catalog entry, such as “Special_A4”. Type the desired name into this field.
The level of transparency of the media. Choose from the following options:
Opaque The media is opaque. If the media is printed on both sides, the image on the other side does not
show through under normal lighting conditions.
Translucent The media is partially transparent, under certain lighting conditions such as back-lit viewing.
Transparent The media is fully transparent, under all lighting conditions.
The media’s percentage of opacity. 0% represents full transparency, and 100% represents full opacity.
Width and height dimensions of the media used. For information about specific Paper Size options, see
Print Options. For information about setting a custom paper size, see “Specifying custom paper sizes” on
page 41.
Pre-Printed
Product ID
Set Count
Indicates whether the media contains pre-printed content. Choose from the following options:
False The media is not pre-printed.
True The media contains pre-printed content (for example, stationery paper with a pre-printed letterhead).
Part number, item code, article number, or other identifier for the media used, as defined by a Management
Information System (MIS). Enter the desired product identifier into the field.
Defines the number of pieces in a grouped media set. For example, tab stock with five pre-cut tabs has a
Set Count of “5”.
Page 44

PAPER CATALOG 44
Media attribute Description
Texture
Surface texture of the media used. Choose from the following, or type in a custom description:
Antique Surface that is rougher than vellum.
Calendered Extra-smooth or polished uncoated paper.
Cockle Surface that has a rough, wrinkled, irregular finish.
Dull Machine-worn finish without gloss or luster.
Eggshell Surface that has a texture similar to that of an eggshell.
Embossed Linen Surface resembling coarse woven cloth, with a pronounced embossed texture.
English Surface that is smoother than Machine Finished, but rougher than Super Calendared.
Felt Finish applied by a special marking felt.
Laid Surface with a pattern of vertical and horizontal lines.
Light Cockle Surface that has a rough, wrinkled, irregular finish, with less pronounced wrinkles than in
Cockle.
Linen Surface that has the texture of coarse woven cloth.
Luster Shiny surface.
Machine Finished Extra-smooth or polished uncoated paper, rougher than English.
Matte Dull finish without gloss or luster.
Mottled Finish that shows diverse spots or blotches.
Parchment Finish that resembles the appearance of parchment paper.
Satin Smooth, dull finish that resembles satin fabric.
Semi-Vellum Slightly rough finish, smoother than Vellum.
Silk Smooth, dull finish that resembles silk fabric.
Smooth Surface that has a smooth finish.
Stipple Fine, pebbled finish.
Suede Smooth, dull finish that resembles suede fabric.
Super Calendered Smoothest, most polished, uncoated paper.
Super Smooth Very flat and even finish. Smoother than Ultra Smooth.
Traditional Laid Surface with a heavier pattern of vertical and horizontal lines than Laid.
Ultra Smooth Very flat and even finish, but not as smooth as Super Smooth.
Uncalendered Rough, unpolished, and uncoated finish.
Vellum Slightly rough and dull finish.
Velvet Smooth, dull finish that resembles velvet fabric.
Wove Soft, smooth finish.
Page 45

PAPER CATALOG 45
Media attribute Description
Thickness
Type
Type Details
Thickness of the media used, measured in microns.
Stock type of the media used. Choose from the following options:
Paper Standard fiber-based paper stock.
Transparency Transparent media stock designed to be viewed through projection.
Additional details describing the stock type of the media used. Choose from the following options:
Plain Choose this option if your media stock does not require a special description.
Cardboard Media made from cardboard stock.
Continuous Long Opaque media composed of sheets continuously connected along the long edge, as
defined by Paper Size.
Continuous Short Opaque media composed of sheets continuously connected along the short edge, as
defined by Paper Size.
Envelope Media that can be used for conventional mailing purposes. Can either be plain envelopes or
envelopes with transparent address windows.
Envelope Plain Envelopes that are not pre-printed and do not have address windows.
Envelope Window Envelopes that have transparent windows for addressing purposes.
Full Cut Tabs Media with a single long tab that extends along the full length of the sheet.
Labels Adhesive label stock, such as a sheet of peel-off labels.
Letterhead Cut sheets of opaque media that contain a pre-printed letterhead.
US Basic Size
Multi-Part Form Media designed for use as a multi-layer form. Individual layers of the form are detached
from one another and may be drawn from separate paper trays.
Photographic Cut sheets of opaque media designed to support photographic-quality images.
Pre Cut Tabs Media with two or more tabs that extend along an edge of the sheet.
Stationery Cut sheets of opaque media. Generic paper falls under this category.
Tab Stock Media with one or more tabs. Can be either Full Cut Tabs or Pre Cut Tabs.
Type of media stock (measured in inches), as defined by US industry standards.
Page 46

PAPER CATALOG 46
Media attribute Description
Weigh t (g sm)
% Recycled Content
Weight of the media used, measured in grams per square meter (gsm).
The basis weights of most North American stock types are measured in pounds (lb.). To convert to gsm,
multiply the basis weight by the appropriate conversion factor for the stock type:
• For bond, ledger, manifold, onion skin, duplicator, or safety; multiply by 3.76.
• For blotter, multiply by 3.08.
• For cover papers, multiply by 2.70.
• For blanks, multiply by 2.28.
• For printing bristol or wedding bristol, multiply by 2.19.
• For index bristol, multiply by 1.81.
• For tagboard or newsprint, multiply by 1.63.
• For uncoated book, coated book, text book, or label; multiply by 1.48.
For example, the metric weight of 50lb bond stock is calculated as follows:
Basis Weight x Conversion Factor = 50
The percentage of recycled material in the media.
x 3.76 = 188gsm
Page 47

PAPER CATALOG 47
Using Paper/Tray Association
Paper/Tray Association allows you to associate a Paper Catalog entry with a particular paper
tray on the copier. This feature instructs the copier to pull the appropriate media for a job
that uses a particular Paper Catalog entry.
Associating catalog entries with trays
After loading media stock on the copier, use Paper/Tray Association to define the tray location
of that media stock. You must first define the media stock as a Paper Catalog entry, as
described in “Managing Paper Catalog entries” on page 36.
TO ASSOCIATE A CATALOG ENTRY WITH A TRAY
1 In the main Command WorkStation window, choose Server > Paper/Tray Association.
NOTE: If you are logged in as an administrator, you can also go to Server > Paper Catalog >
Tools > Paper/Tray Association.
All installed trays are displayed in the main Tray and Paper Association window.
Position the cursor over a tray to display the association details. An unassociated tray is labeled
“unassigned”. An associated tray is displayed with a summary of the associated catalog entry.
2 Click a tray from the list on the left.
All available catalog entries are listed for that tray. If the tray does not recognize any Paper
Catalog information, all catalog entries are displayed.
3 Select a catalog entry.
4 Click OK.
Monitoring media status in trays
If the copier is able to report the amount of media remaining in each tray, you can monitor
media status from the Tray and Paper Association window.
TO MONITOR THE MEDIA STATUS IN A TRAY
1 In the main Command WorkStation window, choose Server > Paper/Tray Association.
Each tray displays the amount of remaining media, expressed as a percentage.
2 Click Cancel to close the window without applying any Tray and Paper Association changes.
Page 48

COMMAND WORKSTATION, MACINTOSH EDITION 48
COMMAND WORKSTATION, MACINTOSH EDITION
Command WorkStation, Macintosh Edition allows operators of the Fiery EX4112/4127, or
users with Operator or Administrator privileges, to monitor and manage the print workflow
of jobs on the Fiery EX4112/4127.
Command WorkStation, Macintosh Edition, enables you to do the following:
• View the print status of jobs on the Fiery EX4112/4127
• Hold, process, and print jobs
• Override user-assigned print option settings
• Preview the page content of a job
• Create and use FreeForm master files for variable data printing
• Archive job files
• View job logs of recent print activity
Page 49

COMMAND WORKSTATION, MACINTOSH EDITION 49
Installing Command WorkStation, Macintosh Edition
Install Command WorkStation, Macintosh Edition on a Mac OS X computer that has
a network connection to the Fiery EX4112/4127. For complete system requirements,
see Welc om e.
Before installing the utility, complete the preliminary procedures described in “Preparing for
installation on Mac OS computers” on page 11.
To install Command WorkStation, Macintosh Edition, see “Installing user software on a
Mac OS computer” on page 14.
Configuring the connection to the Fiery EX4112/4127
The first time you start Command WorkStation, you are prompted to configure the
connection to the Fiery EX4112/4127.
You can also edit the configuration whenever there is any change to your Fiery EX4112/
4127 server or network, such as a changed server name or IP address. If you change
Fiery EX4112/4127 Setup information, do so before you reconfigure the connection.
BEFORE YOU BEGIN
• Print the Fiery EX4112/4127 Configuration page.
For instructions on printing the Configuration page, see Configuration and Setup.
This page contains information you need when configuring the connection, such as the
IP address of the Fiery EX4112/4127. For TCP/IP installations, you can use the DNS name
instead of the IP address. Make sure that the Fiery EX4112/4127 is already registered in a
Domain Name Server (DNS) on your network. For more information, see the documentation
that accompanies your network system.
TO CONFIGURE THE CONNECTION FOR COMMAND WORKSTATION, MACINTOSH EDITION
1 Open the Applications : Fiery : CWS Macintosh Edition folder on the Mac OS X hard disk.
Double-click the CWS Macintosh Edition file to start the application.
The Available Servers dialog box appears. All servers found in the local subnet are displayed.
Page 50

COMMAND WORKSTATION, MACINTOSH EDITION 50
NOTE: The following illustrations show Command WorkStation, Macintosh Edition, on a
Mac OS X v10.4.9 computer.
2 If no Fiery EX4112/4127s were found, click the Manual tab to search by DNS name or
IP address. Click Add to add the server to the Available Servers list.
If no Fiery EX4112/4127s were found in the Manual search, click the Auto Search tab, and
then click Advanced to search by a range of IP addresses or the IP address and subnet mask.
All available servers are displayed in the Available Servers list.
Page 51
COMMAND WORKSTATION, MACINTOSH EDITION 51
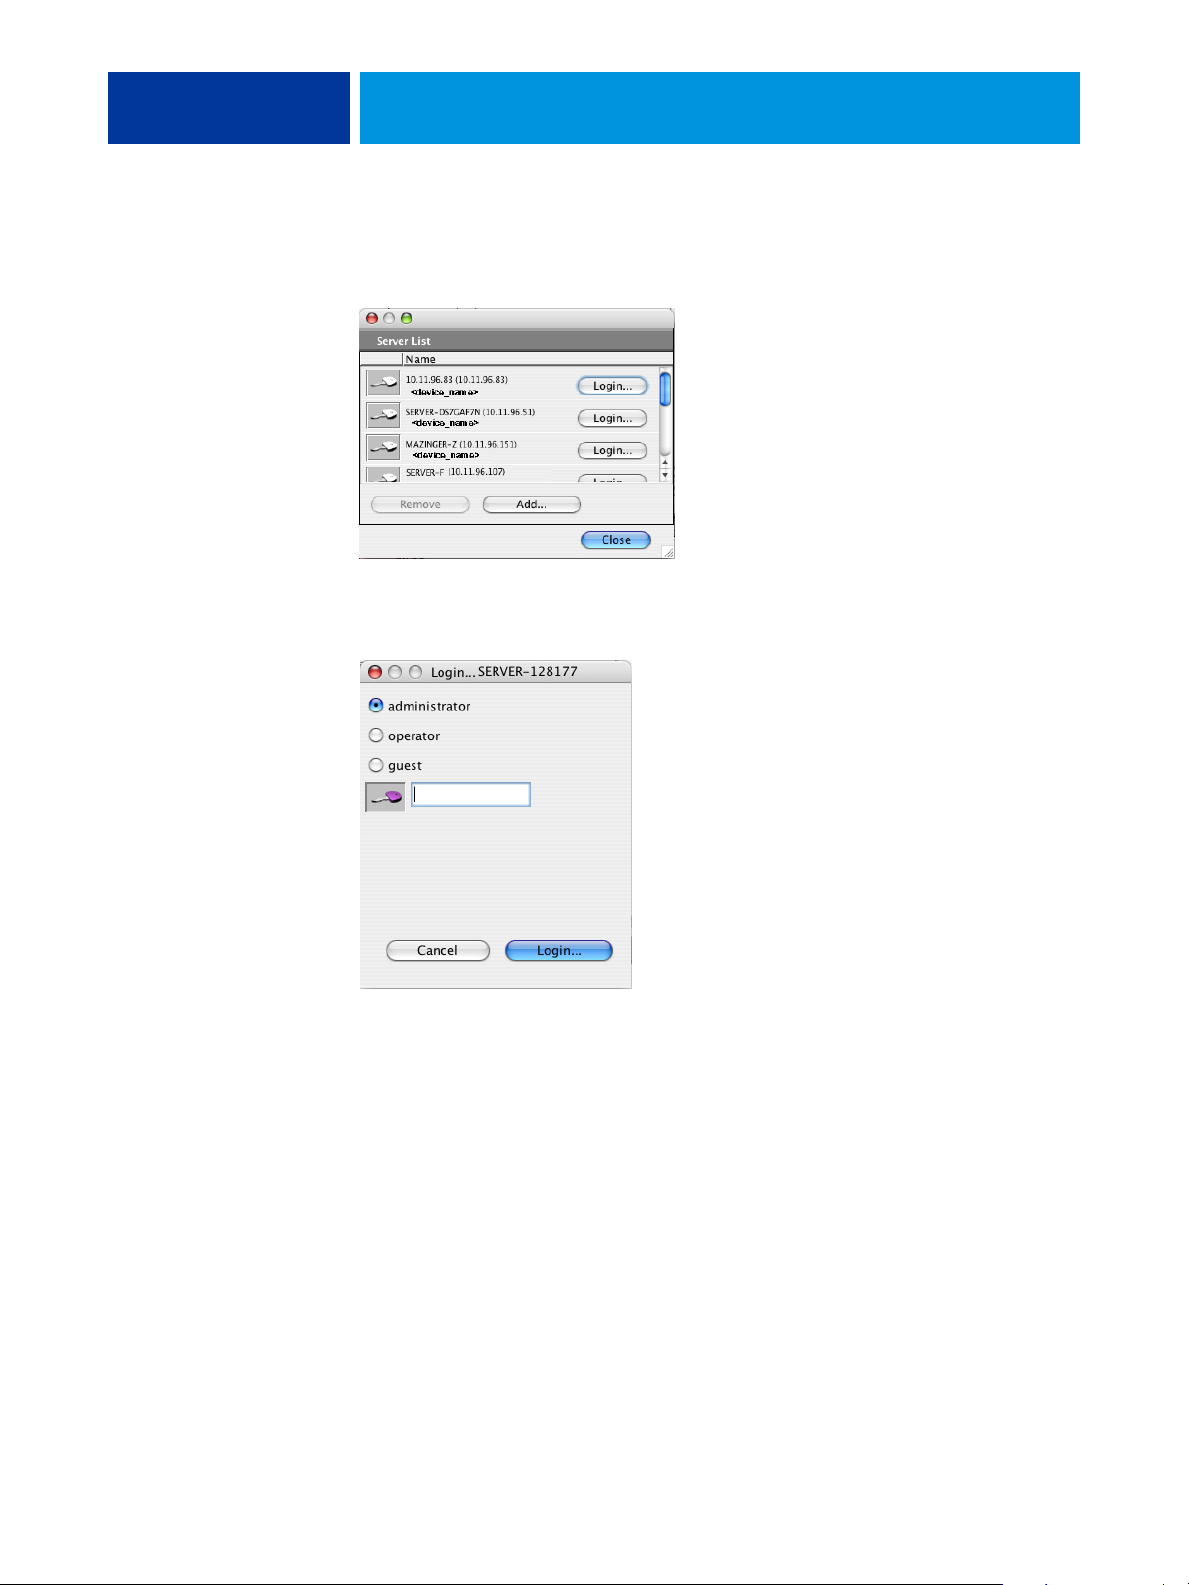
3 Select the Fiery EX4112/4127 that you want to use and click Add.
The selected Fiery EX4112/4127 is displayed in the Server List dialog box.
4 Click the server name to select it, and then click the key or the Login button.
The Login dialog box appears.
5 Select Administrator, Operator, or Guest, type the password next to the key, and then
click Login.
Your computer is connected to the server.
For more information about setting passwords and the default Administrator password for the
Fiery EX4112/4127, see Configuration and Setup.
To modify the Command WorkStation connection to the Fiery EX4112/4127, you must
remove the server from the Login Server list and follow the procedure for configuring the
connection.
Page 52

COMMAND WORKSTATION, MACINTOSH EDITION 52
Using Command WorkStation, Macintosh Edition
After you install and configure Command WorkStation, you can begin using it to monitor
and manage jobs on the Fiery EX4112/4127.
Complete instructions on how to use the Command WorkStation features are provided in
Command WorkStation Help.
TO ACCESS COMMAND WORKSTATION HELP
1 Start Command WorkStation.
Select the Fiery EX4112/4127 in the server list, and log in to the server.
For more information about setting passwords and the default Administrator password for
the Fiery EX4112/4127, see Configuration and Setup.
2 Choose Help from the CWS menu.
Page 53

COMMAND WORKSTATION, MACINTOSH EDITION 53
Additional Features
The following sections describe how to use additional features of Command WorkStation that
are not discussed in Command WorkStation Help.
User Authentication
If user authentication has been enabled in Fiery EX4112/4127 Setup, users may need to enter
a user name and password in the printer driver to send a job to the Fiery EX4112/4127.
Management of the job in Command WorkStation is determined by how you have logged on
to the Fiery EX4112/4127, as Administrator, Operator, or Guest.
For information about setting up Users and Groups and enabling user authentication in
the Configure WebTool, see Configuration and Setup. For information about User
Authentication in the printer driver, see Print Options.
Mixed Media
The Mixed Media feature allows you to define the chapter divisions of a job, print ranges of
pages on varying types of media, insert blank media between pages, and insert tab media
containing text labels.
The following guidelines and restrictions apply to Mixed Media settings:
• The Mixed Media dialog box restricts you from specifying settings that conflict with any
media, page size, or finishing settings that have been specified for the job in the Job
Properties dialog box or printer driver.
• When two or more Mixed Media settings are in conflict with each other, the Mixed Media
dialog box highlights the setting names in red, signaling you to resolve the conflict.
• When you specify print options (in the Job Properties dialog box or printer driver) after
specifying Mixed Media settings, certain print options may conflict with the page-specific
Mixed Media settings. You must resolve the conflict by choosing different print options or
removing certain Mixed Media specifications.
• If counters are configured for the copier/printer, blank media inserted between pages
count as printed pages.
Features specific to the Fiery EX4112/4127 are described in the following procedures.
NOTE: The procedures for defining Mixed Media settings in Command WorkStation,
Windows Edition are similar to those in Command WorkStation, Macintosh Edition, but
include illustrations. For information, see page 22.
Page 54

COMMAND WORKSTATION, MACINTOSH EDITION 54
TO DEFINE MIXED MEDIA SPECIFICATIONS
1 Select or right-click a spooled/held job in the Active Jobs window and choose Properties from
the Actions menu, or double-click a job.
2 Click the Media icon and scroll down to Mixed Media.
The Mixed Media dialog box lists any previously defined media settings and includes buttons
for defining, modifying, and removing settings.
3 For Chapter Start Page(s), type the page numbers on which you want to start new chapter
sections.
Type page numbers as comma-separated values (for example: 4,9,17) to designate the start of
each new chapter. This feature forces each starting page to use a right-side page, adding a
preceding left-sided blank, if required.
NOTE: It is not necessary to type the first page. Page numbers refer to the numbering of the
original document. If you use the Chapter Start Page(s) feature, all media specified in the
Paper menu per chapter must share the same dimensions (for example, all Letter, all Tabloid,
or all A4).
4 To apply finishing options (for example, stapling or sorting) to each chapter created using
the Chapter Start feature, select the “Define Each Chapter As A Separate Finishing Set”
option.
NOTE: Not all finishing options can be applied to chapters that contain mixed sizes of media
(for example, Letter and A4).
5 To define properties for front and back covers, click Define Cover.
For more information, see “To define cover media settings” on page 55.
6 To define properties for individual pages or page ranges, click New Page Range.
For more information, see “To define media for specific pages” on page 55.
7 To insert tab media, click New Tab.
The Insert Tab dialog box appears. For information about defining tab settings, see page 27.
NOTE: The Insert Tab feature is not available for imposed jobs.
8 To insert blank pages, click New Insert.
For more information, see “To insert blank pages” on page 56.
9 To modify or delete a current definition, select it in the Mixed Media Definition list, and click
Edit or Remove.
If you click Edit, enter new settings for the definition and click Modify.
10 After you finish defining Mixed Media settings, click OK to close the Mixed Media dialog box
and Job Properties.
The Mixed Media settings are applied to the job.
NOTE: You can save up to 100 different settings for the Selection list in the Mixed Media
dialog box.
Page 55

COMMAND WORKSTATION, MACINTOSH EDITION 55
TO DEFINE COVER MEDIA SETTINGS
1 In the Mixed Media dialog box, click Define Cover.
The Cover Media dialog box appears.
2 To define identical front cover and back cover media, select the “Apply the same settings for
both front and back cover” option. To define media settings for the front or back cover
individually, select the Front Cover or Back Cover option.
3 Specify other settings as required.
4 For Cover Page Mode, define how you want the content printed on the cover. You can specify
printing on the front side only, back side only, or both sides of the cover page.
The following restrictions apply to Cover Page Mode settings:
• If you specify Print on Front Only, you must set the Duplex setting to Off.
• If you specify Print on Back Only or Print on Both Sides, you must set the Duplex setting
to either Head to Head or Head to Toe. The Duplex setting determines the orientation of
the cover content.
5 Select your desired media from the Paper Catalog drop-down menu.
6 You can also click Select to open the Paper Catalog window, select your desired media, and
click OK.
The media you have selected appears beside Paper Name in the main Cover Media window.
For more information about Paper Catalog, see page 34.
7 Click OK to return to the Mixed Media dialog box.
Cover Media settings take precedence over settings defined in the Page/Page Range Media
dialog box.
TO DEFINE MEDIA FOR SPECIFIC PAGES
1 In the Mixed Media dialog box, click New Page Range.
The Page/Page Range Media dialog box appears.
2 Type pages and page ranges as comma-separated values (for example: 3,9–14,18).
3 Specify other settings, as required.
If you assign a new media type to the back side of a duplexed sheet, a blank page is inserted to
force the assigned page content to the front side of the next sheet.
4 Select your desired media from the Paper Catalog drop-down menu.
5 You can also click Select to open the Paper Catalog window, select your desired media, and
click OK.
The media you have selected appears beside Paper Name in the main Page Range window.
For more information about Paper Catalog, see page 34.
Page 56

COMMAND WORKSTATION, MACINTOSH EDITION 56
6 Click Add Definition after each media setting you define.
7 Click Close to return to the Mixed Media dialog box.
TO INSERT BLANK PAGES
1 In the Mixed Media dialog box, click New Insert.
The Insert Blank dialog box appears.
2 Indicate whether to insert the blank before or after the target page. Define the target page as
either the first or last page in the document, or as a specific numbered page.
3 Specify other settings, as required, for the blank page.
4 Select your desired media from the Paper Catalog drop-down menu.
5 You can also click Select to open the Paper Catalog window, select your desired media, and
click OK.
The media you have selected appears beside Paper Name in the main Insert Blank window.
For more information about Paper Catalog, see page 34.
6 Click Insert after each blank page you define.
7 Click Close to return to the Mixed Media dialog box.
Schedule Printing
The Schedule Printing feature allows you to set a specific date and time for printing a job.
Assign Schedule Printing settings to a job from the following areas:
• Job Properties window in Command WorkStation, Macintosh Edition
• Active Jobs window in Command WorkStation, Macintosh Edition
For more information, see “Schedule Printing” on page 68.
Page 57

COMMAND WORKSTATION, MACINTOSH EDITION 57
Troubleshooting
When troubleshooting basic connection and software problems with Command
WorkStation, see the following sections. For additional troubleshooting information,
see Command WorkStation Help.
Command WorkStation cannot connect to the Fiery EX4112/4127
If you cannot connect to the Fiery EX4112/4127 or locate the Fiery EX4112/4127 from your
computer, contact the network administrator. The administrator may need to troubleshoot
your network connection and check settings on the servers that you print to. If settings have
changed, it may be necessary to reconfigure the Fiery EX4112/4127.
If you are able to connect to the Fiery EX4112/4127 with another utility, you may need to
reconfigure the Command WorkStation connection to the Fiery EX4112/4127 (see page 49).
If you configured the Fiery EX4112/4127 and set up client computers and network servers
according to the instructions in Configuration and Setup, print a Test Page. If you can print
the Test Page but still cannot print a document from a remote computer, contact your
network administrator to troubleshoot the network connection.
Command WorkStation does not respond
If Command WorkStation is unresponsive, use the following troubleshooting guidelines.
IF THE COMMAND WORKSTATION WINDOWS DO NOT UPDATE
1 Log off and then quit Command WorkStation.
2 Restart Command WorkStation or restart the computer.
If the Command WorkStation windows do not update, or no jobs are displayed, and the
mouse has no effect (you cannot select a job or a window, use a Control-click command, or
select a menu item), the Fiery EX4112/4127 is offline or network communication has failed.
TO FORCE AN EXIT FROM COMMAND WORKSTATION
1 Press Command-Option-Escape and use the Force Quit Applications dialog box to close
Command WorkStation.
2 At the Fiery EX4112/4127, disconnect and reconnect the network cable, and then try printing
a Test Page or Configuration page.
3 If printing fails, restart the Fiery EX4112/4127.
Page 58

IMPOSE
IMPOSE 58
Impose is a utility (available as an option) that you access from Command WorkStation,
Windows Edition. Impose allows you to do the following:
• Apply imposition layouts to jobs for custom printing, binding, and cutting
• Apply impositions to variable data jobs
• Save the imposed jobs as PDF files
Installing and enabling Impose
The following sections describe how to install and enable Impose.
Installing Impose
The Impose software is automatically installed when you install Command WorkStation,
Windows Edition from the User Software DVD.
Do not attempt to install Impose manually from the User Software DVD (by starting the
setup.exe from the Impose folder). It is automatically installed when you install Command
WorkStation. Installing Impose separately from Command WorkStation can cause
unpredictable results.
To enable Impose on a client computer, you must:
• Install Adobe Acrobat and Enfocus PitStop Professional.
NOTE: The Adobe Acrobat/Enfocus PitStop DVD is provided in the Impose Media Pack.
• Install the Impose software protection key (dongle) into the correct port of the
client computer.
If you see a dongle installed on the computer, Impose has already been enabled and is ready
for use. If the dongle is not installed, see the documentation that is provided in the Impose
kit. Without a dongle installed, you can use Impose in Demo mode. Demo mode allows you
to impose documents and save them, but all printed output displays a “Demo” watermark.
Page 59

IMPOSE 59
Installing Adobe Acrobat and Enfocus PitStop
To use Impose, you must install the Acrobat and the PitStop Professional plug-in for Acrobat
for use with Impose from the installer DVD provided in your Impose kit. Impose is installed
when you install Command WorkStation, and is accessed from Command WorkStation.
NOTE: If you install Acrobat after Command WorkStation, you may need to restart
Command WorkStation in order to use Impose.
Instructions are provided in your Impose kit for installing Acrobat and PitStop Professional.
We recommend that you follow those instructions.
We recommend that you install the version of Acrobat provided in your Impose kit and
remove any other versions of Acrobat installed on your computer.
TO INSTALL ACROBAT AND PITSTOP
1 Uninstall all versions of Acrobat that are currently installed on the computer.
• Close all open applications.
• Follow the Windows instructions for removing programs.
Make sure to delete not only the main folder for the application but also the associated
Acrobat folder located, by default, in C:\Program Files\Common Files\Adobe. (The exact
drive letter may vary, depending on the computer.)
2 Restart the computer after you finish uninstalling earlier versions of Acrobat.
3 Close all software applications that are currently running on the computer.
4 Insert the Adobe Acrobat/Enfocus PitStop DVD into the DVD drive.
5 If the installer does not start automatically, browse to the location of the DVD drive and
double-click the PDF_Applications icon.
6 At the message reminding you to close all applications, click Yes.
7 At the next installation screen, make sure “Adobe Acrobat” and “PitStop” are both selected,
and then click Next.
Wait while the installer copies software files to the computer and displays progress bars.
8 At the message indicating a successful installation, click Finish.
You can now start Acrobat and configure the recommended program settings, as described in
the following procedure.
Page 60

IMPOSE 60
TO CONFIGURE ACROBAT SETTINGS
NOTE: We recommend that you configure the following settings when starting Acrobat for the
first time. These are the recommended Acrobat settings for use with Impose.
1 Double-click the Acrobat program icon to start the application.
By default, the Acrobat program icon is located in C:\Program Files\Adobe\Acrobat 8.0.
(The exact drive letter may vary, depending on the computer.)
2 At the License Agreement window, choose a language for displaying the agreement, and then
click Accept.
3 At the Activate Adobe Acrobat 8 Standard window, do one of the following:
• To activate Acrobat over the Internet, click the Activate button. Wait for the activation
process to finish.
• To activate Acrobat over the telephone, click “Other activation options.” Select “Over the
Telephone,” and click OK to display the Phone Activation window.
Call the telephone number listed for your location, and follow the voice instructions.
When prompted, use the telephone keypad to enter the serial number and activation
number listed in the Phone Activation window. Listen carefully for the authorization code,
and enter it into the Authorization Code fields on the Phone Activation window. Click the
Activate button to complete the activation process.
You must complete the activation process upon first starting Acrobat in order to use Acrobat
with Impose. Do not choose the Activate Later option if it appears on the screen.
4 When the activation process is finished, click Done.
5 At the Getting Started window, select “Do not show at startup.” Then close the Getting
Started window.
You can access the window later by choosing Getting Started from the Help menu.
6 Close the Acrobat application to save your configuration settings.
If the latest version of Command WorkStation is already installed on the computer, Impose is
now fully enabled. If Command WorkStation is not yet installed, install Command
WorkStation as described on page 17.
Page 61

IMPOSE 61
Using Impose
Complete instructions on how to use Impose are provided in Command WorkStation,
Windows Edition Help.
TO ACCESS IMPOSE HELP
1 Start Command WorkStation, Windows Edition.
2 Choose Help from the Help menu.
3 Use the Contents, Index, or Search panes to navigate to the Impose Help topics.
Page 62

PRODUCTION FEATURES 62
PRODUCTION FEATURES
The Fiery EX4112/4127 offers additional production features for Fiery EX4112/4127
operators (or users with Operator or Administrator privileges) to monitor and manage the
print workflow of jobs on the Fiery EX4112/4127. All the features are accessible from
Command WorkStation, Windows Edition. Schedule Printing and Preflight are also
accessible from Command WorkStation, Macintosh Edition. The features available are
listed below:
• Compose (available as an option)
• Preflight (also available from Command WorkStation, Macintosh Edition)
• Reorder Jobs
•Suspend on Mismatch
•Rush Printing
• Schedule Printing (also available from Command WorkStation, Macintosh Edition)
• Quick Doc Merge
Page 63

PRODUCTION FEATURES 63
Installing the production features
The additional production features are installed with Command WorkStation.
For information about installing Command WorkStation, Windows Edition, see “Installing
Command WorkStation, Windows Edition” on page 17. For information about configuring
Command Workstation, see “Configuring the connection to the Fiery EX4112/4127” on
page 18.
For information about installing Command WorkStation, Macintosh Edition, see “Installing
Command WorkStation, Macintosh Edition” on page 49. For information about configuring
Command Workstation, see “Configuring the connection to the Fiery EX4112/4127” on
page 49.
For complete instructions on how to use the standard Command WorkStation features, see
Command WorkStation Help. For instructions on how to access Command WorkStation,
Windows Edition Help, see “To access Command WorkStation Help” on page 21, and to
access Command WorkStation, Macintosh Edition Help, see “To access Command
WorkStation Help” on page 52.
Page 64

PRODUCTION FEATURES 64
Using the production features
The following sections describe how to access and use the production features of the Fiery
EX4112/4127.
Compose
The Compose application allows you to define the chapter divisions of a job, print ranges of
pages on varying types of media, insert blank media between pages, and insert tab media
containing text labels. You can also preview the job as thumbnails and full screen previews,
and edit documents using Acrobat and PitStop.
A special dongle must be installed on each computer that runs Compose. For more
information about the dongle and installing it, see the document that accompanies the
Compose kit.
To use Compose, you must also install Acrobat and PitStop on the client computer. Installers
for Acrobat and PitStop are provided in the Compose kit. For information about installing
Acrobat and PitStop, see the document that accompanies the Compose kit, or see “Installing
Adobe Acrobat and Enfocus PitStop” on page 59.
For complete instructions on how to use Compose, see Compose Help.
TO ACCESS COMPOSE AND COMPOSE HELP
1 Select a spooled/held job in the Active Jobs window and choose Compose from the Actions
menu, or right-click the job and choose Compose from the menu that appears.
2 Choose Help from the Help menu.
If you have the Compose feature, we recommend that you use it instead of Mixed Media.
Page 65

PRODUCTION FEATURES 65
Preflight
The preflight feature performs a simple check of the most common error areas. This check
ensures that the job prints successfully and to the expected quality on the selected printing
device.
NOTE: This feature is accessible from Command WorkStation on both Windows and
Mac OS X computers.
TO PREFLIGHT A JOB
1 Select a spooled/held job in the Active Jobs window and choose Actions > Preflight.
2 Set a notification level for each error or use the default Preset.
For more information, see “Setting preflight checks” on page 66 and “Setting notification
levels” on page 66.
3 Click Save to save the settings as a new preset if you want to use them again.
4 Click Preflight to perform the Preflight check.
5 Click Save to save the report as a PDF.
6 Click Print Report to print the report.
7 Click Preflight Again to repeat the preflight check.
8 Click Close to exit Preflight.
Supported file formats for preflight
The following file formats are supported for preflight:
•PostScript
• Adobe Acrobat PDF
•EPS
•PPML
NOTE: TIFF is not supported for Preflight checks.
Page 66

PRODUCTION FEATURES 66
Setting preflight checks
You can set preflight checks for the following:
•
Fonts: When missing and when substituted
•
Spot Colors: When missing
•
Low-Res Images: When image resolution is less than specified dpi
•
VDP Resources: When not found
You can choose to Preflight individual VDP resources.
•
Hairlines: When line width is less than specified point size
•
Overprint: When overprint is detected
•
Postscript: When any Postscript error is found
•
Stop preflight on first error: When any error is found
Setting notification levels
For each preflight category, you can specify a notification level:
•
Critical: Marks any errors with Critical icon .
•
Warning: Marks any errors with Warning icon .
•
Information: Marks any error with Information icon and provides information.
•
Ignore: Skips check of that category.
A category with no errors is marked with a Pass icon .
Page 67

PRODUCTION FEATURES 67
Reorder Jobs
The Fiery EX4112/4127 processes and prints batches of selected jobs in the order of each job’s
place in the queue. The Reorder Jobs feature allows you to control the processing or printing
priority by reordering the job queue. When you promote jobs in the queue, these jobs take
priority over the rest of the jobs on the Fiery EX4112/4127.
For example, you can reorder the queue to group jobs with similar print options, such as
media or tray selections. When you select the jobs and apply the Print command, batches of
jobs with similar options are printed together.
To reorder jobs, you must log in to the Fiery EX4112/4127 with Administrator privileges.
TO REORDER JOBS
1 Choose Reorder Jobs from the Server menu.
The Reorder Jobs dialog box appears.
2 Click the tab for the type of job that you want to reorder.
The Fiery EX4112/4127 supports the reordering of spooled/held jobs, processed/held jobs,
and jobs that are waiting to process.
3 Select the job(s) that you want to reorder.
Hold down Ctrl and click to select multiple jobs. Hold down Shift and click to select a range
of jobs.
4 Reorder the selected job(s).
To shift the job priority up or down, click the Move Up or Move Down button. To move the
job(s) to top or bottom priority, click the Move to Top or Move to Bottom button.
Jobs at the top of the list take priority over jobs at the bottom.
5 When you finish defining the order, click Done.
Page 68

PRODUCTION FEATURES 68
Job Mismatch
When Job Mismatch is enabled, the Fiery EX4112/4127 detects if a job can print based on
the media available on the copier. If the media is unavailable, the job is removed from the list
of currently printing jobs so that other jobs can continue to print.
Job Mismatch is enabled in Server Setup. For more information, see Configuration and Setup.
In setup, the Administrator can set Job Mismatch to do the following:
• Cancel a mismatched job so that the job moves to the Printed queue with an error
describing the correct media to be loaded.
• Suspend a mismatched job so that the job is placed in a suspended state with an error
describing the correct media to be loaded.
• Set a time-out that specifies how long the job waits for the media to be loaded.
Rush Printing
The Rush Printing feature allows you to print a job immediately, bypassing other jobs in the
print queue. To rush print a job, you must first place the job in the Hold queue, and then
select Rush Printing from the Actions menu.
The following restrictions apply:
• You cannot interrupt a single set print job. With variable data printing or other record
partition jobs, you can interrupt between records.
• You cannot interrupt a job in RIPping process.
• You cannot interrupt another Rush Print job.
• The Rush Print job must be RIPped before interrupting a normal print job.
• Before the Rush Print job is sent to the copier, 30 pages of normal print jobs must finish
printing.
Schedule Printing
The Schedule Printing feature allows you to set a specific date and time for printing a job.
This feature is accessible from Command WorkStation on both Windows and Mac OS X
computers.
Assign Schedule Printing settings to a job from the following areas:
• Printer driver on a Windows computer only (see Print Options)
• Job Properties window in Command WorkStation
• Active Jobs window in Command WorkStation
Page 69

PRODUCTION FEATURES 69
Command WorkStation also allows you to search for jobs that have been scheduled
for printing.
The procedures below describe accessing Schedule Printing from Command WorkStation,
Windows Edition, and Command WorkStation, Macintosh Edition.
TO SCHEDULE A JOB FOR PRINTING FROM THE ACTIVE JOBS WINDOW
1 Select a job in the Active Jobs window and choose Schedule Printing from the Actions menu.
2 In the dialog box that appears, specify the date and time when you want the job printed, and
click OK.
TO SCHEDULE A JOB FOR PRINTING FROM THE JOB PROPERTIES WINDOW
1 Select a job in the Active Jobs window and choose Properties from the Actions menu.
2 Click the Job Info icon and scroll down to Destination.
3 Select Schedule Printing, specify the date and time when you want the job printed, and
click OK.
NOTE: Display the scheduled date and time by adding a Schedule Printing information
column to the Active Jobs window. For information about adding information columns,
see Command WorkStation Help.
TO FIND SCHEDULE PRINTING JOBS
1 Choose Find from the Edit menu.
2 Select Active Jobs.
3 Click the Advanced tab.
4 Scroll down and select Schedule Printing.
5 Click Find (Mac OS X) or Search (Windows).
6 To print the results of your search, click Print Window.
7 To save the results of your search, click Export Window, specify a file name, file name,
and destination, and click Save.
8 Close the search results dialog.
NOTE: You can also search for scheduled jobs by using the Find Scheduled Jobs command in
the Edit menu in Command WorkStation, Windows Edition.
Page 70

PRODUCTION FEATURES 70
TO FIND SCHEDULED JOBS IN WINDOWS
1 Choose Find Scheduled Jobs from the Edit menu.
A window displays the search results.
2 To print the results of your search, click Print Window.
3 To save the results of your search, click Export Window, specify a file name and destination,
and click Save.
4 Close the search results dialog.
Quick Doc Merge
The Quick Doc Merge feature allows you to merge multiple files or jobs together so they can
be printed as a single job on the Fiery EX4112/4127.
Documents to be merged into one job in Quick Doc Merge must be either PostScript or PDF
format. When merged into one job on the Fiery EX4112/4127, the job becomes VDP
format.
NOTE: When documents are merged into a Quick Doc Merge job, all Job Properties settings
for the individual documents are overwritten and default to the Fiery EX4112/4127 default
settings. So you must set Job Properties after you have combined the separate documents into
the single Quick Doc Merge job.
TO USE QUICK DOC MERGE
1 To open Quick Doc Merge, select a job in the Active Jobs window and right-click, or choose
Quick Doc Merge from the Actions menu.
The selected job is listed.
Or choose File > Import > Import Quick Doc Merge.
Page 71

PRODUCTION FEATURES 71
No selected jobs are listed.
2 Click Add from Networks to browse and select PostScript or PDF files to import.
Click Add from Fiery to display a list of all PostScript and PDF files in the Hold queue on the
Fiery EX4112/4127.
3 When the jobs you selected are listed, click Move Up or Move Down to change the order in
which they are printed. Click Remove to remove a job.
4 Choose whether or not to select “Apply job properties to each job individually”.
This option applies to the job properties you set after creating and saving the Quick Doc
Merge job. For more information, see “Applying job properties to Quick Doc Merge jobs” on
page 72.
5 Type a name for the merged document in the “Save QDM job as” field.
6 Click Save.
The job is created and listed in the Active Jobs window.
7 Specify job properties for the new Quick Doc Merge job.
Page 72

PRODUCTION FEATURES 72
Applying job properties to Quick Doc Merge jobs
When a Quick Doc Merge job is created, any previous job properties set for the individual
documents revert to the default Fiery EX4112/4127 settings. After creating and saving the
Quick Doc Merge job, you must specify job properties for it. The option, “Apply job
properties to each job individually”, applies to those job properties.
If you select “Apply job properties to each job individually,” job properties are applied
individually to each separate document that has been combined into the Quick Doc merge
job. If you clear the option, job properties are applied to the Quick Doc Merge job as a single
job. The settings that apply depending on whether this option is selected or not are described
in the table below:
“Apply job properties to each job individually” option
Selected Not selected
Finishing
attributes
Duplex First page of each document is printed
Mixed Media
settings
Imposition Each document treated as a separate
Applied individually to each separate
document
on the front side of the sheet
Applied separately to each document in
merged job
record of a VDP job
Applied to the merged job as a single
job
Duplex printing is continuous
throughout the merged job
Applied to the merged job as s single
job
Merged document treated as a single
record of VDP job
NOTE: When imposing a Quick Doc Merge job, Impose sets the page size for the entire job
based on the first page of the Quick Doc Merge job. If the Quick Doc Merge job contains
mixed page sizes, those pages with sizes different from the first page will be imposed as if they
were the size of the first page (clipping performed as necessary).
Page 73

SCAN
SCAN 73
Scan is a collection of software components that allow you to scan documents from the copier
glass or through the copier’s document feeder (ADF) and send the scanned images to specific
destinations. Scan consists of the following components:
•
Remote Scan includes the Scan TWAIN plug-in module. Remote Scan allows you to
remotely retrieve a scan from a copier.
•
Scan to E-mail allows you to send the scan file by e-mail as either an attachment or URL.
•
Scan to FTP allows you to send the scan file to an FTP server.
•
Scan to Internet Fax allows you to send the scan file to an e-mail address to be delivered as
a fax.
•
Scan to Mailbox allows you to send the scan to a mailbox on the Fiery EX4112/4127, from
where it can be retrieved.
•
Scan to Hold queue allows you to scan to the Fiery EX4112/4127 Hold queue for
document merging and editing.
•
WebTools Scan Settings allows you to set up scan templates.
•
WebTools Docs allows you to set up mailboxes and retrieve scanned jobs from mailboxes on
the copier.
Page 74

SCAN 74
Installing and configuring Remote Scan
The following sections describe how to install and configure Remote Scan.
Installing Remote Scan
To install and use the Remote Scan application and TWAIN plug-in module, you must have a
Windows or Mac OS computer with a network connection. For detailed system
requirements, see Wel co me .
The installer for Remote Scan is located on the User Software (Utilities) CD.
TO INSTALL REMOTE SCAN
1 Insert the User Software (Utilities) CD into the CD-ROM drive of the computer.
2 On a Windows computer, open the Fiery Remote Scan folder on the CD directory.
On a Mac computer, open either the OS9 or OSX folder.
3 On a Windows computer, double-click the Setup.exe icon.
On a Mac computer, click the Fiery Remote Scan icon.
4 Follow the on-screen instructions.
Configuring Remote Scan
The first time you start Remote Scan, you must configure the connection to the Fiery
EX4112/4127. Before you configure the connection, you must have the correct IP address.
Make sure the Fiery EX4112/4127 is registered in a Domain Name Server (DNS) on your
network. When you open Remote Scan, the Scan Configuration dialog box opens. For
instructions on configuring the connection to the Fiery EX4112/4127 for the first time, see
“To configure the connection to the Fiery EX4112/4127” on page 75.
Complete instructions on configuring and modifying the connection to the Fiery EX4112/
4127 are provided in Remote Scan Help.
If you have previously configured a connection to the Fiery EX4112/4127, it appears in the
main Remote Scan window, and you can immediately start to initiate a scan or retrieve any
scans initiated at the copier control panel, and use the Remote Scan Help.
The following requirements and constraints for using Remote Scan apply:
• Remote Scan cannot be used over the parallel port; it requires a network connection. For
information about supported networking protocols, see Configuration and Setup.
Page 75

SCAN 75
TO CONFIGURE THE CONNECTION TO THE FIERY EX4112/4127
1 When you start Remote Scan for first-time use, the Configuration window automatically
appears. In the Server Name (or IP Address) text field, type the IP address or the DNS name
of the Print Server.
NOTE: For Mac OS 9, use the IP address instead of the DNS name to configure the
connection.
2 Select Use Nickname to enter another name to distinguish the Fiery EX4112/4127. This name
does not have to match the actual Server Name of the Fiery EX4112/4127.
3 Type the device name connected to the Fiery EX4112/4127.
NOTE: The device name is case-sensitive. Ask your network administrator for this name,
which is displayed on the Configuration Page. For more information about the Configuration
Page and the device name, see Configuration and Setup.
4 Click the green arrow to add the Fiery EX4112/4127 to My Fiery List.
5 Click OK.
Page 76

SCAN 76
Using Remote Scan
With the Fiery Remote Scan application and the Remote Scan TWAIN plug-in module, you
can initiate and retrieve scan files remotely. You can open the scan file in a host application,
such as Photoshop, and send the scan file to a mailbox, the Hold queue, or an e-mail address.
You can then retrieve files using Remote Scan, WebScan, or Command WorkStation. All
scans are stored on the Fiery EX4112/4127 hard disk and retrieved through the network.
NOTE: To retrieve a scan from one of the default mailboxes on the copier, type “0” in the
Mailbox field in Remote Scan. No password is required, so leave the password field blank. All
scanned files in all the default mailboxes on the copier are displayed.
Complete instructions for using the Remote Scan application and TWAIN plug-in module
are provided in Remote Scan Help.
TO ACCESS REMOTE SCAN HELP
1 Start Remote Scan or open the Remote Scan plug-in module.
2 Click the Help button.
3 Use the Contents, Index, or Search panes to navigate to the Remote Scan Help topics.
Scanning from the copier Control Panel
Scan jobs can be initiated at the copier control panel, using scan templates set up in WebTools
Scan Settings. Scan jobs are sent to one of the default Mailbox/Job Templates or custom
Mailbox/Job Templates. Using Remote Scan, or WebTools Docs, you can retrieve the scan
jobs and send to various locations.
For information about initiating scans at the copier control panel, see the documentation that
accompanies your copier.
Retrieving scans using WebTools
Using WebTools Docs, you can set up custom mailboxes and retrieve scan jobs in the
Mailboxes to your remote workstation. Using WebTools Scan Settings, you can set up scan
templates. For instructions on using WebTools, see page 83.
Page 77

HOT FOLDERS
HOT FOLDERS 77
Hot Folders is a utility that allows you to store and reuse frequently used print options when
printing PostScript and PDF files on the Fiery EX4112/4127. With Hot Folders, you can do
the following:
• Create special folders (hot folders) that assign specific print settings and print queues
to jobs
• Print jobs to the Fiery EX4112/4127 by dragging and dropping them onto hot folders on
your computer’s desktop
• Monitor the status of jobs sent to hot folders
Installing Hot Folders
The installer for Hot Folders is located on the User Software DVD.
Before installing the utility, make sure you complete the preliminary procedures described on
page 10 and page 11.
To install Hot Folders on a Windows computer, see “Installing user software on a Windows
computer” on page 12. To install Hot Folders on a Mac OS computer, see “Installing user
software on a Mac OS computer” on page 14.
Using Hot Folders
Complete instructions on how to use the standard Hot Folders features are provided in
Hot Folders Help.
TO ACCESS HOT FOLDERS HELP
1 Start Hot Folders.
2 Choose Help > EFI Hot Folders Help.
Page 78

HOT FOLDERS 78
Additional features
The following section describes additional features of Hot Folders that is not discussed in
Hot Folders Help.
Preserve Document Setting
When you define Job Settings for a new Hot Folder and open the Job Properties window,
the default for many settings is displayed as Preserve Document Setting. This setting allows
you to keep the job properties you set when creating the original job in the application.
About Hot Folders filters
Hot Folders filters allow you to convert certain file formats to PostScript or PDF or to
preflight files for conformity. File conversion and preflighting take place on your computer
within Hot Folders, which saves Fiery EX4112/4127 resources. You can print files directly
from Hot Folders filters without starting the application from which they were created.
Using the PDF to PS filter
The PDF to PS filter is standard. The PDF to PS filter accepts PDF (v1.2 through v1.7) files
and outputs PostScript files.
NOTE: The filter converts any PDF v1.2 files to PDF v1.7 files, and then to PostScript Level 3
files before submitting to the Fiery EX4112/4127.
Page 79

VDP RESOURCE MANAGER 79
VDP RESOURCE MANAGER
VDP Resource Manager allows you to do the following:
• Search for global objects used in variable data printing
• Delete global objects used in variable data printing
Installing VDP Resource Manager
To install and use VDP Resource Manager, you must have a Windows or Mac OS computer
that can connect to the Fiery EX4112/4127. For detailed system requirements, see Welc om e.
The installer for VDP Resource Manager is located on the User Software DVD.
Before installing the utility, complete the preliminary procedures described in “Preparing for
installation on Windows computers” on page 10 and “Preparing for installation on Mac OS
computers” on page 11.
To install VDP Resource Manager on a Windows computer, see “Installing user software on a
Windows computer” on page 12. To install VDP Resource Manager on a Mac OS computer,
see “Installing user software on a Mac OS computer” on page 14.
Page 80
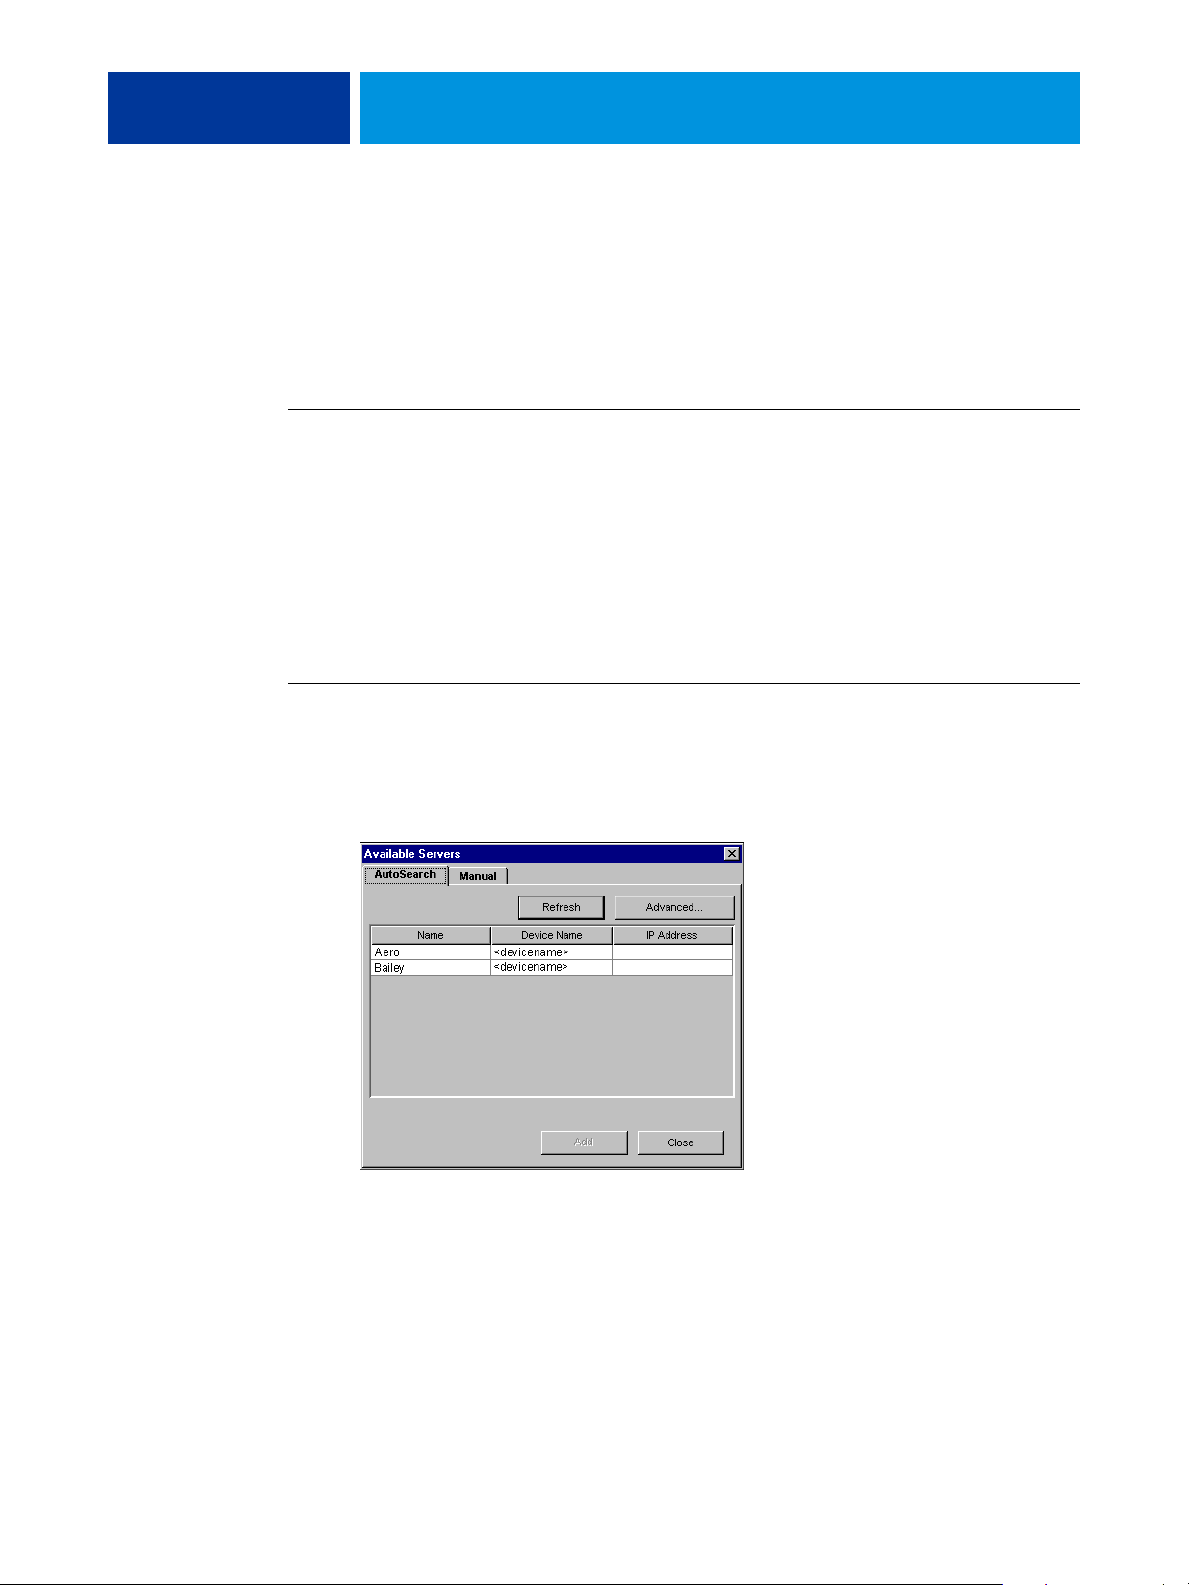
VDP RESOURCE MANAGER 80
Configuring the connection to the Fiery EX4112/4127
The first time you start VDP Resource Manager, you must configure the connection to the
Fiery EX4112/4127.
NOTE: The Windows and Mac OS versions of VDP Resource Manager are similar.
The following illustrations show the Windows version.
BEFORE YOU BEGIN
• Print the Fiery EX4112/4127 Configuration page.
For instructions on printing the Configuration page, see Configuration and Setup.
This page contains information you need when configuring the connection, such as the
IP address of the Fiery EX4112/4127. For TCP/IP installations, you can use the DNS name
instead of the IP address. Make sure that the Fiery EX4112/4127 is already registered in a
Domain Name Server (DNS) on your network. For more information, see the documentation
that accompanies your network system.
TO CONFIGURE THE CONNECTION FOR FIERY VDP RESOURCE MANAGER
1 Click Start, choose Programs, and then click Fiery VDP Resource Manager in the Fiery folder.
The Available Servers dialog box appears, with all Fiery EX4112/4127 servers in the local
subnet displayed.
Page 81

VDP RESOURCE MANAGER 81
2 To locate a server by its IP address, click the Manual tab, type the IP address, and then
click Add.
The server appears in the Available Servers dialog box.
3 To locate the Fiery EX4112/4127 either by a range of IP addresses or by the IP address and
subnet mask, click the Auto Search tab, and then click Advanced.
4 Click the IP Range tab or the Subnet tab.
5 To search by a range of IP addresses, enter the information in the From IP and To IP fields,
click Add, and then click Search.
To search by IP address and subnet mask, enter the information in the From IP and Subnet
fields, click Add, and then click Search.
All available servers are displayed in the Available Servers dialog box.
6 Select the servers that you want and click Add.
All connected servers are displayed in the Fiery Servers list in the Fiery VDP Resource
Manager dialog box.
Page 82

VDP RESOURCE MANAGER 82
TO MODIFY THE CONFIGURATION FOR FIERY VDP RESOURCE MANAGER
1 Click Start, choose Programs, and then click Fiery VDP Resource Manager in the Fiery folder.
All servers you connected to previously are displayed.
2 To remove a server, select the server that you want to remove, and then choose Disconnect
from the Server menu.
3 To add a server, choose Connect from the Server menu and follow the procedure
“To configure the connection for Fiery VDP Resource Manager” on page 80.
Using VDP Resource Manager
Complete instructions on how to use VDP Resource Manager are provided in VDP Resource
Manager Help.
TO ACCESS VDP RESOURCE MANAGER HELP
1 Launch VDP Resource Manager.
2 Choose Help > Fiery VDP Resource Manager Help.
Page 83

WEBTOOLS
WEBTOOLS 83
WebTools allow you to manage your Fiery EX4112/4127 remotely from the Internet or your
company’s intranet. The Fiery EX4112/4127 has its own home page, where you can select the
following WebTools:
•
Home provides current information about the jobs processing and printing on the
Fiery EX4112/4127.
•
Downloads allows remote users to download installers (for drivers, PPDs, and other
software) directly from the Fiery EX4112/4127.
•
Docs allows remote users to access jobs on the Fiery EX4112/4127 over the Internet or
intranet.
•
Scan Settings allows the Fiery EX4112/4127 administrator to create Scan Templates.
•
Configure allows the Fiery EX4112/4127 administrator to view and modify Setup options
remotely from a Windows computer.
Page 84

WEBTOOLS 84
Setting up WebTools
WebTools are resident on the Fiery EX4112/4127 hard disk and do not require special
installation. However, WebTools do require initial setup by the Fiery EX4112/4127
administrator.
To enable network users to access and use WebTools, the administrator must set specific
options in Network Setup and Printer Setup. For information about these specific Setup
options, see Configuration and Setup.
The administrator also must prepare each user’s computer to communicate with the
Fiery EX4112/4127 over the Internet or intranet.
TO SET UP CLIENT COMPUTERS TO USE WEBTOOLS
1 Enable TCP/IP networking.
2 Make sure that the computer has a valid, unique IP address.
3 Make sure that a supported Internet browser is installed on the computer.
For more information about supported browsers, see Welc om e.
4 Make sure that Java is enabled in your Internet browser.
In addition, make sure that you have completed the preliminary procedures described in
“Preparing for installation on Windows computers” on page 10.
NOTE: If the client computer is running Windows XP with Service Pack 2 (SP2) installed,
Pop-up Blocker is turned on by default. With this function turned on, a warning message
appears when you access WebTools, and your access to WebTools is denied. To gain access,
do one of the following:
• Change the Pop-up Blocker setting by clicking the warning message and choosing from
one of the selections that appears.
• Turn off Pop-up Blocker in Internet Explorer from the Tools menu or in Internet Options.
For more information, see Internet Explorer Help, or the documentation that accompanies
Windows.
Page 85

WEBTOOLS 85
Accessing the WebTools home page
Use your Internet browser to access WebTools. For complete information about browser and
system requirements, see Wel co me .
TO ACCESS THE WEBTOOLS HOME PAGE
1 Start your Internet browser.
2 Type the IP address or DNS name of the Fiery EX4112/4127.
The Fiery EX4112/4127 home page appears.
If the home page for the copier appears instead of the WebTools page, click the
WebTools link.
3 Click the tab for the WebTool that you want to use.
Using WebTools
The following sections describe how to use the WebTools.
Home
Home lets you view jobs that are currently processing and printing on the Fiery EX4112/
4127. Printing and processing information is updated every 30 seconds.
For complete instructions on how to use Home, see WebTools Home Help.
Downloads
The Downloads WebTool allows you to download installers (for drivers, PPDs, and other
Fiery EX4112/4127 software) directly from the Fiery EX4112/4127.
For complete instructions on how to use Downloads, see WebTools Downloads Help.
Docs
Docs allows you to access jobs on the Fiery EX4112/4127 over the Internet or intranet.
You can:
• Manage and distribute jobs in your mailbox.
Mailboxes are set up in the Users and Groups area of the Configure WebTool.
• Control and modify jobs.
• Submit jobs to the Print Server.
For complete instructions on how to use Docs, see WebTools Docs Help.
Page 86

WEBTOOLS 86
Scan Settings
Scan Settings allows the Fiery EX4112/4127 administrator to set up Scan Templates.
These scan templates are accessible from the copier.
TO CREATE A SCAN TEMPLATE
1 On the WebTools Home page, click the Scan Settings tab.
2Log in as Administrator.
Only Administrators can create Scan Templates.
3 Click the New icon.
4 In the General Settings area, enter a name for your new scan template and, if desired,
a description.
5 In the Scan Destination area, select the destinations you want and enter the required
information.
You can send a scan to a Mailbox, E-Mail, FTP server, or SMB location.
6 In the Document Settings and Scan Enhancements areas, select your choices from the menus
for each option.
7 Click Save. To reset the defaults, click Reset.
The newly created Scan Template appears on the Control Panel.
For complete instructions on how to use Scan Settings, see WebTools Scan Settings Help.
Configure
Configure allows the Fiery EX4112/4127 administrator to view and modify Setup
options remotely from a Windows computer. For information about using Configure,
see Configuration and Setup.
Before using Configure, make sure you have completed the Configure preparation procedure
described in “Preparing for installation on Windows computers” on page 10.
For complete instructions on how to use Configure, see WebTools Configure Help.
Page 87

INDEX
INDEX 87
A
ADF (automatic document feeder) 73
Antique 44
B
basis weight 46
Booklet option 42
C
Calendared 44
Cardboard 45
chapter definition for jobs 23, 54
Cockle 44
columns
changing 40
deleting 40
Configure 86
configuring
Command WorkStation, Macintosh
Edition 49
Command WorkStation, Windows
Edition 18
server 86
VDP Resource Manager 80
virtual printers 30
WebTools 84
connection on Windows, configuring 74
Continuous format 43
Continuous Long 45
Continuous Short 45
conventions 8
cover media 24, 55
CT/LW to PS Filter
about 78
configuring 78
custom page size 41
D
deleting virtual printers 31
demoting jobs 67
DNS name 18, 49, 80
Docs webtool 85
Domain Name Server, see DNS name
dongle 58
downloading software 85
Downloads WebTool 85
drag-and-drop printing 77
Dull 44
duplicating virtual printers 31
E
editing virtual printers 31
Eggshell 44
Embossed Linen 44
English 44
Envelope 45
Envelope Plain 45
Envelope Window 45
F
Felt 44
Fiery utilities
configuring the connection on Windows 74
FTP printing 32
Full Cut Tabs 45
G
global objects, in VDP 79
H
Home WebTool 85
I
icons in documentation 8
imposing jobs 58
imposition layouts 58
Insert Tabs 27
inserting tabs 27
installing
Impose 58
VDP Resource Manager 79
J
Java 17, 84
Java JRE 10
job queue, reordering 67
job reordering 67
Page 88

INDEX 88
jobs
chapter definitions 23, 54
cover media 24, 55
mixed media definitions 22
rush printing 68
scheduling 56, 68
VDP 58
L
Labels 45
Laid 44
Letterhead 45
Light Cockle 44
Linen 44
Long grain 43
LPR printing
on Mac OS 31
on Windows 31
Luster 44
M
Machine Finished 44
Matte 44
media definitions 22
Mixed Media 22
Mottled 44
Multi-Part Form 45
O
Opaque 43
P
paper definitions 22
Photographic 45
Plain 45
Pre Cut Tabs 45
printing, frequently used print options 77
promoting jobs 67
R
remote setup 86
Reorder Jobs 67
Roll format 43
Rush Printing 68
S
Satin 44
scanning
from the copier glass 76
Schedule Printing 56, 68
Semi-Vellum 44
server setup 86
Sheet format 43
Short grain 43
Silk 44
software protection key 58
Stationery 45
Stipple 44
stock types 46
Sun Java JRE 10
Super Calendared 44
Super Smooth 44
T
tab
insertion 27
media 27
Tab Stock 45
TCP/IP 18, 49, 80
terminology 8
Traditional Laid 44
Tr a n sl u c e nt 4 3
Tr a n sp a r e n t 4 3
troubleshooting
Command WorkStation, Macintosh
Edition 57
Command WorkStation, Windows
Edition 33
U
Ultra Smooth 44
Uncalendared 44
user authentication 22, 53
users and groups 22, 53
V
variable data printing, see VDP jobs
VDP jobs
imposing 58
managing global objects 79
Vellum 44
Vel v e t 4 4
virtual printers
configuring 30
FTP printing 32
LPR printing 31
Mac OS 31
overview 30
printing to 31
Page 89

INDEX 89
W
WebTools
Configure 86
Docs 85
Downloads 85
Home 85
home page 13, 15, 85
Scan Settings 86
Wov e 4 4
Page 90

 Loading...