

Page 1

21 October 2008
Xerox
®
490/980
TM
Color
Continuous Feed Printing System
Printer and PC GUI User Guide
Page 2

Page 3

Table of Contents
1 PC-GUI Introduction and Setup . . . . . . . . . . . . . . . . . . . . . . . . . 1-1
PC-GUI Setup . . . . . . . . . . . . . . . . . . . . . . . . . . . . . . . . . . . . . . . . . . . . . . . . . . . . . . . . . . . . . 1-1
Set up a Remote PC. . . . . . . . . . . . . . . . . . . . . . . . . . . . . . . . . . . . . . . . . . . . . . . . . . . . . . . . 1-1
Set Screen Resolution and Power Options . . . . . . . . . . . . . . . . . . . . . . . . . . . . . . . . . . . 1-2
Set Time . . . . . . . . . . . . . . . . . . . . . . . . . . . . . . . . . . . . . . . . . . . . . . . . . . . . . . . . . . . . . . . . . . 1-2
Configure Network . . . . . . . . . . . . . . . . . . . . . . . . . . . . . . . . . . . . . . . . . . . . . . . . . . . . . . . . 1-3
Install Software. . . . . . . . . . . . . . . . . . . . . . . . . . . . . . . . . . . . . . . . . . . . . . . . . . . . . . . . . . . . 1-3
Uninstall Software . . . . . . . . . . . . . . . . . . . . . . . . . . . . . . . . . . . . . . . . . . . . . . . . . . . . . . . . . 1-4
Connecting to the Printer . . . . . . . . . . . . . . . . . . . . . . . . . . . . . . . . . . . . . . . . . . . . . . 1-4
PC-GUI Menu. . . . . . . . . . . . . . . . . . . . . . . . . . . . . . . . . . . . . . . . . . . . . . . . . . . . . . . . . . . . . . 1-5
Icons . . . . . . . . . . . . . . . . . . . . . . . . . . . . . . . . . . . . . . . . . . . . . . . . . . . . . . . . . . . . . . . . . 1-5
Job management icon . . . . . . . . . . . . . . . . . . . . . . . . . . . . . . . . . . . . . . . . . . . . . 1-5
Queue management icon . . . . . . . . . . . . . . . . . . . . . . . . . . . . . . . . . . . . . . . . . . 1-5
Printer management icon . . . . . . . . . . . . . . . . . . . . . . . . . . . . . . . . . . . . . . . . . . 1-5
Resource management icon. . . . . . . . . . . . . . . . . . . . . . . . . . . . . . . . . . . . . . . . 1-6
System Menu . . . . . . . . . . . . . . . . . . . . . . . . . . . . . . . . . . . . . . . . . . . . . . . . . . . . . . . . . 1-6
Status Window . . . . . . . . . . . . . . . . . . . . . . . . . . . . . . . . . . . . . . . . . . . . . . . . . . . . . . . . 1-7
Console tab . . . . . . . . . . . . . . . . . . . . . . . . . . . . . . . . . . . . . . . . . . . . . . . . . . . . . . . 1-7
Message area . . . . . . . . . . . . . . . . . . . . . . . . . . . . . . . . . . . . . . . . . . . . . . . . . . . . . 1-7
Displayed Contents Selection . . . . . . . . . . . . . . . . . . . . . . . . . . . . . . . . . . . . . . 1-7
Printer icon . . . . . . . . . . . . . . . . . . . . . . . . . . . . . . . . . . . . . . . . . . . . . . . . . . . . . . . . 1-8
Printer start/stop. . . . . . . . . . . . . . . . . . . . . . . . . . . . . . . . . . . . . . . . . . . . . . . . . . . 1-8
Console Window . . . . . . . . . . . . . . . . . . . . . . . . . . . . . . . . . . . . . . . . . . . . . . . . . . . . . . 1-8
Service Mode . . . . . . . . . . . . . . . . . . . . . . . . . . . . . . . . . . . . . . . . . . . . . . . . . . . . . . . . . . . . . . 1-9
Logging tab . . . . . . . . . . . . . . . . . . . . . . . . . . . . . . . . . . . . . . . . . . . . . . . . . . . . . . . 1-9
GUI Port Setting tab . . . . . . . . . . . . . . . . . . . . . . . . . . . . . . . . . . . . . . . . . . . . . 1-10
Remote GUI Setting tab . . . . . . . . . . . . . . . . . . . . . . . . . . . . . . . . . . . . . . . . . 1-11
Shut Down . . . . . . . . . . . . . . . . . . . . . . . . . . . . . . . . . . . . . . . . . . . . . . . . . . . . . . . . . . . 1-12
Setting Menu. . . . . . . . . . . . . . . . . . . . . . . . . . . . . . . . . . . . . . . . . . . . . . . . . . . . . . . . . . . . . 1-13
Restricted setting menu functions . . . . . . . . . . . . . . . . . . . . . . . . . . . . . . . . . . . . 1-13
Refresh Rate. . . . . . . . . . . . . . . . . . . . . . . . . . . . . . . . . . . . . . . . . . . . . . . . . . . . . . . . . . . . . . 1-15
Setting a refresh rate . . . . . . . . . . . . . . . . . . . . . . . . . . . . . . . . . . . . . . . . . . . . . . . . . 1-15
Screen Setting . . . . . . . . . . . . . . . . . . . . . . . . . . . . . . . . . . . . . . . . . . . . . . . . . . . . . . . . . . . . 1-15
Language Setting . . . . . . . . . . . . . . . . . . . . . . . . . . . . . . . . . . . . . . . . . . . . . . . . . . . . 1-15
2 Printer GUI . . . . . . . . . . . . . . . . . . . . . . . . . . . . . . . . . . . . . . . . . . . . 2-1
Printer GUI Setup. . . . . . . . . . . . . . . . . . . . . . . . . . . . . . . . . . . . . . . . . . . . . . . . . . . . . . . . . . 2-1
Screen Saver . . . . . . . . . . . . . . . . . . . . . . . . . . . . . . . . . . . . . . . . . . . . . . . . . . . . . . . . . . 2-1
Language . . . . . . . . . . . . . . . . . . . . . . . . . . . . . . . . . . . . . . . . . . . . . . . . . . . . . . . . . . . . . 2-2
Screen Cleaning . . . . . . . . . . . . . . . . . . . . . . . . . . . . . . . . . . . . . . . . . . . . . . . . . . . . . . . 2-2
Screen Menu Restrictions . . . . . . . . . . . . . . . . . . . . . . . . . . . . . . . . . . . . . . . . . . . . . . 2-2
3 Basic Settings. . . . . . . . . . . . . . . . . . . . . . . . . . . . . . . . . . . . . . . . . . 3-1
Menus and Screen Configuration. . . . . . . . . . . . . . . . . . . . . . . . . . . . . . . . . . . . . . . . . . . 3-1
Menu screen . . . . . . . . . . . . . . . . . . . . . . . . . . . . . . . . . . . . . . . . . . . . . . . . . . . . . . . . . . 3-1
Menu screen transparent settings . . . . . . . . . . . . . . . . . . . . . . . . . . . . . . . . . . 3-2
Printer and PC GUI User Guide i
Page 4

Table of Contents Xerox 490/980 Color Continuous Feed Printing System
GUI Layout . . . . . . . . . . . . . . . . . . . . . . . . . . . . . . . . . . . . . . . . . . . . . . . . . . . . . . . . . . . 3-3
Title bar . . . . . . . . . . . . . . . . . . . . . . . . . . . . . . . . . . . . . . . . . . . . . . . . . . . . . . . . . . . 3-3
Status display . . . . . . . . . . . . . . . . . . . . . . . . . . . . . . . . . . . . . . . . . . . . . . . . . . . . . 3-4
Menu area . . . . . . . . . . . . . . . . . . . . . . . . . . . . . . . . . . . . . . . . . . . . . . . . . . . . . . . . 3-5
Select Favorites. . . . . . . . . . . . . . . . . . . . . . . . . . . . . . . . . . . . . . . . . . . . . . . . . . . . 3-5
Sub-menu . . . . . . . . . . . . . . . . . . . . . . . . . . . . . . . . . . . . . . . . . . . . . . . . . . . . . . . . . 3-5
Display/Operation . . . . . . . . . . . . . . . . . . . . . . . . . . . . . . . . . . . . . . . . . . . . . . . . . 3-5
Operating buttons . . . . . . . . . . . . . . . . . . . . . . . . . . . . . . . . . . . . . . . . . . . . . . . . . 3-6
User permissions . . . . . . . . . . . . . . . . . . . . . . . . . . . . . . . . . . . . . . . . . . . . . . . . . . . . . . 3-6
Basic GUI operations . . . . . . . . . . . . . . . . . . . . . . . . . . . . . . . . . . . . . . . . . . . . . . . . . . . . . . 3-7
Virtual keyboard . . . . . . . . . . . . . . . . . . . . . . . . . . . . . . . . . . . . . . . . . . . . . . . . . . . . . . 3-7
Virtual ten-key pad . . . . . . . . . . . . . . . . . . . . . . . . . . . . . . . . . . . . . . . . . . . . . . . . . . . . 3-8
List display . . . . . . . . . . . . . . . . . . . . . . . . . . . . . . . . . . . . . . . . . . . . . . . . . . . . . . . . . . . . 3-8
List display and sorting. . . . . . . . . . . . . . . . . . . . . . . . . . . . . . . . . . . . . . . . . . . . . 3-9
Changing the width in the title bar . . . . . . . . . . . . . . . . . . . . . . . . . . . . . . . . . 3-9
Multiple selections . . . . . . . . . . . . . . . . . . . . . . . . . . . . . . . . . . . . . . . . . . . . . . . . . 3-9
4 User Permissions. . . . . . . . . . . . . . . . . . . . . . . . . . . . . . . . . . . . . . . .4-1
Permission menu . . . . . . . . . . . . . . . . . . . . . . . . . . . . . . . . . . . . . . . . . . . . . . . . . . . . . . . . . . 4-1
Change User Permission . . . . . . . . . . . . . . . . . . . . . . . . . . . . . . . . . . . . . . . . . . . . . . . 4-1
Change Password . . . . . . . . . . . . . . . . . . . . . . . . . . . . . . . . . . . . . . . . . . . . . . . . . . . . . 4-2
Permission Restrictions . . . . . . . . . . . . . . . . . . . . . . . . . . . . . . . . . . . . . . . . . . . . . . . . 4-2
Security Management . . . . . . . . . . . . . . . . . . . . . . . . . . . . . . . . . . . . . . . . . . . . . . . . . . . . . 4-3
Adding users . . . . . . . . . . . . . . . . . . . . . . . . . . . . . . . . . . . . . . . . . . . . . . . . . . . . . . . . . . 4-3
Modifying users . . . . . . . . . . . . . . . . . . . . . . . . . . . . . . . . . . . . . . . . . . . . . . . . . . . . . . . 4-4
Deleting Users . . . . . . . . . . . . . . . . . . . . . . . . . . . . . . . . . . . . . . . . . . . . . . . . . . . . . . . . 4-4
5 Printer Status . . . . . . . . . . . . . . . . . . . . . . . . . . . . . . . . . . . . . . . . . . .5-1
Printer Status Menu . . . . . . . . . . . . . . . . . . . . . . . . . . . . . . . . . . . . . . . . . . . . . . . . . . . . . . . 5-1
Printer status . . . . . . . . . . . . . . . . . . . . . . . . . . . . . . . . . . . . . . . . . . . . . . . . . . . . . . 5-1
Job Information . . . . . . . . . . . . . . . . . . . . . . . . . . . . . . . . . . . . . . . . . . . . . . . . . . . 5-2
Paper Information. . . . . . . . . . . . . . . . . . . . . . . . . . . . . . . . . . . . . . . . . . . . . . . . . 5-2
Data . . . . . . . . . . . . . . . . . . . . . . . . . . . . . . . . . . . . . . . . . . . . . . . . . . . . . . . . . . . . . . 5-2
Consumables . . . . . . . . . . . . . . . . . . . . . . . . . . . . . . . . . . . . . . . . . . . . . . . . . . . . . . 5-2
Recovery . . . . . . . . . . . . . . . . . . . . . . . . . . . . . . . . . . . . . . . . . . . . . . . . . . . . . . . . . . 5-3
Used Size of RIP Buffer . . . . . . . . . . . . . . . . . . . . . . . . . . . . . . . . . . . . . . . . . . . . 5-3
Forced Printing . . . . . . . . . . . . . . . . . . . . . . . . . . . . . . . . . . . . . . . . . . . . . . . . . . . . 5-3
Restrictions on use of the Printer Status menu . . . . . . . . . . . . . . . . . . . . . . 5-3
6 Job Management . . . . . . . . . . . . . . . . . . . . . . . . . . . . . . . . . . . . . . .6-1
Overview of Job Management . . . . . . . . . . . . . . . . . . . . . . . . . . . . . . . . . . . . . . . . . . . . . 6-1
Tab menus . . . . . . . . . . . . . . . . . . . . . . . . . . . . . . . . . . . . . . . . . . . . . . . . . . . . . . . . . . . 6-1
Job operation buttons . . . . . . . . . . . . . . . . . . . . . . . . . . . . . . . . . . . . . . . . . . . . . . . . . 6-2
Jobs list . . . . . . . . . . . . . . . . . . . . . . . . . . . . . . . . . . . . . . . . . . . . . . . . . . . . . . . . . . . . . . . 6-2
Input/output spool capacity . . . . . . . . . . . . . . . . . . . . . . . . . . . . . . . . . . . . . . . . . . . 6-3
Restrictions of the Job Management menu . . . . . . . . . . . . . . . . . . . . . . . . . . . . 6-3
Job Status and Reason. . . . . . . . . . . . . . . . . . . . . . . . . . . . . . . . . . . . . . . . . . . . . . . . . . . . . 6-6
Job Status . . . . . . . . . . . . . . . . . . . . . . . . . . . . . . . . . . . . . . . . . . . . . . . . . . . . . . . . . . . . 6-6
Active Job tab . . . . . . . . . . . . . . . . . . . . . . . . . . . . . . . . . . . . . . . . . . . . . . . . . . . . . 6-6
Held Job tab. . . . . . . . . . . . . . . . . . . . . . . . . . . . . . . . . . . . . . . . . . . . . . . . . . . . . . . 6-7
Completed Job tab . . . . . . . . . . . . . . . . . . . . . . . . . . . . . . . . . . . . . . . . . . . . . . . . 6-7
Job History tab . . . . . . . . . . . . . . . . . . . . . . . . . . . . . . . . . . . . . . . . . . . . . . . . . . . . 6-7
Job Reason . . . . . . . . . . . . . . . . . . . . . . . . . . . . . . . . . . . . . . . . . . . . . . . . . . . . . . . . . . . 6-8
ii Printer and PC GUI User Guide
Page 5

Xerox 490/980 Color Continuous Feed Printing System Table of Contents
Active Job tab . . . . . . . . . . . . . . . . . . . . . . . . . . . . . . . . . . . . . . . . . . . . . . . . . . . . . 6-9
Held Job tab . . . . . . . . . . . . . . . . . . . . . . . . . . . . . . . . . . . . . . . . . . . . . . . . . . . . . . . 6-9
Completed Job tab . . . . . . . . . . . . . . . . . . . . . . . . . . . . . . . . . . . . . . . . . . . . . . 6-10
Job History tab . . . . . . . . . . . . . . . . . . . . . . . . . . . . . . . . . . . . . . . . . . . . . . . . . . 6-10
Active Job tab . . . . . . . . . . . . . . . . . . . . . . . . . . . . . . . . . . . . . . . . . . . . . . . . . . . . . . . . . . . . 6-11
Active job properties . . . . . . . . . . . . . . . . . . . . . . . . . . . . . . . . . . . . . . . . . . . . . . . . . 6-11
Operating buttons . . . . . . . . . . . . . . . . . . . . . . . . . . . . . . . . . . . . . . . . . . . . . . . 6-11
Tab menus . . . . . . . . . . . . . . . . . . . . . . . . . . . . . . . . . . . . . . . . . . . . . . . . . . . . . . 6-12
Job Information . . . . . . . . . . . . . . . . . . . . . . . . . . . . . . . . . . . . . . . . . . . . . . . . . . . . . . 6-12
Active Job Hold . . . . . . . . . . . . . . . . . . . . . . . . . . . . . . . . . . . . . . . . . . . . . . . . . . . . . .6-13
Suspend Active jobs . . . . . . . . . . . . . . . . . . . . . . . . . . . . . . . . . . . . . . . . . . . . . . . . . . 6-13
Active Job Restart . . . . . . . . . . . . . . . . . . . . . . . . . . . . . . . . . . . . . . . . . . . . . . . . . . . . 6-14
Active Job Cancel . . . . . . . . . . . . . . . . . . . . . . . . . . . . . . . . . . . . . . . . . . . . . . . . . . . . 6-15
Canceling Active Job during printing . . . . . . . . . . . . . . . . . . . . . . . . . . . . . . . . . . 6-15
Active Job Delete . . . . . . . . . . . . . . . . . . . . . . . . . . . . . . . . . . . . . . . . . . . . . . . . . . . . . 6-16
Deleting active Job during printing . . . . . . . . . . . . . . . . . . . . . . . . . . . . . . . . . . . . 6-16
Held Job tab. . . . . . . . . . . . . . . . . . . . . . . . . . . . . . . . . . . . . . . . . . . . . . . . . . . . . . . . . . . . . . 6-17
Held Job properties . . . . . . . . . . . . . . . . . . . . . . . . . . . . . . . . . . . . . . . . . . . . . . . . . . . 6-18
Operating buttons . . . . . . . . . . . . . . . . . . . . . . . . . . . . . . . . . . . . . . . . . . . . . . . 6-18
Tab Menus . . . . . . . . . . . . . . . . . . . . . . . . . . . . . . . . . . . . . . . . . . . . . . . . . . . . . . 6-18
Job information . . . . . . . . . . . . . . . . . . . . . . . . . . . . . . . . . . . . . . . . . . . . . . . . . 6-19
Properties tab for a Held Job . . . . . . . . . . . . . . . . . . . . . . . . . . . . . . . . . . . . . . . . . . 6-19
Change name of held job . . . . . . . . . . . . . . . . . . . . . . . . . . . . . . . . . . . . . . . . 6-19
Changing priority of held job . . . . . . . . . . . . . . . . . . . . . . . . . . . . . . . . . . . . . 6-19
Delete Job After Printing . . . . . . . . . . . . . . . . . . . . . . . . . . . . . . . . . . . . . . . . . 6-20
I/O process for a Held Job . . . . . . . . . . . . . . . . . . . . . . . . . . . . . . . . . . . . . . . . . . . . 6-20
Paper Settings for Held Jobs . . . . . . . . . . . . . . . . . . . . . . . . . . . . . . . . . . . . . . . . . . 6-21
Color tab for a Held Job . . . . . . . . . . . . . . . . . . . . . . . . . . . . . . . . . . . . . . . . . . . . . . 6-21
Print Range for a Held Job . . . . . . . . . . . . . . . . . . . . . . . . . . . . . . . . . . . . . . . . . . . . 6-22
Setting the print range . . . . . . . . . . . . . . . . . . . . . . . . . . . . . . . . . . . . . . . . . . . 6-22
Job Info for a Held job . . . . . . . . . . . . . . . . . . . . . . . . . . . . . . . . . . . . . . . . . . . . . . . 6-23
Data format of a Held Job . . . . . . . . . . . . . . . . . . . . . . . . . . . . . . . . . . . . . . . . . . . . 6-24
Release a Held Job . . . . . . . . . . . . . . . . . . . . . . . . . . . . . . . . . . . . . . . . . . . . . . . . . . . 6-24
Priority Process of a Held Job . . . . . . . . . . . . . . . . . . . . . . . . . . . . . . . . . . . . . . . . . 6-24
Move a Held Job . . . . . . . . . . . . . . . . . . . . . . . . . . . . . . . . . . . . . . . . . . . . . . . . . . . . . 6-24
Delete a Held Job . . . . . . . . . . . . . . . . . . . . . . . . . . . . . . . . . . . . . . . . . . . . . . . . . . . . 6-25
Re-edit a Held Job . . . . . . . . . . . . . . . . . . . . . . . . . . . . . . . . . . . . . . . . . . . . . . . . . . . . 6-25
System Page for Held Jobs . . . . . . . . . . . . . . . . . . . . . . . . . . . . . . . . . . . . . . . . . . . . 6-26
Select/Deselect All Held Jobs . . . . . . . . . . . . . . . . . . . . . . . . . . . . . . . . . . . . . . . . . . 6-27
Refresh Held Jobs . . . . . . . . . . . . . . . . . . . . . . . . . . . . . . . . . . . . . . . . . . . . . . . . . . . . 6-27
Completed Jobs . . . . . . . . . . . . . . . . . . . . . . . . . . . . . . . . . . . . . . . . . . . . . . . . . . . . . . . . . . 6-28
Completed Jobs Properties . . . . . . . . . . . . . . . . . . . . . . . . . . . . . . . . . . . . . . . . . . . 6-28
Hold Completed Jobs . . . . . . . . . . . . . . . . . . . . . . . . . . . . . . . . . . . . . . . . . . . . . . . . . 6-29
Reoutput Completed Jobs . . . . . . . . . . . . . . . . . . . . . . . . . . . . . . . . . . . . . . . . . . . . 6-29
Delete Completed Job . . . . . . . . . . . . . . . . . . . . . . . . . . . . . . . . . . . . . . . . . . . . . . . . 6-29
System Page for Completed Jobs . . . . . . . . . . . . . . . . . . . . . . . . . . . . . . . . . . . . . 6-30
Select All/Deselect All Completed Jobs . . . . . . . . . . . . . . . . . . . . . . . . . . . . . . . . 6-31
Refresh Completed Jobs . . . . . . . . . . . . . . . . . . . . . . . . . . . . . . . . . . . . . . . . . . . . . . 6-31
Job History . . . . . . . . . . . . . . . . . . . . . . . . . . . . . . . . . . . . . . . . . . . . . . . . . . . . . . . . . . . . . . . 6-32
Delete Job History . . . . . . . . . . . . . . . . . . . . . . . . . . . . . . . . . . . . . . . . . . . . . . . . . . . . 6-32
Export Job History . . . . . . . . . . . . . . . . . . . . . . . . . . . . . . . . . . . . . . . . . . . . . . . . . . . . 6-33
Printer and PC GUI User Guide iii
Page 6

Table of Contents Xerox 490/980 Color Continuous Feed Printing System
Job History System Page . . . . . . . . . . . . . . . . . . . . . . . . . . . . . . . . . . . . . . . . . . . . . 6-33
Select All/Deselect Job History . . . . . . . . . . . . . . . . . . . . . . . . . . . . . . . . . . . . . . . . 6-33
Refresh Job History . . . . . . . . . . . . . . . . . . . . . . . . . . . . . . . . . . . . . . . . . . . . . . . . . . . 6-34
Release a Job. . . . . . . . . . . . . . . . . . . . . . . . . . . . . . . . . . . . . . . . . . . . . . . . . . . . . . . . . . . . . 6-34
Automatic Release of Timed Job . . . . . . . . . . . . . . . . . . . . . . . . . . . . . . . . . . . . . . 6-35
Setting Manual Release . . . . . . . . . . . . . . . . . . . . . . . . . . . . . . . . . . . . . . . . . . . . . . 6-36
Delete Job . . . . . . . . . . . . . . . . . . . . . . . . . . . . . . . . . . . . . . . . . . . . . . . . . . . . . . . . . . . . . . . 6-37
Automatic delete . . . . . . . . . . . . . . . . . . . . . . . . . . . . . . . . . . . . . . . . . . . . . . . . . . . . 6-37
Delete Printed Job . . . . . . . . . . . . . . . . . . . . . . . . . . . . . . . . . . . . . . . . . . . . . . . . . . . 6-38
Immediately Delete Printed Job . . . . . . . . . . . . . . . . . . . . . . . . . . . . . . . . . . . . . . 6-38
Schedule a Job . . . . . . . . . . . . . . . . . . . . . . . . . . . . . . . . . . . . . . . . . . . . . . . . . . . . . . . . . . . 6-39
Job Setting . . . . . . . . . . . . . . . . . . . . . . . . . . . . . . . . . . . . . . . . . . . . . . . . . . . . . . . . . . 6-39
Schedule Types . . . . . . . . . . . . . . . . . . . . . . . . . . . . . . . . . . . . . . . . . . . . . . . . . . . . . . 6-40
Job Schedule Attributes . . . . . . . . . . . . . . . . . . . . . . . . . . . . . . . . . . . . . . . . . . . . . . 6-40
Job Schedule Priority . . . . . . . . . . . . . . . . . . . . . . . . . . . . . . . . . . . . . . . . . . . . . . . . . 6-40
Do not Accept Job . . . . . . . . . . . . . . . . . . . . . . . . . . . . . . . . . . . . . . . . . . . . . . . . . . . 6-40
Do Not Process Job . . . . . . . . . . . . . . . . . . . . . . . . . . . . . . . . . . . . . . . . . . . . . . . . . . . 6-40
Faulted Jobs. . . . . . . . . . . . . . . . . . . . . . . . . . . . . . . . . . . . . . . . . . . . . . . . . . . . . . . . . . . . . . 6-41
Handling Fault Job . . . . . . . . . . . . . . . . . . . . . . . . . . . . . . . . . . . . . . . . . . . . . . . . . . . 6-41
7 Printer Management . . . . . . . . . . . . . . . . . . . . . . . . . . . . . . . . . . . .7-1
Printer Management Overview . . . . . . . . . . . . . . . . . . . . . . . . . . . . . . . . . . . . . . . . . . . . . 7-1
Tab Menus . . . . . . . . . . . . . . . . . . . . . . . . . . . . . . . . . . . . . . . . . . . . . . . . . . . . . . . . . . . 7-1
On the PC-GUI . . . . . . . . . . . . . . . . . . . . . . . . . . . . . . . . . . . . . . . . . . . . . . . . . . . . 7-1
On the Printer GUI. . . . . . . . . . . . . . . . . . . . . . . . . . . . . . . . . . . . . . . . . . . . . . . . . 7-1
Printer Management Restrictions . . . . . . . . . . . . . . . . . . . . . . . . . . . . . . . . . . . . . . 7-2
Image Quality. . . . . . . . . . . . . . . . . . . . . . . . . . . . . . . . . . . . . . . . . . . . . . . . . . . . . . . . . . . . . 7-4
Print Density and Position Adjustment . . . . . . . . . . . . . . . . . . . . . . . . . . . . . . . . . 7-5
Print Position Adjustment . . . . . . . . . . . . . . . . . . . . . . . . . . . . . . . . . . . . . . . . . . 7-6
Print Density Adjustment . . . . . . . . . . . . . . . . . . . . . . . . . . . . . . . . . . . . . . . . . . 7-7
Color mode density adjustment . . . . . . . . . . . . . . . . . . . . . . . . . . . . . . . . . . . . 7-7
Color Mode . . . . . . . . . . . . . . . . . . . . . . . . . . . . . . . . . . . . . . . . . . . . . . . . . . . . . . . . . . . . . . . 7-8
Consumables. . . . . . . . . . . . . . . . . . . . . . . . . . . . . . . . . . . . . . . . . . . . . . . . . . . . . . . . . . . . . . 7-9
List of consumables. . . . . . . . . . . . . . . . . . . . . . . . . . . . . . . . . . . . . . . . . . . . . . . 7-10
Status. . . . . . . . . . . . . . . . . . . . . . . . . . . . . . . . . . . . . . . . . . . . . . . . . . . . . . . . . . . . 7-10
Icons. . . . . . . . . . . . . . . . . . . . . . . . . . . . . . . . . . . . . . . . . . . . . . . . . . . . . . . . . . . . . 7-11
CE Consumables . . . . . . . . . . . . . . . . . . . . . . . . . . . . . . . . . . . . . . . . . . . . . . . . . . . . . 7-11
Consumable replacement procedure . . . . . . . . . . . . . . . . . . . . . . . . . . . . . . . . . . 7-12
Operating buttons . . . . . . . . . . . . . . . . . . . . . . . . . . . . . . . . . . . . . . . . . . . . . . . . 7-12
System Configuration . . . . . . . . . . . . . . . . . . . . . . . . . . . . . . . . . . . . . . . . . . . . . . . . . . . . 7-13
Printer GUI . . . . . . . . . . . . . . . . . . . . . . . . . . . . . . . . . . . . . . . . . . . . . . . . . . . . . . . . . . 7-13
Operating buttons . . . . . . . . . . . . . . . . . . . . . . . . . . . . . . . . . . . . . . . . . . . . . . . . 7-13
Printer Configuration Tab . . . . . . . . . . . . . . . . . . . . . . . . . . . . . . . . . . . . . . . . . . . . 7-14
Operating buttons . . . . . . . . . . . . . . . . . . . . . . . . . . . . . . . . . . . . . . . . . . . . . . . . 7-14
Changing printer configuration . . . . . . . . . . . . . . . . . . . . . . . . . . . . . . . . . . . . . . . 7-15
PC-GUI . . . . . . . . . . . . . . . . . . . . . . . . . . . . . . . . . . . . . . . . . . . . . . . . . . . . . . . . . . . . . . 7-16
Software Tab. . . . . . . . . . . . . . . . . . . . . . . . . . . . . . . . . . . . . . . . . . . . . . . . . . . . . 7-16
System Environment Tab . . . . . . . . . . . . . . . . . . . . . . . . . . . . . . . . . . . . . . . . . 7-17
Backup . . . . . . . . . . . . . . . . . . . . . . . . . . . . . . . . . . . . . . . . . . . . . . . . . . . . . . . . . . . 7-17
Backup resource select screen . . . . . . . . . . . . . . . . . . . . . . . . . . . . . . . . . . . . . 7-18
Restore. . . . . . . . . . . . . . . . . . . . . . . . . . . . . . . . . . . . . . . . . . . . . . . . . . . . . . . . . . . 7-18
Restore resource select screen . . . . . . . . . . . . . . . . . . . . . . . . . . . . . . . . . . . . . 7-19
iv Printer and PC GUI User Guide
Page 7

Xerox 490/980 Color Continuous Feed Printing System Table of Contents
Mark Tab. . . . . . . . . . . . . . . . . . . . . . . . . . . . . . . . . . . . . . . . . . . . . . . . . . . . . . . . . . . . . . . . . 7-20
Setting side of forced ROF mark . . . . . . . . . . . . . . . . . . . . . . . . . . . . . . . . . . . . . .7-20
ROF mark print in adjustment print . . . . . . . . . . . . . . . . . . . . . . . . . . . . . . . . . . . 7-20
ROF mark print in print end . . . . . . . . . . . . . . . . . . . . . . . . . . . . . . . . . . . . . . . . . . . 7-20
ROF mark print in job print . . . . . . . . . . . . . . . . . . . . . . . . . . . . . . . . . . . . . . . . . . . . 7-20
Sensor Tab . . . . . . . . . . . . . . . . . . . . . . . . . . . . . . . . . . . . . . . . . . . . . . . . . . . . . . . . . . . . . . . 7-21
8 Queue Management . . . . . . . . . . . . . . . . . . . . . . . . . . . . . . . . . . . 8-1
Queue Management Overview . . . . . . . . . . . . . . . . . . . . . . . . . . . . . . . . . . . . . . . . . . . . . 8-1
Queue operating buttons . . . . . . . . . . . . . . . . . . . . . . . . . . . . . . . . . . . . . . . . . . . . . . 8-2
Queue List . . . . . . . . . . . . . . . . . . . . . . . . . . . . . . . . . . . . . . . . . . . . . . . . . . . . . . . . . . . . 8-2
Queue Management Restrictions . . . . . . . . . . . . . . . . . . . . . . . . . . . . . . . . . . . . . . 8-3
Queue Properties . . . . . . . . . . . . . . . . . . . . . . . . . . . . . . . . . . . . . . . . . . . . . . . . . . . . . . . . . . 8-4
Creating a New Queue . . . . . . . . . . . . . . . . . . . . . . . . . . . . . . . . . . . . . . . . . . . . . . . . . . . . . 8-5
Operating buttons . . . . . . . . . . . . . . . . . . . . . . . . . . . . . . . . . . . . . . . . . . . . . . . . . . . . 8-5
New Queue Tab menus . . . . . . . . . . . . . . . . . . . . . . . . . . . . . . . . . . . . . . . . . . . . . . . . 8-5
New Queue Properties . . . . . . . . . . . . . . . . . . . . . . . . . . . . . . . . . . . . . . . . . . . . . . . . . 8-6
I/O Process for New Queue . . . . . . . . . . . . . . . . . . . . . . . . . . . . . . . . . . . . . . . . . . . . 8-7
New Queue Paper Settings . . . . . . . . . . . . . . . . . . . . . . . . . . . . . . . . . . . . . . . . . . . 8-10
New Queue Color Settings . . . . . . . . . . . . . . . . . . . . . . . . . . . . . . . . . . . . . . . . . . . . 8-11
Print Characteristics. . . . . . . . . . . . . . . . . . . . . . . . . . . . . . . . . . . . . . . . . . . . . . 8-11
Color Characteristics - Upstream. . . . . . . . . . . . . . . . . . . . . . . . . . . . . . . . . . 8-12
Color Characteristics - Downstream. . . . . . . . . . . . . . . . . . . . . . . . . . . . . . . 8-12
Output Characteristics . . . . . . . . . . . . . . . . . . . . . . . . . . . . . . . . . . . . . . . . . . . . . . . . 8-13
Resource Group Name . . . . . . . . . . . . . . . . . . . . . . . . . . . . . . . . . . . . . . . . . . . 8-13
User TRC . . . . . . . . . . . . . . . . . . . . . . . . . . . . . . . . . . . . . . . . . . . . . . . . . . . . . . . . 8-13
RGB . . . . . . . . . . . . . . . . . . . . . . . . . . . . . . . . . . . . . . . . . . . . . . . . . . . . . . . . . . . . . 8-14
CMYK . . . . . . . . . . . . . . . . . . . . . . . . . . . . . . . . . . . . . . . . . . . . . . . . . . . . . . . . . . . 8-15
Output Screen Characteristics . . . . . . . . . . . . . . . . . . . . . . . . . . . . . . . . . . . . 8-15
New Queue PS Options . . . . . . . . . . . . . . . . . . . . . . . . . . . . . . . . . . . . . . . . . . . . . . . 8-17
New Queue PDF Settings . . . . . . . . . . . . . . . . . . . . . . . . . . . . . . . . . . . . . . . . . . . . . 8-18
New Queue IPDS Settings . . . . . . . . . . . . . . . . . . . . . . . . . . . . . . . . . . . . . . . . . . . . 8-18
Delete a Queue . . . . . . . . . . . . . . . . . . . . . . . . . . . . . . . . . . . . . . . . . . . . . . . . . . . . . . . . . . . 8-19
Setting Queue Accept Status . . . . . . . . . . . . . . . . . . . . . . . . . . . . . . . . . . . . . . . . . . . . . . 8-19
Setting Queue Processing . . . . . . . . . . . . . . . . . . . . . . . . . . . . . . . . . . . . . . . . . . . . . . . . . 8-20
Select Queue . . . . . . . . . . . . . . . . . . . . . . . . . . . . . . . . . . . . . . . . . . . . . . . . . . . . . . . . . . . . . 8-21
Select a queue list . . . . . . . . . . . . . . . . . . . . . . . . . . . . . . . . . . . . . . . . . . . . . . . . . . . . 8-21
Select a queue . . . . . . . . . . . . . . . . . . . . . . . . . . . . . . . . . . . . . . . . . . . . . . . . . . . . . . . 8-21
Deselect a queue list . . . . . . . . . . . . . . . . . . . . . . . . . . . . . . . . . . . . . . . . . . . . . . . . .8-21
9 Gateway . . . . . . . . . . . . . . . . . . . . . . . . . . . . . . . . . . . . . . . . . . . . . . 9-1
Overview of Gateway Setting . . . . . . . . . . . . . . . . . . . . . . . . . . . . . . . . . . . . . . . . . . . . . . 9-1
Printer GUI Gateway . . . . . . . . . . . . . . . . . . . . . . . . . . . . . . . . . . . . . . . . . . . . . . . . . . 9-1
Gateway Tab menus . . . . . . . . . . . . . . . . . . . . . . . . . . . . . . . . . . . . . . . . . . . . . . . 9-1
Gateway Restrictions . . . . . . . . . . . . . . . . . . . . . . . . . . . . . . . . . . . . . . . . . . . . . . 9-2
PC-GUI Gateway . . . . . . . . . . . . . . . . . . . . . . . . . . . . . . . . . . . . . . . . . . . . . . . . . . . . . . 9-3
Configure the Gateway . . . . . . . . . . . . . . . . . . . . . . . . . . . . . . . . . . . . . . . . . . . . 9-3
FTP Tab . . . . . . . . . . . . . . . . . . . . . . . . . . . . . . . . . . . . . . . . . . . . . . . . . . . . . . . . . . . . . . . . . . . 9-4
Sub-tab menu . . . . . . . . . . . . . . . . . . . . . . . . . . . . . . . . . . . . . . . . . . . . . . . . . . . . . 9-4
FTP User Setting . . . . . . . . . . . . . . . . . . . . . . . . . . . . . . . . . . . . . . . . . . . . . . . . . . . . . . 9-5
FTP Server . . . . . . . . . . . . . . . . . . . . . . . . . . . . . . . . . . . . . . . . . . . . . . . . . . . . . . . . . 9-5
Authorized User . . . . . . . . . . . . . . . . . . . . . . . . . . . . . . . . . . . . . . . . . . . . . . . . . . . 9-5
Printer and PC GUI User Guide v
Page 8

Table of Contents Xerox 490/980 Color Continuous Feed Printing System
FTP Server Setting . . . . . . . . . . . . . . . . . . . . . . . . . . . . . . . . . . . . . . . . . . . . . . . . . 9-7
FTP Server. . . . . . . . . . . . . . . . . . . . . . . . . . . . . . . . . . . . . . . . . . . . . . . . . . . . . . . . . 9-7
Authorized Client . . . . . . . . . . . . . . . . . . . . . . . . . . . . . . . . . . . . . . . . . . . . . . . . . . 9-8
LPR Connection . . . . . . . . . . . . . . . . . . . . . . . . . . . . . . . . . . . . . . . . . . . . . . . . . . . . . . . . . . 9-11
IPDS Connection . . . . . . . . . . . . . . . . . . . . . . . . . . . . . . . . . . . . . . . . . . . . . . . . . . . . . . . . . 9-14
IPDS Server Setting . . . . . . . . . . . . . . . . . . . . . . . . . . . . . . . . . . . . . . . . . . . . . . . . . . 9-14
Authorized Client . . . . . . . . . . . . . . . . . . . . . . . . . . . . . . . . . . . . . . . . . . . . . . . . . 9-14
IPDS Attachment . . . . . . . . . . . . . . . . . . . . . . . . . . . . . . . . . . . . . . . . . . . . . . . . . . . . 9-17
Barcode Fine Adjustment . . . . . . . . . . . . . . . . . . . . . . . . . . . . . . . . . . . . . . . . . . . . . 9-22
10 Resource Management. . . . . . . . . . . . . . . . . . . . . . . . . . . . . . . . 10-1
Overview of Resource Management . . . . . . . . . . . . . . . . . . . . . . . . . . . . . . . . . . . . . . . 10-1
System Resource . . . . . . . . . . . . . . . . . . . . . . . . . . . . . . . . . . . . . . . . . . . . . . . . . . . . . . . . . 10-3
Destination directory . . . . . . . . . . . . . . . . . . . . . . . . . . . . . . . . . . . . . . . . . . . . . . . . . 10-4
Stock set list . . . . . . . . . . . . . . . . . . . . . . . . . . . . . . . . . . . . . . . . . . . . . . . . . . . . . . . . . 10-4
Status area . . . . . . . . . . . . . . . . . . . . . . . . . . . . . . . . . . . . . . . . . . . . . . . . . . . . . . . . . . 10-4
Operating buttons . . . . . . . . . . . . . . . . . . . . . . . . . . . . . . . . . . . . . . . . . . . . . . . . . . . 10-4
Resource list . . . . . . . . . . . . . . . . . . . . . . . . . . . . . . . . . . . . . . . . . . . . . . . . . . . . . . . . . 10-5
System Resource Stock Set . . . . . . . . . . . . . . . . . . . . . . . . . . . . . . . . . . . . . . . . . . . . . . . . 10-5
Operating buttons . . . . . . . . . . . . . . . . . . . . . . . . . . . . . . . . . . . . . . . . . . . . . . . . . . . 10-5
Restrictions on use of stock set operations . . . . . . . . . . . . . . . . . . . . . . . . . . . . 10-6
Creating a new stock set . . . . . . . . . . . . . . . . . . . . . . . . . . . . . . . . . . . . . . . . . . . . . 10-7
Copying a stock set . . . . . . . . . . . . . . . . . . . . . . . . . . . . . . . . . . . . . . . . . . . . . . . . . . 10-8
Deleting a stock set . . . . . . . . . . . . . . . . . . . . . . . . . . . . . . . . . . . . . . . . . . . . . . . . . . 10-8
Renaming a stock set . . . . . . . . . . . . . . . . . . . . . . . . . . . . . . . . . . . . . . . . . . . . . . . . . 10-9
Backing up a stock set . . . . . . . . . . . . . . . . . . . . . . . . . . . . . . . . . . . . . . . . . . . . . . . 10-10
Restoring a stock set . . . . . . . . . . . . . . . . . . . . . . . . . . . . . . . . . . . . . . . . . . . . . . . . 10-11
System Resource File . . . . . . . . . . . . . . . . . . . . . . . . . . . . . . . . . . . . . . . . . . . . . . . . . . . .10-12
Operating buttons . . . . . . . . . . . . . . . . . . . . . . . . . . . . . . . . . . . . . . . . . . . . . . . . . . 10-14
Resources list . . . . . . . . . . . . . . . . . . . . . . . . . . . . . . . . . . . . . . . . . . . . . . . . . . . . . . .10-14
Restricted system resource set handling functions . . . . . . . . . . . . . . . . . . . .10-15
Creating a new imposition file . . . . . . . . . . . . . . . . . . . . . . . . . . . . . . . . . . . . . . .10-15
Editing an imposition file . . . . . . . . . . . . . . . . . . . . . . . . . . . . . . . . . . . . . . . . . . . .10-16
Imposition information for paper setting . . . . . . . . . . . . . . . . . . . . . . . . . . . . 10-16
Imposition File Name. . . . . . . . . . . . . . . . . . . . . . . . . . . . . . . . . . . . . . . . . . . 10-17
Use Paper Size. . . . . . . . . . . . . . . . . . . . . . . . . . . . . . . . . . . . . . . . . . . . . . . . . . 10-18
Simplex/Duplex. . . . . . . . . . . . . . . . . . . . . . . . . . . . . . . . . . . . . . . . . . . . . . . . . 10-18
Preview . . . . . . . . . . . . . . . . . . . . . . . . . . . . . . . . . . . . . . . . . . . . . . . . . . . . . . . . 10-19
Unit. . . . . . . . . . . . . . . . . . . . . . . . . . . . . . . . . . . . . . . . . . . . . . . . . . . . . . . . . . . . 10-19
Paper Size . . . . . . . . . . . . . . . . . . . . . . . . . . . . . . . . . . . . . . . . . . . . . . . . . . . . . . 10-19
Page Printable Area. . . . . . . . . . . . . . . . . . . . . . . . . . . . . . . . . . . . . . . . . . . . . 10-19
Repaint . . . . . . . . . . . . . . . . . . . . . . . . . . . . . . . . . . . . . . . . . . . . . . . . . . . . . . . . 10-20
Setting the number of sheets . . . . . . . . . . . . . . . . . . . . . . . . . . . . . . . . . . . 10-20
Imposition information for Options data . . . . . . . . . . . . . . . . . . . . . . . . . . . . .10-20
Print Mark 1 . . . . . . . . . . . . . . . . . . . . . . . . . . . . . . . . . . . . . . . . . . . . . . . . . . . . 10-21
Filter Control . . . . . . . . . . . . . . . . . . . . . . . . . . . . . . . . . . . . . . . . . . . . . . . . . . . 10-21
Recovery Marker Page . . . . . . . . . . . . . . . . . . . . . . . . . . . . . . . . . . . . . . . . . . 10-21
Copy Mark Switching . . . . . . . . . . . . . . . . . . . . . . . . . . . . . . . . . . . . . . . . . . . 10-22
Report . . . . . . . . . . . . . . . . . . . . . . . . . . . . . . . . . . . . . . . . . . . . . . . . . . . . . . . . . 10-22
Job. . . . . . . . . . . . . . . . . . . . . . . . . . . . . . . . . . . . . . . . . . . . . . . . . . . . . . . . . . . . . 10-23
Free Imposition Properties . . . . . . . . . . . . . . . . . . . . . . . . . . . . . . . . . . . . . . . . . . .10-24
Book Imposition Properties . . . . . . . . . . . . . . . . . . . . . . . . . . . . . . . . . . . . . 10-25
vi Printer and PC GUI User Guide
Page 9

Xerox 490/980 Color Continuous Feed Printing System Table of Contents
Imposition . . . . . . . . . . . . . . . . . . . . . . . . . . . . . . . . . . . . . . . . . . . . . . . . . . . . . 10-26
Saving Imposition Information . . . . . . . . . . . . . . . . . . . . . . . . . . . . . . . . . . . . . .10-29
Copy Resource File . . . . . . . . . . . . . . . . . . . . . . . . . . . . . . . . . . . . . . . . . . . . . . . . . .10-30
Export Resource File . . . . . . . . . . . . . . . . . . . . . . . . . . . . . . . . . . . . . . . . . . . . . . . . .10-31
Import a Resource File . . . . . . . . . . . . . . . . . . . . . . . . . . . . . . . . . . . . . . . . . . . . . . .10-32
Import TIFF File . . . . . . . . . . . . . . . . . . . . . . . . . . . . . . . . . . . . . . . . . . . . . . . . 10-32
Select Resource Files . . . . . . . . . . . . . . . . . . . . . . . . . . . . . . . . . . . . . . . . . . . . . . . .10-34
Deselect a Resource List . . . . . . . . . . . . . . . . . . . . . . . . . . . . . . . . . . . . . . . . . . . . .10-34
Color Resource Tab . . . . . . . . . . . . . . . . . . . . . . . . . . . . . . . . . . . . . . . . . . . . . . . . . . . . . .10-35
Destination Directory . . . . . . . . . . . . . . . . . . . . . . . . . . . . . . . . . . . . . . . . . . . . . . . .10-35
Resource Set List . . . . . . . . . . . . . . . . . . . . . . . . . . . . . . . . . . . . . . . . . . . . . . . . . . . .10-35
Color Resource Set . . . . . . . . . . . . . . . . . . . . . . . . . . . . . . . . . . . . . . . . . . . . . . . . . . . . . . .10-36
Operating buttons . . . . . . . . . . . . . . . . . . . . . . . . . . . . . . . . . . . . . . . . . . . . . . . . . .10-36
Color Resource Set Restrictions . . . . . . . . . . . . . . . . . . . . . . . . . . . . . . . . . . . . . .10-37
Create New Color Resource Set . . . . . . . . . . . . . . . . . . . . . . . . . . . . . . . . . . . . . .10-38
Copy Color Resource Set . . . . . . . . . . . . . . . . . . . . . . . . . . . . . . . . . . . . . . . . . . . . .10-39
Delete Color Resource Set . . . . . . . . . . . . . . . . . . . . . . . . . . . . . . . . . . . . . . . . . . .10-39
Rename Color Resource Set . . . . . . . . . . . . . . . . . . . . . . . . . . . . . . . . . . . . . . . . . .10-40
Backup Resource Set . . . . . . . . . . . . . . . . . . . . . . . . . . . . . . . . . . . . . . . . . . . . . . . .10-41
Restore Color Resource Set . . . . . . . . . . . . . . . . . . . . . . . . . . . . . . . . . . . . . . 10-42
Color Resource File. . . . . . . . . . . . . . . . . . . . . . . . . . . . . . . . . . . . . . . . . . . . . . . . . . . . . . .10-43
Resources list . . . . . . . . . . . . . . . . . . . . . . . . . . . . . . . . . . . . . . . . . . . . . . . . . . . . . . .10-44
Color Resource File Restrictions . . . . . . . . . . . . . . . . . . . . . . . . . . . . . . . . . . . . . .10-44
Create TRC file . . . . . . . . . . . . . . . . . . . . . . . . . . . . . . . . . . . . . . . . . . . . . . . . . . . . . .10-45
Edit a TRC File . . . . . . . . . . . . . . . . . . . . . . . . . . . . . . . . . . . . . . . . . . . . . . . . . . . . . . .10-46
Copy Color Resource File . . . . . . . . . . . . . . . . . . . . . . . . . . . . . . . . . . . . . . . . . . . .10-47
Export Color Resource File . . . . . . . . . . . . . . . . . . . . . . . . . . . . . . . . . . . . . . . . . . .10-47
Import Color Resource File . . . . . . . . . . . . . . . . . . . . . . . . . . . . . . . . . . . . . . . . . . .10-48
Delete Color Resource File . . . . . . . . . . . . . . . . . . . . . . . . . . . . . . . . . . . . . . . . . . .10-48
Color Resource File Properties . . . . . . . . . . . . . . . . . . . . . . . . . . . . . . . . . . . . . . . .10-48
Select Color Resource File . . . . . . . . . . . . . . . . . . . . . . . . . . . . . . . . . . . . . . . . . . . .10-49
Deselect Color Resource List . . . . . . . . . . . . . . . . . . . . . . . . . . . . . . . . . . . . . . . . .10-49
Paper Resource . . . . . . . . . . . . . . . . . . . . . . . . . . . . . . . . . . . . . . . . . . . . . . . . . . . . . . . . . .10-50
Paper Resource Management Restrictions . . . . . . . . . . . . . . . . . . . . . . . . . . . .10-51
Create New Paper Resource File . . . . . . . . . . . . . . . . . . . . . . . . . . . . . . . . . 10-51
Pre-printed Info tab. . . . . . . . . . . . . . . . . . . . . . . . . . . . . . . . . . . . . . . . . . . . . 10-52
TOF Mark. . . . . . . . . . . . . . . . . . . . . . . . . . . . . . . . . . . . . . . . . . . . . . . . . . . . . . . 10-52
ROF Mark. . . . . . . . . . . . . . . . . . . . . . . . . . . . . . . . . . . . . . . . . . . . . . . . . . . . . . . 10-53
Trans/Flash tab . . . . . . . . . . . . . . . . . . . . . . . . . . . . . . . . . . . . . . . . . . . . . . . . . 10-53
Check tab . . . . . . . . . . . . . . . . . . . . . . . . . . . . . . . . . . . . . . . . . . . . . . . . . . . . . . 10-54
Edit Paper Resource File . . . . . . . . . . . . . . . . . . . . . . . . . . . . . . . . . . . . . . . . . . . . .10-55
Paper name change . . . . . . . . . . . . . . . . . . . . . . . . . . . . . . . . . . . . . . . . . . . . 10-55
Delete Paper Resource File . . . . . . . . . . . . . . . . . . . . . . . . . . . . . . . . . . . . . . . . . . .10-55
Paper Setting . . . . . . . . . . . . . . . . . . . . . . . . . . . . . . . . . . . . . . . . . . . . . . . . . . . . . . .10-56
PostScript Font . . . . . . . . . . . . . . . . . . . . . . . . . . . . . . . . . . . . . . . . . . . . . . . . . . . . . . . . . .10-57
PostScript Font Restrictions . . . . . . . . . . . . . . . . . . . . . . . . . . . . . . . . . . . . . . . . . .10-57
Sample Printing . . . . . . . . . . . . . . . . . . . . . . . . . . . . . . . . . . . . . . . . . . . . . . . . . . . . .10-58
Download Font . . . . . . . . . . . . . . . . . . . . . . . . . . . . . . . . . . . . . . . . . . . . . . . . . . . . .10-58
Ending download mode. . . . . . . . . . . . . . . . . . . . . . . . . . . . . . . . . . . . . . . . . 10-58
11 System Management . . . . . . . . . . . . . . . . . . . . . . . . . . . . . . . . . 11-1
System Management Overview . . . . . . . . . . . . . . . . . . . . . . . . . . . . . . . . . . . . . . . . . . . 11-1
Printer and PC GUI User Guide vii
Page 10

Table of Contents Xerox 490/980 Color Continuous Feed Printing System
System Management Restrictions . . . . . . . . . . . . . . . . . . . . . . . . . . . . . . . . . . . . . . . . . 11-2
System Settings . . . . . . . . . . . . . . . . . . . . . . . . . . . . . . . . . . . . . . . . . . . . . . . . . . . . . . . . . . 11-2
Schedule Job with Extended Spool . . . . . . . . . . . . . . . . . . . . . . . . . . . . . . . . . . . . 11-3
System Time . . . . . . . . . . . . . . . . . . . . . . . . . . . . . . . . . . . . . . . . . . . . . . . . . . . . . . . . . 11-4
Time setting . . . . . . . . . . . . . . . . . . . . . . . . . . . . . . . . . . . . . . . . . . . . . . . . . . . . . . . . . 11-5
Refresh Rate . . . . . . . . . . . . . . . . . . . . . . . . . . . . . . . . . . . . . . . . . . . . . . . . . . . . . . . . . 11-5
Reset Job ID . . . . . . . . . . . . . . . . . . . . . . . . . . . . . . . . . . . . . . . . . . . . . . . . . . . . . . . . . 11-6
PC-GUI. . . . . . . . . . . . . . . . . . . . . . . . . . . . . . . . . . . . . . . . . . . . . . . . . . . . . . . . . . . 11-6
Printer GUI . . . . . . . . . . . . . . . . . . . . . . . . . . . . . . . . . . . . . . . . . . . . . . . . . . . . . . . 11-6
Software tab . . . . . . . . . . . . . . . . . . . . . . . . . . . . . . . . . . . . . . . . . . . . . . . . . . . . . . . . . . . . . 11-7
Printer GUI . . . . . . . . . . . . . . . . . . . . . . . . . . . . . . . . . . . . . . . . . . . . . . . . . . . . . . . . . . 11-7
PC-GUI . . . . . . . . . . . . . . . . . . . . . . . . . . . . . . . . . . . . . . . . . . . . . . . . . . . . . . . . . . . . . . 11-8
Backup . . . . . . . . . . . . . . . . . . . . . . . . . . . . . . . . . . . . . . . . . . . . . . . . . . . . . . . . . . . . . . 11-9
Backup resource select screen . . . . . . . . . . . . . . . . . . . . . . . . . . . . . . . . . . . . . 11-9
Restore . . . . . . . . . . . . . . . . . . . . . . . . . . . . . . . . . . . . . . . . . . . . . . . . . . . . . . . . . . . . .11-10
Restore execution . . . . . . . . . . . . . . . . . . . . . . . . . . . . . . . . . . . . . . . . . . . . . . 11-10
Restore resource select screen . . . . . . . . . . . . . . . . . . . . . . . . . . . . . . . . . . . 11-11
12 Tools. . . . . . . . . . . . . . . . . . . . . . . . . . . . . . . . . . . . . . . . . . . . . . . . . 12-1
Overview of Tools Menu . . . . . . . . . . . . . . . . . . . . . . . . . . . . . . . . . . . . . . . . . . . . . . . . . . 12-1
Log Operation . . . . . . . . . . . . . . . . . . . . . . . . . . . . . . . . . . . . . . . . . . . . . . . . . . . . . . . . . . . . 12-2
System Log Display . . . . . . . . . . . . . . . . . . . . . . . . . . . . . . . . . . . . . . . . . . . . . . . . . . 12-3
Display Contents and Meanings. . . . . . . . . . . . . . . . . . . . . . . . . . . . . . . . . . . 12-3
Tools Menu Restrictions . . . . . . . . . . . . . . . . . . . . . . . . . . . . . . . . . . . . . . . . . . . . . . 12-4
Export System Log. . . . . . . . . . . . . . . . . . . . . . . . . . . . . . . . . . . . . . . . . . . . . . . . . . . . . . . . 12-5
13 Server and Input Function . . . . . . . . . . . . . . . . . . . . . . . . . . . . . 13-1
FTP Server Connecting Function. . . . . . . . . . . . . . . . . . . . . . . . . . . . . . . . . . . . . . . . . . . 13-1
FTP Installation Commands . . . . . . . . . . . . . . . . . . . . . . . . . . . . . . . . . . . . . . . . . . 13-1
Additional Information for Commands . . . . . . . . . . . . . . . . . . . . . . . . . . . . . . . 13-3
NLST command . . . . . . . . . . . . . . . . . . . . . . . . . . . . . . . . . . . . . . . . . . . . . . . . . . 13-3
NLST getCommand. . . . . . . . . . . . . . . . . . . . . . . . . . . . . . . . . . . . . . . . . . . . . . . 13-4
LIST command . . . . . . . . . . . . . . . . . . . . . . . . . . . . . . . . . . . . . . . . . . . . . . . . . . . 13-5
LIST getCommand . . . . . . . . . . . . . . . . . . . . . . . . . . . . . . . . . . . . . . . . . . . . . . . 13-6
LIST. . . . . . . . . . . . . . . . . . . . . . . . . . . . . . . . . . . . . . . . . . . . . . . . . . . . . . . . . . . . . . 13-7
DELE command . . . . . . . . . . . . . . . . . . . . . . . . . . . . . . . . . . . . . . . . . . . . . . . . . . 13-8
RETR command . . . . . . . . . . . . . . . . . . . . . . . . . . . . . . . . . . . . . . . . . . . . . . . . . . 13-9
RETR printerinfo . . . . . . . . . . . . . . . . . . . . . . . . . . . . . . . . . . . . . . . . . . . . . . . . 13-12
FTP response messages . . . . . . . . . . . . . . . . . . . . . . . . . . . . . . . . . . . . . . . . . . . . . 13-13
Connection request . . . . . . . . . . . . . . . . . . . . . . . . . . . . . . . . . . . . . . . . . . . . . 13-13
USER Command . . . . . . . . . . . . . . . . . . . . . . . . . . . . . . . . . . . . . . . . . . . . . . . 13-13
PASS Command . . . . . . . . . . . . . . . . . . . . . . . . . . . . . . . . . . . . . . . . . . . . . . . 13-13
TYPE Command . . . . . . . . . . . . . . . . . . . . . . . . . . . . . . . . . . . . . . . . . . . . . . . . 13-13
MODE Command . . . . . . . . . . . . . . . . . . . . . . . . . . . . . . . . . . . . . . . . . . . . . . 13-13
STUR Command . . . . . . . . . . . . . . . . . . . . . . . . . . . . . . . . . . . . . . . . . . . . . . . 13-14
PORT Command. . . . . . . . . . . . . . . . . . . . . . . . . . . . . . . . . . . . . . . . . . . . . . . . 13-14
STOR/DELETE/NLST/LIST/RETR Command . . . . . . . . . . . . . . . . . . . . . . 13-14
STOR Command . . . . . . . . . . . . . . . . . . . . . . . . . . . . . . . . . . . . . . . . . . . . . . . 13-14
RETR Command . . . . . . . . . . . . . . . . . . . . . . . . . . . . . . . . . . . . . . . . . . . . . . . 13-14
NLST/LIST/RETR Command . . . . . . . . . . . . . . . . . . . . . . . . . . . . . . . . . . . . 13-14
STOR/NLST/LIST/RETR Command . . . . . . . . . . . . . . . . . . . . . . . . . . . . . . 13-15
STOR/NLST/LIST/RETR Command . . . . . . . . . . . . . . . . . . . . . . . . . . . . . . 13-15
viii Printer and PC GUI User Guide
Page 11

Xerox 490/980 Color Continuous Feed Printing System Table of Contents
ABOR Command . . . . . . . . . . . . . . . . . . . . . . . . . . . . . . . . . . . . . . . . . . . . . . . 13-15
DELE Command . . . . . . . . . . . . . . . . . . . . . . . . . . . . . . . . . . . . . . . . . . . . . . . . 13-15
QUIT Command . . . . . . . . . . . . . . . . . . . . . . . . . . . . . . . . . . . . . . . . . . . . . . . 13-15
Common errors . . . . . . . . . . . . . . . . . . . . . . . . . . . . . . . . . . . . . . . . . . . . . . . . 13-16
LPR Server Connection Function . . . . . . . . . . . . . . . . . . . . . . . . . . . . . . . . . . . . . . . . . .13-17
LPR installation commands . . . . . . . . . . . . . . . . . . . . . . . . . . . . . . . . . . . . . . . . .13-17
Supported control file commands . . . . . . . . . . . . . . . . . . . . . . . . . . . . . . . . . . . .13-18
Supported lpr/lp command options (client) . . . . . . . . . . . . . . . . . . . . . . . . . . .13-20
Supported Ipr command (Windows 2000) . . . . . . . . . . . . . . . . . . . . . . . 13-20
Supported lpr command (Solaris8) . . . . . . . . . . . . . . . . . . . . . . . . . . . . . . 13-20
Supported lpq command options (client) . . . . . . . . . . . . . . . . . . . . . . . . . . . . .13-22
Supported lpq command (Windows 2000) . . . . . . . . . . . . . . . . . . . . . . 13-22
Supported lpq command (Solaris8) . . . . . . . . . . . . . . . . . . . . . . . . . . . . . 13-22
Response to lpq client . . . . . . . . . . . . . . . . . . . . . . . . . . . . . . . . . . . . . . . . . . . . . . .13-22
Displaying job information (short) . . . . . . . . . . . . . . . . . . . . . . . . . . . . . . . . . . .13-22
Displaying job information (long) . . . . . . . . . . . . . . . . . . . . . . . . . . . . . . . . . . . .13-23
IPDS Input Function . . . . . . . . . . . . . . . . . . . . . . . . . . . . . . . . . . . . . . . . . . . . . . . . . . . . .13-24
Stream Mode . . . . . . . . . . . . . . . . . . . . . . . . . . . . . . . . . . . . . . . . . . . . . . . . . . . . . . .13-24
Host recovery mode . . . . . . . . . . . . . . . . . . . . . . . . . . . . . . . . . . . . . . . . . . . . . . . . .13-24
Printer recovery mode . . . . . . . . . . . . . . . . . . . . . . . . . . . . . . . . . . . . . . . . . . . . . . .13-24
Active Color Image . . . . . . . . . . . . . . . . . . . . . . . . . . . . . . . . . . . . . . . . . . . . . . . . . .13-25
Printer and PC GUI User Guide ix
Page 12

Table of Contents Xerox 490/980 Color Continuous Feed Printing System
x Printer and PC GUI User Guide
Page 13

PC-GUI Introduction
1
and Setup
This document explains how to use the GUI associated with the 490/980 Color Continuous
Feed Printing System. The GUI is located on the Touch Screen directly on the Printer as well as
on a remote PC (the PC-GUI). This document explains all of the GUI operations on both
locations. Unless otherwise noted, operations are found on both the printer as well as the PCGUI. Operational buttons may be located differently on each GUI, but how the operational
button works will be similar.
The PC-GUI is a control software program that is installed on a remote PC. The PC-GUI allows
you to operate your printer from a remote location.
PC-GUI Setup
Before proceeding with the PC-GUI setup, ensure that you do following:
• That you are logged on as an administrator or from a user account with administrator
privileges.
• That the remote PC on which you are about to install the PC-GUI is connected to a network.
• That the display has a minimum 1280 x 1024 screen resolution.
Set up a Remote PC
Before installing the software, you must set up a remote PC. Turn on the remote PC, log on to an
administrator account, and make the following configuration settings:
1. In network settings, set the computer name as XEROX.
2. Select a workgroup as a domain name and set it as WORKGROUP.
3. For the PC-GUI ID, type xerox.
4. For the initial password, type xerox.
Printer & PC GUI Guide 1-1
Page 14

PC-GUI Introduction and Setup Xerox 490/980 Color Continuous Feed Printing System
Set Screen Resolution and Power Options
1. To set a screen resolution, right-click on a empty part of the Desktop and select
[Properties]. The Display Properties dialog box appears.
2. Select the [Settings] tab and select the slider in Screen resolution, or drag it and drop, to
1280 x 1024 pixels.
3. Select [Highest (32 bit)] from the Color quality pull-down list.
4. Select [Apply].
5. Select [Yes].
6. Confirm the settings and proceed to set up a screensaver.
7. Select the Screen Saver tab and select [None] from the Screen saver pull-down list.
8. Select [Power....] and the Power Options Properties dialog box will appear.
9. Select [Home/Office Desk] from the Power schemes pull-down list.
10. Select [Never] for all of the [Turn off hard disks], [System standby] and [Hibernate] pull-
down lists. Leave Turn off monitor at the default or set it to any value of your choosing.
11. Select the [Advanced] tab and select [Prompt for password] when computer resumes from
standby. Leave other options at their defaults or set them to any values of your choosing.
12. Select the [Hibernate] tab and clear Enable hibernation.
13. Select the [UPS] tab and verify the settings. Select [OK] and the Power Options Properties
dialog box will close.
14. Select [OK] in the Display Properties dialog box. The Display Properties dialog box will close.
Set Time
1. Select [Start], [Settings] and select [Control Panel]. The Control Panel window appears.
2. Double-click the [Date and Time] icon. The Date and Time Properties dialog box will
appear.
3. Select the [Time Zone] tab to verify that the correct time zone is set. To change the time
zone, select a new time zone from the pull-down list.
4. Select the [Date & Time] tab to verify the Current time zone and select [OK].
1-2 Printer & PC GUI Guide
Page 15
Xerox 490/980 Color Continuous Feed Printing System PC-GUI Introduction and Setup
Configure Network
1. Select the [My Network Places] icon on the Desktop, right-click and select [Properties]. The
Network Connections screen appears.
2. Select the [Local Area Connection] icon on the Network Connections screen, right-click on
it and select [Properties]. The Local Area Connection Properties dialog box appears.
3. Select [Internet Protocol (TCP/IP)] and select [Properties]. The Internet Protocol (TCP/IP)
Properties dialog box appears.
4. Select [Use the following IP address]. Fill in the IP address and Subnet mask and select
[Advanced....]. The Advanced TCP/IP Settings dialog box appears.
5. Select the [DNS] tab, select to clear Register this connection’s addresses in DNS and select
[OK]. The Advanced TCP/IP Settings dialog box closes.
6. Select [OK] in the Internet Protocol (TCP/IP) Properties dialog box and Local Area
Connection Properties dialog box. The network settings are now completed.
Install Software
1. Place the 490/980 Color Continuous Feed Printing System CD-ROM into the remote PC’s
CD-ROM drive.
2. Double-click [setup.exe]
3. Select [Next].
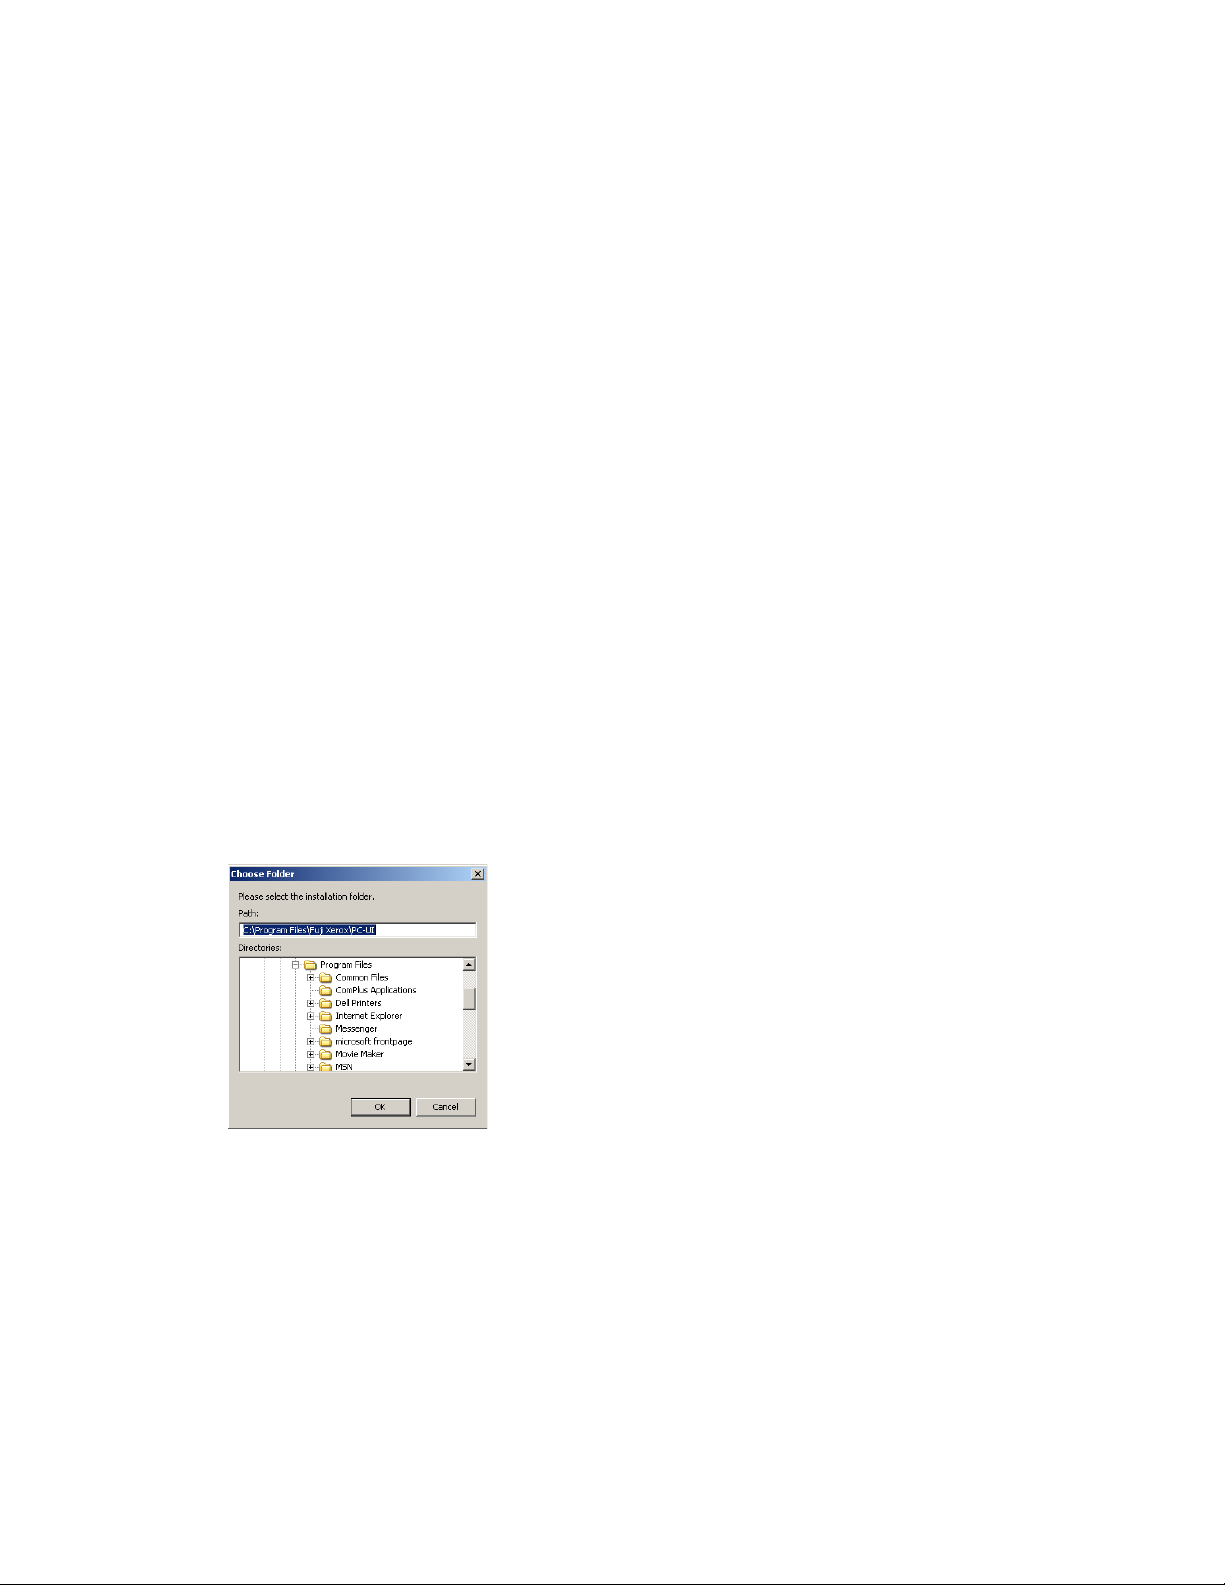
4. To reset the destination folder to the default [C:\], select [Next]. To install the software to a
folder other than the default, select [Browse...] to open a dialog box and specify a
destination folder. Select [Next].
5. Select a program folder to add program icons and select [Next]. The default program folder
is \Xerox.
6. Select [Next]. The installation process will begin.
7. The InstallShield wizard complete dialog will appear. Select [Finish].
When all of the requested operations are completed, remove the CD-ROM from the CD-ROM
drive. Keep the installation CD-ROM in a safe place. You may need it later to recover from errors
running the software or to upgrade it.
Printer & PC GUI Guide 1-3
Page 16

PC-GUI Introduction and Setup Xerox 490/980 Color Continuous Feed Printing System
Uninstall Software
Uninstall software by selecting [Start] and pointing to Settings. Choose [Control Panel] and
[Add/Remove Programs] dialog box. If you choose, you may also follow the following steps to
remove the software:
1. Place the 490/980 Color Continuous Feed Printing System CD-ROM into the remote PC’s
CD-ROM drive.
2. Double-click [setup.exe]
3. Select [Remove] and select [Next]. The Confirm Uninstall dialog box will appear.
4. Select [OK].
5. Select [Finish]. The software uninstallation process is now complete.
Connecting to the Printer
When the PC-GUI is accessed, the 490/980 Color Continuous Feed window will open. If the
printer has just been installed or the PC-GUI has been installed for the first time, select [Add] in
the Select Server to Connect dialog box.
Enter the following information to connect the printer:
• Host Name: Type the network host name assigned to your printer. Any host name can be
specified if the PC-GUI is not managed by a DNS server.
• IP Address: Type the IP address (for example, 192.168.10.1) assigned to your printer.
• GUI Port: The PC-GUI and the printer communicate by transferring packets to each other
on a TCP/IP socket connection. Set a port number that is assigned to achieve this
communication.
• Console Port: Set a port to which the printer will transmit messages to display on the
console.
• Register: Select this option to register the connection settings.
• Cancel: Select this option to cancel the connection settings and close the dialog box.
1-4 Printer & PC GUI Guide
Page 17
Xerox 490/980 Color Continuous Feed Printing System PC-GUI Introduction and Setup
PC-GUI Menu
The menu bar of the PC-GUI window allows you to enter general system settings, including your
logon level and security management. These options are located on pull-down menus from the
menu bar. The following is a summary of these menu options:
Menu Summary
System Contains action items, such as changing logon level and shutting down the system.
Setting Contains action items pertaining to the system configuration, gateway, security, etc.
Tools Handles log information, test jobs, etc. Test Job is a menu choice available only to
Xerox service personnel technical experts and is normally not user-serviceable.
Help Displays version information.
Icons
The following icons are located on the PC-GUI. The name of each icon and a description are
listed below:
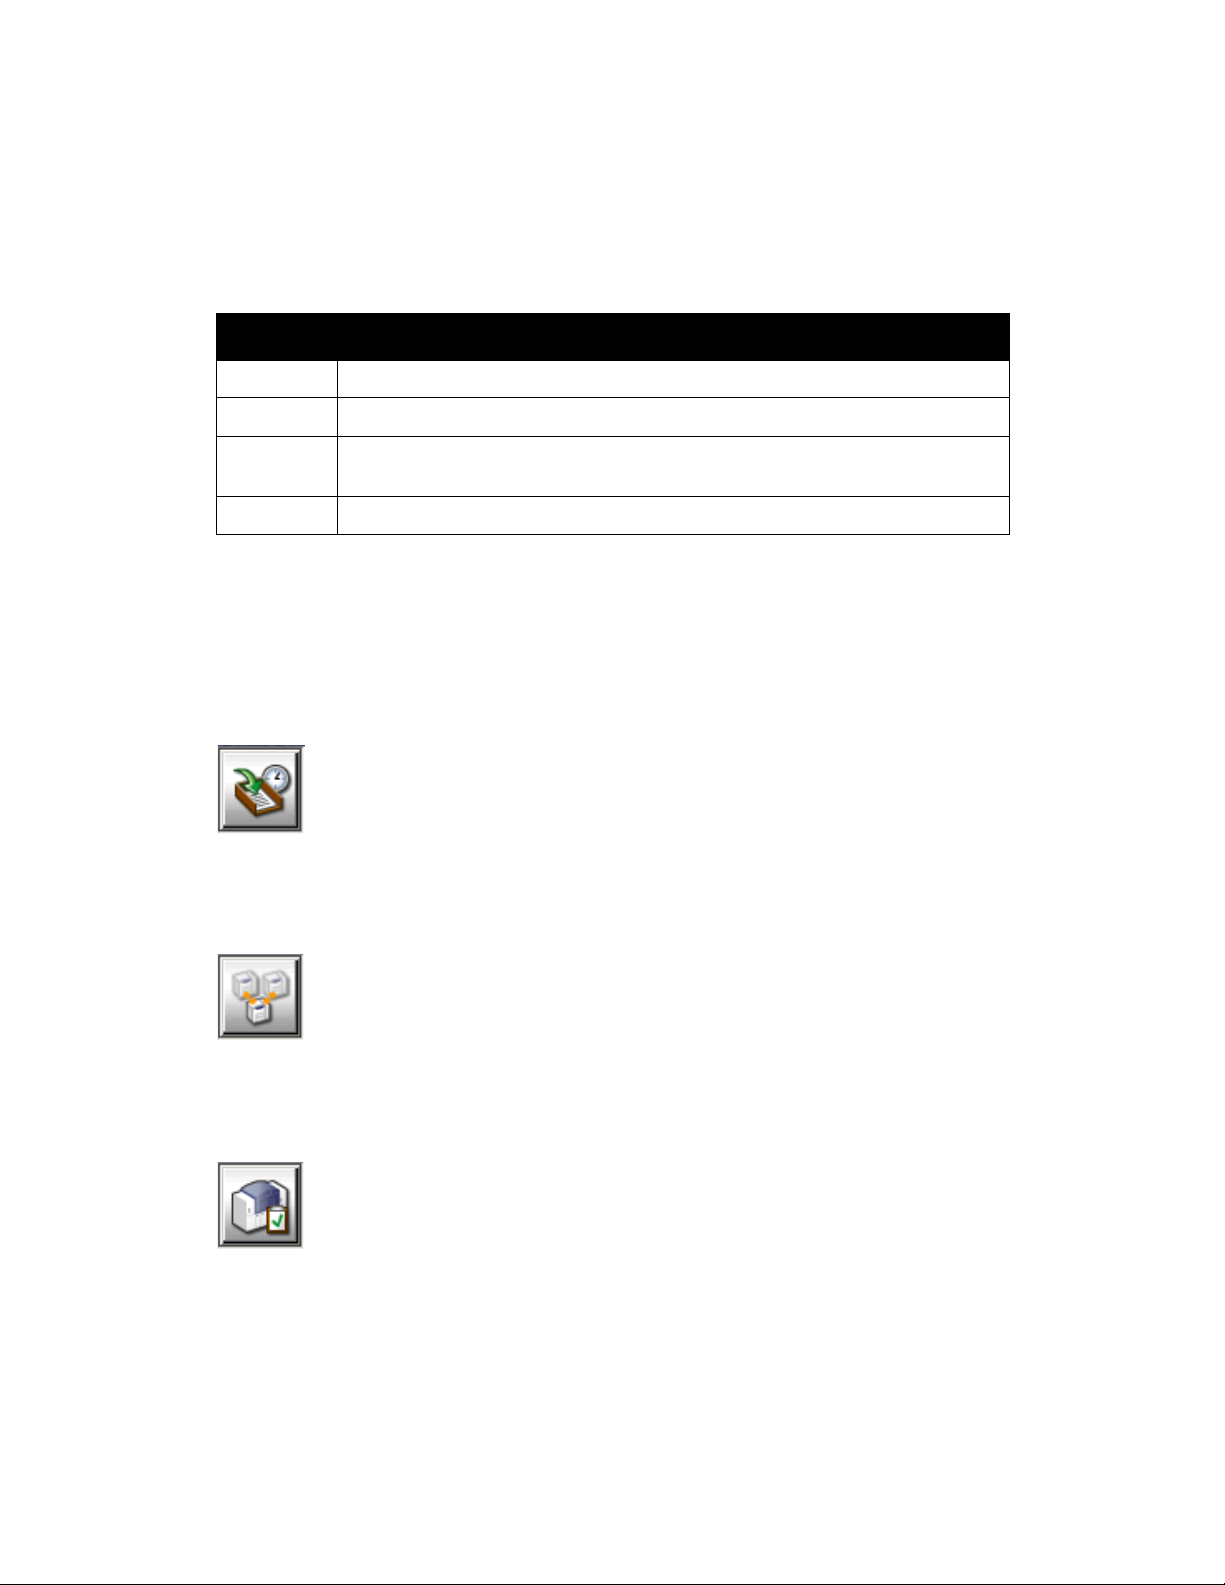
Job management icon
Manages the status of a job, such as active or held jobs.
Queue management icon
Manages the creation, modification, deletion and other aspects of a queue.
Printer management icon
Manages the image quality adjustment of the printer.
Printer & PC GUI Guide 1-5
Page 18

PC-GUI Introduction and Setup Xerox 490/980 Color Continuous Feed Printing System
Resource management icon
Manages the import, registration, deletion and other aspects of a resource file.
System Menu
The System menu allows you to change your logon level, stop the PC-GUI, shut down the
system and other operations of the system.
Some functions of the System menu are not available depending on the logon level.These
unavailable menu choices will be grayed and will not be selectable. These restrictions are
depicted in the following chart.
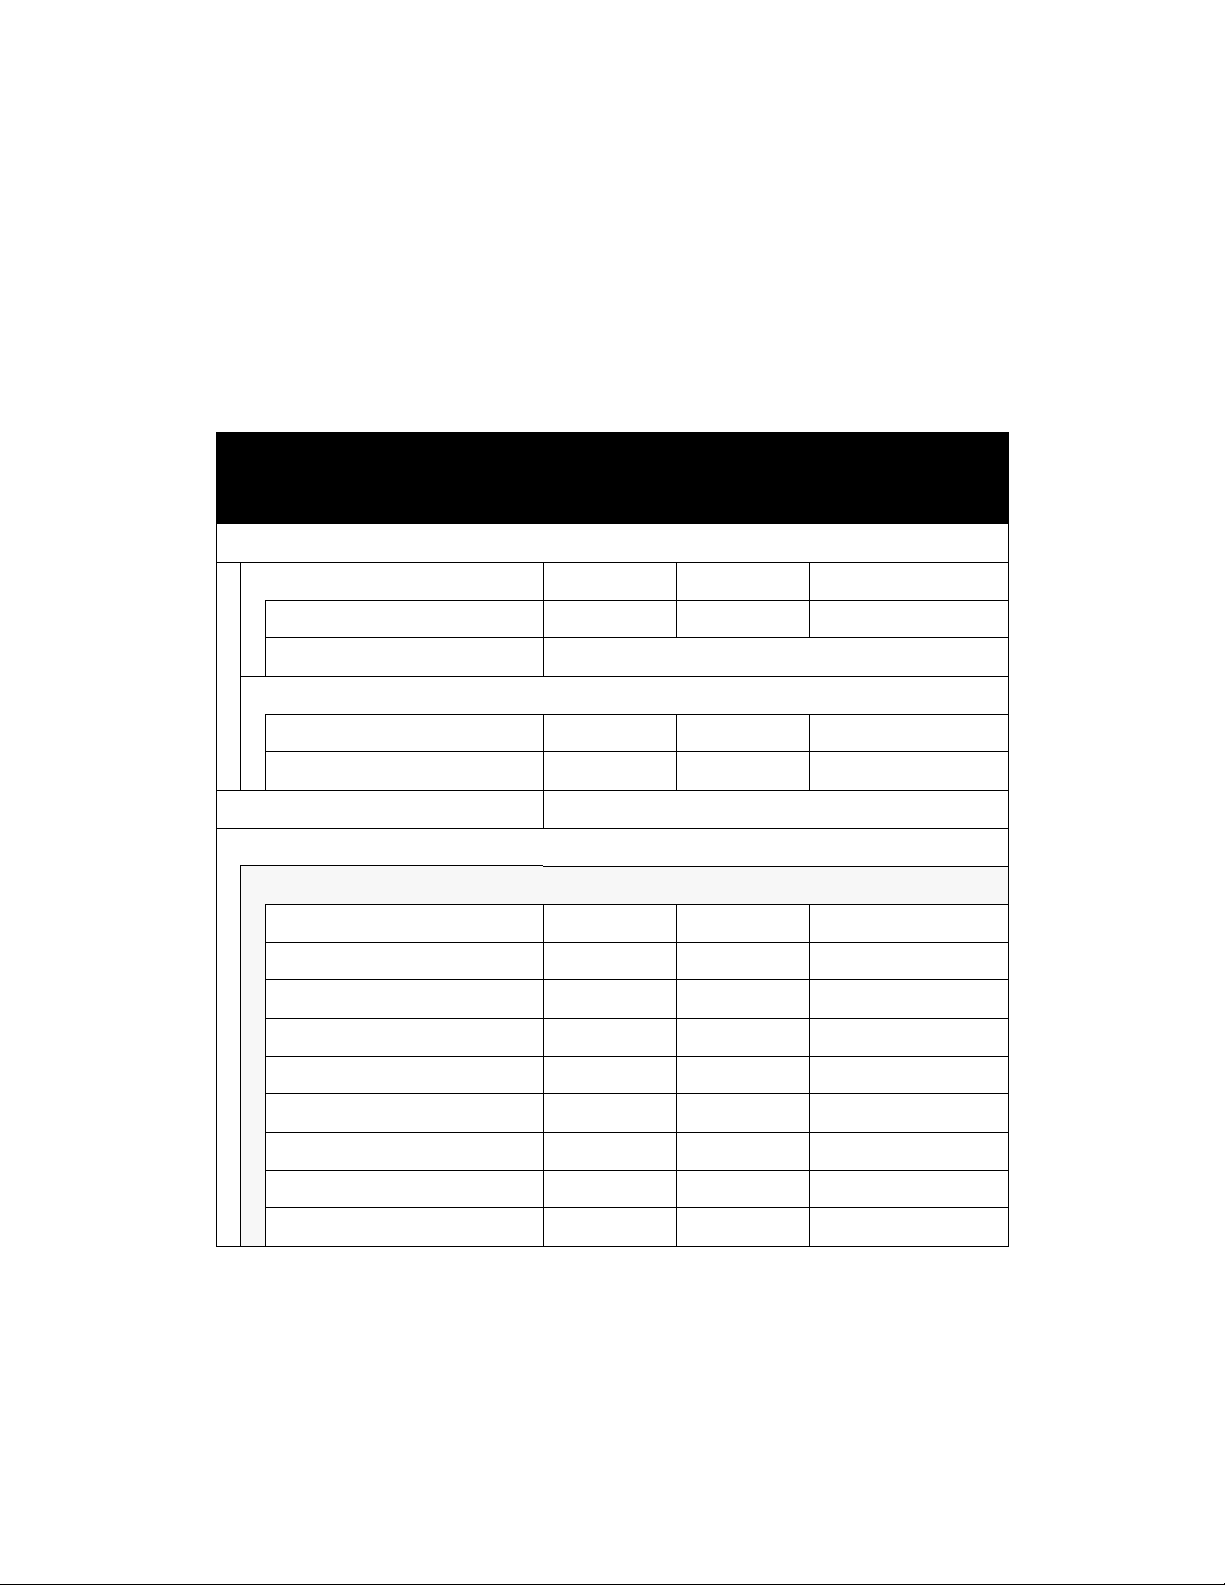
Logon level
Menu choice
End User Operator System Administrator
Changing Logon User... Yes Yes Yes
End Yes Yes Yes
Online Management Not supported by this version.
Tape Client Not supported by this version.
Co ns o le .. . Ye s Ye s Ye s
Reset Job ID No No Yes
Service Mode... Yes Yes Yes
Shut Down No Yes Yes
Forced Shut Down No Yes Yes
1-6 Printer & PC GUI Guide
Page 19
Xerox 490/980 Color Continuous Feed Printing System PC-GUI Introduction and Setup
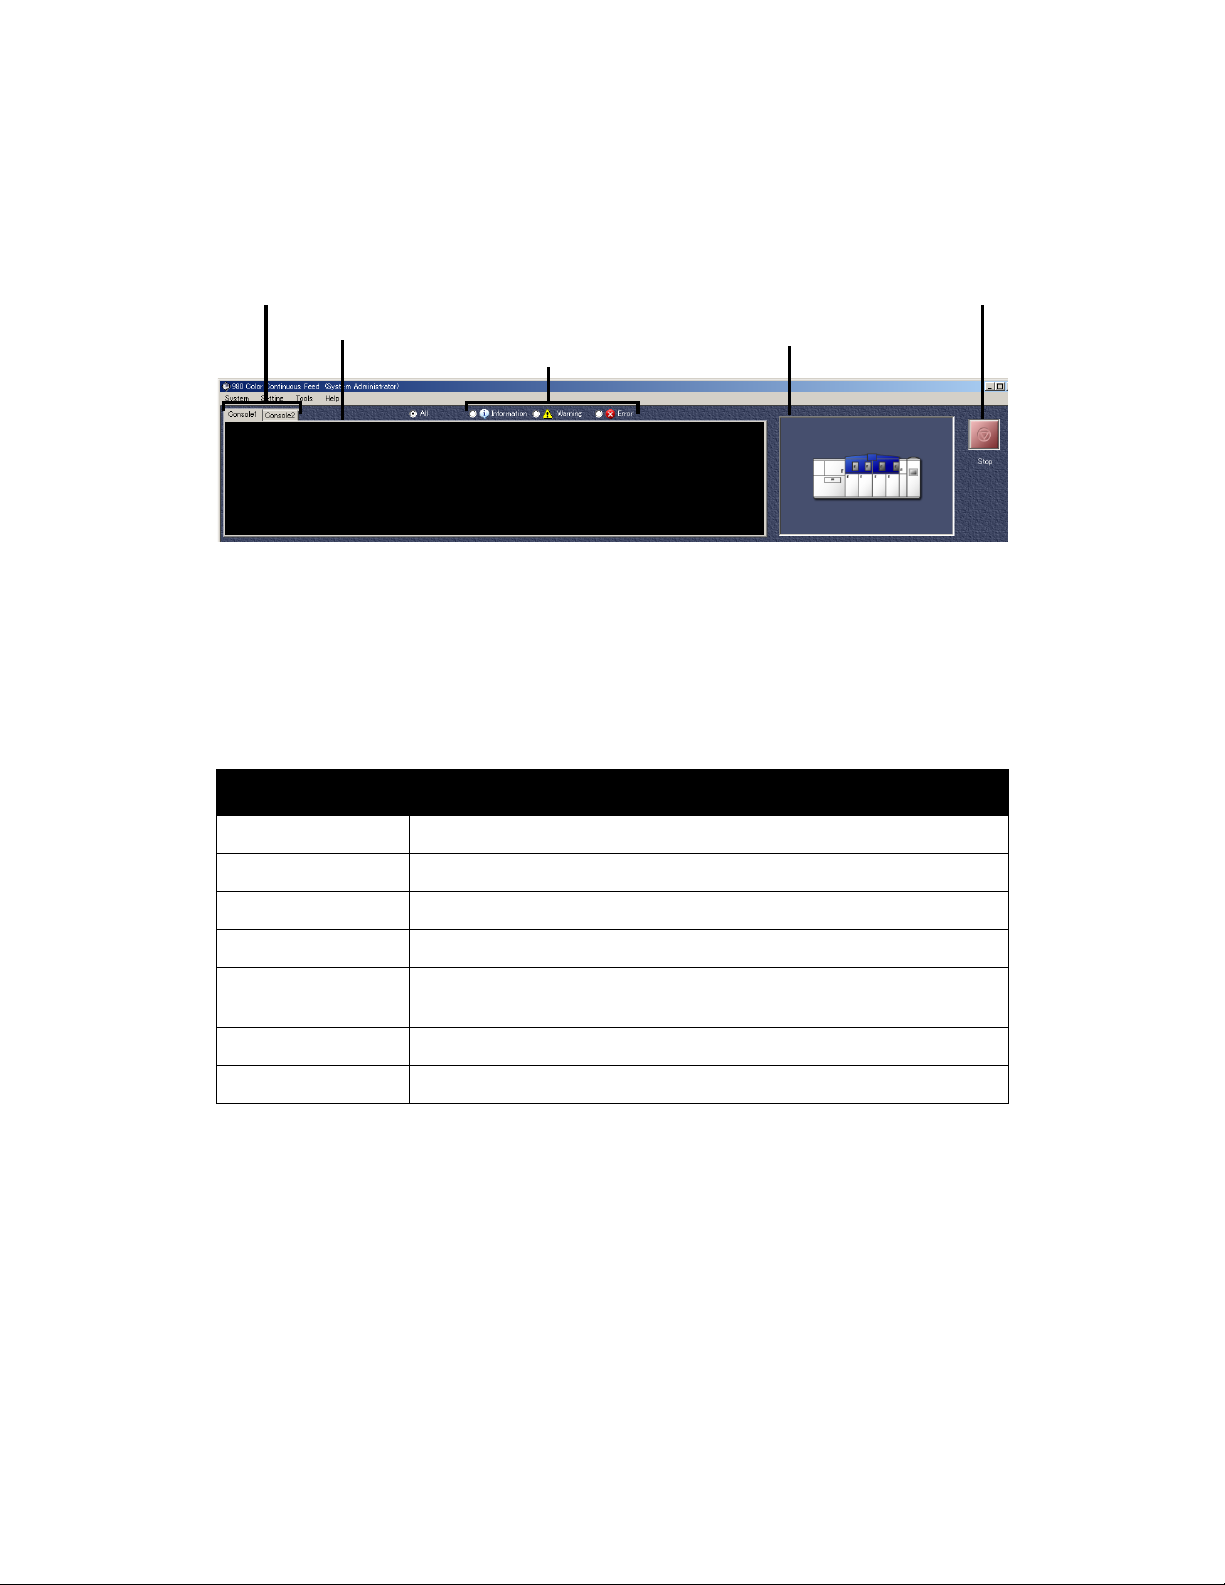
Status Window
The Printer Status window will appear on the PC-GUI window and will display similar to the
following:
Console tab
Message area Printer icon
Displayed contents selection area
Printer start/stop button
Console tab
Console1 tab: Displays the messages from the upstream printer
Console2 tab: Displays the messages from the downstream printer
Message area
Name Meaning
Date information The date information is displayed in YYYY/MM/DD format.
Time information The time information is displayed in HH:MM:SS format.
System name The system name of the task that outputs the message is displayed.
Task name The task identifier that outputs the message is displayed.
Service name The service name of the task that outputs the message is displayed. The
displayed service name is either SYSTEM or the IP address.
Message No. The message number is displayed.
Message Messages are displayed.
Displayed Contents Selection
The type of messages to be displayed in the message area can be chosen. Up to 1,000 lines of
messages can be held.
• All: Displays all of the messages.
• Information: Displays only information messages.
• Warning: Displays only warning messages.
• Error: Displays only error messages.
Printer & PC GUI Guide 1-7
Page 20
PC-GUI Introduction and Setup Xerox 490/980 Color Continuous Feed Printing System
Printer icon
The printer icon designates the printer status in a combination of an icon and animation. When
a fault occurs in the printer, the printer icon is superimposed with one of the following icons as
appropriate.
An error, such as paper out or a paper jam, has occurred in the printer.
A warning related to consumable.
Printer start/stop
The Printer start/stop option pauses and resumes a print job. Each click on the button toggles
between the two functions, with its display being changed accordingly to the start/stop button.
Select this button to pause the print job.
Select this button to resume the print job.
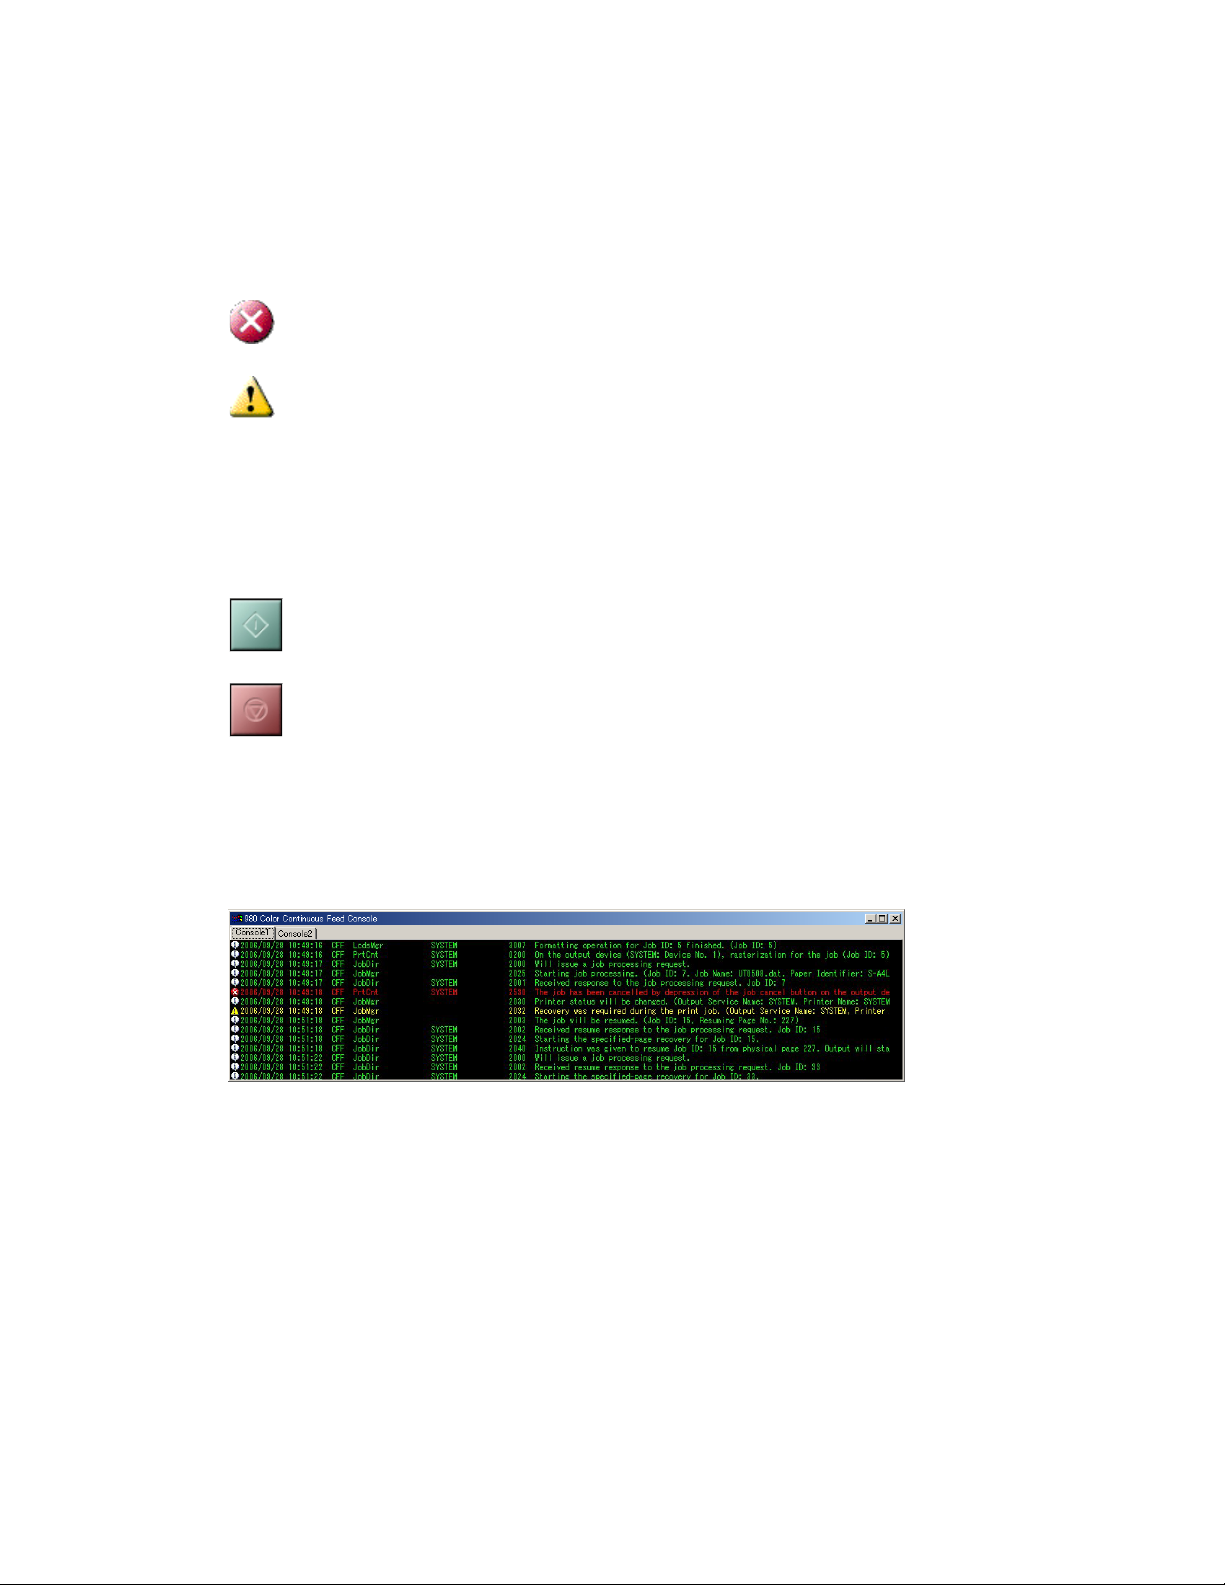
Console Window
You can view print job messages on the console screen. When printer errors occur, search
through this screen to identify the error.
Print job messages that are displayed are erased when the controller software reboots. To close
the console, select the [x] in the upper right corner of the console screen.
1-8 Printer & PC GUI Guide
Page 21
Xerox 490/980 Color Continuous Feed Printing System PC-GUI Introduction and Setup
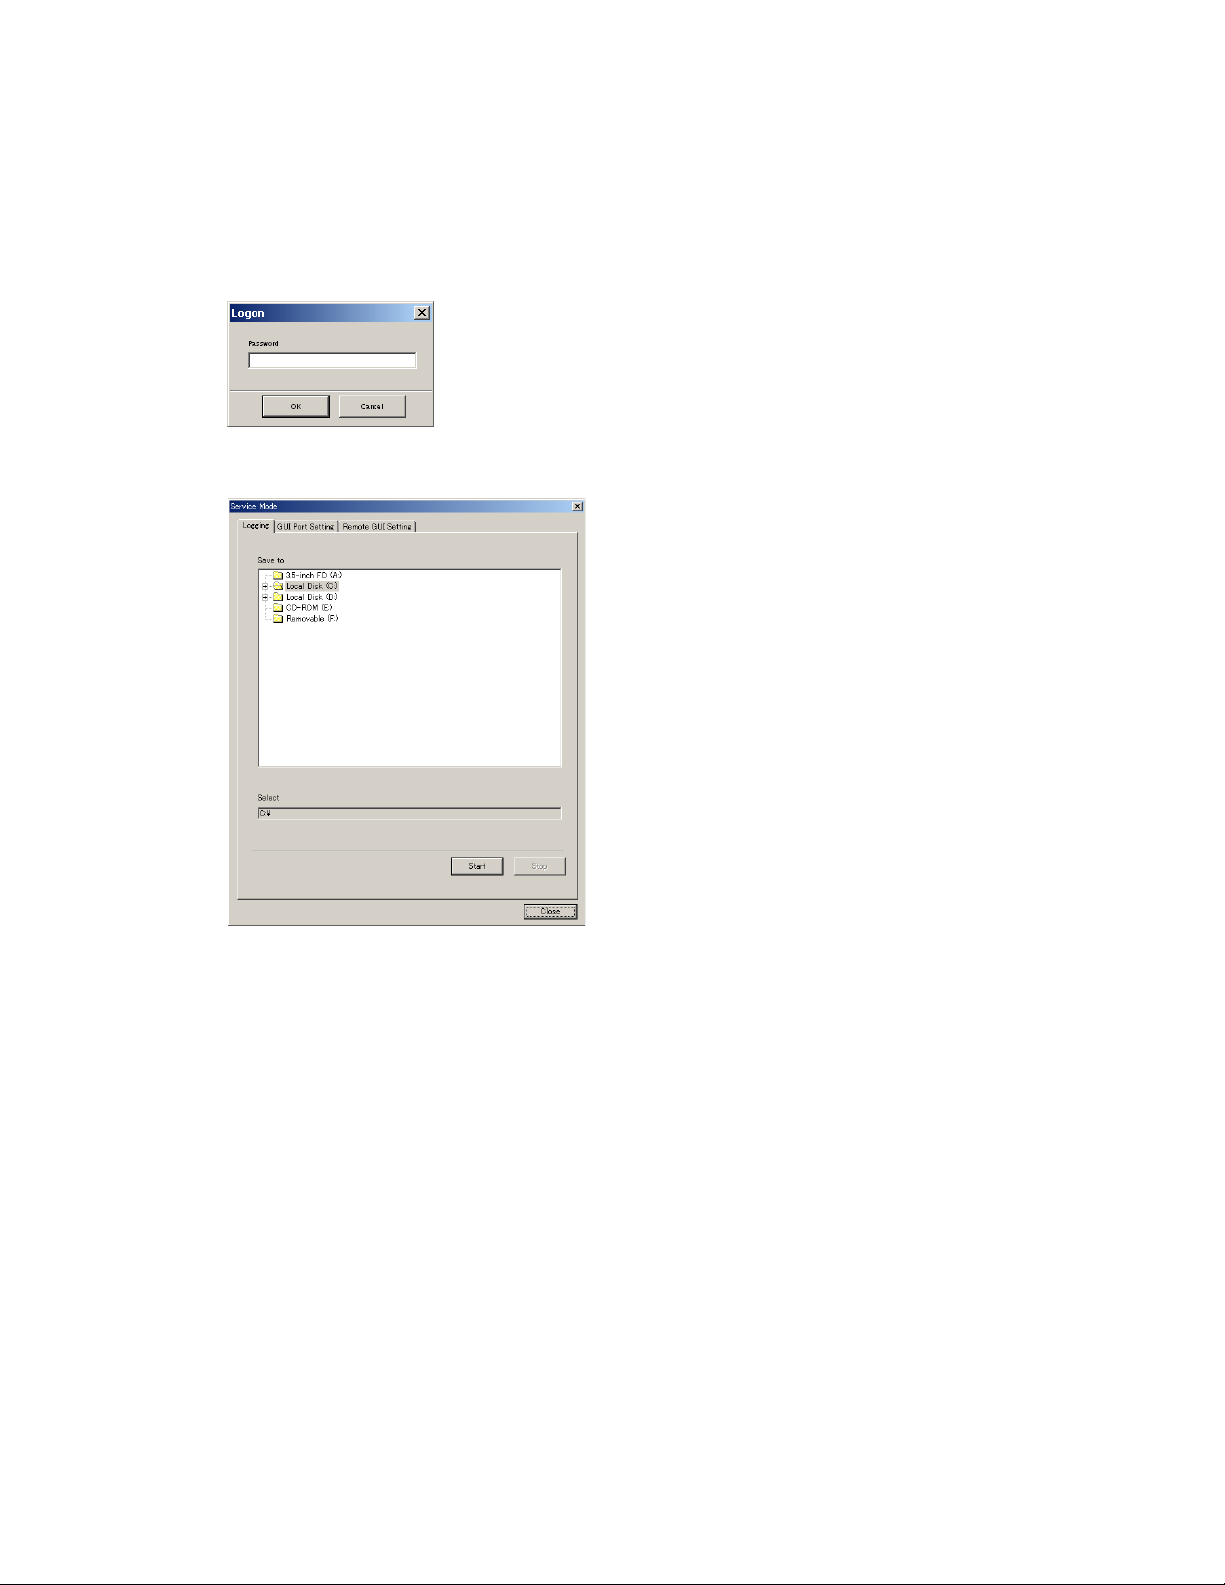
Service Mode
Select the Service Mode allows you to view controller information, collect logs and other service
related functions. From the System menu, select [Service Mode....] to open the Logon dialog
box.
Type the correct password, the Service Mode dialog box will appear.
Check with your Xerox customer service representative for the password needed to invoke
Service Mode. To close the Service Mode dialog box, select the [x] in the upper right corner of
the console screen or select [Close].
Logging tab
Select [Start] in the Service Mode dialog box to start logging trace information and save it to
the location specified by the Save To destination. On a duplex configuration, the upstream and
downstream logs are automatically collected.
• Save to: The log can be saved to any drive that is connected to the remote PC. Remember
the name of the drive before saving the log to a hard disk drive that is attached to the
remote PC.
• Start: Select [Start] to start logging to the selected folder.
• Stop: Select [Cancel] to cancel logging after it has started. Logging is canceled and the
processing will stop.
• Close: Select [Close] to exit the operation and close the dialog box.
Printer & PC GUI Guide 1-9
Page 22
PC-GUI Introduction and Setup Xerox 490/980 Color Continuous Feed Printing System
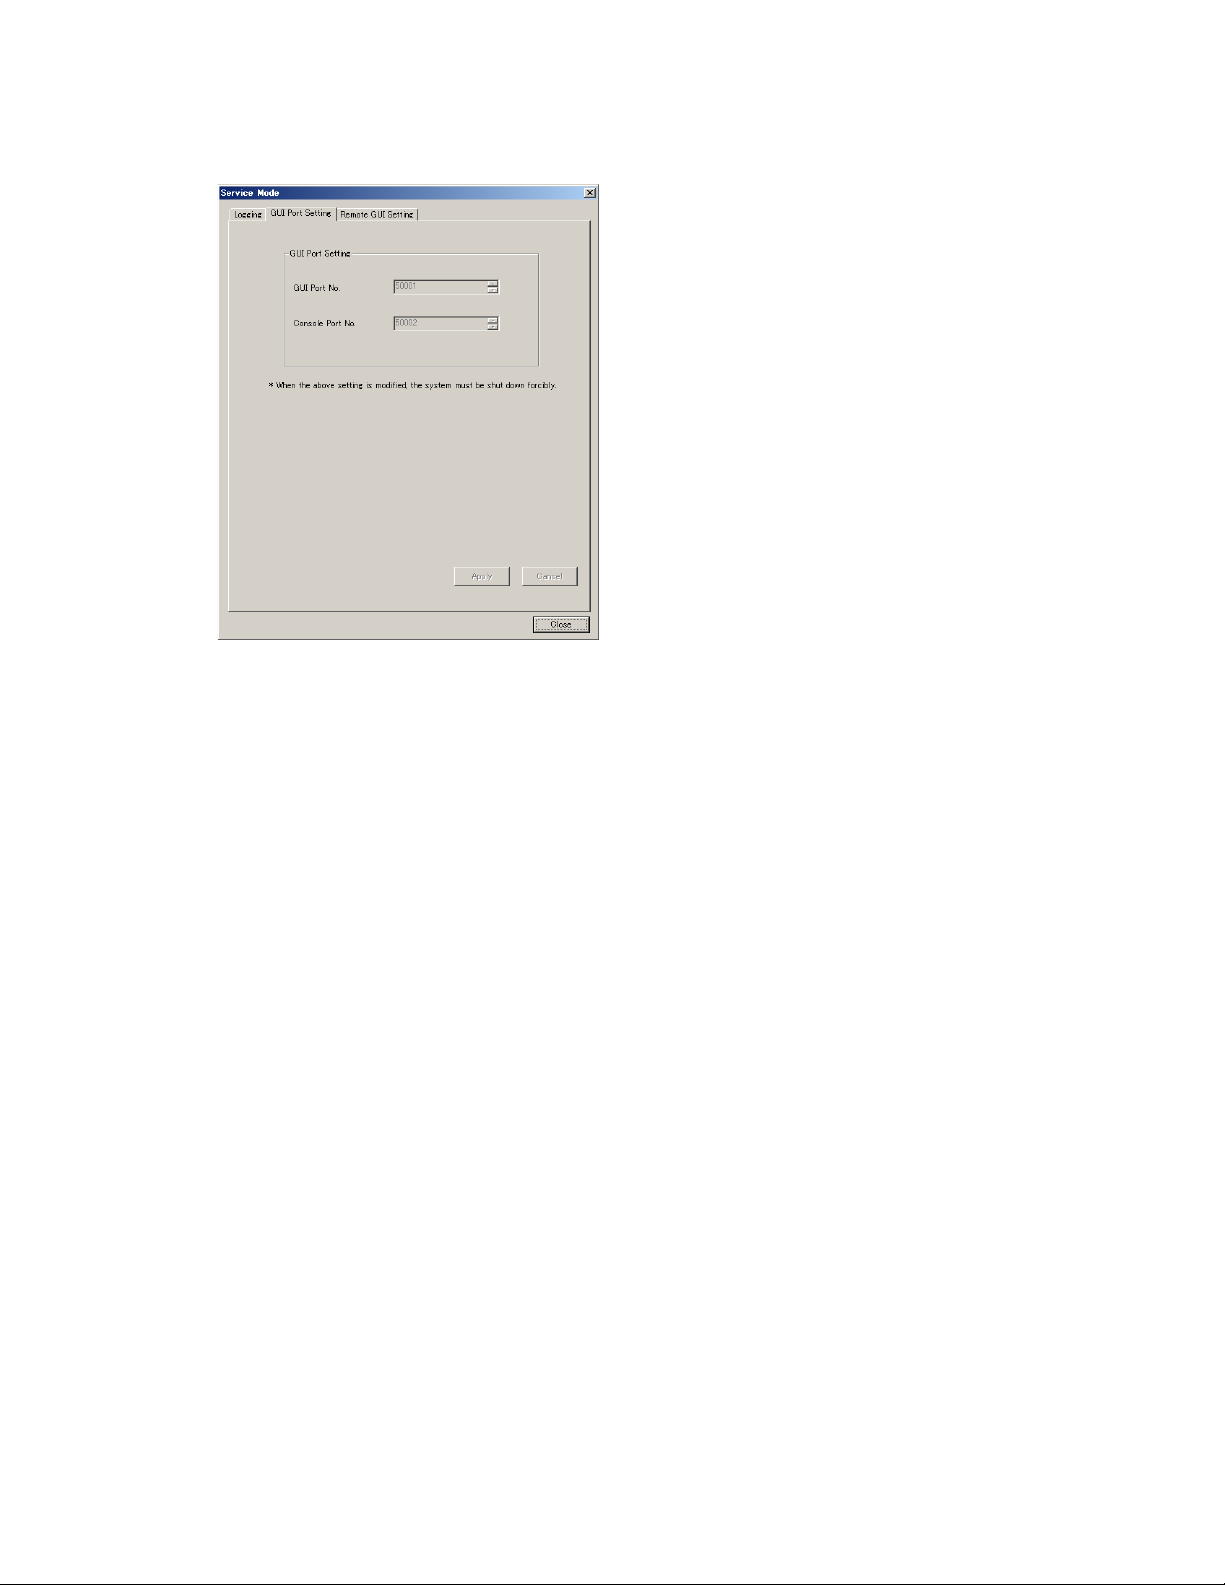
GUI Port Setting tab
• GUI Port No.: Set the GUI port number in the dialog box where the PC-GUI destination is
added or edited.
• Console Port No.: Set the console port number in the dialog box where the PC-GUI
destination is added or edited.
• Cancel: Select [Cancel] to initialize the port number lists to their defaults.
1-10 Printer & PC GUI Guide
Page 23
Xerox 490/980 Color Continuous Feed Printing System PC-GUI Introduction and Setup
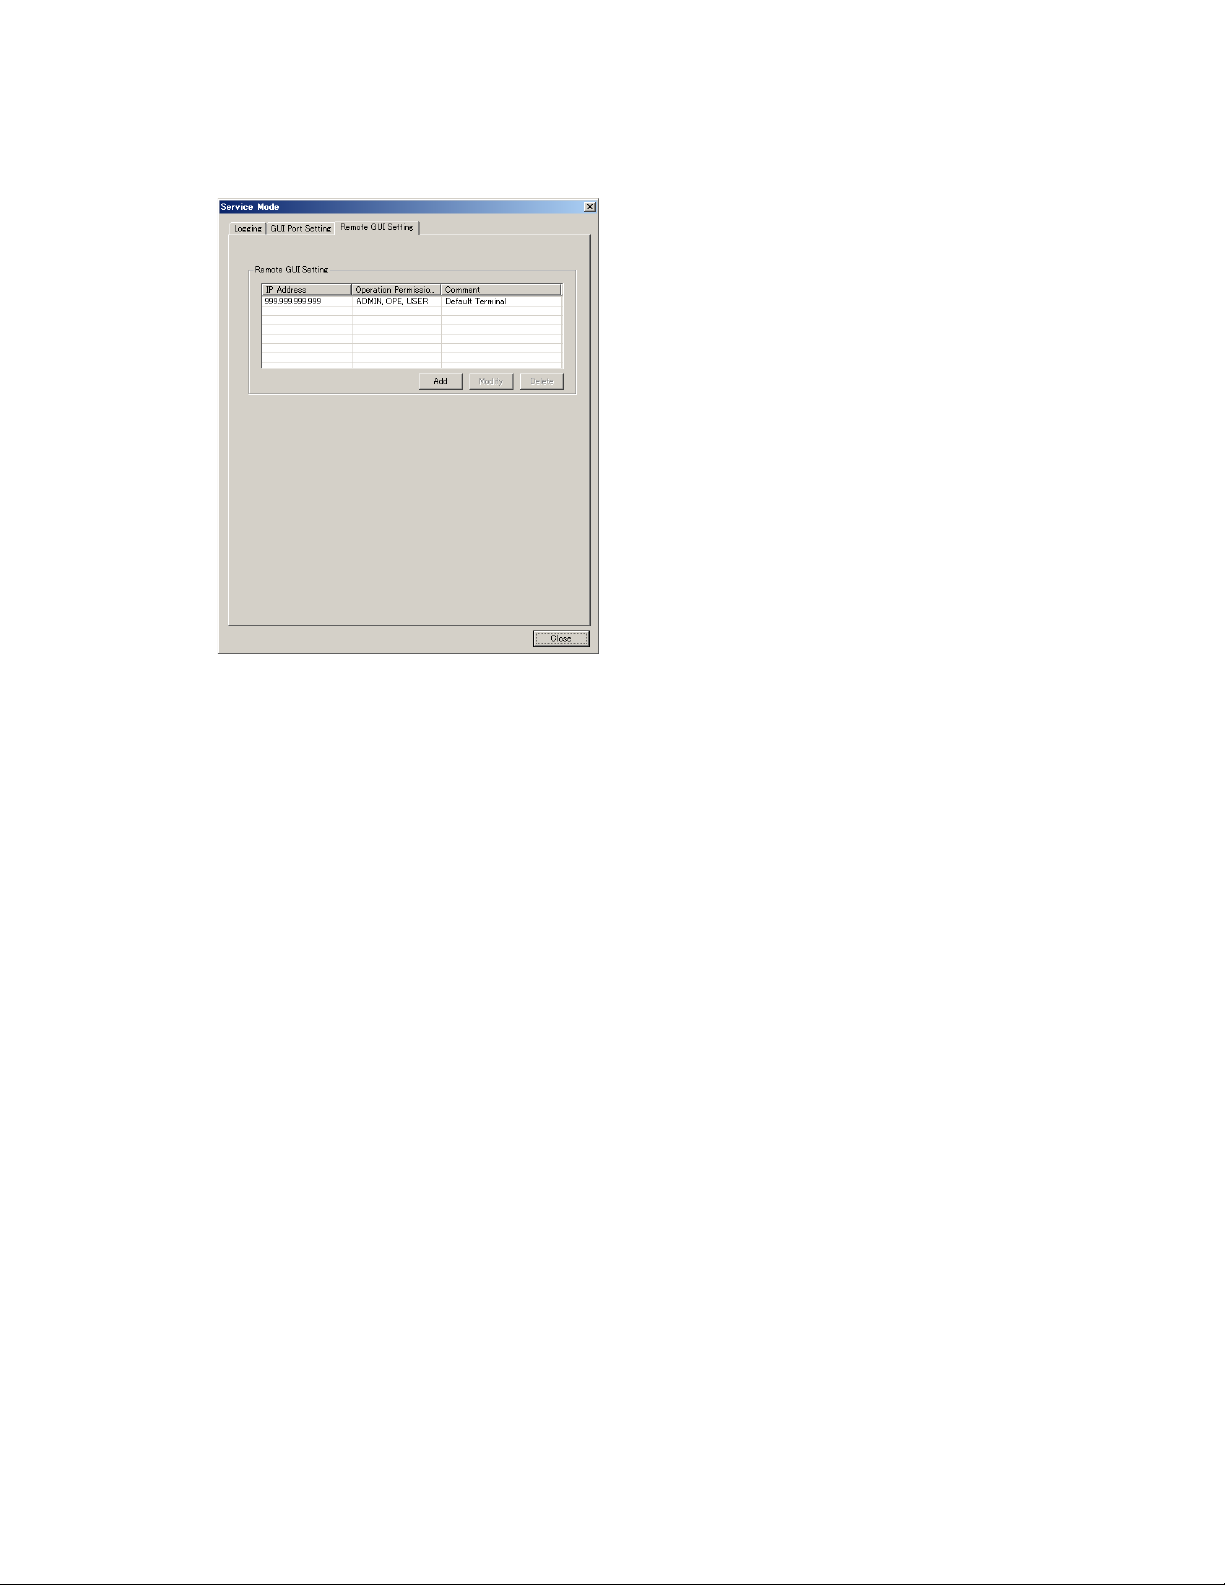
Remote GUI Setting tab
• IP Address: Displays the IP address of the PC-GUI connected to the network.
• Operation Permission Level: Displays the logon level of the PC-GUI connected to the
network.
• ADMIN: System Administrator
•OPE: Operator
•USER: End User
• Comment: Displays a comment that has been typed into the Remote GUI Information
dialog box.
• Add: Select [Add] to open the Add Remote GUI Information dialog box.
Printer & PC GUI Guide 1-11
Page 24
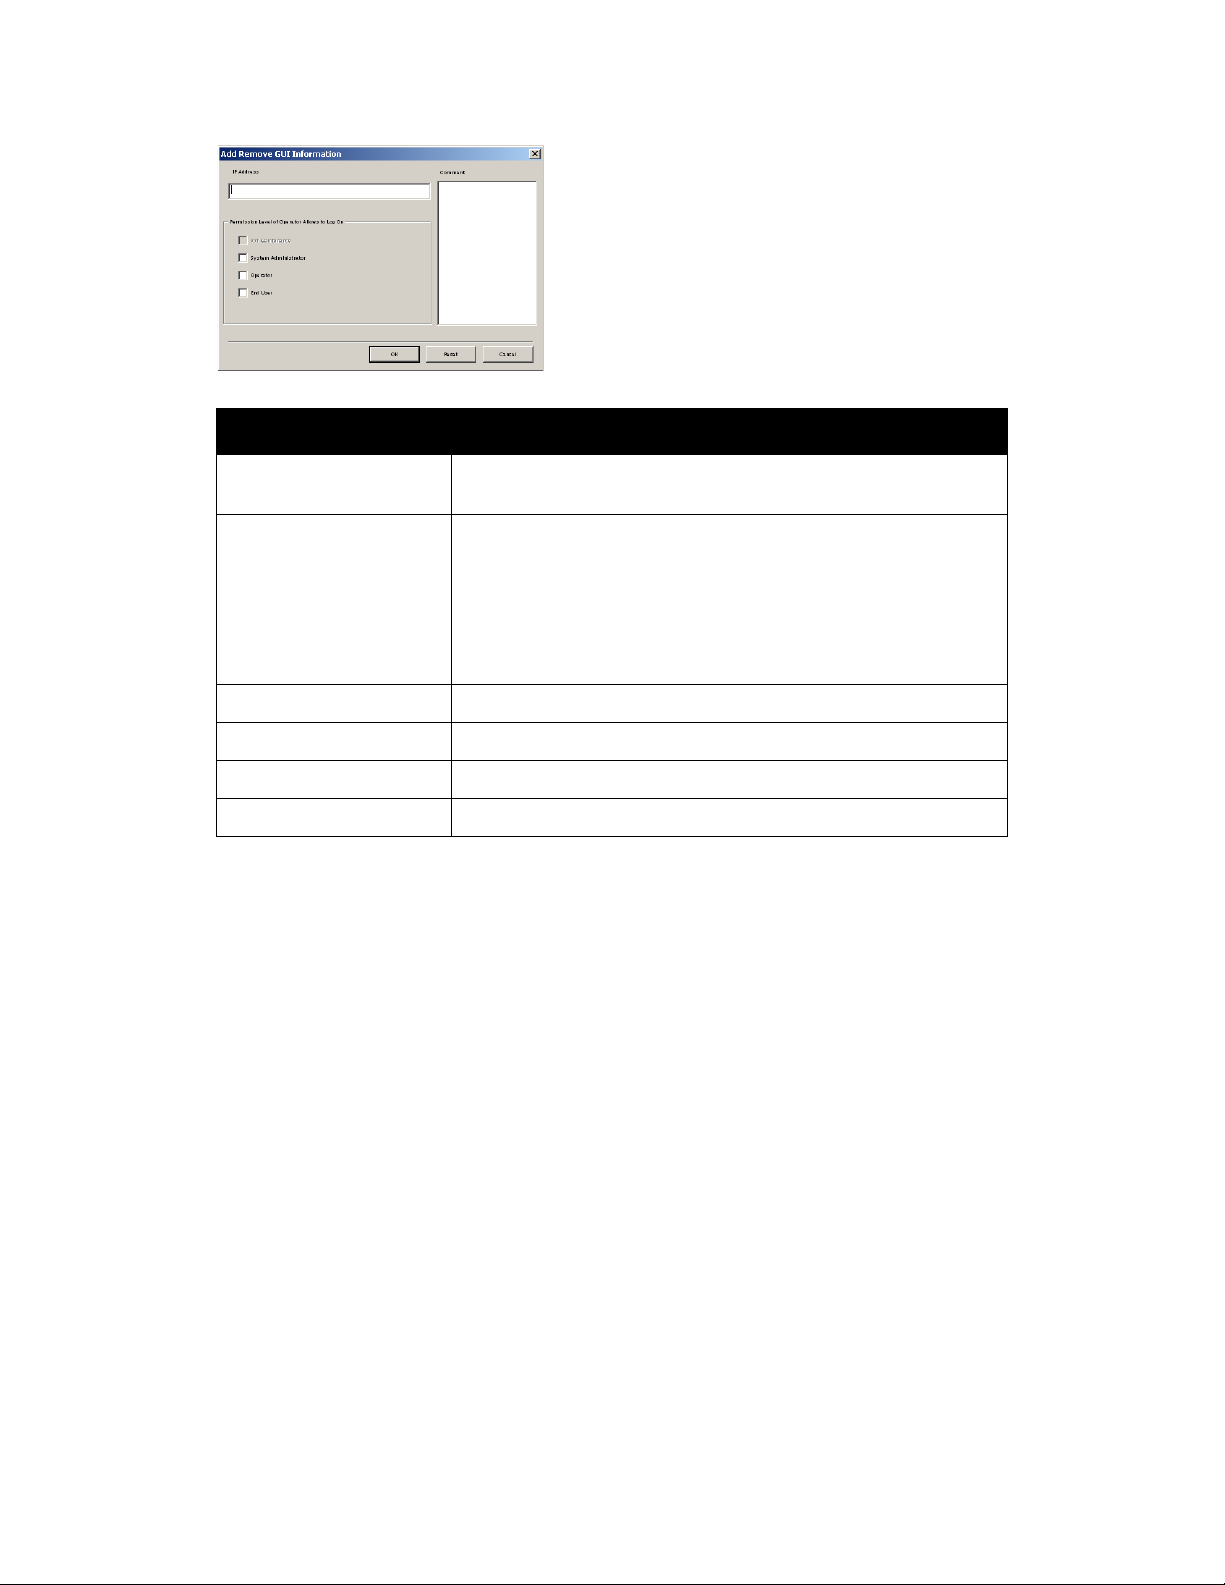
PC-GUI Introduction and Setup Xerox 490/980 Color Continuous Feed Printing System
Display element Function
IP Address Shows the IP address of the PC-GUI permitted to connect to the
network.
Permission Level of
Operator Allowed to Log On
Comment You can type a comment.
OK Select to apply changes.
Reset Select to reset changes.
Cancel Select to close the dialog box.
[System Administrator]
Permitted to execute all functions.
[Operator]
Permitted to execute all the functions of a system administrator, except
for resetting job IDs, setting screens, controlling logs.
[End User]
Not permitted to handle jobs, queues, resources and so on.
• Modify: Select [Modify] to edit the permission level and enter a comment. Select a target
GUI from the remote GUI setting list and select [Modify].
• Delete: Select to delete the PC-GUI.
• Close: Select to exit the operation and close the dialog box.
Shut Down
You can shut down your printer from the PC-GUI.
•From the System menu, select [Shut Down]. The printer cannot shut down when there are
active jobs present.
• A pop-up appears on the printer touch screen to report the shutdown status.
If the input process mode is Spool, the job being processed will be held forcibly at the next
startup of the system.
1-12 Printer & PC GUI Guide
Page 25
Xerox 490/980 Color Continuous Feed Printing System PC-GUI Introduction and Setup
Setting Menu
The setting menu allows you to set the display elements of the system configuration, including
setting security options.
Restricted setting menu functions
Some functions of the setting menu are not available depending on the logon level of the user.
These unavailable menu choices are grayed and are not selectable.
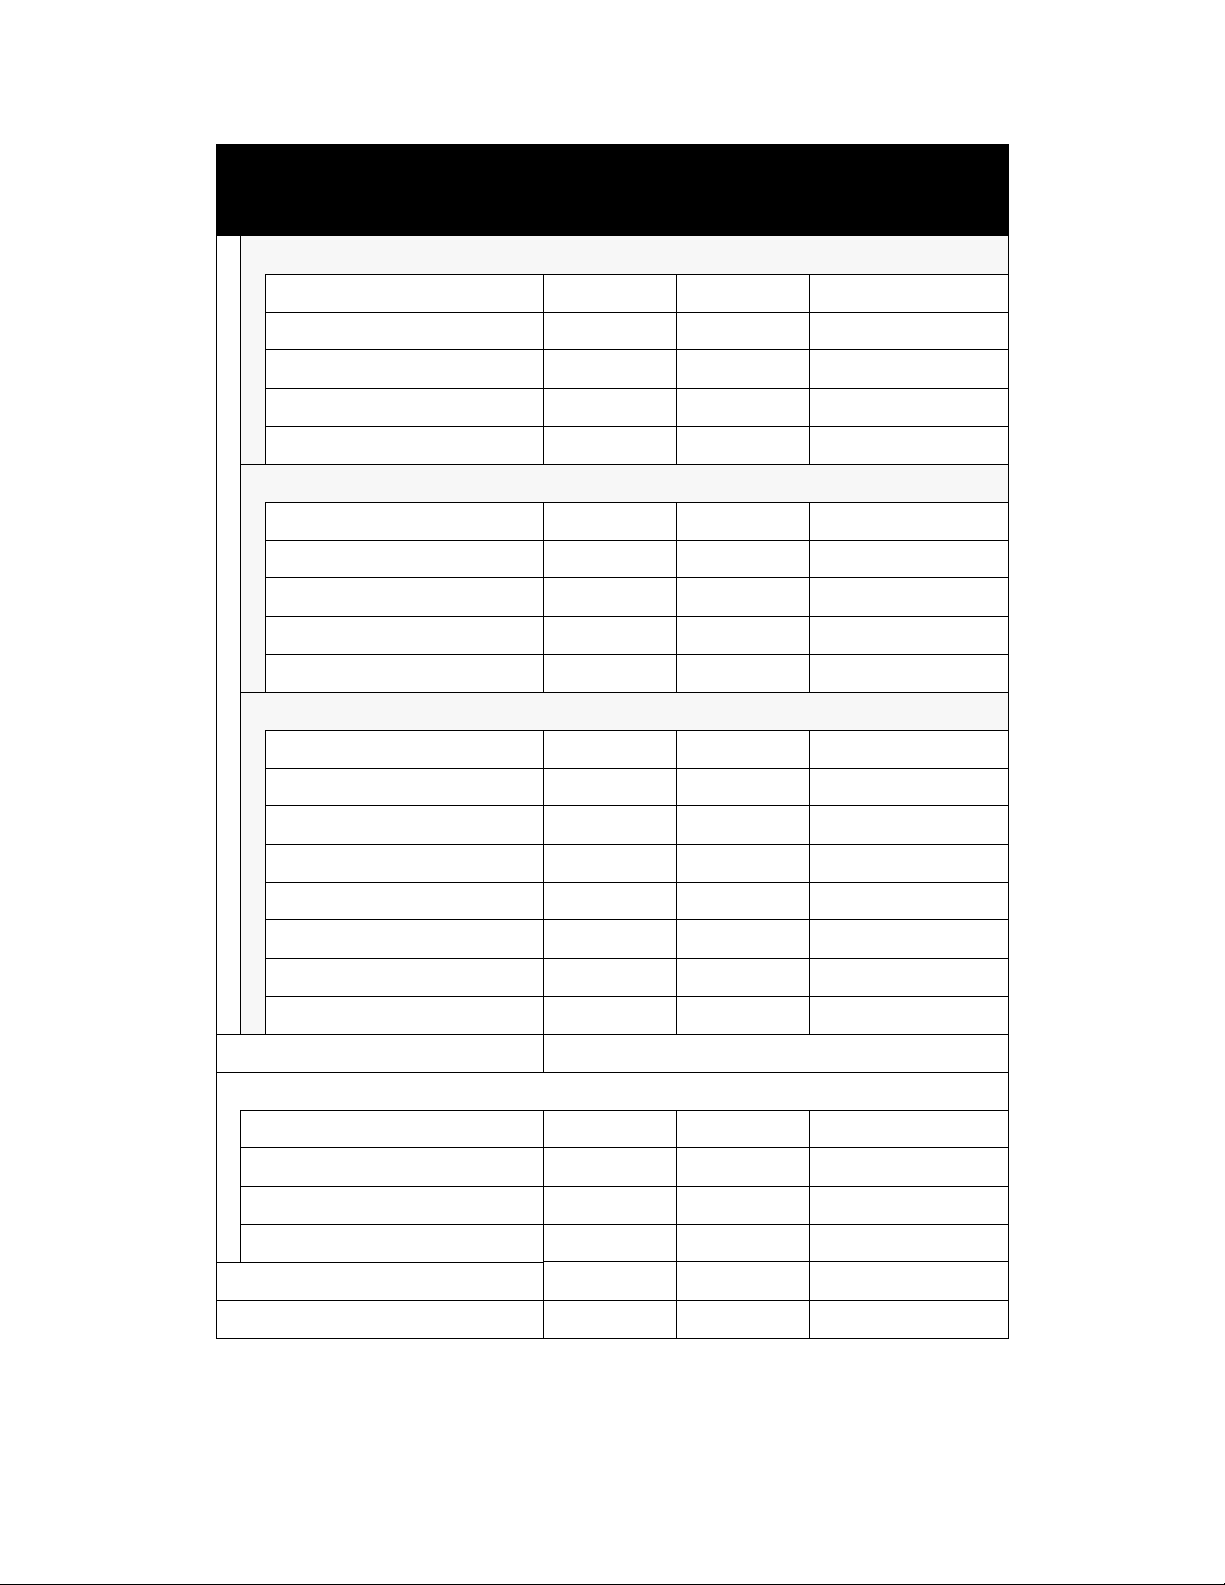
Logon level
Menu choice
End User Operator System Administrator
System Configuration
S of tw ar e Ye s Ye s Ye s
(Information display) Yes Yes Yes
Install Not supported by this version.
Definition File
Backup No No Yes
Restore NoNoYes
License Management Not supported by this version.
Gateway
FTP
FTP Server Start/Stop No Yes Yes
Authorized Client No Yes Yes
Authorized Client Add No Yes Yes
Authorized Client Modify No Yes Yes
Authorized Client Delete No Yes Yes
Authorized User No Yes Yes
Authorized User Add No Yes Yes
Authorized User Modify No Yes Yes
Authorized User Delete No Yes Yes
Printer & PC GUI Guide 1-13
Page 26
PC-GUI Introduction and Setup Xerox 490/980 Color Continuous Feed Printing System
Logon level
Menu choice
End User Operator System Administrator
LPR
LPR Server Start/Stop No Yes Yes
Authorized Client No Yes Yes
Authorized Client Add No Yes Yes
Authorized Client Modify No Yes Yes
Authorized Client Delete No Yes Yes
IPDS Server Setting
IPDS Input Start/Stop No Yes Yes
Authorized Client No Yes Yes
Authorized Client Add No Yes Yes
Authorized Client Modify No Yes Yes
Authorized Client Delete No Yes Yes
IPDS] Attachment
IPDS Attachment No Yes Yes
Attachment Information No Yes Yes
Attachment Information Add No Yes Yes
Attachment Information Modify No Yes Yes
Attachment Information Delete No Yes Yes
Attachment Information Browse No Yes Yes
Attachment Information Select No Yes Yes
Status Eject No Yes Yes
Site Setting... Not supported by this version.
Security Management...
User List No Yes Yes
User Add No Yes Yes
User Modify No Yes Yes
User Delete No Yes Yes
Refresh Rate... No Yes Yes
Screen Setting... No Yes Yes
1-14 Printer & PC GUI Guide
Page 27
Xerox 490/980 Color Continuous Feed Printing System PC-GUI Introduction and Setup
Refresh Rate
You can set the interval of time that information appears in the console screen before it is
refreshed. Refreshed information includes print status, such as Receiving Data and Printing
Completed.
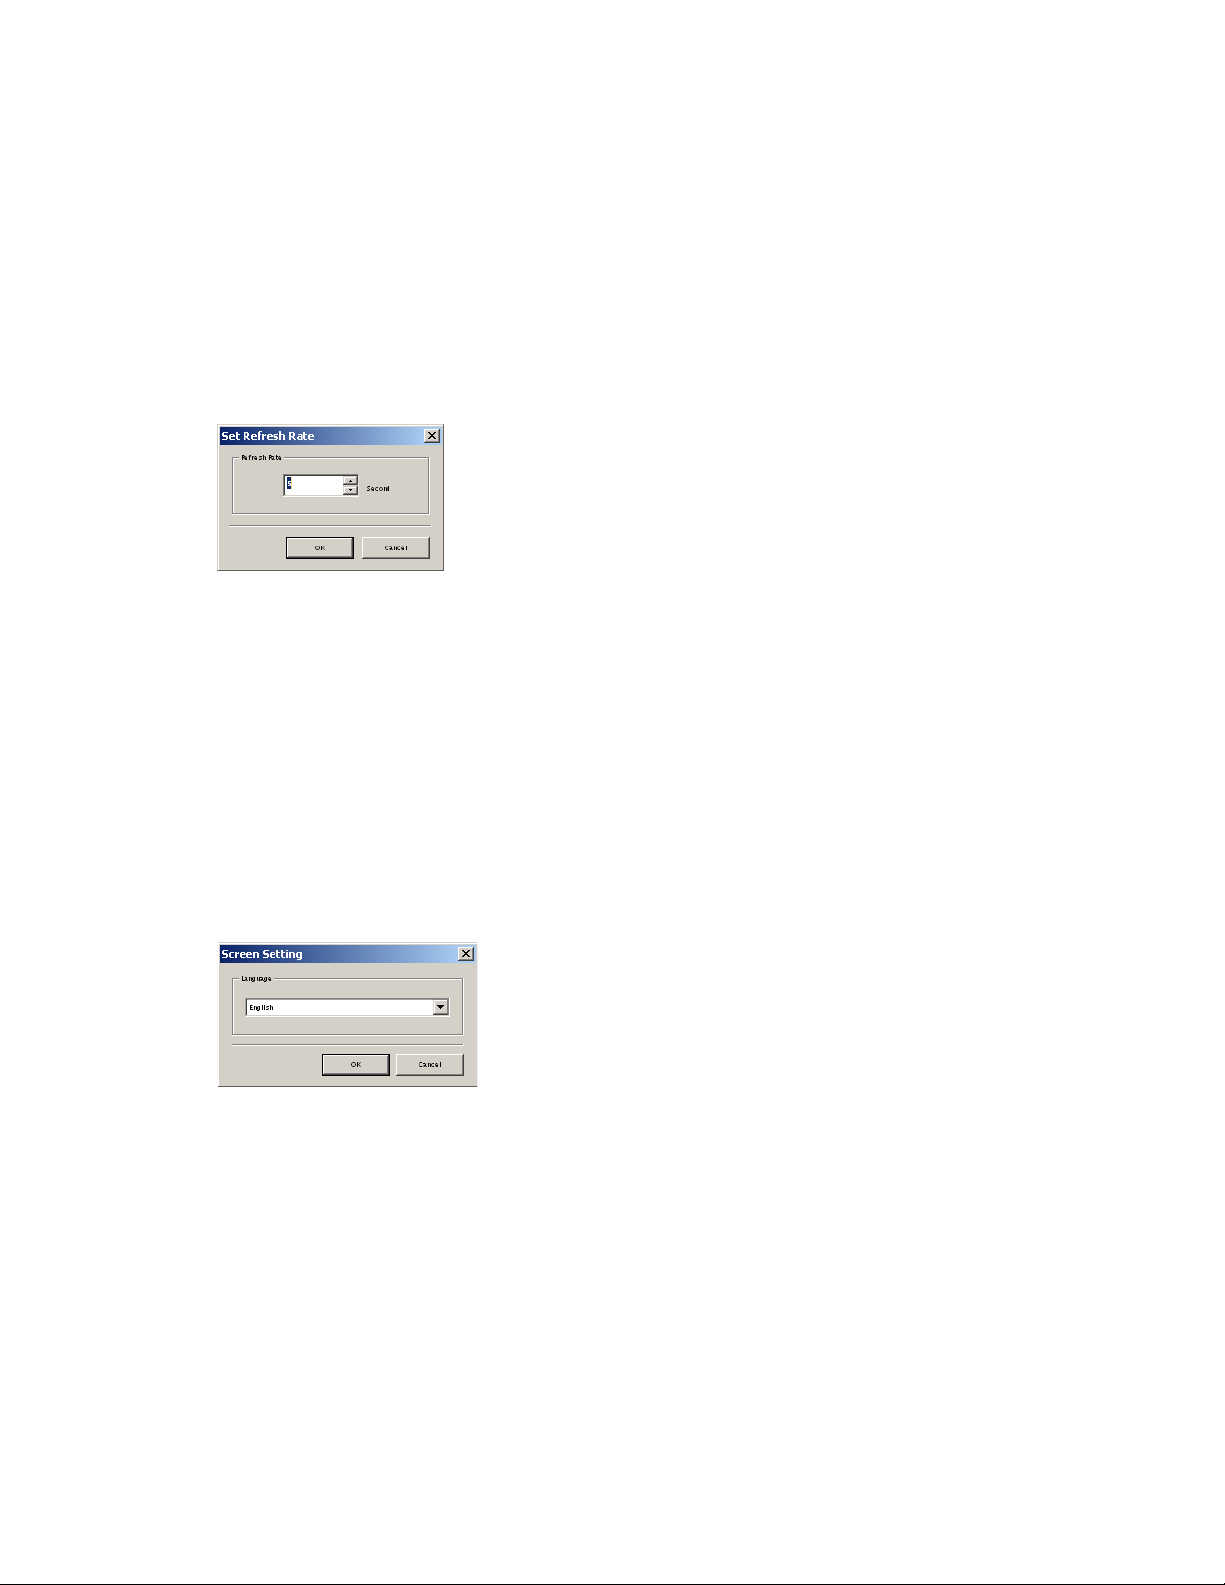
Setting a refresh rate
Select [Refresh Rate...] from the Setting menu to open the Set Refresh Rate dialog box.
Refresh Rate: The interval of time that on-screen information is refreshed can be set between 0
and 60 seconds. The default is 5 seconds. A refresh rate setting of 0 seconds disables refreshing.
OK: Select to set information entered.
Cancel: Select to cancel the operation and close the dialog box.
Screen Setting
The screen setting is accessible only to the System Administrator logon level. Select [Screen
Setting...] from the Setting menu to open the Screen Setting dialog box.
Language Setting
This section describes the language types that can be set in the Screen Setting dialog box and
the available options.
Language:
•Japanese
•English
OK: Select [OK] to apply the selected language to the screen.
Cancel: Select [Cancel] to cancel the operation and close the dialog box.
Printer & PC GUI Guide 1-15
Page 28

PC-GUI Introduction and Setup Xerox 490/980 Color Continuous Feed Printing System
1-16 Printer & PC GUI Guide
Page 29
Printer GUI
The 490/980 Color Continuous Feed Printing System can be operated by the remote PC-GUI
and by the Printer GUI. Options are selected on the PC-GUI by use of a mouse. Options on the
Printer GUI are selected by touching the screen.
2
Printer GUI Setup
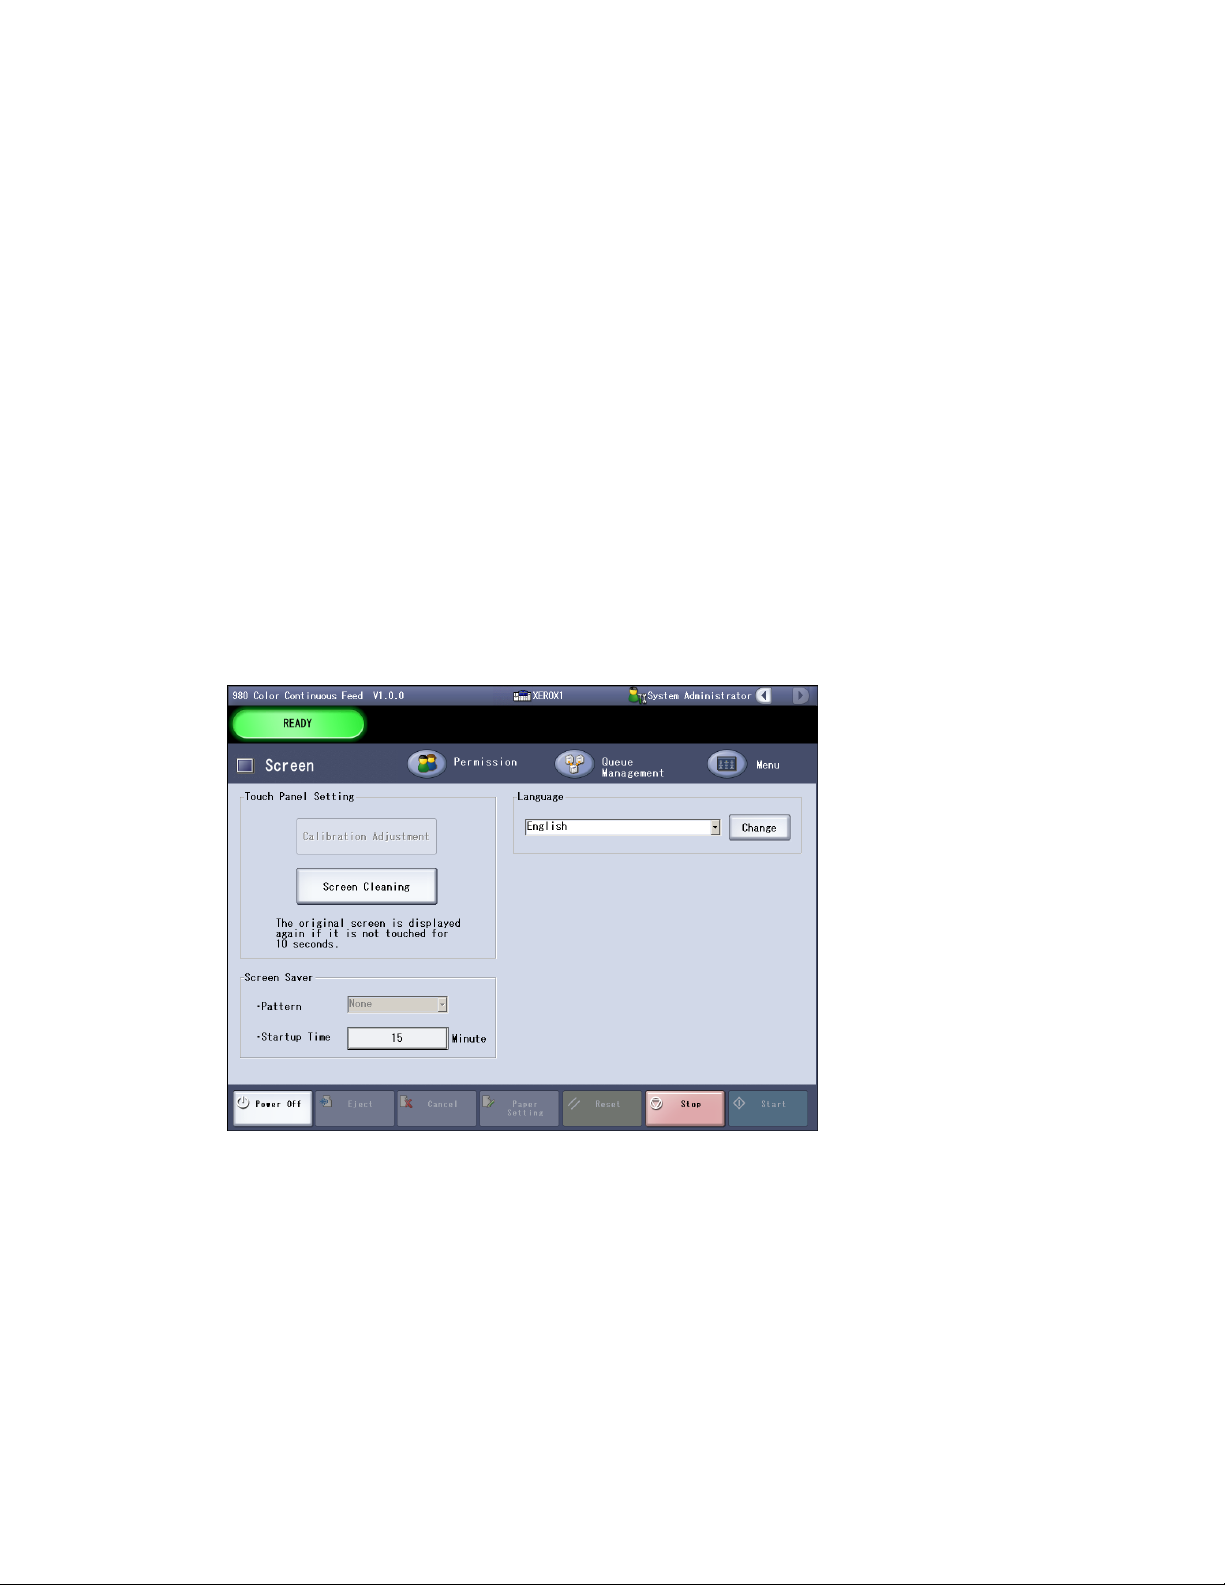
Use the Printer GUI screen to manage basic settings for the Printer GUI. The Printer GUI is often
referred to as the Touch-Panel Screen since options are selected by touching them on the
screen. The basic screen window will display similar to the following:
Screen Saver
The screen saver function blackens the screen if the touch screen is kept untouched after the
lapse of the specified time. The screen saver is automatically released if the printer status is
changed.
Pattern: Not available in this version.
Startup Time: This function displays a black screen if the touch panel is not operated. The
allowable range of time is from 0 to 9999 in minutes. If 0 is specified, the screen saver is not
operated.
Printer & PC GUI Guide 2-1
Page 30
Printer GUI Xerox 490/980 Color Continuous Feed Printing System
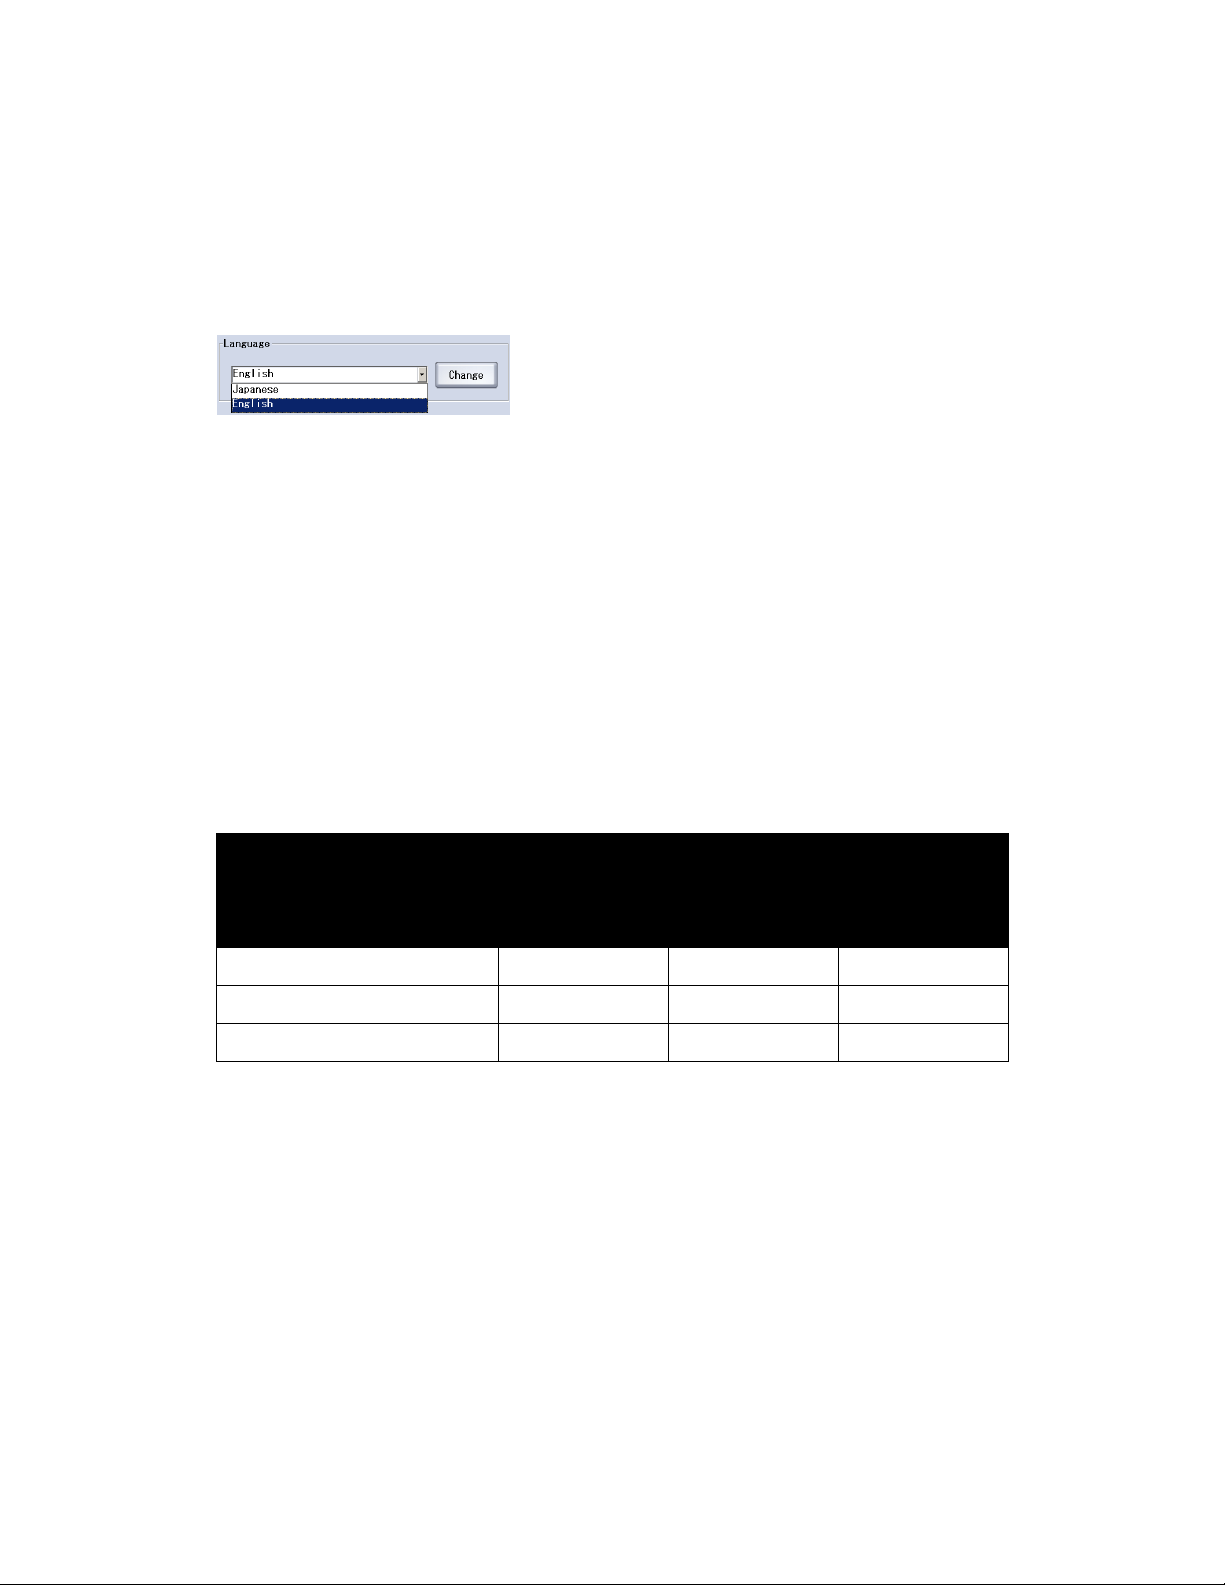
Language
This function is available for the logon level of System Administrator.
This function changes the language to be displayed on the touch screen.
On the pull-down menu, it is possible to select one of the following languages:
•Japanese
•English
Selecting [Change] switches over the language to be displayed.
Screen Cleaning
The screen can be cleaned while running the printer. Selecting this option blackens the whole
screen. If this option is kept untouched for 10 seconds, the lock state will be released.
Screen Menu Restrictions
The functions available on the Screen menu depend on the logon level. Disabled functions are
grayed out.
Logon level
Function
General User Operator
Screen Cleaning No Yes Yes
Screen Saver No Yes Yes
Language No Yes Yes
System
Administrator
2-2 Printer & PC GUI Guide
Page 31

Basic Settings
3
Menus and Screen Configuration
This section explains the touch screen menus and screen configuration.
Menu screen
Select the menu to view the Menu screen. To access each menu item, select the corresponding
menu button on the touch panel screen.
Menu Major function
Indicates the printer status by color and displays the
printer the printer name, input mode, and color mode.
The job information, paper information, and expansion
Printer Status
Job Management
Printer & PC GUI Guide 3-1
spool in use are displayed as well. Forced printing starts
when the Forced Printing button is pressed.
Valid jobs, held jobs, completed jobs and job history can
be managed.
Page 32

Basic Settings Xerox 490/980 Color Continuous Feed Printing System
Menu Major function
Message display and export are possible.
Tools
User permission and password setting and modification
are possible.
Permission
FTP/LPR/LPDS server setting and modification are
possible.
Gateway
Queue creation and deletion are possible.
Queue
Management
Imposition, preprinted forms, process mark, calibration
data, paper resource and other resource managements
are possible. Postscript font sample printing and
Resource
Management
downloading are also possible.
Density adjustment, print mode, and printer
configuration can be set. It is also possible to change
over between single and duplex printing systems.
Printer
Management
Screensaver and display language can be set. Screen
cleaning is also possible.
Screen
Job number resetting, refresh rate setting, and time
setting are possible. It is also possible to back up and
restore the system configuration information. Software
System
Management
version display, and option software license display are
also possible.
Menu screen transparent settings
The menu screen transparency can be set in seven levels. The transparent setting makes the
touch screen visible under the menu screen. Select this option to return to the previous
operating screen.
• Left-hand button: Sets the menu screen transparency. The degree of transparency
increases each time the button is pressed.
• Right-hand button: The degree of transparency decreases each time the button is pressed.
3-2 Printer & PC GUI Guide
Page 33

Xerox 490/980 Color Continuous Feed Printing System Basic Settings
GUI Layout
The layout of the GUI screen will display similar to the following. The layout of this window is
described in this section.
Title bar
The title bar displays the following:
• Product name: Product name and controller software version are displayed.
• Printer name: The name set by the set-up tab is displayed.
• Logon level: The logon level of the current user is displayed.
• Menu: Shifts the operated menus sequentially. Select the left arrow to display the latest
menu and press right arrow to return to the preceding menu.
Printer & PC GUI Guide 3-3
Page 34

Basic Settings Xerox 490/980 Color Continuous Feed Printing System
Status display
The printer status and message are displayed.
Status color Meaning
INITIALIZING Gray Initializing the machine.
PREPARING PRINTER Gray The machine is getting ready.
SHUTTING DOWN... Gray Shutting down the printer system.
NOT READY Yellow Printing is paused.
ERROR Red
(blink)
Red The error occurring in the machine requires operator
SYSTEM ERROR Red
(blink)
SYSTEM DOWN Red
(blink)
READY Green The machine can start printing.
PRINTING Blue Printing.
STOPPING PRINTING Blue The machine is stopping printing.
EJECTING Blue As the Eject button has been pressed, the machine is
AUTO LOADING Blue Auto loading.
TEST PRINTING Blue Test printing.
MAINTENANCE Gray The machine is in Maintenance mode.
FEEDING Gray Feeding.
An error occurred in the machine. Depending on the
error, it may be required to clear the error with Reset
and then select Start to start printing.
interaction such as clearing paper jams.
An error occurred inside the machine.
This error cannot be cleared with the Reset option.
An error occurred inside the controller.
ejecting paper.
CLEANING Gray Cleaning inside the printer.
PRINTING FOR ADJUSTMENT Gray Adjusting the printing.
RESETTING Gray Resetting.
PRINTER POST PROCESSING Gray Performing post-processing on the print.
3-4 Printer & PC GUI Guide
Page 35

Xerox 490/980 Color Continuous Feed Printing System Basic Settings
Menu area
This area displays the title of the menu being displayed and the menus that were identified as
favorites .
Select Favorites
Frequently used menus can be registered as Favorite buttons. The setting procedure is
explained below.
To register menu items for Favorites, perform the following:
1. Select [Favorites 0] or [Favorites1 ] in the menu area. The Select Favorites screen will
appear.
2. Select the menu buttons desired for registration to the favorite button. The menu is
registered to a favorites button.
To ch a ng e favor i tes :
1. De-select the Favorites button you want to change. The Select Favorites screen will appear.
2. Select the menu button desired for registration to the Favorites button. The menu for the
Favorites button is changed.
Sub-menu
The second level menu of the selected menu appears in this area.
Display/Operation
The current operation will display in this area.
Printer & PC GUI Guide 3-5
Page 36

Basic Settings Xerox 490/980 Color Continuous Feed Printing System
Operating buttons
The buttons in this section are used to operate the printer. If a button is inactive, it will display
as grayed out.
Button name Button Function
Power Off Turns the printer power off.
Eject Ejects paper. This button is available when the printer is
stopped. Depressing the button for three seconds or more
allows you to change the paper ejection method.
For information on changing the paper ejection method, see
the Printer Operator Guide.
Cancel Cancels the printing job in progress. The Cancel button is
valid when printing is stopped by the Stop button.
Paper Setting Select this option to set or load paper. This option may be
used when the printer status is Not Ready.
Reset Select this option when an error requiring resetting occurs.
The error is reset.
Stop Suspends the print operation. This option is available when
the printer status is Idle, Printing, or Ejecting.
Select this button to change the printer status to Paused.
Start Starts printing. The Start option can be used only when the
printer is in temporary stopped state without an error in the
printer.
User permissions
The following are the different user types that can use this system and their permissions are
listed.
• General User: Allowed for daily operations such as system startup and job confirmation.
The usable functions are the most limited among four user classes.
• Operator: Allowed for most operations excluding some operations including password
setting.
• System Administrator: Allowed for operations for most menus, including system
installation and setting.
• Maintenance: Provided exclusively for Xerox service personnel.
3-6 Printer & PC GUI Guide
Page 37

Xerox 490/980 Color Continuous Feed Printing System Basic Settings
Basic GUI operations
Virtual keyboard
Select the input area of each setting screen to display the virtual keyboard when character
input is needed. Select a key on the virtual keyboard to display the corresponding character in
the input character check area.
• Cancel: Cancels a operation
• OK: Enters the characters displayed in the input character check area into the input area on
each setting screen
• Input character check area: Displays the keyed-in characters
• BS button: Deletes the character displayed immediately before the cursor in the input
check area
• Clear: Clears the characters displayed in the input character check area
• ¨ button: Moves the cursor displayed in the input character check area toward the left
• Æ button: Moves the cursor displayed in the input character check area toward the right
• Caps: Select this uppercase/lowercase character to display a character string of special
symbols
Printer & PC GUI Guide 3-7
Page 38

Basic Settings Xerox 490/980 Color Continuous Feed Printing System
Virtual ten-key pad
Select the input area on each setting screen to display the virtual ten-key pad when numeric
input is necessary. Select a key on the virtual keyboard to display the corresponding numeral in
the input character check area.
• Cancel: Cancels the operation.
• OK: Enters the characters displayed in the input character check area into the input area on
each setting screen.
• Input character check area: The keyed-in numerals are displayed here.
• BS button: Deletes the character displayed immediately before the cursor in the input
check area.
• Clear: Clears the characters displayed in the input character check area.
List display
This section explains the list that is displayed for job management and queue management
using the active job list as an example.
3-8 Printer & PC GUI Guide
Page 39

Xerox 490/980 Color Continuous Feed Printing System Basic Settings
List display and sorting
A list is displayed in the order of registration. Select each item in the title bar to change the
display into ascending or descending order. When the list is in ascending order, an up arrow icon
will appear on the right side of an item name.
Select the same item in the title bar twice to display a downward arrow icon on the right side of
the item name. The list will be in descending order.
Select the same item in the title bar three times to cancel the sorted display.
Changing the width in the title bar
Items in the title bar may be widened by pressing its border in the title bar. The touched border
can be shifted horizontally rightward.
If the title bar is widened horizontally too much, the display will disappear. Select the space
(approximately. 1 mm) between the overlapped portion and the title character twice to return
the display to the original state.
Multiple selections
Multiple consecutive items can be selected.
Select and hold the blank column on the upper left corner of the list, then drag the cursor down
across the range to select multiple items in the list.
Printer & PC GUI Guide 3-9
Page 40

Basic Settings Xerox 490/980 Color Continuous Feed Printing System
3-10 Printer & PC GUI Guide
Page 41

User Permissions
4
Permission menu
The Permission menu enables you to set user permissions for the GUI. The Permission menu
displays the following:
Login user display
User permission
change button
Change User Permission
Select the user permission change button to enable you to change operation permissions for
the following users.
• General User
•Operator
• System Administrator
•Maintenance
Maintenance mode is used only by Xerox service personnel.
The system is automatically logged on with operator's permissions just after the printer power
is turned on.
Printer & PC GUI Guide 4-1
Page 42

User Permissions Xerox 490/980 Color Continuous Feed Printing System
There is no need to enter the password when changing the permission for lower levels.
Change Password
The user password may be changed.
On the PC-GUI, you can change your logon level from the System menu. Select [Changing
Logon User...] to open the Logon] dialog box. To change the logon level, type your user name
and password into the Logon dialog box.
On the Printer GUI, select the password change button to display the virtual keyboard. Enter a
new password using eight characters.
The default password for Operator and System Administrator is xerox.
Permission Restrictions
Some functions are not available on the Permission menu depending on the logon level. Those
functions are grayed out to disable selection.
Logon level
Function
General User Operator
Change of user permissions Yes Yes Yes
Change of password - Yes Yes
System
Administrator
4-2 Printer & PC GUI Guide
Page 43

Xerox 490/980 Color Continuous Feed Printing System User Permissions
Security Management
Use Security Management to add users, and modify their logon levels. Select [Security
Management] from the Setting menu to open the Security Setting dialog box.
Adding users
New users can be added. Select [Add] in the Security Setting dialog box to open the dialog box
shown below.
• User: Type the name of a user to add.
• New Password: Type the password to set on the additional user with one to eight
alphanumeric characters. Symbols cannot be used.
• Retype New Password: Ve rify t he ne w pass word.
• Logon level: Set a logon level on the additional user. The logon level is selectable from the
three choices. End User/Operator/System Administrator. The default is End User.
• Comment: Type a comment, such as user information.
• OK: Select [OK] to set information entered.
• Reset: Select [Reset] to reset information entered.
• Cancel: Select [Cancel] to cancel the operation and close the dialog box.
Printer & PC GUI Guide 4-3
Page 44

User Permissions Xerox 490/980 Color Continuous Feed Printing System
Modifying users
You can modify the entry of a registered user. Select a user to modify and select [Modify] to
open the following dialog box.
• User: Shows the user name to modify.
• Current Password: Type the password that has been set on the user to modify.
• New Password: Type a new password to set on the user to modify with one to eight
alphanumeric characters. Symbols cannot be used.
• Retype New Password: Verify the new password.
• Logon level: Set a logon level on the user to modify. The logon level is selectable from the
three choices: End User/Operator/System Administrator.
• Comment: Type a comment, such as user information.
• OK: Select [OK] to set information entered.
• Reset: Select [Reset] to reset information entered.
• Cancel: Select [Cancel] to cancel the operation and close the dialog box.
Deleting Users
You can delete the entry of a registered user. Select a user to delete and select [Delete].
4-4 Printer & PC GUI Guide
Page 45

Printer Status
5
Printer Status Menu
This section explains the Printer Status menu. The Printer Status window looks similar to the
following:
Printer status
The following information is displayed on the Printer Status menu:
• Printer Name: The name of the selected printer is displayed.
• Input Mode Online/Network: Online appears for the IPDS, and Network appears for others.
• Color Mode (monochrome/color)
• Icon: The printer status is displayed. The background has the color that corresponds to the
printer status.
Printer & PC GUI Guide 5-1
Page 46

Printer Status Xerox 490/980 Color Continuous Feed Printing System
Job Information
The following information is displayed for the job being printed.
• Job ID (value between 1 and 99,999)
• Report ID (value between 1 and 99,999)
•Job Name
• Paper Identifier
• Format (PS/PDF/IPDF/INTERNAL)
•Page No.
Paper Information
The following information is displayed for the paper that is being used.
•Paper Name
•Pin Feed Hole
•g/m2
•Media Type
•Paper Length
•Paper Width
Data
When printing data remains on the printer, it will be displayed.
Consumables
The Consumables lamp will come on when a consumable replacement is necessary. Select the
[Consumables] button. The Consumables status screen will appear.
5-2 Printer & PC GUI Guide
Page 47

Xerox 490/980 Color Continuous Feed Printing System Printer Status
Recovery
The recovery light will appear when recovery becomes necessary. Select the [Recovery] button.
The recovery status will then appear.
Used Size of RIP Buffer
The degree of RIP buffer usage is displayed in ten levels. The indicators come on according to
the progress of spooling to the RIP buffer.
Forced Printing
The data stored in the RIP buffer can be forcibly printed. This button is valid when the printer is
in READY status and the data to be printed is 1 page or more.
Restrictions on use of the Printer Status menu
Some functions cannot be used depending on the logon level. Unusable functions are grayed
out to prohibit use. The relationships between each menu and logon levels are as shown below.
Logon level
Name
General User Operator
Equipment information, job information,
paper status information
All consumables status display No Yes Yes
Ye s Ye s Ye s
System
Administrator
Forced Printing No Yes Yes
Printer & PC GUI Guide 5-3
Page 48

Printer Status Xerox 490/980 Color Continuous Feed Printing System
5-4 Printer & PC GUI Guide
Page 49

Job Management
Overview of Job Management
Use Job Management to manage print jobs, display jobs and set job attributes. The Job
Management menu appears similar to the following on the Printer GUI:
6
Tab menus
The following tab menus are found on the Job Management window.
• Active Job tab: The jobs in progress are displayed with the operation menu.
• Held Job tab: The held jobs are displayed with the operation menu.
• Completed Job tab: The printing-completed jobs are displayed with the operation menu.
• Job History tab: The printing history is displayed with the operation menu.
Printer & PC GUI Guide 6-1
Page 50

Job Management Xerox 490/980 Color Continuous Feed Printing System
Job operation buttons
On the Job Management window, there are buttons which correspond to job status including
cancellation, retention, and release (process start assistance) etc. The following buttons are
displayed in all tabs.
• Select All: Selects all jobs in the list. Upon selection of a job, this button changes to
Deselect.
• Deselect: Cancels selection. Upon cancellation, this button changes to Select all.
• Refresh: Displays the most recent job information
The refresh rate set on the system setting screen of the System Management tab is applied in
the job list. (This is called automatic refresh function.) The automatic refresh function is
disabled automatically upon job selection. Select [Refresh] to enable the automatic refresh
function.
Jobs list
The job list displays the jobs in process. To operate a job, select it from the list or select it after
selecting [Select All], and select the job operation button.
The job list displays the following contents job by job.
• Job ID: The ID assigned to each job sent to the printer. The ID is assigned in a range
between 1 and 99,999.
• Queue: The job queue name is displayed.
• Job Name: The job document name is displayed. The file name received by the client is set
as the job document name.
• Imposition File: The imposition file, also known as paper identifier, is used for job printing
is displayed. The paper identifier set for the queue is displayed. For individual setting, select
the job and change the job attribute.
• Form at: The job data format (PDL) is set.
• Status: The job status is displayed. The displayed job status varies with each tab menu
(active/ held/completed/job history).
• Reason: Details of job status are displayed.
• Number of RIP pages: Displayed when using the extended spool. When not using the
extended spool, 0 is always displayed. When using the simplex printing system, the number
of physical pages with RIP processing are displayed.
• When using the duplex printing system, the number of pages with RIP processing on the
upstream and downstream printers are compared and the smaller value is displayed. The
displayed number of RIP pages is twice the number of physical pages for the smaller value.
• Number of Pages: The number of printing completed pages per job is displayed.
The maximum number of jobs that can be loaded is 1,000 totaling the number of active, held,
and completed jobs.
Input/output spool capacity: The maximum number of reports in a job is 9,999.
6-2 Printer & PC GUI Guide
Page 51

Xerox 490/980 Color Continuous Feed Printing System Job Management
Input/output spool capacity
The spool capacity available for input and output, and the current usage are displayed in the
following format.
Currently used capacity/available spool capacity
Restrictions of the Job Management menu
Some functions are unusable depending on the logon level. Unusable functions are grayed out
and not selectable. The relationship between each menu and logon level is as follows.
Logon level
Function
General User Operator
Active jobs
Job list display Yes Yes Yes
System
Administrator
Properties Yes Yes Yes
Hold No Yes Yes
Restart No Yes Yes
Cancel No Yes Yes
Delete No Yes Yes
Sel e ct All Yes Yes Yes
Des e lect Yes Ye s Yes
Select starting date & time Yes Yes Yes
Refre s h Yes Ye s Ye s
Det ail Yes Yes Yes
Held Job
Printer & PC GUI Guide 6-3
Page 52

Job Management Xerox 490/980 Color Continuous Feed Printing System
Logon level
Function
General User Operator
Job list display Yes Yes Yes
Properties Yes Yes Yes
Release No Yes Yes
Priority Process No Yes Yes
Reedit No Yes Yes
System Page No Yes Yes
Move No Yes Yes
Delete No Yes Yes
Sel e ct All Yes Yes Yes
Des e lect Yes Ye s Yes
Select starting date & time Yes Yes Yes
System
Administrator
Refre s h Yes Ye s Ye s
Det ail Yes Yes Yes
Completed Job
Job list display Yes Yes Yes
Properties Yes Yes Yes
Hold No Yes Yes
Reoutput No Yes Yes
System Page No Yes Yes
Delete No Yes Yes
Sel e ct All Yes Yes Yes
Des e lect Yes Ye s Yes
Select starting date & time Yes Yes Yes
Refre s h Yes Ye s Ye s
Det ail Yes Yes Yes
6-4 Printer & PC GUI Guide
Page 53

Xerox 490/980 Color Continuous Feed Printing System Job Management
Logon level
Function
General User Operator
Job History
Job list display Yes Yes Yes
Delete No Yes Yes
Export] No Yes Yes
Sel e ct All Yes Yes Yes
Des e lect Yes Ye s Yes
Select starting date & time Yes Yes Yes
Refre s h Yes Ye s Ye s
System
Administrator
Printer & PC GUI Guide 6-5
Page 54

Job Management Xerox 490/980 Color Continuous Feed Printing System
Job Status and Reason
This section describes the job status and reason displayed in the job list.
Job Status
The job status for each tab is explained here.
The job status varies with the tab menu of the Job Management menu.
Active Job tab
Job status display Explanation
Waiting for Job Registration The job is waiting for registration.
Registering Job The job is being registered.
Receiving Data Data is being received from the input device.
Data Reception Completed Data reception from the input device is completed.
Editing Job editing has started. Printing is not executed.
Editing Completed Job editing has been completed.
Outputting Job output has been started. Printing has not been started.
Output Completed Whole job has been edited and output. Printing has not been
started.
Ready for Printing Preparation for job printing has been completed. Printing has not
been started.
Printing Job data printing has started.
Transfer Completed Whole job printing has been completed to the transfer step.
Fault A fault like paper jam requiring printer recovery occurred during
job printing.
Holding The job is being held.
Deleting The job is being deleted.
Canceling The job is being canceled.
6-6 Printer & PC GUI Guide
Page 55

Xerox 490/980 Color Continuous Feed Printing System Job Management
Held Job tab
Job status display Explanation
Data Reception Completed The printer is held by using the holding operation or by automatic
holding function set in queue, with data reception from the input
device completed.
Editing Completed The printer is held by using the holding operation or by the
automatic holding function set in queue after completing job
editing. This occurs only when the output process mode is set to
spooling.
Completed Job tab
Job status display Explanation
Printing Completed Printing of the job is completed.
Job History tab
Job status display Explanation
Waiting for Job Registration The job is waiting for registration.
Registering Job The job is being registered.
Receiving Data Data is being received from the input device.
Data Reception Completed Data reception from the input device is completed.
Editing Job editing has started. Printing has not been started.
Editing Completed Job editing has been completed.
Ready for Printing Preparation for job editing has been completed, but printing has
not been started.
Outputting Job output has started, but printing has not been started.
Transfer Completed All job printing has been completed to the transfer step.
Output Completed Whole job has been edited and output. Printing has not been
started.
Printing Job data printing has been started.
Printing Completed Whole job printing has been completed.
Printer & PC GUI Guide 6-7
Page 56

Job Management Xerox 490/980 Color Continuous Feed Printing System
Job Reason
Details of Job Reason on each tab are explained here.
6-8 Printer & PC GUI Guide
Page 57

Xerox 490/980 Color Continuous Feed Printing System Job Management
Active Job tab
Display in tab Explanation
Normal Normal status.
Deleted by Client The job is deleted by the user operating the input device.
Canceled by Operator The job is canceled by user operation.
Deleted by Operator The job is deleted by user operation.
Held by Operator The job is held by user operation.
Deleted by System The job is deleted by the system for any of the following reasons.
• Job reception has been rejected.
• The job is aborted during data sending/receiving.
• Failed in locking the system resource.
• Inconsistency in job status during system startup.
(Existence of a status-irrecoverable job among active
jobs.)
Held by System The job is held by the system for any of the following reasons.
• Failed in locking the system resource.
• Inconsistency in job status during system startup.
(Existence of an unscheduled job among active jobs.)
Alarm Warning occurrence
Error Error occurrence
Held Job tab
Display in tab Explanation
Normal Normal status.
Timed Job Job waiting for the designated time.
Held by Operator The job is held by user operation.
Held by System The job is held by the system for any of the following reasons.
• Failed in locking the system resource.
• Inconsistency in job status during system startup.
(Existence of an unscheduled job among active jobs.)
Forcibly Held by System The job has been held by the system for the following reason.
• Inconsistency in job status during system startup.
(Existence of a job being scheduled among active jobs.)
Alarm Warning occurrence
Error Error occurrence
Printer & PC GUI Guide 6-9
Page 58

Job Management Xerox 490/980 Color Continuous Feed Printing System
Completed Job tab
Display in tab Explanation
Normal Normal status
Timed Job The job is waiting for the designated time.
Canceled by Operator The job is canceled by the user.
Job History tab
Display in tab Explanation
Normal Normal status
Deleted by Client The job is deleted by the user.
Canceled by Operator The job is canceled by the user.
Deleted by Operator The job is deleted by the user.
Held by Operator The job is held by the user.
Deleted by System The job is deleted by the system for any of the following reasons.
• Receiving of the job has been rejected.
• The job is aborted during data sending/receiving.
• Failed in locating the system resources.
• Inconsistency in job status during system startup.
(Existence of a non recovered job among active jobs.)
Held by System The job is held by the system for either of the following reasons.
• Failed in locking the system resource.
• Inconsistency in job status during system startup.
(Existence of an unscheduled job among active jobs.)
Auto Job Deletion The job is deleted by the automatic job deleting function.
Alarm Warning occurrence
Error Error occurrence
6-10 Printer & PC GUI Guide
Page 59

Xerox 490/980 Color Continuous Feed Printing System Job Management
Active Job tab
Active jobs are organized into two areas: an ongoing job list and a held job list. Held jobs are
those jobs that wait for operator intervention.
On the Active Job tab, jobs in process can be operated.
The number of loadable jobs is 1,000 totaling the number of active, held, and completed jobs.
Active job properties
Active job properties are detailed below. Select a job from the active job list and select
[Properties] to display the active job Properties screen.
The active job properties screen only displays the information and does not allow modification.
Operating buttons
The following buttons are operating buttons:
• Previous: Displays the information on the job above the currently displayed ones in the
active job list. This button is disabled and grayed out when there is no corresponding job.
• Next: Displays the information on the job next to the currently displayed ones in the active
job list. This button is disabled and grayed out when there is no corresponding job.
• Close: Closes the Properties screen.
The [Apply] and [OK] buttons are disabled with graying out.
Printer & PC GUI Guide 6-11
Page 60

Job Management Xerox 490/980 Color Continuous Feed Printing System
Tab menus
The following tab menus are displayed:
• Properties
•I/O Process
• Paper Setting
• Color
• Print Range
•Job Info
• Data format The job data format is displayed. There are three data formats:
• PS- (PostScript format): The PostScript option is necessary.
• PDF- (Portable Document Format): The PostScript option is necessary.
• IPDS- (Intelligent Printer Data Stream): The IPDS option is necessary.
Job Information
The job information displays the settings of each tab menu.
6-12 Printer & PC GUI Guide
Page 61

Xerox 490/980 Color Continuous Feed Printing System Job Management
Active Job Hold
Select a job from the job list and select [Hold] to hold the job. Jobs in the IPDS data format
cannot be held.
Jobs with the following status can be placed on hold:
•Registering Job
•Receiving Job
• Data Reception Completed
•Editing
•Editing Completed
• Outputting
• Output Completed
•Ready for Printing
•Printing
•Transfer Completed
•Fault
The job in process can be held after canceling processing. The reason for the held job in this
case is Held by Operator.
The job is held after the end of input processing.
Suspend Active jobs
When suspending any jobs in the Active Job list during printing or processing, the following
popup message will appear.
• OK: Quits the job for which printing is in progress and suspends the selected jobs.
• Cancel: Cancels the suspension operation.
Printer & PC GUI Guide 6-13
Page 62

Job Management Xerox 490/980 Color Continuous Feed Printing System
Active Job Restart
Select a job from the job list and select [Restart] to display the job-restarting screen.
• Number of printed pages: Displays the current number of printed pages of the job being
printed.
• Information on page allowing printing restart: The number of pages allowing Restart
specification appears.
• Print Continuously: To continue printing, select [Print Continuously] and [OK] for
restarting. When Print Continuously is selected, printing restarts from the page next to the
printed ones.
• Physical Page Specification: To designate the restarting page, select [Physical Page
Specification] and designate the page number within the displayed printing restart range.
The virtual ten-key pad is displayed when the numeral input/display area is touched.
Input the desired value and select [OK] to reflect the value on the screen. Select [OK] on the
restart screen to restart the job.
6-14 Printer & PC GUI Guide
Page 63

Xerox 490/980 Color Continuous Feed Printing System Job Management
Active Job Cancel
To cancel an active job, select the job from the job list and select [Cancel]. The job is canceled
when [OK] is pressed on the confirmation screen. To cancel the operation, select [Cancel] on the
confirmation screen.
Jobs with the following status can be cancelled:
•Receiving Data
•Editing
• Outputting
• Output Completed
•Ready for Printing
•Printing
•Transfer Completed
•Fault
The job in progress can be cancelled. If the job is being printed, the printer stops temporarily. In
this case, the job is deleted regardless of the post-processing instruction of the job.
The reason for the cancelled job becomes Canceled by Operator.
To delete jobs in IPDS data format, IPDS online net input must be stopped in the Gateway
settings.
Canceling Active Job during printing
When canceling jobs under Active Job during printing processing, the following popup message
appears.
• OK: Quits the job for which printing is in progress and cancels the selected job.
• Cancel: Quits the cancel operation.
Printer & PC GUI Guide 6-15
Page 64

Job Management Xerox 490/980 Color Continuous Feed Printing System
Active Job Delete
To delete an active job, select the job from the job list and select [Delete]. The job is deleted
upon selecting [OK] on the confirmation screen. To cancel the deleting operation, select
[Cancel] on the confirmation screen.
Jobs with the following status can be deleted:
• Waiting for Job Registration
•Registering Job
•Receiving Data
• Data Reception Completed
•Editing
•Editing Completed
• Outputting
• Output Completed
•Ready for Printing
•Printing
•Transfer Completed
•Fault
A job in progress can be deleted after canceling its execution. When the job is being printed, the
printer stops temporarily.
The job is then deleted irrelevant to the next job processing instruction.
The reason for the deleted job becomes Deleted by Operator. To delete jobs in IPDS data
format, IPDS online net input must be stopped in the Gateway settings.
Deleting active Job during printing
When deleting jobs under Active Job during printing processing, the following popup message
appears.
• OK: Quits the job for which printing is in progress and deletes the selected job.
• Cancel: Quits the cancel operation.
6-16 Printer & PC GUI Guide
Page 65

Xerox 490/980 Color Continuous Feed Printing System Job Management
Held Job tab
This section explains the Held Job tab. Under the Held Job tab, information can be displayed,
changed, held and released.
Stream jobs cannot be placed on hold.
The number of loadable jobs is 1,000 totaling the number of active, held, and completed jobs.
Printer & PC GUI Guide 6-17
Page 66

Job Management Xerox 490/980 Color Continuous Feed Printing System
Held Job properties
This section explains how to display the detailed information (properties) of the held job.
Select a job from the job list, and select [Properties] to display the held job Properties screen.
This display appears also when a job in the job list is pressed twice.
Operating buttons
The types and functions of operating buttons are as follows.
• Previous: Displays the information on the job above the currently displayed ones in the
active job list. This button is grayed out (disabled) when there is no corresponding job.
• Next: Displays the information on the job next to the currently displayed ones in the active
job list. This button is grayed out (disabled) when there is no corresponding job.
• OK: Reflects the changes made and closes the Properties screen.
• Apply: Reflects the changes made without closing the Properties screen.
• Close: Closes the Properties screen without reflecting the set contents.
Tab Me n u s
The following tab menus can be selected.
• Properties
•I/O Process
• Paper Setting
• Color
• Print Range
•Job Info
• Data format
The job data format is displayed.
There are two data formats.
• PS (PostScript format): The PostScript option is necessary.
• PDF (Portable Document Format): The PostScript option is necessary.
6-18 Printer & PC GUI Guide
Page 67

Xerox 490/980 Color Continuous Feed Printing System Job Management
Job information
The job information displays the setting items on each tab menu.
Properties tab for a Held Job
The display format of the held job Properties tab is as follows.
• Job Name: The document name is displayed in within 128 bytes. The file name is set in
case of input by connecting the FTP/LPR server.
• Data Format: The data format is displayed. PS/PDF
• Priority: The priority set for the job is displayed. This priority is applied to the job output
order control. The priority is 0 to 100, with 0 as the top priority.
• Release Job: If automatic job release is set, the set value is displayed. If manually held, job
• Delete Job After Printing: The processing to be performed after printing is displayed.
• Job Status: The current job status is displayed. The reason (detailed information) is
displayed in parentheses.
Change name of held job
The document name of a held job can be changed. Select [Document Name], and the virtual
keyboard appears. Key in up to 128 characters as the document name. All characters displayed
on the virtual keyboard can be used except for a space.
Changing priority of held job
The priority of a held job can be changed.
Select the priority number to display the virtual keyboard.
A value between 0 and 100 may be set as the priority.
Printer & PC GUI Guide 6-19
Page 68

Job Management Xerox 490/980 Color Continuous Feed Printing System
Delete Job After Printing
Specify what to do with the job after it has printed. Selectable from among Manual,
Immediately and Timed Job.
Timed Job: The job is automatically deleted from the job queue when a specified period of
time expires after completion of its printing. If a job has Timed Job specified in Delete Job After
Printing it remains in the job list on the Completed Job tab for an appointed period of time after
printing. The period of time for which a completed job stays in the job list until it is deleted can
be specified in minutes.
Manual: Saves the job without deleting it from the job queue when the print has completed,
along with the spooled data. To delete a job whose Delete Job after Printing is set to Manual
select it from the list appearing on the Completed Job tab and delete it.
Immediately: Deletes the job immediately upon completion of its printing.
I/O process for a Held Job
The information on the input/output process set in the queue appears.
The contents displayed under the I/O Process tab look similar to the following:
6-20 Printer & PC GUI Guide
Page 69

Xerox 490/980 Color Continuous Feed Printing System Job Management
Paper Settings for Held Jobs
The Paper Settings tab displays similar to the following:
Color tab for a Held Job
The Color tab displays similar to the following:
Printer & PC GUI Guide 6-21
Page 70

Job Management Xerox 490/980 Color Continuous Feed Printing System
Print Range for a Held Job
The Print Range tab displays similar to the following:
Print Range: The output information of the page specified in the job is displayed. The page
range can be designated by sheet, physical page and logical page. Up to ten types of
information can be specified.
Select All: Select this option to select all pages.
Select Pages: Select this option to specify the print range information. If none of the job set
with the print range is output, the job is held.
Logical Page: The print range is set in logical page units.
Physical Page: The print range is set in physical page units.
Sheet: The print range is set in sheet units.
Setting the print range
To set the print range, select [Select Pages].
Select the setting unit from Logical Page, Physical Page, and Sheet by selecting the respective
button. When the Print Range numerical display area is touched, the virtual ten-key pad
appears to enable numeric input.
6-22 Printer & PC GUI Guide
Page 71

Xerox 490/980 Color Continuous Feed Printing System Job Management
Job Info for a Held job
The Job information screen for Held jobs displays similar to the following:
Sender: In case of FTP, the client who sent the job is displayed. And in case of LPR, the host
name: user name of the client is displayed.
Job Size: Displays the job size in number of bytes.
Processing Date/Time: Displays the data reception start time, reception completion time, and
job end time.
Number of Logical Pages: Displays the number of pages after job conversion by the filter.
Number of Physical Pages: Displays the number of pages after the imposition is implemented
according to the specified page imposition information after the job is converted by the filter.
Number of Print Pages: Displays the total number of the physical pages (sides) output from the
printer.
Copies: Displays the copies being printed when the number of copies is specified.
Printer & PC GUI Guide 6-23
Page 72

Job Management Xerox 490/980 Color Continuous Feed Printing System
Data format of a Held Job
The data format is displayed in two types: PS and PDF. To use each data format, an option is
necessary. Please consult with your Xerox customer service representative for the option.
Release a Held Job
Select [Release] after selecting a job in the job list will release the job from the held state.
The released job is subject to job scheduling.
Priority Process of a Held Job
Select a job from the job list and select Priority Process to process the job with higher priority.
The priority of a held job is set to 0.
Move a Held Job
Select a job from the job list and select [Move] to display the screen for selecting the job
destination. Touch the display portion of the destination queue name. A pull-down menu
appears. Select the desired destination from the menu, and select [OK] to set the destination.
Select [Cancel] to cancel the selection of destination.
6-24 Printer & PC GUI Guide
Page 73

Xerox 490/980 Color Continuous Feed Printing System Job Management
Delete a Held Job
To delete the held job, select it from the job list and select [Delete]. The job is deleted upon
selecting [OK] on the confirmation screen. Select [Cancel] here to cancel the deleting operation.
The reason for the job deleted by this operation becomes Deleted by Operator.
Re-edit a Held Job
The Editing Completed status of a job in the job list may be changed to Data Reception
Completed. This operation is valid for a job whose input/output process mode is Spool. When a
job in Editing Completed status is selected, the Re-edit button is enabled.
Upon selecting Re-edit, the confirmation message appears.
Select [OK] for reediting by setting the job status to Data Reception Completed, or Cancel to
cancel re-editing operation.
Select [Ye s] to delete the reedited job data from the output spool.
Printer & PC GUI Guide 6-25
Page 74

Job Management Xerox 490/980 Color Continuous Feed Printing System
System Page for Held Jobs
The yellow triangle icon is displayed in the job list for each job containing the System Page.
Select the job marked with the icon and select [System Page] to display the details of the job.
Report No: The job report number appears.
Save: Saves the system page. The screen below appears upon selecting [Save]. Saves the
system page. The screen below appears upon selecting [Save].
• Save to: Select the system page destination by selecting. Select [+] to display the lower
directory.
• Select: The directory selected by Save to appears.
• OK: Saves the system page to the specified destination.
• Cancel: Cancels the operation and closes the screen.
• Close: Closes the system page
6-26 Printer & PC GUI Guide
Page 75

Xerox 490/980 Color Continuous Feed Printing System Job Management
Select/Deselect All Held Jobs
Select [Select All] to select all jobs.
Refresh Held Jobs
Select [Refresh] to display the latest job list information.
Printer & PC GUI Guide 6-27
Page 76

Job Management Xerox 490/980 Color Continuous Feed Printing System
Completed Jobs
Completed Jobs Properties
Display of detailed information on completed jobs is explained here.
Select a job from the job list and select [Properties] to display the active job Properties screen.
The completed job properties screen only displays information and does not allow any
modification.
Operating buttons:
• Previous: Displays the information on the job above the currently displayed ones in the
active job list. This button is grayed out to become disabled when there is no corresponding
job.
• Next: Displays the information on the job next to the currently displayed ones in the active
job list. This button is grayed out to become disabled when there is no corresponding job.
• Close: Closes the Properties screen.
The following tab menus can be selected:
• Properties
•I/O Process
• Paper Setting
• Color
• Print Range
•Job Info
The following job Data formats are available:
• PS (PostScript format)
• PDF (Portable Document Format)
• IPDS (Intelligent Printer Data Stream)
Job information: The job information displays the setting items on each tab menu.
6-28 Printer & PC GUI Guide
Page 77

Xerox 490/980 Color Continuous Feed Printing System Job Management
Hold Completed Jobs
Select a job from the job list, and select [Hold] to hold the job. The reason for the held job
becomes Held by Operator.
Reoutput Completed Jobs
Select a job in the job list and select [Reoutput]. The job is displayed in the active job list to be
subject to job scheduling.
Delete Completed Job
To delete a completed job, select the job from the job list and select [Delete]. Select [OK] on the
confirmation screen to delete the job. To cancel the deleting operation, select [Cancel].
The reason for the deleted job becomes Deleted by Operator.
Printer & PC GUI Guide 6-29
Page 78

Job Management Xerox 490/980 Color Continuous Feed Printing System
System Page for Completed Jobs
The yellow triangle”!” icon is displayed in the job list for each job containing the System Page.
Select the job marked with the icon and select [System Page] to display the details of the job.
Report No.: The job report number appears.
6-30 Printer & PC GUI Guide
Page 79

Xerox 490/980 Color Continuous Feed Printing System Job Management
Save: The system page can be saved on a removable disk. Select [Save] and the following
screen appears.
• Save to: Select the system page saving destination by selecting. Select [+] to display the
lower-order directory.
• Select: The directory selected by the Save to button is displayed.
• OK: Saves the system page to the specified destination.
• Cancel: Cancels the operation and closes the screen.
• Close: Closes the system page.
Select All/Deselect All Completed Jobs
Select [Select all] to select all jobs. To cancel selection, select [Deselect].
Refresh Completed Jobs
Select [Refresh] to display the most recent job list.
Printer & PC GUI Guide 6-31
Page 80

Job Management Xerox 490/980 Color Continuous Feed Printing System
Job History
This section explains the Job History tab.
The maximum number of loadable jobs is 3,000. After reaching 3,000, jobs are erased from the
oldest one.
Delete Job History
To delete a job, select it from the job list and select [Delete]. The job is deleted upon selecting
OK on the confirmation screen. To cancel the deleting operation, select [Cancel].
6-32 Printer & PC GUI Guide
Page 81

Xerox 490/980 Color Continuous Feed Printing System Job Management
Export Job History
To export a job history, select a job from the job list and select [Export]. The Confirmation
screen appears. The job history is exported upon selecting [OK] after selecting the export
destination. To cancel the export operation, select [Close]. The job history is saved in CSV file
format.
Job History System Page
The yellow triangle “!” icon is displayed in the job list for each job containing the System Page.
Select the job marked with the icon and select System Page to display the details of the job.
Select All/Deselect Job History
Select [Select All] to select all of jobs. Select [Deselect] to cancel selection.
Printer & PC GUI Guide 6-33
Page 82

Job Management Xerox 490/980 Color Continuous Feed Printing System
Refresh Job History
Select [Refresh] to display the most recent information of job history.
Release a Job
This section explains releasing a held job.
Releasing the held job can be set by Release Job in the Properties tab for a Held Job.
Held call release setting is done in two ways: automatic release by Timed Job and manual
release by Manual setting.
6-34 Printer & PC GUI Guide
Page 83

Xerox 490/980 Color Continuous Feed Printing System Job Management
Automatic Release of Timed Job
Automatic release can be set in two ways: Date & time setting and lapse time setting.
Date & time setting: The held job is automatically released at the specified date and time.
Specify the date in the date specification area, and the time in the time specification area.
• Date setting: Select the date specification area to display the calendar. Select the month
by the month select button, and select the date from the displayed calendar. Select [OK] to
set the date & time. Select [Close] to close the screen without reflecting the setting.
• Time setting: Touch the time specification area to display the virtual ten-key pad. Time
specification method: (Example 1) To set 10:00:00, input 10, 1000, or 100000. (Example 2)
To set 10:20, input 1020 or 102000.
Printer & PC GUI Guide 6-35
Page 84

Job Management Xerox 490/980 Color Continuous Feed Printing System
Lapse time setting: The job is held upon the lapse of the set time. Lapse time is counted from
the time of this setting. Select the icon in the lapse time specification area and touch the
numerical input area to display the virtual ten-key pad. A value from 1 to 43200 can be set.
If 0 is specified, the manual holding is released.
Select [OK] to set the date and time. Select [Cancel] to cancel the operation.
Setting Manual Release
Select manual release to hold a job that is released by the operator. If the manual mode is set,
the job will be held in the input queue until the operator starts the operation.
6-36 Printer & PC GUI Guide
Page 85

Xerox 490/980 Color Continuous Feed Printing System Job Management
Delete Job
This section describes an item that defines processing to be performed after printing Delete
After Printing.
Delete Job After Printing located in Properties of the held job, Timed Job, Immediately, and
Manual can be set.
Automatic delete
Automatic deletion is possible two ways: Date and time setting and lapse time setting.
• Date & time setting: A job is automatically deleted at the set date and time. Set the date
in the date specification area, and the time in the time specification area.
• Date specification: Touch the date specification area to display the calendar. Select the
month using the month selection button and select the date from the date display. Select
[OK] to set the date & time and close the screen. Select [Cancel] to cancel the operation
and close the screen.
Printer & PC GUI Guide 6-37
Page 86

Job Management Xerox 490/980 Color Continuous Feed Printing System
• Time specification: Touch the time specification area to display the virtual ten-key pad.
The time is specified as follows. (Example 1) To set 10:00:00, input 10, 1000, or 100000.
(Example 2) To set 10:20, input a020 or 102000.
• Lapse time setting: The job is held upon the lapse of the set time. Lapse time is counted
from the time of this setting. Select the icon in the lapse time specification area and touch
the numerical input area to display the virtual ten-key pad. A value from 1 to 43200 can be
set. If 0 is specified, the immediate deletion is set. Select [OK] to set the date & time and
close the screen. Select [Cancel] to cancel the operation and close the screen.
Delete Printed Job
Select to hold a job that is released by the operator. If the manual mode is set, the job will be
held in the input spool until the operator starts the operation.
Immediately Delete Printed Job
Select this to delete the job after printing.
6-38 Printer & PC GUI Guide
Page 87

Xerox 490/980 Color Continuous Feed Printing System Job Management
Schedule a Job
The job schedule function controls starting of job input and editing/output.
The jobs to be scheduled are displayed in the job list on the Active Job tab. The jobs in the
active job list are displayed in ascending order of priority and successively scheduled from the
top.
Job Setting
The schedule varies according to the settings of Schedule Job with Extended Spool of System
Setting and Extended Spool of the queue. The correspondence between each setting and job
schedule is shown below.
Schedule Job with Extended Spool Extended Spool Job schedule
Active Active
Inactive
Inactive Active
Inactive
Job subject to scheduling
Not subject to scheduling
Not subject to scheduling
Job subject to scheduling
Printer & PC GUI Guide 6-39
Page 88

Job Management Xerox 490/980 Color Continuous Feed Printing System
Schedule Types
The job scheduling timing varies according to the Input Process Mode and Output Processing
Mode set by queue properties. The scheduling types are as follows.
Input Process
Mode
Spool Stream Waiting for Job Registration Schedules job input.
Spool Stream Data Reception Completed Schedules job editing/output
Spool Spool Waiting for Job Registration] Schedules job input.
Spool Spool Data Reception Completed Schedules job editing.
Spool Spool Editing Completed Schedules job output (printing
Stream] Stream Display according to the
Output
Process Mode
Job status Explanation
(printing process).
process).
Schedules stream jobs.
progress of job processing
Job Schedule Attributes
The job schedule attribute is defined as the Job Schedule Type of output service. The schedule
attribute is as follows.
Scheduling after output completion (default): After completion of data output to the printer,
the next job is scheduled without waiting for printing completion notice from the printer.
Job Schedule Priority
Jobs are scheduled in descending order of job priority.
If multiple jobs have the same priority, they are scheduled in the order of registration.
Do not Accept Job
If Do not Accept is set in the job queue information, job input processing is not accepted.
Do Not Process Job
If Do not Process is set in the job queue information, job editing and output processes are not
acceptable.
6-40 Printer & PC GUI Guide
Page 89

Xerox 490/980 Color Continuous Feed Printing System Job Management
Faulted Jobs
Use Restarting a Fault Job to restart a job that has failed during printing. A possible reason
would be an error like paper jam that requires printer recovery.
Handling Fault Job
Printing can be restarted when the printer is ready for printing. Otherwise, printing will fail when
restarting is instructed.
When Print Continuously is selected, the job is printed from the page next to the already printed
page.
The physical page number displayed as the starting page number and output page number is
always an even number in case of duplex printing. If an even re-output page number is set,
printing occurs from the front page.
This screen is not displayed for jobs in IPDS data format.
Fault page information
• Close: The screen is closed without fault job restart setting.
• OK: The specified fault job operation occurs.
• Fault page information: The information on fault page appears.
• Restart Printing: Select when continued printing is desired. The physical page position
where the printing is restarted can be specified.
Print Continuously: Printing restarts from the page next to the finally printed one.
• Physical Page Specification: The page number appearing as the physical page is the
number of printed pages completed before an error occurred and not the number of pages
correctly eliminated from the printer. Therefore, it is necessary to restart printing in
succession with the correctly eliminated pages. Printing restarts from the front side of the
page specified here.
The page number displayed equals the printing completed page number.
• Interrupt Printing (Hold): Select this to hold a job.
• Cancel Printing (Delete): The job being printed is terminated. The job is cancelled from
registration in the queue, and the job data on the spool is deleted.
The job is interrupted in fault status. To restart the job after closing the fault job restart screen,
select and operate the job in the Active Job list.
Printer & PC GUI Guide 6-41
Page 90

Job Management Xerox 490/980 Color Continuous Feed Printing System
6-42 Printer & PC GUI Guide
Page 91

Printer Management
7
Printer Management Overview
On the Printer Management menu, printer adjustment and consumable replacement can be
set. The Printer Management menu consists of the following tab menus.
Operation can be implemented when the printer is in NOT READY status. The Consumable tab
allows operation during error occurrence.
Ta b M e n u s
On the PC-GUI
The printer management screen is organized into the following two tabs.
• Quality Setting
• Consumable
On the Printer GUI
There are following tab menus.
• Dens/Pos Adjust tab: Density and Position Adjustment tab. It is possible to set the print
density and the print position.
• Color Mode tab: It is possible to select the monochrome or color print mode.
• Consumable tab: The status of consumable are displayed. Also, the operation procedure is
displayed.
• System Config tab: The printer name can be set.
• Printer Config tab: The printer configuration such as single or duplex can be set.
• Mark tab: This section describes how to set whether to enable the ROF mark and how
many pages of adjustment printing to use.
• Sensor tab: The mark sensor that reads the TOF/ROF/duplex marks can be repositioned.
Printer & PC GUI Guide 7-1
Page 92

Printer Management Xerox 490/980 Color Continuous Feed Printing System
Printer Management Restrictions
Some functions are not usable depending on the logon level. Unusable functions are grayed out
and disabled. The relationships between the menus and logon levels are shown in the table
below.
Logon level
Function
General User Operator
Density/Position Adjustment
Print position setting No Yes Yes
Monochrome density setting No Yes Yes
Color density setting No Yes Yes
Color Mode Setting
Monochrome or color selection No Yes Yes
Consumables
Black toner replacement No Yes Yes
Cyan toner replacement No Yes Yes
Yellow toner replacement No Yes Yes
Magenta toner replacement No Yes Yes
Black waste toner container replacement No Yes Yes
Cyan waste toner container replacement No Yes Yes
Yellow waste toner container replacement No Yes Yes
System
Administrator
Magenta waste toner container replacement No Yes Yes
Black Developer No Yes Yes
Cyan Developer No Yes Yes
Magenta Developer No Yes Yes
Yellow Developer No Yes Yes
Smoke filter replacement No Yes Yes
Kit A (black) replacement No Yes Yes
Kit A (cyan) replacement No Yes Yes
Kit A (yellow) replacement No Yes Yes
Kit A (magenta) replacement No Yes Yes
Kit B (black) replacement No Yes Yes
Kit B (cyan) replacement No Yes Yes
Kit B (yellow) replacement No Yes Yes
Kit B (magenta) replacement No Yes Yes
7-2 Printer & PC GUI Guide
Page 93

Xerox 490/980 Color Continuous Feed Printing System Printer Management
Logon level
Function
General User Operator
Transfer roller cleaner (black) replacement No Yes Yes
Transfer roller cleaner (cyan) replacement No Yes Yes
Consumables
Transfer roller cleaner (yellow) replacement No Yes Yes
System
Administrator
Transfer roller cleaner (magenta)
replacement
System Config
Printer Name No Yes Yes
Printer Config
Setting change No Yes Yes
Browse No Yes Yes
Mark No Yes Yes
Sensor No Yes Yes
No Yes Yes
Printer & PC GUI Guide 7-3
Page 94

Printer Management Xerox 490/980 Color Continuous Feed Printing System
Image Quality
On the PC-GUI, you can set print densities' for monochrome printing on the front and back
sides of paper. Additional Image Quality settings are covered in the Color Management Guide.
• Quality Setting1: Density for the upstream printer can be set.
• Quality Setting2: Density for the downstream printer can be set.
7-4 Printer & PC GUI Guide
Page 95

Xerox 490/980 Color Continuous Feed Printing System Printer Management
Print Density and Position Adjustment
Print density can be set at seven levels. It is set in monochrome mode on the Monochrome and
in color mode on each of the K (black), C (cyan), M (magenta) and Y (yellow). On the Dens/Pos
Adjust tab, monochrome mode density and print position can be adjusted.
The following contents can be adjusted.
• Print position adjustment: The horizontal/vertical offset value can be changed.
• Print density setting: The print density can be changed.
• Operating buttons:
• Setting: The information is updated according to the changes made.
• Cancel: The operation is cancelled and the information before making changes is
shown.
Operation is possible while the printer is stopped.
Printer & PC GUI Guide 7-5
Page 96

Printer Management Xerox 490/980 Color Continuous Feed Printing System
Print Position Adjustment
To change the set value, select left arrow or right arrow to set the horizontal position, and select
up arrow or down arrow to set the vertical position. Select [OK] to set the changed values.
Display content Function
Adjusts horizontal offset (-).
Adjusts horizontal offset (+).
Adjusts vertical offset (+).
Adjusts vertical offset (-).
Resets the horizontal/vertical offset to 0.
The set offset value is displayed in mm.
The set offset value is displayed in inch.
Select [Setting] to set the value, and [Cancel] to cancel the setting.
The allowable setting value is as follows.
• Millimeter (mm): -2.7 to 86.6
• Inch: -0.10 to 3.41
If the setting unit is inch, the value is valid to two places of decimals. If the setting unit is
millimeter, the value is valid to one decimal place.
7-6 Printer & PC GUI Guide
Page 97

Xerox 490/980 Color Continuous Feed Printing System Printer Management
Print Density Adjustment
The print density can be adjusted in seven levels. For the monochrome mode, use the Color
Mode tab. For the full color mode, use each of K (Black), C (Cyan), M (Magenta), and Y (Yellow)
tabs for setting.
For the print density, select the desired level from the seven preset levels by selecting the (-)
button or (+) button.
Color mode density adjustment
If using the color mode, adjust the density on each tab (color). The factory default is 4.
K Black C Cyan
Y Yellow
M Magenta
Printer & PC GUI Guide 7-7
Page 98

Printer Management Xerox 490/980 Color Continuous Feed Printing System
Color Mode
Under the Color Mode tab, the color mode or monochrome mode can be selected. The setting
can be changed when the printer is in NOT READY status. The setting cannot be changed when
the job is being processed.
• Select either B/W or Color, and select [Setting] to set the print mode.
• In the monochrome mode, only the K toner color is used for the printing.
• If the monochrome mode is set for the printer while monochrome is not set at the Color tab
under Queue Management, a message appears at the start of the job to check if the job is
to be continued.
• If the color mode is set for the printer while monochrome is set at the queue management
color tab, no message appears.
• No modification is possible if there is any active job.
7-8 Printer & PC GUI Guide
Page 99

Xerox 490/980 Color Continuous Feed Printing System Printer Management
Consumables
On the Consumables tab, the consumable status and replacement settings are displayed.
Consumables replaced by the operator are listed on the User (left) side of the screen.
Consumables listed under the CE (right) side of the screen must be replaced by your Xerox
customer service representative.
On the PC-GUI, a consumables status table is displayed when Consumables is selected.
Display element Function
(Green)
(Yellow)
(Red)
Consumables are sufficiently available.
Consumables are nearing the period of replacement.
Consumables have reached the end of their service lives. Replace them.
Printer & PC GUI Guide 7-9
Page 100

Printer Management Xerox 490/980 Color Continuous Feed Printing System
List of consumables
The contents displayed on the consumable list and the functions are as follows.
Consumable Name ID Function
Black Toner K The black toner status is displayed.
Cyan Toner C The cyan toner status is displayed.
Magenta Toner M The magenta toner status is displayed.
Yellow Toner Y The yellow toner status is displayed.
Black Waste Toner Container K The black waste toner container status is displayed.
Cyan Waste Toner Container C The cyan waste toner container status is displayed.
Magenta Waste Toner Container M The magenta waste toner container status is displayed.
Yellow Waste Toner Container Y The yellow waste toner container status is displayed.
Black Developer R1-K The black developer status is displayed.
Cyan Developer R1-C The cyan developer status is displayed.
Magenta Developer R1-M The magenta developer status is displayed.
Yellow Developer R1-Y The yellow developer status is displayed.
Smoke Filter R2 The smoke filter status is displayed.
Kit A (Black) R3-K The Kit A (black) status is displayed.
Kit A (Cyan)] R3-C The Kit A (cyan) status is displayed.
Kit A (Magenta) R3-M The Kit A (magenta) status is displayed.
Kit A (Yellow) R3-Y The Kit A (yellow) status is displayed.
Kit B (Black) R4-K The Kit B (black) status is displayed.
Kit B (Cyan) R4-C The Kit B (cyan) status is displayed.
Kit B (Magenta) R4-M The Kit A (magenta) status is displayed.
Kit B (Yellow) R4-Y The Kit B (yellow) status is displayed.
Transfer Roller Cleaner (Black) R5-K The transfer roller cleaner (black) status is displayed.
Transfer Roller Cleaner (Cyan) R5-C The transfer roller cleaner (cyan) status is displayed.
Transfer Roller Cleaner (Magenta) R5-M The transfer roller cleaner (magenta) status is displayed.
Transfer Roller Cleaner (Yellow) R5-Y The transfer roller cleaner (yellow) status is displayed.
Status
• Good: The consumable status is good (normal).
• Replacement Timing: The replacement timing is near.
• Replacement is Required: Replacement is necessary.
• Consumables management counter: A remaining consumables count is displayed while
the printer is paused.
7-10 Printer & PC GUI Guide
 Loading...