

Page 1
XEROX 4595 Copier/Printer Basic Navigation
Quick Reference for Administrators
701P46249, Version 1.0, April 2007
Getting help
For information/assistance, check the following:
• User Guide for information on how to use the
Xerox 4595.
• System Administrator Guide for information on
to how to set/change the system defaults for
the Xerox 4595.
• For online assistance go to: www.xerox.com
• Click the Support and Drivers link.
•In Product Name, type 4595 and click
Search.
• From the list presented, locate your model
(4595).
• Click the appropriate link for the desired
information: Support, Drivers & Download,
or Documentation
• You may also call 1-800-275-9376 extension
871 for technical assistance.
System messages
If the system displays a message on the screen, be
sure to follow the steps in the order presented to
solve the problem. Failure to do so may cause
additional problems.
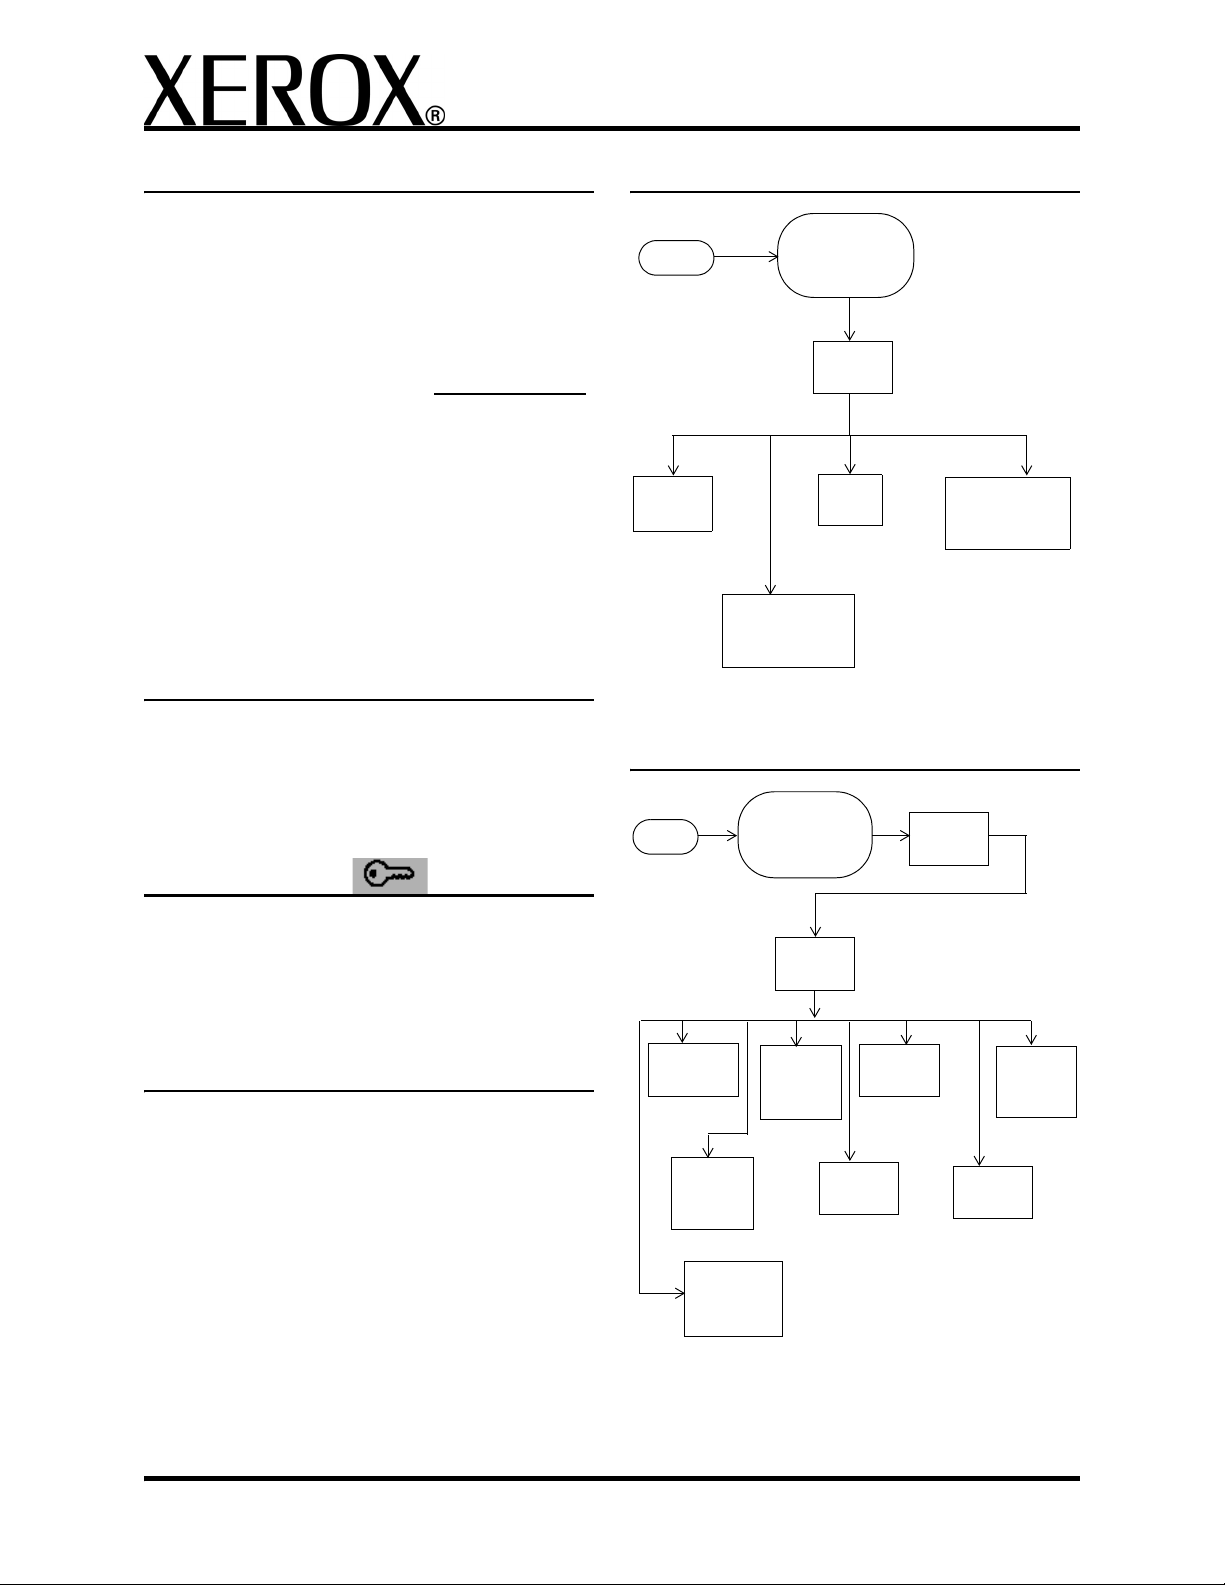
Log In/Log Out
Main System Settings menus
System
Login
System
Settings
Login Setup/
Auditron
Administration
Administrator
Menu
System
Settings
Setup
Menu
System
Administrator
Settings
Second level System Settings
menus
Login
System
Administrator
Menu
System
Settings
To Logon as a System Administrator, press the Log
In/Log Out button. Enter your System Administrator
Login ID and select Confirm.
Access the System Settings
features
1. Log in as a System Administrator.
2. From the System Administrator Menu screen,
select System Settings.
3. Select System Settings again.
4. Select the desired feature(s) to review/change.
1
Common
Settings
Scan
Mode
Settings
Stored
Document
Settings
System
Settings
Copy
Mode
Settings
Network
Settings
E-mail
Settings
Print
Mode
Settings
Mailbox
Settings
Page 2
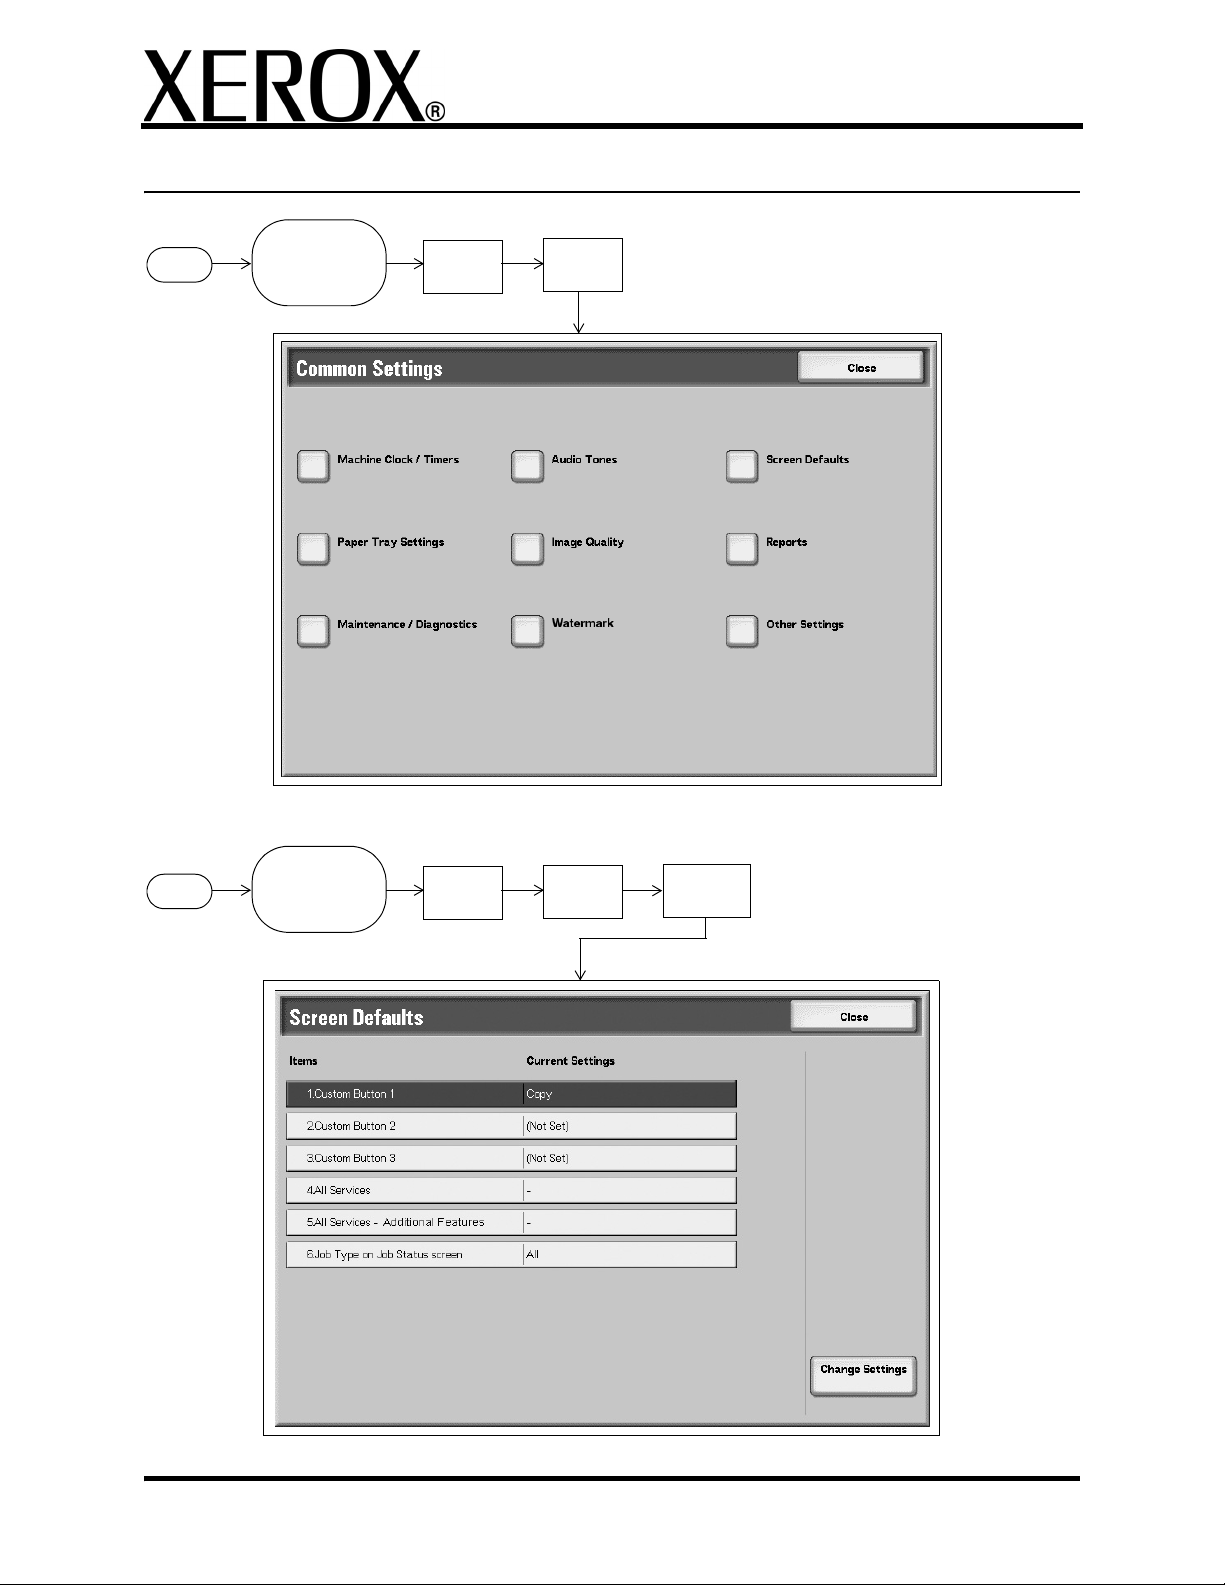
Common Settings
XEROX 4595 Copier/Printer Basic Navigation
Quick Reference for Administrators
701P46249, Version 1.0, April 2007
Login
System
Administrator
Menu
System
Settings
System
Settings
Screen Defaults
System
Login
Administrator
Menu
System
Settings
System
Settings
Common
Settings
2
Page 3

Paper Tray Settings
XEROX 4595 Copier/Printer Basic Navigation
Quick Reference for Administrators
701P46249, Version 1.0, April 2007
Login
System
Administrator
Menu
System
Settings
System
Settings
Common
Settings
Other Settings (Common Settings)
Login
System
Administrator
Menu
System
Settings
System
Settings
Common
Settings
3
Page 4

Copy Mode Settings
XEROX 4595 Copier/Printer Basic Navigation
Quick Reference for Administrators
701P46249, Version 1.0, April 2007
Login
System
Administrator
Menu
System
Settings
System
Settings
Copy Defaults
System
Login
Administrator
Menu
System
Settings
System
Settings
Copy Mode
Settings
4
Page 5

Setup Menu
XEROX 4595 Copier/Printer Basic Navigation
Quick Reference for Administrators
701P46249, Version 1.0, April 2007
Login
System
Administrator
Menu
System
Settings
Login Setup/Auditron Administration
Login
System
Administrator
Menu
System
Settings
5
Page 6

XEROX 4595 Copier/Printer Basic Navigation
Quick Reference for Administrators
701P46249, Version 1.0, April 2007
Set/change the Power Saver time
interval
1. Press the Log In/Out button.
2. Enter the System Administrator Login ID and
select Confirm.
3. Select System Settings > System Settings >
Common Settings > Machine Clock/Timers.
4. Select Auto Power Saver > Change Set-
tings.
5. Enter the desired time interval for the Low
Power Mode and the Sleep Mode (two separate modes).
6. Select Save.
7. Select Close/Exit until you exit the System
Administration mode.
Set/change the Screen Defaults
1. Press the Log In/Out button.
2. Enter the System Administrator Login ID and
select Confirm.
3. Select System Settings > System Settings >
Common Settings > Screen Defaults.
4. Select the desired Screen Defaults feature and
Change Settings.
5. Select the desired options/settings for that feature and select Save to return to the Screen
Defaults window.
6. Repeat steps 4 and 5 for other Screen Defaults
features, including:
• Custom Button 1-3
• All Services
• All Services - Additional Features
• Job Type on Job Status screen
7. Select Close/Exit until you exit the System
Administration mode.
Set/change the default Paper Tray
Attributes
1. Press the Log In/Out button.
2. Enter the System Administrator Login ID and
select Confirm.
3. Select System Settings > System Settings >
Common Settings > Paper Tray Settings.
4. Select Paper Tray Attributes.
5. Select the desired paper tray and Change Set-
tings.
6. If necessary, select Paper Size > Auto Size
Detect or Variable.
7. Select Save.
8. Select Paper Type/Color and the desired
Paper Type and if applicable, the Paper Color.
9. Select Save.
10. Select Save to return to the Tray screen.
11. Se l e ct Save again to return to the Paper Tray
Attributes screen.
12. Repeat Steps 5-11 for the other trays.
13. Select Close/Exit until you exit the System
Administration mode.
Set/change the System Administrator Login ID and Password
1. Press the Log In/Out button.
2. Enter the System Administrator Login ID and
select Confirm.
3. Select System Settings > System Adminis-
trator Settings.
4. Select System Administrator Login ID.
5. Select On and Keyboard.
6. Enter the new System Administrator Login ID
and then re-enter it a second time.
7. Select Save.
8. From the System Administrator Settings window, select System Administrator Pass-
word.
9. Select Keyboard.
10. Enter the new password and then re-enter it a
second time.
11. Se l e ct Save.
12. Select Close/Exit until you exit the System
Administration mode.
6
 Loading...