

Page 1

NPS/IPS Extensions
Xerox DocuPrint 100/115/135/180 EPS
operations
guide
701P42241
September, 2004
Page 2

Prepared by:
Xerox Corporation
Global Knowledge and Language Services
800 Philips Road Bldg. 845-17S
Webster, New York 14580
USA
©2004 by Xerox Corporation. All rights reserved.
Copyright protection claimed includes all forms and matters of copyrightable material and information
now allowed by statutory judicial law or hereinafter granted, including without limitation, material generated
from the software programs displayed on the screen such as icons, screen displays, or looks.
Printed in the United States of America.
XEROX® and all Xerox product names mentioned in this publication are trademarks of XEROX CORPORATION.
Other company trademarks are also acknowledged.
Changes are periodically made to this document. Changes, technical inaccuracies, and
typographic errors will be corrected
in subsequent editions.
Page 3

Safety
Laser safety . . . . . . . . . . . . . . . . . . . . . . . . . . . . . . . . . . . . . . . . . . . . . . . . . . . . . . . . . . . . . . . . . . iii
Ozone information: U. S. only . . . . . . . . . . . . . . . . . . . . . . . . . . . . . . . . . . . . . . . . . . . . . . . . . . . . . iii
Operation safety: U. S. . . . . . . . . . . . . . . . . . . . . . . . . . . . . . . . . . . . . . . . . . . . . . . . . . . . . . . . . . . iv
Operation safety: Europe . . . . . . . . . . . . . . . . . . . . . . . . . . . . . . . . . . . . . . . . . . . . . . . . . . . . . . . . v
Warning markings . . . . . . . . . . . . . . . . . . . . . . . . . . . . . . . . . . . . . . . . . . . . . . . . . . . . . . . v
Electrical supply . . . . . . . . . . . . . . . . . . . . . . . . . . . . . . . . . . . . . . . . . . . . . . . . . . . . . . . . v
Ventilation . . . . . . . . . . . . . . . . . . . . . . . . . . . . . . . . . . . . . . . . . . . . . . . . . . . . . . . . . . . . . vi
Operator accessible areas . . . . . . . . . . . . . . . . . . . . . . . . . . . . . . . . . . . . . . . . . . . . . . . . vi
Maintenance . . . . . . . . . . . . . . . . . . . . . . . . . . . . . . . . . . . . . . . . . . . . . . . . . . . . . . . . . . .vi
Before cleaning your product . . . . . . . . . . . . . . . . . . . . . . . . . . . . . . . . . . . . . . . . . . . . . . vi
CE mark: Europe only . . . . . . . . . . . . . . . . . . . . . . . . . . . . . . . . . . . . . . . . . . . . . . . . . . . . . . . . . . .vi
Radio and telecommunications equipment directive . . . . . . . . . . . . . . . . . . . . . . . . . . . . . . . . . . . vii
Europe only . . . . . . . . . . . . . . . . . . . . . . . . . . . . . . . . . . . . . . . . . . . . . . . . . . . . . . . . . . . vii
For further information . . . . . . . . . . . . . . . . . . . . . . . . . . . . . . . . . . . . . . . . . . . . . . . . . . . . . . . . . viii
Introduction
About this guide . . . . . . . . . . . . . . . . . . . . . . . . . . . . . . . . . . . . . . . . . . . . . . . . . . . . . . . . . . . . . . .ix
Contents . . . . . . . . . . . . . . . . . . . . . . . . . . . . . . . . . . . . . . . . . . . . . . . . . . . . . . . . . . . . . .ix
Conventions . . . . . . . . . . . . . . . . . . . . . . . . . . . . . . . . . . . . . . . . . . . . . . . . . . . . . . . . . . .ix
Documentation . . . . . . . . . . . . . . . . . . . . . . . . . . . . . . . . . . . . . . . . . . . . . . . . . . . . . . . . . . . . . . . . x
DocuPrint 100/115/135/155/180 EPS documentation . . . . . . . . . . . . . . . . . . . . . . . . . . . . x
NPS/IPS publications . . . . . . . . . . . . . . . . . . . . . . . . . . . . . . . . . . . . . . . . . . . . . . . . . . . .xi
Printing the customer documentation . . . . . . . . . . . . . . . . . . . . . . . . . . . . . . . . . . . . . . . xii
Table of contents
1 Product overview
System overview . . . . . . . . . . . . . . . . . . . . . . . . . . . . . . . . . . . . . . . . . . . . . . . . . . . . . . . . . . . . 1-1
Operating system software . . . . . . . . . . . . . . . . . . . . . . . . . . . . . . . . . . . . . . . . 1-2
Network Printer Series (NPS) and IPDS Printing System (IPS) . . . . . . . . . . . . 1-2
Data streams supported . . . . . . . . . . . . . . . . . . . . . . . . . . . . . . . . . . . . . . . . . . 1-3
Differences in supported software features . . . . . . . . . . . . . . . . . . . . . . . . . . . . 1-4
Components of the NPS/IPS Extension . . . . . . . . . . . . . . . . . . . . . . . . . . . . . . . . . . . . . . . . . . . 1-5
2 Installation planning
Preparing for installation . . . . . . . . . . . . . . . . . . . . . . . . . . . . . . . . . . . . . . . . . . . . . . . . . . . . . . . 2-1
DocuPrint NPS Extension . . . . . . . . . . . . . . . . . . . . . . . . . . . . . . . . . . . . . . . . . 2-1
DocuPrint IPS Extension . . . . . . . . . . . . . . . . . . . . . . . . . . . . . . . . . . . . . . . . . . 2-2
Installation process . . . . . . . . . . . . . . . . . . . . . . . . . . . . . . . . . . . . . . . . . . . . . . . . . . . . . . . . . . . 2-2
Software licensing . . . . . . . . . . . . . . . . . . . . . . . . . . . . . . . . . . . . . . . . . . . . . . . . . . . . . . . . . . . 2-3
3 Changing print modes
Changing from EPS print mode to NPS/IPS print mode . . . . . . . . . . . . . . . . . . . . . . . . . . . . . . 3-1
Changing from NPS/IPS print mode to EPS print mode . . . . . . . . . . . . . . . . . . . . . . . . . . . . . . 3-4
NPS/IPS Extension Operations Guide
i
Page 4

Table of contents
4 Problem solving
Mode switching problems . . . . . . . . . . . . . . . . . . . . . . . . . . . . . . . . . . . . . . . . . . . . . . . . . . . . . . 4-1
Information to have when calling for service . . . . . . . . . . . . . . . . . . . . . . . . . . . . . . . . . . . . . . . 4-1
Index
ii NPS/IPS Extension Operations Guide
Page 5
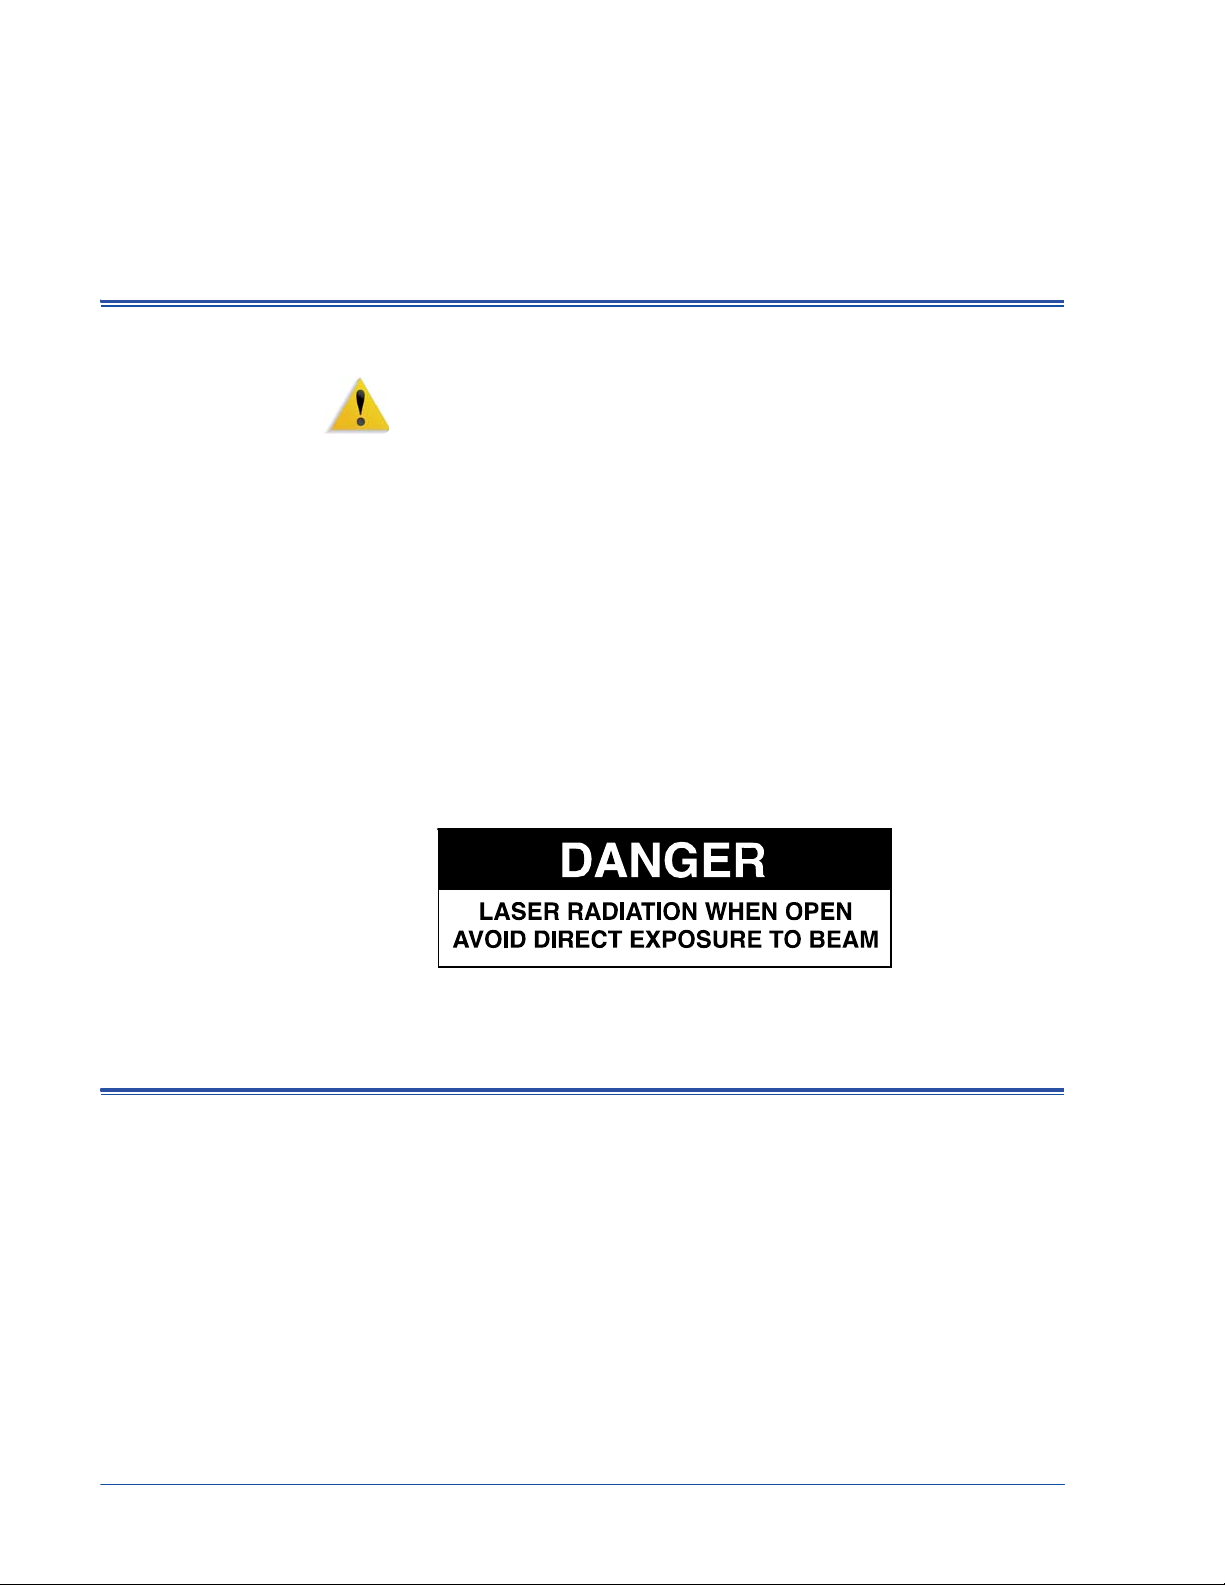
Laser safety
Safety
WARNING: Adjustments, use of controls, or performance of
procedures other than those specified herein may result in
hazardous light exposure.
The Xerox DocuPrint printers are certified to comply with the
performance standards of the U.S. Department of Health,
Education, and Welfare for Class 1 laser products. Class 1 laser
products do not emit hazardous radiation. The DocuPrint printers
do not emit hazardous radiation because the laser beam is
completely enclosed during all modes of customer operation.
The laser danger labels on the system are for Xerox service
representatives and are on or near panels or shields that must be
removed with a tool.
DO NOT REMOVE LABELED PANELS OR PANELS NEAR
LABELS. ONLY XEROX SERVICE REPRESENTATIVES HAVE
ACCESS TO THESE PANELS.
Ozone information: U. S. only
This product produces ozone during normal operation. The
amount of ozone produced depends on copy volume. Ozone is
heavier than air. The environmental parameters specified in the
Xerox installation instructions ensure that concentration levels are
within safe limits. If you need additional information concerning
ozone, call 1-800-828-6571 to request the Xerox publication
600P83222, OZONE.
NPS/IPS Extension Operations Guide iii
Page 6

Safety
Operation safety: U. S.
Your Xerox equipment and supplies have been designed and
tested to meet strict safety requirements. They have been
approved by safety agencies, and they comply with environmental
standards. Please observe the following precautions to ensure
your continued safety.
WARNING: Improper connection of the equipment grounding
conductor may result in risk of electrical shock.
• Always connect equipment to a properly grounded electrical
• Never use a ground adapter plug to connect equipment to an
• Always place equipment on a solid support surface with
• Always use materials and supplies specifically designed for
outlet. If in doubt, have the outlet checked by a qualified
electrician.
electrical outlet that lacks a ground connection terminal.
adequate strength for its weight.
your Xerox equipment. Use of unsuitable materials may result
in poor performance and may create a hazardous situation.
• Never move either the printer or the controller without first
contacting Xerox for approval.
• Never attempt any maintenance that is not specifically
described in this documentation.
• Never remove any covers or guards that are fastened with
screws. There are no operator-serviceable areas within these
covers.
• Never override electrical or mechanical interlocks.
• Never use supplies or cleaning materials for other than their
intended purposes. Keep all materials out of the reach of
children.
• Never operate the equipment if you notice unusual noises or
odors. Disconnect the power cord from the electrical outlet and
call service to correct the problem.
If you need any additional safety information concerning the
equipment or materials Xerox supplies, call Xerox Product Safety
at the following toll-free number in the United States:
1-800-828-6571
For customers outside the United States, contact your local Xerox
representative or operating company.
iv NPS/IPS Extension Operations Guide
Page 7
Operation safety: Europe
This Xerox product and supplies are manufactured, tested and
certified to strict safety regulations, electromagnetic regulations
and established environmental standards.
Any unauthorised alteration, which may include the addition of
new functions or connection of external devices, may impact the
product certification.
Please contact your Xerox representative for more information.
Warning markings
All warning instructions marked on or supplied with the product
should be followed.
This WARNING alerts users to areas of the product where there is
the possibility of personal damage.
Safety
Electrical supply
This WARNING alerts users to areas of the product where there
are heated surfaces, which should not be touched.
This product shall be operated from the type of electrical supply
indicated on the product’s data plate label. If you are not sure that
your electrical supply meets the requirements, please consult your
local power company for advice.
WARNING
This product must be connected to a protective earth circuit. This
product is supplied with a plug that has a protective earth pin. This
plug will fit only into an earthed electrical outlet. This is a safety
feature. Always connect equipment to a properly grounded
electrical outlet. If in doubt, have the outlet checked by a qualified
electrician.
To disconnect all electrical power to the product, the disconnect
device is the power cord. Remove the plug from the electrical
outlet.
NPS/IPS Extension Operations Guide v
Page 8

Safety
Ventilation
Slots and opening in the enclosure of the product are provided for
ventilation. Do not block or cover the ventilation vents, as this
could result in the product overheating.
This product should not be placed in a built-in installation unless
proper ventilation is provided, please contact your Xerox
representative for advice.
Never push objects of any kind into the ventilation vents of the
product.
Operator accessible areas
This product has been designed to restrict operator access to safe
areas only. Operator access to hazardous areas is restricted with
covers or guards, which would require a tool to remove. Never
remove these covers or guards.
Maintenance
Before cleaning your product
CE mark: Europe only
Any operator product maintenance procedures will be described in
the user documentation supplied with the product. Do not carry
out any maintenance on the product, which is not described in the
customer documentation.
Before cleaning this product, unplug the product from the electrical
outlet. Always use materials specifically designated for this
product, the use of other materials may result in poor performance
and may create a hazardous situation. Do not use aerosol
cleaners, they may be flammable under certain circumstances.
January 1, 1995: Council Directive 73/23/EEC, amended by
Council Directive 93/68/EEC, approximation of the laws of the
member states related to low voltage equipment.
January 1, 1996: Council Directive 89/336/EEC, approximation of
the laws of the member states related to electromagnetic
compatibility.
vi NPS/IPS Extension Operations Guide
Page 9

March 9, 1999: Council Directive 99/5/EC, on radio equipment and
telecommunications terminal equipment and the mutual
recognition of their conformity.
A full declaration of conformity, defining the relevant directives and
referenced standards, can be obtained from your Xerox
representative.
In order to allow this equipment to operate in proximity to
Industrial, Scientific and Medical (ISM) equipment, the external
radiation for the ISM equipment may have to be limited or special
mitigation measures taken.
This is a Class A product. In a domestic environment this product
may cause radio frequency interference, in which case the user
may be required to take adequate measures.
Shielded interface cables must be used with this product to
maintain compliance with Council Directive 89/36/EEC.
Radio and telecommunications equipment directive
Safety
Europe only
Certification to 1999/5/EC Radio Equipment and
Telecommunications Terminal Equipment Directive:
This Xerox product has been self-certified by Xerox for panEuropean single terminal connection to the analog public switched
telephone network (PSTN) in accordance with Directive 1999/5/
EC.
The product has been designed to work with the natiopnal PSTNs
and compatible PBXs of the following countries:
Austria Germany Luxembourg Sweden
Belgium Greece Netherlands Switzerland
Denmark Iceland Norway United Kingdom
Finland Ireland Portugal
France Italy Spain
In the event of problems, contact your local Xerox representative
in the first instance.
This product has been tested to, and is compliant with, TBR21, a
specification for terminal equipment for use on analog switched
telephone networks in the European Economic area.
The product may be configured to be compatible with other
country networks. Please contact your Xerox representative if
NPS/IPS Extension Operations Guide vii
Page 10

Safety
your product needs to be reconnected to a network in another
country. This product has no user-adjustable settings.
NOTE: Although this product can use either loop disconnect
(pulse) or DTMF (tone) signaling, it should be set to use DTMF
signaling. DTMF signaling provides reliable and faster call setup.
Modification or connection to external control software, or to
external control apparatus not authorized by Xerox, invalidates its
certification.
For further information
For more information on Environment, Health and Safety in
relation to this Xerox product and supplies, please contact the
following customer help lines:
Europe:+44 1707 353434
USA:1 800 8286571
Canada:1 800 8286571
viii NPS/IPS Extension Operations Guide
Page 11

About this guide
Introduction
This document provides all the information you need to install, set
up, and operate the NPS/IPS Extension option on the DocuPrint
100/115/135/155/180 EPS. It also describes the procedure for
switching between operating modes and provides troubleshooting
information. This document is intended for the site system
administrator who is responsible for installing and setting up the
NPS/IPS Extension option, and for the Operator who is
responsible for the day-to-day operations.
Before using this documentation, become familiar with its contents
and conventions.
Contents
Conventions
This guide contains the following:
• Chapter 1, “Product overview,” provides detailed explanations
of the NPS/IPS Extension option.
• Chapter 2, “Installation planning,” gives you the information
that you need to prepare for installation of the NPS/IPS
Extension software.
• Chapter 3, “Changing print modes,” provides procedures for
switching between EPS, and NPS/IPS operating systems.
• Chapter 4, “Problem solving,” provides troubleshooting
information about switching between print modes.
• An index is provided at the end of this document.
This guide uses the following conventions:
• Initial capital and angle brackets: Within procedures, the
names of keys are shown with an initial capital and within
angle brackets (for example, press <Enter>).
• Angle brackets: Variable information, or the position of a
specified argument in the command syntax, appears in angle
NPS/IPS Extension Operations Guide ix
Page 12

Introduction
brackets (for example, List Fonts <pattern>).
• Fixed pitch font: Within procedures, text and numbers that
you enter are shown in a bold, fixed pitch (“computer”) font (for
example, enter privilege operator).
Messages that appear on the controller screen are shown in
the medium weight fixed pitch font.
For example: Online Gateway disabled.
• The word “enter” within procedures: The two-step process
of keying in data and pressing <Enter> (for example, enter y).
• Italics: Document and library names are shown in italics (for
example, the Xerox DocuPrint NPS/IPS Guide to Managing
Print Jobs).
Variable elements in a command or directory path are also
shown in italics (for example, var/spool/XRXnps/ filename).
• Vertical bars: Alternatives to specified arguments are
separated by vertical bars (for example, Set Time <Time |
Remote Host Name | IP Address>).
NOTE: Notes are hints that help you perform a task or
understand the text.
Documentation
DocuPrint 100/115/135/155/180 EPS documentation
CAUTION: Cautions alert you to an action that could damage
hardware or software.
WARNING: Warnings alert you to conditions that may affect the
safety of people.
This section lists related publications and provides information on
printing the customer documentation.
The following documents contain information on the Xerox
DocuPrint 100/115/135/155/180 EPS:
• Xerox DocuPrint 100/115/135/155/180 EPS Electronic
Customer Documentation CD
• Xerox DocuPrint 100/115/135/155/180 EPS Operator Guide
• Xerox Document Services Platform System Guide
• Xerox Document Services Platform Using LCDS Print
Description Language
x NPS/IPS Extension Operations Guide
Page 13

Introduction
• Xerox DocuPrint 100/115/135/155/180 EPS Installation
Planning Guide
• Xerox DocuPrint 100/115/135/155/180 EPS NPS/IPS
Extension Operations Guide
• Xerox DocuPrint EPS Font Reference Manual
• Xerox DocuPrint 100/115/135/155/180 EPS Operator Quick
Reference Card
• Xerox DocuPrint 100/115/135/155/180 EPS Customer
Information Quick Reference Card
• Xerox DocuPrint 100/115/135/155/180 EPS Job Submission
Quick Reference Card
• Xerox DocuPrint 100/115/135/155/180 EPS Operator Training
Instructor Guide
• Xerox DocuPrint 100/115/135/155/180 EPS Operator Training
Participant Guide
• Xerox DocuPrint 100/115/135/155/180 EPS Programmer/
Administrator Self-Study
• Generic MICR Fundamentals Guide
NPS/IPS publications
For customers who have the NPS/IPS Extension configuration
and are using the Network Printer Series software, the following
related publications are available:
• Xerox DocuPrint 96/4635/180 NPS/IPS V8.0 Interactive
Customer Documentation CD
• Xerox DocuPrint 96/4635/180 NPS/IPS System Overview
Guide
• Xerox DocuPrint 96/4635/180 NPS/IPS Guide to Performing
Routine Maintenance
• Xerox DocuPrint 96/4635/180 NPS/IPS Troubleshooting
Guide
• Xerox DocuPrint 96/4635/180 NPS/IPS Master Index
• Xerox DocuPrint 96/4635/180 NPS/IPS Installation Planning
Guide
• Xerox DocuPrint 96/4635/180 NPS/IPS Customer Information
Quick Reference Card
• Xerox DocuPrint NPS/IPS Guide to Configuring and Managing
the System
• Xerox DocuPrint NPS/IPS Guide to Submitting Jobs from the
Client
• Xerox DocuPrint NPS/IPS Guide to Managing Print Jobs
NPS/IPS Extension Operations Guide xi
Page 14

Introduction
• Xerox DocuPrint NPS/IPS Guide to Using Page Description
Languages
• Xerox DocuPrint NPS/IPS Solutions Guide for IPDS Printing
• Xerox DocuPrint NPS/IPS Decomposition Service and Tools
Guide
• Xerox DocuPrint NPS/IPS Glossary
Printing the customer documentation
You can print the customer documentation for both the DocuPrint
EPS and the DocuPrint NPS/IPS. The complete documentation
sets are provided on CD with your printing system.
DocuPrint EPS documentation
You can print the latest version of the DocuPrint EPS customer
documentation from your DocuSP controller by following this
procedure:
1. Create a queue.
2. Insert the DOC CD into the controller CD drive.
3. Open a UNIX terminal window on the graphical user interface.
4. Enter:
cd /cdrom/quantumedoc/pdfs
5. To list the names of all documents in PDF format, enter:
ls -l
6. Enter the lpr location:
cd /usr/ucb
7. To print the selected file (document), enter:
lpr -P queuename/cdrom/
quantumedoc/pdfs/filename
where filename is the name of the document file to be printed.
You can also print the documentation files from your PC, using the
normal document printing procedure for your system.
NPS/IPS documentation
You can print the documentation for your system when it is
operating in NPS/IPS mode from your PC by following this
procedure.
1. Insert the DocuPrint NPS/IPS Interactive Customer
Documentation CD in the CD drive. After a few seconds, the
documentation Main menu is displayed.
2. Click [NPS/IPS DOCUMENTS] on the navigation bar at the top
of the screen.
xii NPS/IPS Extension Operations Guide
Page 15

Introduction
3. From the document list, click the name of the document that
you want to print.
4. If the documentation does not open when the CD is inserted,
browse to your CD drive and open the file named “docs.” Open
the .pdf file for the document that you want to print.
5. Select [Print] from the Acrobat Reader File pull-down menu to
print the document.
NPS/IPS Extension Operations Guide xiii
Page 16

Introduction
xiv NPS/IPS Extension Operations Guide
Page 17

System overview
1 Product overview
The NPS/IPS Extension is an option for the DocuPrint 100/115/
135/155/180 EPS that enables your printing system to operate in
two different print modes: Enterprise Printing System (EPS), and
Network Printer Series/IPDS Printing System (NPS/IPS). These
print modes allow your printing system to handle more data
streams, giving you added flexibility and increased productivity.
This chapter introduces the NPS/IPS Extension option hardware
and software components, features, functions, and modes of
operation.
The DocuPrint 100/115/135/155/180 EPS prints high quality, highresolution monochrome documents in simplex (one-sided) or
duplex (two-sided) mode at high production speeds from LCDS,
PostScript, and PCL data streams. Jobs may be sent to the EPS
printer from client workstations over a network or from a
mainframe host computer over a channel.
The following figure shows a DP 180 EPS, which is available with
the four stacker configuration.
Figure 1-1 The Xerox DocuPrint 180 EPS
The NPS/IPS Extension option expands the printing capabilities of
the 100/115/135/155/180 EPS. With this option installed, the EPS
has the additional ability to print jobs from an IPDS data stream,
as well as utilize the extended network printing capabilities that
are available in NPS/IPS mode.
The NPS/IPS Extension consists of two components that are
easily added to your printing system:
• Hardware: An external fixed disk drive
• Software: NPS/IPS 8.0 operating system software
NPS/IPS Extension Operations Guide 1-1
Page 18

Product overview
Operating system software
Network Printer Series (NPS) and IPDS Printing System (IPS)
You can switch between print modes by performing a few simple
steps. This procedure is described in chapter 3, “Changing print
modes.”
The DocuPrint 100/115/135/155/180 EPS operates from the
standard internal fixed disk drive, and the EPS software release
level must be 2.10.00 or higher. The DocuPrint NPS/IPS operates
from an external fixed disk drive, and the NPS/IPS software level
must be 7.4.1 or higher.
Overview
The DocuPrint NPS/IPS enables personal computer (PC), Sun
workstation, DEC workstation, HP/Apollo, IBM RS/6000, and
Apple Macintosh users to print PostScript level 2, HP PCL5e, or
ASCII documents. These documents are then submitted to the
printing system over a network connection.
The system also enables IBM hosts running appropriate levels of
PSF to print IPDS data. The NPS/IPS emulates an IBM AFP
Group 3 Page Printer with the Advanced Function Image and
Graphics (AFIG) option.
The DocuPrint NPS/IPS can receive data at 240 or 300 dpi and
full-page IOCA images at 600 dpi. The system can also use 600
dpi fonts. All 240 or 300 dpi resources are interpolated to 600 dpi
by the printing system for higher print quality.
For more detailed DocuPrint NPS/IPS product information, refer to
the DocuPrint NPS/IPS System Overview Guide.
IBM hosts supported
The following IBM hosts are supported for NPS/IPS with a network
connection:
•MVS
•OS/2
• OS/400 (TCP/IP only)
•AIX
1-2 NPS/IPS Extension Operations Guide
Page 19

Connectivity
One or more of the following network communications systems
may be used to transport documents from the client workstations
to the printing system:
• Ethernet local area network (LAN) running TCP/IP, AppleTalk,
or Novell NetWare network protocol software.
• Token Ring running TCP/IP, Novell 3.x, or AppleTalk network
protocol software.
• FDDI running TCP/IP, Novell 3.x, or AppleTalk network
protocol software.
Product overview
Figure 1-2 DocuPrint NPS/IPS through Token Ring or Ethernet
1. Host system (workstation or mainframe)
2. Token Ring or Ethernet network connection
3. Controller
4. Printer interface cable
5. Printer
For more detailed DocuPrint NPS/IPS product information, refer to
your DocuPrint NPS/IPS System Overview Guide.
Data streams supported
The Xerox DocuPrint 100/115/135/155/180 EPS with optional
NPS/IPS Extension hardware and software supports the following
data formats:
• PostScript Level 2
• PostScript Level 3 with PDF
•PCL 5e
•PCL 6
• LCDS
•IPDS
•VIPP
• ASCII
•TIFF
NPS/IPS Extension Operations Guide 1-3
Page 20

Product overview
The following table shows the print mode (EPS, NPS, or IPS) in
which the printing system must be operating to process specific
data formats.
Table 1-1 Point mode required to process supported data streams
Acceptable
data stream
Required
print mode
PCL5e PCL6
EPS
EPS NPS EPS EPS
or
NPS
PostScript
Level 2
PostScript
Level 3 with
PDF
ASCII VIPP TIFF LCDS IPDS*
EPS
or
NPS
or
NPS
NOTE: When the system is printing an IPDS job using DocuPrint
NPS/IPS, PostScript and PCL data streams can be spooled in the
background. If a PostScript or PCL job is printing, the NPS/IPS
software reports a not-ready condition back to the host until the
printer becomes available.
*IPDS is not available as of this printing for the DocuPrint EPS
systems.
Differences in supported software features
Because of differences between NPS/IPS and EPS in regard to
the PostScript, PCL, ASCII, and VIPP interpreters, some features
are supported in NPS/IPS mode that are not supported in EPS
mode, and vice versa. Listed below are some features that are
supported differently by the two different operating systems.
EPS or
NPS
EPS PS or
IPS
EPS only:
• Queue overrides
• Multiple queues
• DocuSP job ticket
• 178 default PostScript fonts
• Level 3 PostScript interpreter
NPS/IPS only:
•Cycle forms
• xgfnub (ability to add a VIPP Start command in front of a file)
• NPS/IPS job ticket
• Two-sided (duplex) tab stock printing
• Virtual printer/document attributes
1-4 NPS/IPS Extension Operations Guide
Page 21

NOTE: You can access some equivalent options on the EPS
by using the Job Manager and Queue Manager windows.
• 51 default PostScript Type 1 fonts
• Level 2 PostScript interpreter
NOTE: Ensuring that the queue names on the EPS are unique
and different from the Virtual Printer names on the NPS/IPS
will help prevent jobs from being sent in the wrong print mode.
Be sure to consider this when setting up your clients.
Both EPS and NPS/IPS:
•FIFO
• Background form
• Ability to add a VIPP start command
• Resource based scheduling
Components of the NPS/IPS Extension
Product overview
The NPS/IPS Extension option consists of the following system
components, which are added to the base DocuPrint 100/115/135/
155/180 EPS configuration:
• 9.1 gigabyte (GB) or larger external fixed disk drive
• 1 meter SCSI cable
• AC power cord
• NPS/IPS version 7.4.1 software or higher
The external fixed disk drive is located under the quarter-inch
cartridge (QIC) tape drive within the controller stand, and is
connected to the processor through the SCSI cable. This external
disk drive requires a separate AC power source.
NPS/IPS Extension Operations Guide 1-5
Page 22

Product overview
Figure 1-3 Controller with external fixed disk drive
1. External fixed disk drive
NOTE: Your system may have a controller and stand that are
different from the ones pictured above. The external disk drive
may be placed in either the right or left compartment of the stand.
1-6 NPS/IPS Extension Operations Guide
Page 23

2 Installation planning
This chapter helps you prepare for delivery and installation of the
NPS/IPS Extension option. It is intended for the person who is
responsible for coordinating the installation of the NPS/IPS
Extension option at your site, and provides an overview of the
tasks associated with installation.
NOTE: The NPS/IPS software must be reinstalled each time your
DocuPrint EPS software is upgraded or reinstalled.
For complete installation planning details, refer to your DocuPrint
NPS/IPS Installation Planning Guide and the DocuPrint 100/115/
135/155/180 EPS Installation Planning Guide.
Preparing for installation
The Xerox representative needs certain information about your
environment to complete the software installation and
configuration process for the NPS/IPS Extension option.
DocuPrint NPS Extension
Information needed
for installation
The following information provides an overview of activities
associated with setting up your system to accept PostScript, PCL,
or ACSII jobs. Some of the most typical tasks that must be
performed prior to installation are:
• Identify networked client workstations that will be used to
submit jobs.
• Install network to system location, if applicable.
• Establish network addresses
Be prepared to provide the Xerox personnel with the following
information during installation:
• Network information such as host-name, IP address, IP
netmask, and default router
• AppleTalk network information, if applicable
• Novell network information, if applicable
• Superuser password
• Accounting information
• Xerox client software information
NPS/IPS Extension Operations Guide 2-1
Page 24

Installation planning
DocuPrint IPS Extension
• lpr information
• UNIX command tool availability
Since you are upgrading your DocuPrint 100/115/135/155/180
EPS, many of these parameters have already been determined.
However, you should refer to “Preparing for installation” in the
Installation Planning Guide for specific information.
The following is an overview of the tasks associated with setting
up your system to accept IPDS data from an IBM host. Some
tasks that typically need to be performed prior to installation are:
• Install Token Ring to the system location, if applicable.
• Install Ethernet to the system location, if applicable.
• Define the printer to your host as an AFP Type 1, Group 3
printer.
• Specify a superuser password.
Defining the printer to a host
Installation process
In order to send data from the IBM host to the printing system, you
must define the printer on your host. The IBM host to which you
are connecting the printing system, as well as the type of
connection used, determines how the printer is defined on the
host.
For example, you may connect the printing system to an AS/400
host through a Token Ring network, or to a PC with OS/2 software
via Ethernet.
For detailed information about defining the printer to your specific
host and connectivity requirements, refer to “Preparing for
installation” in the DocuPrint NPS/IPS Installation Planning Guide.
To efficiently install and set up the NPS/IPS Extension option on
your 100/115/135/155/180 EPS system, certain activities need to
be performed by you and by Xerox.
Xerox is responsible for the physical installation of the NPS/IPS
Extension hardware and IPS/NPS software. The steps in the
installation process typically occur in the following order:
1. Xerox personnel install the NPS/IPS software and the NPS/
IPS Extension hardware.
2. Xerox personnel obtain a software license authorizing you to
use the IPS/NPS software.
2-2 NPS/IPS Extension Operations Guide
Page 25

Software licensing
Installation planning
3. Xerox personnel connect the printing system to the network or
channel.
4. Xerox personnel and you configure the printing system,
clients, or IBM host as applicable to submit jobs.
5. Xerox personnel conduct initial operator training.
For detailed information about the activities that you and Xerox
personnel perform during installation, refer to Installation in the
Xerox DocuPrint NPS/IPS Installation Planning Guide.
When the NPS/IPS software is purchased, the owner needs a
license to use it. Until the license is enabled at the printing system,
the printer does not process jobs.
NOTE: Software licenses are required for the NPS/IPS Extension.
Refer to your Xerox DocuPrint NPS/IPS Installation Planning
Guide for further information on licenses.
NPS/IPS Extension Operations Guide 2-3
Page 26

Installation planning
2-4 NPS/IPS Extension Operations Guide
Page 27

3 Changing print modes
This chapter provides information on switching between the
various print modes of the printing system.
Changing from EPS print mode to NPS/IPS print mode
NOTE: You must be logged in the system as either an Operator or
Administrator to switch from EPS to NPS/IPS mode.
Use the following procedure to change operating modes of the
printing system from EPS mode to NPS/IPS mode.
1. On the DocuSP Print Services window, click the Queue
Manager icon. The Queue Manager window opens.
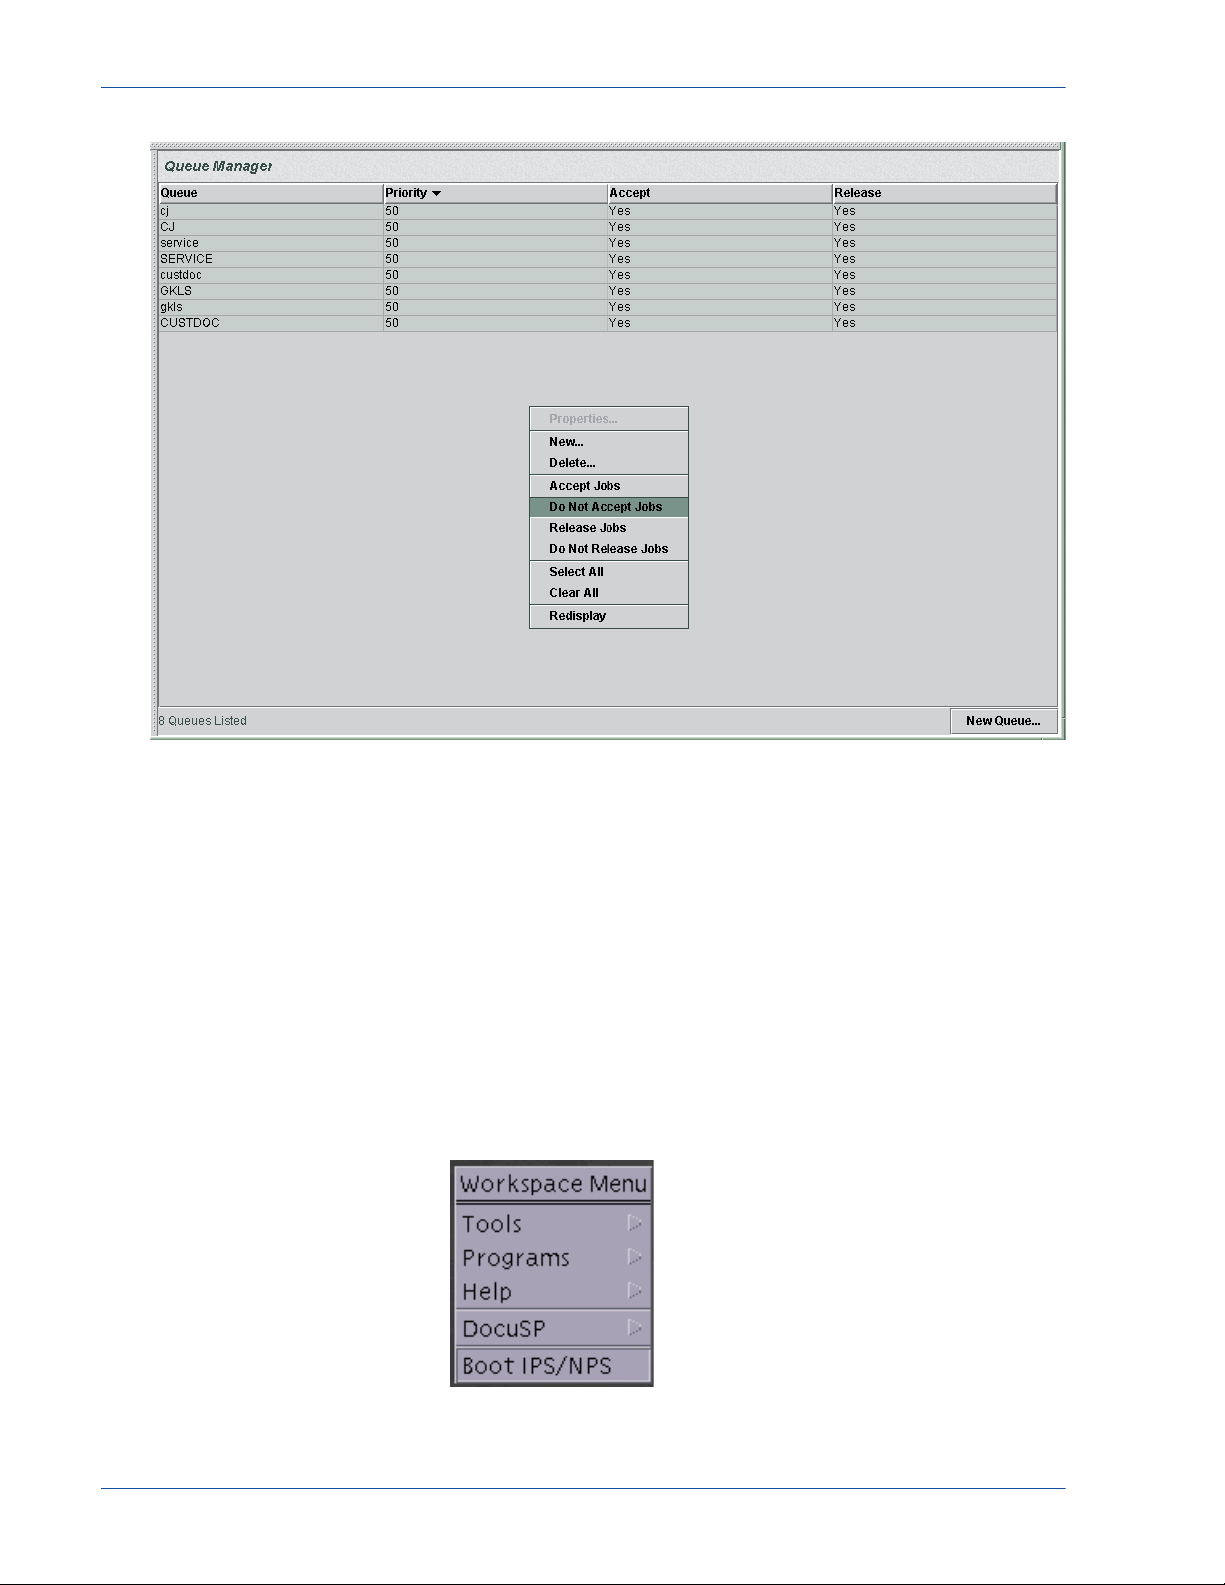
2. In the Queue Manager window, hold all queues by performing
the following:
a. Right-click in the queue list area, and select [Select All]
from the pop-up menu.
b. Right-click again in the queue list area, and select [Do Not
Accept Jobs] from the pop-up menu.
c. Display the pop-up menu again, and select [Do Not
Release Jobs].
NPS/IPS Extension Operations Guide 3-1
Page 28
Changing print modes
Figure 3-1 Queue Manager window with pop-up menu displayed
3. If your system is channel-attached, disable the online gateway
as follows:
a. From the System pull-down menu on the DocuSP window,
select [Online Manager...].
b. On the Online Manager window, select [Disable] in the
Channel Gateway section.
c. Click [Close].
4. Right-click on the screen background to open the Workspace
background menu.
5. From the Workspace menu, select [Boot IPS/NPS].
Figure 3-2 EPS Workspace menu
3-2 NPS/IPS Extension Operations Guide
Page 29

Changing print modes
In a few minutes, the printing system reboots and starts in
NPS/IPS print mode.
Figure 3-3 NPS/IPS graphical user interface main window
NPS/IPS Extension Operations Guide 3-3
Page 30

Changing print modes
Changing from NPS/IPS print mode to EPS print mode
Use the following procedure to change operating modes of the
printing system from NPS/IPS mode to EPS mode.
NOTE: You must be logged in the system as either an Operator or
Administrator to switch between NPS/IPS and EPS modes.
1. Stop printing of any pending jobs, using one of the following
procedures:
• In command line mode: On the command line, enter: stop
printing.
• In GUI mode: Click the red [Stop Printing] button in the
upper-right corner of the main window.
2. View the document list and wait for any document currently
pending or being printed to complete. To view the list, do one
of the following:
• In command line mode: Enter: list documents.
• In GUI mode: Click the [Job Manager] icon to display the
Job Manager window.
3. From the Workspace background menu, select [Start EPS
Printing].
4. On the confirmation window that appears, click [Confirm].
Within a few minutes, the printing system reboots and starts in
EPS print mode, displaying the graphical user interface.
Refer to the DocuPrint 100/115/135/155/180 EPS customer
documentation set for information and procedures for operating in
EPS print mode.
3-4 NPS/IPS Extension Operations Guide
Page 31

4 Problem solving
This chapter describes how to solve some specific problems that
may occur when you are switching from one mode to another.
Mode switching problems
Use the following information if you experience problems when
switching print modes.
Table 4-1 Mode switching problems
Condition Possible causes Corrective actions
Does not boot
from EPS to
NPS/IPS print
mode.
External rigid disk
drive is not powered
ON (LED on the right
front of the external
disk drive is not
illuminated).
SCSI cable between
external rigid disk
drive and processor
is not properly
connected.
Information to have when calling for service
In the United States, if you are unable to correct the problem, call
the following number:
1-800-822-2979
For customers outside the United States, call your local service
representative. A model-specific phone number is attached to
your printer at installation time.
Before you call, make note of the following:
Ensure that the drive is
plugged into the power
strip at the rear of the
controller stand.
Ensure that the SCSI
cable is connected to
the single-ended SCSI
connector on the rear
of the processor unit.
• Status code numbers and messages that appear on the
controller screen and the printer console
• Indicator lights that are lit
NPS/IPS Extension Operations Guide 4-1
Page 32

Problem solving
• Name of your printer, for example, DocuPrint 2000 Series180
EPS
• Serial number of your printing system (a 9-digit alphanumeric
code located on the frame inside the printer, behind the narrow
door to the far left, on the front of the printer)
• Problems you are experiencing
• Whether the problem is an EPS or NPS/IPS problem
Additional information you may wish to note prior to calling
includes:
• An explanation of how output differs from what was expected
• An assessment of whether the symptoms follow a pattern or
occur randomly
Also note any special conditions that may be related to the
problem, such as:
• New applications
• Changes made to the software
• Recent service performed
• Previous conditions under which the application has printed
properly
Give this information to a customer service representative, who
will discuss the situation and give you an estimated time of arrival,
or assist you over the phone to resolve the problem.
4-2 NPS/IPS Extension Operations Guide
Page 33

Index
C
CE mark vi
changing print mode
EPS to NPS/IPS 1
NPS/IPS to EPS 4
components 1, 5
connectivity 3
conventions ix
D
data streams 1, 3
differences, EPS and NPS 4
disk drive, external 1, 5
documentation
available x
NPS/IPS, available xi
printing xii
E
EPS
changing print mode 1
software features 4
EPS print mode
changing to NPS/IPS 1
Ethernet 3
external disk drive 1, 5
I
IBM host 2
installation
information needed for 1
preparing for 1, 2
process 2
installation activities
NPS/IPS 1, 2
L
laser safety iii
N
NPS/IPS
changing print mode 4
installation activities 1, 2
overview 2
software features 4
NPS/IPS print mode
changing to EPS 4
O
operation safety, Europe v–vi
operation safety, U. S. iv
overview, system 1
ozone production information iii
F
features
EPS 1, 4
software 4
G
graphical user interface 4
GUI, see graphical user interface
H
holding queues 1
host
defining IPS printer 2
NPS/IPS Extension Operations Guide I-1
P
preparing for installation 1
print mode, changing
EPS to NPS/IPS 1
NPS/IPS to EPS 4
problem solving 1
problems, see troubleshooting
publications
available x
NPS/IPS, available xi
printing xii
Q
Queue Manager 1–2
Page 34

Index
queues
holding 1
S
safety
hotline numbers iv
laser iii
operation iv–vi
service, calling for 1–2
software
features supported 4
software levels 2
T
TCP/IP 3
Token Ring 3, 2
troubleshooting 1
I-2
NPS/IPS Extension Operations Guide
 Loading...