

Page 1

User Guide
X3-User-Guide
-v2-5-
web.5 1
Page 2

User Guide
Issue No:
V2.5
Dec 2005
Legal Information
The
Xenos Audio
The information presented in this user guide is written specifically for the
Copying of this information through any means
Systems logo is a
property of ATP Systems.
trademark of AT
without specific written consent form ATP Syst
permitted.
P Systems of Ontario, Canada.
NOTES:
X3HA
Headphone Amplifier and is
ems is not
X3-User-Guide
-v2-5-
web.5 2
Page 3

Contents
WELCOME
INTRODUCTION
PACK
AGE CONTENTS
GETTING STARTED
G
I
U
I
P
THE CONTROLS
A
P
P
TROUBLESHOOTING
CARING FOR YOUR X3HA
TECHNICAL SPECIFICAT
WARRANTY INFORMATION
...............................................................................................................................................................................
.....................................................................................................................................................................
..........................................................................................................................................................
...............................................................................................................................................................
ENERAL BATTERY USE I
NSTALLING BATTERIES
SING THE
NPUT CONNECTIONS
LUG IN YOUR HEADPHONES
DJUSTING SOUND LEVEL
OWERING UP
OWER INDICATOR
AC
A
DAPTER
.....................................................................................................................................................
...................................................................................................................................................................10
...............................................................................................................................................................11
.......................................................................................................................................................11
..........................................................................................................................................................12
.................................................................................................................................................12
IONS
NFORMATION
..................................................................................................................................................
...............................................................................................................................................
..........................................................................................................................................
S
..........................................................................................................................................10
........................................................................................................................................13
.............................................................................................................................................15
..........................................................................................................................
4
4
5
6
6
7
7
8
9
X3-User-Guide
-v2-5-
web.5 3
Page 4

1. Welcome
Congratulations on your purchase of the
w
elcome to a world of astounding audio clarity
with
superb
listen to your favourite tracks with incredible clarity and dimension that you never thought
existed.
has a headphone
deliver
T
ake time to read through this user guide as it will provide you with valuable information
to help you ensure that you get the ver
call in for technical
this user guide.
Thank you for choosing Xenos Audio
It will remarkably enhance the sound quality prod
.
Xenos 3
High
-Fidelity sound for many hours of listening pleasure.
output and provide you with the very best sound your headphones can
y best
support, read through and follow the recommendations in
Systems
Headphone Amplifier (X3HA) and
. This professional amplifier wi
performance from
and ATP Systems.
ll provide you
You will be able to
uced by almost any device that
your
X3HA
. Before you
chapter 6
Introduction
Connecting to Headphone Ou
Most CD players, MP3 players, personal computers, medium to high end stereo receivers
and other audio sources with headphone outputs often make use of single-chip , singleended output
fairly reasonable low-distortion sound but
headphones.
This results in low-volume, inferior quality (high distortion) reproduction of the audio signal
by headphone sets. Bass signals sound flat and or hi
when listening to audio tracks from these inferior
can be observed when you turn up the volume to your headphones and is evidenced by
increased distortion of the audio signal.
The
X3HA
audio quality thereby overcoming the weaknesses inherent in lower quality headphone
amplifiers.
As mentioned above, headphone amplifiers in CD players, MP3 players, personal
computer
little distortion as long as there is little to no load connected to their output.
The
X3HA
these
amplifier stage that drives the bipolar transistor output stages. The
same amplifier design as that used in high end speaker amplifiers. A DC-DC converter is
use
amplifiers.
headphone amplifiers. The
d to convert the battery voltage to a full dual-rail supply as found in high end stereo
headphone
Headphone Amplifier provides higher headphone drive levels and enhances
s and stereo receivers, in most cases, can reproduce audio signals with very
takes advantage of this by firstly presenting a negligible load to the output of
tputs
amplifier devices. These devices
often
lack adequate power to effectively drive
gher frequencies
single-chip
X3HA
then uses it s own high quality low-
may without load pr
sound
headphone amplifiers.
X3HA
employs the
oduce
distorted
noise pre
of
This
-
Connecting to Line Outputs
The
X3HA
cases the line output provides a higher qua
for driving headphones. The
driving headphones. This allows you to take advantage of the superior quality of line
output audio.
X3-User-Guide
can also be connected to the line output of audio playback devices. In most
-v2-5-
web.5 4
X3HA
lity low distortion audio signal but is insufficient
can
amplify the line output signal to a level suitable for
Page 5
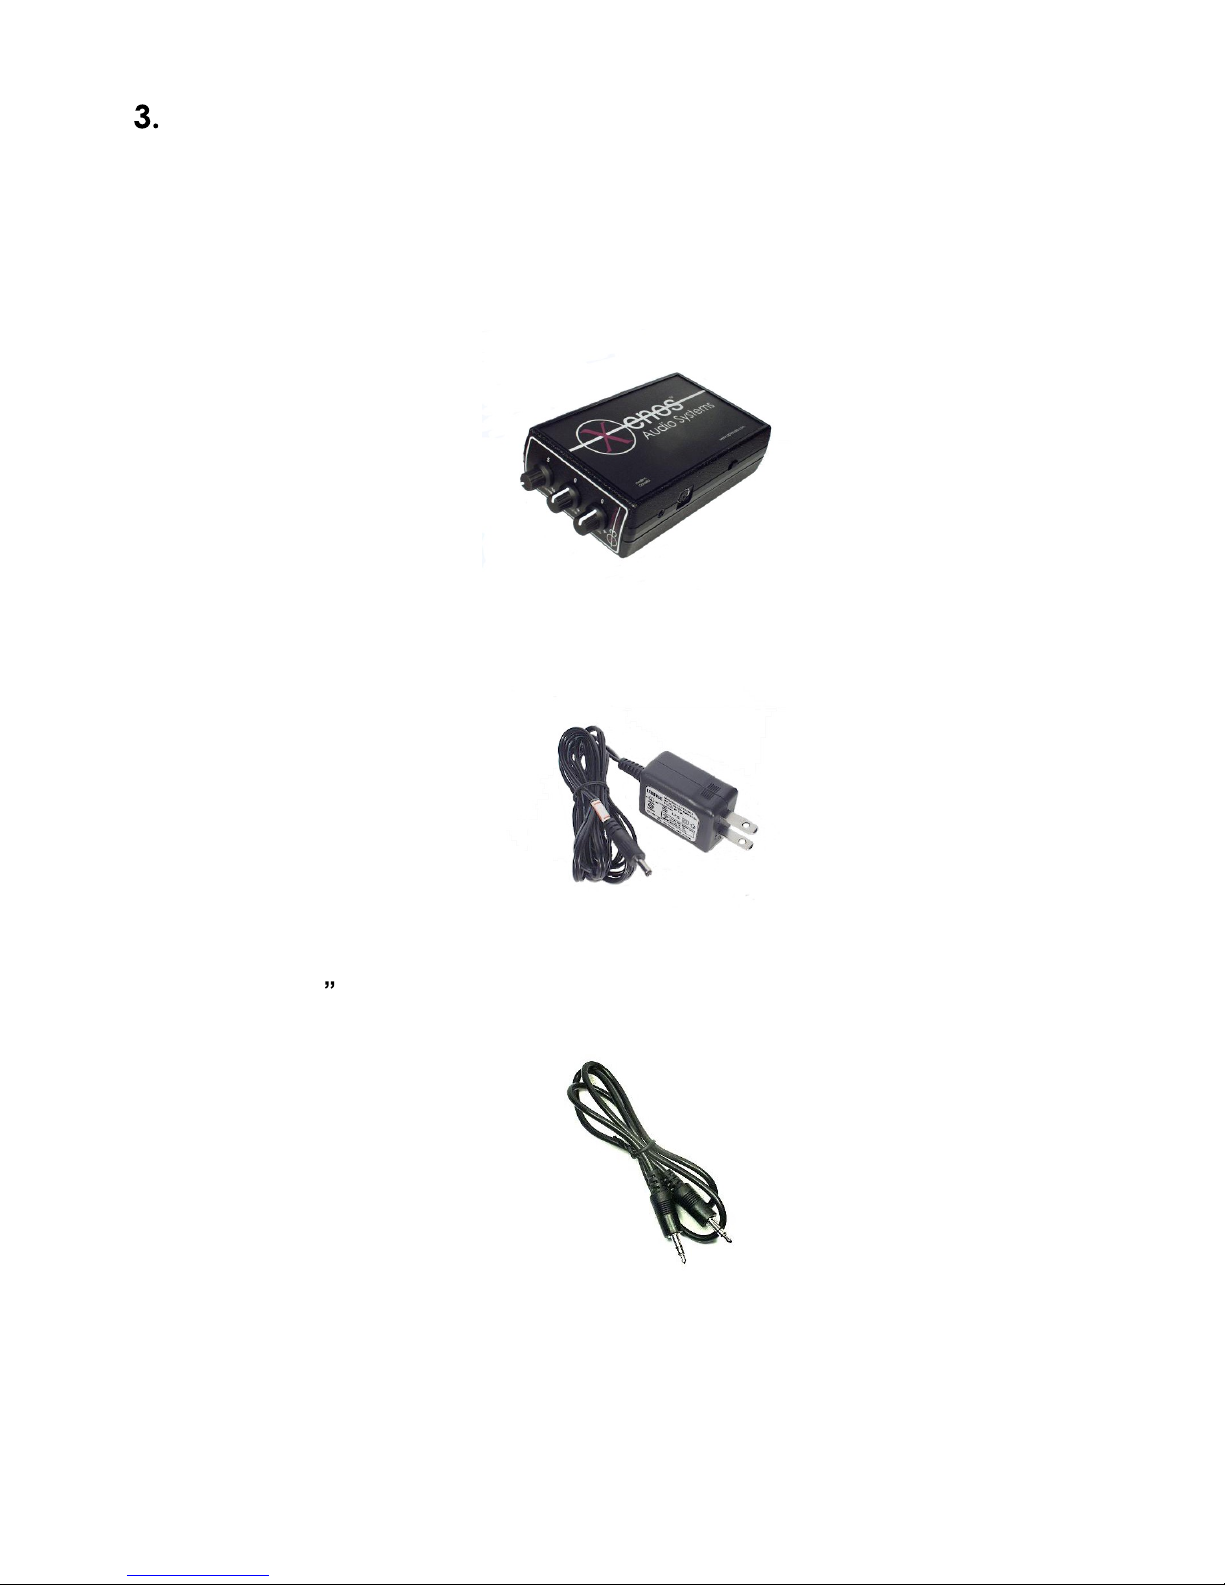
Package Co
Take a few moments to inspect your package and ensure that all items listed here are
included.
If any of the listed items are missing please contact your dealer immediately, or if you
purchased direct from Xenos Audio then refer to the contact infor
guide.
A.
X3HA
B. 9V 1.3A Regulated AC
Headphone Amplifier
ntents
adapter
mation
found in this
C. 3.5mm
X3-User-Guide
(1/8 mini) Stereo Jack patch cord
-v2-5-
web.5 5
Page 6

Getting Started
General battery
If you intend to use
The
X3HA
or NiMH.
charge rechargeable batteries in their appropriate
instructions
The table below indicates the
Alkaline
NiMH
Rechargeable
(2300mAH
cells)
The above
respective batteries are fully charged when installed in the Zenos 3. Also that the
driving a
setting.
and quality.
Note that with Alkaline batteries assuming the above load conditions the
continue to operate beyond the 7
NiMH
voltage is reached
indicator being virtually extinguished.
will work with either Alkaline or rechargeable type batteries including Alkaline
Note that the
before installing them in the
7hrs 6
battery
32Ohm headphone set continuously at approximately
Overall performance will also vary depending on individual battery characteristics
batteries tend to stop delivering sufficient current after their discharged
use information
the
X3HA in a portable mode you will r
X3HA
Battery
Life
8hrs
performance values are
(discharged
does not include a built in battery charger
typical
Time to low
power alarm
7h30min
performance of various battery types:
-
hrs
hour mark but will not perform optimally. Rechargeable
battery condition). This is evidenced by the blue
charger
X3HA
Time to dead battery
after low-power alarm
.
6
0min
30min
indicative
and
equire four AA size batteries.
so you must
according to manufacturer
bas
ed on assumptions
33% 50%
volume
X3HA
will
status
LED
that the
X3HA
is
Caution:
It is
in the
X3-User-Guide
Never mix batteries of different types in the
highly recommend t
X3HA
-v2-5-
.
web.5 6
o use 1.2V
X3HA
2300mAh or 2400mAh NiMH
.
capacity
batteries
Page 7

Installing batteries
Step 1
down on the indicated location while simultaneously pushing towards the rear of the unit
as illustrated.
Step 2 Install the batteries as illustrated being careful to a
polarity markings in the battery compartment. The unit is protected against reverse
polarity however it will not function with incorrectly installed batteries.
Replace the battery compartment door.
-
Open the battery compartme
nt door on the bottom of the unit by gently pressing
View of
Battery Compartment
lign the batteries with the
View
of
Battery Compartment with
Batteries Installed
Using the
The included
It is not necessary to remove the batteries from the unit when using the AC power
adapter
When using the
higher output power than in battery mode (refer to Chapter 8 in this guide). NOTE: Turn
the
X3HA
AC
Adapter
AC
power
. The batteries are automatically disconnected w
AC
power switch off before plugging in the AC
adapter
power
is rated at 9VDC 1.3A regulated output.
adapter
the
X3HA
operates in high-power mode and produces
hen the adapterr is in use.
adapte
r.
X3-User-Guide
-v2-5-
web.5 7
Page 8

WARNING:
the
X3HA. The X3HA
voiding the warranty.
Always turn the power switch of the X3HA off before connecting the
Locate the Power Jack on the rear of the
adapter into the
110V/240V wall outlet.
Input Connections
When facing
As illustra
mini-din socket. The six
X3HA
to connect to other Xenos Audio products.
The included power adapter
may be damaged if plugged into any other power source thereby
DC
Power Jack
the controls, the i
ted two connections are present, t
-pin mini-din socket is used as an expansion port allowing the
of the
nput connections are located on the right side of the
must be used as an external power source for
X3HA
X3HA
Rear V
, insert the DC Jack Plug from the power
. Plug the power adapter into a standard
iew of X3HA
he 3.5mm
(1/8 mini)
jack
AC adapter.
socket
and a six-pin
X3HA
.
Viewing the
For normal use, the 3.5mm stereo
the provided 3.5mm stereo jack plug extension cable
RCA adapter cable to connect the X3HA to either the headphone output or the
of
your sound equipment
as in the following
input
X3HA
Input Connectors
jack socket
illustrations
on the X3HA
or an optional 3.5mm stereo ja
.
is used. You may use
ck to
line output
X3-User-Guide
-v2-5-
web.5 8
Page 9

To
headphones
Connecting the
headphone or line-out jack.
Xenos 3
Headphone
Amplifier
Connecting the
RCA type line-out.
X3HA
3.5mm
input jack
X3HA
to an audio source with
3.5mm
stereo jack
patch cable
Headphone or
line-out
to
an audio source with
MP3 Player, CD
Player, personal
computer or other
audio source
Xenos 3
Headphone
Amplifier
To
headphones
Plug in your Headphones
The
X3HA
headphones simultaneously.
of 16
headphones but it will also work with
CAUTION: Do not connect more than one headphone with impedance lower than 16
Ohm, this could damage the output stage of the amplifier
has two 3.5mm
Ohm
up to
600 Ohm. The
(1/8 mini)
You may use standard headphones with typical impedance
X3HA
3.5mm
input jack
3.5mm stereo jack to
RCA adaptor cable
headphone jacks outputs and can drive up to two
is specially designed to drive mid to high end
lower cost headphones.
RCA line
output
Stereo receiver or other
audio source with RCA
line output
.
X3-User-Guide
-v2-5-
web.5 9
Page 10

View of 3.5mm
5. The Controls
Adjusting
The front panel of the
The volume control adjusts the signal level
headphones. Before powering up the
position or half way between 0 and 5 positions on the Volume dial. After the
powered up and the music source is playing place the headphones on your head and
adj
ust the Volume control to a suitable sound level.
sound levels
X3HA
(1/8 mini)
has three controls being Volume, Treble and Bass.
X3HA
Headphone Output Jacks
to the output amplifier stage
, reduce the volume setting to below ¼
that dr
X3HA
ives the
is
The Treble and Bass controls are part of the active tone control circuit that allow you to
adjust equalization to suit your listening pleasure.
When the Treble and Bass controls are in the 0 position (cen
response is flat and the input signal will be amplified without any
adjustments.
WARNING: Excessively high volume levels for extended periods can cause
permanent damage to your ear
judgment when using this headphone amplifier.
you feel discomfort or experience pain in your ears.
drum
Front Panel view of
and hearing. Use prudence and good
tre) the
Discontinue use immediately if
X3HA
X3HA
noticeable
frequency
equalization
X3-User-Guide
-v2-5-
web.5
10
Page 11

Powering up
The
X3HA
of the unit when viewing from the control panel.
To turn the power on, slide the power switch towards the front panel as illustrated.
Turn the
Power indicator
The blue
has two functions:
X3HA off at the power switch when not in use to preserve battery life.
power indicator
On steady - the power is on.
Pulsating
use at 1/3 volume setting the flashing LED indicates the following battery status:
i.
For alkaline cells the battery level is at 4.3V and there is approximately
minutes of battery power remaining.
ii. For NiMH rechargeable cells the battery level is at 4.3V and there is
approximately 30 minutes of ba
power switch is located on the right side (same side as t
LED
is located on the front panel
the power is on and
the low battery alarm is on. Assuming continuous
ttery power remaining.
near the volume control
he input connectors)
60
and
X3-User-Guide
-v2-5-
web.5
11
Page 12

6. Troubleshooting
The
X3HA
electronic audio appliance
operation of the unit within it s operating para
trouble free listening pleasure.
is designed to provide years of trouble free service. However as with any
some servicing may be required from time to time. Careful
meters and treating it with care will ensure
No power, p
Check that batteries are good
turn on power check that LED lights up.
Plug in
No sound in headphones.
Check that the power switch is in the On position and that LED is lit.
Ensure that there is an input audio signal. Check by plugging the
source, try a dif
Ensure that the
Check that headphones are functioning, plug them into another audio source to test them.
Distorted sound from headphones.
Check to make sure that the connected audio playback device vol
as this could be the potential cause of distortion. Set volume at ¼ setting on your
playback device then try again. If distortion is still present try using another playback
device (CD player or other).
distortion and add noise to the audio signal, the
distorted or noisy signal.
Service
The
opened. For service please refer to your dealer or contact ATP Systems directly,
Chapter 9 of this user guide.
AC adapter, turn on power check that LED lights up.
X3HA
ower LED does not
ferent
X3HA
does not contain any user serviceable parts inside and therefore should not be
input
cable.
Volume control is turned up.
light up
or fully charged
NOTE: Some computer sound cards may inherently produce
.
and correctly installed
X3HA cannot correct an inherently
, replace batteries,
X3HA
into another audio
ume is not set too high
refer to
7. Caring for your
Always observe environmental conditions as documented in
Cleaning surfaces may be cleaned with a slight
not use any solvents or alcohol.
Avoid high temperatures do not store or operate near a heat source or in direct
sunlight.
Keep dry keep free from moisture, water and dust.
Shock
Do not disassemble never disassemble or modify the unit in any way.
X3-User-Guide
do not subject the unit to shoc
-v2-5-
web.5
X3HA
Chapter
ly damp cloth and mild detergent. Do
k from dropping.
12
8 of this user guide.
Page 13

8. Technical Specifications
Parameter
Total Harmonic
Distortion and Noise
Signal to Noise Ratio94dB
Frequency
Response
Channel-to-Channel
Crosstalk
Maximum Input
Level
Maximum Output
Level
Maximum Gain
Output Power - p
channel
With Battery
With Power Adapter
With Battery
With Power Adapter
With Battery
With Power Adapter
With Battery
With Power Adapter
With Battery
With Power Adapter
Input impedance
er
Typical Measured
0.01%
+/-0.00
10.5Hz
-
-72dB
6.70VRMS (+16.5dBV) 1kHz
6.14VRMS (+15.8dBV) 1kHz, 600 ohm load
+26.4dB
RMS, (Peak)
485mW, (970mW)
755mW, (1505mW)
370mW, (740mW)
580mW, (1160mW)
280mW, (56
432mW, (864mW)
115mW, (230mW)
183mW, (366mW)
62mW, (124mW)
96mW, (192mW)
20
1%
0
3dB
/ +0.3dB
ko
hm nominal
40kHz,
0mW)
60mV input, output at 315mV (-10dBV reference
le
vel) gain is 14.4dB, 1kHz input signal, 30kHz
bandwidth
dBV reference level, 30kHz bandwidth
0dB reference at 1kHz input signal (output at
10dBV)
1kHz input signal, 60mV input level, output at
10dbV
1kHz input signal, 600 ohm load
32 ohm load, 1kHz input signal
64 ohm load, 1kHz input signal
120 ohm load, 1kHz input signal
300 ohm load, 1kHz input signal
600 ohm load, 1kHz input signal
, 30kHz bandwidth
Conditions
-
-
Headphone Load
Impedance
Bass control
response
parameters
Treble control
response
parameters
16 ohm
< 16o
-
-
550Hz
-
-
-
1.3kHz
Power Requirements
Battery
Power
Power Adapter
Power Consumption
Power LED indicator
Consumption
to 600 ohm
hm
17dB to +17dB
15dB to +15dB
12dB to +12dB
17dB to +17dB
16dB to +16dB
12dB to +12dB
Up to two headphones
Only one headphone
@ 49.5Hz (centre frequency)
@ 80.0Hz
@ 140.0Hz
-
3dB cut-off with Bass control at max setting
@ 17.2kHz (centre frequency)
@ 12.0kHz
@ 5.0kHz
-
3dB cut-off with Treble control at max setting
4 x 1.5V AA Alkaline cells OR 4 x 1.2V 1800mAH or 2300mAH
AA NiMH cells (charger not included)
150mA @ 6VDC idle
9V 1.3A regulated ou
power adapter incl
160mA @ 9VDC idle
tput,
100
-24
uded with X3HA headphone amplifier
Blue, Steady = Power OK, Pulsating = Battery low
0VAC 50/60Hz input
X3-User-Guide
-v2-5-
web.5
13
Page 14

Environmental
Operating Temperature
Storage Temperature
Humidity
Dimensions
Weight
Warranty
400
350
300
250
200
m V
150
100
9
11
12
14
17
32°F to 131°F (0°C to 55°C)
4°F to 167°F (-20°C to 7
95% maximum (non-condensing)
6.3L x 3.56W x 1.68H(Inch), 160H x 90.5W x 43H(mm)
12
oz, 330g (excluding batteries)
2 Years (see detail warranty info)
5°C)
X3HA Frequency Response
20
26
32
38
50
70
100
250
400
550
700
1000
1600
2500
4000
6000
9000
12000
15000
Frequency in Hz
18000
21000
24000
27000
32000
38000
X3-User-Guide
-v2-5-
web.5
14
Page 15

9. Warranty Information
Warranty for Xenos Audio
This warranty on you
(Canada), remains
Systems or through an appointed authorized ATP
Except as specified below, this warranty covers all defects in material and workmanship of this product. The following are
not covered by this warranty:
Rechargeable batteries of any type.
Any product where the se
Damage, wear and tear or malfunction resulting from:
a) Accident, act of nature, abuse, misuse, neglect, unauthorized repair or modification, failure to follow
instructions supplied w
c) Shipping of the product (claims are to be made with the carrier). Where shipment is arranged by ATP Systems
with it s preferred carrier, contact ATP Systems support
this regard. d) Normal use, for example wear and tear, imperfections, scratches, blemishes or other damage to the
equipment.
r new Xenos Audio product which is manufactured, distributed and warranted by ATP Systems
in effect for the period of five (5
rial
number sticker has been removed or
ith the product. b) Repair or attempted repair by anyone not authorized by ATP Systems.
Products
Length of warranty
) years from the date of consumer purchase either direct from ATP
Systems dealer.
What the warranty covers
for additional information regarding making a claim in
modified or defaced in any way.
What ATP Systems will pay for
If during the applicable warranty period fro
defective by ATP Systems. ATP Systems will repair, or at it s option, replace, such defective product without charge for
parts or labour.
If your Xenos Audio
ATP Systems. Please contact ATP Systems for a list of authorized service centres.
The following apply whenever your Xenos Audio product must be transpo
THIS WARRANTY IS EXPRESSLY MADE IN LIEU
INCLUDING WITHOUT LI
PARTICULAR PURPOSE.
ATP SYSTEMS LIABILIT
ANY DEFECTIVE PRODUC
INCIDENTAL OR CONSEQ
KIND.
product requires service, it may be taken or shipped to any authorized ATP Systems service centre or
You the end user are responsible for transporting your Xenos Audio product or arranging for it s transportation.
If shipment is required:
o
If shipping it to ATP Systems you must first contact ATP Systems Support to obtain an RMA number and detail
shipping instructions.
o
You are responsible for payin
o
All products must be shipped in their original packaging if possible, if not available please contact ATP
Systems for assistance.
Include the following: name, address
description of the problem.
A COPY OF THE ORIGIN
MITATION, WARRANTIES OF MERCHANTABILITY
Y IS EXPRESSLY LIMIT
T MANUFACTURED BY AT
UENTIAL COMMERCIAL,
m date of consumer purchase your Xenos Audio product is found to be
How to make a Warranty Claim
g shipping charges.
, phone number, model and serial number of the product being returned and a
AL SALES INVOICE / R
ED TO THE REPAIR OR
ECEIPT
OF ALL OTHER WARRANT
P SYSTEMS AND SHALL
PERSONAL INJURY OR P
MUST BE INCLUDED
rted for warranty service:
.
IES, EXPRESSED OR IM
AND FITNESS FOR A
REPLACEMENT, AT OUR
IN NO
ROPERTY DAMAGES OF A
EVENT INCLUDE
PLIED,
OPTION, OF
NY
ATP Systems, 86 Durham St., Oshawa, Ontario, L1J 5P7, Canada Tel: (Int)+1-905-579-5699 Fax:(Int)+1-905-438-1079
X3-User-Guide
-v2-5-
web.5
15
Page 16

Cut Here
Cut Here
---------------------------
Xenos Audio
Or fill in the i
Title:___
Address:
Street:___________________________________________
City:_____________________
Postal code:________________ Country:_
Tel:_______________________ email:___________
Product detail
Serial number:____
Dealer name:____________________
Place this card in an addressed and stamped envelope and mail to:
--------------------
ATP Systems, 86 Durham St., Osh
----------------------------------------------
-------------------------
----------------------------------------------
X3HA - Warranty Registration
You can register your product on line at:
nformation requested below and mail to the address above.
First name: ________________
_________ State/Province:________________________
for X3 Headphone Amplifier
_____________
____
_______
____
________
:
____ Date purchased:____
_____ City:________________________
awa, Ontario, L1J 5P7, Ca
www.aptecpro.com
_ Last name:_
_________
____________________________
_________
-------------------------------------------
Card
_____
_________________
_ Apt no:______
____________________
____
____________
nada
-----------
Cut Here
Cut Here
X3-User-Guide
-v2-5-
web.5
16
 Loading...