

XENO XPANHDA180A-6MP User Manual


XPANHDA180A-6MP
180 Degree panoramic AHD IR Bullet
User’s Manual Version 1.0
Before installing and using the camera, please read this manual carefully.
Be sure to keep it handy for future reference.

CE INFORMATION
The product must be installed according to the currently valid installation regulations for EMC to guarantee
the designed use and to prevent EMC problems.
The device supplied with this manual is according to the EC, EMC Directive,
2004/108/EC & LVD 2006/95/EC
SAFETY PRECAUTIONS
1. Do not modify the three-prong grounding type monitor power plug in any way.
2. Operate this unit only from the type of power source indicated on the label.
3. Do not block or cover ventilation openings on the back or bottom of the monitor cabinet.
4. Do not place this monitor near a radiator or heating vent.
5. Do not push objects of any kind through cabinet openings. This may result in fire or electrical shock.
6. Before adding attachments always ask a service technician to perform routine safety tests to determine
that equipment is in safe operating condition. Ground potential tests should be part of the routine safety
check made by the service technician.
7. Do not place monitor on an unstable cart, stand, or shelf where it may fall and injure personnel or
damage equipment.
8. Route power cords so that they cannot be walked upon or tripped over. Do not allow anything to rest on
the power cord.
9. Do not install monitor in wet areas, or where it may be exposed to rain or water. Do not spill liquid of any
kind on the unit.
10. Unplug the power cord from the unit before cleaning the display. Use only a damp cloth. Do not use
alcohol, spirits, or ammonia to clean the display. DO NOT ATTEMPT TO CLEAN THE INTERIOR OF
THIS UNIT- THIS ACTION MUST BE PERFORMED BY THE SERVICE TECHNICIAN AS REQUIRED
DURING NORMAL MAINTENANCE.
11. Refer all servicing to qualified service personnel. REMOVAL OF BACK COVER BY UNAUTHORIZED
PERSONNEL MAY EXPOSE THE USER TO DANGEROUS VOLTAGES OR OTHER HAZARDS.
12. Unplug the unit immediately and notify the service technician.
A. If liquid has been spilled into the display or the display has been exposed to rain or water.
B. If the unit has been dropped or the cabinet damaged.
C. If fuses continue to blow.
D. If the power cord is damaged or frayed.
E. If a distinct change from normal operation is apparent.
When replacement parts are required, be sure that the service technician uses components specified by the
manufacturer which have the same characteristics as the original parts. UNAUTHORIZED SUBSTITUTIONS
MAY RESULT IN FIRE, ELECTRICAL SHOCK OR OTHER HAZARDS.
Upon completion of any service or repairs, ask the technician to perform safety checks to determine that the
equipment is in safe operating condition.

WARNING: SERIOUS SHOCK HAZARDS EXIST WITHIN THE COVERS OF THIS MONITOR. DO NOT
OPEN THE COVERS UNDER ANY CIRCUMSTANCES,
THERE ARE NO USER SERVICEABLE COMPONENTS INSIDE
Before You Begin
Read these instructions before installing or operating this product.
Note: This installation should be made by a qualified service person and should conform to local codes.
This manual provides installation and operation information. To use this document, you must have the following
minimum qualifications:
A basic knowledge of CCTV systems and components
A basic knowledge of electrical wiring and low-voltage electrical connections
Intended use
Only use this product for its designated purpose; refer to the product specification and user documentation.
Customer Support
For assistance in installing, operating, maintaining and troubleshooting this product refer to this document and
any other documentation provided. If you still have questions, please contact Norbain Technical Support and
Sales:
Vista, 210 Wharfedale Road, IQ Winnersh, Wokingham, Berkshire RG41 5TP, England.
UK +44 (0) 118 912 5000
Note: You should be at the equipment and ready with details before calling Technical Support.
Conventions Used in this Manual
Boldface or button icons highlight command entries. The following WARNING, CAUTION and Note
statements identify potential hazards that can occur if the equipment is not handled properly:
* WARNING:
Improper use of this equipment can cause severe bodily injury or equipment damage.
** Caution:
Improper use of this equipment can cause equipment damage.
Note: Notes contain important information about a product or procedure.
This apparatus is manufactured to comply with the radio interference.
A Declaration of Conformity in accordance with the following EU standards has been
made. The manufacturer declares that the product supplied with this document is
compliant the provisions of the EMC Directive 2004/108/EC, the CE Marking Directive
93/68 EEC and all associated amendments.
All lead-free products offered by the company comply with the requirements of the
European law on the Restriction of Hazardous Substances (RoHS) directive:
2011/65/EU, which means our manufacture processes and products are strictly “lead free” and without the hazardous substances cited in the directive.
The crossed-out wheeled bin mark symbolizes that within the European Union the
product must be collected separately at the product end-of-life. This applies to your
product and any peripherals marked with this symbol. Do not dispose of these
products as unsorted municipal waste.
* This symbol indicates electrical warnings and cautions.
** This symbol indicates general warnings and cautions.
NORBAIN SD LTD reserves the right to make changes to the product and specification of the product from
time to time without prior notice.
WARNINGS AND CAUTIONS:
To reduce the risk of fire or electric shock, do not insert any metallic objects through the ventilation grills or
other openings on the equipment.
WARNING
This is a Class A product. In a domestic environment this product may cause radio interference in which case
the user may be required to take adequate measures.
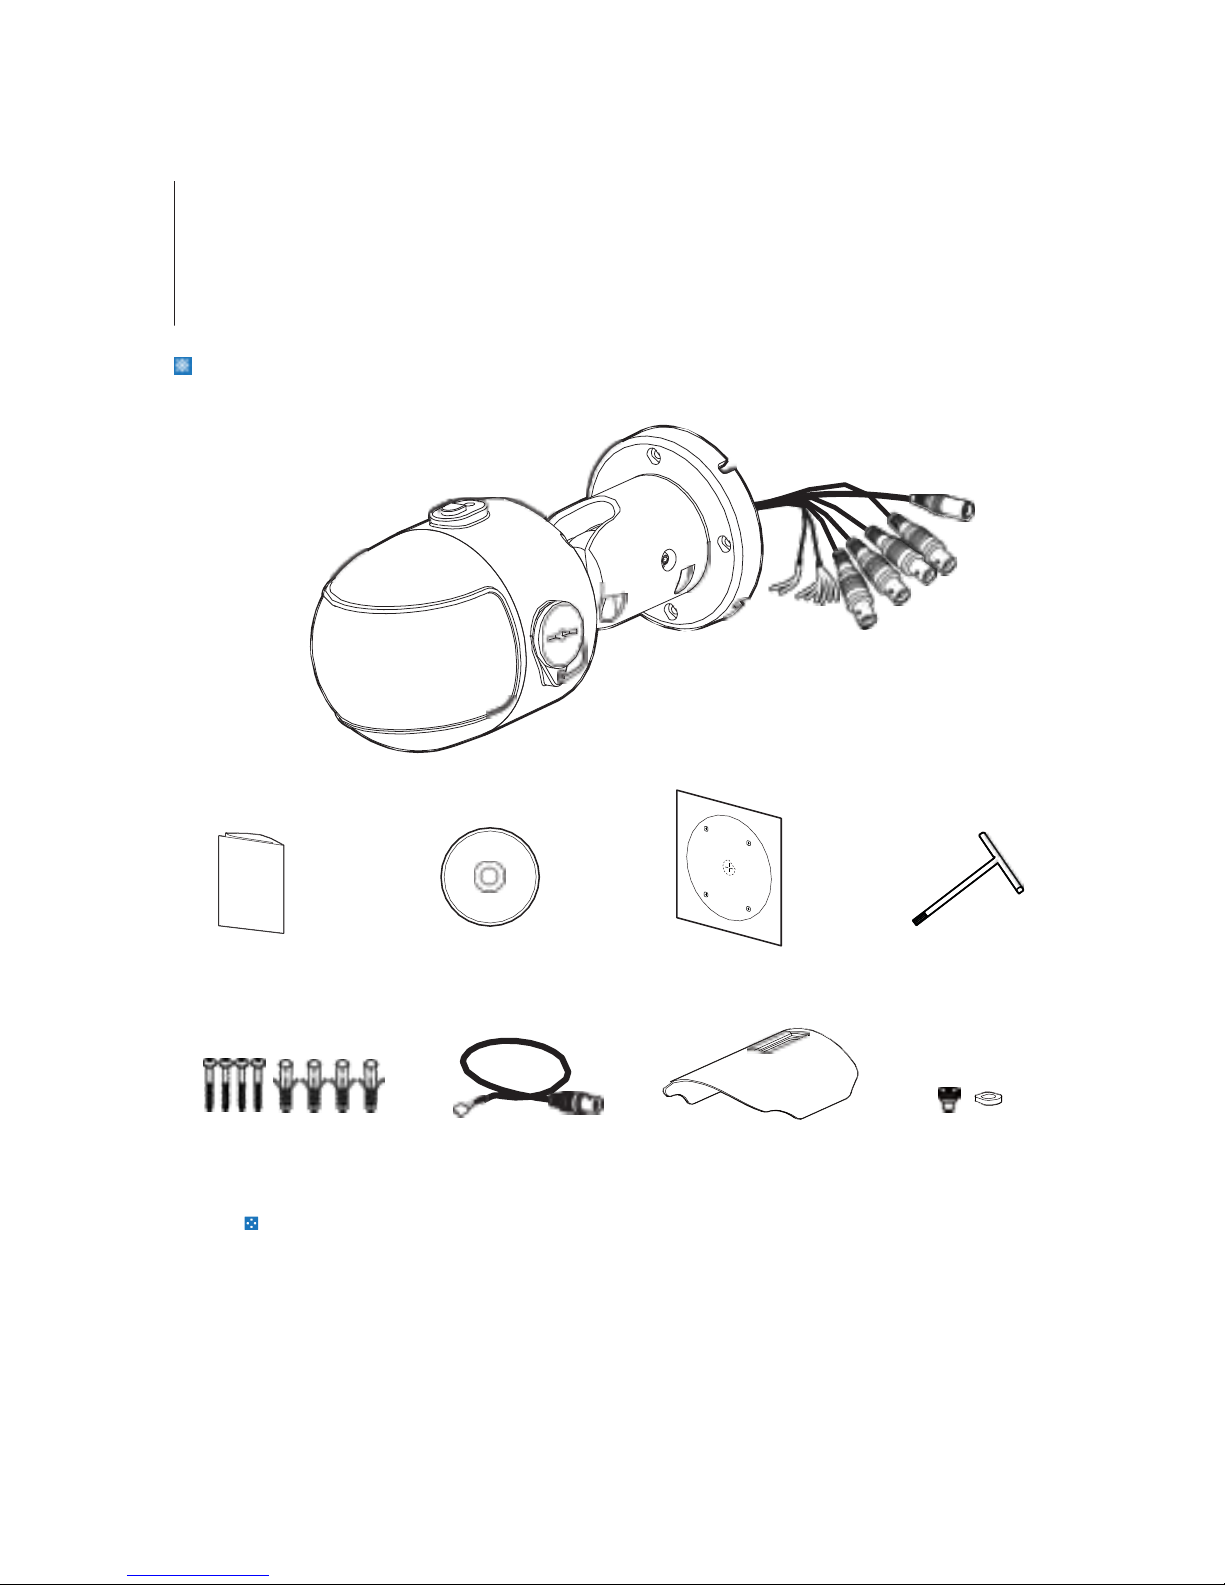
Product & Accessories
Please check if all the camera and accessories are included in the package.
Quick Manual
Manual CD
Template Sheet T-Wrench
Screw &
Plastic Anchor-4pcs
Test Monitor Cable
Sunshield Sunshield Screws
NOTE: The ‘Test Monitor Cable’ is used to test the camera by connecting to a portable display.
Cables
Camera
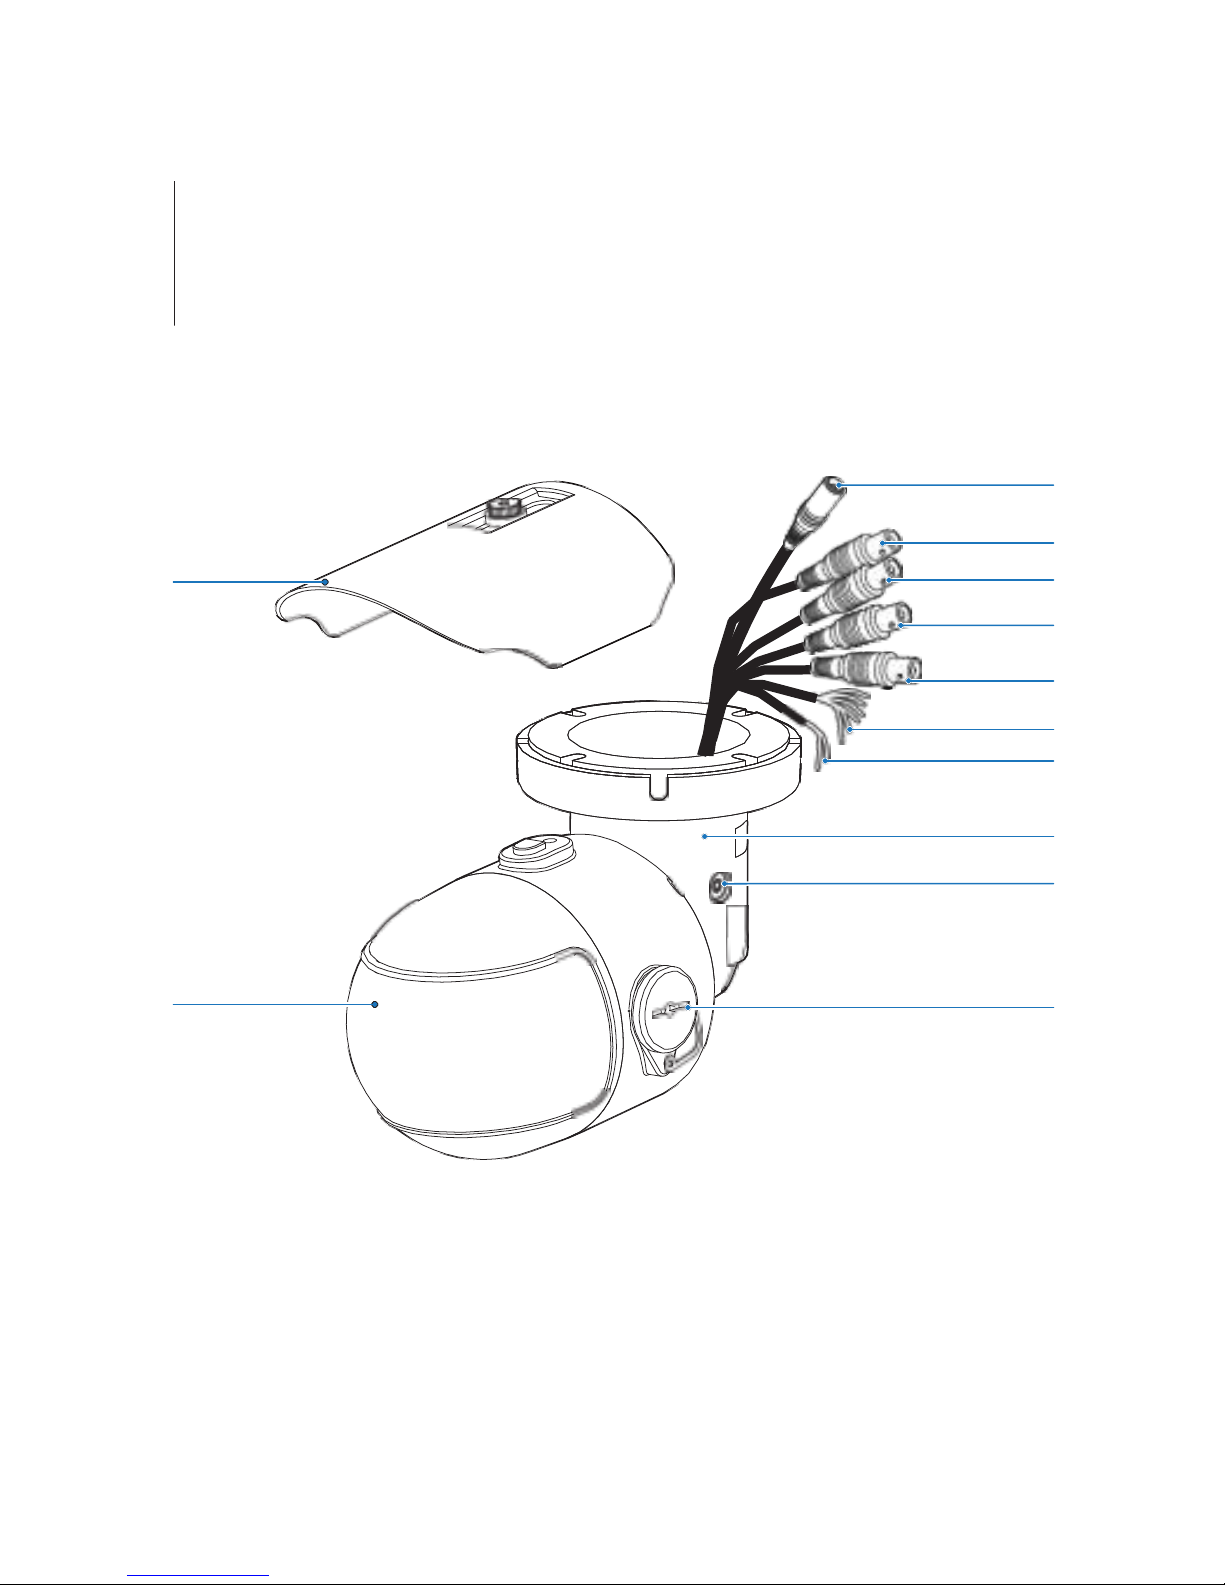
Part name
HD Universal 1CH
HD Universal 2CH
HD Universal 3CH
HD Universal 4CH
ALARM
RS485
Ball Neck Bracket
Pan/Tilt Stopper
Lens
Cable cap
POWER
Sunshield
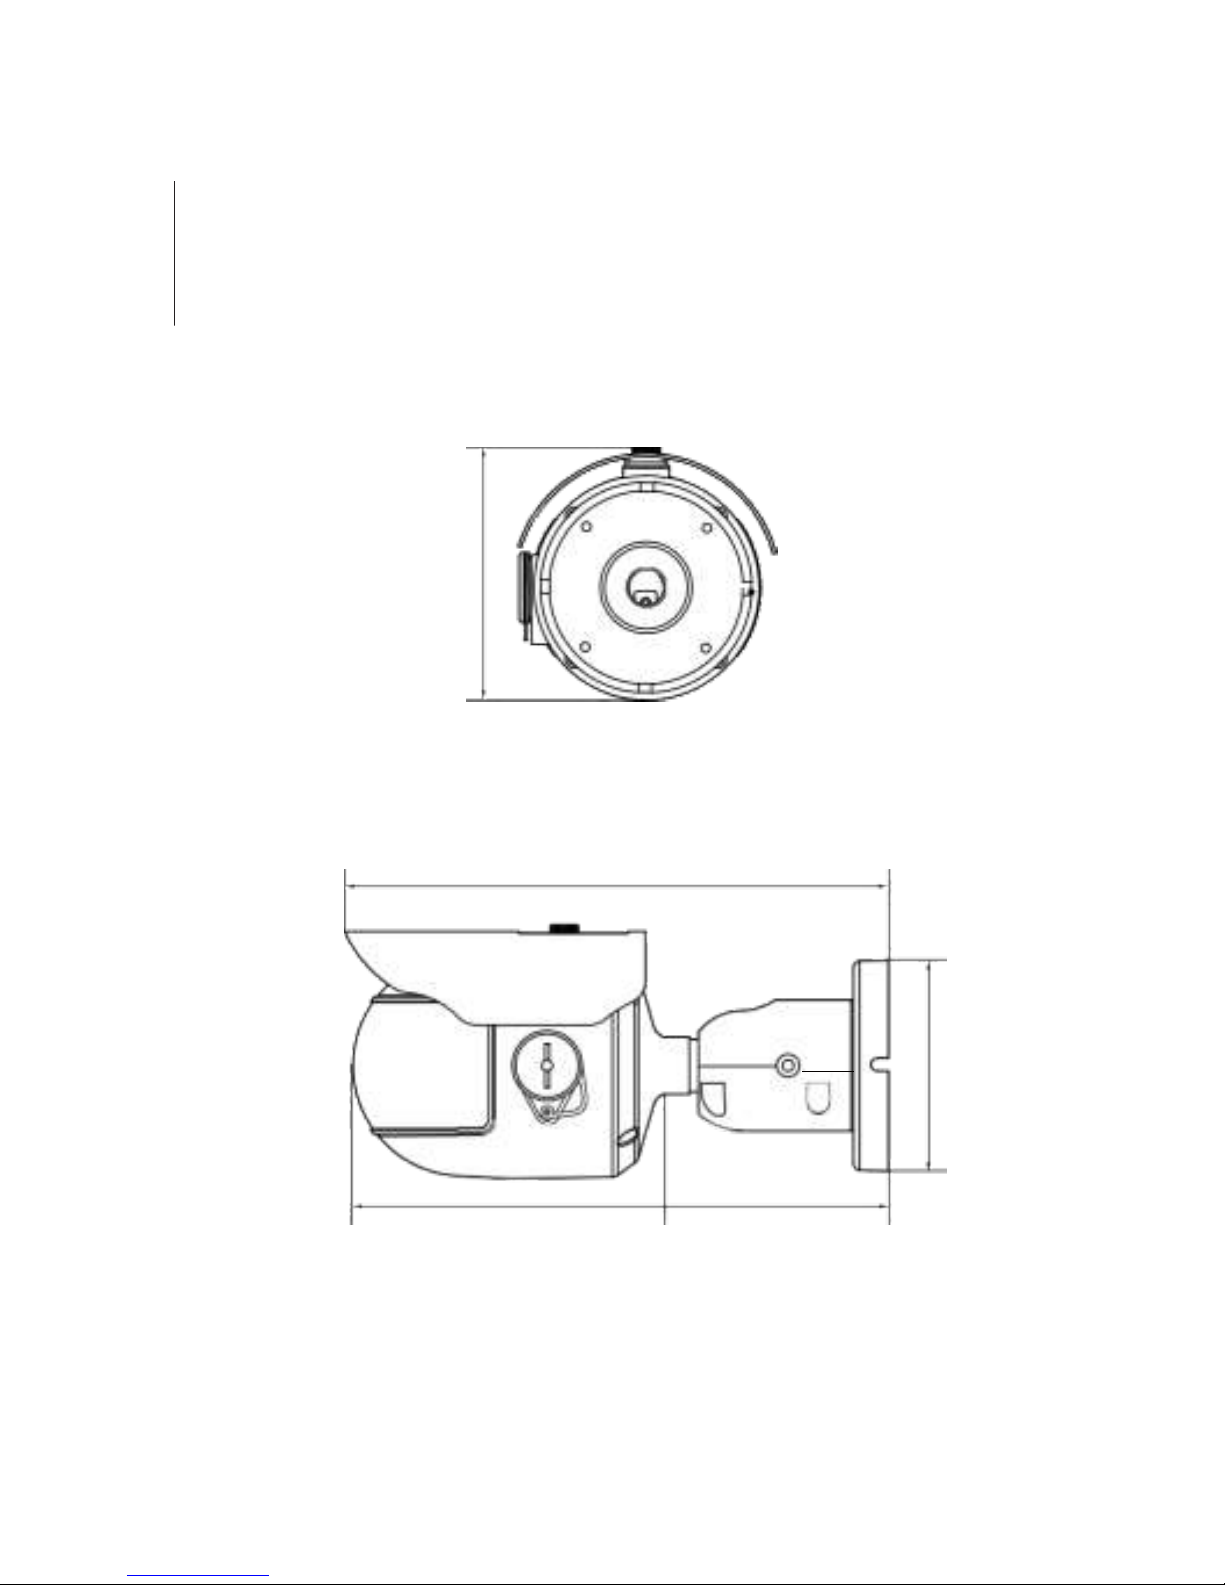
Dimension
Unit : mm
116
250 ~ 270
96.5
144.5 101
Installation
10
Before installing your camera, you have to read the following cautions.
1. You have to check whether the location can bear five times of the weight of your camera.
2. Don’t let the cable to be caught in improper place or the electric line cover to be damaged.
Otherwise it may cause a breakdown or fire.
3. When installing your camera, don’t allow any person to approach the installation site.
If you have any valuable things under the place, move them away.
To pass cables through the wall/ceiling,
drill holes on the ceiling panel.
Connect the cables respectively.
See the section ‘4. Cabling’ for details.
Fix the camera on the wall/ceiling by
screw provided.
Loosen the Pan/Tilt stoper screw a litte before
fixing the camera.
By using the video test cable, check
the screen during installation.
5
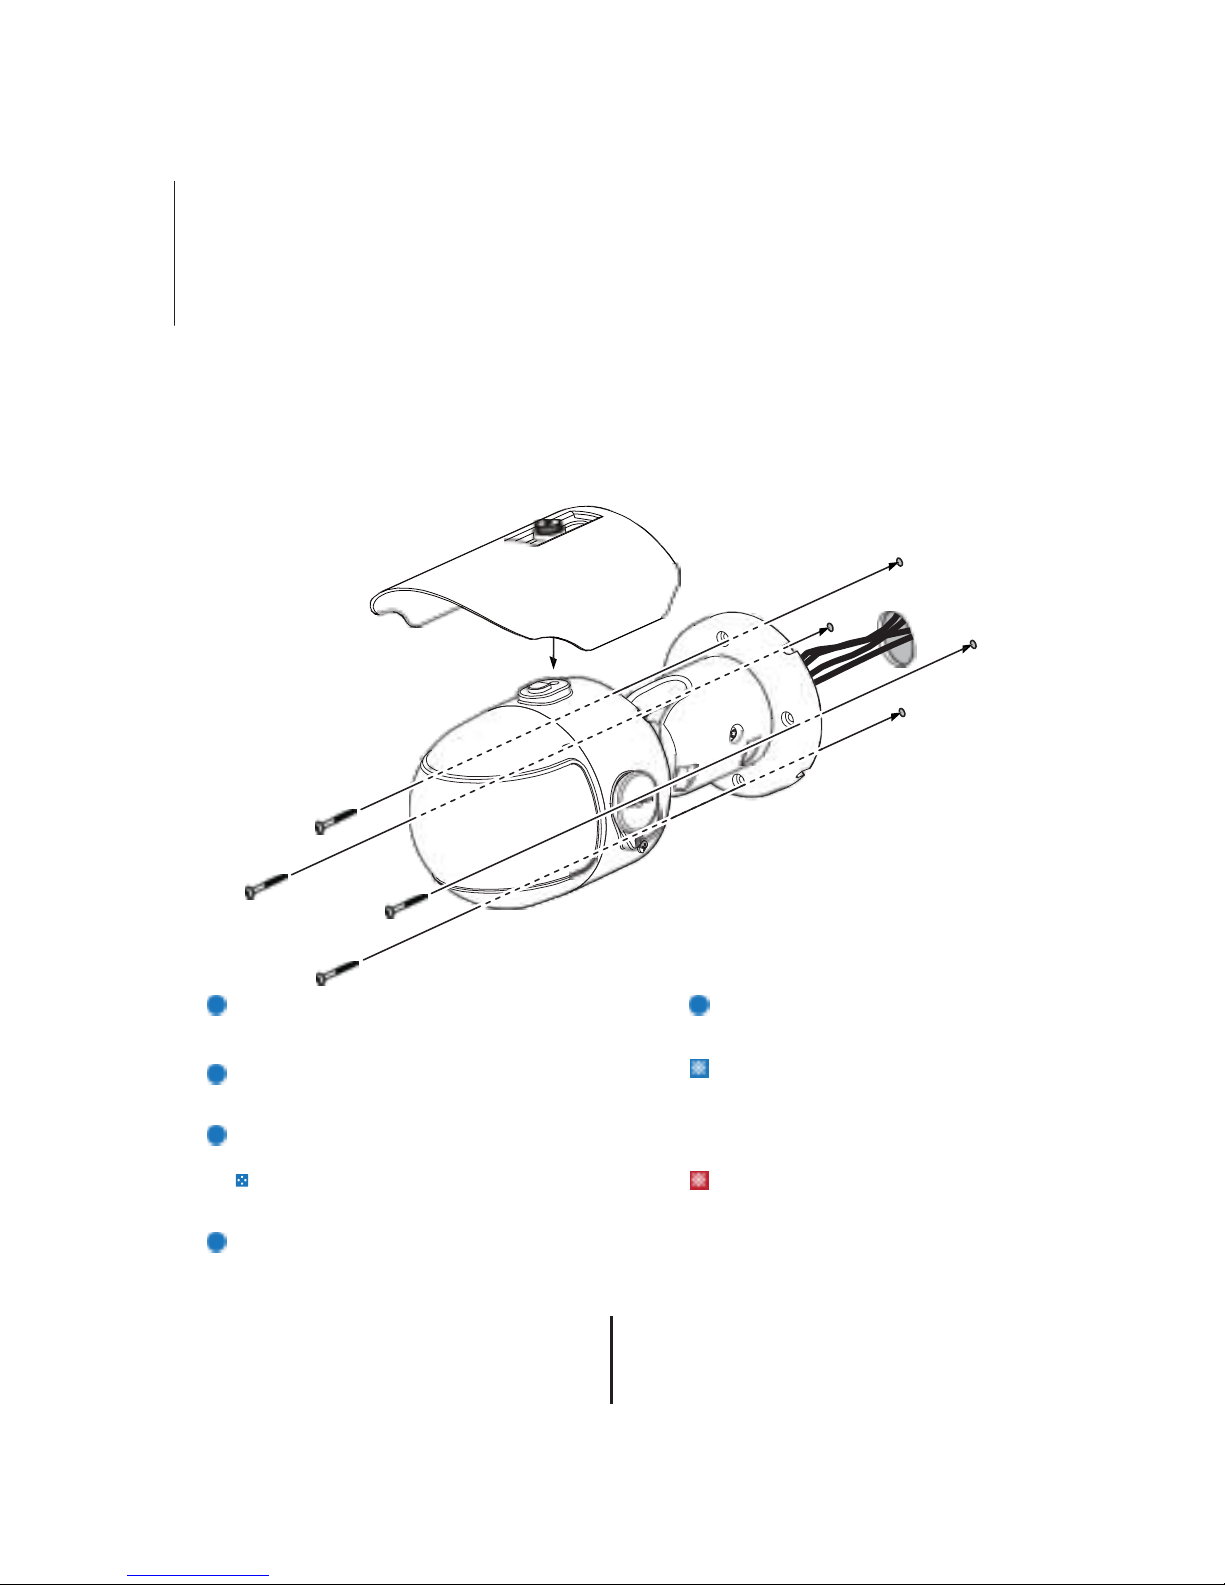
Attach the Sunsheild to the bottom case
by using Sunshield Screws.
Reset to the Factory Default
Press the reset button for 5 seconds to
return the setup to the factory default.
Warning:
If you press the ‘Reset’ button, you will
lose all setting data. If needed, please,
make a note for further installation.
1
2
3 4
 Loading...