

Page 1
QUICK START GUIDE
Xcelcam.com
For complete instructions
Pour les instructions complètes
Für weitere Informationen
Per maggiori informazioni
Para más información
v1.4
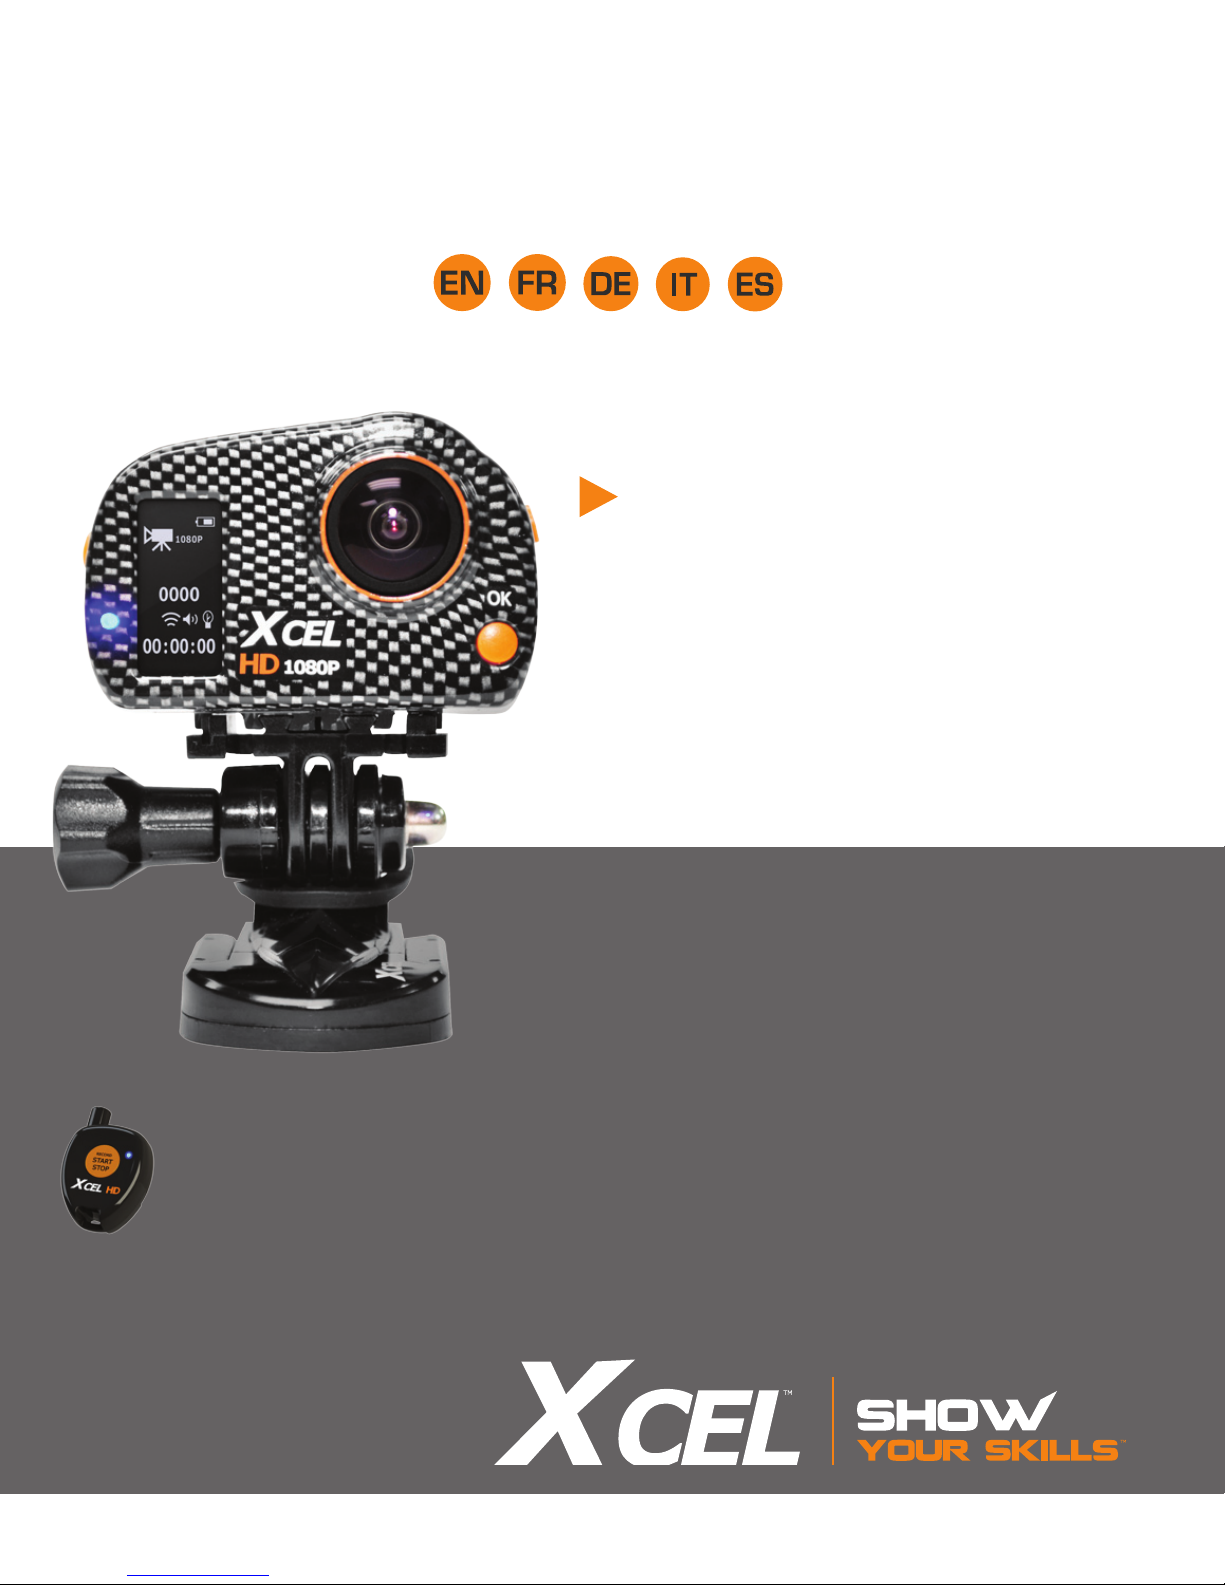
XCEL HD CAMERA
Remote control (included)
Télécommande (incluse)
Fernbedienung (enthalten)
Telecomando (incluso)
Mando a distancia (incluido)
Page 2
1. Basic functions
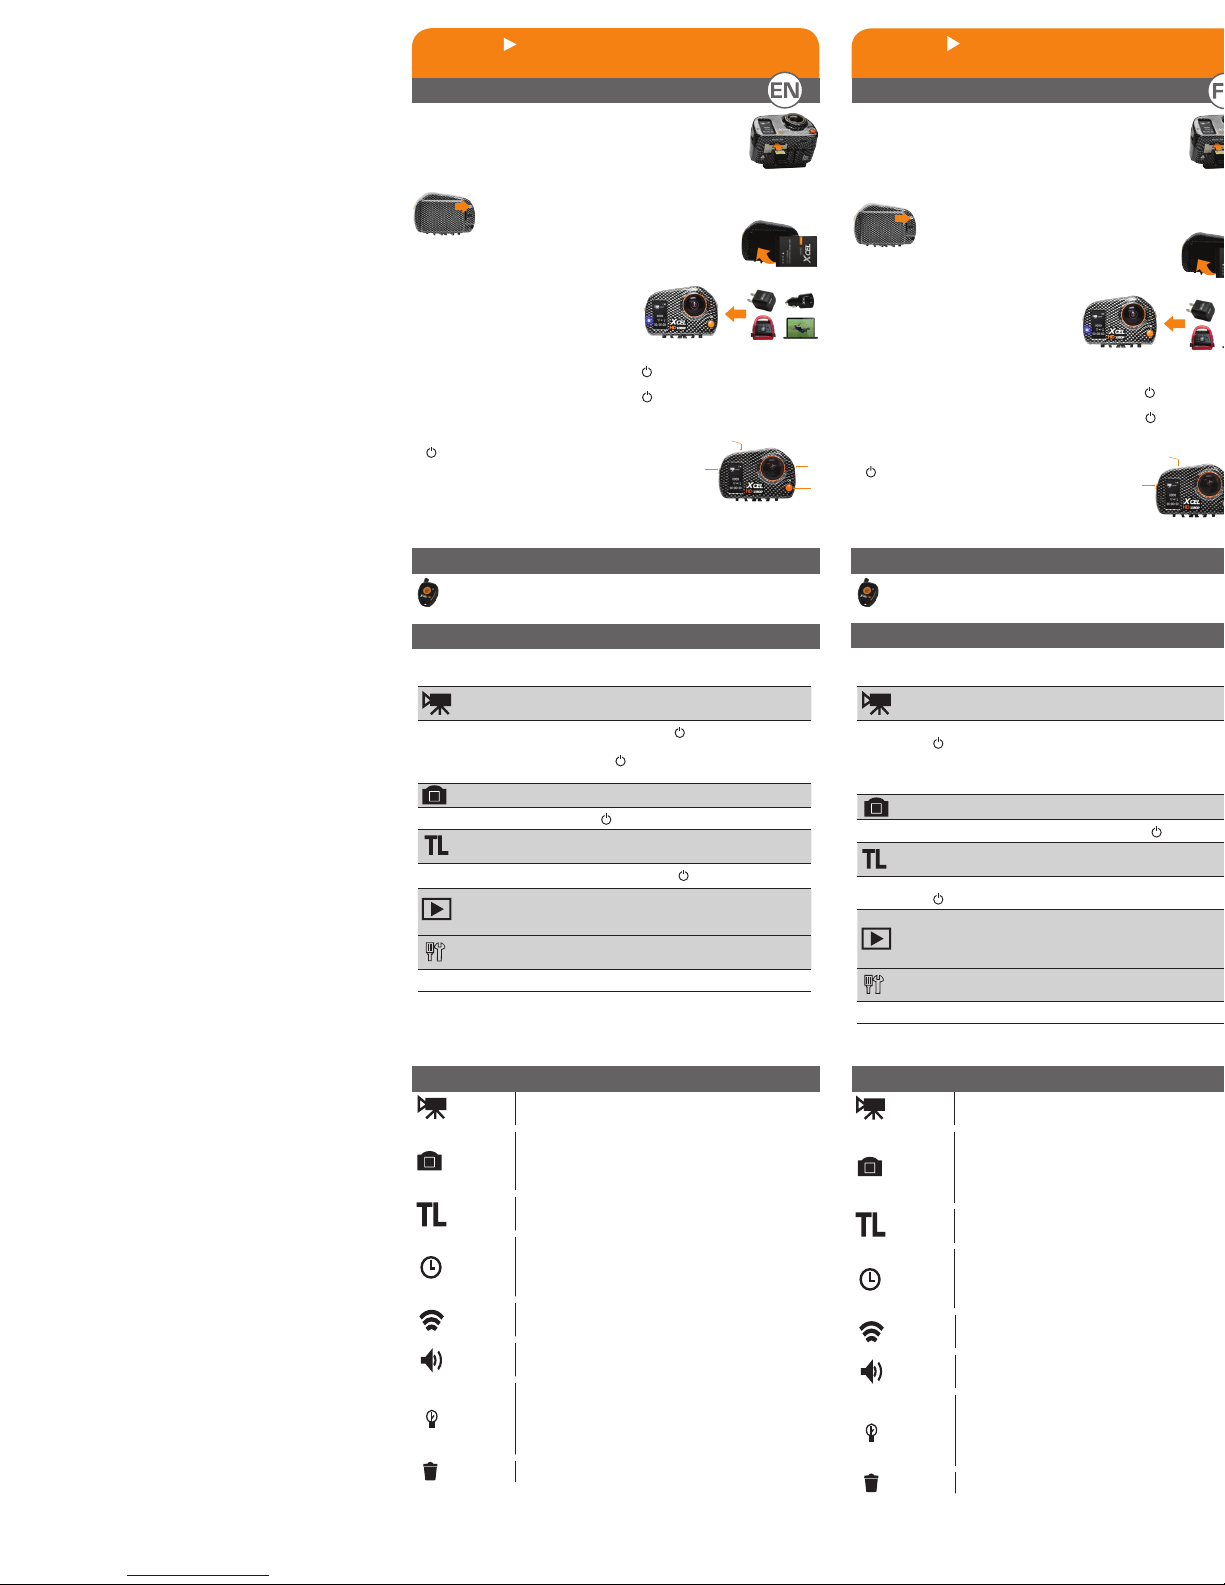
INSERTING THE MICROSD CARD
Insert a microSD memory card (up to 32 GB capacity, not
included) in the card slot, gold contacts facing up. The card is
inserted correctly when a click is heard.
BATTERY INSTALLATION
Unlock the battery compartment cover by moving the lock
button to the right and remove the cover.
Insert the lithium-ion battery
(included) into the battery compartment.
CHARGING THE BATTERY
Using the included USB cable, connect
the camera to a USB power source and
select the desired mode of charging (see
user manual for more details).
TURNING ON THE CAMERA
• To turn on the camera, press and hold the button a few seconds until the
welcome screen appears.
• To turn off the camera, press and hold the button a few seconds until the
shutdown screen appears.
BUTTON FUNCTION
1. : ON/OFF, START/STOP
2. M : Change mode/Next
3. OK : Conrm entries
4. BACK : Exit the menu/Previous
2.Remote control
When the camera is on, the remote allows you to take photos and
videos in the mode shown on the screen by pressing the START/STOP
button.
1
2
4
3
1. Fonctions de base
1. Grundfunktionen
3.Modes
It is possible to see on the conguration screen 5 different modes. To switch
from one mode to another, press the M button.
VIDEO
HD video recording
(WVGA, 720p or 1080p)
• To start recording a video, press the
button. The elapsed
recording time is displayed on the screen.
• To stop recording, press the
button. The estimate remaining
recording time on the memory card will reappear on the screen.
PHOTO Taking photos (1mp, 3mp or 5 mp)
• To take a photo, press the
button.
TIME LAPSE
Taking photos at predened regular intervals
(0.5, 2, 5, 10, 30 or 60 sec.)
• To start and stop taking photos, press the
button.
VIEW
Allows the user to see the number of
recorded les and view photos/videos when
the camera is connected to a TV.
SETTINGS
Allows the user to congure the settings of
the camera.
• To access to the settings menu, press OK.
4.Settings
Video
mode
Allows you to record video in the following resolutions:
WVGA, 720p and 1080p.
Photo
mode
• Allows you to take photos in following resolutions:
1 mp, 3 mp and 5 mp.
• Allows you to take 1 to 6 consecutive photos with a
delay of approximately 0,5 second between each photo.
TIMELAPSE
Mode
Taking photos at predened regular intervals:
0.5, 2, 5, 10, 30, 60 sec.
Date/
Time
Allows you to set the date (Year/Month/Day) and time
(Hour/Minute).
Use the OK button to conrm the entries and use the M
and BACK buttons to adjust the digits.
Remote
control
Enable or disable the remote control (wireless).
Sound
signal
Enable or disable the sound of the camera when using
the buttons.
LED
Lights
Enable or disable the LEDs lights. When the Remote
control and LED lights options are activated, the 4 LEDs
ash slowly to indicate that the camera is waiting for the
signal from the remote control and ash rapidly during
the recording of the videos/photos.
Erase Allows you to erase the last le or all les.
Visit Xcelcam.com
INSERTION DE LA CARTE MICROSD
Insérer une carte mémoire microSD (jusqu’à une capacité de
32Go, non incluse) dans la fente de la carte, contacts dorés
vers le haut. La carte est correctement insérée lorsqu’un clic
se fait entendre.
INSTALLATION DE LA PILE
Déverrouiller le couvercle du compartiment à pile en déplaçant
le bouton de verrouillage vers la droite et retirer le couvercle.
Insérer la pile au lithium-ion
(incluse) dans le compartiment à pile.
CHARGEMENT DE LA PILE
À l’aide du câble USB inclus, connecter la
caméra à une source d’alimentation USB
et sélectionner le mode de chargement
désiré (voir le manual d’utilisation pour
plus de détails).
MISE SOUS TENSION DE LA CAMÉRA
• Pour allumer la caméra, maintenir enfoncé le bouton quelques secondes
jusqu’à ce que l’écran de bienvenue apparaisse.
• Pour éteindre la caméra, maintenir enfoncé le bouton
quelques secondes
jusqu’à ce que l’écran de fermeture apparaisse.
FONCTION DES BOUTONS
1. : Allumer/éteindre, Démarrer/arrêter
2. M : Changer de mode/Suivant
3. OK: Conrmer les entrées
4. BACK: Quitter le menu/Précédent
1
2
4
3
2.Télécommande
Lorsque la caméra est allumée, permet de prendre des photos et des
vidéos dans le mode afché à l’écran en appuyant sur le
bouton START/STOP.
3.Modes
Il est possible de voir à l’écran de conguration 5 modes différents. Pour
passer d’un mode à un autre, appuyer sur le bouton M.
VIDÉO
Enregistrement de vidéos HD
(WVGA, 720p ou 1080p)
• Pour commencer l’enregistrement d’un vidéo, appuyer sur le
bouton
. La durée d’enregistrement écoulée s’afche à l’écran.
• Pour arrêter l’enregistrement, appuyer à nouveau sur le bouton
.
La durée approximative d’enregistrement restante sur la carte
s’afchera à nouveau à l’écran.
PHOTO Prise de photos (1mp, 3mp ou 5 mp)
• Pour prendre une photo, appuyer sur le bouton
.
TIME LAPSE
Prise de photos à intervalles réguliers
prédénis (0.5, 2, 5, 10, 30 ou 60 sec.)
• Pour lancer et arrêter la prise de photos, appuyer sur le
bouton
.
VISIONNEMENT
Permet de voir le nombre de chiers
enregistrés et de visionner les photos/
vidéos lorsque la caméra est branchée à une
télévision.
CONFIGURATIONS
Permet de dénir les paramétres de la
caméra.
• Pour accéder au menu de congurations, appuyer sur OK.
4.Menu de configuration
Mode
vidéo
Permet d’enregistrer des vidéos dans les résolutions
suivantes: WVGA, 720p et 1080p.
Mode
photo
• Permet de prendre des photos dans les résolutions
suivantes: 1 mp, 3 mp et 5 mp.
• Permet de prendre 1 à 6 photos consécutives à chaque
prise de photos, avec un délai d’environ 0,5 seconde
entre chacune.
Mode
TIMELAPSE
Permet la prise de photos à intervalles réguliers
prédénis: 0.5, 2, 5, 10, 30, 60 sec.
Date/
Heure
Permet de congurer la date (Année/Mois/Jour) et
l’heure (Heure/Minute).
Utiliser le bouton OK pour conrmer les entrées et
utiliser le bouton M et BACK pour ajuster les chiffres.
Télécom mande
Permet l’utilisation de la télécommande (sans l).
Signal
sonore
Permet d’activer ou de désactiver le son émis par la
caméra lors de l’utilisation des boutons.
Lumières
DEL
Permet d’activer ou de désactiver les DEL. Lorsque les
options Télécommande et Lumières DEL sont activées, les
4 DEL clignotent lentement pour indiquer que la caméra
est en attente du signal de la télécommande et clignotent
rapidement pendant l’enregistrement de vidéos/photos.
Effacer Permet d’effacer le dernier chier ou tous les chiers.
Visitez Xcelcam.com
DIE MICRO-SD KARTE EINLEGEN
Legen Sie eine microSD Karte (bis zu 32GB, nicht enthalten)
in das Kartenlesegerät ein, sodas die goldenen Kontakte nach
oben zeigen. Die Karte ist ordnungsgemäß eingelegt, wenn ein
klicken zu hören ist.
BATTERIE INSTALLATION
Entsperren Sie das Batteriefach, indem Sie den Sperrknopf auf
die rechte Seite drücken und die Abdeckung anheben.
Legen Sie die Lithium-Ionen Batterie
(enthalten) in das Batteriefach ein.
AUFLADEN DER BATTERIE
Mit dem mitgelieferten USB-Kabel
verbinden Sie die Kamera mit einer
USB-Stromquelle und wählen sie den
gewünschten Lade-Modus (siehe Bedien-
ungsanleitung für weitere Details)
DIE KAMERA EINSCHALTEN
• Zum Einschalten der Kamera, drücken und halten Sie die Taste ein paar
Sekunden, bis der Willkommens-Bildschirm erscheint.
• Um die Kamera auszuschalten, drücken und halten Sie die -Taste für ein
paar Sekunden, bis das Display herunterfährt.
TASTEN FUNKTIONEN
1. : ON/OFF, START/STOP
2. M : Moduswechsel/Nächster Modus
3. OK: Conrm entries Eingabestätigung
4. BACK: Das Menü verlassen/Zurück
1
4
2. Fernbedienung
Bei eingeschalteter Kamera können Sie durch Betätigung der START/
STOP Taste mit der Fernbedienung Fotos und Videos aufnehmen.
3. Modi
Es ist möglich, auf dem Kongurations-Bildschirm 5 verschiedenen Modi
zu sehen. Um von einem Modus in den anderen zu wechseln, drücken Sie
die Taste M.
VIDEO
HD Video Aufnahmen
(WVGA, 720p or 1080p)
• Um die Videoaufnahme zu starten, drücken Sie die
verstrichene Aufnahmezeit wird auf dem Bildschirm angezeigt.
• Um die Aufnahmen anzuhalten, drücken Sie die
geschätzte verbleibende Aufnahmezeit wird auf dem Bildschirm
angezeigt.
FOTO Aufnahmen in (1mp, 3mp or 5 mp)
• Um ein Foto aufzunehmen, drücke Sie die
Taste.
ZEITRAFFER
Fotoaufnahmen in einem vordenierten
Intervall (0,5;2;5;10;30 oder 60 Sekunden)
• Zum starten oder stoppen der Bilder, die
Taste drücken.
BETRACHTEN
Ermöglicht es dem Anwender die Anzahl
der Aufnahmen einzusehen und Bilder/
Videos zu betrachten, wenn die Kamera an
einem TV angeschlossen ist.
EINSTELLUNGEN
Ermöglicht es dem Anwender die
Einstellungen der Kamera zu kongurieren.
• Um Einstellungen vorzunehmen, drücken Sie die Ok Taste.
4. Einstellungsmenü
Video
Modus
Ermöglicht Videoaufnahmen in den folgenden
Auösungen: WVGA, 720p und 1080p.
Foto
Modus
• Ermöglicht Fotoaufnahmen in den folgenden
Auflösungen: 1 Mp, 3 Mp und 5 Mp.
• Ermöglicht Ihnen 1 bis 6 aufeinander folgendene Fotos
mit einer Verzögerung von etwa 0,5 Sekunde zwischen den
Bildern aufzunehmen.
Zeitraffer
Modus
Fotoaufnahmen in einem vordenierten Intervall:
0,5;2;5;10;30 oder 60 Sekunden.
Datum/
Zeit
Ermöglicht Ihnen das Datum (Jahr/Monat/Tag) und die
Uhrzeit (Stunde/Minute) einzustellen.
Verwenden Sie die OK Taste, um die Eingabe abzuspeichern
und verwenden Sie die M und BACK Taste um die
Einstellung zu ändern.
Fernbe-
dienung
Aktivieren oder deaktivieren der Fernbedienung
(Wireless).
Tonsignal
Tastenton ein- oder ausschalten.
LED
LITCHER
LED Lichter aktivieren oder deaktivieren. Wenn die
“Fernbedienung” und die “LED Lichter” Optionen
aktiviert sind blinken die 4 LED langsam auf, um
anzuzeigen, dass die Kamera auf ein Signal der
Fernbedienung wartet. Während die Kamera ein Video
oder Foto aufnimmt blinken die LED schnell auf.
Löschen
Ermöglicht das Löschen der letzten Datei oder aller Dateien.
Complete instructions under Support section
Instructions complètes sous la section Support
Vollständige Bedienungsanleitung unter Abschnitt Support
Besuchen Xcelcam.com
 Loading...