

Page 1
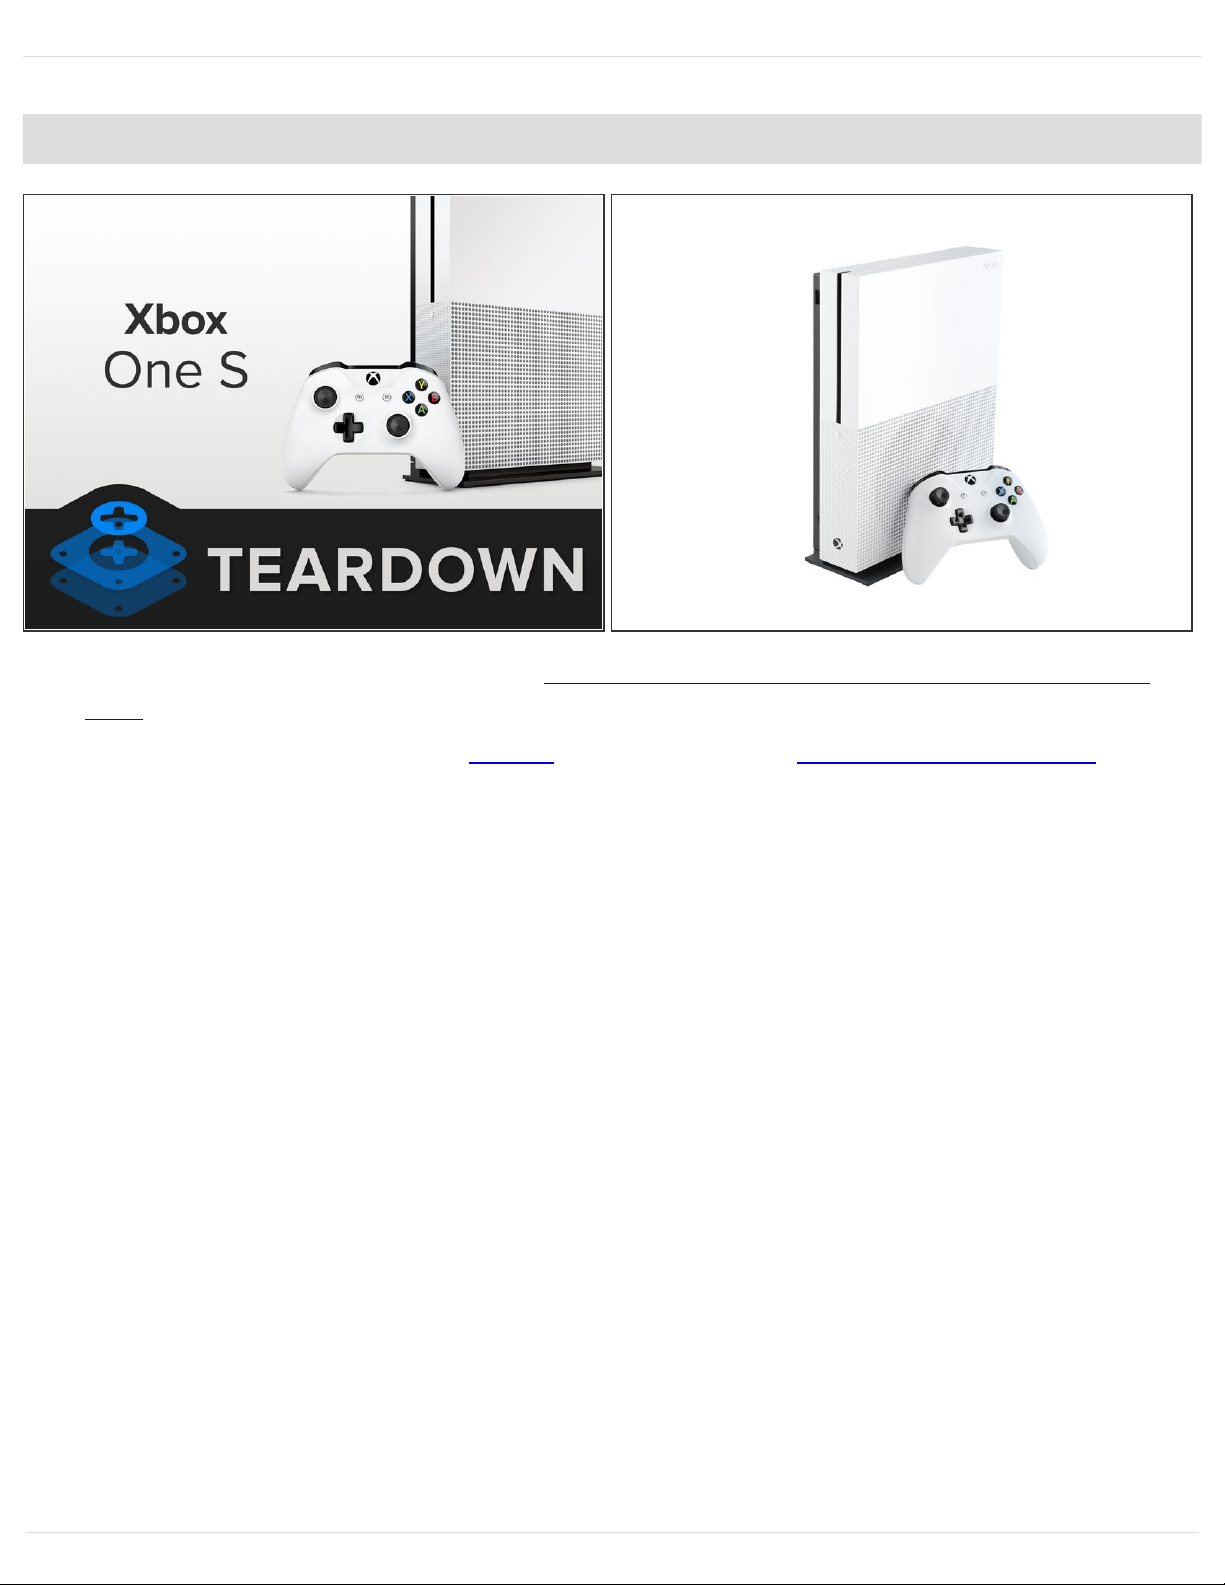
Xbox One S Teardown
Teardown of the 2TB Xbox One S, released August 2nd 2016.
Written By: Scott Havard
Xbox One S Teardown
Draft: 2021-06-21Guide ID: 65572 -
This document was generated on 2021-06-21 06:21:53 PM (MST).
© iFixit — CC BY-NC-SA www.iFixit.com Page 1 of 21
Page 2

INTRODUCTION
Today a new Xbox lands in our inbox, and that's a rare thing—though not as rare as it used to be.
What makes the new Xbox One S a worthy mid-cycle update to Microsoft's console? Let's tear
down this surprisingly slimmer, possibly speedier, appreciably sassier Xbox One and find out. Game
on!
This teardown season is just getting started—add us on Facebook, Instagram, or Twitter and never
miss a beat.
[video: https://www.youtube.com/watch?v=uF_jNJ1FSYc]
TOOLS:
iFixit Opening Tool (1)
T8 Torx Screwdriver (1)
T8 Torx Security Bit Screwdriver (1)
T10 Torx Screwdriver (1)
Tweezers (1)
Flathead 3/32" or 2.5 mm Screwdriver (1)
Xbox One S Teardown
Draft: 2021-06-21Guide ID: 65572 -
This document was generated on 2021-06-21 06:21:53 PM (MST).
© iFixit — CC BY-NC-SA www.iFixit.com Page 2 of 21
Page 3
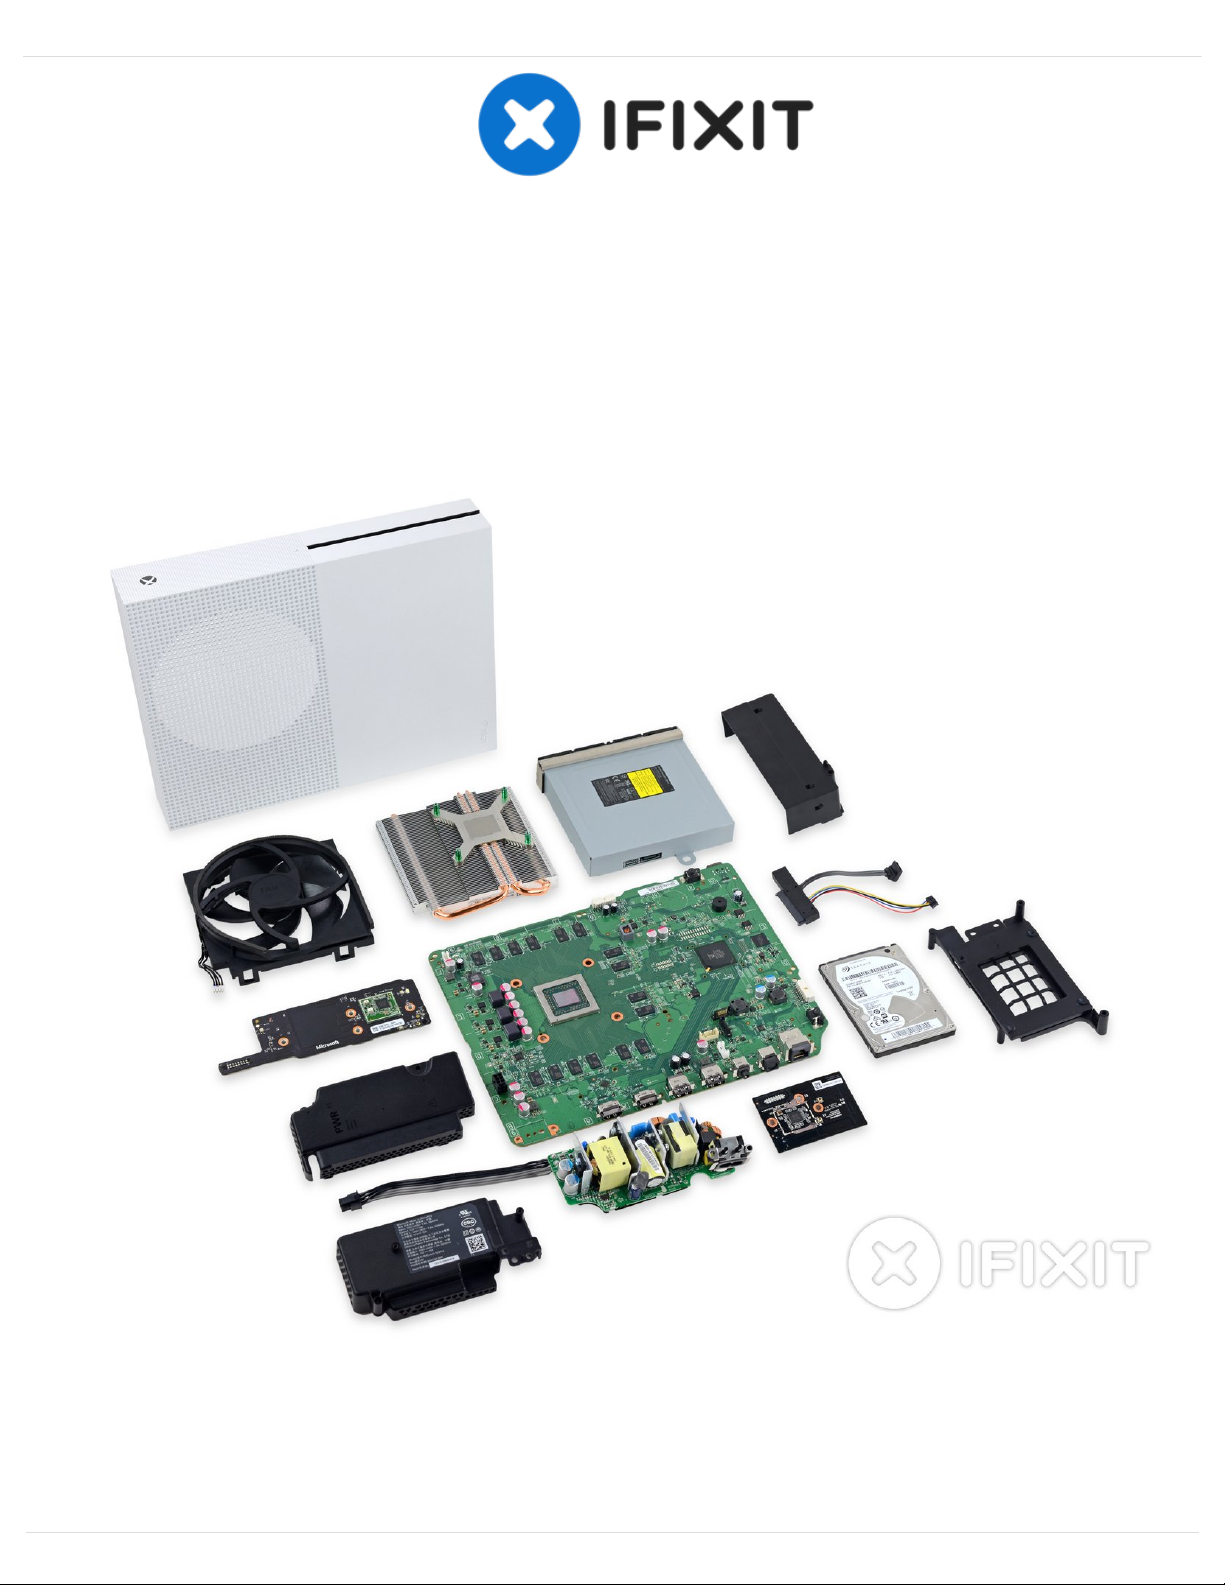
Step 1 — Xbox One S Teardown
You'd expect some differences from the Day One Edition Xbox One we tore down way back in
2013, and you'd be right. Here's what we know:
Spec-bumped GPU supporting HDR10 along with the same AMD "Jaguar" 8-core SoC found in
the original Xbox One.
2 TB of storage (500 GB and 1 TB configurations are coming)
HDMI 2.0a connectivity with support for 4K video at 60 Hz
Internal power supply
IR blaster
Fancy vertical stand (2 TB model only)
Redesigned Xbox Wireless Controller
Xbox One S Teardown
Draft: 2021-06-21Guide ID: 65572 -
This document was generated on 2021-06-21 06:21:53 PM (MST).
© iFixit — CC BY-NC-SA www.iFixit.com Page 3 of 21
Page 4
Step 2
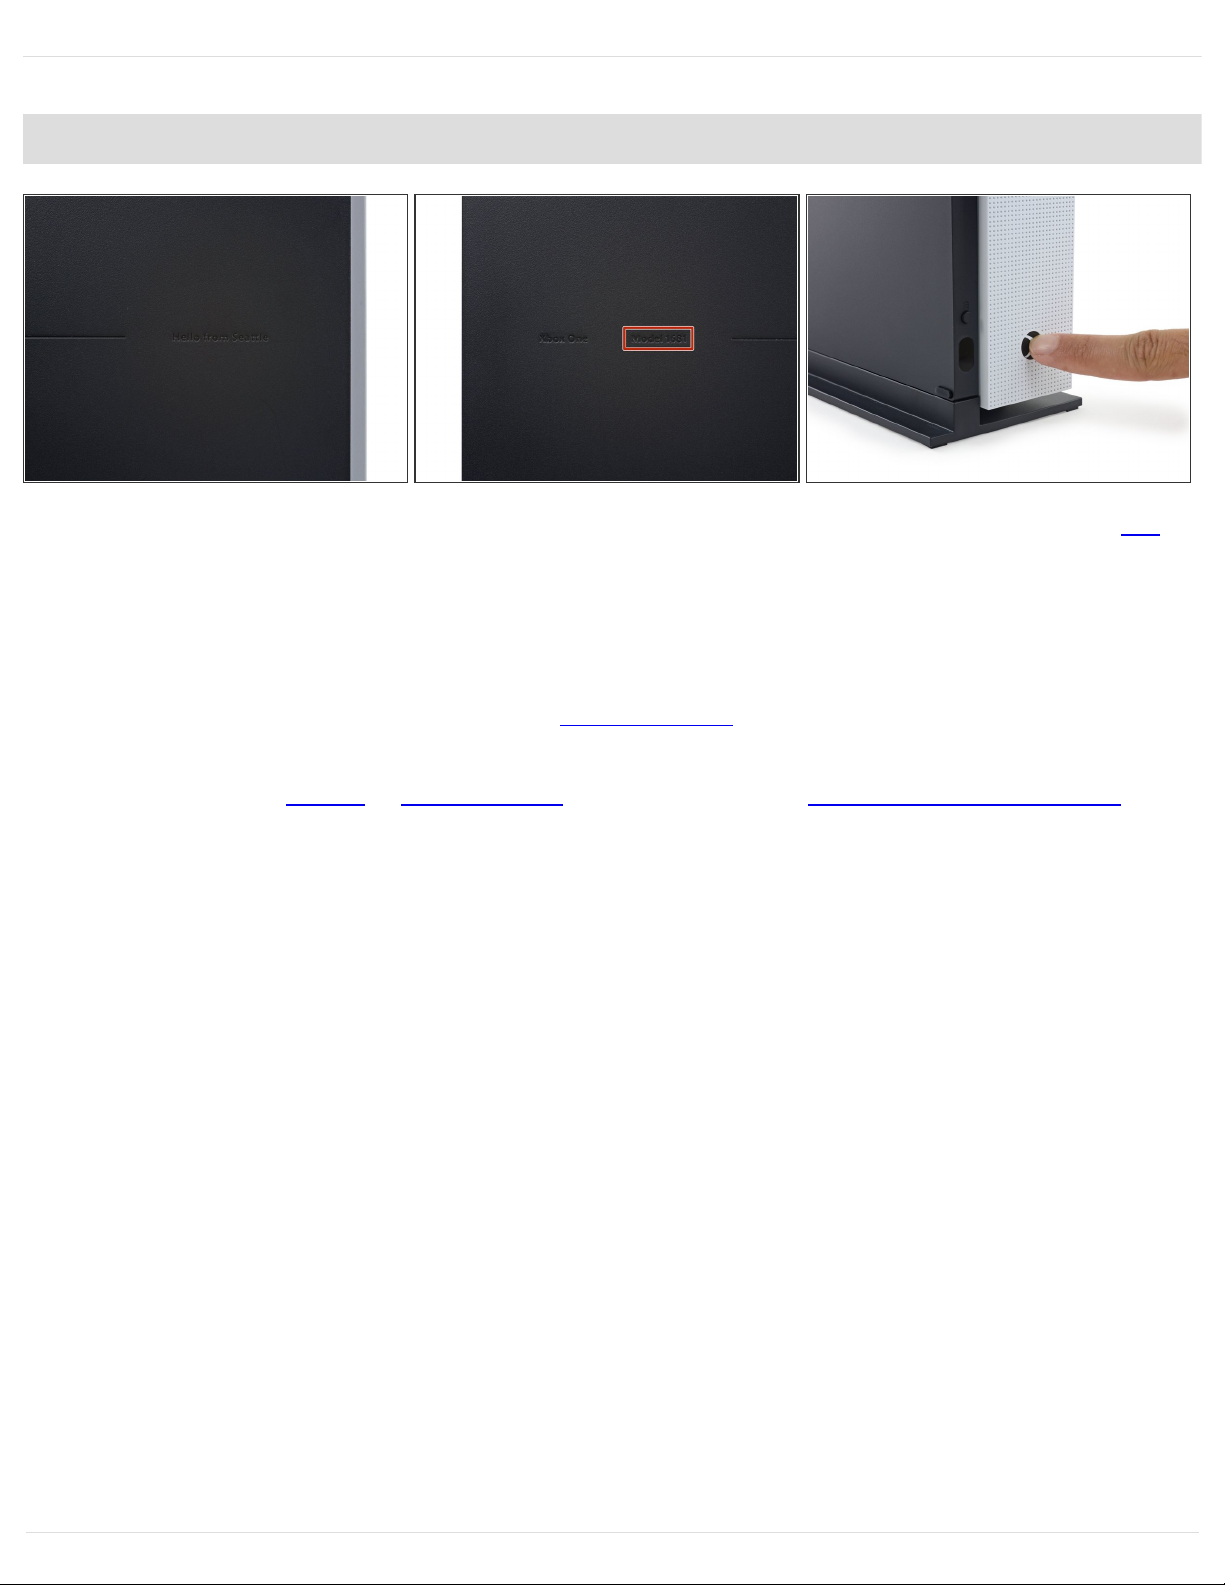
Etched into the starboard side of the Xbox One S, we find a cute reminder that this console still
hails from the other tech capital of the West Coast: "Hello from Seattle," home of the Microsoft
brigade.
Moving right along, we discover the Xbox One S is now identified as Model 1681.
In a design decision that takes us back to consoles of old, this One features mechanical buttons in
lieu of capacitive ones.
Gamers with a toddler or wet-nosed pet know the pain of the ultra-sensitive power button on the
original Xbox One.
Xbox One S Teardown
Draft: 2021-06-21Guide ID: 65572 -
This document was generated on 2021-06-21 06:21:53 PM (MST).
© iFixit — CC BY-NC-SA www.iFixit.com Page 4 of 21
Page 5
Step 3
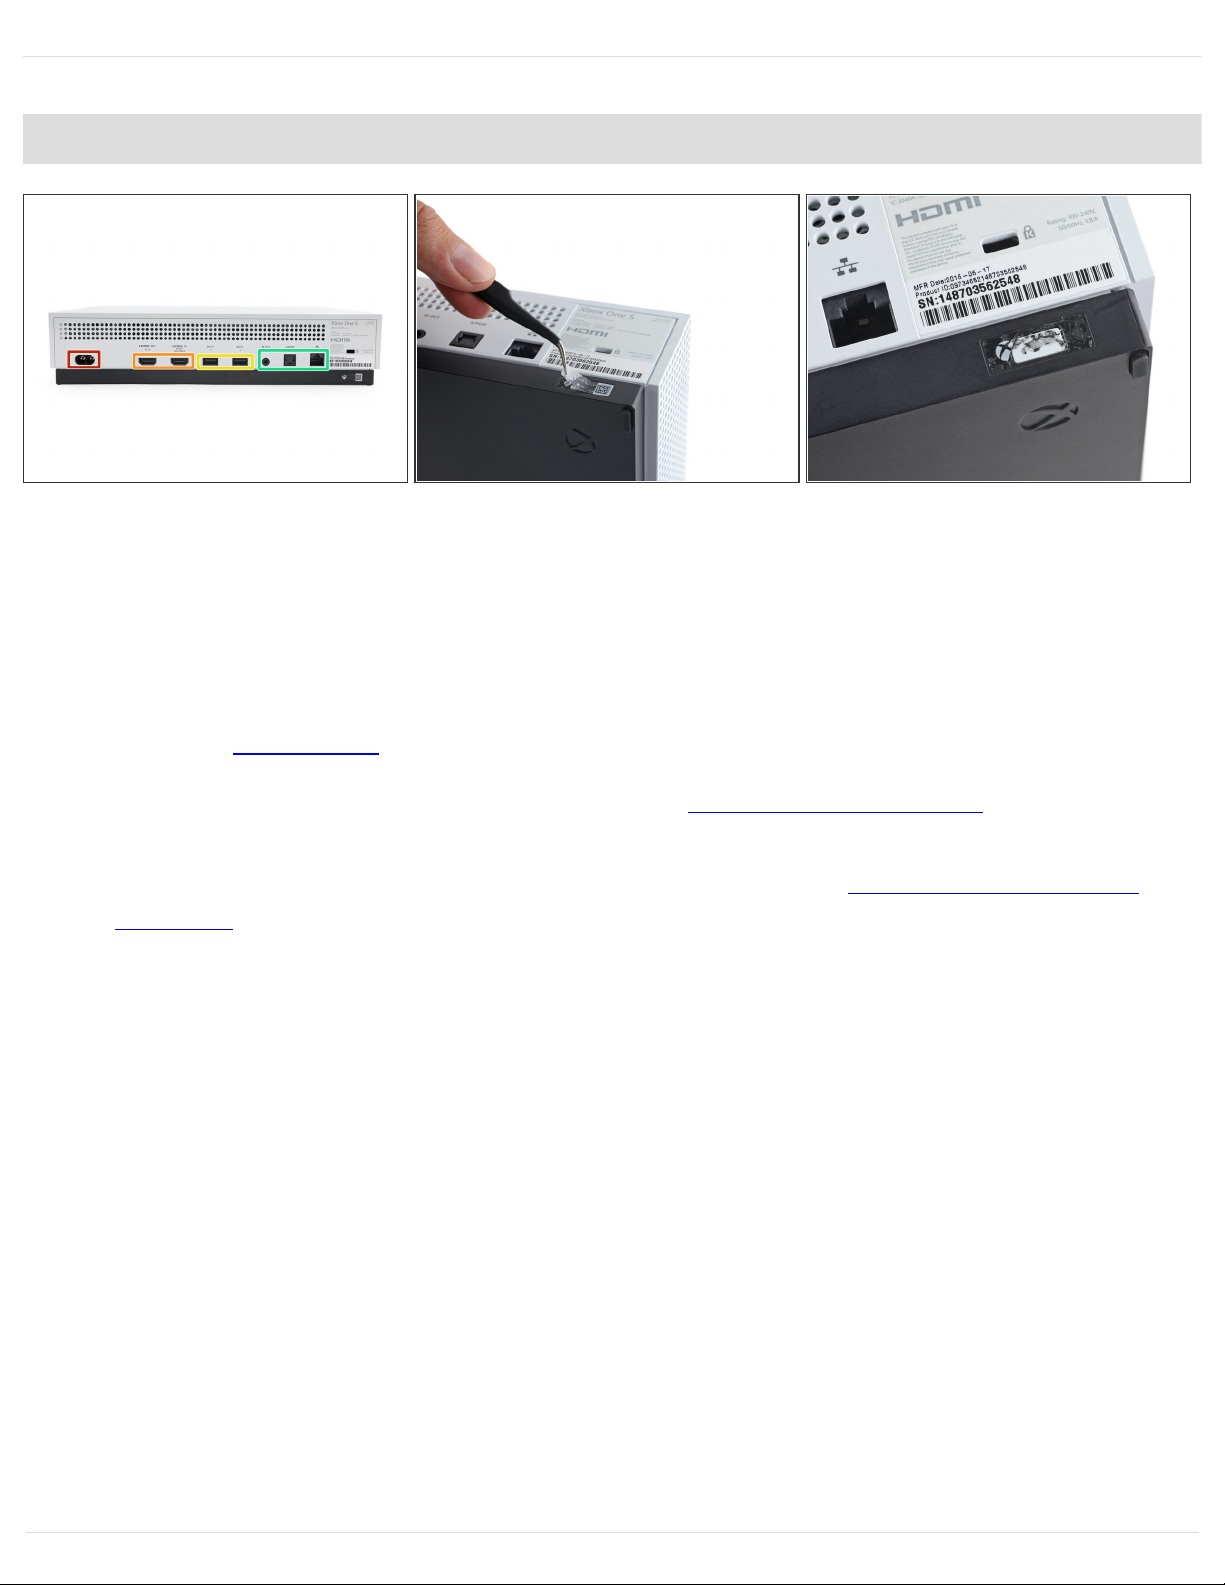
Around back, under the many vent holes we find:
Power inlet
HDMI out (left) and in (right)
Two USB 3.0 ports (in addition to the one on the front)
IR output, optical audio, and Ethernet ports
What about my Kinect, you ask? You can apply for a "free" Kinect USB adapter—provided you
already own a Kinect, an original Xbox One, and the Xbox One S.
Those who buy a Kinect to go with their Xbox One S will have to purchase the $40 adapter
separately.
Our first act of teardown: tamper evident sticker removal. But no screws in sight, just the back of
an immobile plastic clip. Bummer.
Xbox One S Teardown
Draft: 2021-06-21Guide ID: 65572 -
This document was generated on 2021-06-21 06:21:53 PM (MST).
© iFixit — CC BY-NC-SA www.iFixit.com Page 5 of 21
Page 6
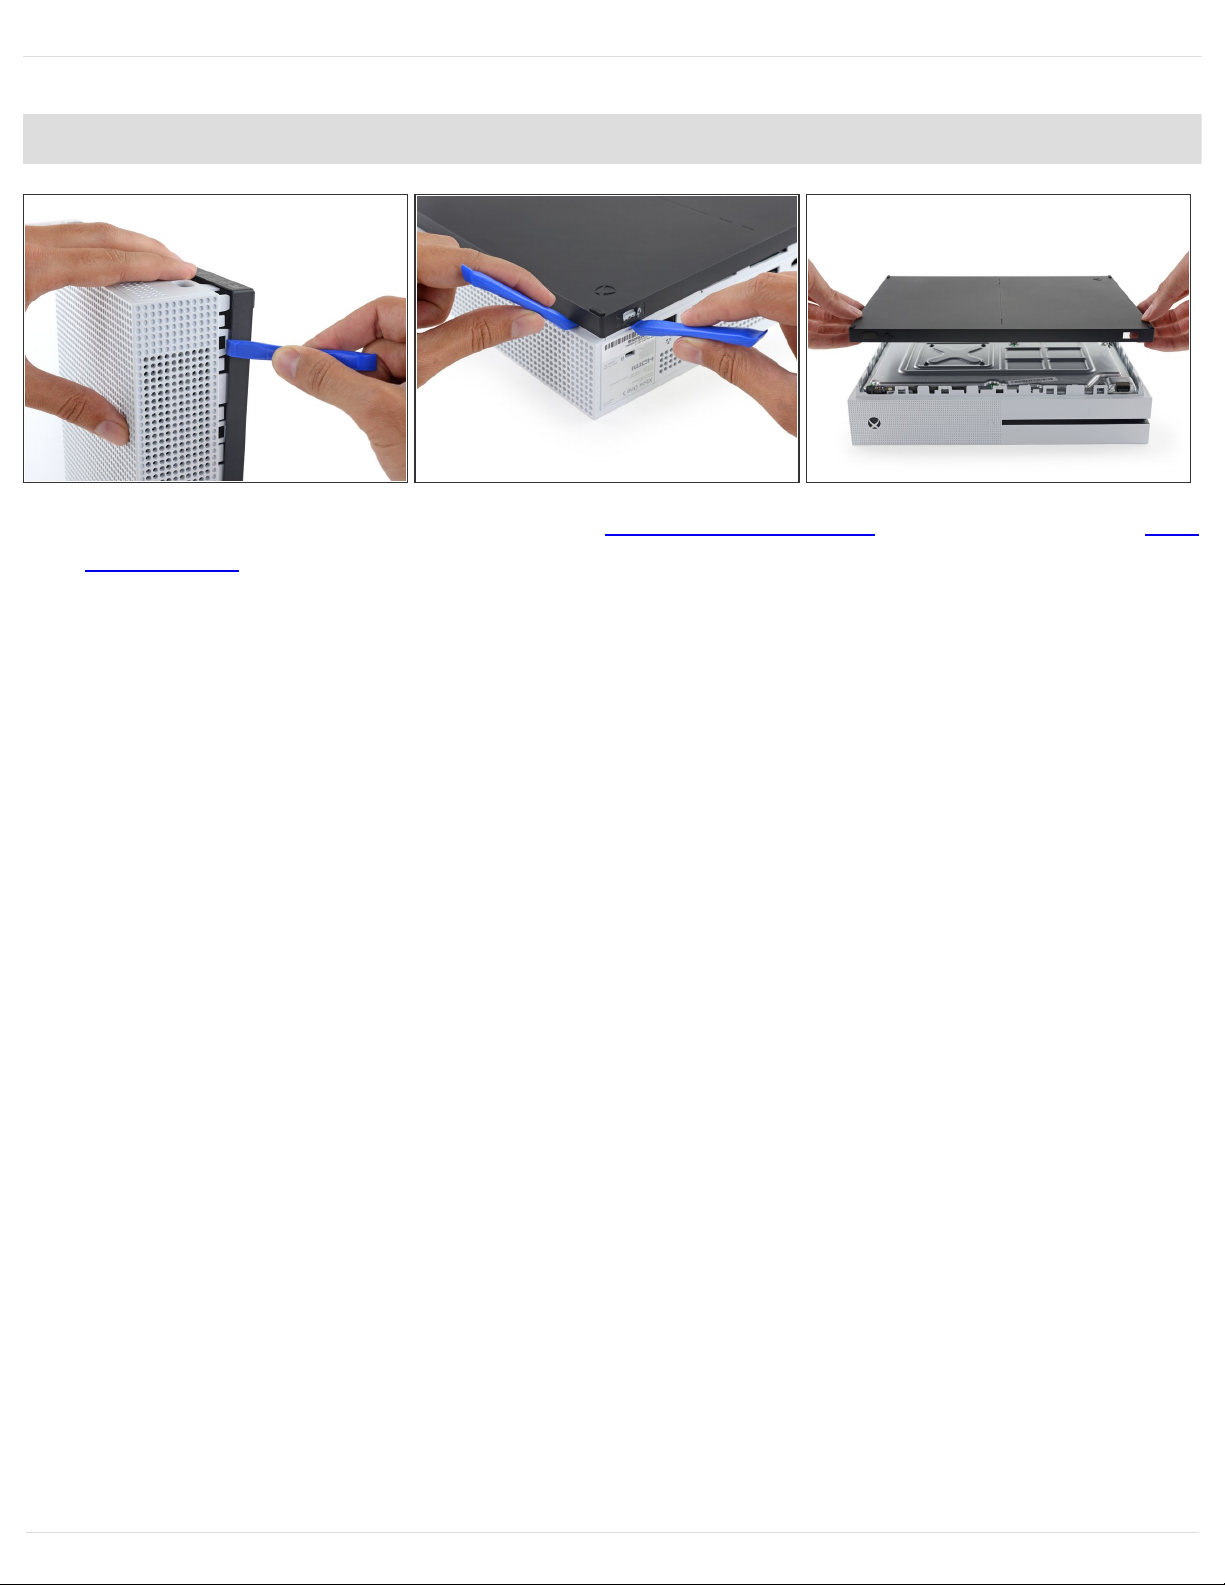
Step 4
We take a moment to reminisce about our old Xbox 360 Opening Tool, but decide our trusted iFixit
Opening Tool would be of more use here.
Make that opening tools—because popping that plastic "security" nub takes a little extra oomph.
Do we like security clips? Not in a box. Not with a fox. Not in a house. Not with a mouse. We do
not like them here nor there; we do not like them anywhere.
After some intense prying, we successfully remove the bottom cover, revealing a metal interior
case.
These clips may be tough at first, but plastic is bound to bend or break, unlike a reusable screw.
The next time you open your One S it may not clip back together...
Xbox One S Teardown
Draft: 2021-06-21Guide ID: 65572 -
This document was generated on 2021-06-21 06:21:53 PM (MST).
© iFixit — CC BY-NC-SA www.iFixit.com Page 6 of 21
Page 7
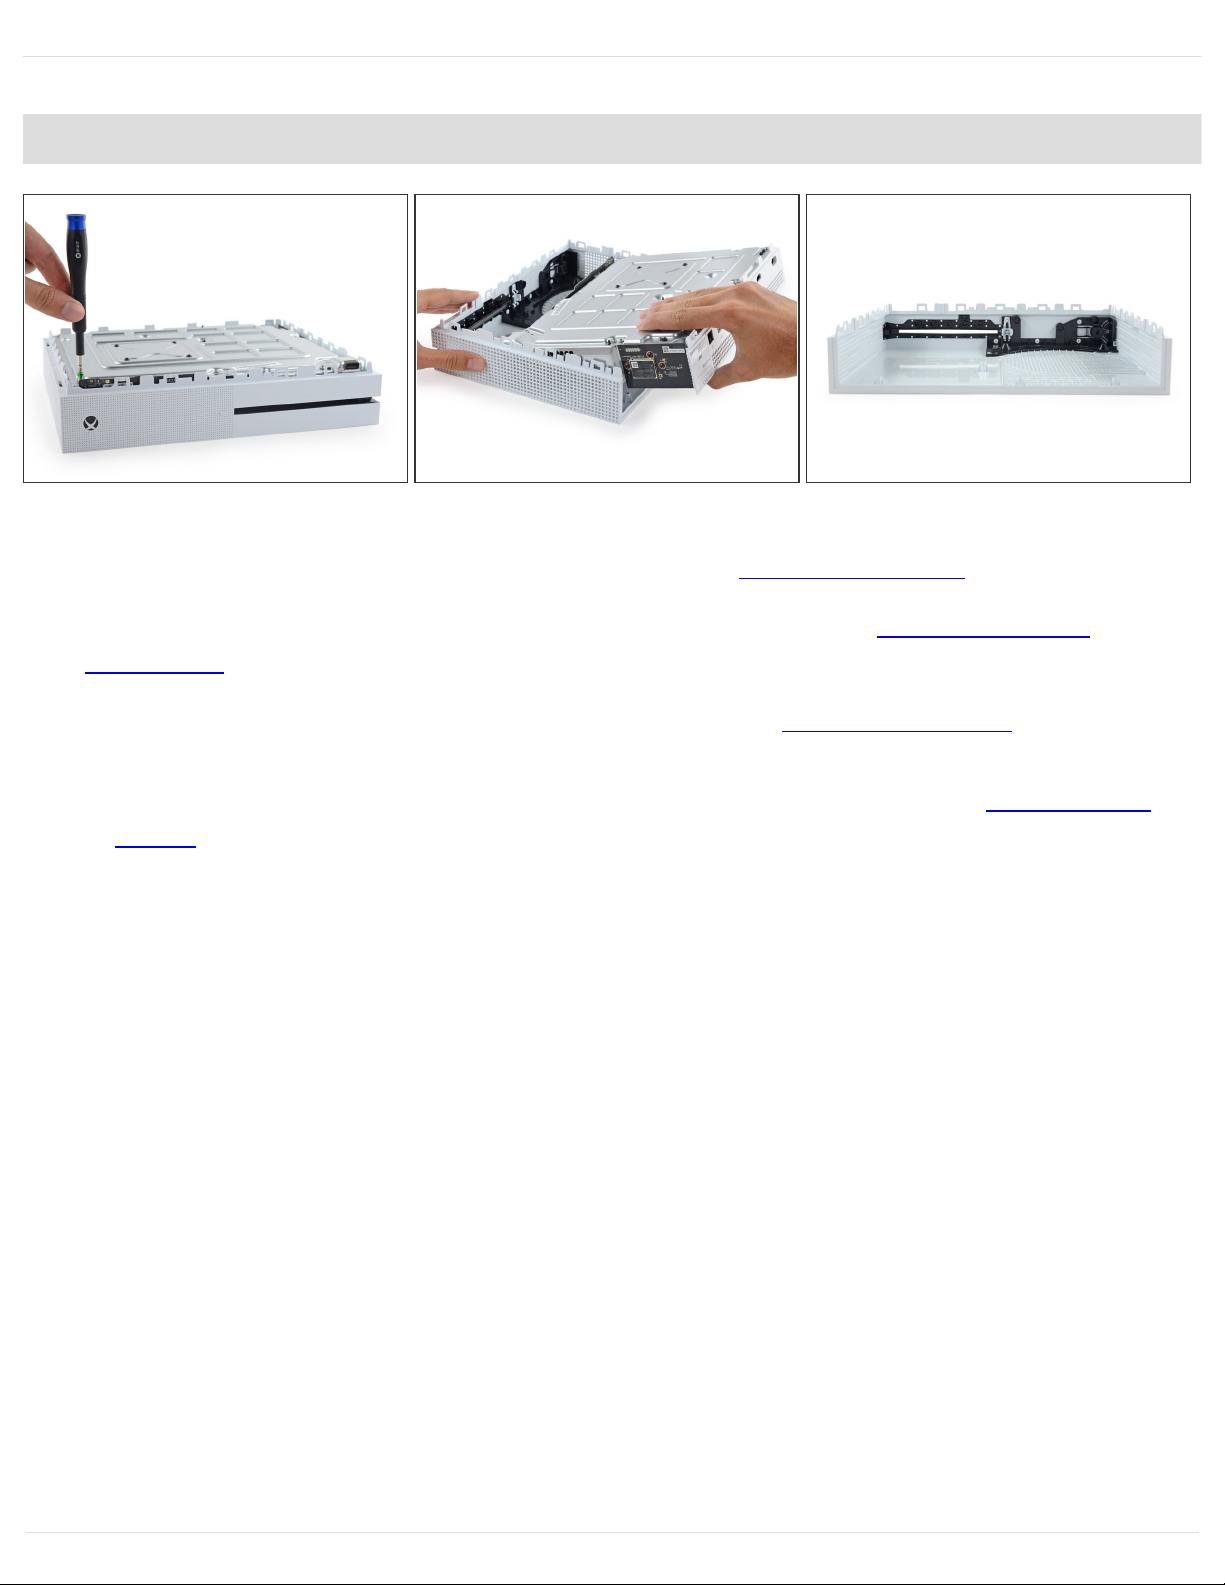
Step 5
Some nostalgic green screws labeled F (for first?) free the primary assembly from the upper case.
Remember when Xbox was black and green and not a Destiny bundle PS4?
This One, more streamlined than its predecessor, doesn't feature any weird, afterthought
components left out in the cold.
All that's left in the PC/ABS case are some button covers and Sabic and Samsung logos—
probably the plastic suppliers.
Okay, is it just the teardown giddiness, or does this case vaguely resemble a Star Destroyer
hangar?
Xbox One S Teardown
Draft: 2021-06-21Guide ID: 65572 -
This document was generated on 2021-06-21 06:21:53 PM (MST).
© iFixit — CC BY-NC-SA www.iFixit.com Page 7 of 21
Page 8

Step 6
Lifting one metal midbody panel reveals a beautiful sight: such nice, sleek components that we are
momentarily inclined to keep the cover off forever.
Somebody call the Jackson 5, 'cause identifying these numbered and labeled components is easy
as 01-02-03 (and 04).
But wait—who's that we spy?
Master Chief has arrived on a new world, this time to protect the optical disc drive bracket.
Hopefully the Flood keeps out of this drive for good.
Xbox One S Teardown
Draft: 2021-06-21Guide ID: 65572 -
This document was generated on 2021-06-21 06:21:53 PM (MST).
© iFixit — CC BY-NC-SA www.iFixit.com Page 8 of 21
Page 9

Step 7
Much like the RF board on the Xbox One , the front panel board of the Xbox One S detaches
outward from the lower case.
With the front panel board's EMI shield removed, we quickly spy a lone IC and some of its friends:
MediaTek MT7632TUN (Likely a variation of MT7632 2x2 802.11n + Bluetooth 4.0 Module)
Skyworks SKY13314-374LF GaAs SPDT Switch
Sync switch for wireless controllers
IR Blaster
Power Switch
Eject switch
Xbox One S Teardown
Draft: 2021-06-21Guide ID: 65572 -
This document was generated on 2021-06-21 06:21:53 PM (MST).
© iFixit — CC BY-NC-SA www.iFixit.com Page 9 of 21
Page 10

Step 8
Next up on the teardown chopping block is the Wi-Fi board. After removing a few Torx screws, it
comes quietly just like the front panel board before it.
This is a nice incremental improvement over its location in the previous Xbox One—it makes for
one less step to open the inner metal case.
Wi-Fi is handled by a MediaTek MT7612UN (Likely a variation of MT7612U 2x2 802.11ac Wi-Fi
Module)
Xbox One S Teardown
Draft: 2021-06-21Guide ID: 65572 -
This document was generated on 2021-06-21 06:21:53 PM (MST).
© iFixit — CC BY-NC-SA www.iFixit.com Page 10 of 21
Page 11

Step 9
At this point, component removal is a bit of a hunt, so we extract some screws and see which
component is freed first.
Oddly enough, despite being labeled 04, the hard drive is the first component out.
The labels are likely numbered according to assembly, rather than the disassembly.
We find a Samsung Seagate Spinpoint M9T ST2000LM003 2 TB 5400 RPM with 32 MB Cache
SATA III 6.0 Gb/s hard drive. Try saying that ten times fast.
Sadly, hard drive replacements still void the warranty, and need some tricky formatting.
The One S packs a sweet SATA III drive, but it may still be using the SATA II interface of the
original Xbox One. You can always add an external hard drive though, thanks Microsoft!
Xbox One S Teardown
Draft: 2021-06-21Guide ID: 65572 -
This document was generated on 2021-06-21 06:21:53 PM (MST).
© iFixit — CC BY-NC-SA www.iFixit.com Page 11 of 21
Page 12

Step 10
The next to go is number two: the optical drive— too easy! Master Chief is of course along for the
ride.
Here we have the artist formally known as a BD-ROM drive, courtesy of Philips and Lite-On Digital
Solutions. The DG-6M5S model found in the Xbox One S is slightly different from the DG-6M1S
found in the Xbox One, with the biggest upgrade being support for BD-UHD.
We also snag a couple rubber bumpers. These probably help keep the high-speed optical drive
from rattling us off our rockers.
Xbox One S Teardown
Draft: 2021-06-21Guide ID: 65572 -
This document was generated on 2021-06-21 06:21:53 PM (MST).
© iFixit — CC BY-NC-SA www.iFixit.com Page 12 of 21
Page 13

Step 11
Now we come to the One S's hat trick (a.k.a. #03)—a smaller, newly-fanless, neatly-integrated
power supply. Gone is that dangling anchor of yore.
Welcome to the club, Xbox One.
An external power supply is much easier to replace than an internal one. So let's hope Microsoft
did their homework to mitigate that need!
This power supply also accepts 100-240 V inputs, meaning you can take it pretty much anywhere
there's a socket. Take that, Xbox One!
The power supply connects with what PC gamers will instantly recognize as a perfectly ordinary, 6-
pin PCIe connector.
Xbox One S Teardown
Draft: 2021-06-21Guide ID: 65572 -
This document was generated on 2021-06-21 06:21:53 PM (MST).
© iFixit — CC BY-NC-SA www.iFixit.com Page 13 of 21
Page 14

Step 12
Things are heating up in the teardown room, but we can't extract the "Thermal System" just yet. So
we lift the whole dang motherboard assembly out of the metal casing.
A springy, X-shaped bracket secures the heat sink to the motherboard—a signature part we've
seen in every Xbox since the original 360.
The "X" is a bit fussy and takes some muscle, but some practiced prying with a flathead driver
saves the day.
Xbox One S Teardown
Draft: 2021-06-21Guide ID: 65572 -
This document was generated on 2021-06-21 06:21:53 PM (MST).
© iFixit — CC BY-NC-SA www.iFixit.com Page 14 of 21
Page 15

Step 13
With the component countdown nearly complete, it's time to extract part number 01: the thermal
system.
Out comes the system's single 120 mm fan—looking much like a PC case fan, but with some
sculpting that's unique to the Xbox One's design.
The standard Xbox One had a similarly robust cooling setup, possibly designed to avoid a
repeat of the Xbox 360's billion dollar problem.
The backup for the One S's biggest fan is an impressive aluminum heat sink and copper heat pipe
set. Cool.
Xbox One S Teardown
Draft: 2021-06-21Guide ID: 65572 -
This document was generated on 2021-06-21 06:21:53 PM (MST).
© iFixit — CC BY-NC-SA www.iFixit.com Page 15 of 21
Page 16

Step 14
Now on to our One true love, chips!
X949211-001 DG4001FYG87IA
(Includes 1.75 GHz AMD
"Jaguar" 8-core CPU +
overclocked 914 MHz AMD
Radeon Graphics GPU)
16 x Samsung SEC 549
K4W4G1646E-BC1A 4 Gb (512
MB) "gDDR3" SDRAM (total of 16
x 512 MB = 8 GB)
X861949-005 T6WD5XBG-0003
Southbridge I/O controller
Toshiba THGBMFG6C1LBAIL 8
GB eMMC NAND flash
ON Semiconductor NCP4205
(Likely an iteration of the
NCP4204 Integrated Power
Control IC found in the Xbox One)
(probably CPU power phase
PWM controller)
Texas Instruments SN75DP159 6
Gb/s DP++ to HDMI retimer
STMicroelectronics LDFPT 1 A
LDO regulator
Xbox One S Teardown
Draft: 2021-06-21Guide ID: 65572 -
This document was generated on 2021-06-21 06:21:53 PM (MST).
© iFixit — CC BY-NC-SA www.iFixit.com Page 16 of 21
Page 17

Step 15
And on the back of the
motherboard...is not much really.
Realtek RTL8111HM (Likely an
iteration of the RTL8111 gigabit
ethernet controller)
Nuvoton ISD8104 2 W class AB
audio amplifier (likely)
Texas Instruments
SN74LVC1G08 single 2-input
AND gate
Oh and that handy front-side USB
port—which is on the opposite
end and opposite side from its
friends, poor guy.
Xbox One S Teardown
Draft: 2021-06-21Guide ID: 65572 -
This document was generated on 2021-06-21 06:21:53 PM (MST).
© iFixit — CC BY-NC-SA www.iFixit.com Page 17 of 21
Page 18

Step 16
Bonus chips:
STMicroelectronics LM339A quad voltage comparator
Texas Instruments TPS51916 memory power controller
Richtek RT9011-JGPQV 300 mA dual LDO regulator
Monolithic Power Systems MP8757GL 7 A / 18 V synchronous step-down converter
Monolithic Power Systems MP2161GJ 2 A / 6 V synchronous step-down converter
ON Semiconductor CAT6243DCADJ 1 A LDO regulator
Diodes Incorporated (formerly BCD Semiconductor) AP2127K-ADJTRG1 300 mA LDO
regulator
Xbox One S Teardown
Draft: 2021-06-21Guide ID: 65572 -
This document was generated on 2021-06-21 06:21:53 PM (MST).
© iFixit — CC BY-NC-SA www.iFixit.com Page 18 of 21
Page 19

Step 17
Now on to the controller!
While we are disappointed by the lack of visible screws, we will celebrate a small concession: the
batteries are still user-replaceable! (Looking at you, DualShock 4).
Using our recent console expertise, we bust out the trusty opening tools and pop off some white
paneling, finding some sneaky Torx security screws. Boo.
Not only that, but a final Torx security screw is hiding under the battery compartment sticker.
Double boo.
But hey, still better than Pentalobes.
Xbox One S Teardown
Draft: 2021-06-21Guide ID: 65572 -
This document was generated on 2021-06-21 06:21:53 PM (MST).
© iFixit — CC BY-NC-SA www.iFixit.com Page 19 of 21
Page 20

Step 18
Popping off those plastic panels reveals what looks like a neat little assembly, complete with four
haptic feedback motors.
But once we start to extract the beast, we see the truth: Unless you're handy with a soldering iron,
this is an all-or-nothing disassembly procedure.
We decided to pick option "all" and just lay everything out, still connected.
Beauty is only skin-deep, and so too are this controller's physical changes. Inside, it's largely the
same design as the original Xbox One controller—our guides should be relevant for both models.
Step 19
That's a wrap! Time to lay out the
parts and calculate a repairability
score.
Xbox One S Teardown
Draft: 2021-06-21Guide ID: 65572 -
This document was generated on 2021-06-21 06:21:53 PM (MST).
© iFixit — CC BY-NC-SA www.iFixit.com Page 20 of 21
Page 21

Step 20 — Final Thoughts
Microsoft Xbox One S Repairability
Score: 8 out of 10 (10 is easiest to
repair):
Only a few tools are required to
take the whole console apart.
Once inside, a clean, nononsense modular design allows
the drives, fan, heat sink, PSU,
wireless board, and front
daughterboard to be easily
replaced.
Fewer interlocking body panels
and a simpler clip arrangement
make opening this generation of
Xbox easier than its senior.
Replacing the hard drive will
require both voiding your
warranty and some difficult
hackery to make it serviceable.
Xbox One S Teardown
Draft: 2021-06-21Guide ID: 65572 -
This document was generated on 2021-06-21 06:21:53 PM (MST).
© iFixit — CC BY-NC-SA www.iFixit.com Page 21 of 21
 Loading...