

Page 1

english
3
Thanks for choosing the Xbox 360
120GB Hard Drive. The Xbox 360
120GB Hard Drive lets you save
games, save music and create
custom playlists, download videos
and other new content from Xbox
Live®, and play original Xbox games.
Your hard drive comes pre-loaded
with high-denition bonus content
and includes a software disc and
transfer cable that let you move
content from an Xbox 360 20GB Hard
Drive to your new Xbox 360 120GB
Hard Drive.
If you want to transfer saved
games and other content from your
existing hard drive to your new
120-GB hard drive, do not attach
the 120-GB hard drive to your Xbox
360 console until you have
transferred the contents of your 20GB hard drive according to the
instruc
tions below. Anything you
store on the hard drive prior to
content transfer will be lost.
The Xbox 360 120GB Hard Drive is
for use exclusively with the Xbox
360™ video game and
entertainment system.
For an easy, portable way to take
y
our saved games or Xbox Live
membership with you wherever you
go, try the Xbox 360 Memory Unit
(sold separately).
english
Xbox 360 120GB Hard Drive
!
important
Page 2
4
english
notE
Because the Xbox 360 system
software uses some of the memory
from the hard drive, less than the
stated storage capacity will be
available to the user.
!
WarninG
Before using this product, read this
manual and the Xbox 360 console
manuals for important safety and
health information. Keep all
manuals for future reference. For
replacement manuals, go to
www.xbox.com/support or call
X
box Customer Support (see
“If
You Need More Help”).
The limited warranty covering this
product is contained in the Xbox 360
Wa
rranty manual (Volume 2) and is
available online at
www.xbox.com/support.
TRAnsFeR COnTenT FROM
An eXisTing XBOX 360
hARD DRiVe
Before attaching your new 120-GB
hard drive, decide whether you want
to perform a one-time transfer of all
content from your existing hard
drive. Whether you move your
existing content or not, both drives
are—and will remain, even after
content transfer—fully compatible
with your console. However, content
can only ever be moved from the
smaller drive to the larger one, and
only once.
notE
If you intend to move content from
your 20-GB hard drive, do not use the
120-GB hard drive prior to
performing this procedure or you
will lose whatever content you have
put on it.
At the end of the transfer, your 120-
GB hard drive will contain every le
that could be transferred, including
your saved games and content
downloaded from Xbox Live.
Page 3
english
5
Apart from this one-time option to
move all content to your new drive,
you cannot copy or move les from
one hard drive to another, regardless
of drive capacity. Except as detailed
in the following procedure, only one
hard drive may be connected to your
console at a time.
notE
As with any data-transfer process,
there is a risk that some or all of
your data may become lost during
the transfer process. If you proceed
with the data-transfer process, you
do so at your own risk and you agree
that Microsoft is not liable for any
loss of data resulting from the
transfer process.
To transfer content from your 20-GB
hard drive to your 120-GB hard drive:
1 Turn off your console with your
existing hard drive still attached.
2 Disconnect all accessories from
the console’s controller ports.
3 Turn on your console. Connect and
turn on a controller, which you’ll
need during content transfer.
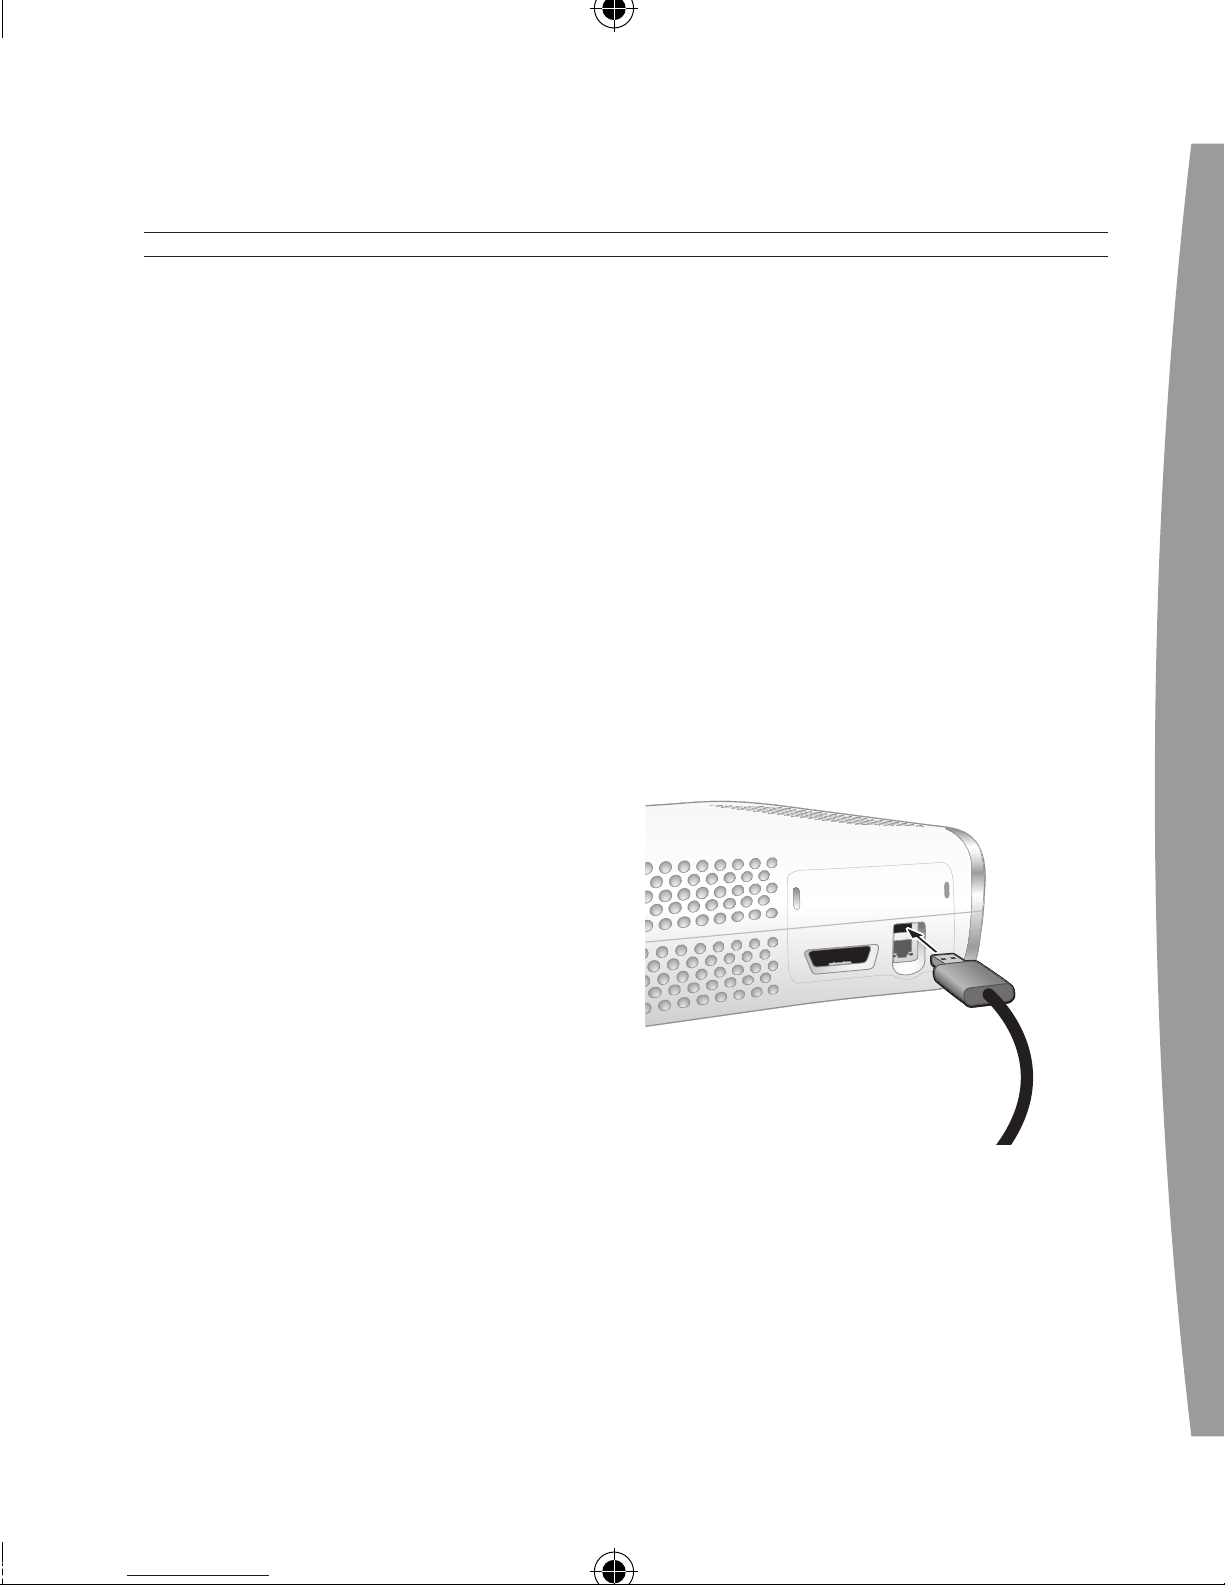
4 Connect one end of the transfer
cable to your 120-GB hard drive.
5 Connect the other end of the
transfer cable to the console’s
r
ear USB port.
important
Be sure to connect the transfer cable
to the back port, not a port on the
front of the console.
6 Insert the included Hard Drive
Transfer Disc and follow the onscreen instructions.
Page 4

6
english
important
The transfer cable connects to the
120-GB hard drive in only one
orientation. Do not force the
connector on. Connect the cable in
the orientation shown.
notES
• The Xbox 360 120GB Hard Drive
transfer cable is not a PC
accessory. It is intended only for
connecting the Xbox 360 120GB
Hard Drive to an Xbox 360 console
for data transfer. Damage to your
PC or other USB device could
occur if you connect the transfer
c
able to such devices. The cable
functions only when used with the
supplied transfer software.
• The transfer cable is intended only
for transferring data from your old
hard drive to your new hard drive
through your console. It is not
intended for long-term connection
to your console, nor is it intended
for use with any other USB host or
device. Dispose of the cable in
accordance with the Disposal of
Waste Electrical and Electronic
Equipment guidelines below.
• If you are signed in to Xbox Live, the
transfer process will sign you out.
•
The Xbox Guide is not available
during content transfer.
•
If the transfer is interrupted for
any reason, your content will
remain on your existing 20-GB
hard drive. You can restart the
transfer process at any time prior
to completion.
•
To begin using your 120-GB hard
drive after content transfer is
complete, remove your 20-GB
hard drive and attach your 120-GB
h
ard drive as instructed in “Attach
and Remove Your Hard Drive.”
Page 5

english
7
If you’re already using a 20-GB Xbox
360 Hard Drive, see “Transfer Content
From an Existing Hard Drive” before
attaching your 120-GB hard drive.
To attach your hard drive:
1 Turn off your console.
2 Remove the hard drive bay cover
from your console.
3 Position the hard drive over the
hard drive bay with the thin end
(the front) pointed toward the
front of the console and the thick
end (the back) pointed toward the
back of the console.
4 Place the back of the hard drive
against the back of the hard drive
bay. Make sure the ridge along
the back of the hard drive is under
the lip on the back of the hard
drive bay.
5 Push the front end of the hard
drive down until the tab clicks.
To remove your hard drive:
1 Turn off your console.
2 Press the tab on the front of the
hard drive and lift the unit from
the console.
important
Avoid touching hard drive bay contacts
or hard drive connector contacts with
ngers or metal objects.
ATTACh AnD ReMOVe YOUR hARD DRiVe
Page 6

8
english
You can personalise your hard drive
by giving it a name.
To give your hard drive a name:
1 With the hard drive attached to
the Xbox 360 console, select
System, Memory.
2 Highlight your hard drive.
3 Choose Device Options and
rename your hard drive.
Once your hard drive has been
personalised, you can identify it by
its new name.
PERSONALISE YOUR HARD DRIVE
COPY OR DELETE SAVED ITEMS
You can move items on your hard
drive to a memory unit. You can also
free up space on your hard drive by
deleting items.
To move or delete an item from your
hard drive:
1 With the hard drive attached to
the Xbox 360 console, select
System, Memory.
2 Select your hard drive.
3 Choose the type of item, then the
specic item that you want to
move to another location or
delete from the hard drive.
notE
If you delete content originally
included with your hard drive, it
cannot be restored. Make sure you
do not want to keep any content
before deletion.
Page 7

english
9
TROUBLESHOOTING
If you encounter problems, try the
possible solutions indicated below.
Hard Drive Not a Listed Storage
Device
If
your hard drive is not listed as a
storage device, try the following
steps, in order.
1 Make sure the hard drive is fully
inserted into the hard drive bay
and looks level. Turn the console
off, and then back on again.
2 Turn the console off and remove
the hard drive. Turn the console
on and then off again. Reattach
the hard drive.
3 If possible, try the hard drive on
another console, or try another
hard drive on your console to
pinpoint the problem.
notE
Damaged hard drives will not show
up in the Xbox Guide and could harm
your Xbox 360 console. Hard drives
that have been crushed, immersed in
liquids, or exposed to intense heat
may be damaged beyond use and
will not show up in your list of
storage devices.
IF YOU NEED MORE HELP
Go to www.xbox.com/support or call
Xbox Customer Support:
• Ireland: 1-800-509-186
(T
TY users: 1-800-509-197)
• United Kingdom: 0800-587-1102
(TTY users: 0800-587-1103)
• South Africa: 0800-99-1550
Do not take your Xbox 360 console
or its accessories to your retailer for
repair or service unless instructed to
d
o so by an Xbox Customer Support
representative.
Page 8

10
english
!
Do not Attempt Repairs
Do not attempt to take apart,
service, or modify the Xbox 360
console, power supply, or its
a
ccessories in any way. Doing
so could present the risk of
serious injury or death from
electric shock or fire, and it
will void your warranty.
Page 9

english
11
DisPOsAl OF WAsTe eleCTRiCAl
AnD eleCTROniC eQUiPMenT
(Weee) in The eUROPeAn UniOn
AnD OTheR COUnTRies WiTh
sePARATe COlleCTiOn sYsTeMs
This symbol on the product or its
packaging means that this product
must not be disposed of with your
househol
d waste. Instead, it is your
responsibility to hand this over to an
applicable collection point for the
recycling of electrical and electronic
equipmen
t. This separate collection
and recycling will help conserve
natural resources and prevent
potential negative consequences for
human health and the environment,
which inappropriate disposal could
cause due to the possible presence of
hazardous substances in electrical
and electronic equipment. For further
information about where to drop off
your electrical and electronic waste,
please contact your local city/
municipality ofce, your household
waste disposal service, or the shop
where you purchased this product.
C
ontact
weee@microsoft.com for
additional information on
W
EEE.
Hereby, Microsoft declares that this
accessory is in compliance with the
essential requirements and other
r
elevant provisions of Directive
1999/5/EC with regard to the EMC
Directive 89/336/EEC.
Page 10

12
english
COPYRighT
Information in this document, including URL and other Internet Web site references, is subject to change
without notice. Complying with all applicable copyright laws is the responsibility of the user. Without
limiting the rights under copyright, no part of this document may be reproduced, stored in or introduced
into a retrieval system, or transmitted in any form or by any means (electronic, mechanical,
photocopying, recording, or otherwise), or for any purpose, without the express written permission of
M
icrosoft Corporation.
Microsoft may have patents, patent applications, trademarks, copyrights, or other intellectual property
rights covering subject matter in this document. Except as expressly provided in any written licence
agreement from Microsoft, the furnishing of this document does not give you any licence to these
patents, trademarks, copyrights, or other intellectual property.
©
2007 Microsoft Corporation. All rights reserved.
Microsoft, Xbox, Xbox 360, Xbox Live, Hexic, the Xbox logos, and the Xbox Live logo are either registered
trademarks or trademarks of Microsoft Corporation in the United States and/or other countries.
 Loading...