

Page 1

MODEL
XIS100
Integration Dock for iPod
INSTALLATION INSTRUCTION
DESCRIPTION
Xantech's ‘XIS100' docking station is the industry's first iPod docking station designed for the highresolution television revolution. It features a unique component video output capability that will enable
owners of the new 480P video output iPods to see their video in full native resolution on a plasma,
LCD, or other compatible TV screen with component video output. The ‘XIS100' features a unique onscreen menu display and control system and is compatible with the latest iPod video technology.
KEY FEATURES
• Stand-Alone iPod Dock
• Stylish Remote with Hi-End Chrome Design
• Compatible with All Current iPods (iPod Classic, iPod Touch, Nano 3g etc...)
• Allows Menu Viewing and Control Direct from Any Viewing Monitor (i.e. Plasma, LCD
Projector etc.)
• COMPONENT Video and Composite Video Output
• RS232 and IR Controllable
• Touch Panel Support
• Multi-Language Menu Support
• Direct IR Input on Rear
• Works as Stand Alone or Via On-Screen Video Display
• Album Art Display
• Metadata to and from Xantech CSPLCD Displays with Multi Line Display (or to XTR39 with
New RF2IR2w)
• Single Line Metadata Display with Xantech MRC Keypads
• Threaded Inserts for Secure Mounting in Public Places
PACKAGE INCLUDES
• Component Video Cables
• Composite Video and Audio Left & Right Cable
• Power Supply with North America, Europe, UK, and Australia/New Zealand Adapters
• XIS100 Docking Station
• XIS100 Remote Control
• Instruction Manual
• DB9 to RJ45 Adaptor
08905180X1 - 1 -
Page 2
QUICK START
STEP 1:
Connect the XIS100 to the power supply and use the included
A/V cable to connect to a composite video and audio amplifier.
Direct the included remote control to the XIS100 and press the
‘power’ button. The ring on the XIS100 will light ‘on’. Be sure the
remote control has batteries installed.
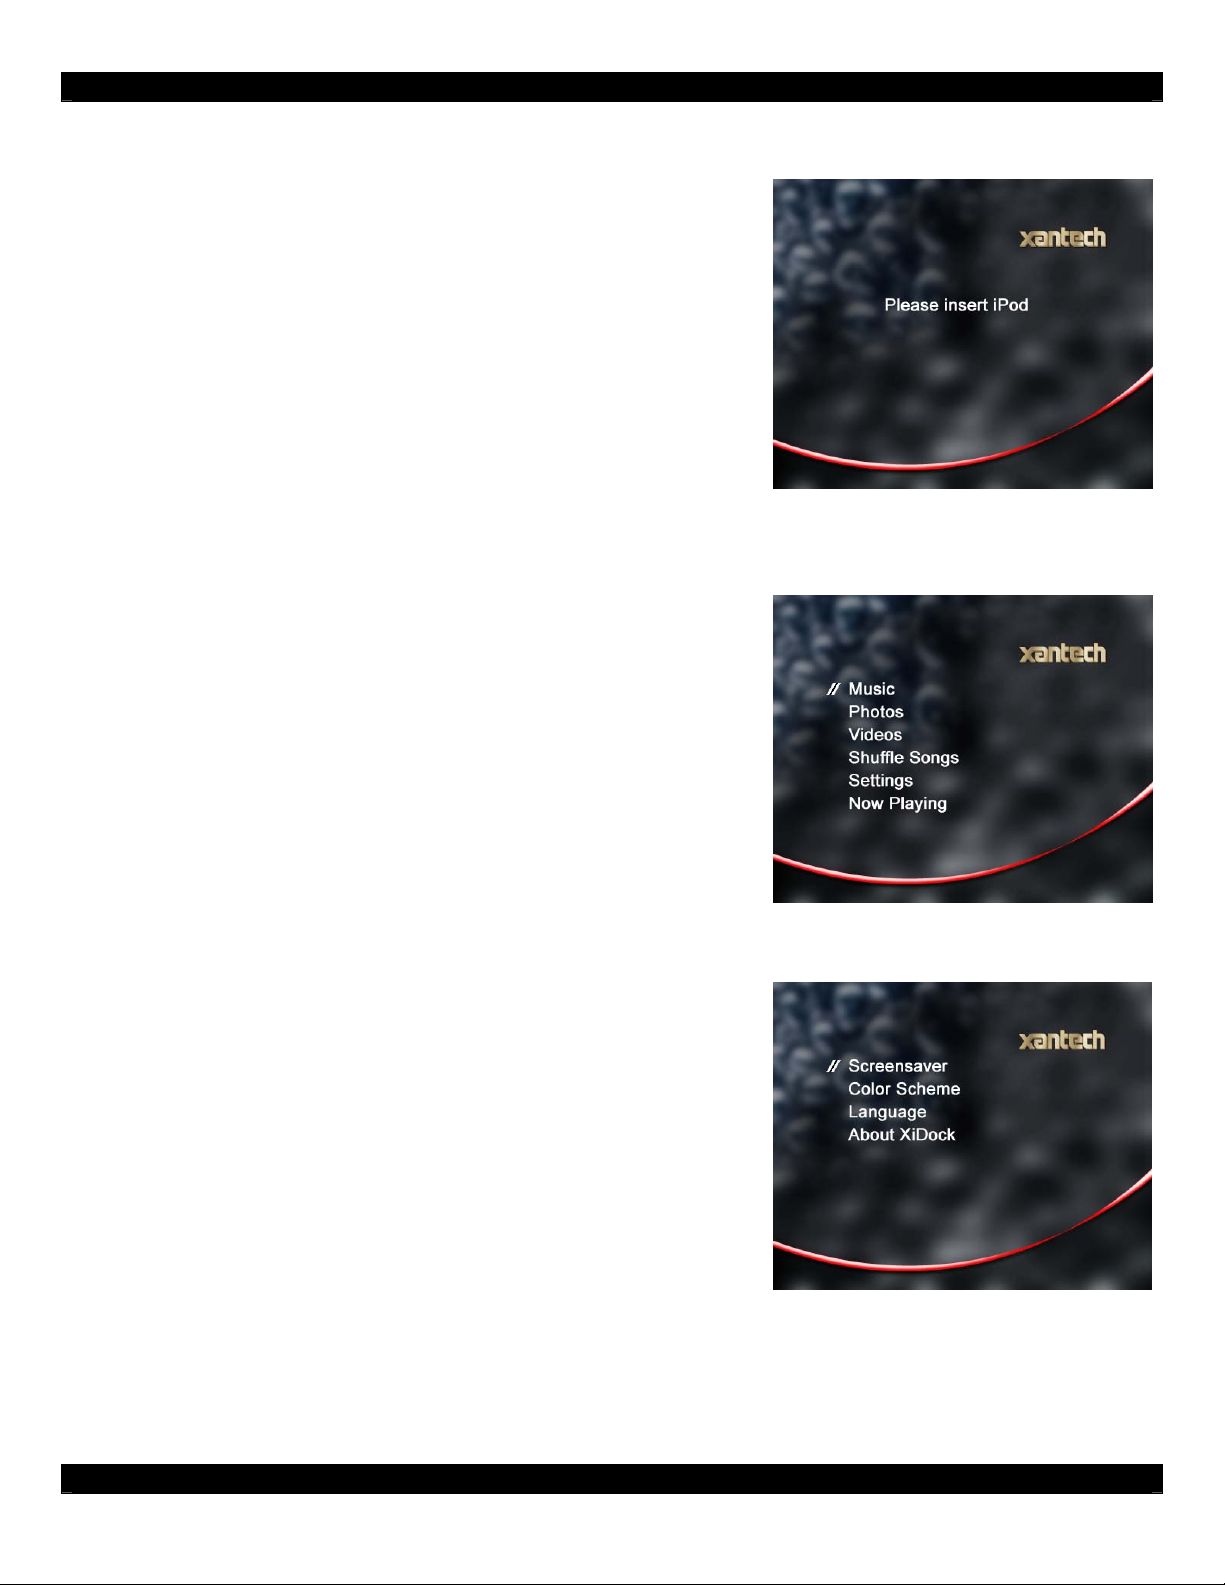
With a connected display and the XIS100 powered on, the
screen on the right will appear indicating no iPod has been
connected to the XIS100.
STEP 2:
Once and iPod has been connected to the XIS100, the screen
on the right will appear showing the main menu options.
The menu is similar to the iPod menu and all functions can be
selected using the remote control.
STEP 3:
The ‘settings’ menu page is unique to the XIS100. On this page,
the screensaver time out, color scheme, and language can be
changed.
On the color scheme selection, there are five schemes to select
from.
On the language selection, there are eight different languages
to select from.
08905180X1 - 2 -
Page 3

REMOTE CONTROL
UPPER PART
Home Whenever pressing this button, you
can go back to the Main Menu.
Power Press it to power on and off.
SELECT PART
Select When you decide to select a item,
press it to enter or play it.
Select
UP/
DOWN
Previous
Page
Next
Page
When you are in a menu, press
them to go up and down and select
what you want.
Press it and you can return to the
previous page.
Press it and you can enter the next
page.
ADJUST PART
Volume
UP/
DOWN
Previous
Track
Press them to adjust the volume.
Press it to go back to the previous
track.
Next
Press it to go to the next track.
Track
Play/
Pause
Press it to start playing and get
pausing.
BOTTOM PART
Mute Turn to the Mute state.
Repeat Press it once and the now-playing
song will be repeated. Press it twice
and the songs in the folder will be
repeated. And press it again (the
third time) and you can remove.
Shuffle Press it to “randomly” play the
songs in the same folder. repeat
mode.
08905180X1 - 3 -
Page 4

BASE STATION – FRONT VIEW
BASE STATION
1 Dock Well Connects to the iPod connector. Gently slide the iPod unit into the vertical
connector and verify it is not tilted. Included with the XIS100 is a Dock Well
adaptor for smaller iPod units.
2 IR Eye Discreetly hidden is a front panel IR eye used to communicate with the
XIS100 remote control. Be sure the remote control is directly towards this
lens.
08905180X1 - 4 -
Page 5

BASE STATION – REAR VIEW
BASE STATION
3 Video Format This selector switch is used to select NTSC or PAL format.
4 IR IN Modulated IR input use to connect to a Xantech IR bus system.
5 RS232/422 Port to connect to RS232 or RS422 communications devices. To change
between 232 and 422, use the on-screen ‘settings’ menu.
6 Component Out Component video output to be connected to a display.
7 A/V Output Composite video and Left & Right Audio output Use included cable adaptor
to break-out RCA connections. Audio output is always active. Composite
and component video selection is made using the on-screen ‘settings’
menu. Only one video format can be active.
8 Power In Power input using wall adapter power supply.
08905180X1 - 5 -
Page 6

CONTROL COMMANDS – RC68X IR COMMANDS
The RC68+ should be set to Group Code “B9”.
Key Definition RC68X
Menu 80
1
Power 90
2
Up 20
3
Left E0
4
Select 48
5
Right A8
6
Down 08
7
Volume Up F0
8
Volume Down 98
9
Play/Pause 10
10
Forward A9
11
Rewind 89
12
Shuffle 68
13
Repeat C8
14
15
Mute 38
16
Power On C9
17
Power Off E1
18
Component Video Output 00
19
Composite Video Output C0
20
Artist 50
21
Album D0
CONTROL COMMANDS – RS232 SERIAL STRING COMMANDS
See document 089051XXX – XIS100 Serial Protocol. Available on www.xantech.com
Limited Warranty
Xantech® warrants its products to be free of defects in materials or workmanship. This is a Limited Lifetime warranty from the date of purchase by the
original consumer. Any products returned to Xantech and found to be defective by Xantech within the warranty period will be repaired or replaced, at
Xantech’s option, at no charge. Xantech will not be responsible for the actual cost of installation or removal of the product, nor for any incidental or
consequential damages. Some states do not allow the exclusion or limitation of incidental or consequential damages, so the above limitation may not
apply to you. This warranty gives you specific legal rights. You may have additional legal rights that vary from state to state.
Xantech Corporation
13100 Telfair Ave. 2F, Sylmar CA 91342 | Xantech.com
Installation Instructions, XIS100 © 2008 Xantech Corporation
This document is copyright protected. No part of this manual may be copied or reproduced in any form without prior written consent from Xantech
Corporation. Xantech Corporation shall not be liable for operational, technical, or editorial errors/omissions made in this document.
Document # 08905180X1
08905180X1 - 6 -
 Loading...