

XAC xCE-200T.3G Installation Manual

94m
SECURE CLOUD POS TERMINAL
INSTALLATION GUIDE
MODEL:
xCE-200T.3G
xCE_E200T.3G
1. Before Starting
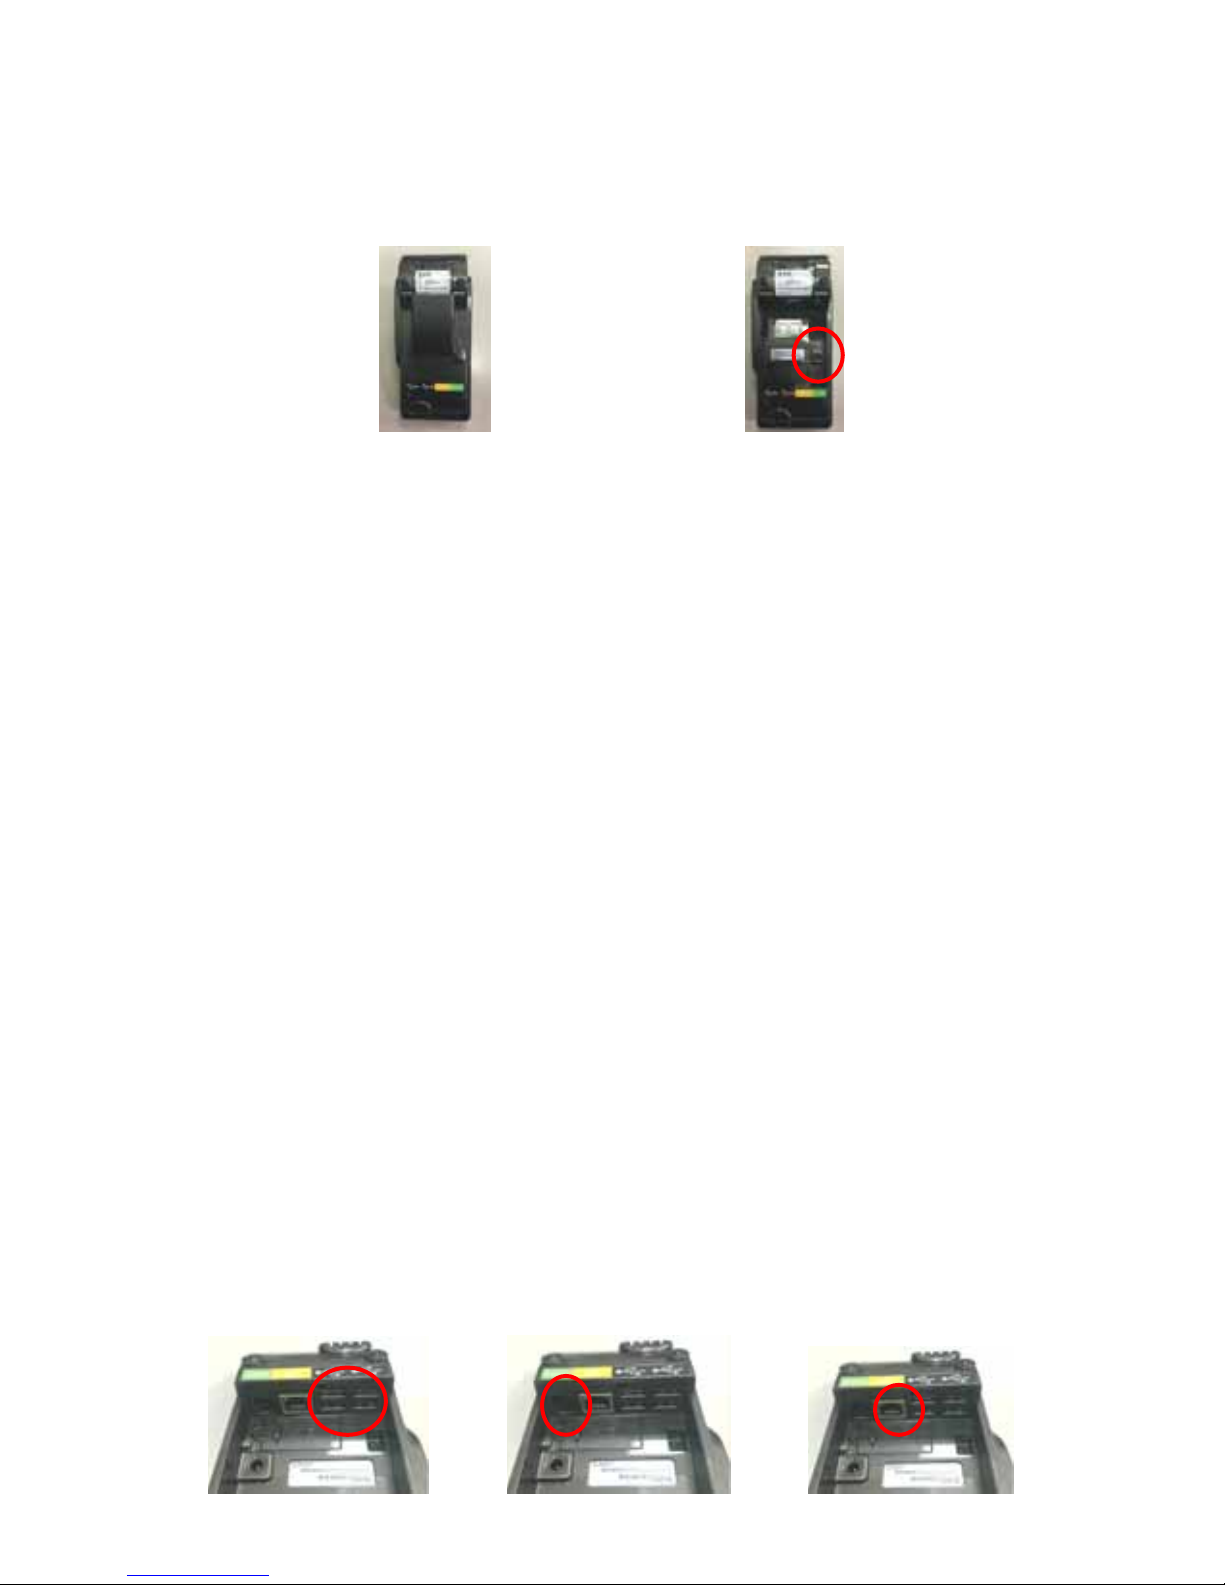
Open the gate behind the device (Figure 1), and find the power input on the right side of the terminal
(Figure 2). Connect the plug from the power adapter into the power input. Plug the power adapter into a
surge suppressor (recommended) after the power cord is connected to the power adapter.
Figure 1 Figure 2
Operating Temperature: 0 °C to 40 °C
Adapter: Chicony Power Technology ,A12-040N1A, I/P: 100-240Vac, 50-60Hz, 1.0A, O/P: 12Vdc,
3.33A
Adapter: 12Vdc, 3.33A(Output rating)
(Use only the XAC Automation Corporation provided AC adapter approved for use with this
device. Use of another AC adapter may cause a fire or explosion)
(This product should only be used with a NRTL approved power supply marked “I.T.E. LPS”
with an output rated 12V DC, minimum 3.0 A, Tma: minimum 40 degree C.)
Caution: The cover (Figure 1) shall be provided with a means to keep it closed during normal operation.
Caution: Risk of explosion if the battery is replaced by an incorrect type. Please dispose of used battery
according to the instructions.
Warning: A shielded-type power cord is required in order to meet FCC emission limits and also to prevent
interference to the nearby radio and television reception. It is essential that only the supplied power cord be
used.
This terminal supports four USB ports and all USB ports located on the back of the terminal. If the terminal
uses a peripheral device with USB connector, plug it into the USB host port (Figure 3).
This terminal supports one RS-232 ports of RJ-12 offset keyed connector. If the terminal uses a peripheral
device with this connector and interface type, plug it into the RS-232 port on the back of the terminal
(Figure 4).
If the terminal needs communication through Ethernet, plug cable into the RJ-45 port on the back of the
terminal (Figure 5).
This terminal supports one micro USB port. You can use micro USB port to connect to other devices and
update your operating system or firmware (Figure 6).
The terminal supports GSM/3G wireless communication and the SIM card slot locates on the bottom of the
device , loose the screw and open the SIM cover, insert the SIM card into SIM card slot to communicate
with GSM/3G, Make sure SIM card is inserted in the right direction. (Figure 7, 8).
 Loading...