

Page 1
DE
EN
701483
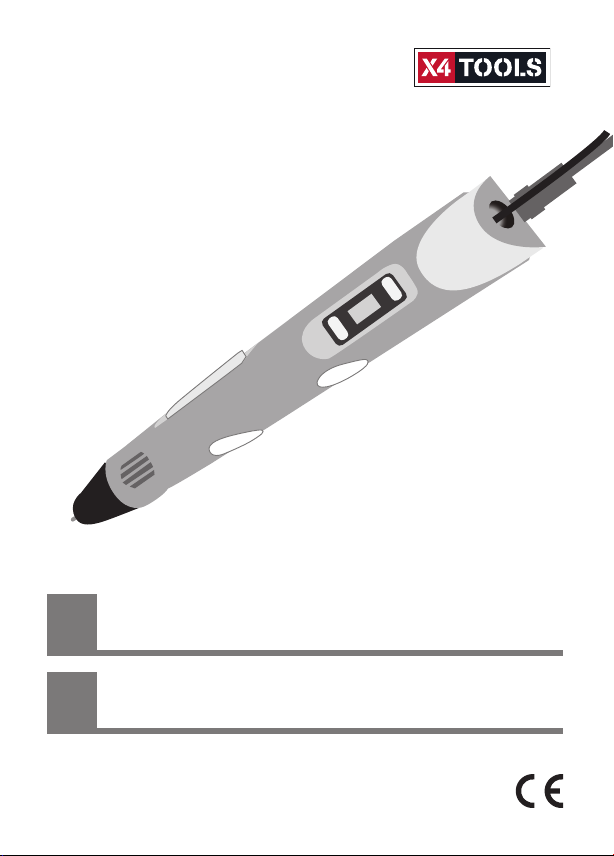
3D-Drucker Stift 2.0
BEDIENUNGSANLEITUNG
3D-Printing Pen 2.0
USER MANUAL
Page 2
DE lived no n food GmbH
lived non f ood GmbH, alle R echte vorbehal ten.
Es wird keinerlei Haftung für Änderungen oder
Irrtümer zu den in dieser Bedienungsanleitung
beschriebenen technischen Daten oder
Produkteigenschaften übernommen.
Alle Rechte vorbehalten. Jegliche Vervielfältigung, Übertragung, Abschrift oder
Speicherung dieser Anleitung oder Teilen
davon, sow ie dessen Übers etzung in eine
Fremdsprache oder eine Computersprache
sind ohne die ausdrückliche Genehmigung
des Hers tellers nicht g estattet. Au fgrund der
schnellen Weiterentwicklung der Produkte
kann kein e Garantie auf Volls tändigkeit
übernommen werden. Änderungen an Technik
und Ausstattung sind jederzeit vorbehalten.
Wenn Sie die Bedienungsanleitung in digitaler
Form ben ötigen, wenden Si e sich bitte an
unseren Service.
Garantie- und Reparaturbedingungen
Sie erhalten eine freiwillige 2-jährige
Herste llergarantie a b Kaufdatum auf Ma terialund Fabrikationsfehler des Produktes. Der
Geltungsbereich dieser Garantie betrit die
Bundesrepublik Deutschland, Österreich
und die Schweiz. Als Garantienachweis gilt
der Kaufbeleg. Innerhalb der Garantiezeit
behebe n wir kostenlos al le Materialoder Herstellfehler. Ihre gesetzlichen
Gewährleistungen bleiben durch die Garantie
unberührt.
Die Garantie gilt nicht:
– im Falle von Schäden , die auf
unsachgemäßer Bedienung beruhen
– für Verschleißteile / Zubehörteile die einer
normalen Abnutzung unterliegen
– für Mängel, die d em Kunden bereit s bei Kauf
bekannt waren
– bei Schäden, di e auf Instandse tzung oder
Eingri e durch den Käufe r oder unbefug te
Dritte zurückzuführen sind
– wenn das Gerät an ei n Stromnetz mit
höherer S pannung, als auf d em Gerät
2
angegeben, angeschlossen wird
– bei Fallenlassen des Gerätes oder einzelner
Teil e
– bei unsachgem äßem Transport o der
unsachgemäßer Verpackung für den
Tran spor t
– bei Schäden die d urch höhere Gew alt
herbeigeführt wurden
– bei Nichtbeach tung der für das Ge rät
geltenden Sicherheitsvorkehrungen
– bei Nichtbeachtung der
Bedienungsanleitung
Das Verkau fsdatum ist im Ga rantiefall
durch die Kaufquittung oder Rechnung
nachzuweisen. Durch eine Garantieleistung
tritt ke ine Verlängerun g der Garantiez eit ein weder fü r das Gerät noch fü r aus gewechselte
Bauteil e. Im Falle eines bere chtigten
Garantieanspruchs sind wir nach unserer Wahl
berechtigt, das defekte Gerät unentgeltlich
zu reparieren oder zu tauschen. Darüber
hinausgehende Ansprüche bestehen nicht.
Erset zte Teile oder Produ kte gehen in uns er
Eigentum ü ber. Wir behalten u ns das Recht
vor, defek te Teile oder Produk te gegen
Nachfolgemodelle zu tauschen.
Bitte ko ntaktieren Si e uns immer zuers t, bevor
Sie Ihr Produkt an uns einsenden.
Sofern eine Einsendung vereinbart wurde,
senden Si e das Gerät siche r verpackt auf I hre
Kosten an unsere Serviceabteilung.
Fügen Sie un bedingt eine Ko pie des
Kaufb eleges bei. Na ch Ablauf der Gar antiezeit
anfallende Reparaturen sind kostenpichtig.
Unfrei eingesandte Sendungen können nicht
angenommen werden und gehen automatisch
zurück.
Page 3
Bedienungsanleitung | 3D-Drucker Stift 2.0 | DEUTSCH
Es freut uns, dass Sie sich für dieses Produkt entschieden haben.
Wir wünschen Ihnen viel Freude damit.
Informationen zu dieser Bedienungsanleitung
Diese Bedienungsanleitung enthält wichtige Informationen für
einen ordnungsgemäßen und sicheren Betrieb des Gerätes.
Lesen Sie die Bedienungsanleitung daher vollständig durch,
bevor Sie das Produkt einsetzen. Andernfalls können Gefahren
für Personen sowie Schäden am Gerät entstehen.
Bewahren Sie die Bedienungsanleitung auf. Wenn Sie
das Produkt an Dritte weitergeben, geben Sie auch die
Bedienungsanleitung mit.
Haftung
Bei Sach- oder Personenschäden, die durch unsachgemäße
Handhabung oder Nichtbeachten dieser Bedienungsanleitung
und der Sicherheitshinweise verursacht werden, übernehmen
wir keine Haftung. In solchen Fällen erlischt jeder
Garantieanspruch!
Bestimmungsgemäße Verwendung
Der X4-TOOLS 3D-Drucker Stift 2.0 dient zum Erstellen von
dreidimensionalen Objekten aus PLA oder ABS Plastik-Filament.
Das Material, welches auch in 3D-Druckern Anwendung ndet,
wird durch Erhitzen verüssigt und erhärtet sich anschließend
wieder bei Zimmertemperatur.
3
Page 4
Zur bestimmungsgemäßen Verwendung gehört auch die
Einhaltung aller Angaben dieser Bedienungsanleitung. Dieses
Produkt ist nicht geeignet für den gewerblichen Einsatz.
Allgemeine Hinweise
Alle enthaltenen Firmennamen und Produktbezeichnungen
sind Warenzeichen der jeweiligen Inhaber. © Alle Rechte
vorbehalten.
Bei Schäden, die durch Nichtbeachtung der
Bedienungsanleitung und/oder unsachgemäße oder fahrlässige
Handhabung und/oder durch nicht erlaubten Umbau
entstehen, wird keine Haftung für einen entstandenen Schaden
übernommen und es erlischt der Garantieanspruch. Haftung
wird für Folgeschäden nicht übernommen.
Der Inhalt dieser Bedienungsanleitung kann von dem Produkt
abweichen. Beachten Sie gegebenenfalls zusätzliche Beilagen.
Diese Anleitung und eventuelle Beilagen sind Bestandteil
des Gerätes und daher sorgfältig aufzubewahren und
gegebenenfalls bei Weitergabe des Geräts mitzugeben.
Die CE-Konformität wurde nachgewiesen, die entsprechenden
Erklärungen sind bei uns hinterlegt. Aus Sicherheits- und
Zulassungsgründen ist es nicht erlaubt dieses Gerät umzubauen
und/oder zu verändern oder einer nicht-sachgemäßen
Verwendung zuzuführen. Es dürfen nur Originalersatzteile
verwendet werden.
4
Page 5
Service
Service
Adresse
Importeur
Adresse lived non food GmbH
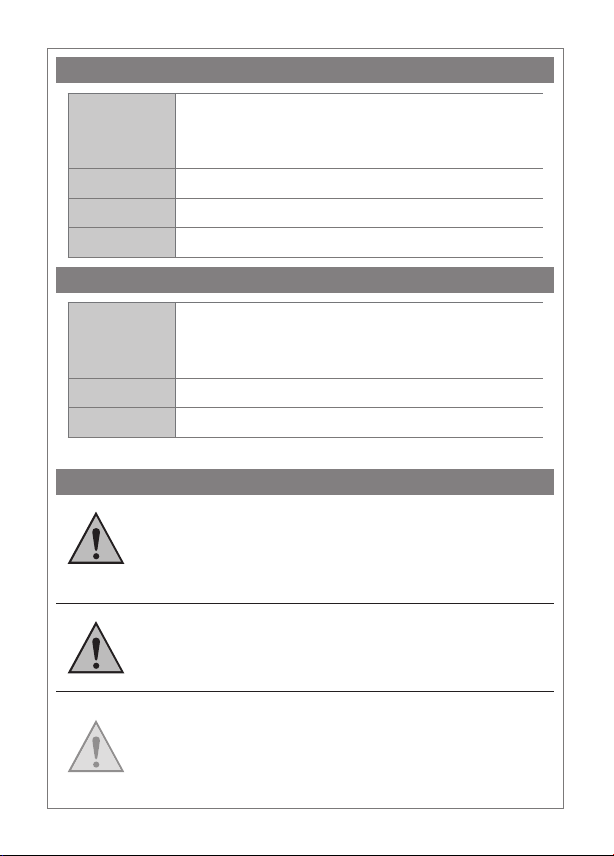
Signalwörter
lived non food GmbH | TOR 8 – 9
Donaustraße 20
D-38120 Braunschweig
Donaustraße 20
D-38120 Braunschweig
ACHTUNG
HOHES RISIKO!
Missachtung kann Schaden für Leib und Leben
verursachen.
WARNUNG
MITTLERES RISIKO!
Missachtung kann einen Sachschaden verursachen.
VORSICHT
GERINGES ODER KEIN RISIKO!
Sachverhalte, die beim Umgang mit dem Produkt
beachtet werden sollten.
5
Page 6

Sicherheitshinweise
ACHTUNG!
Die folgenden Sicherheits- und Gefahrenhinweise
dienen nicht nur dem Schutz des Gerätes, sondern
auch dem Schutz Ihrer Gesundheit! Lesen Sie sich alle folgenden
Punkte aufmerksam durch.
• Der Netzadapter ist kein Spielzeug!
• Strangulationsgefahr! Die Kabel dieses Produkts können eine
Gefahr für Kinder darstellen.
• Nicht für Kinder geeignet. Nur von Erwachsenen zu verwenden.
• Verbrennungsgefahr! Die Keramikspitze entwickelt sehr hohe
Temperaturen und darf nicht berührt werden. Außerdem ist die
Spitze von leicht entammbaren Gegenständen fernzuhalten.
Das ausgetretene Filament ist ebenfalls sehr heiß und darf erst
nachdem es erkaltet ist angefasst werden. Sowohl die Düse,
als auch das heiße Filament kann Kleidung, Oberächen und
andere Gegenstände beschädigen.
• Das Gerat sollte nicht extremer Hitze oder Kälte ausgesetzt
werden. Lassen Sie das Produkt nicht in der prallen Sonne, in der
Nähe von oenem Feuer oder extremen Wärmequellen liegen:
Ladetemperatur: 0°C bis 40°C; Betriebstemperatur: -20°C bis 40°C.
• Verwenden Sie das Produkt NICHT in der Nähe von Wasser
wie z.B. Badewannen, Duschen oder Waschbecken. Es besteht
Gefahr bis hin zum Tod durch Stromschläge.
• Lassen Sie kein Verpackungsmaterial achtlos liegen – dies kann
für Kinder und/oder Haustiere zu einem gefährlichen Spielzeug
werden. Verpackungs- und Schutzfolien oder Styroporteile
bergen z.B. Erstickungsgefahr.
• Wenn Sie Zweifel über die Arbeitsweise, die Sicherheit oder
die korrekte Anwendung des Gerätes haben, oder sollten sich
6
Page 7
Fragen ergeben, die nicht im Laufe dieser Bedienungsanleitung
abgeklärt werden, wenden Sie sich an eine Fachkraft oder
setzen Sie sich mit unserer technischen Auskunft in Verbindung.
• Verwenden Sie zum Betrieb nur das mitgelieferte Netzteil.
• Wenn Sie Zweifel an der Sicherheit des Gerätes haben (zum
Beispiel bei Beschädigung des Gehäuses, der Kabel, des
Netzteils oder des verbauten Transformators), sollte das Gerät
nicht benutzt werden bis der Mangel behoben wurde.
• Sollte das Gerät anfangen schwarz oder braun zu rauchen,
stoppen Sie sofort die Anwendung und ziehen Sie den
Netzstecker ab. Bitte kontaktieren Sie in diesem Fall direkt den
X4-TOOLS Service.
WARNUNG!
BESCHÄDIGUNGSGEFAHR DURCH FEHLGEBRAUCH!
Unsachgemäßer Umgang mit dem Gerät kann zu
Beschädigung führen.
• Verwenden Sie ausschließlich handelsübliche ABS- oder PLAFilamentschnüre mit einem Durchmesser von 1,75 mm.
VORSICHT
ABS Filament hat eine höhere Schmelztemperatur als
PLA. Wechseln Sie von PLA auf ABS, können PLA-Reste
im Stift kurzzeitig etwas Rauch verursachen.
7
Page 8
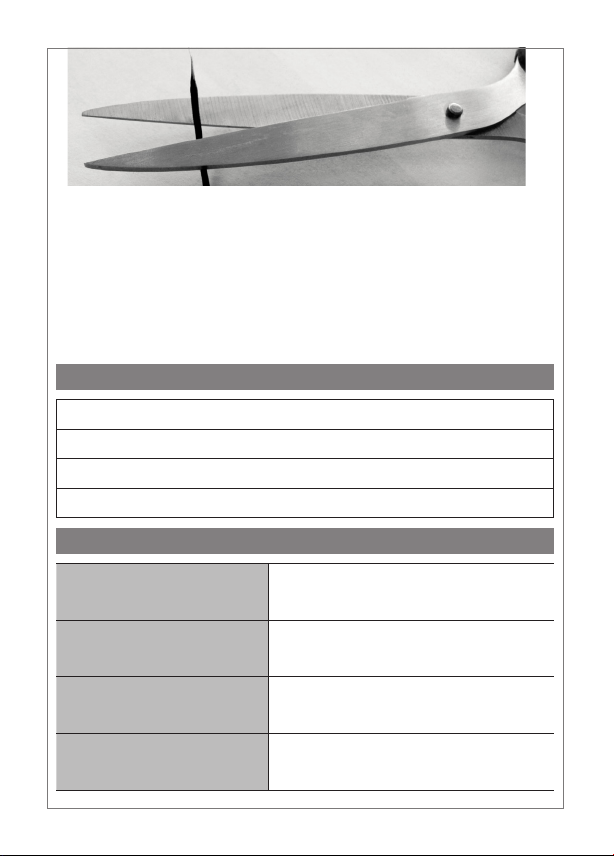
Nachdem Sie Filamentschnüre aus dem Stift entnommen haben,
müssen Sie das angeschmolzene Material am Ende entfernen
bevor es erneut verwendet werden kann. Schneiden Sie hierzu
einfach das letzte Stück mit einer Schere ab, so dass Sie wieder
einen geraden Schnitt haben.
Packungsinhalt
3D-Drucker-Stift 2.0
2x 10 m Plastik Filament (PLA)
Bedienungsanleitung
Netzteil
Technische Daten
Netzteil
AC 100/240 V ~50/60 Hz /
DC 12 V 3,0 A
Abmessungen 18,5 x 4,5 x 3,1 cm
Gewicht 63 g; 152 g (Netzteil)
Kabellänge 1,18 m
8
Page 9

Arbeiten mit dem 3D-Drucker-Stift
Schritt 1: Stecken Sie das Netzteil am Stift und an einer
Steckdose an.
Schritt 2: Wählen Sie an der Temperaturkontrolle ABS oder PLA
aus, je nachdem welches Filament Sie laden möchten.
Schritt 3: Betätigen Sie einmal die Ausgabetaste um den
Aufheizvorgang zu starten.
Schritt 4: Schieben Sie den Ausgaberegler ganz zurück (von der
Spitze weg).
Schritt 5: Sobald links neben der Temperaturanzeige eine
grüne LED leuchtet, ist das Gerät bereit zum Laden
von Filamenten.
Schritt 6: Schieben Sie das gewünschte Filament in die dafür
vorgesehene Önung neben dem Netzteil-Anschluß.
Schritt 7: Halten Sie den Knopf der Ausgabetaste gedrückt um
den Ladevorgang zu starten.
Schritt 8: Sobald aus der Spitze etwas Filament ausgegeben
wird, können Sie mit dem Arbeiten beginnen.
9
Page 10
Objekte erstellen
Um Objekte zu erstellen, gehen Sie bitte wie folgt vor:
Zeichnen Sie sich eine Vorlage auf ein Blatt Papier und legen
Sie es auf eine hitzefeste Unterlage. Fahren Sie mit der Spitze
des Stifts die Zeichnung nach, während Sie die Ausgabetaste
gedrückt halten. Die Austrittsgeschwindigkeit und damit die
Dicke des ausgegebenen Plastikstrangs, können Sie durch
Verschieben des Ausgabereglers verändern. Tragen Sie mehrere
Schichten auf, um dem Objekt mehr Tiefe zu geben.
Eine gute Variante für technische Objekte ist das Erstellen von
einzelnen Wänden oder Segmenten und das anschließende
zusammenkleben. Verwenden Sie z.B. die beiliegende Vorlage
des Eifelturms um 4 Seiten davon zu erstellen. Wenn alle
Seiten erkaltet und hart geworden sind, halten Sie die Kanten
aneinander und benutzen den 3D-Drucker-Stift, um diese
mit einem neuen Strang üssigem Filament miteinander
zu „verschweissen“. Mit dieser Methode bauen Sie im
Handumdrehen kubische Formen.
Falls Sie einen richtigen 3D-Drucker besitzen, können Sie mit
dem 3D-Drucker-Stift ausgedruckte Objekte ergänzen, Lücken
ausgleichen oder anderweitig bearbeiten. Ihrer Kreativität sind
keine Grenzen gesetzt.
Tipp: Im Internet nden Sie auf den bekannten
Videoportalen massenhaft Videos von begeisterten
Bastlern, die mit einem 3D-Drucker-Stift faszinierende Kunstwerke
erschaen. Lassen Sie sich inspirieren!
10
Page 11
Filament wechseln
Wenn Sie das Filament aus dem Stift entfernen möchten, um z.B.
die Farbe zu wechseln, gehen Sie bitte wie folgt vor: Betätigen
Sie mehrfach die Rück-Taste, bis das Filament automatisch nach
hinten rausgeschoben wird. Halten Sie die Taste gedrückt und
helfen Sie ggf. mit einem sanften Ziehen am Filament nach.
Ziehen Sie auf keinen Fall zu fest, da sonst der Motor beschädigt
werden kann.
Problemlösungen
Das ausgegebene Plastik wirft Blasen und ist zu üssig:
• Die Temperatur der Heizkammer ist zu hoch.
• Überprüfen Sie, ob Sie die richtige Betriebsart (PLA oder ABS) für
das verwendete Filament eingestellt haben. Falls ja, reduzieren
Sie die Temperatur durch Betätigen der Pfeiltaste links neben
der Temperaturanzeige.
Das ausgegebene Plastik ist zu steif und der Motor gibt
abnormale Geräusche von sich:
• Die Temperatur der Heizkammer ist zu niedrig.
• Überprüfen Sie, ob Sie die richtige Betriebsart (PLA oder ABS) für
das verwendete Filament eingestellt haben. Falls ja, erhöhen Sie
die Temperatur durch Betätigen der Pfeiltaste rechts neben der
Temperaturanzeige.
11
Page 12
Entsorgung
Elektrische und elektronische Bauteile dürfen nicht im
Hausmüll entsorgt werden!
Der Verbraucher ist gesetzlich verpichtet,
Elektro- und Elektronikgeräte am Ende ihrer
Lebensdauer an den dafür eingerichteten
öentlichen Sammelstellen zurückzugeben,
um die Altgeräte der Verwertung zuzuführen.
Die Sammelstelle gibt Ihr örtliches
Abfallentsorgungsunternehmen bekannt.
12
Page 13
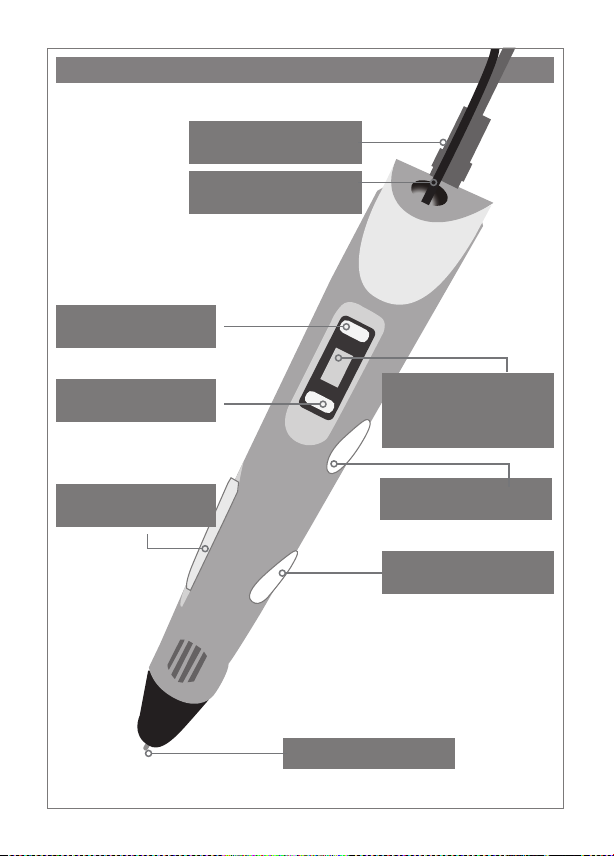
Das Gerät | The device
NETZTEIL ANSCHLUSS
POWE R ADAPTER PO RT
TEMPERATUR ERHÖHEN
INCREASE TEMPERATURE
FILAMENT EINSCHUB
FILAMENT INPUT
TEMPERATUR SENKEN
REDUCE TEMPERATURE
AUSGABEREGLER
SPEED SWITCH
TEMPERATUR KONTROLLE/
LCD DIS PLAY
TEMPERATURECONTROL/
LCD DI SPL AY
RÜCK-TASTE
RETREAT BUTTON
AUSGABETASTE
WIRE F EED BUTTO N
SPIT ZE | TIP
13
Page 14
EN lived no n food GmbH
lived non f ood GmbH, all ri ghts reserve d.
No liabil ity will be take n for modicati ons
or mistakes regarding the technical data or
produc t features desc ribed in this use r manual.
All right s reserved. An y reproducti on, transfer,
duplica tion or ling of thi s user manual or
parts o f it, as well as the tr anslation into a
foreign language or computer language is
prohibited without the explicit approval of the
manufac turer. Due to the fa st advancemen t of
these products, no guarantee of completeness
can be give n. Modicati ons in technique
and congu ration are subje ct to change at
any time.
To receive a dig ital copy of this use r manual,
please contact our service department.
Guarantee and service conditions
You receive a vo luntary 2-year m anufacture r
guarante e, starting at p urchase date, for
material a nd productio n defects of th e
produc t. This guarante e is applicabl e in
Germany, Aus tria and Switze rland. The rece ipt
counts as a p roof of guarante e. Within the
guarantee period we will repair all material
and manuf acturer defe cts free of ch arge. Your
statuto ry warrantie s remains unaec ted by
this guarantee.
The guara ntee does not cou nt:
– in cas e of damages which h ave arisen afte r
improper use
– for wea r parts / access ories that are sub ject
to natural w ear and tear
– for de fects that are k nown to the custo mer
at purchas e
– in cas e of damages that oc curred due to
repair or i ntervention o f the buyer or an
unauthorized third party
– in cas e the device was con nected to a high er
14
voltage a s stated on the dev ice
– when dropping the device or single elements
of it
– for improper transportation or packaging
– damages t hat occurred due t o force majeure
– for non-observance of valid safety
precautions
– for non-observance of the manual
In case of a gu arantee claim, t he date of
sale has to b e proven by receipt o r invoice.
Replace ments for reaso ns covered by the
guarante e do not lead to an ex tension of the
origina l guarantee peri od, neither for t he
device itself nor for any replaced components.
If you are cla iming a valid guar antee, we are
entitle d to choose wheth er we will repair
the devic e free of charge or e xchange it for a
new devic e. Any further cl aims are exclude d.
Parts re placed will pas s into our proper ty. We
reser ve the right to chang e defective p arts or
produc ts against fol low-up model s.
Please alw ays contact us be fore you return
your product.
Provide d that a return ship ment has been
agreed u pon, send the def ective prod uct
secure ly packaged at yo ur own cost to our
service department.
It is absol utely necessa ry that you add a
copy of your r eceipt to your retu rn shipment.
Repair s carried out af ter the guarante e period
are subje ct to a charge. We will n ot accept
freight co llect shipm ents and will ret urn them
to the sender.
Page 15
User Manual | 3D-Printing Pen 2.0 | ENGLISH
We are pleased that you have decided to buy our product and
wish you an enjoyable and successful use.
Information on this user manual
This user manual contains important information for the safe
use of the product. Therefore, for your own safety and for a
successful use, please read this user manual completely before
assembling and using the product. Please keep this operating
manual for reference. If you pass on the product to anyone else,
please hand over the operating manual as well.
Liability
We do not accept liability for any damage to property or for
personal injury that is due to improper use or failure to follow
the instructions in this operating manual and the safety advice.
In such cases any claim under the guarantee is null and void!
Designated Use
The X4-TOOLS 3D-Printing Pen 2.0 is for creating threedimensional objects made of PLA or ABS plastic. The material,
which is also used for 3D printers, is melted through heating it
up and solidies again when put to room temperature.
The designated use is dened by the instruction manual and in
following the appliance and the warnings mentioned in this user
manual. This product is not suitable for commercial usage.
15
Page 16
General Notes
All mentioned company and product names
are registered trademarks under the rights of their owners.
© All rights reserved.
No liabilities will be taken for damages or claims resulting out of
not reading and/or not following the user guide and/or any form
of modication on or in the product. Under these circumstances,
no warranty services will be given. Liability cannot be taken for
consequential damages.
The contents of this user manual may dier from the product. If
so, please consult additional manuals in the packing. Keep this
user manual in a safe place. If you give this product away to a
third party, make sure that you also pass on the user manual.
The CE conformity has been declared and proven, and the
corresponding documents have been deposited with the
manufacturer. For the reason of safety and CE-licensing it is
not allowed to modify this unit in any way and/or use it for
functions, other than the designated use.
Service
Service
address
lived non food GmbH | TOR 8 – 9
Donaustraße 20
16
Page 17
Importer
Address lived non food GmbH
Donaustraße 20
Signal Words
CAUTION!
High risk!
Disregard of this regulation may result in danger to life
or physical condition.
WARNING!
Medium risk!
Disregard of this regulation may cause material
damage.
ATTENTION!
Low or no risk!
Facts to follow for the designated use of this product.
17
Page 18
Safety guide
CAUTION!
The following safety and danger references/notices
serve not only for the protection of the product, but
also the protection of your safety and health. Please
read all following instructions carefully.
• The power adapter is not a toy!
• Risk of strangulation! The cables of this product may become a
danger for children.
• Not suitable for children. Only to be used by adults.
• Risk of burning! The ceramic tip gets very hot and may not
be touched. The tip is to be kept away from highly ammable
objects. The lament output is also very hot and may only be
touched after it has cooled down. The tip as well as the hot
lament can damage clothes, surfaces and other objects.
• The product may not be subjected to extreme heat or cold.
Do not expose the product to intense sunlight, open re or
other heat sources: Storage temperature: -0°C to 40°C; Working
temperature: 0°C to 40°C.
• Do not use this product in the near of water like for example
bathtubs, showers or wash basins. There is danger that can even
lead to death by electric shock.
• Never leave packaging material lying around unsupervised – this
can become a hazardous toy for children and/or pets and lead to
serious injuries, e.g. suocation.
• Contact a service technician if there is any reason to believe
that the operation or safety of the device has been impaired.
Please adhere to the additional safety information found in the
individual chapters of this instruction manual. Should you be in
doubt of the correct operation of this device or questions arise
18
Page 19
that are not explained within this manual, please contact our
technical hotline or a service technician for further information.
• Only use the original power adapter that is included in the scope
of delivery for running this product.
• If there is any doubt in the safety of this device (e.g. because
of damage to the enclosure, cables, the power adapter or the
internal transformer), the device should not be used until the
damage has been properly removed.
• Should the device start to generate black or brown smoke, stop
the application immediately and pull the power plug. Please
contact the X4-TOOLS service directly.
WARNING!
MISUSE MAY CAUSE RISK OF DAMAGE. INCORRECT
• Only use ABS- or PLA- lament according to custom with a
diameter of 1.75 mm.
USE OF THE DEVICE MAY LEAD TO DAMAGES.
ATTENTION!
ABS lament has a higher melting temperature than
PLA. If you change from PLA to ABS, PLA remains inside
the pen can brie y generate a bit smoke.
19
Page 20
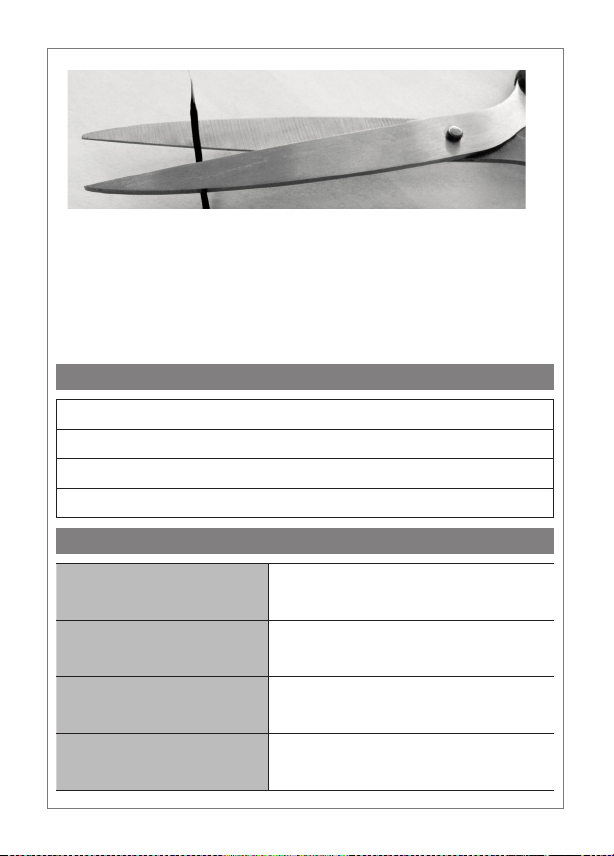
After taking out lament wire from the pen, the partly melted
material at the end of the wire must be removed before it can be
used again. To do so simply cut the end with scissors, so that you
get a straight cut at the wire again.
Box contents
3D-Printing Pen 2.0
2x 10 m plastic lament wire (PLA)
Manual
Power adapter
Technical data
Power adapter
AC 100/240 V ~50/60 Hz /
DC 12 V 3,0 A
Dimensions 18.5 x 4.5 x 3.1 cm
Weight 63 g; 152 g (power adapter)
Cable length 1.18 m
20
Page 21
Using the 3D-Printing Pen
Step 1: Connect the power adapter with the pen and plug it
into a socket.
Step 2: Choose ABS or PLA at the temperature control,
depending on which lament you want to load.
Step 3: Press the wire feed button to start the heating
process.
Step 4: Put the speed switch back completely (away from the
tip).
Step 5: As soon as a green LED, located at the left side of
the temperature display, starts to glow, the device is
ready to load laments.
Step 6: Put the desired lament in the designated opening
next to the power adapter port.
Step 7: Hold the wire feed button to start the loading
process.
Step 8: As soon as some lament comes out of the tip, you
can start the application.
Creating objects
To create objects, please do as follows:
Draw a template on a sheet of paper und put it on a heatresistant base. Trace the drawing with the tip of the pen while
keeping the wire feed button pressed. The release speed and
therewith the thickness of the released plastic wire can be
adjusted through moving the speed switch. Add more layers to
give the object more depth.
A good variant for technical objects is to create single walls or
segments and then gluing them together. Use for example the
attached draft of the Eiel Tower to create 4 sides of it. Once all
21
Page 22
sides are cooled down and solidied, hold the edges together
and use the 3D-Printing Pen to “weld” them together. With this
method you build cubical forms in the blink of an eye.
If you possess a real 3D printer, you can use the 3D-Printing Pen
to complete printed objects, ll gaps or work otherwise on it.
There are no boundaries to you creativity.
HINT
On the internet you will nd numerous videos from
enthusiastic hobbyists on popular video platforms. Watch them
create fascinating pieces of art with a 3D-Printing Pen. Let yourself
be inspired!
Changing lament
If you want to remove the lament from the pen, for example
to change the color, please do as follows: Press the retreat
button multiple times until the lament gets pushed out at
the backside. Hold the button and gently pull on the string if
necessary. Don’t pull too hard in any case or the motor might
get damaged.
Troubleshooting
The outputted plastic throws bubbles and is too runny:
• The temperature in the heating chamber is too high.
• Check if you have chosen the right mode (PLA or ABS) for the
used lament. If yes, reduce the temperature manually by
pressing the arrow button on the left side of the temperature
display.
22
Page 23
The outputted plastic is too sti and the motor makes
abnormal noises:
• The temperature in the heating chamber is too low.
• Check if you have chosen the right mode (PLA or ABS) for the
used lament. If yes, increase the temperature manually by
pressing the arrow button on the right side of the temperature
display.
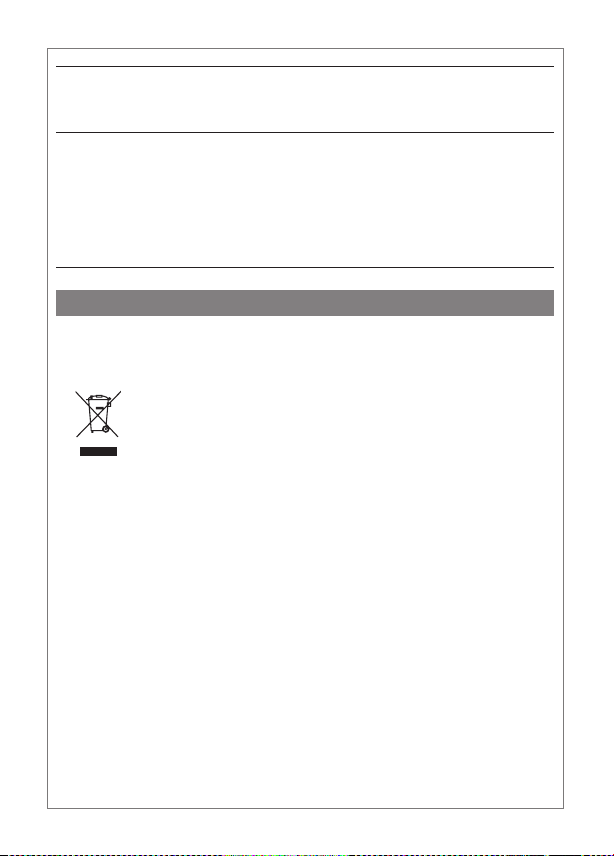
Disposal
Electrical- and electronic devices must never be disposed of
in the regular household waste!
Consumers are legally obligated and responsible
for the proper disposal of electronic and electrical
devices by returning them to collecting sites
designated for the recycling of electrical and
electronic equipment waste. For more information
concerning disposal sites, please contact your local
authority or waste management company.
23
Page 24

8/ 2015
 Loading...