

Wyndham Collection WC-R4500-60-DBL Installation Instructions
●
Prior to installation please check received
items against the “Packing List”.
Please report any missing items to your
retailer immediately.
●
Protect all surfaces from sharp objects,
high heat sources, direct prolonged
sunlight and chemical hazards.
●
Professional installation recommended.
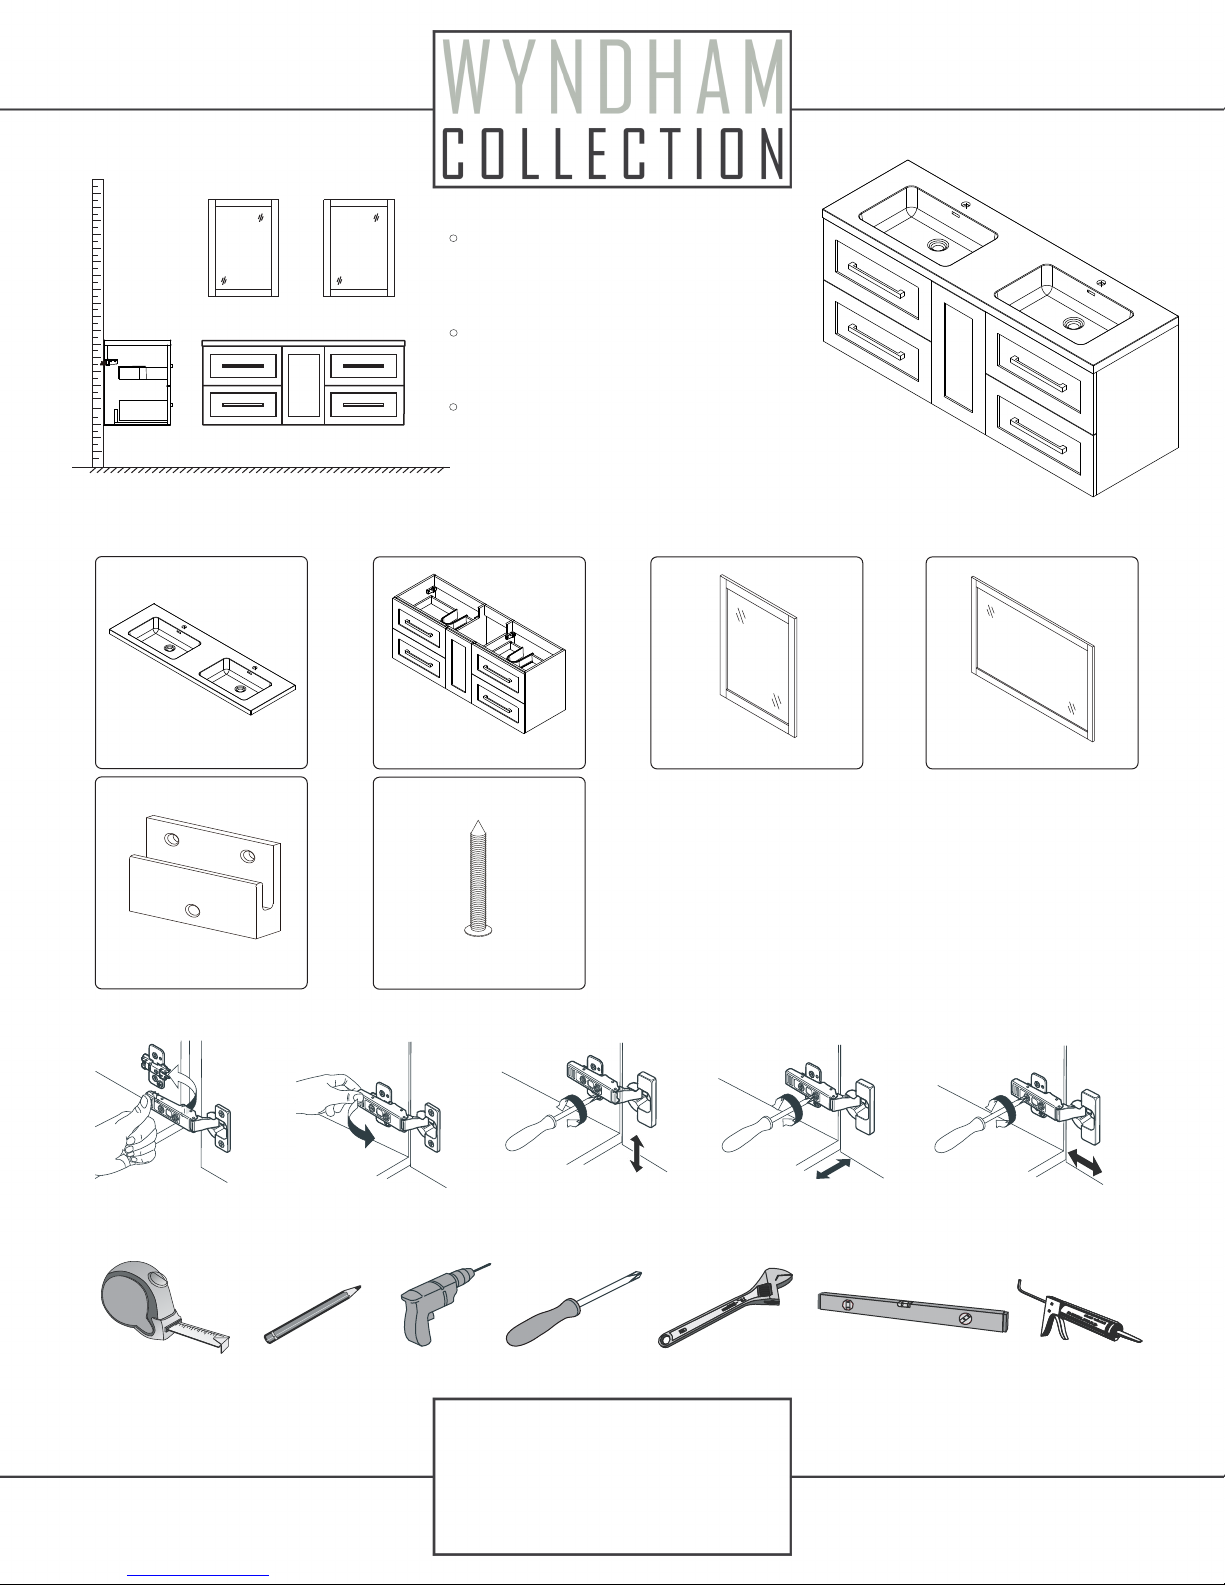
PACKING LIST
(Not all components may be included, depending on your purchase)
Sink / 1 Main cabinet / 1 24” Mirror / 2 58” Mirror / 1
Bracket / 4
Screw for vanity / 12
INSTALLATION AND ADJUSTMENT OF HINGES (if required)
install
remove adjust height adjust laterally adjust depth
REQUIRED TOOLS NOT IN BOX
4
3
2
1
0
T
ape Measure
Pencil
Electric Drill
Phillips Screwdriver
Adjustable Wrench
WC-R4500-60-DBL
INSTALLATION-GUIDE
1
2
"
-
3
0
0
m
m
C
H
N
Spirit Level
Silicone Sealant
INSTALLATION INSTRUCTIONS
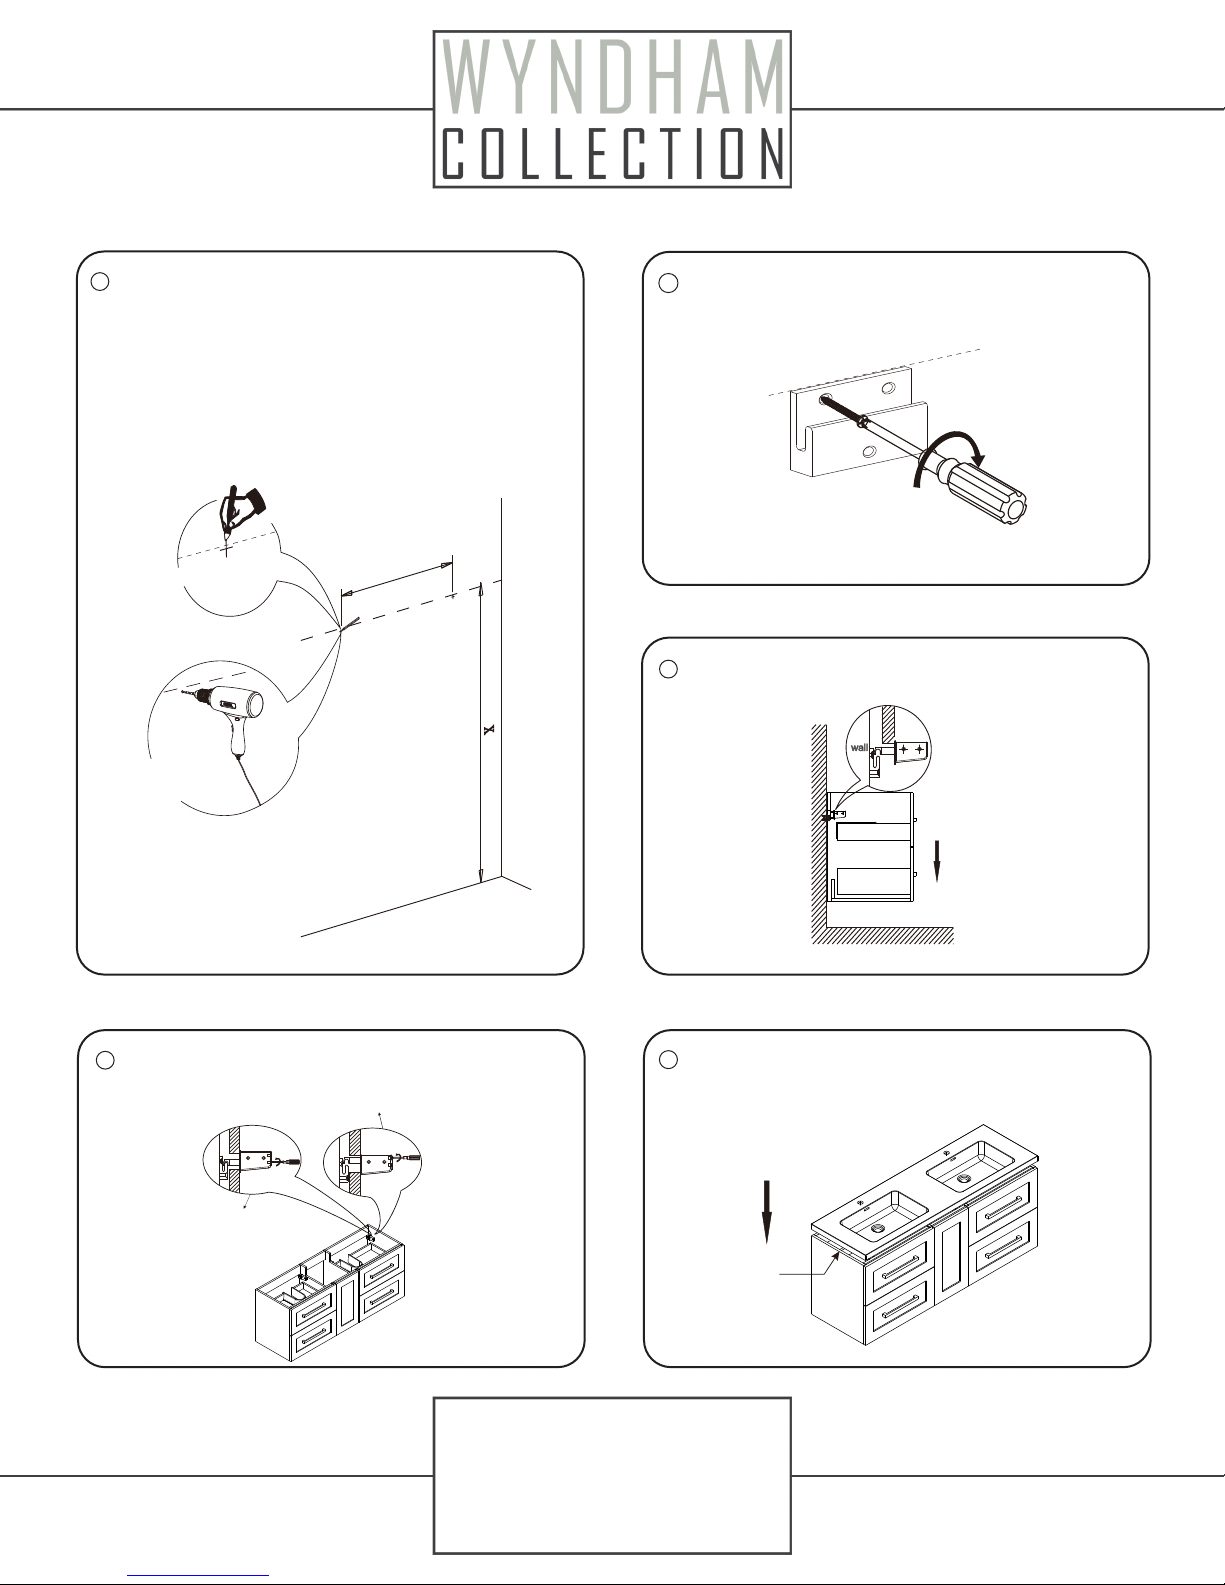
1
Mark the position of the screw holes on the wall by
measuring the space between the centers of the mounting
brackets on the back of the vanity. Vertical position (X) is
decided by the purchaser. Remember to mark low enough
to accommodate the sink on the top of the top of the vanity
counter or it will be too high when installed. Use a spirit level
to ensure the screw holes are horizontal.
Draw horizontal line
Mark screw position
Diameter 15/64 in.
Depth 1.57 in.
2
Attach the bracket by screwing into a wall stud for
reinforcement.
3
Attach vanity to wall by lowering onto the mounting
brackets.
4
Adjust the mounting attachment as required.
Upper screw adjusts
vertical position
Lower screw
adjusts depth
5
Attach counter to cabinet with silicone sealant applied
to top of front and side cabinet edges. Do not over apply.
Allow to dry for 24 hours for proper curing.
WC-R4500-60-DBL
INSTALLATION-GUIDE
Silicone
 Loading...