

Wyndham Collection WCOBT101260, WCOBT101371ATP11PC, WCOBT101260BNTRIM, WCOBT101267, WCOBT101267BNTRIM Installation Manual
...
FREESTANDING INSTALLATION
Note: If you purchased a brushed nickel trim kit, it must be installed before installing the
bathtub (brushed nickel trim not available on all models).
Warning: Due to the rough handling during shipping or on the job site, do not install this product
until a thorough inspection and water test has been completed.
Check bathtub for correct model and size. Carefully inspect the tub for any damage (i.e., chips,
scratches, cracks). If at any point during the pre-installation inspection and water test, you discover a
problem with the bathtub or piping system, DO NOT INSTALL the unit and contact us immediately.
All pre installed parts must be checked and retightened before installation.
PREPARATION
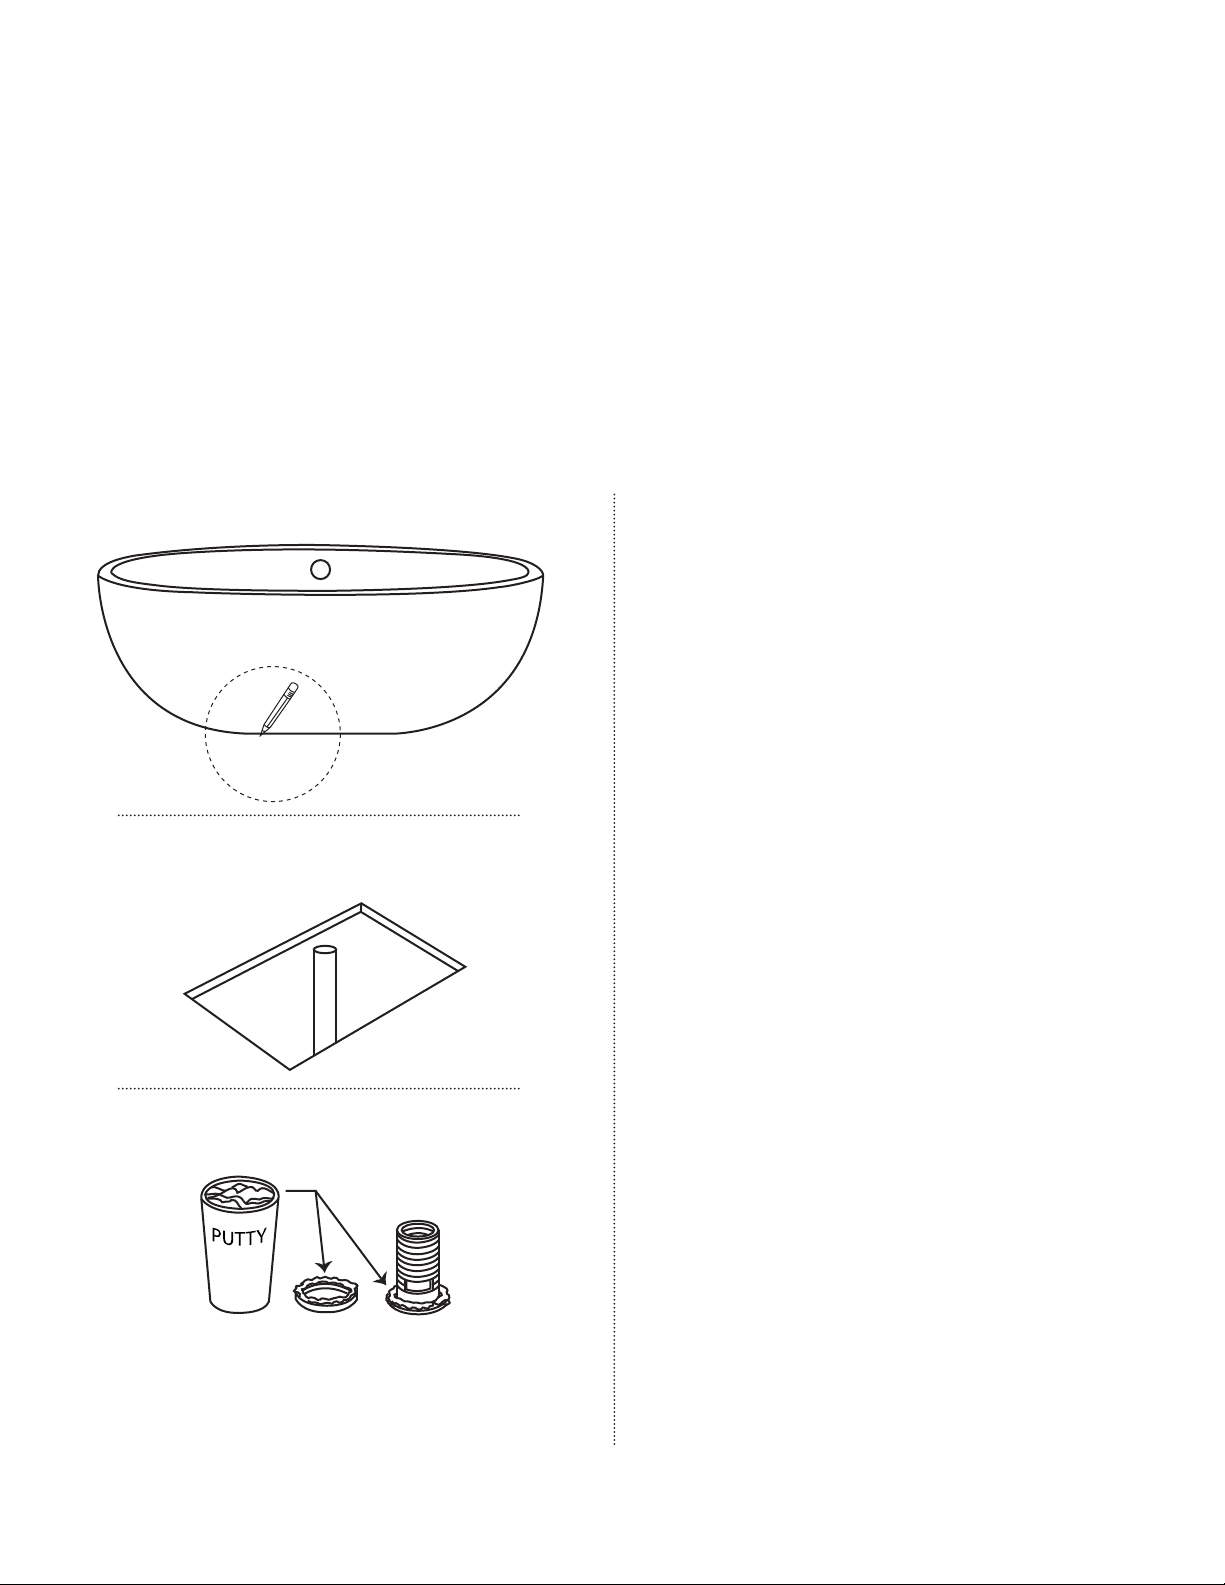
1. Clean, level, and prepare the floor for installation.
2. Place the unit in the exact installed position
on the floor and trace the outline of the bath
with a pencil or any erasable marking
(figure 1).
Washer
(figure 1)
(figure 2)
Drain Body
(figure 3)
3. Determine the location of the drain pipe,
on the floor by taking measurements of the
drain and waste location underneath the unit
(figure 2).
Note: Drain, waste locations, and trim
options vary by model.
4. Using a blanket, cardboard, or other clean
protective surface, turn the unit on its side
so that the unit is properly supported during
drain installation.
5. Clean the drain hole area in preparation of
setting the drain. The area should be dry and
free of any debris.
INSTALL DRAIN HARDWARE
6. Apply a bead of clear silicone or plumbers
putty around the Drain Body and pass it
through the drain hole (figure 3).
7.
Apply plumbers putty to the Washer and slide
it over the bottom of the Drain Body (figure 3).
8. Slide the paper washer over the drain body.
9.
Attach the Drain Body Nut on the Drain
Body and tighten until the Nut and Washer
have created a seal with the bottom of the
bathtub. DO NOT OVERTIGHTEN (figure 4).
(figure 4)
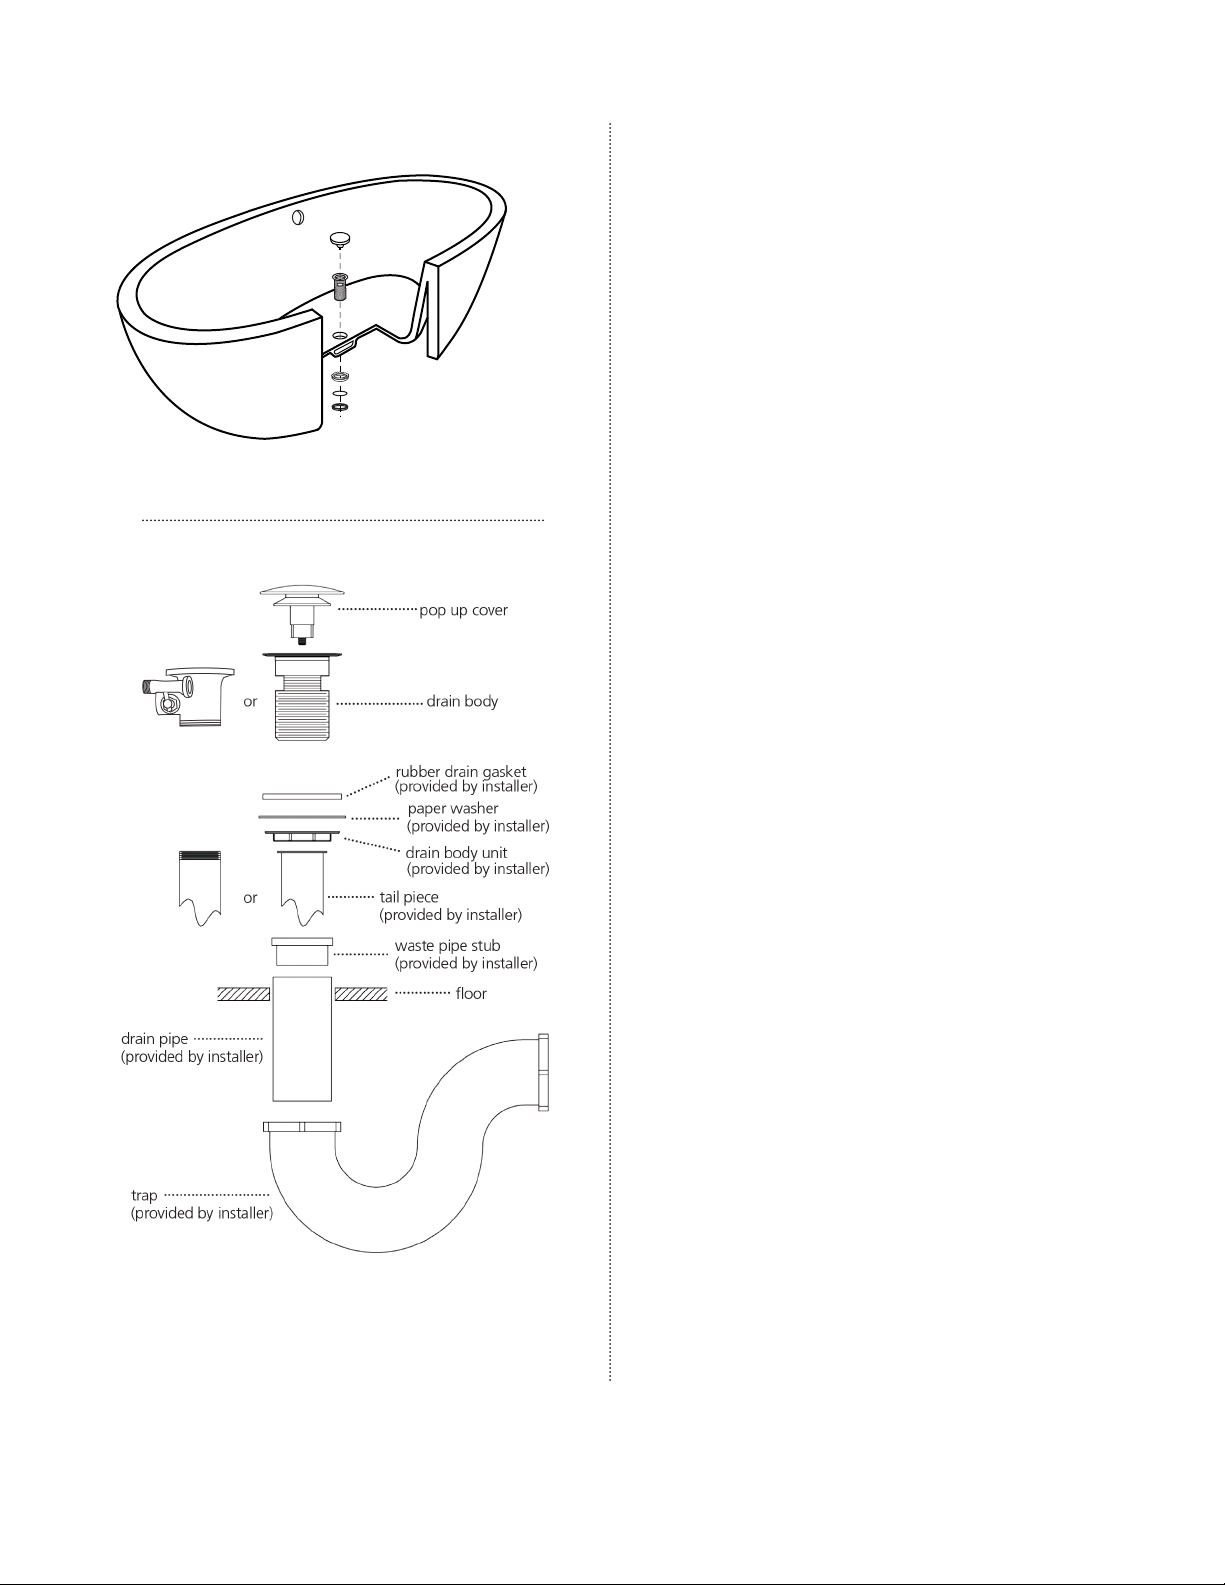
PREPARE TAIL PIECE
All parts involved in tail piece installation are
provided by the installer.
10. Drain waste vent must always be installed
according to local standard. Verify the
placement of the bathtub before drilling the
hole for the drain waste vent.
11. Install 1 3/4” tail piece over the
drain waste vent.
12. Cut tail piece to desire
each installation).
13. Slide tail piece nut over tail piece towards
flanged end.
14. Connect tail piece assembly to waste vent.
(figure 5).
d length (will vary for
(figure 5)
15. Place flange washer on top of tail piece.
 Loading...