

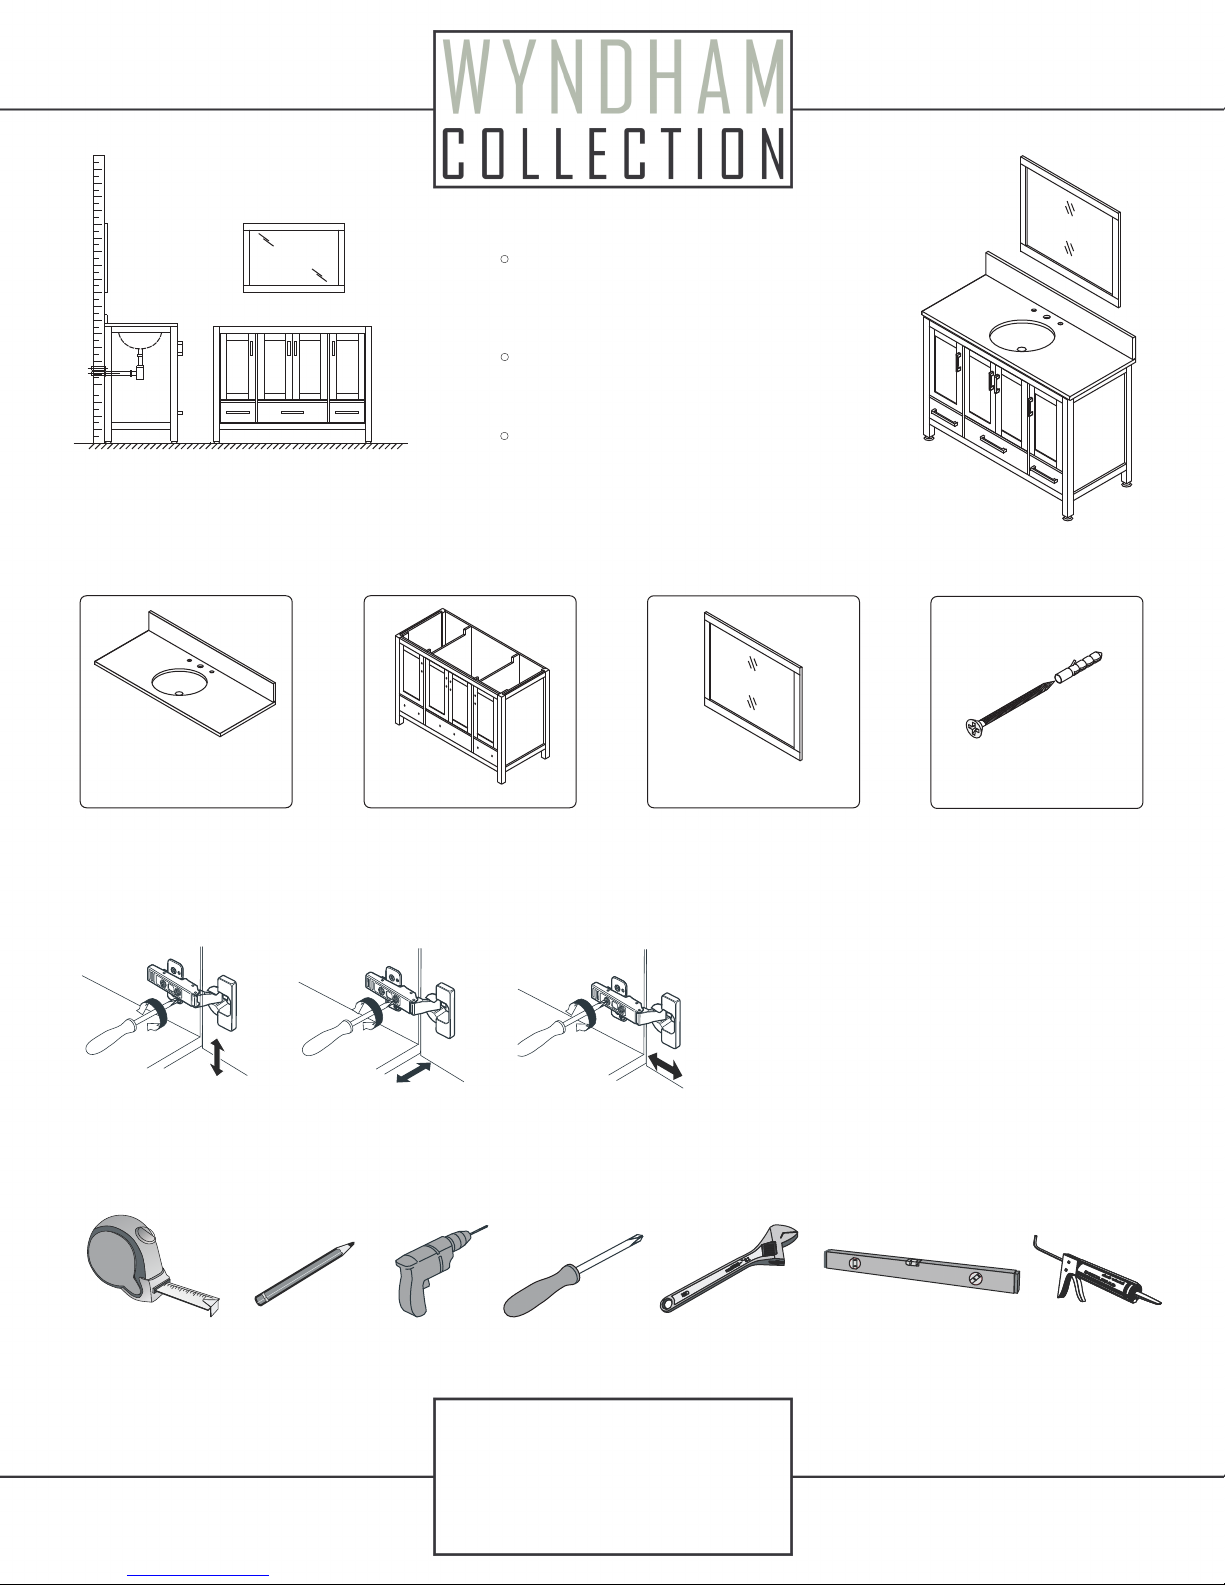
Wyndham Collection WC-1414-48, WC-1414-72 Installation Instructions
●
Prior to installation please check received
items against the "Packing List".
Please report any missing items to your
retailer immediately .
●
Protect all surfaces from sharp objects,
high heat sources, direct prolonged
sunlight and chemical hazards.
●
Professionalinstallationrecommended.
PACKING LIST
(Not all components may be included,depending upon your purchase)
Mirror / 1 (may n ot be
Counter & sin k / 1
Main cabine t / 1
included)
Screws for m irr or 2/
HOW TO ADJUST HINGES (if required)
adjust height
adjust laterally
REQUIRED TOOLS NOT IN BOX
4
3
2
1
0
Tape measure
Pencil
Electric Drill
adjust depth
Phillips Screwdriver
WC-1414-48
1
2
"
-
3
0
0
m
m
C
H
N
Adjustable Wrench
Spirit Level
Silicone sealant
Installation Guide
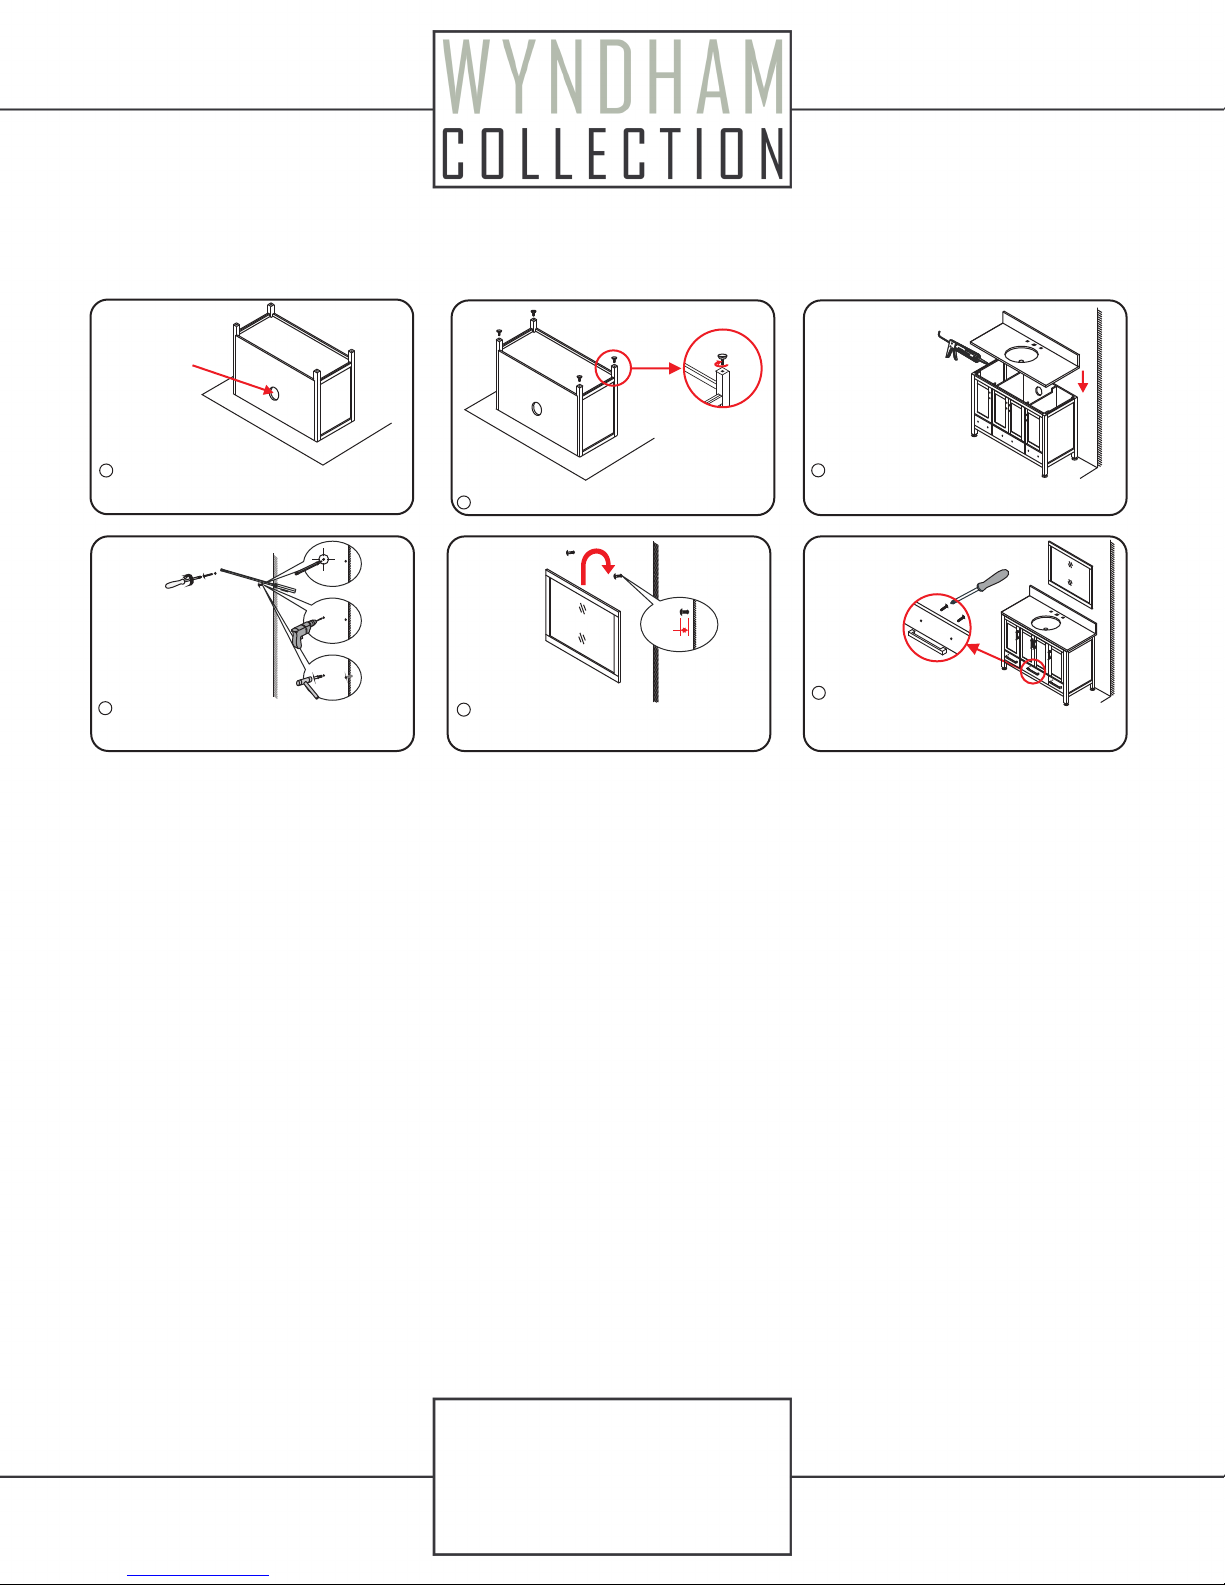
INSTALLATION INSTRUCTIONS
Cut hol e in back
of cabi net
1
Insta ller mu st cut ap pro priat ely siz ed hole
in back o f cabin et to acc omm odate e xisti ng
place ment of h ot & cold w all v alves a nd drai ns.
(1)
(2)
(3)
Insta ll the mi rror: u se a pe ncil to m ark the
4
place ment of t he scre w hol es on the w all
the hol es and in sert th e pla stic wa ll anch ors.
,dri ll
2
Adjust the feet if needed.
6-8 mm
Insta ll the sc rews in to th e wall an chors ,
5
leavi ng enou gh of the s cre w ex pos ed to han g
the mir ror - app rox 1/4 " - 1/2 ".
3
Insta ll the co unter. S eal a round
the top o f the cab inet wi th cl ear sil icone
seala nt.
6
Remov e the han dles fr om
insid e the cab inet do ors a nd draw ers and
reins tall on t he outs ide .Do not o ver-t ighte n
when re attac hing.
WC-1414-48
Installation Guide
 Loading...