

WXT-Pro DIGITAL VIDEO CAMERA Easy Manual

1
DIGITAL VIDEO CAMERA
Easy guide
PRO

2
Preparing for use
➢ Parts of the camcorder
1. USB jack
2. TF card slot
3. LCD touch screen
4. Shutter button
5. Speaker
6. Charging indicator light
7. Busy indicator light
8. Power button
9. Reset
10. AV out jack
11. HDMI output
12. Tripod slot
13. Microphone
14. Lens
15. Water proof case
15

3
➢ Charging the battery
The camcorder has an internal lithium battery, Please
charge the battery for the first time use.
1:Turn off the camcorder.
2:Connect the USB cable to the camcorder and the
computer for battery charging.
3:when charging ,the power indicator light will turn red.
4: Once fully charged the charging indictor will disappear.
Then Unplug the USB cable.
The camcorder body may be warm after extended use.
This is normal.
➢ Inserting the Memory Card
This camcorder does not equipped with internal memory.
An TF card (at least class 4) or multimedia card must be
inserted for WXT PRO camcorder to operate. If a card has
not been inserted, camcorder can not record.
1:Turn off the camcorder.
2: Open the rubber cover at the side of camcorder .Find
the TF card slot, and then insert the TF card .
If the memory card has successfully been inserted, you will
hear a clear buzzer.
4
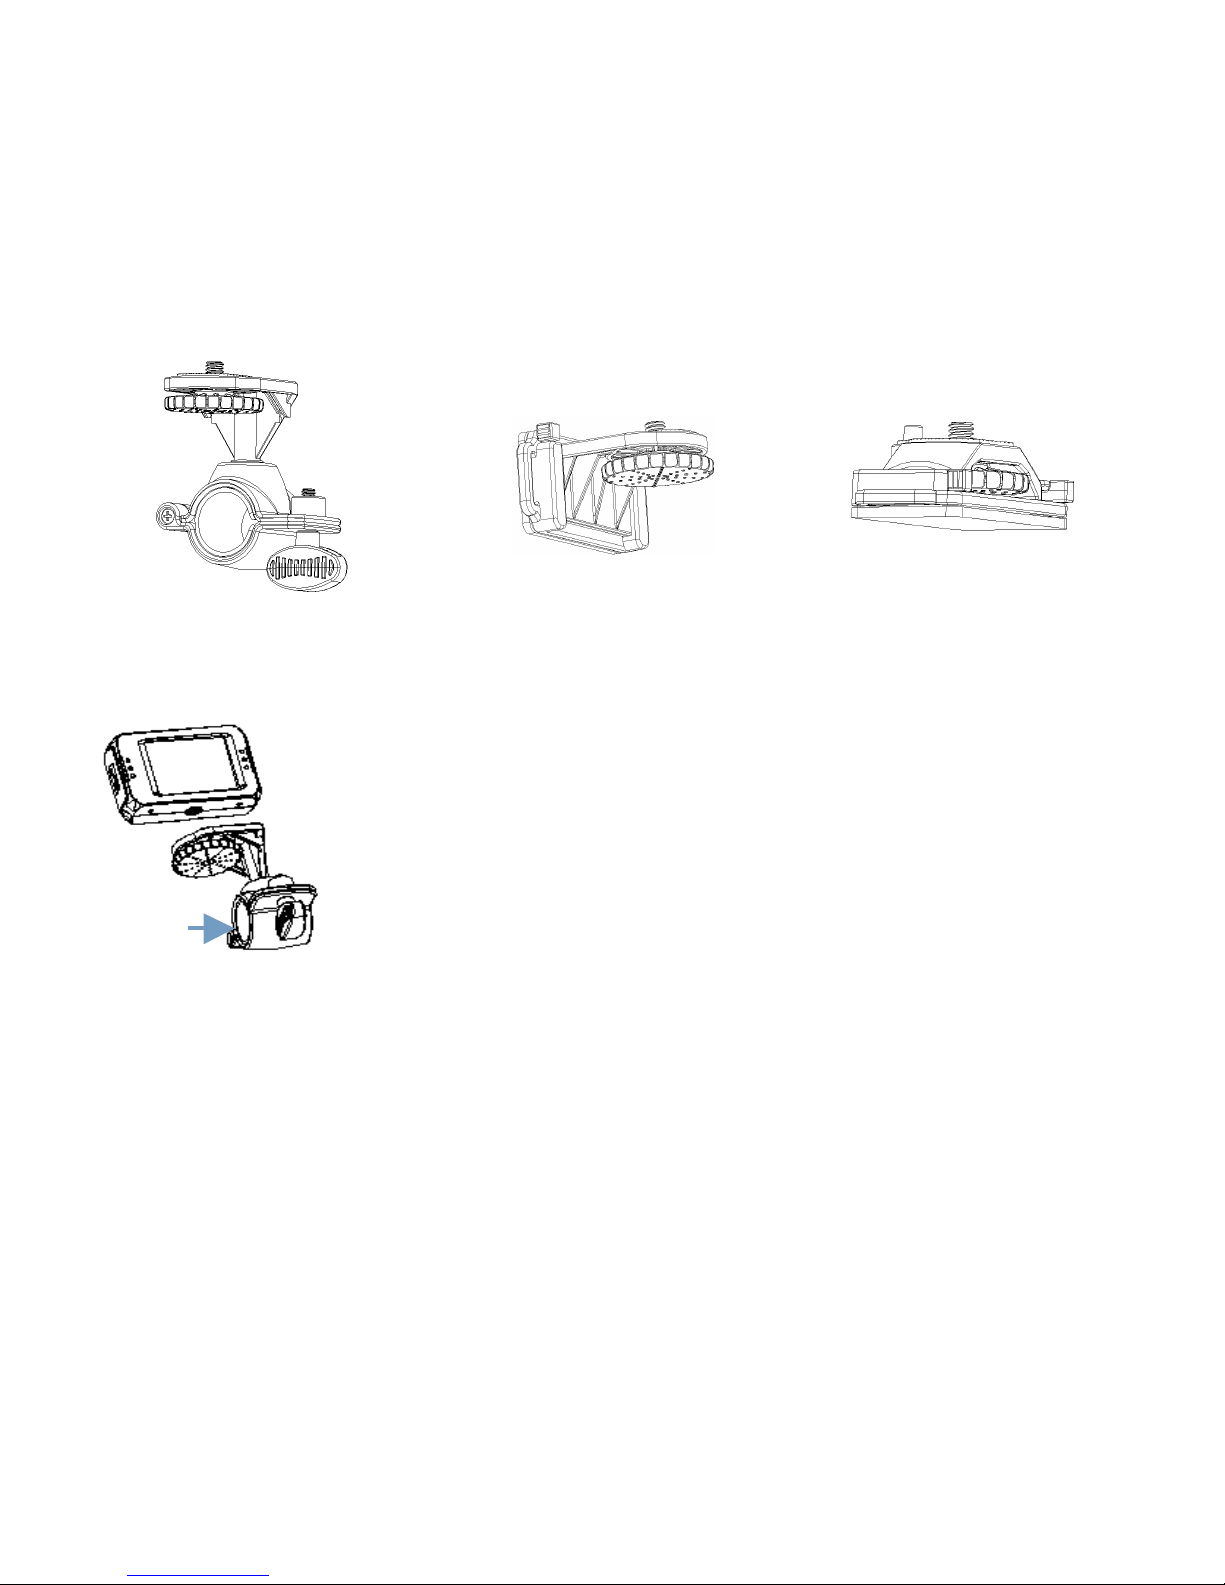
➢ Mounts How to fix the WXT PRO camcorder to the bike?
1: Open the round of mount (1), insert the
rubber pad(2) into it and fix them to
handlebars of bike, then turn the screw to fix
it.
2: Fix the metal screw of the mount to the
tripod slot of the camcorder respectively,
and then wring the thread to fix the mount
3. After fixing it to bike, you can start to take pictures.
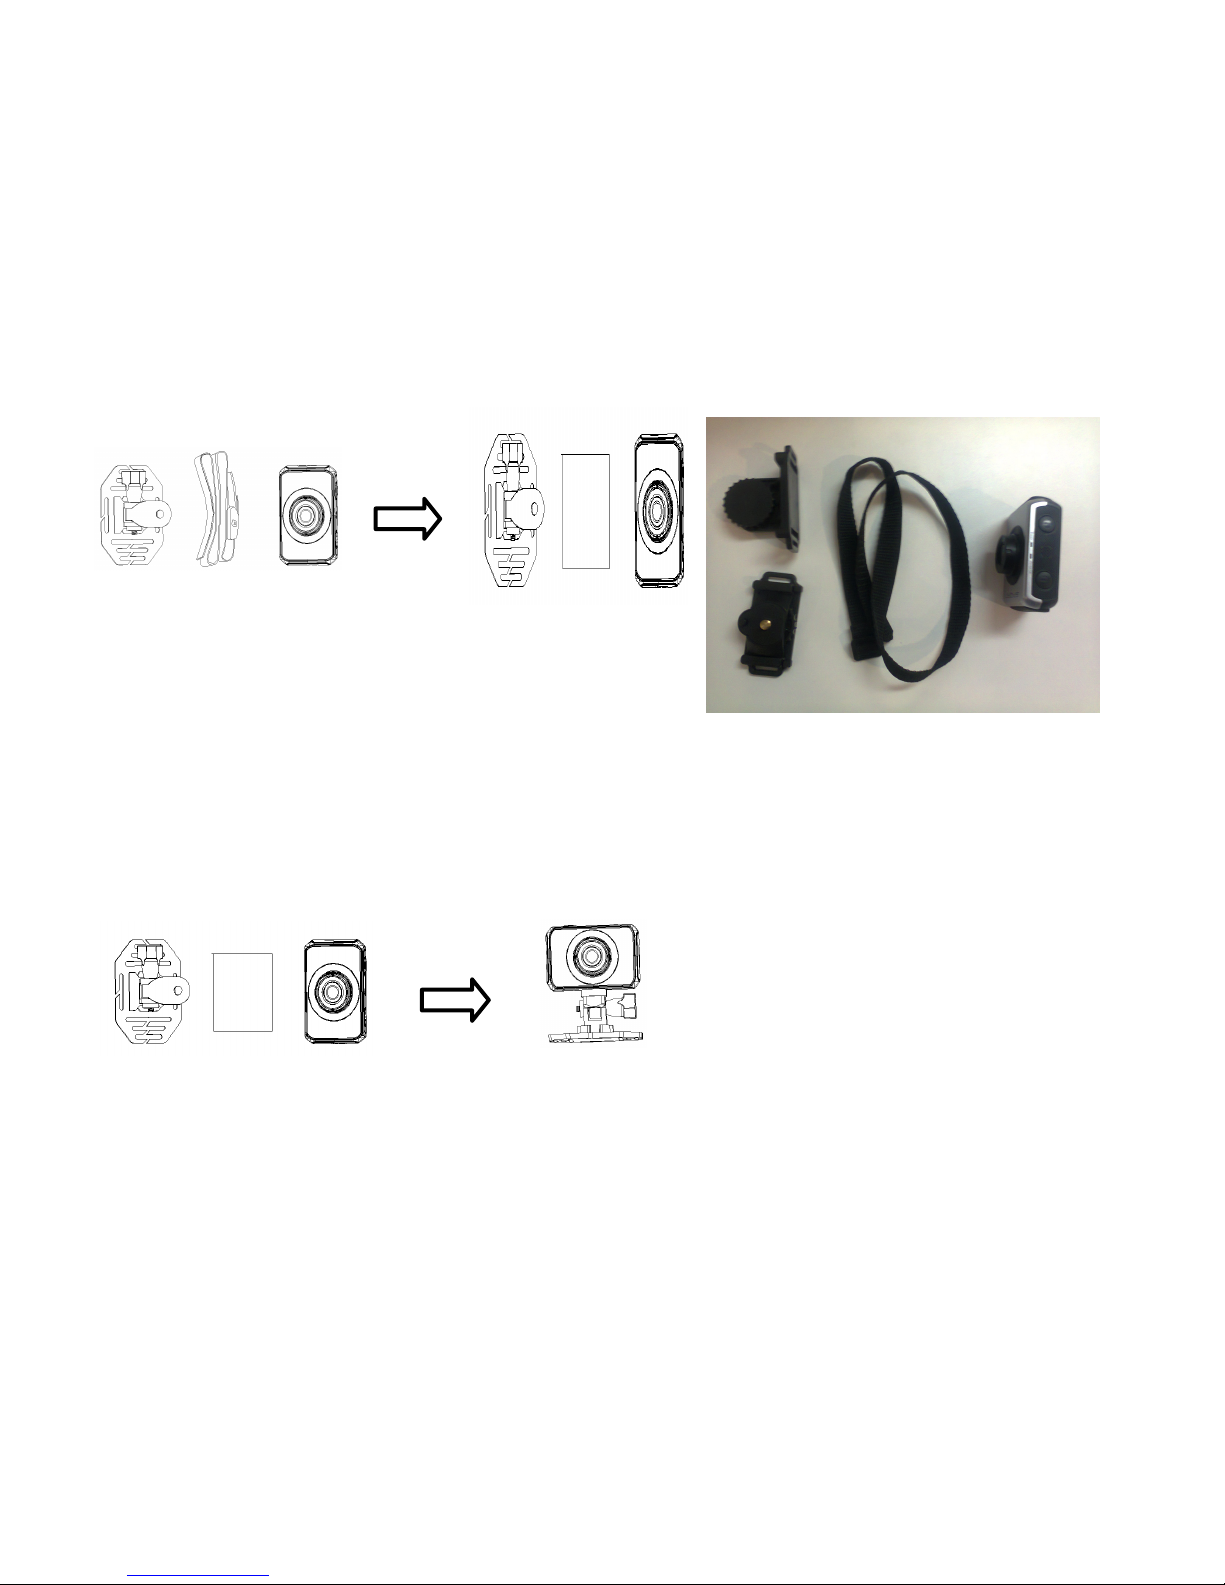
➢ How to use strap fix to your helmet?
There are two types: for top and side mount : Insert strap
into the two ends of the mount, adjust length according to
1
5
helmet’s size, and then you can use strap fix to your helmet
and start to take pictures.
➢ How to use sticker fix to your helmet?
1: Use the side of the paste to the mount, and the other side
paste to your helmet and start to take pictures. You can fix
it as below
TIPS: Please note that watercase can also be used in the
sport camcorder fixed to the bike or the helmet .

6
Basic operation
➢ Turn Power On and Off
1:Press the POWER button to turn on the camcorder.
2: Press the POWER button again to turn the power off.
Both turn on and turn off the camcorder ,the busy indicator
light will turn green.
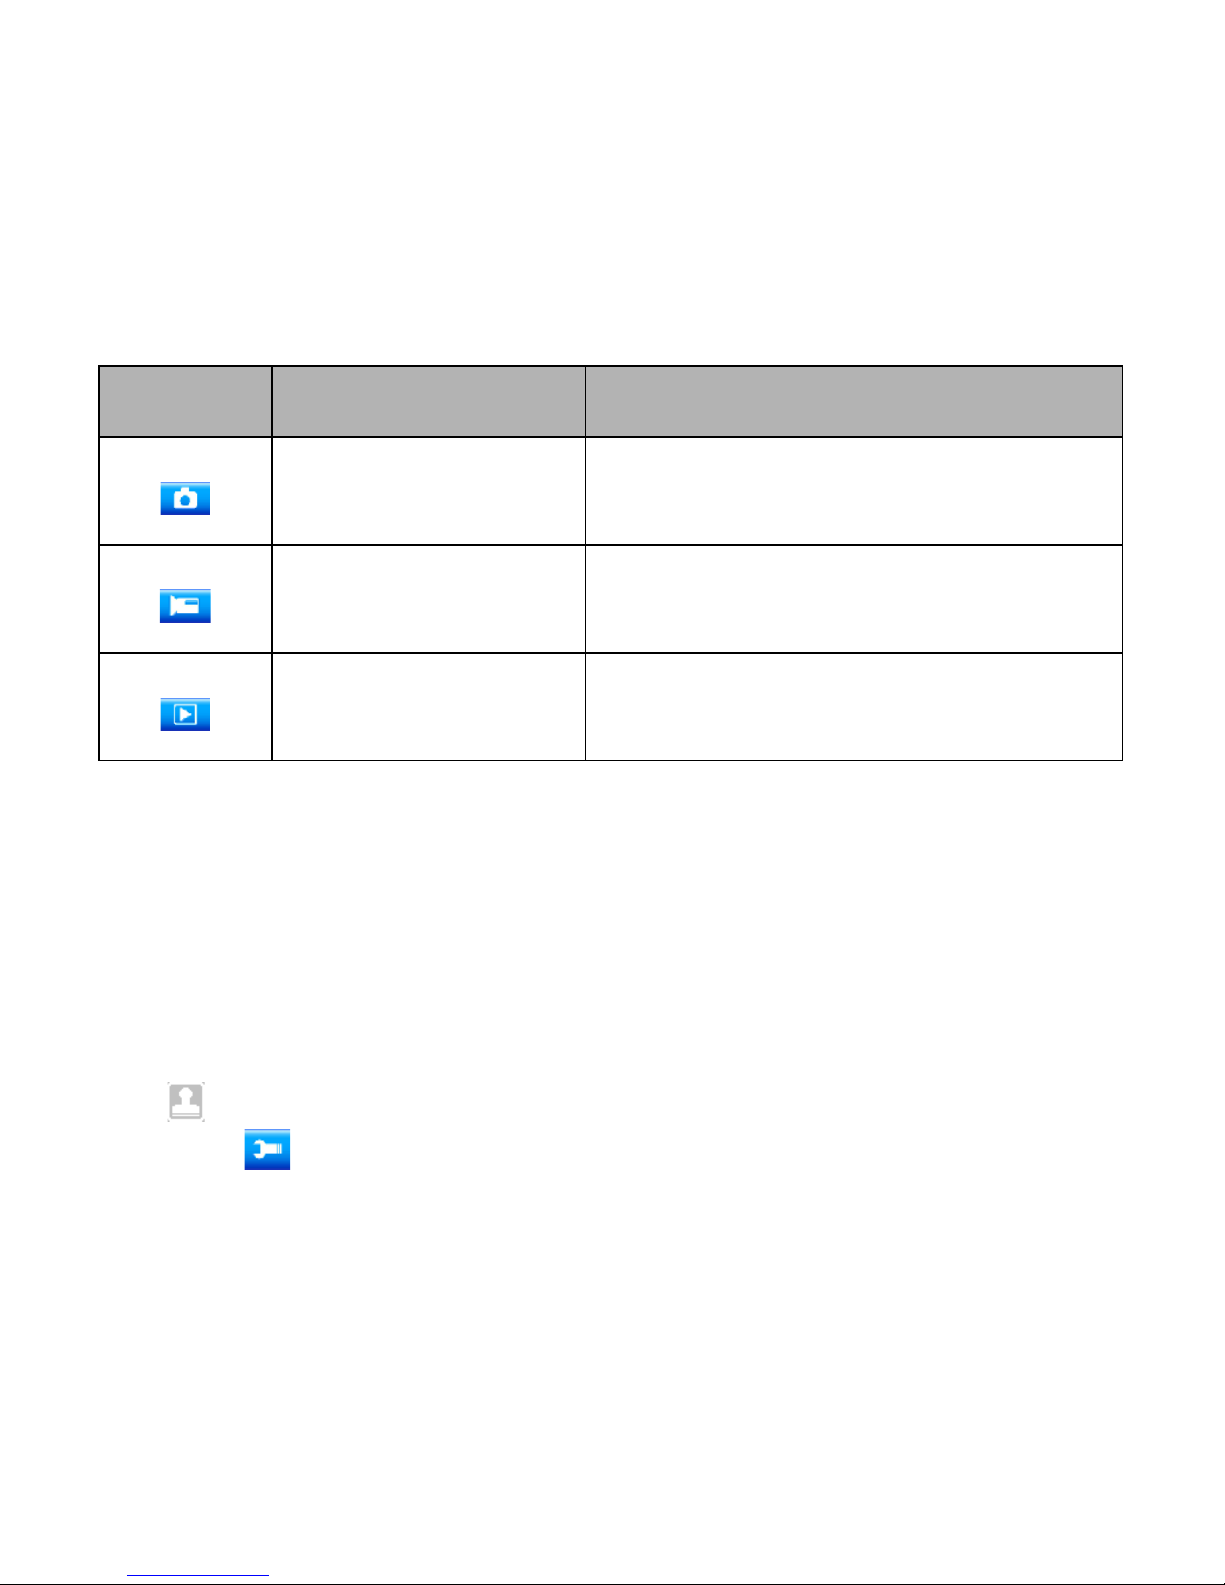
➢ Change the mode of the camcorder
The LCD screen is touchable, so you can touch it to set
most of the options. Current camcorder settings will be
displayed on the touchable LCD screen. The camcorder
has 3 different modes : capture mode, video mode and
playback mode. Touch the icon ( / / ) on the LCD
screen to select between those modes.
7
Display
Title
Description
Capture mode
For taking still photos.
Video mode
For recording movie clips.
Playback mode
For playing recorded files.
➢ Setting the camcorder
Before taking photographs or recoding videos ,press the
power button to switch on the camcorder first. our
camcorder has a touch LCD screen, so all the settings are
operated by touching the options on the screen. Touch the
icon to show the MENU on the screen, touch it and then
the icon to bring up the setup menu (Date/ Auto power
off / Beep sound/ Language/ Frequency / TV mode/
Format/ Default setting), touch the option you want to
 Loading...