

Wulian WL-ZTCWNPW-H2-01 Quick Installation Manual
Smart Thermostat (USA Standard)
WL-ZTCWNPW-H2-01
Quick Installation Guide
Product Illustration
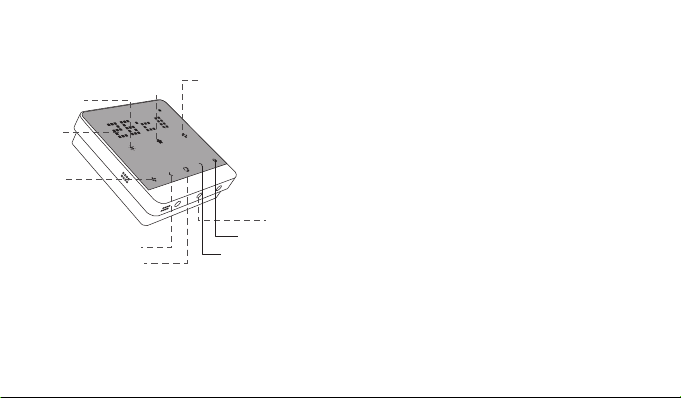
①
③
④
⑤
Modes:
AUTO: HEAT icon and COOL icon will be illuminated at the same time. The Smart Thermostat will automatically select the appropriate
mode.
OFF: No icons will be illuminated. The system is in neither heating nor cooling.
②
⑩
⑥
⑦
⑨
⑧
Fan
①
COOL/AUTO
②
HEAT/AUTO
③
Room Temperature. Press [<] & [>] to set temperature.
④
ON/OFF Switch for Fan
⑤
Turn down the Thermostat
⑥
Mode Key:Change Thermostat between HEAT/COOL/AUTO modes
⑦
Turn up the Thermostat
⑧
ON/OFF Switch
⑨
[Set Key]:
⑩
1. For networking: press it once to join a network; press and hold it
for 6s to exit from the network.
2. Quickly press it 5 times to turn on/off the Emergency Heat.
1

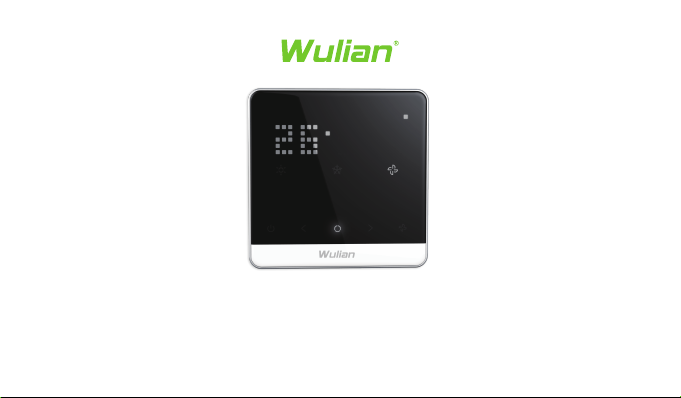
Display
5. Tap the Mode Key to change the mode at any time.
• There are 4 modes: HEAT, COOL, AUTO, and OFF.
• In AUTO mode, the brighter icon indicates which set point is currently displayed, HEAT or COOL.
• The display will show the current room temperature after 5 seconds. The mode icon will stay lit to indicate this. After that, the display
will turn off to save energy. The Smart Thermostat will continue to work when the display is off.
6. Press [Set Key] once to join a network; press and hold it for 6s to restore the device to factory default settings; quickly press it 5 times
to turn on/off the Emergency Heat.
1. Press any key to wake up the device.
2. The device shows current mode and room temperature after waking up.
3. When you tap UP [>] /DOWN [<] Key for the first time, the device shows
the preset temperature.
• The HEAT or COOL icon will flash.
4. Tap the UP [>] /DOWN [<] Key again to adjust room temperature.
2
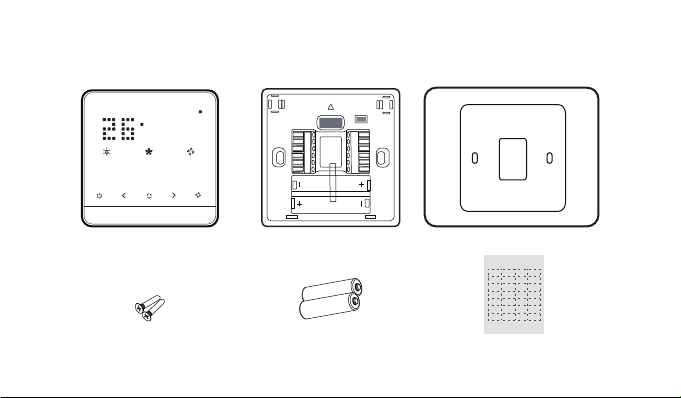
Packing List
Thermostat Display Thermostat Base
Decorative Plate (Optional)
RC
RC
RH
W1
W1
Y1
W2
W2
Y2
B
B
O
G
G
C
AUX1
AUX1
AUX2
E.heat
E.heat
Drywall Screw (x2) AAA Batteries Wire Labels
3
RH
Y1
Y2
O
C
AUX2
Installation Guide
The Old Thermostat
Step 1: Check system
Before getting started, make sure that your HVAC system works normally.
Do not short across electric terminals at the control on the furnace or air conditioner to test the system. This may damage the
thermostat.
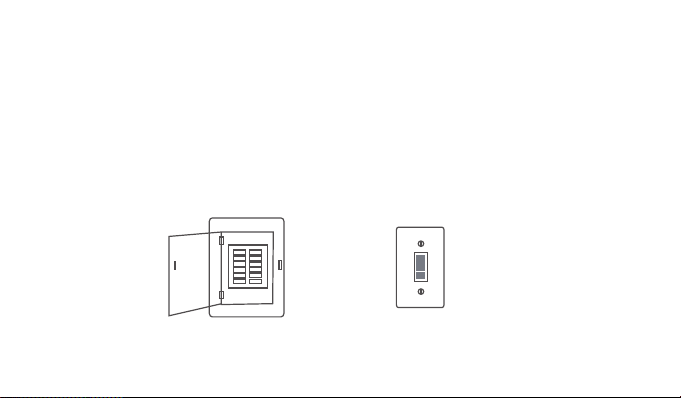
Step 2: Switch off power
Switch off the power to your heating and cooling systems at the breaker box or the system switch.
or
Do not remove the old thermostat with the power on.
4
When the power is off, take the Step 3.
Step 3: Remove the cover and take a picture of the wire.
Before you take out any wires, take a picture of the wires on your
old thermostat so you have an easy reference if you need it.
w
Y
Y
G
W
G
c
C
5
R
R
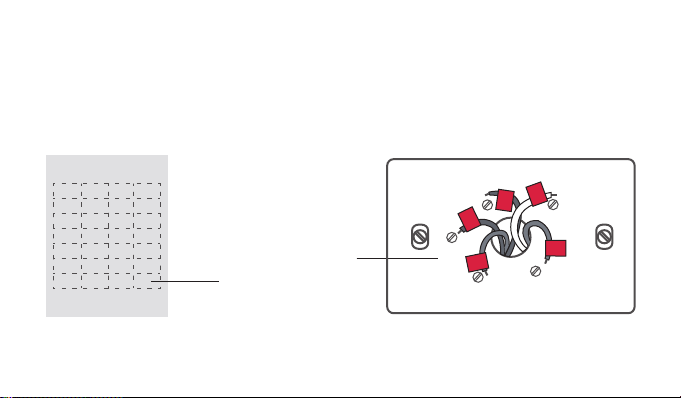
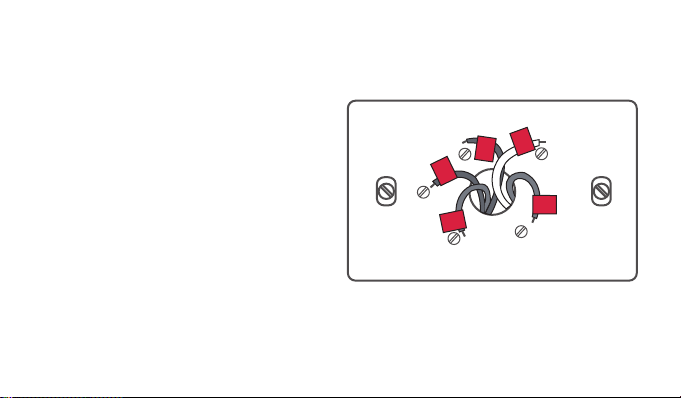
Step 4: Label all wires.
Use the supplied sticky tags to label each wire. Label wires according to old thermostat terminal designations and make sure that the
wires are labeled correctly.
w
RC
W1
W2
B
G
AUX1
E.heat
RC
W1
W2
B
G
AUX1
E.heat
RH
Y1
Y2
O
C
AUX2
RH
Y1
Y2
O
C
AUX2
Terminal designation
Blank sticky tag
Y
Y
G
G
c
C
W
R
R
If no tag matches a terminal designation, write the appropriate letter on a blank sticky tag.
6
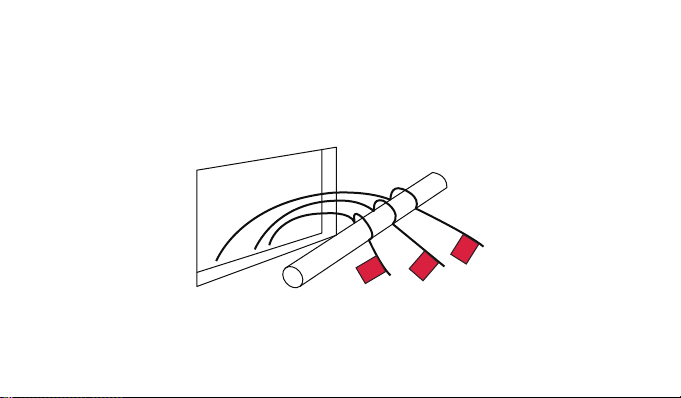
Step 5: Remove the wallplate.
Remove the old wallplate from the wall after all wires are labelled and disconnected.
R
Remember that do not let wires fall back into the hole in the wall.
7
G
C

Prepare Wires
Follow the tips for security:
1. Make sure that the diameter of wire is 18-24AWG;
2. Make sure that the length of exposed wire is 1/8 of the whole wire.
CAUTION: Make sure your system voltage is 24V AC. If the old thermostat is labeled 120V or 240V, or has thick wires with wire nuts, your
system is high voltage. Then do not install the Smart Thermostat, and contact HVAC specialist.
8
 Loading...