


F220 OTT
Android Set-Top Box
User Manual

1. FCC STATEMENT
This equipment has been tested and found to comply with the limits
for a Class B digital device, pursuant to Part 15 of the FCC Rules.
These limits are designed to provide reasonable protection against
harmful interference in a residential installation. This equipment
generates uses and can radiate radio frequency energy and, if not
installed and used in accordance with the instructions, may cause
harmful interference to radio communications. However, there is no
guarantee that interference will not occur in a particular installation.
If this equipment does cause harmful interference to radio or
television reception, which can be determined by turning the
equipment off and on, the user is encouraged to try to correct the
interference by one or more of the following measures:
Reorient or relocate the receiving antenna.
Increase the separation between the equipment and receiver.
Connect the equipment into an outlet on a circuit different from
that to which the receiver is connected.
Consult the dealer or an experienced radio/TV technician for
help.
This device complies with part 15 of the FCC Rules. Operation is
subject to the following two conditions: (1) This device may not
cause harmful interference, and (2) this device must accept any
interference received, including interference that may cause
undesired operation.
Changes or modifications not expressly approved by the party
responsible for compliance could void the user's authority to
operate the equipment.
The antenna(s) used for this transmitter must be installed to provide
a separation distance of at least 20 cm from all persons and must
not be co-located or operating in conjunction with any other antenna
or transmitter.
1
2. Precautions
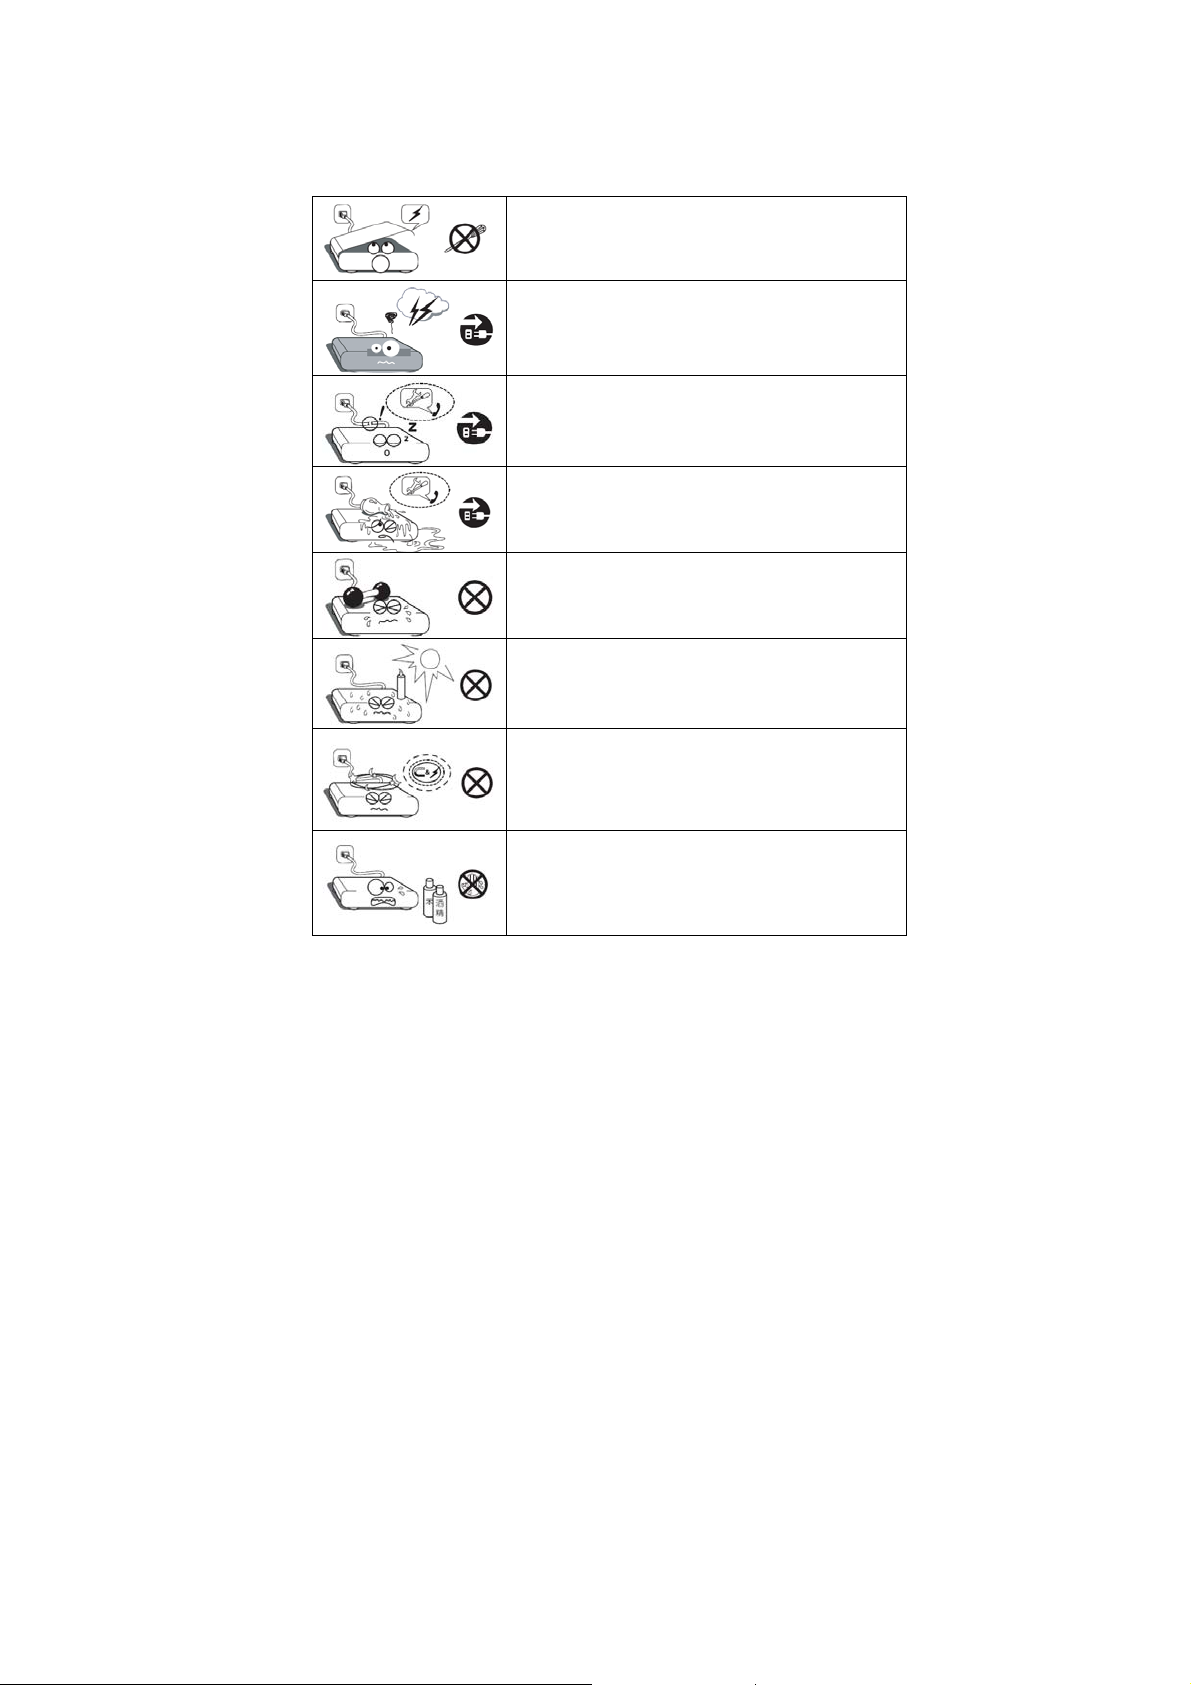
Do not disassemble the STB.
Power off the STB before inserting or removing
video/audio cables, or when it is thundering.
If the STB is not in use for a long period of
time, power it off and remove the power plug.
Do not put liquid containers around the STB. If
the STB is wet with liquid, power it off
immediately and contact professional
maintenance personnel.
Do not place heavy objects on the STB.
Keep the STB away from heat sources,
moisture, hot and humid places, and the
sunlight.
Keep the STB away from electric appliances
with strong magnetic or electric field, such as
microwave oven, refrigerator, and mobile
phone.
Remove the power plug before cleaning the
STB shell.
Do not touch the power cable with wet hands.
Do not clean the STB with chemicals
containing benzene, alcohol or gasoline.
1

3. List of Articles
Article Amount
F220 OTT STB 1
Power adapter 1
HDMI cable 1
Coin battery 1
Remote controller 1
User manual 1
Note: This article list is for reference only. If the articles in a
packing box are damaged or inconsistent with the list, contact
your service supplier, and keep the p acking box and the articles
in it for exchange.
2

4. Product Description
4.1 Front Panel
No. Nam Description
Power indicator
1 POWER
2 NET
3 STATUS
4 IR IR receiving area
5
Red indicates standby.
Green indicates working.
Network indicator
Red indicates that Internet is not
connected.
Green indicates that Internet h as been
connected.
IR indicator
When you press the remote controller, it
blinks red every 200~500ms.
Power button
After you press it, STB enters sl eep or
wake-up mode.
3

4.2 Right-Side Panel
No. Name Description
1 IR IN Interface for IR receiver extension
2 TF Card TF card port
3 USB
4 USB1
USB ports
4.3 Rear Panel
No. Name Description
1 HDMI HDMI output
2 SPDIF Optical audio output
3 LAN Wired network port
4 YPbPr Component output
5 AV R/L Right/left channel output
6 12V DC IN Power input
4

4.4 Remote Controller
5

5. Installation and Start-up
5.1 Placing the STB
Place the STB on a stable table.
Note: Do not place anything on the STB. Leave over 10cm space
around two sides of the STB for radiating.
5.2 Connecting Cables
Power off all to-be-connected devices (including TV and STB) first.
Step 1
Step 2 Use the audio/video cable to connect the STB AV inte rface to TV.
Step 3
Step 4
Use the HDMI / MiniCVBS cable to conn ect the STB HDM I /
YPbPr interface to TV.
Use a network cable to connect the STB LA N inter face to the
router, or turn on your wireless rout er.
Use the power cable to connect the STB DC IN i nterface to a
household power socket.
6

5.3 Starting the STB
Step 1 Verify that all cables are co rrectly c onnecte d.
Step 2 Verify that power supply of all devices is normal.
Step 3 Turn on the TV and STB.
5.4 Automatic Upgrade
After startup, the STB checks whether upgrade is needed. If yes, it
is upgraded in the next 3 to 5 minutes. Do not perform any other
operations during upgrade.
If the upgrade fails, restart the STB.
5.5 Homepage
Menu Description
Hotel & Local Introduces hotel information, hotel services, and
local attractions.
7

Video & Music Shows video and music apps.
Activate Your iTV Includes MikroTik radius authentication, EPG user
help, account overview, and airplay services.
Sports, News, & TV Shows sports, news, and TV apps.
Internet & More Shows browser, social networking sites, world clock,
world weather, and miracast.
8

6. Troubleshooting
Symptom Possible Cause Solution
After STB is
turned on, power
indicator is off.
After STB
startup, TV does
not display any
image.
STB cannot
connect to the
network.
Speaker has no
voice.
Controller does
not work.
Video sometimes
is not smooth.
Power adapter is not
connected.
Power adapter is
damaged.
Power socket does
not supply power.
STB is in standby
state.
Video cable is
connected improperly.
Network cable is
connected improperly
or broken.
Network is
unavailable.
Network configuration
is incorrect.
Audio cable is
connected improperly.
Volume of STB or TV
is lowest, or in mute
state.
Low battery power Replace t he b attar y.
STB does not receive
commands of
controller.
Weak video signals
Connect power adapter to STB.
Replace the power adapte r.
Ensure that voltage of powe r
socket is normal.
Press power key on controller.
Refer to "4.2 Connecting
Cables" to reconnect cables.
Reconnect or replace network
cable.
Contact network service
provider.
Reconfigure network
parameters.
Refer to "4.2 Connecting
Cables" to reconnect cables.
Increase volume of STB or TV,
or press MUTE.
Keep controller within 8m from
STB. Aim controller at infrared
receiving area of STB, and
move away the barriers
between STB and controller.
Check TV cable connection or
strength TV signals.
9

Symptom Possible Cause Solution
Audio and video
are not
synchronous.
Other faults /
Abnormal carrier
network
Video is transmitted
with multiple
accompanying
sounds.
Abnormal video
source
Contact network carrier.
Adjust sound channel mode.
Change video source.
Restart STB or email our
technical support.
10

7. Specifications
Item Specification
CPU Cortex-A9 @ 1.5GHz dual core
OS Android 4.2
NAND flash 4G/8G/16G
RAM 1GB DDR3
Power input 12V, 1A
USB port Two (support wireless mouse and USB optical mous e)
HDMI port HDMI 1.4
Network 10/100M RJ45, 802.11b/g/n Wi-Fi
RCA output R/L MIX-MONO, YPbPr, CVBS
Video decoding
Audio decoding MP3, WMA, OGG, FLA C, WAV, AAC, APE
Image JPG, BMP, GIF, PNG
Power
consumption
Controller 8m effective operati ng range wi thin +/- 60°
Environment
STB
Package
MPEG, RMVB, MKV, AVI, MP4, FLV, ect.
Support the 1080P 60FPS format at maximu m.
Working: < 10W
Standby: 0.8W
Operating temperature: 0 C to 40 C
Operating humidity: 5% to 90% (n on-cond ensing)
Storage temperature: -20 C to 70 C
Storage humidity: 0 to 98% (non-condensing)
Size (L x W x H): 105 × 100 × 25 mm
Weight: about 0.11 KG (not including the power
adapter)
Size (L x W x H): 195 x 185 x 57 mm
Weight: about 0.40 KG (not including optional articles)
11
 Loading...