

WTFF GROUP G1-2000 Operating Instructions Manual
1
WTFF GROUP®
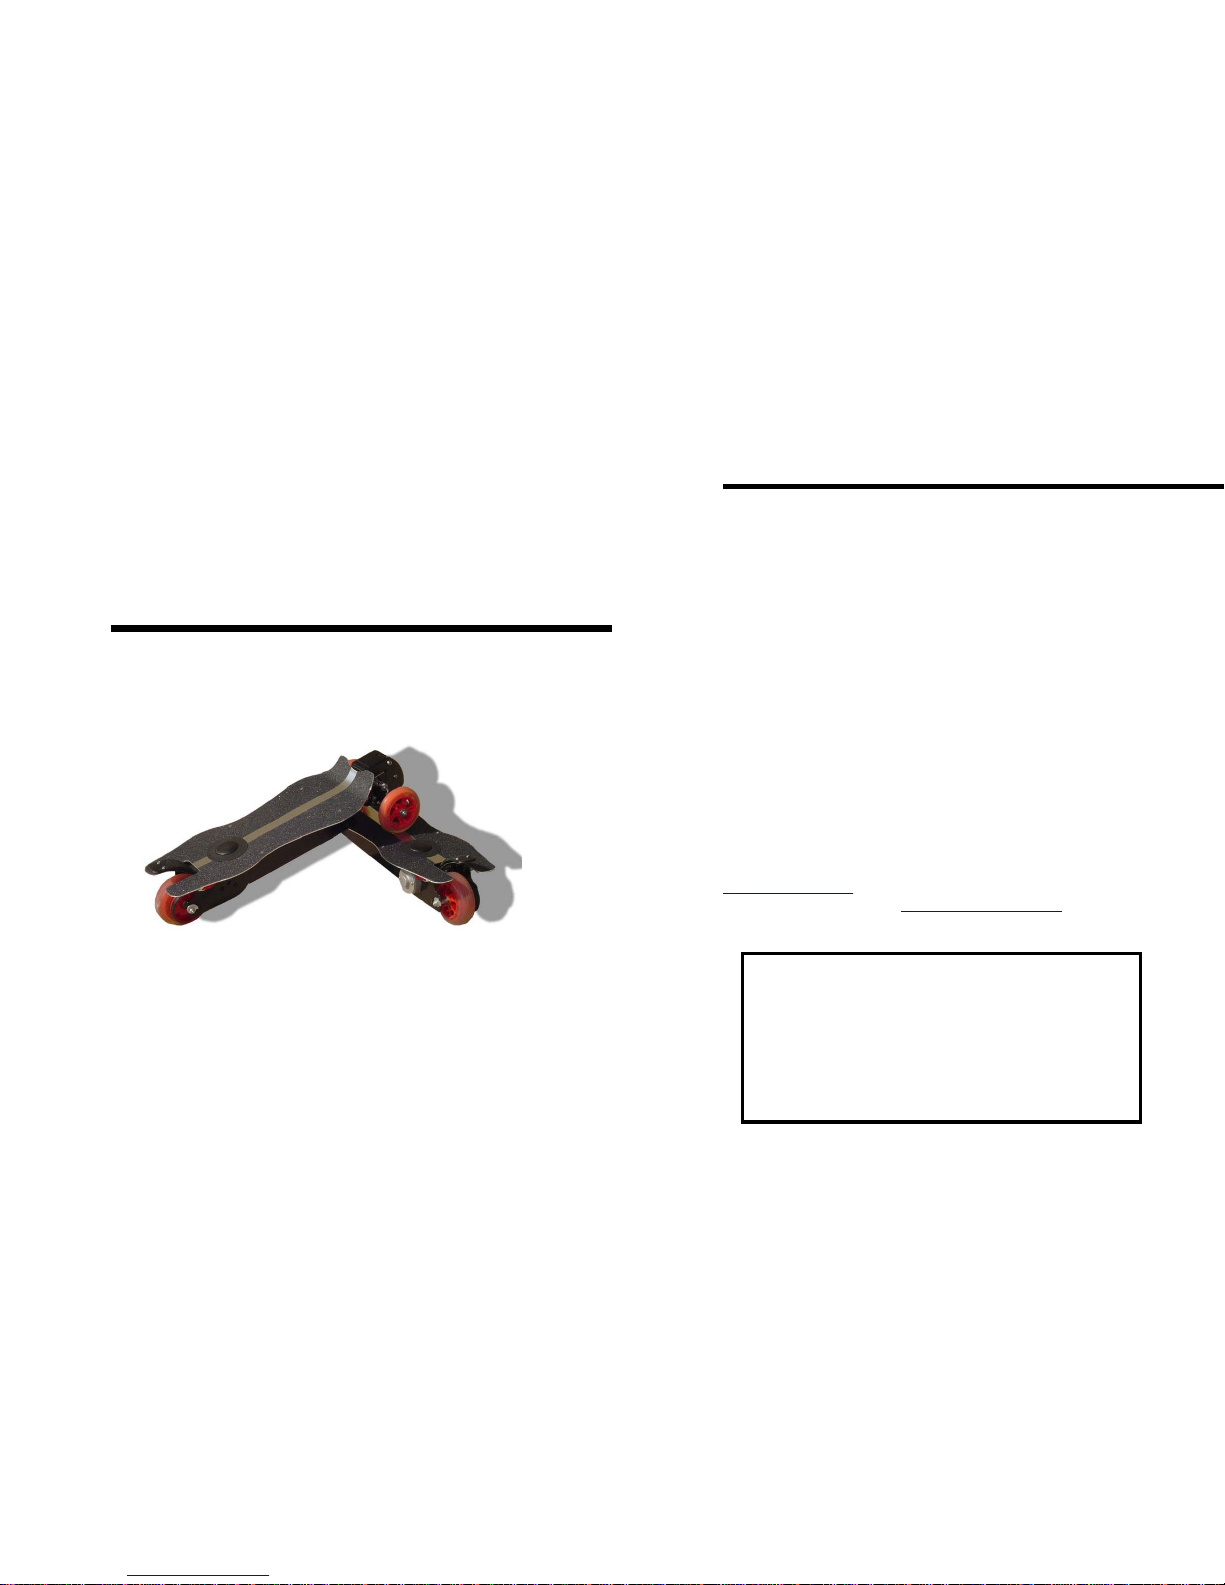
G-1 Electric Skateboard
Operating Instructions
Model No. G1-2000
© 2005 WTFF GROUP All Rights Reserved
2
Information
For customers in the United States
Interference may occur while operating this unit. If this product
does cause harmful interference to radio or television reception,
“which can be determined by turning the equipment off and on,”
the user is encouraged to try to correct the interference by one or
more of the following resolutions:
- Reorient or relocate the receiving antenna.
- Increase the separation between all equipment and the receivers.
- Connect the equipment into an outlet on a circuit different from
that to which the receiver is connected.
- Consult the dealer or an experienced radio/TV technician for
assistance.
Caution: Any changes or modifications to the unit that are not
expressly approved in this manual could void the warranty and
your authority to operate this equipment.
If you have any questions about this product, you may visit
www.wtffgroup.com
for information. If you cannot find your
answers there, please e-mail inquiries@wtffgroup.com. Your
inquiries will be replied by our professional staff.
WARNING!
♦ Read and understand owner’s manual carefully for proper use
and charging.
♦ Caution – Shock Hazard – Do not insert any foreign objects into
this charging port. Use only authorized charger originally
provided with this unit. Never modify electrical, battery or
charging system as alterations may cause fire or explosion. Any
tampering or alterations will void manufacturer’s warranty.
♦ Caution – Electric Toy.

3
Notice for Users
Please read this manual thoroughly before operating
the G-1 Electric Skateboard.
All rights are reserved. This manual may not be
reproduced or translated without prior written approval
from WTFF GROUP.
In no event will WTFF GROUP be responsible for any
consequential or incidental damages or events that may
occur from any information contained or omitted from
this manual.
WTFF GROUP reserves the rights to make any changes
to this manual and its contents at any time without
notice.
WTFF GROUP also reserves the rights to make any
changes to the G-1 Electric Skateboard at any time
without notice.
In no event will WTFF GROUP be responsible for
personal injury, death, damages to the G-1 Electric
Skateboard, or damages to any public and personal
properties caused by the rider’s negligence.
4
Before the initial use, make sure the batteries are fully
charged. Otherwise, you may cause severe damage to
your G-1 Electric Skateboard’s electrical system, and
your G-1 Electric Skateboard may never reach its full
performance potential.
- The G-1 Electric Skateboard is recommended for
experienced extreme riders only.
- The speed of the G-1 varies according to the grades of
riding surface and rider’s weight.
- The G-1 Electric Skateboard is neither water-proof
nor water resistant. DO NOT operate the G-1 in any
wet conditions. This action may cause permanent
damage to the product and the warranty will be voided.
- Check all nuts and bolts before and after each ride.
- WTFF GROUP does not warrant any acts of God.
- RIDERS OF THESE BOARDS ASSUME ALL
RISK OF OPERATION INCLUDING SERIOUS
BODILY INJURY AND OR DEATH.
Note: Street legal as 09-09-2004 in the State of
California and neighboring States. Please check
your local and State laws and regulations to confirm
the “Street Legal” status of the G-1 Electric
Skateboard.

5
Preface
Thank you for purchasing the G-1 Electric Skateboard
from WTFF GROUP. We hope that the G-1 Electric
Skateboard will bring you years of entertainment and
satisfaction.
- Check your local state and city regulations before
riding the G-1 Electric Skateboard on public roads and
properties.
- The G-1 Electric Skateboard is intended for private
property only.
- DO NOT operate or ride the G-1 Electric Skateboard
in crowded areas or places where you will cause
interruptions in the flow of traffic.
- Always wear safety gear: an approved helmet along
with knee and elbow pads for extra protection.
- Adult supervision is required for riders under the age
of 18.
- For use of experienced riders over the age of 16.
- The G-1 Electric Skateboard is a foot controlled
electrical motorized three-wheel board.
6
- The foot throttle is not a variable controller. The foot
throttle is located on the top of the G-1 Electric
Skateboard’s deck, towards the rear.
- The G-1 Electric Skateboard comes standard with a
1.5 second power delay, which can not be changed.
- The G-1 Electric Skateboard turns in the same manner
as a traditional skateboard. You must lean it in order for
it to turn: the more you lean the smaller radius of the
turn.
- Please turn the lights on when operating the G-1
Electric Skateboard in low light areas.
- The G-1 Electric Skateboard is not intended for trick
riding.
- DO NOT jump curbs with the G-1 Electric
Skateboard.
- Always be aware of your surroundings and the road
conditions while you are operating the G-1.
7
Table of Contents
Notice to Users………………………………..……………… 3
Preface…………………………………………………………… 5
Getting Started
Step one: Charging the Batteries…………………
8
Step two: Preparing the G-1 ………….. ……
…
10
Step three: Ride the G-1 ……….. ……………….
14
Basic Operations
Turning the G-1’s Power ON/OF………………
…
15
Turning the Running Lights ON/OFF…………
…
16
Setting the Stabilization Spring Tensioners…
…
17
The Throttle……………………………………………
…
20
How to Turn the G-1 .……………………….
20
How to Stop the G-1 …………….…….…….
21
Additional Information
Charger……………………………………………………
21
Battery Information…………………………………
…
22
Precautions………………………………………………
…
24
Trouble Shooting………………………………………
25
Specifications…………………………………………
…
27
Speed Controller………………………………………
…
28
Contact Information…………………………………………28
8
♦♦ Getting Started
Step One: Charging the Batteries
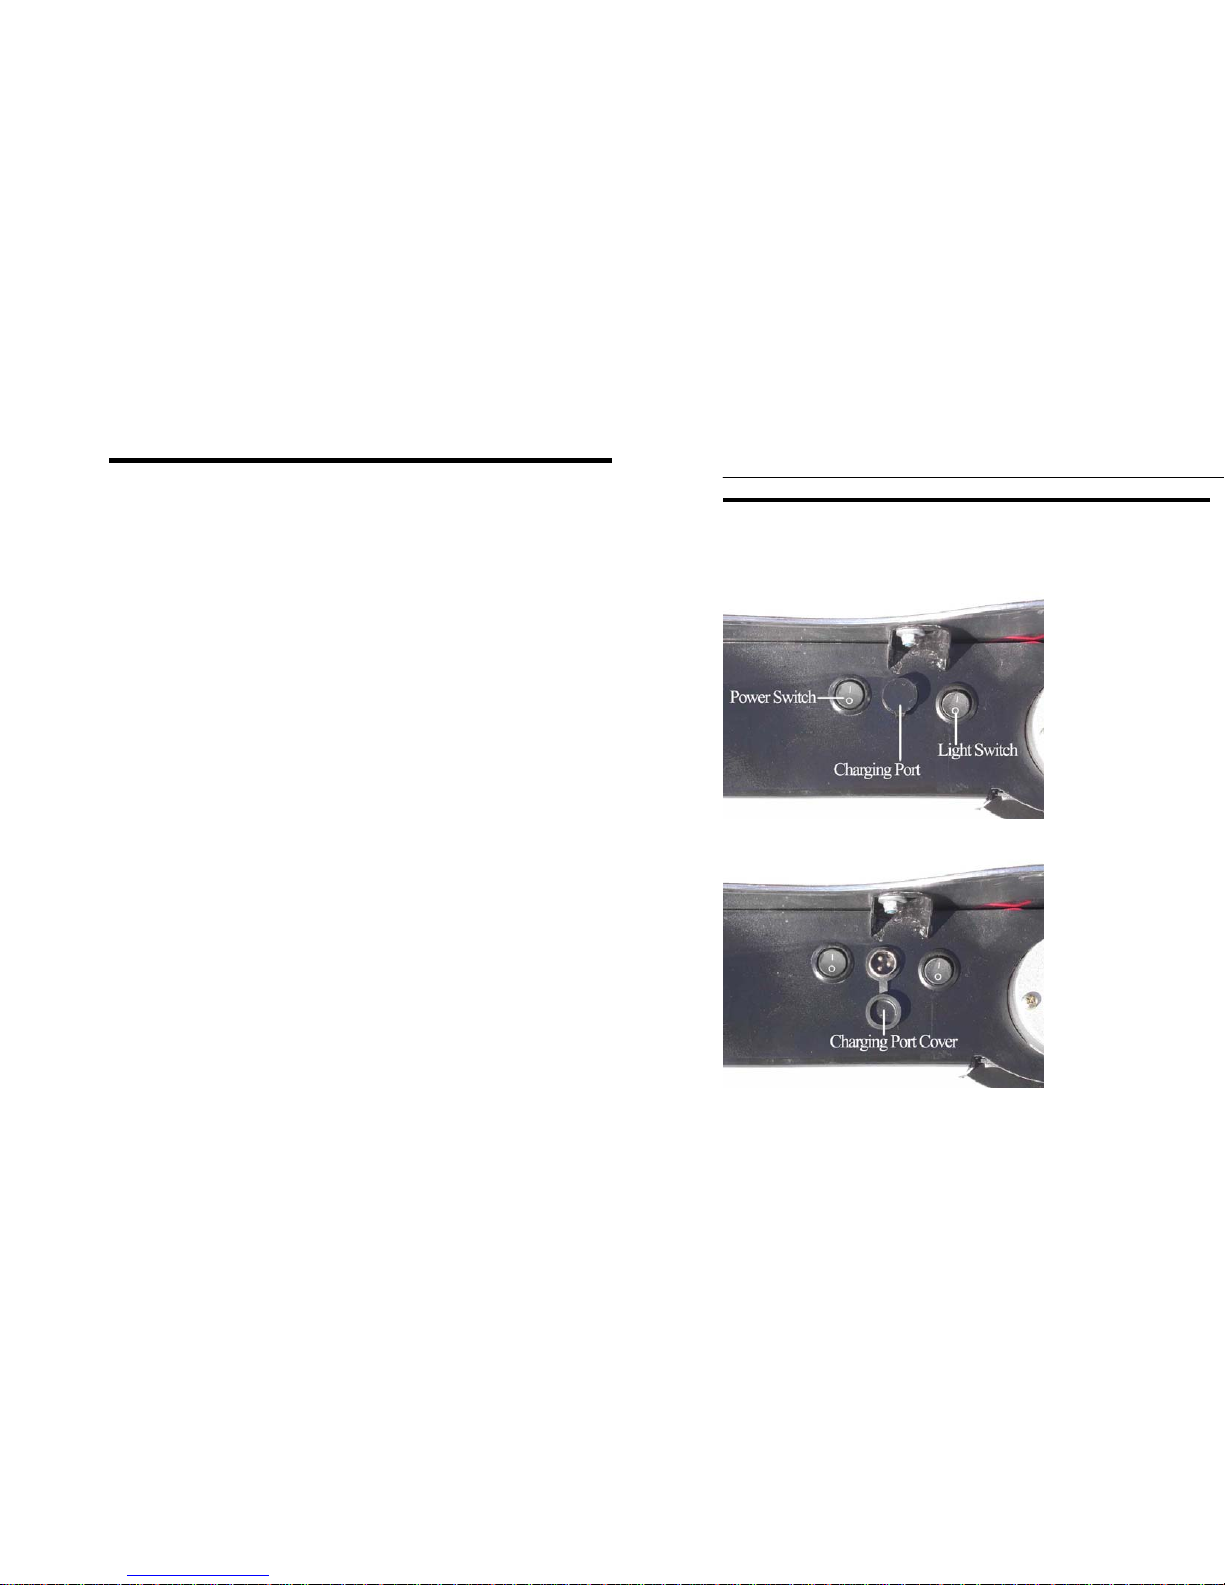
1. Locate the charging port.
2. Remove the charging port cover.
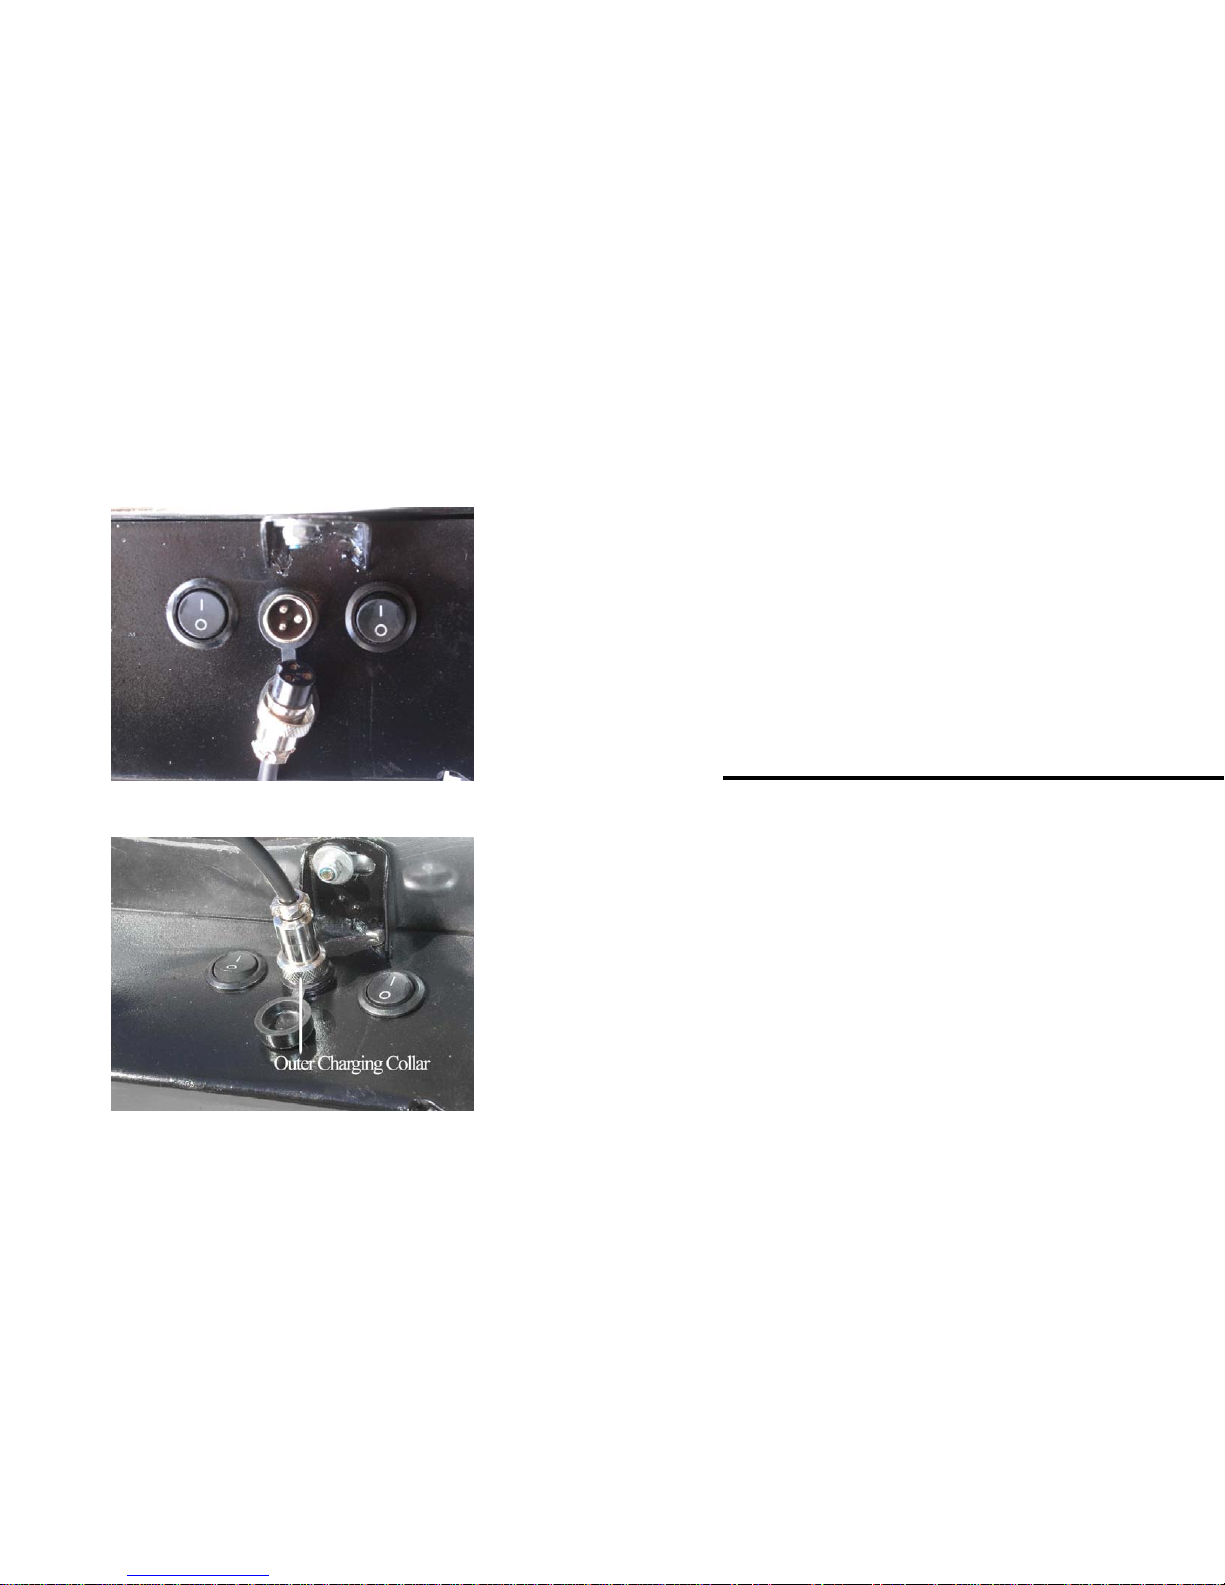
9
3. Connect the charging adapter into the charging
port
4.
Screw the outer charging collar down.
10
5. Plug in the chargers AC adapter directly to a
wall outlet.
6.
When the G-1 Electric Skateboard is finished
charging, it will be indicated by a solid green light
on the charger. Please disconnect the AC adapter
from the wall.
7. Disconnect the charging adapter from the
charging port and place charging port cover back on
port.
Step Two: Preparing the G-1
1
Visually check for any damaged or loose nuts
and bolt.
2 Check front and rear axel nuts
- If they are loose, tighten them.
3 Do not over tighten axel nuts.
 Loading...